SOURDOUGH BUBBLE BREAD

This is my third attempt at covering sourdough with a thin layer of a cocoa-dyed wrap. I stumbled by accident on a youtube site that got me lost for a while in the many possibilities of sourdough fun. She does incredibly beautiful loaves, pushing the envelope with gilding the lily. This is my first adventure following her overall method. The Bubble Bread.
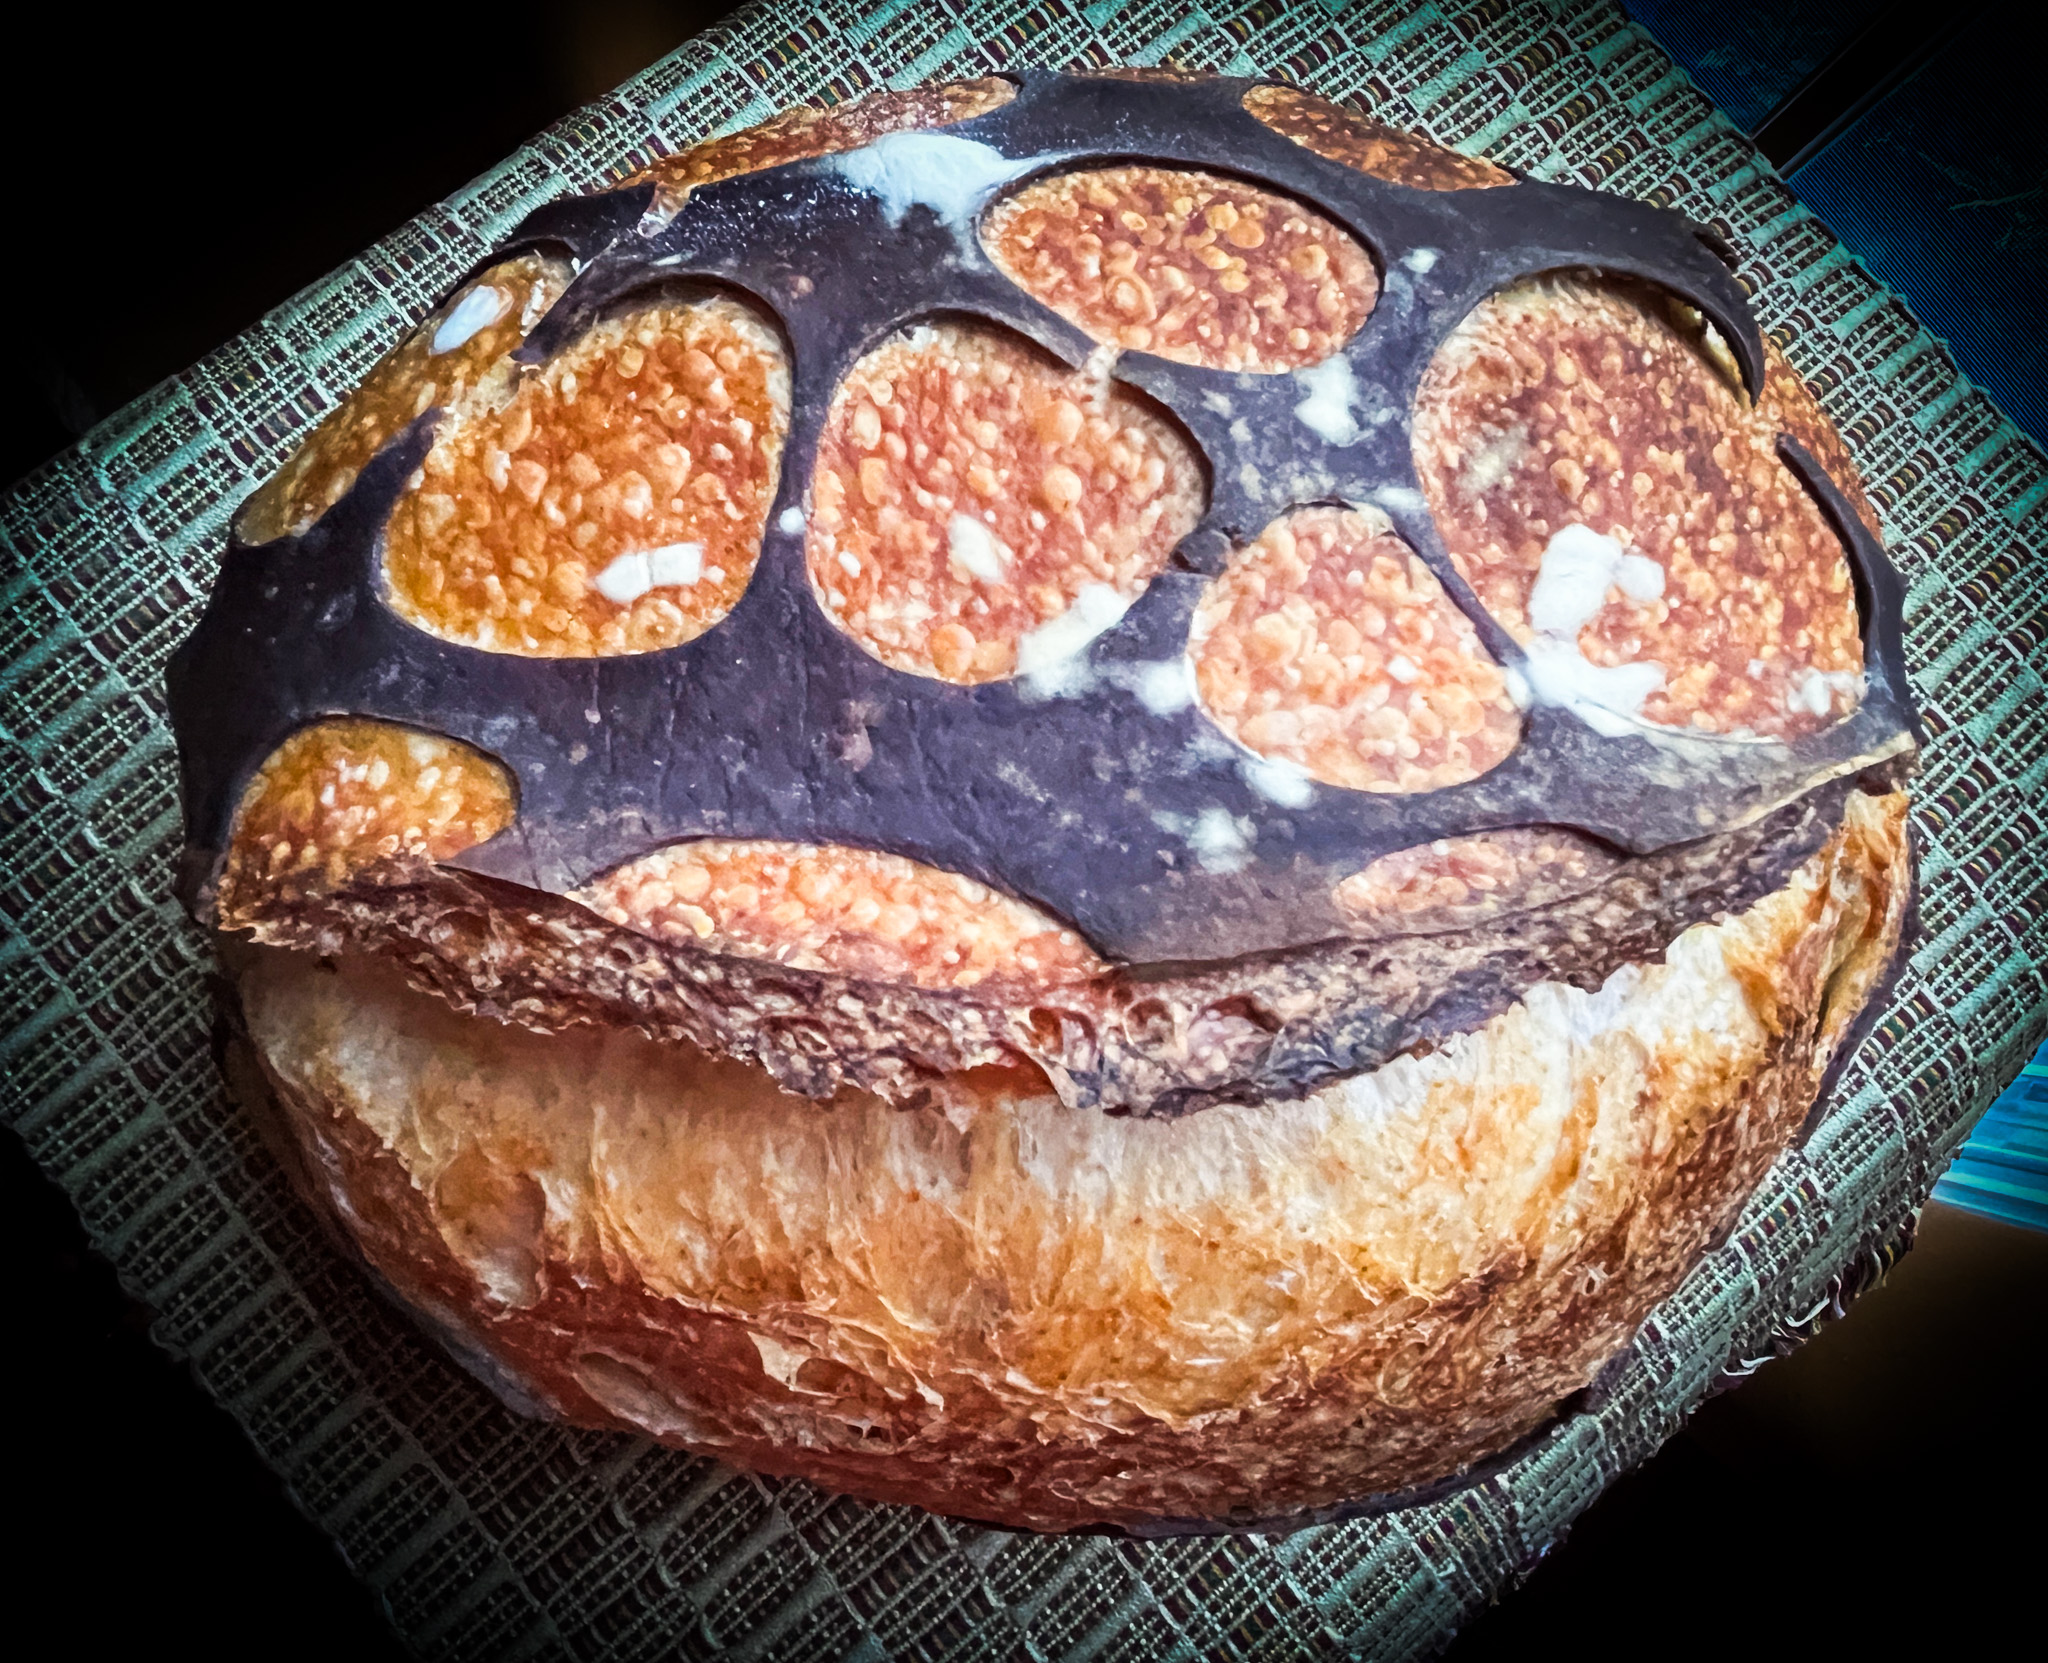
Contrary to my usual method, which I consider simple and straightforward, this one involved autolysis, adding the starter and salt at different stages, and a lamination step. I followed her recipe to a T, although I opted for making only one loaf instead of two. The real game changer was the way she handled the cocoa-dyed dough. That is a must!
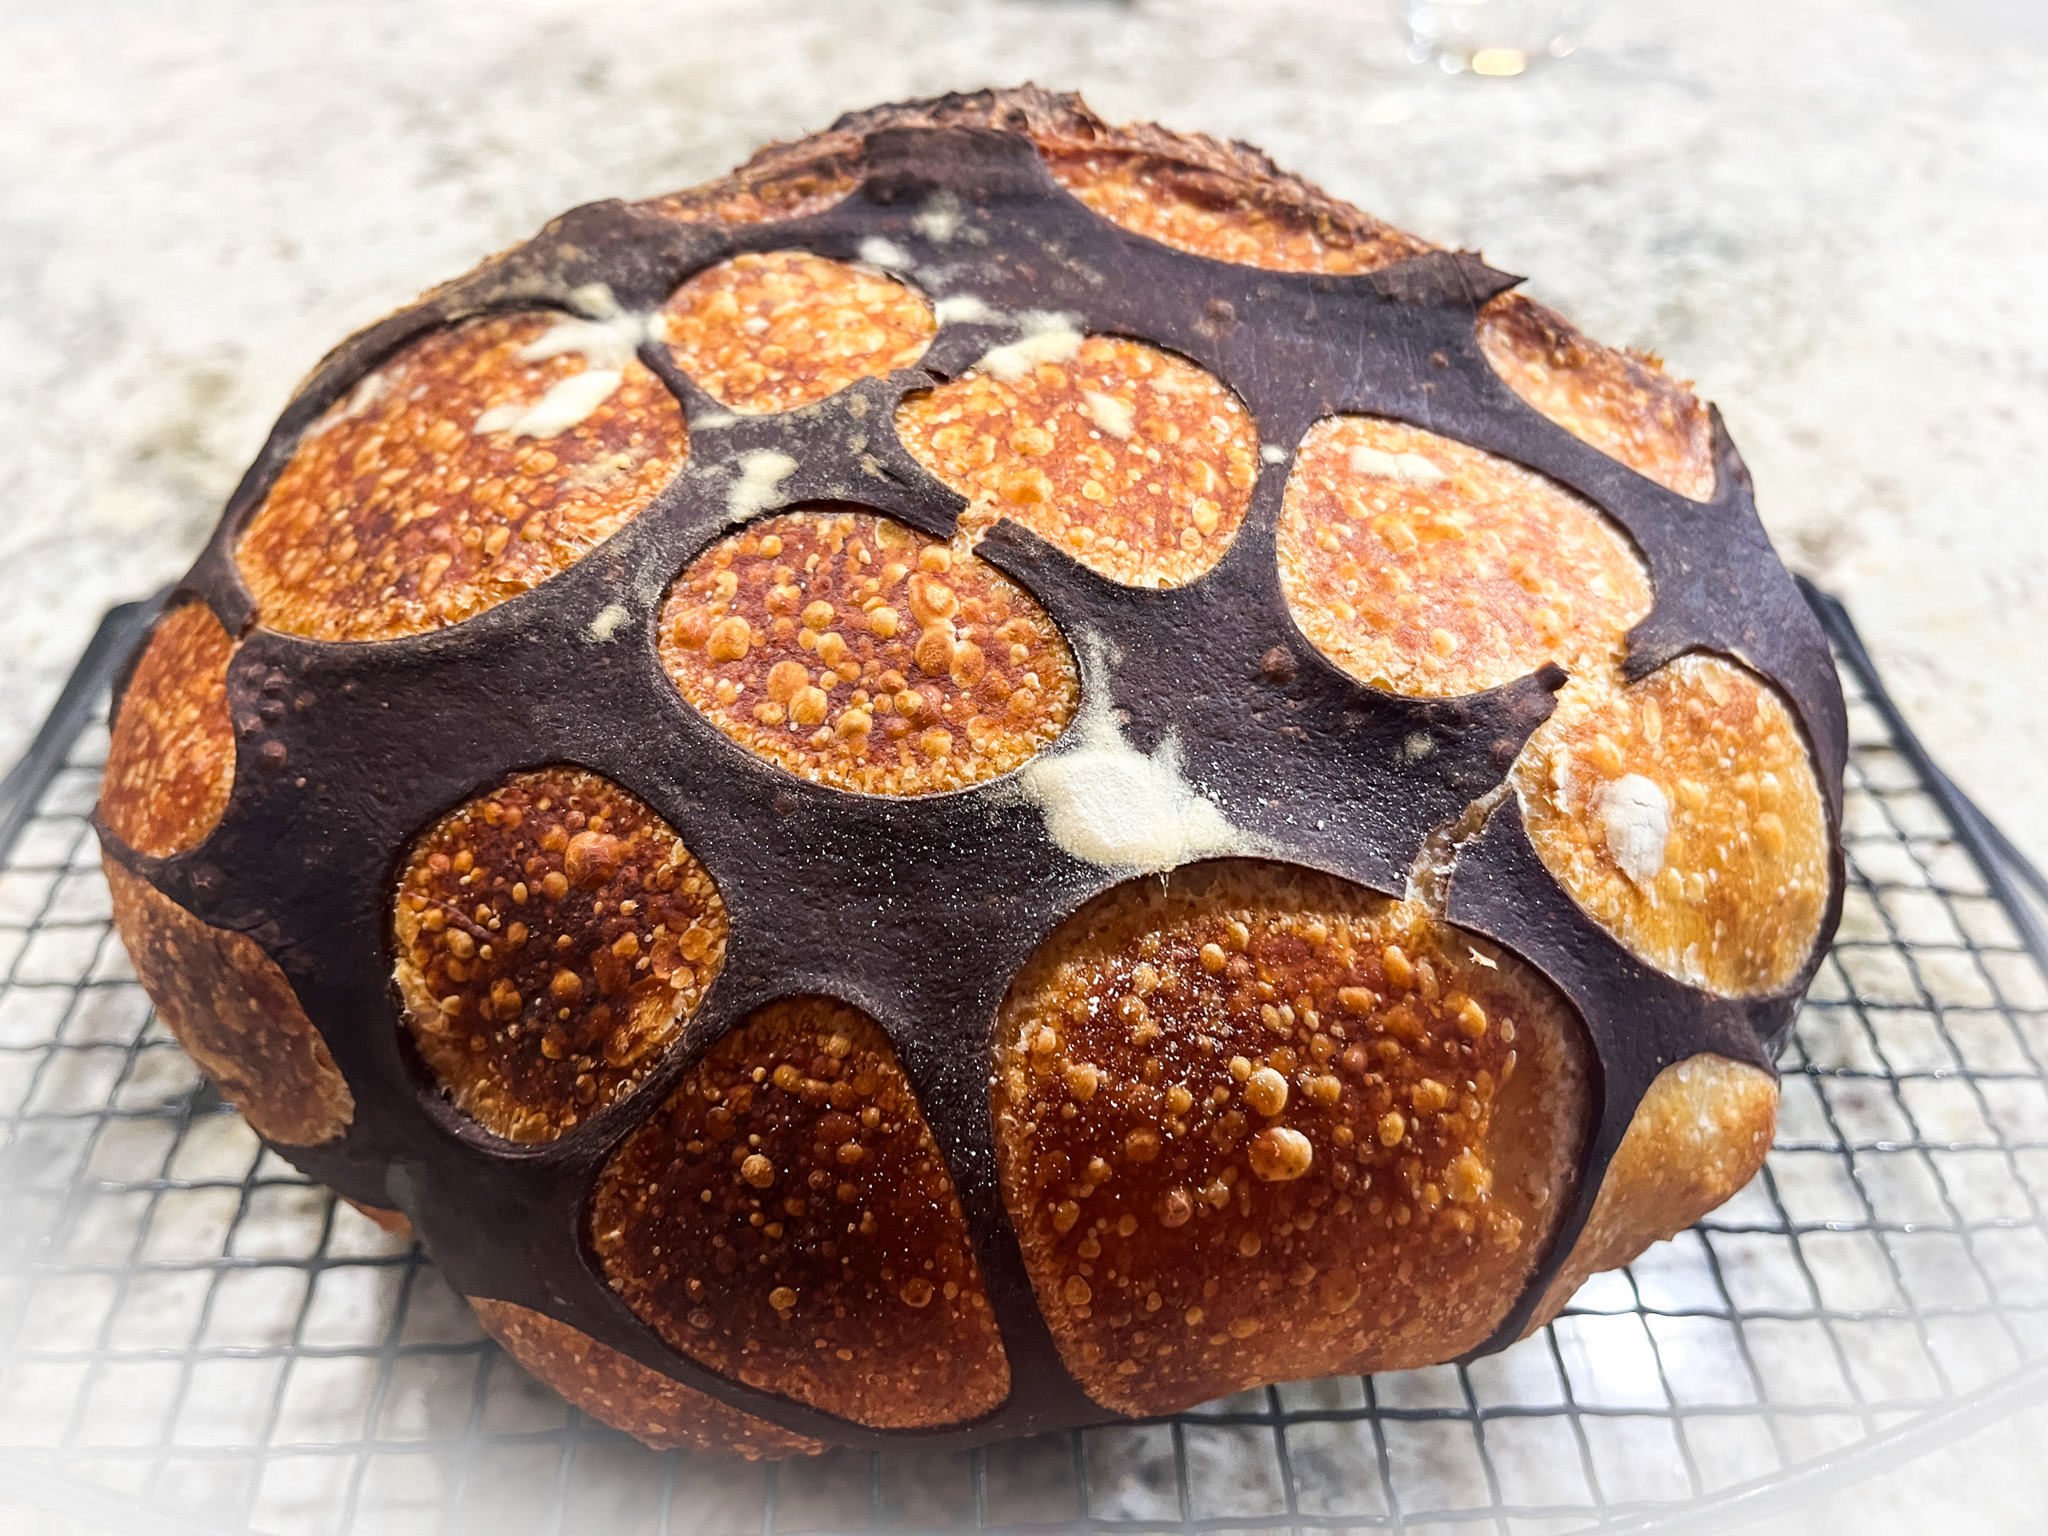
SOURDOUGH BUBBLE BREAD
(slightly modified from Hungry Shots)

for the main dough:
88g sourdough starter (100% hydration)
388g bread flour
50g spelt flour
270g water
9g salt

for the cocoa-wrap:
85g discarded sourdough
85g all-purpose flour
30g water
7g cocoa powder

Mix water with the two types of flour until combined. Leave at room temperature, covered, for one hour. Add the starter and mix until combined. Leave for 1 hour at room temperature. Add the salt and mix by kneading gently for about 4 minutes until incorporated. Leave at room temperature for 1 hour.

Spray a little water on your countertop and place the dough over it. Do a set of stretch and folds, and let it proof for one more hour at room temperature.

Laminate the dough (you can watch her youtube video if you have never done it). Allow it to rest for 90 minutes. Right after lamination, make the cocoa-dyed dough by mixing all the ingredients and kneading until fully smooth. To help with flexibility of the dough, roll it thinly with a rolling pin, fold it, and knead it again. Make sure the dough is very smooth and pliable before you form is into a ball and let it ferment at room temperature until you are ready to cover the dough with t.

Go back to the main dough: Do three sets of gentle foil colds (watch her video for details). Do the first one, wait 30 minutes to do the second one, 1 hour to do the third one. One hour after the third coil fold is done, you are ready to shape the dough and cover it with the cocoa wrap.

Roll out the cocoa dough to an extension that allows you to wrap the whole bread. Cut circles of different sizes with a cookie cutter. Shape the main dough as a batard (or round if you prefer), cover it with the cocoa dough, and place in the banneton. Proof for 30 minutes at room temperature, then place in the fridge overnight.

Next morning, heat oven to 450F. Invert the dough over parchment paper, make a deep slice off-center, and bake covered in a Dutch oven for 30 minutes, remove the cover and bake for 20 minutes more. Allow it to cool completely before slicing.

ENJOY!

to print the recipe, click here

.
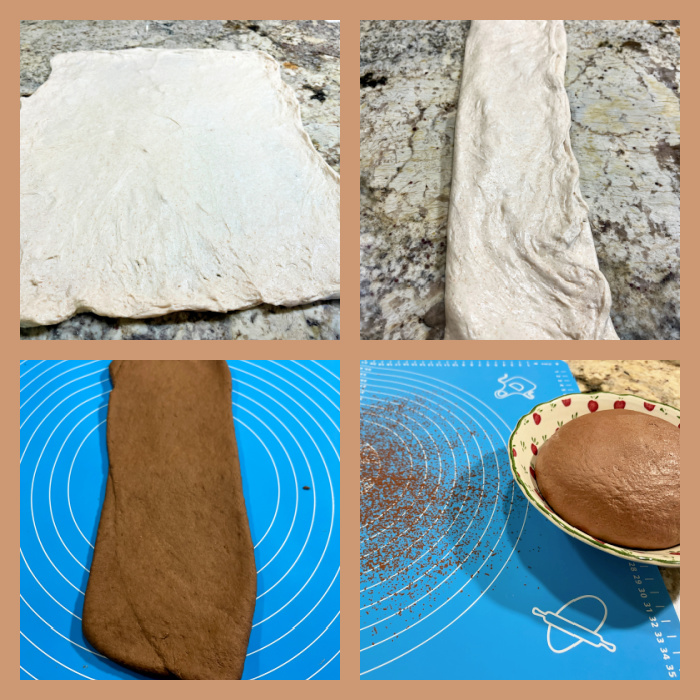
Comments: This was so much fun to make! I have tried to cover sourdough with a dark wrap using the pie lattice cutter, but I did not care for the way it turned out (see it on this post of my past). However, the key is making the dough extensible enough, and that is achieved by thorough kneading, rolling, kneading again. If you go through the process, your outcome will be much better.

I would cut holes of different sizes next time, some a lot smaller, like she did, but this time I was a bit too anxious and nervous about the whole thing, so I kept is simple. Used only two sizes of circles. I could not take pictures of the wrapping of the dough, as I was alone in the house and it was impossible to do it on my own, but her videos show it all in great detail. Check the bubble bread video here.
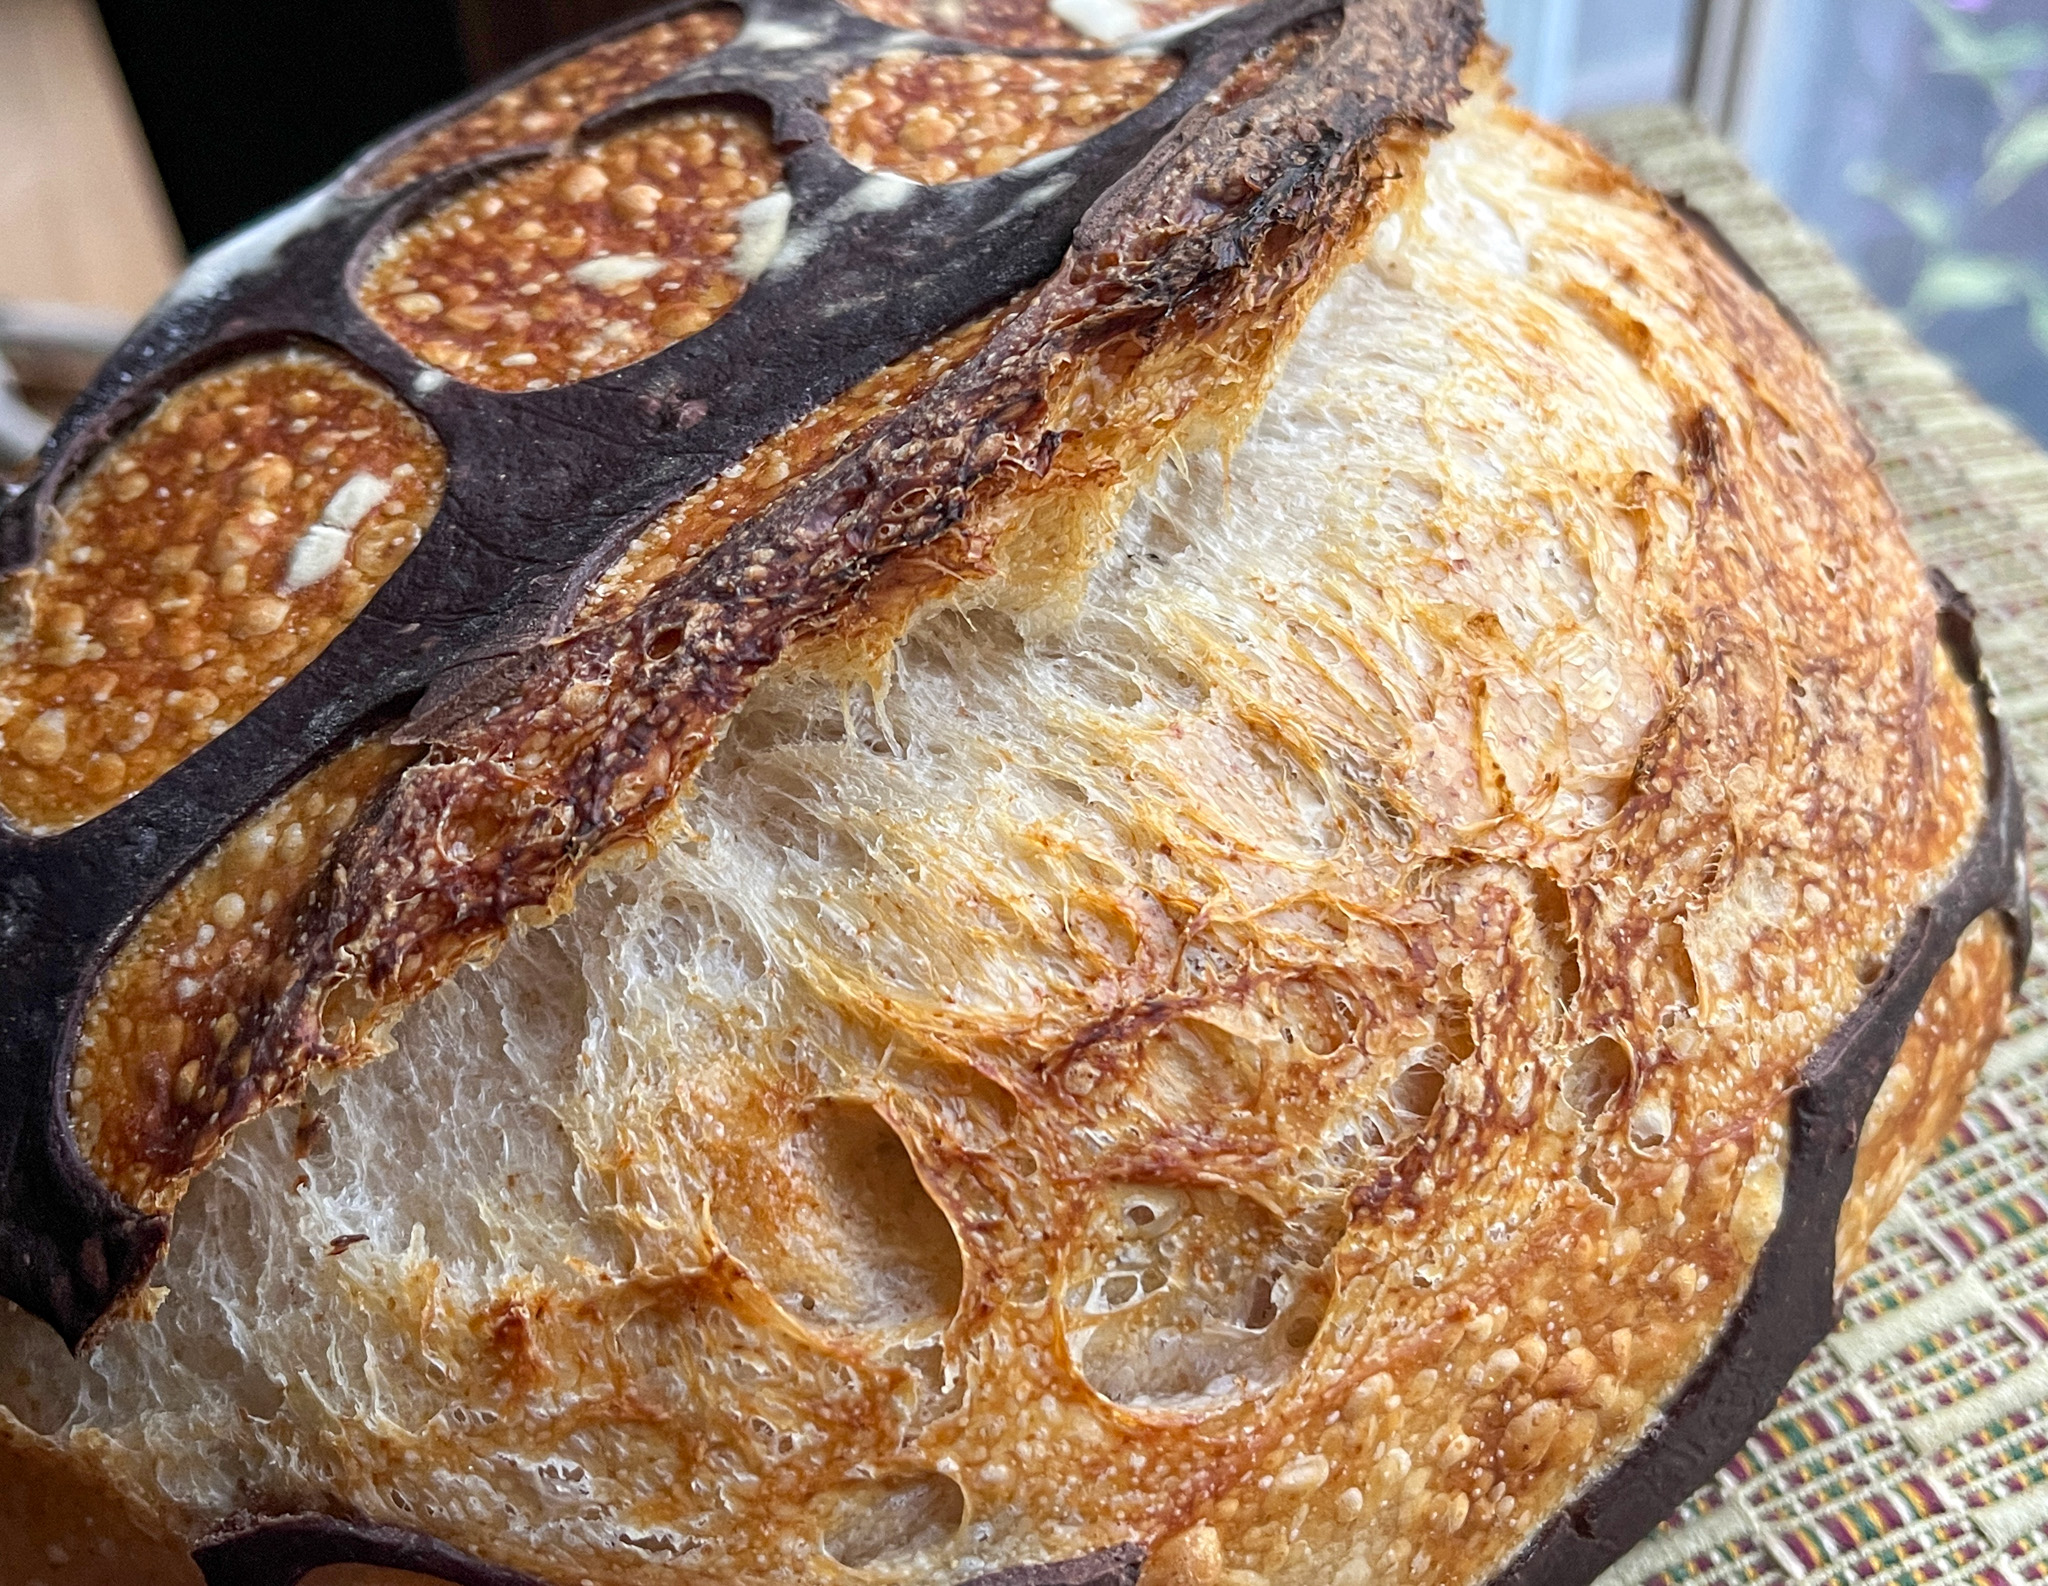
The bread had amazing oven-spring, particularly considering that the wrapped dough constrains it quite a bit. As to the crumb, it was very moist and tender, in fact the husband professed it to be his very favorite of this year! Can you say mission accomplished?

I am not convinced that the lamination and coil-folding are absolutely necessary to bake this type of bread, but definitely the handling of the cocoa dough will be key. I hope you give this method a try, it is so cool to see the outcome when you get that lid open after 30 minutes!

ONE YEAR AGO: Watermelon Salad

TWO YEARS AGO: Kashmiri Chicken Thighs

THREE YEARS AGO:  A Vegan Trilogy

FOUR YEARS AGO: The Mystifying Hurricane Roll

FIVE YEARS AGO: Pop-Tarts with Strawberry Balsamic Jam

SIX YEARS AGO: Ptichye Moloko, a Russian Dessert

SEVEN YEARS AGO: Cheesy Low-Carb Zucchini Tarts

EIGHT YEARS AGO: Blogging Hiatus

NINE YEARS AGO: Apricots, Three Ways

TEN YEARS AGO: Up Close and Personal with Kale

ELEVEN YEARS AGO: Black Berry Cherry Sorbet

TWELVE YEARS AGO: Asparagus Pesto

THIRTEEN YEARS AGO: Chocolate and Chestnut Terrine

FOURTEEN YEARS AGO: Under the spell of lemongrass

FIFTEEN YEARS AGO: Greens + Grapefruit + Shrimp = Great Salad!

SHIROI KOIBITO BISCUITS

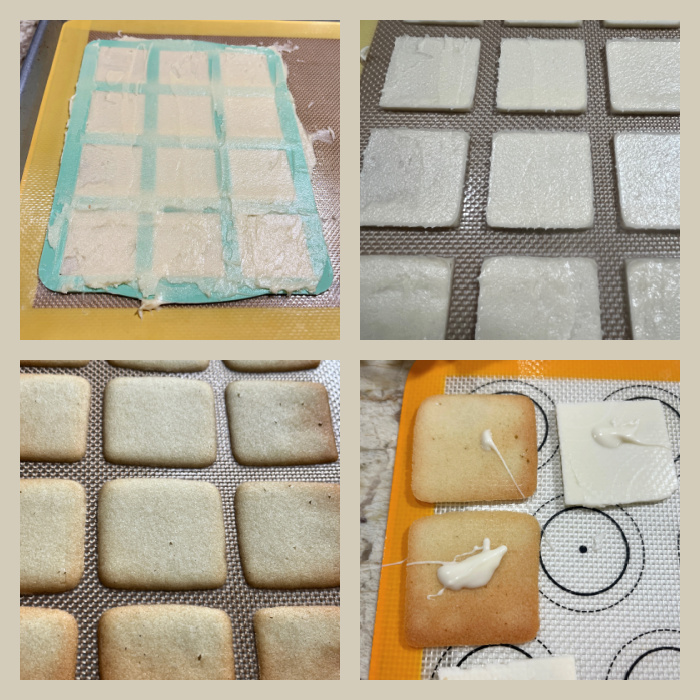
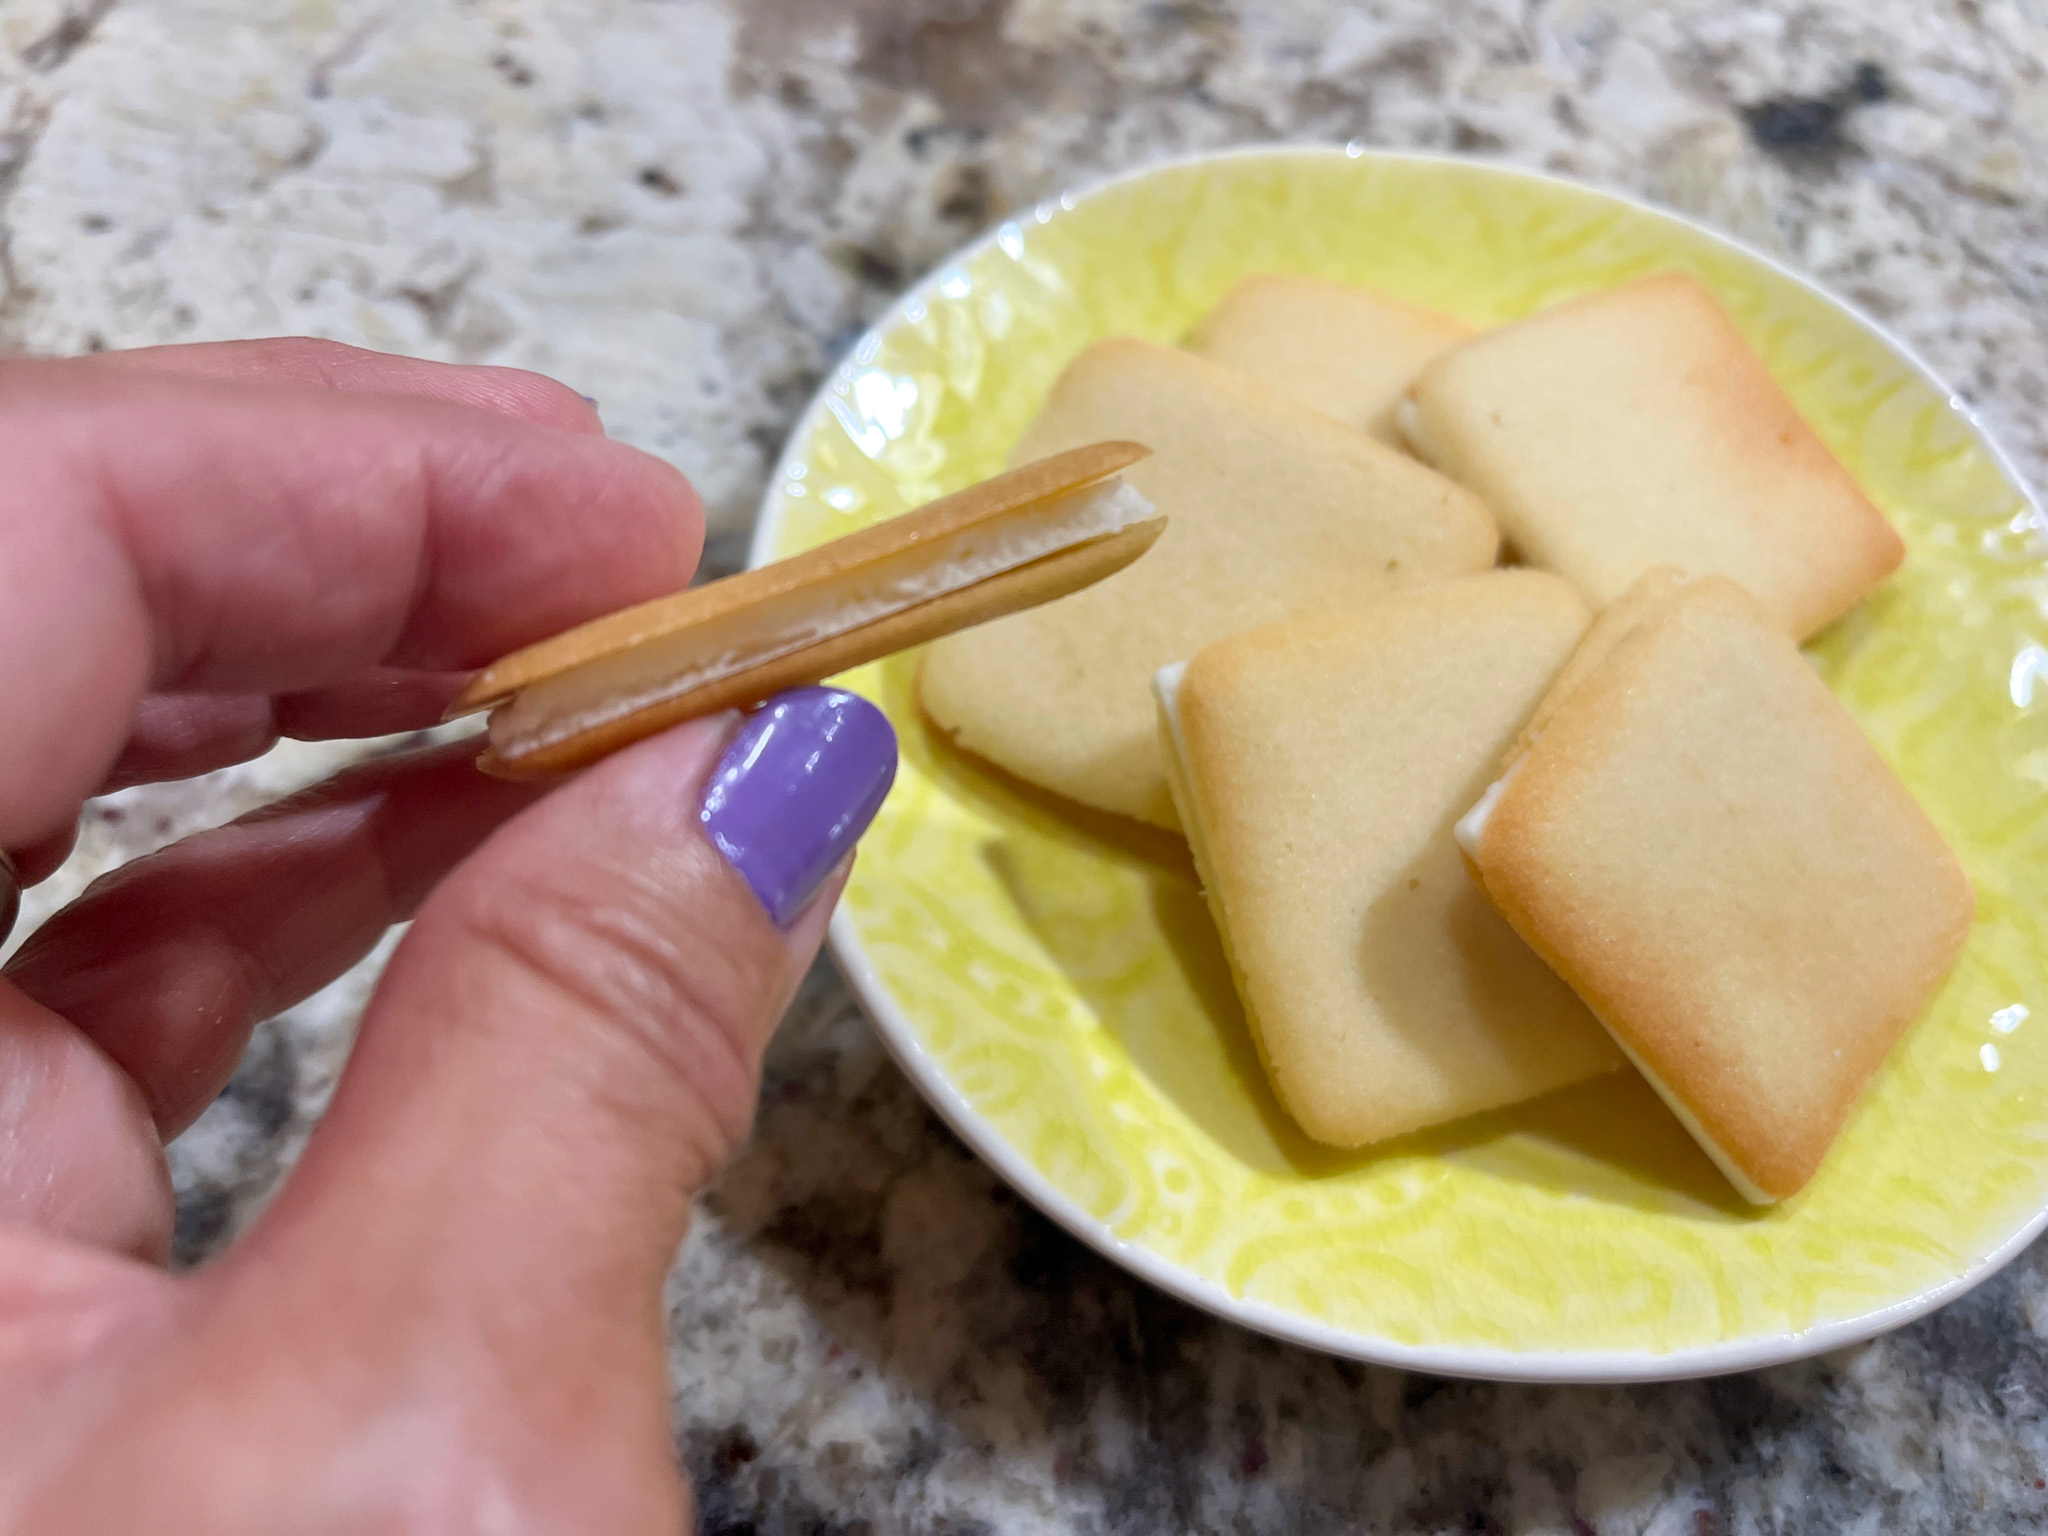
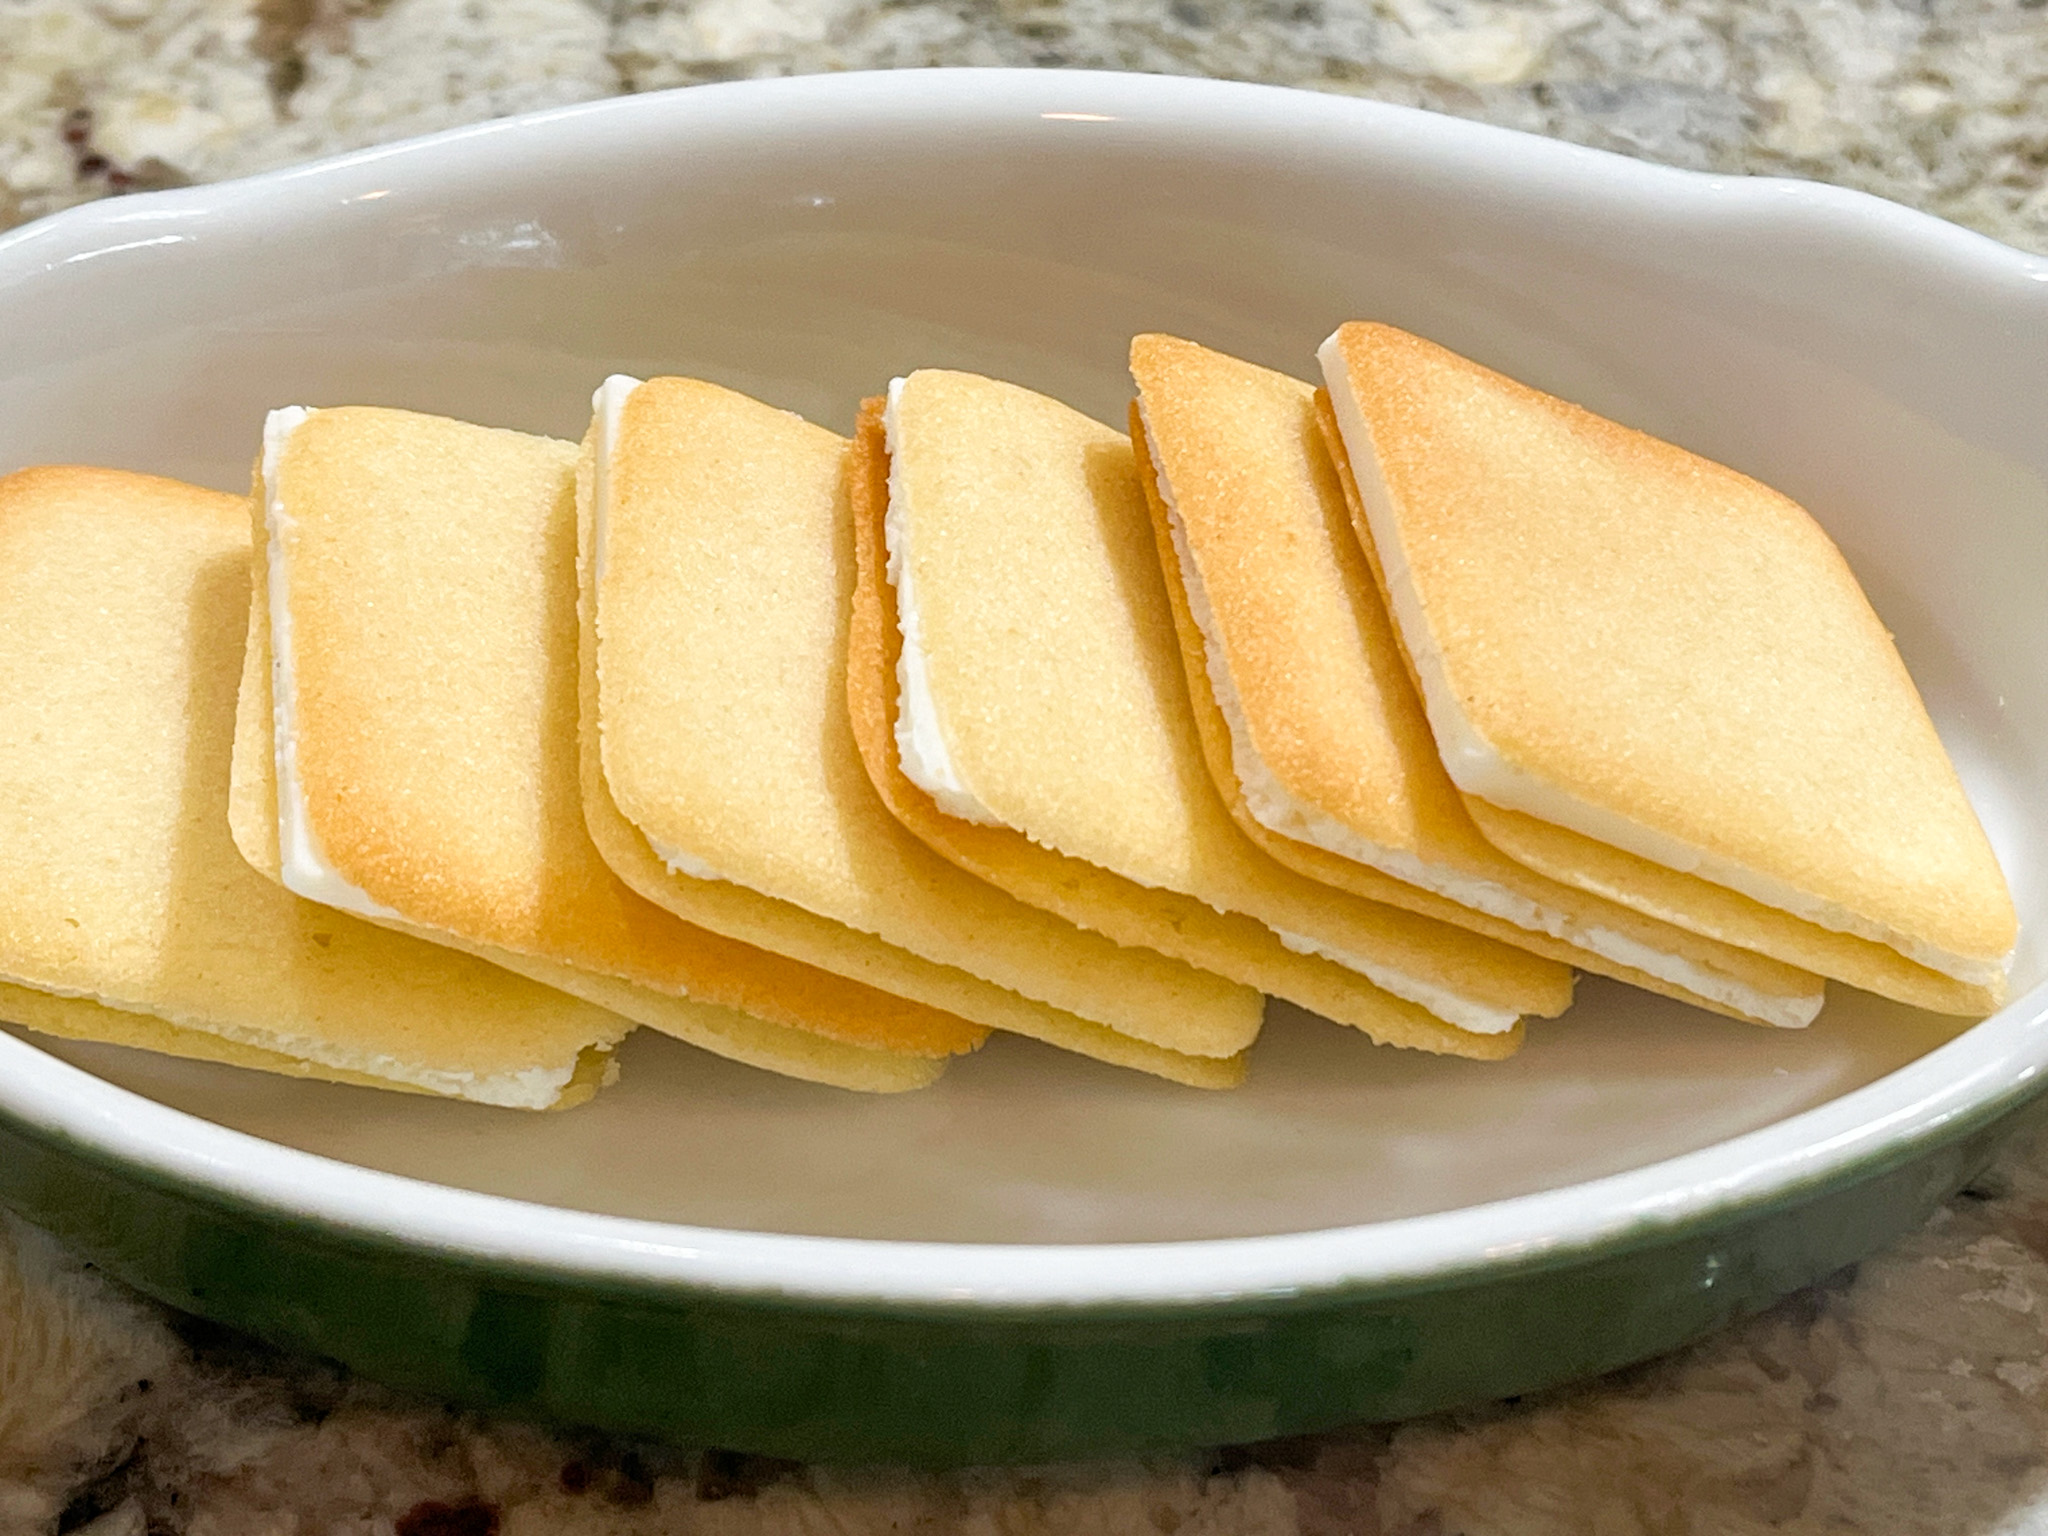
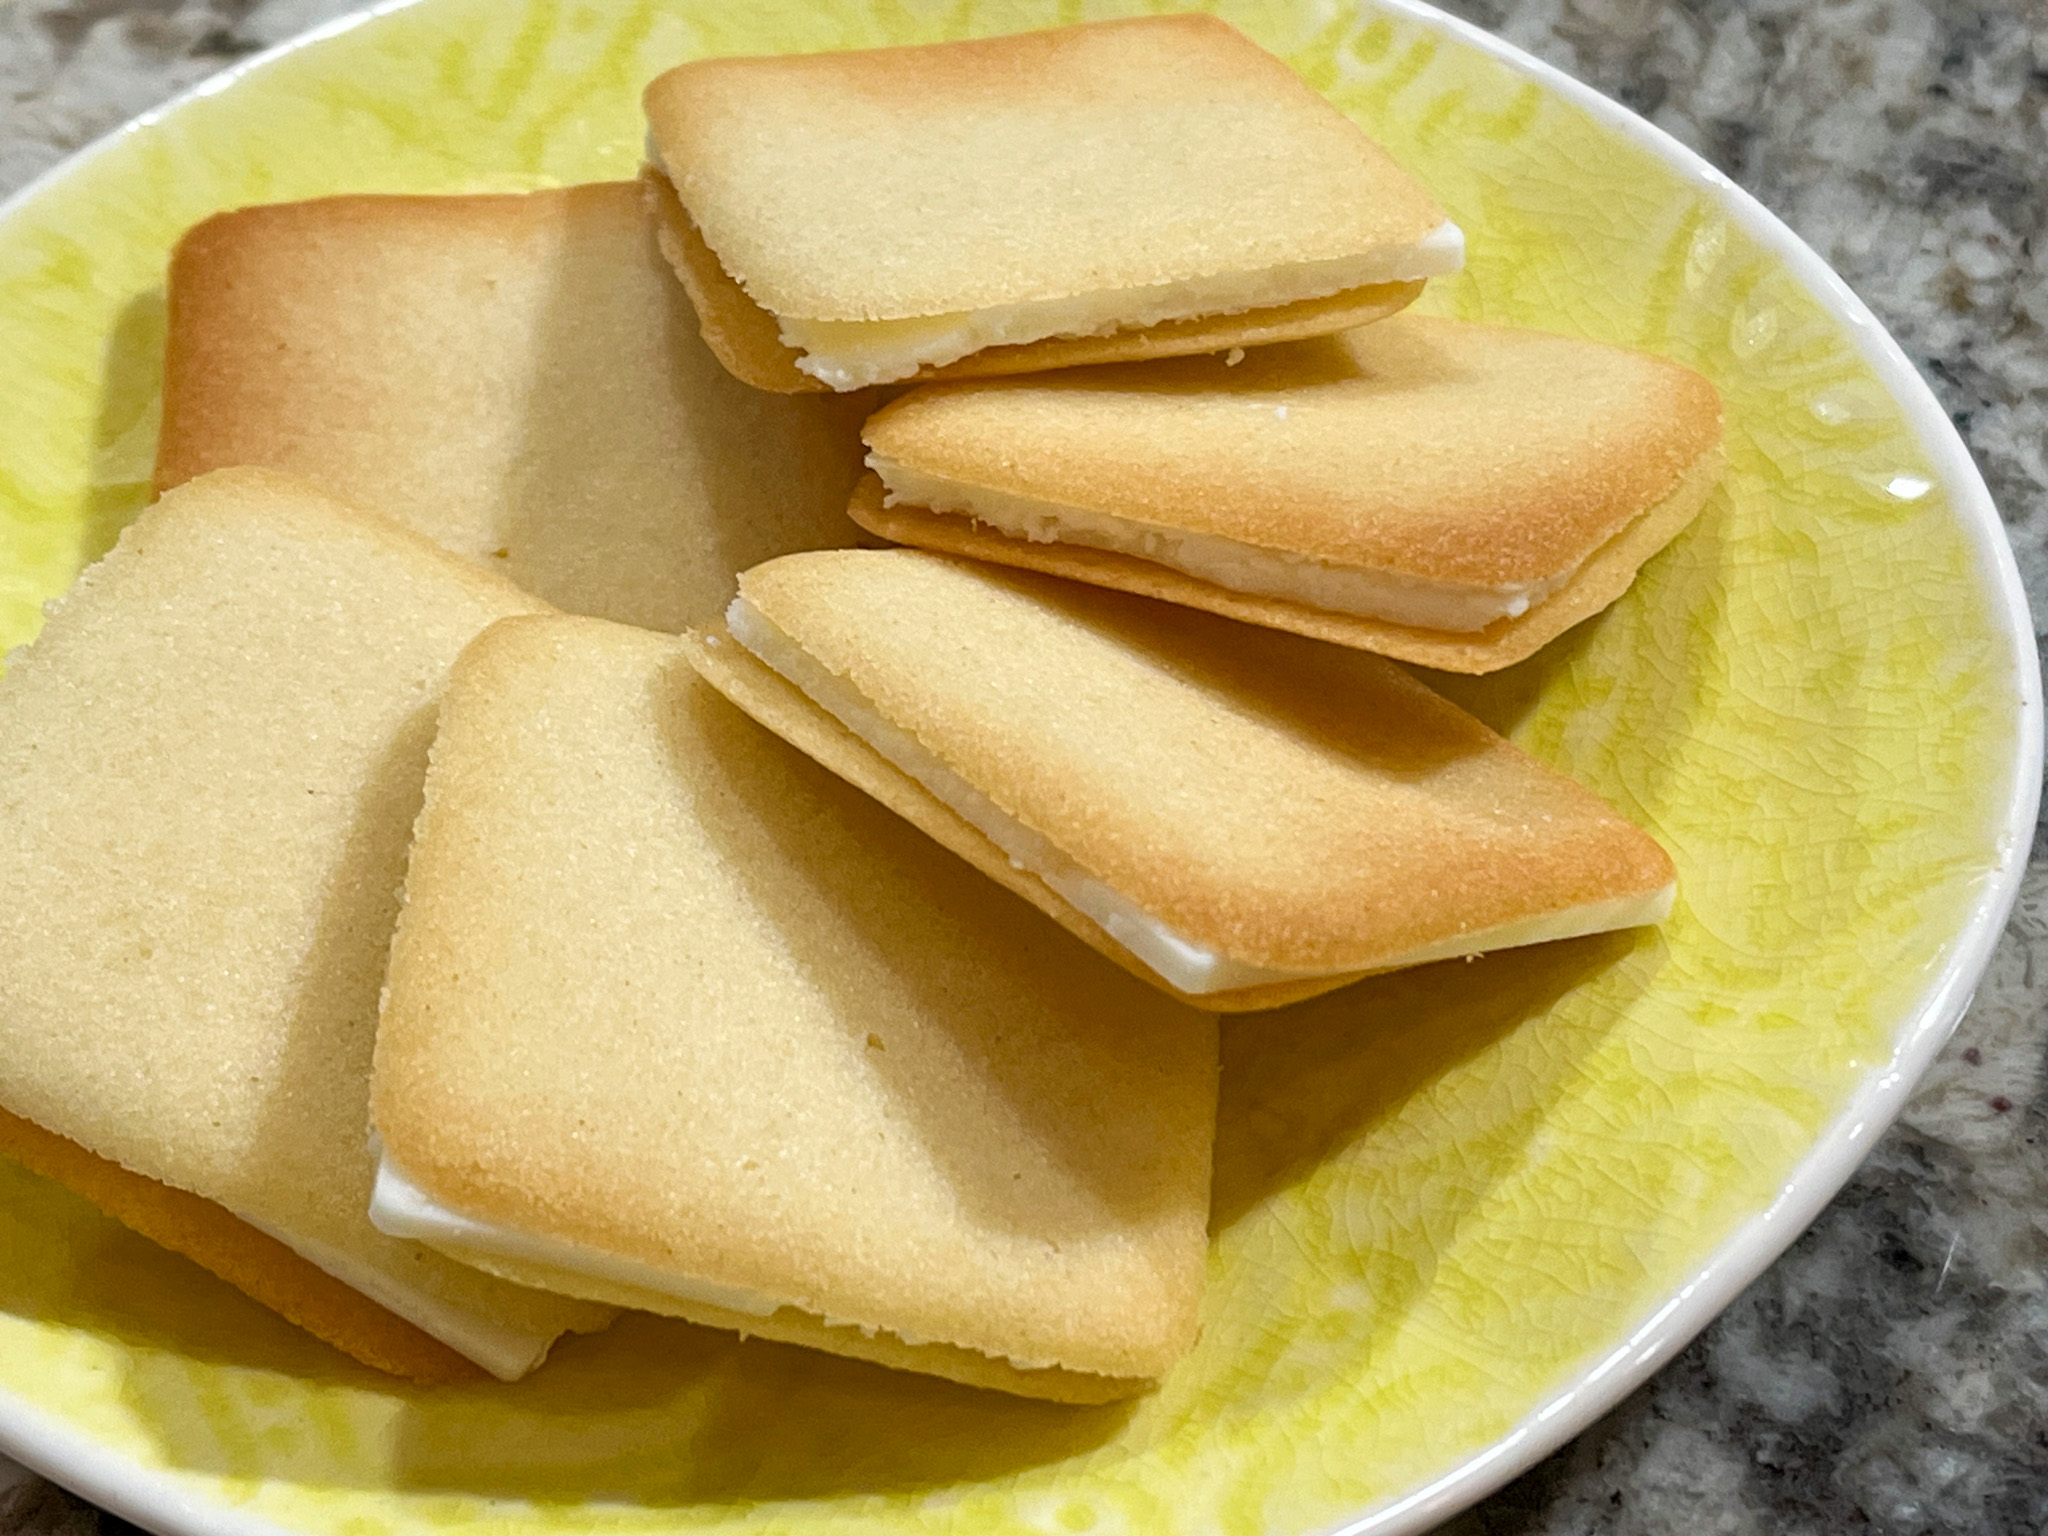
I’ve flirted with the idea of making these Japanese cookies for a long time, but finally took a deep breath and went for it. I consider this project a work in progress because there is room for improvement. And also, there are so many other shapes and options of fillings to make them. BUT the most traditional kind is Shiroi Koibito, that translates as White Lover. So the biscuit is white and the filling is a square of white chocolate. The filling is never spread inside but instead it is formed using the exact same mold that the biscuit component was formed with (I used the square one from this set). Such a cute concept!

SHIROI KOIBITO BISCUITS
(from The Bewitching Kitchen)

50 g softened butter
50 g powdered sugar
50 g all-purpose or pastry flour
1 egg white
100 g white chocolate for the filling

Heat oven to 350F.

Using a mixer, beat the butter until soft, gradually add in the powdered sugar, egg white and flour. Mix until you get a smooth batter.


Spread the batter onto a square chablon stencil placed on a baking tray lined with silicone mat, or parchment paper (I prefer silicone mat). Use a dough scraper to remove the excess dough. Lift the stencil carefully. Bake the biscuits for 10 minutes until the edges become slightly golden.


Temper the white chocolate then pour on the same chablon stencil (washed and fully dried). Refrigerate for 30 minutes to set completely. Remove the chocolate squares from the stencil and assemble the chocolate square on the cookies with some melted chocolate.

ENJOY!

to print the recipe, click here

Comments: The trickiest part of this recipe is baking the squares homogeneously. It is easy to get some a bit too dark whereas others are not yet there. But removing them as they get ready is not feasible, they are too delicate to lift while warm. So maybe turning the baking sheet around more often is going to help. I will try it soon. Many recipes I’ve seen around omit tempering the chocolate, but I advise you to bite the bullet an temper it, or else use compound chocolate to make life easier. I don’t have much luck trying to melt white chocolate in the microwave and keep it at temper, both me and the chocolate and up losing it. If you have that skill, go for it!

This is the exact same dough used to make the famous French cookie called Langue de Chat (Cat’s Tongue). They are delicate, crunchy, thin, and delicious. I can hardly wait to make Shiroi Koibito again!

ONE YEAR AGO: Mini-Cakes, Two Ways
TWO YEARS AGO: Earl Grey Shortbread Cookies
THREE YEARS AGO: Summertime Macaron Duet
FOUR YEARS AGO: Pain de Mie Dressed up for Party
FIVE YEARS AGO: Five-Stranded Bread
SIX YEARS AGO: Green Olive Salad
SEVEN YEARS AGO: Coffee Macarons Dressed up to Party
EIGHT YEARS AGO: Blogging Hiatus
NINE YEARS AGO: Tomato Tatin
TEN YEARS AGO: Headed to Colorado!  
ELEVEN YEARS AGO: Farofa Brasileira
TWELVE  YEARS AGO: Thai-Inspired Pork Tenderloin
THIRTEEN YEARS AGO: A yummy Brazilian cake: Bolo de Fuba’
FOURTEEN YEARS AGO:  Summer’s Tomatoes
FIFTEEN YEARS AGO: Leaving on a jet plane… 


BUTTERFLY PEA FLOWER ACCORDION BREAD

I am so thrilled with this recipe! You can use different ingredients to obtain the bicolor effect: charcoal powder, carrot powder, ube, sweet potato powder, just keep in mind that it needs to be concentrated enough not to mess up with the dough, so liquid things won’t work well. Stick to powder and thick pastes. I used butterfly pea flower powder from Selefina (click here for ordering info).

ACCORDION BREAD
(adapted from this recipe)

180 ml warm milk
4g instant yeast
375g bread flour
18g dry milk powder
7g salt
50g sugar
1 large egg
56g softened butter
5g butterfly pea flower powder dissolved in 2 tsp milk
Egg wash (1 egg + 1 tbsp milk)

Combine yeast, warm milk, and 5 g of the sugar in a small measuring cup or bowl. Stir and let it sit for 5-10 minutes.

In a stand mixing bowl fitted with the dough hook, add the flour, salt, milk powder, egg, yeast mixture, and knead on med-low speed until dough comes together and no dry flour is visible. Add in remaining 45g of sugar. Incorporate all the butter, little by little. Knead on med-high for 8-10 mins, or until dough is smooth and releases from the sides of the bowl.


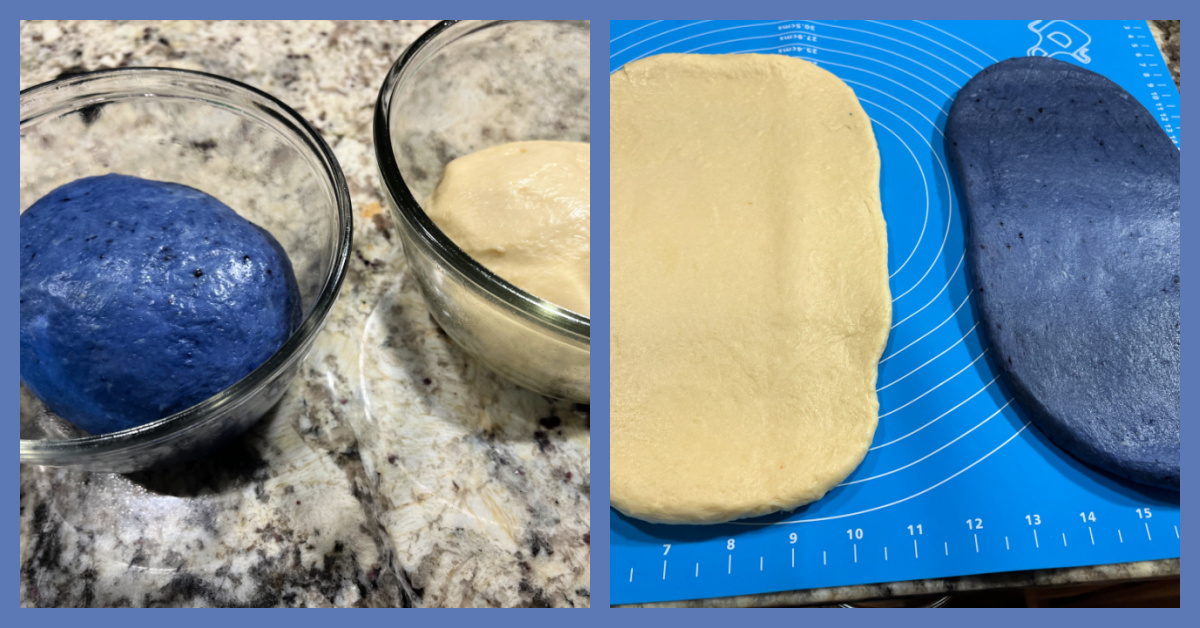
Split dough into two, placing one half the dough back in the mixer, adding the dissolved butterfly pea powder over it. Knead until color is well combined. Cover both doughs in clean bowls, and let rise 1.5 to 2 hours or until they have doubled in size.


Punch and degas doughs. Using a rolling pin, roll out each dough into an oblong shape. Layer the two doughs with colored dough on the top. Perform an envelope fold meeting both sides in the center. Wrap dough in cling wrap and chill in fridge for 15 minutes.
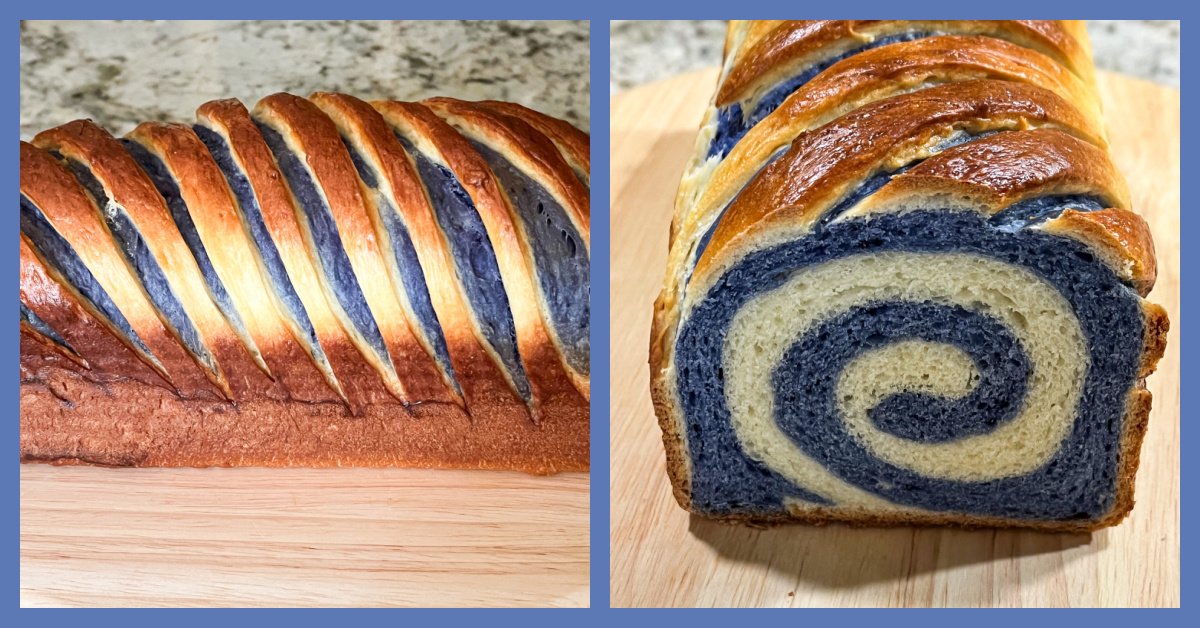
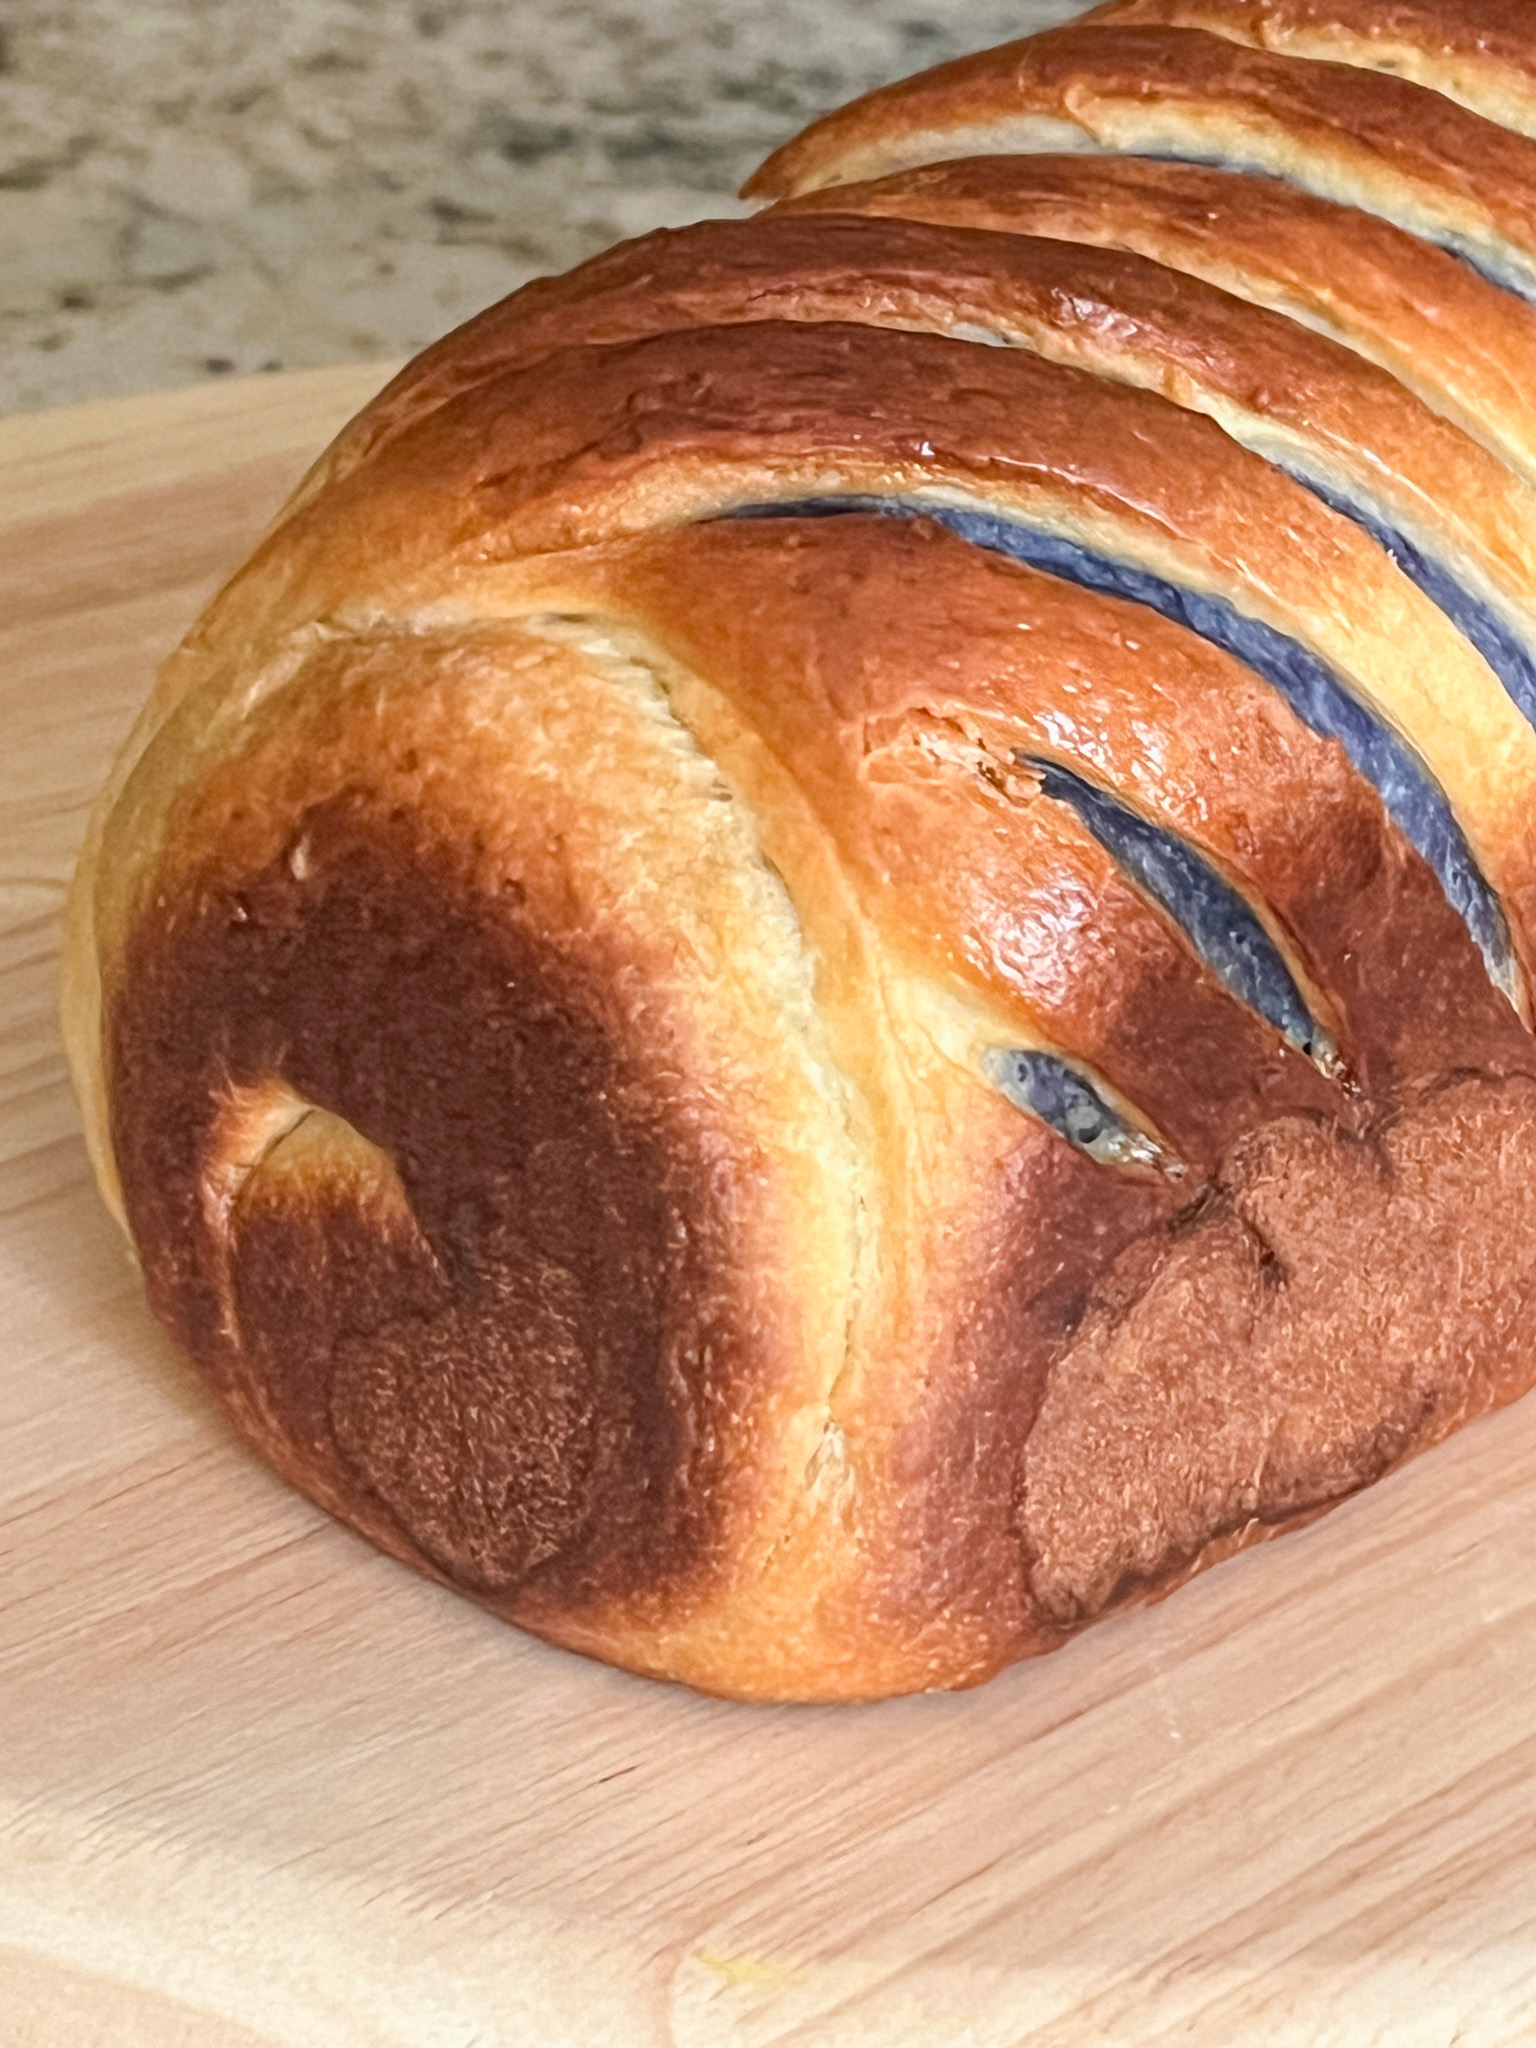
Unwrap dough and roll out into a long even rectangle. Staring from one end, roll in dough to create a swirl, making sure colored dough is inside while regular dough is facing out. Using a sharp blade or razor, score the dough evenly across the top to create “accordion” effect. Lines should be approx 1/4 inch apart and 1/8 inch deep to reveal the colored dough. Place in 450g Pullman loaf pan, cover, and let proof for 45 mins.

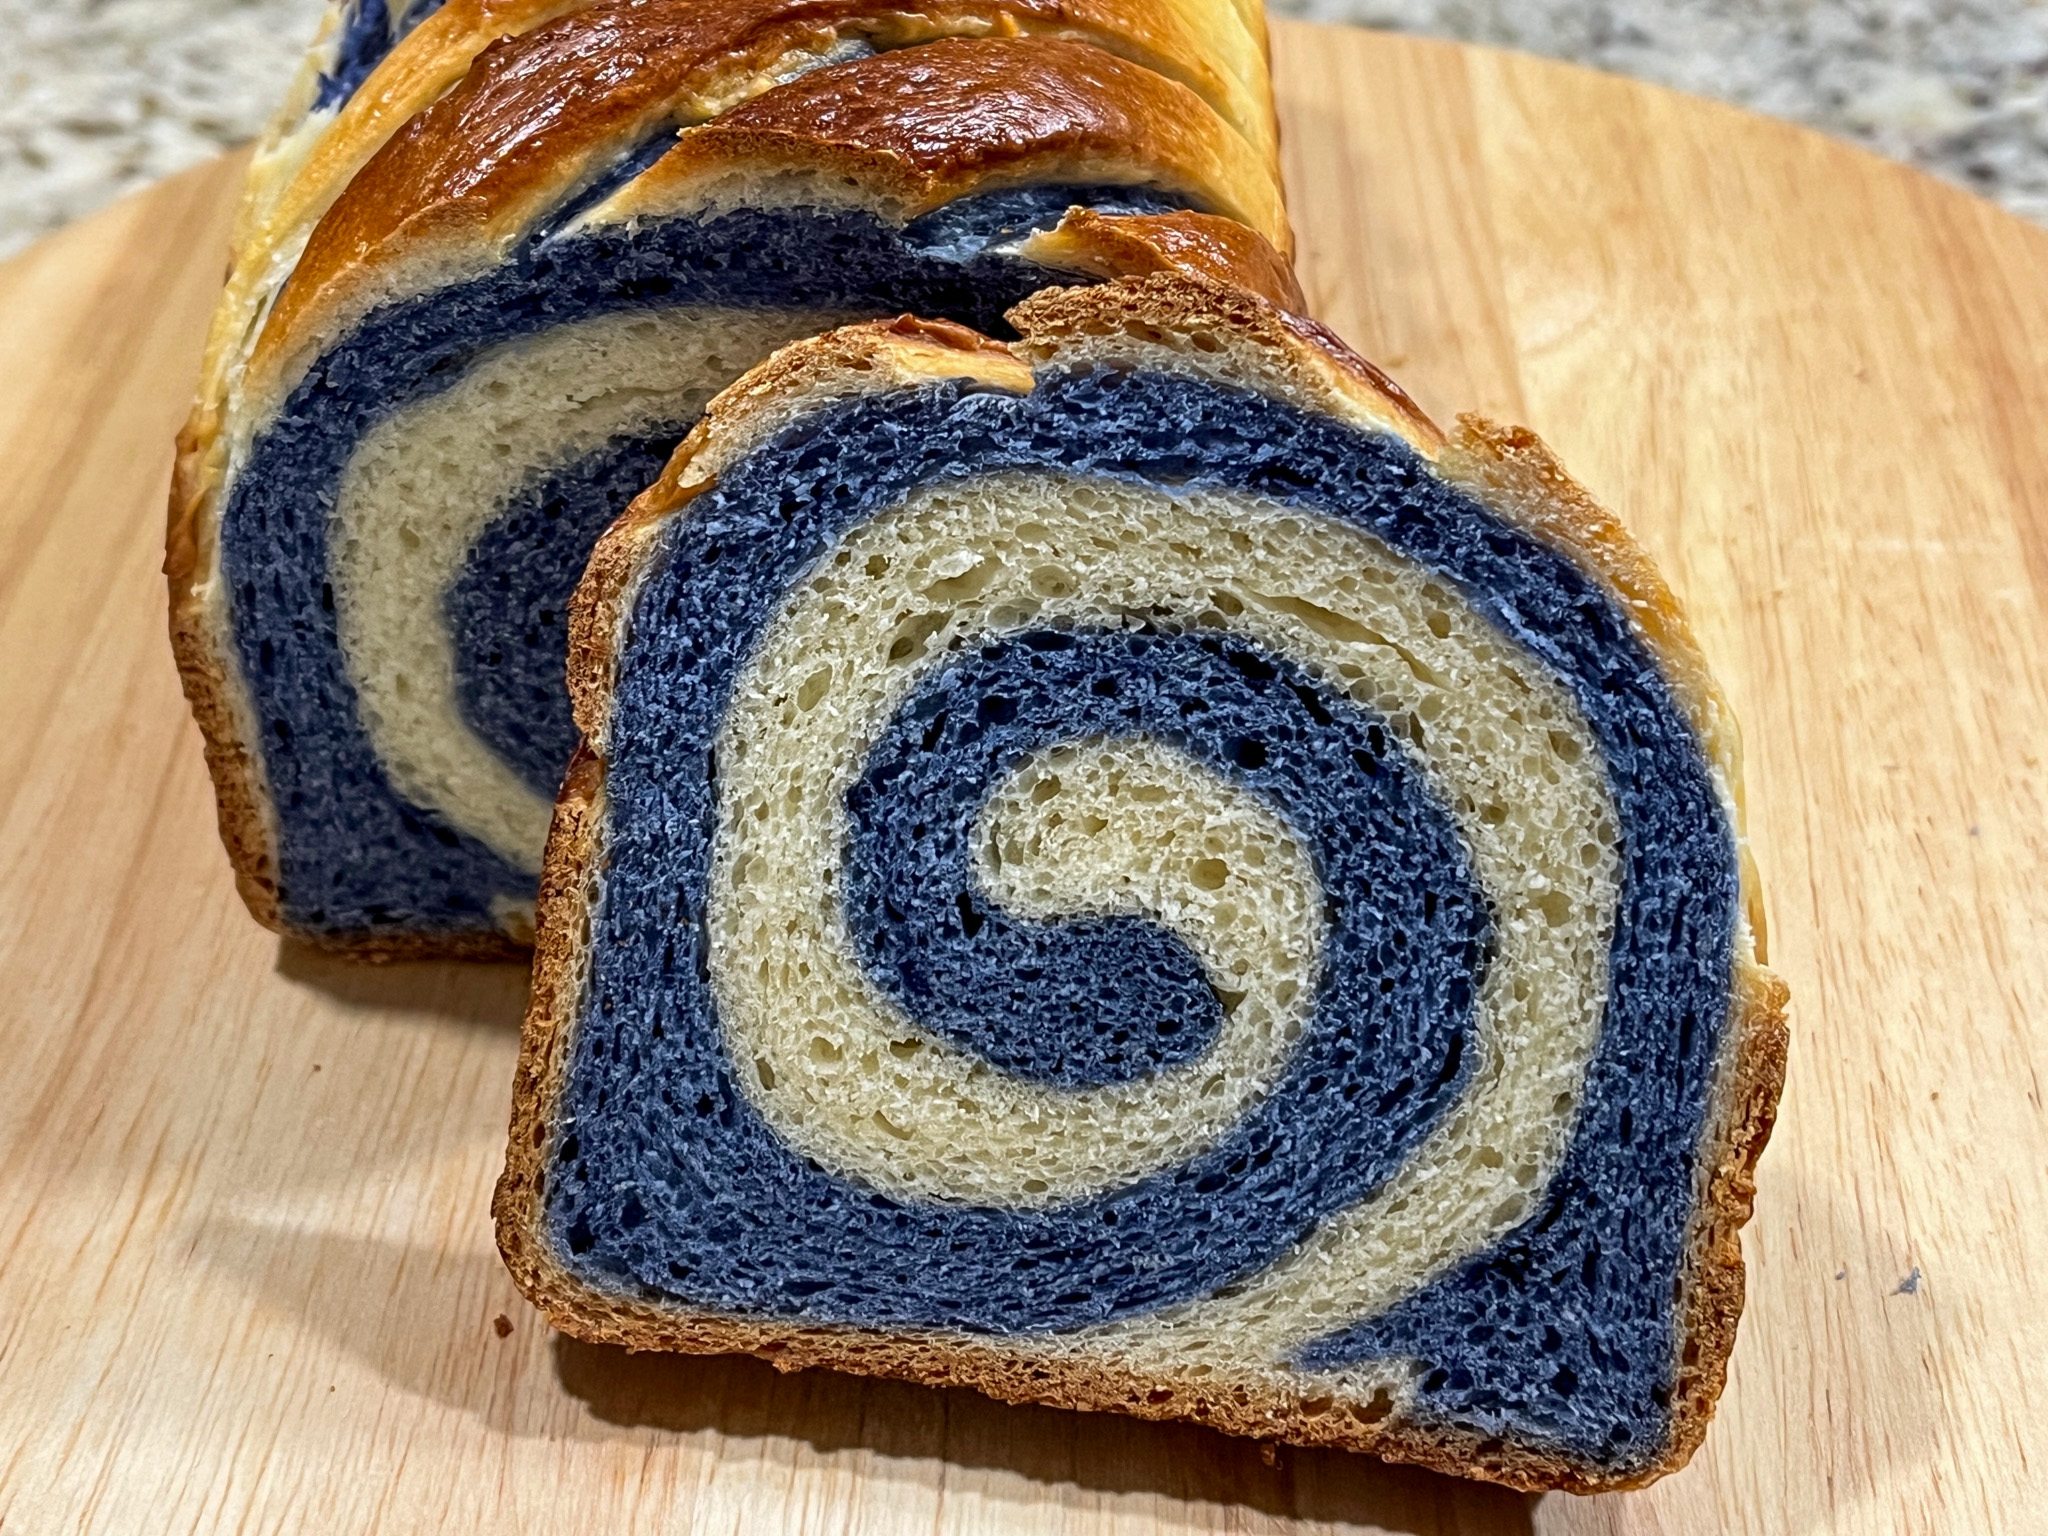
Heat oven to 355 F. Brush egg wash and bake for 40-42 mins until loaf is golden brown. Release bread from pan after 10 minutes, then cool completely on wire rack before slicing and smiling at the swirl…

ENJOY!

to print the recipe, click here

Comments: The dough, like most enriched doughs, is a pleasure to work with, rolls very easily and you can stretch it and adjust so that both layers sit perfectly on top of each other.

Make sure to slice the external layer with a sharp razor blade and all the way through to see the colored dough underneath. The sugar and milk in the recipe give it a nice brown color after baking.

But the best part? That swirl revealed once you slice through!

.

The bread has a very mild flavor, the butterfly pea flower does not contribute much in terms of flavor, just color. I will be making other versions for sure…

.

ONE YEAR AGO: Slow-Cooker Pineapple Carnitas

TWO YEARS AGO: Three Little Cakes

THREE YEARS AGO: From our Garden to You

FOUR YEARS AGO: Lady Bug Macarons

FIVE YEARS AGO: Five-Stranded Braided Bread

SIX YEARS AGO: Green Olive Salad

SEVEN YEARS AGO: Coffee Macarons Dressed up to Party

EIGHT YEARS AGO: Blogging Hiatus

NINE YEARS AGO: Tomato Tatin

TEN YEARS AGO: Headed to Colorado!  

ELEVEN YEARS AGO: Farofa Brasileira

TWELVE  YEARS AGO: Thai-Inspired Pork Tenderloin

THIRTEEN YEARS AGO: A yummy Brazilian cake: Bolo de Fuba’

FOURTEEN YEARS AGO:  Summer’s Tomatoes

FIFTEEN YEARS AGO: Leaving on a jet plane… 

AIR-FRYER CHICKEN SKEWERS

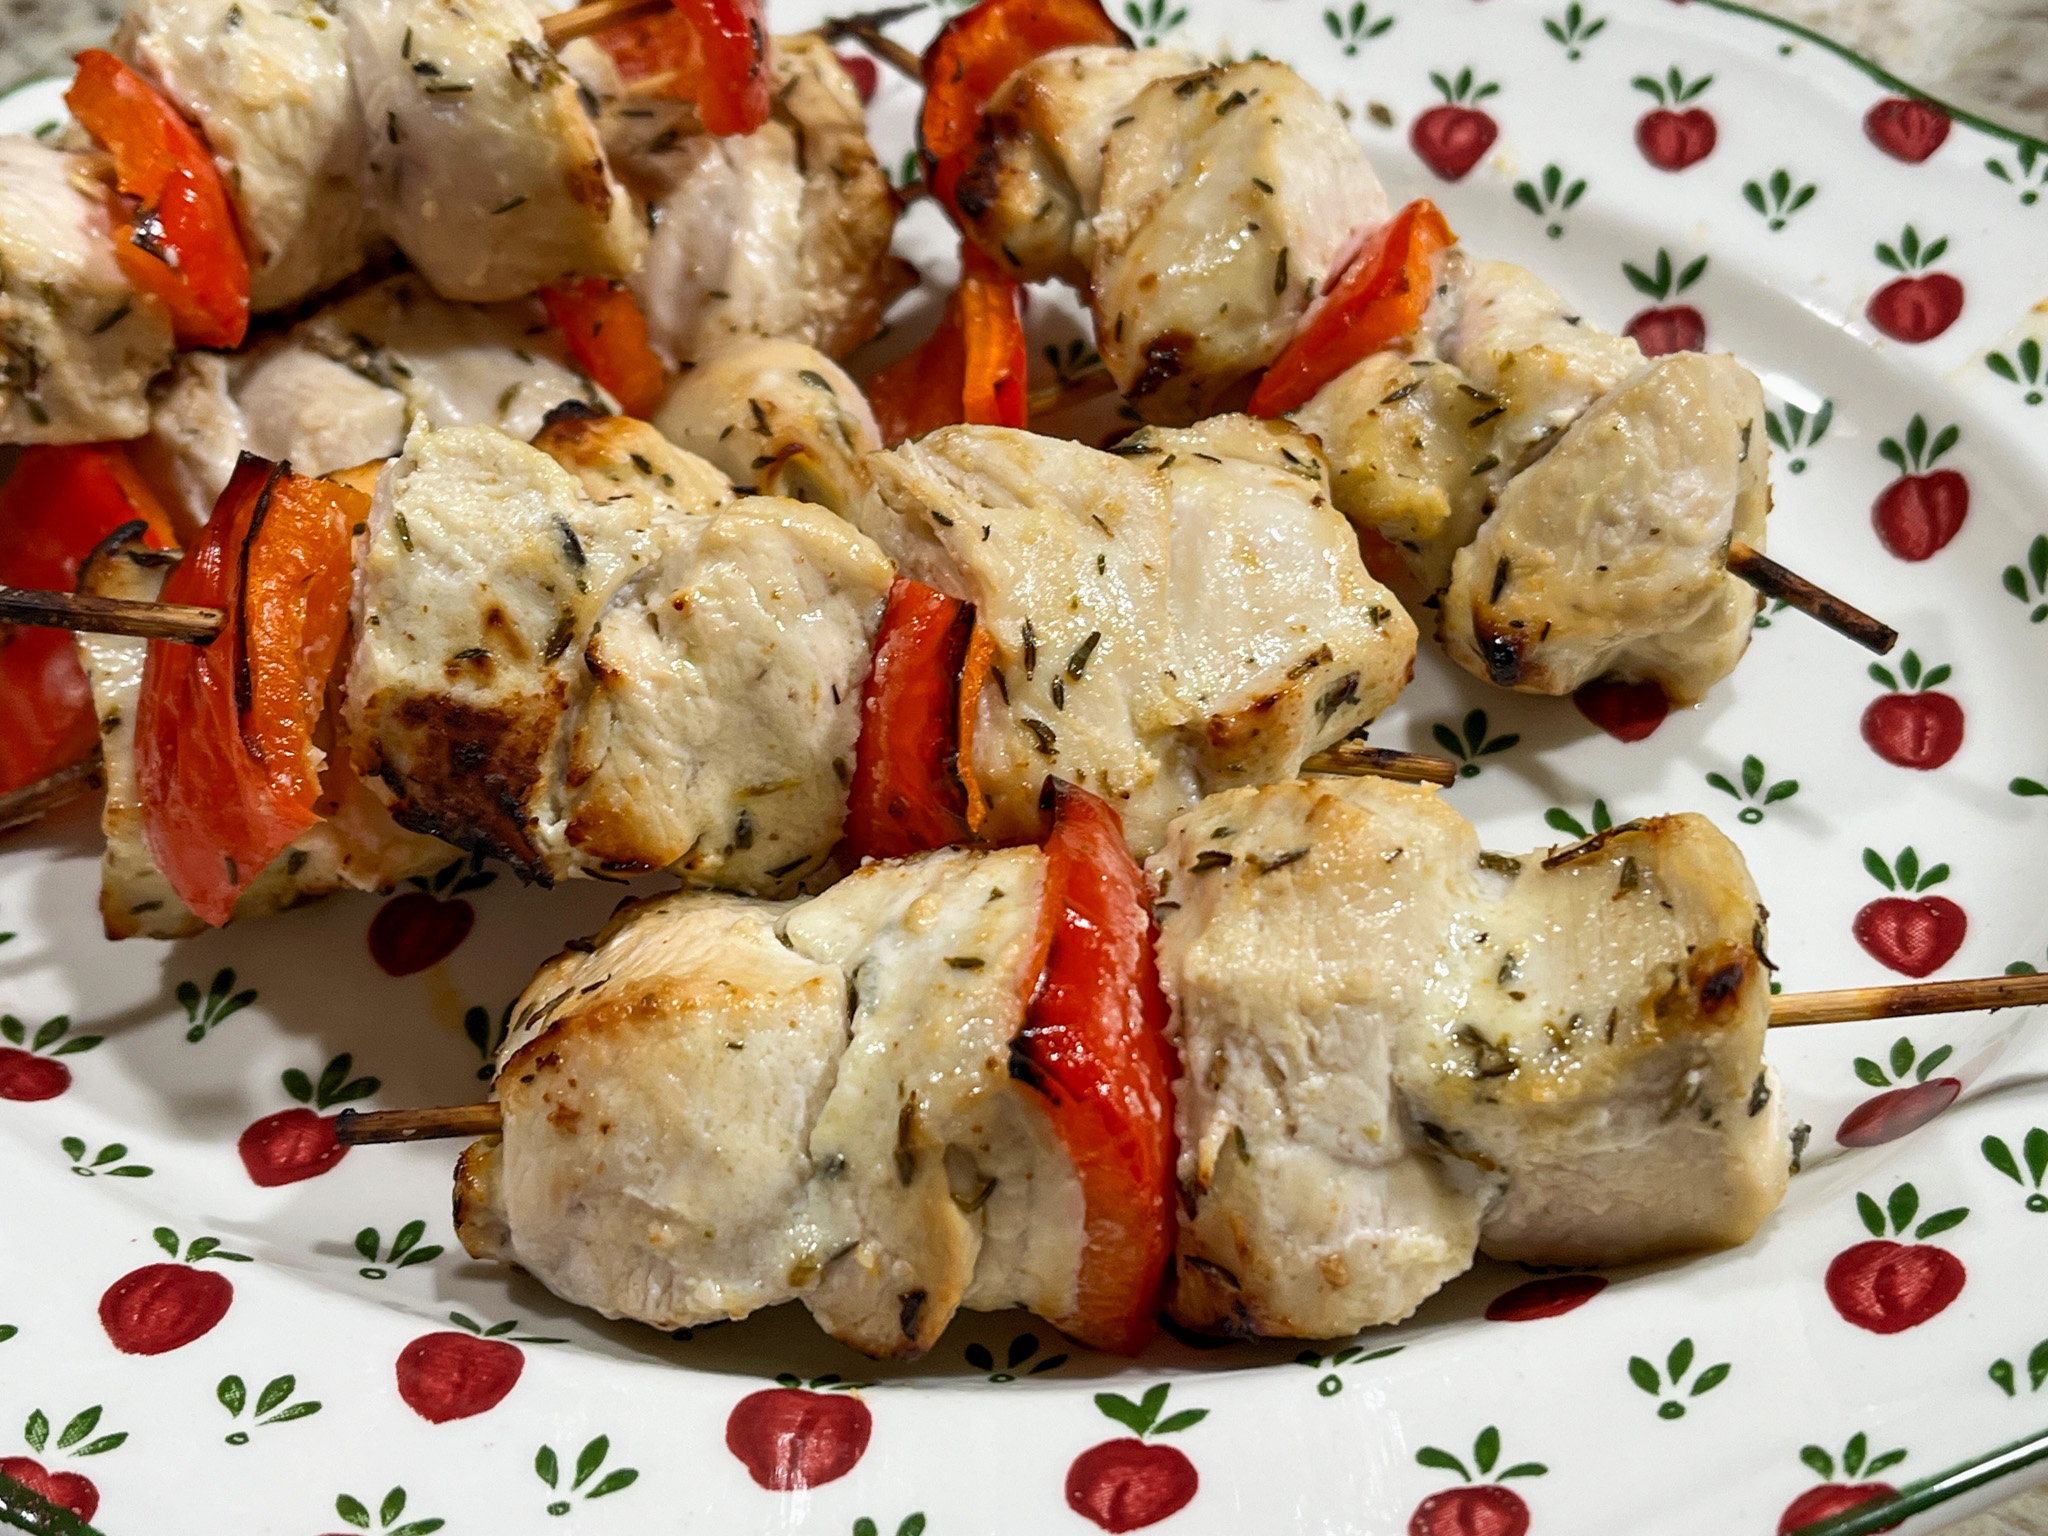
Super simple preparation, the air-fryer shines to produce moist and tender chicken in less than 30 minutes (not counting marinating time, of course). You can add different spices, just keep the basic oil, lemon and yogurt base.

AIR-FRYER CHICKEN SKEWERS
(from The Bewitching Kitchen)

3 boneless chicken breasts, cut in 1 inch pieces
1/4 cup olive oil
1/4 cup lemon juice
1/2 cup yogurt, low-fat or full fat
1 Tablespoon apple cider vinegar
1 Tablespoon agave nectar
1 teaspoon Herbes de Provence
1/2 tsp black pepper
salt to taste
1 red bell pepper, cut in squares
olive oil spray

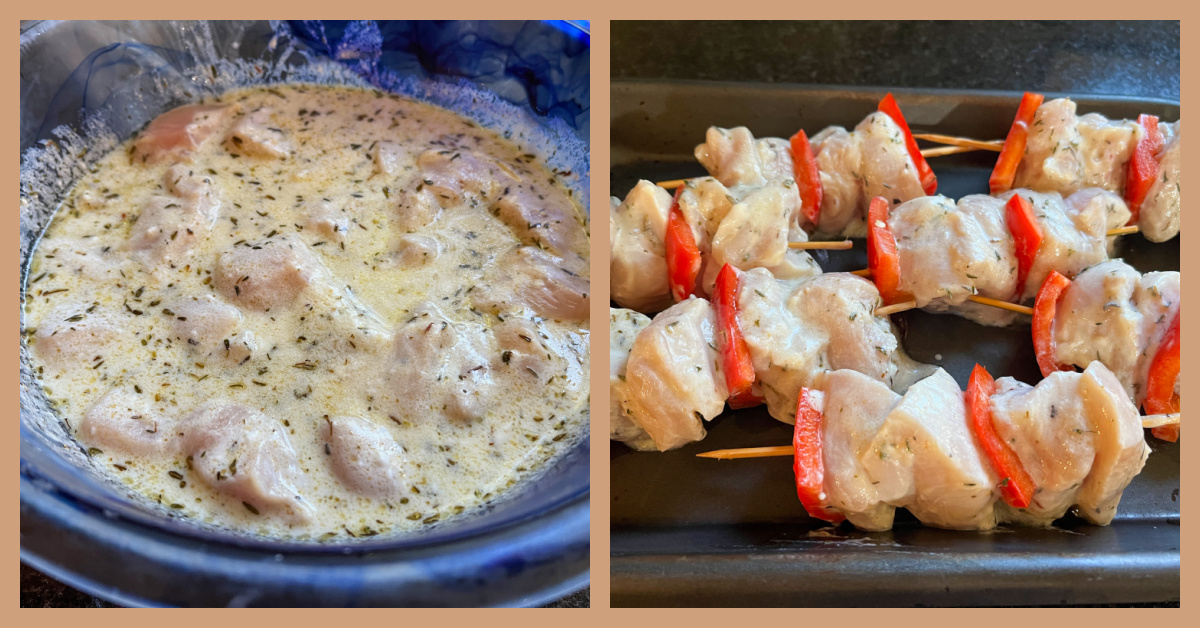
Make the marinade by whisking vigorously the olive oil, lemon juice, vinegar, yogurt, and agave nectar. Add the Herbes de Provence, pepper and salt, mix well.

Place the pieces of chicken in a bowl and add the marinade. Cover and refrigerate for a minimum of 30 minutes to 4 hours.

Soak wooden skewers in water while you marinate de meat. Make sure to you skewers that fit inside your air-fryer, or cut them in the appropriate length. Remove chicken from the marinade. Thread pieces of chicken and a couple of red bell pepper pieces in each skewer.

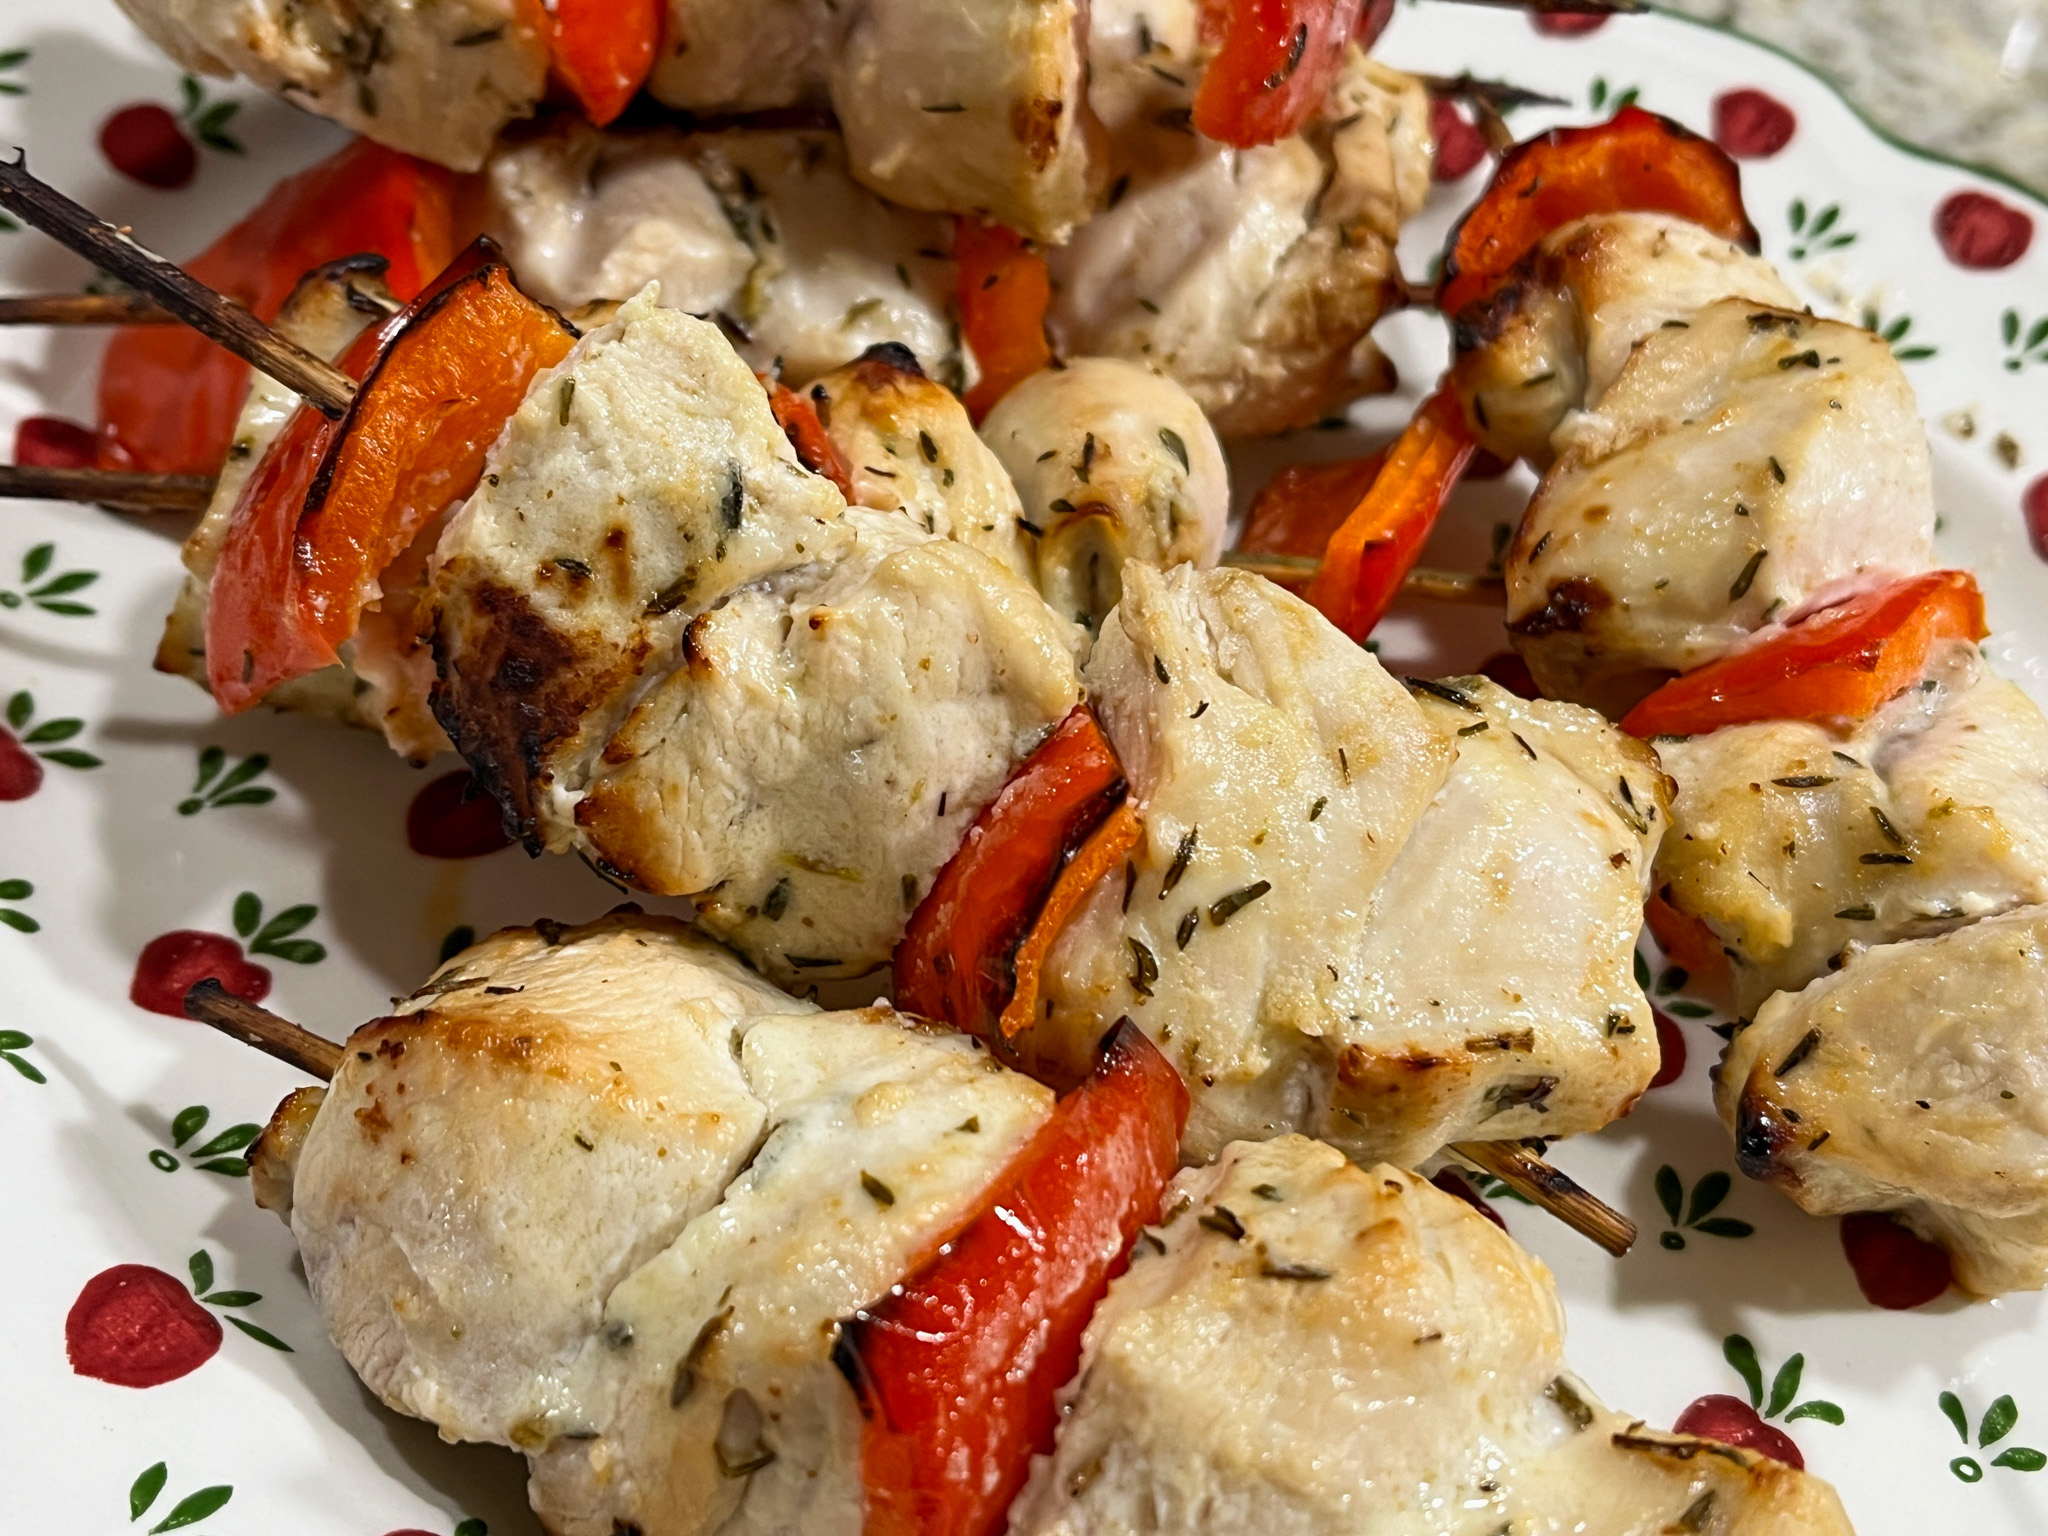
Turn fryer to 400F or as high as it will go. Spray the basket with olive oil, place the skewers inside, spray some more olive oil over them. Cook for 12 to 15 minutes. Remove them to a baking dish and cover with foil for 5 minutes. Uncover and serve.

ENJOY!

to print the recipe, click here

Comments: Another one for our rotation. Our fryer held 7 skewers with no issues, but smaller fryers might force you to cook in batches, so keep that in mind. If onions are not a problem for you, thread some together with the red bell pepper for even more flavor. You can also take this preparation heavily into Middle Eastern territory by incorporating cinnamon, turmeric, allspice, whatever you feel like.

We enjoyed ours with simple white rice and broccoli.
A perfect meal for a Wednesday evening!

ONE YEAR AGO: Almond-Cranberry Sandwich Cookies

TWO YEARS AGO: Brazilian Candy, Surpresa de Uva

THREE YEARS AGO: Red Quinoa “Tabbouleh”

FOUR YEARS AGO: Cucumber Salad with Yogurt-Harissa Dressing

FIVE YEARS AGO: Sundried Tomato and Feta Cheese Torte 

SIX YEARS AGO: Hickory-Smoked Beef Tenderloin

SEVEN YEAR AGO: Spaghetti Squash, Revisited

EIGHT YEARS AGO: Stir-fried Chicken and Cabbage in Spicy Almond Sauce

NINE YEARS AGO: Fifteen Years!

TEN YEARS AGO: Light Brioche Burger Buns

ELEVEN YEARS AGO: Sourdough Blues

TWELVE  YEARS AGO: Headed to Hawaii

THIRTEEN YEARS AGO: A yummy Brazilian cake: Bolo de Fuba’

FOURTEEN YEARS AGO:  Hidden Treasure

FIFTEEN YEARS AGO: Avocado Three Ways

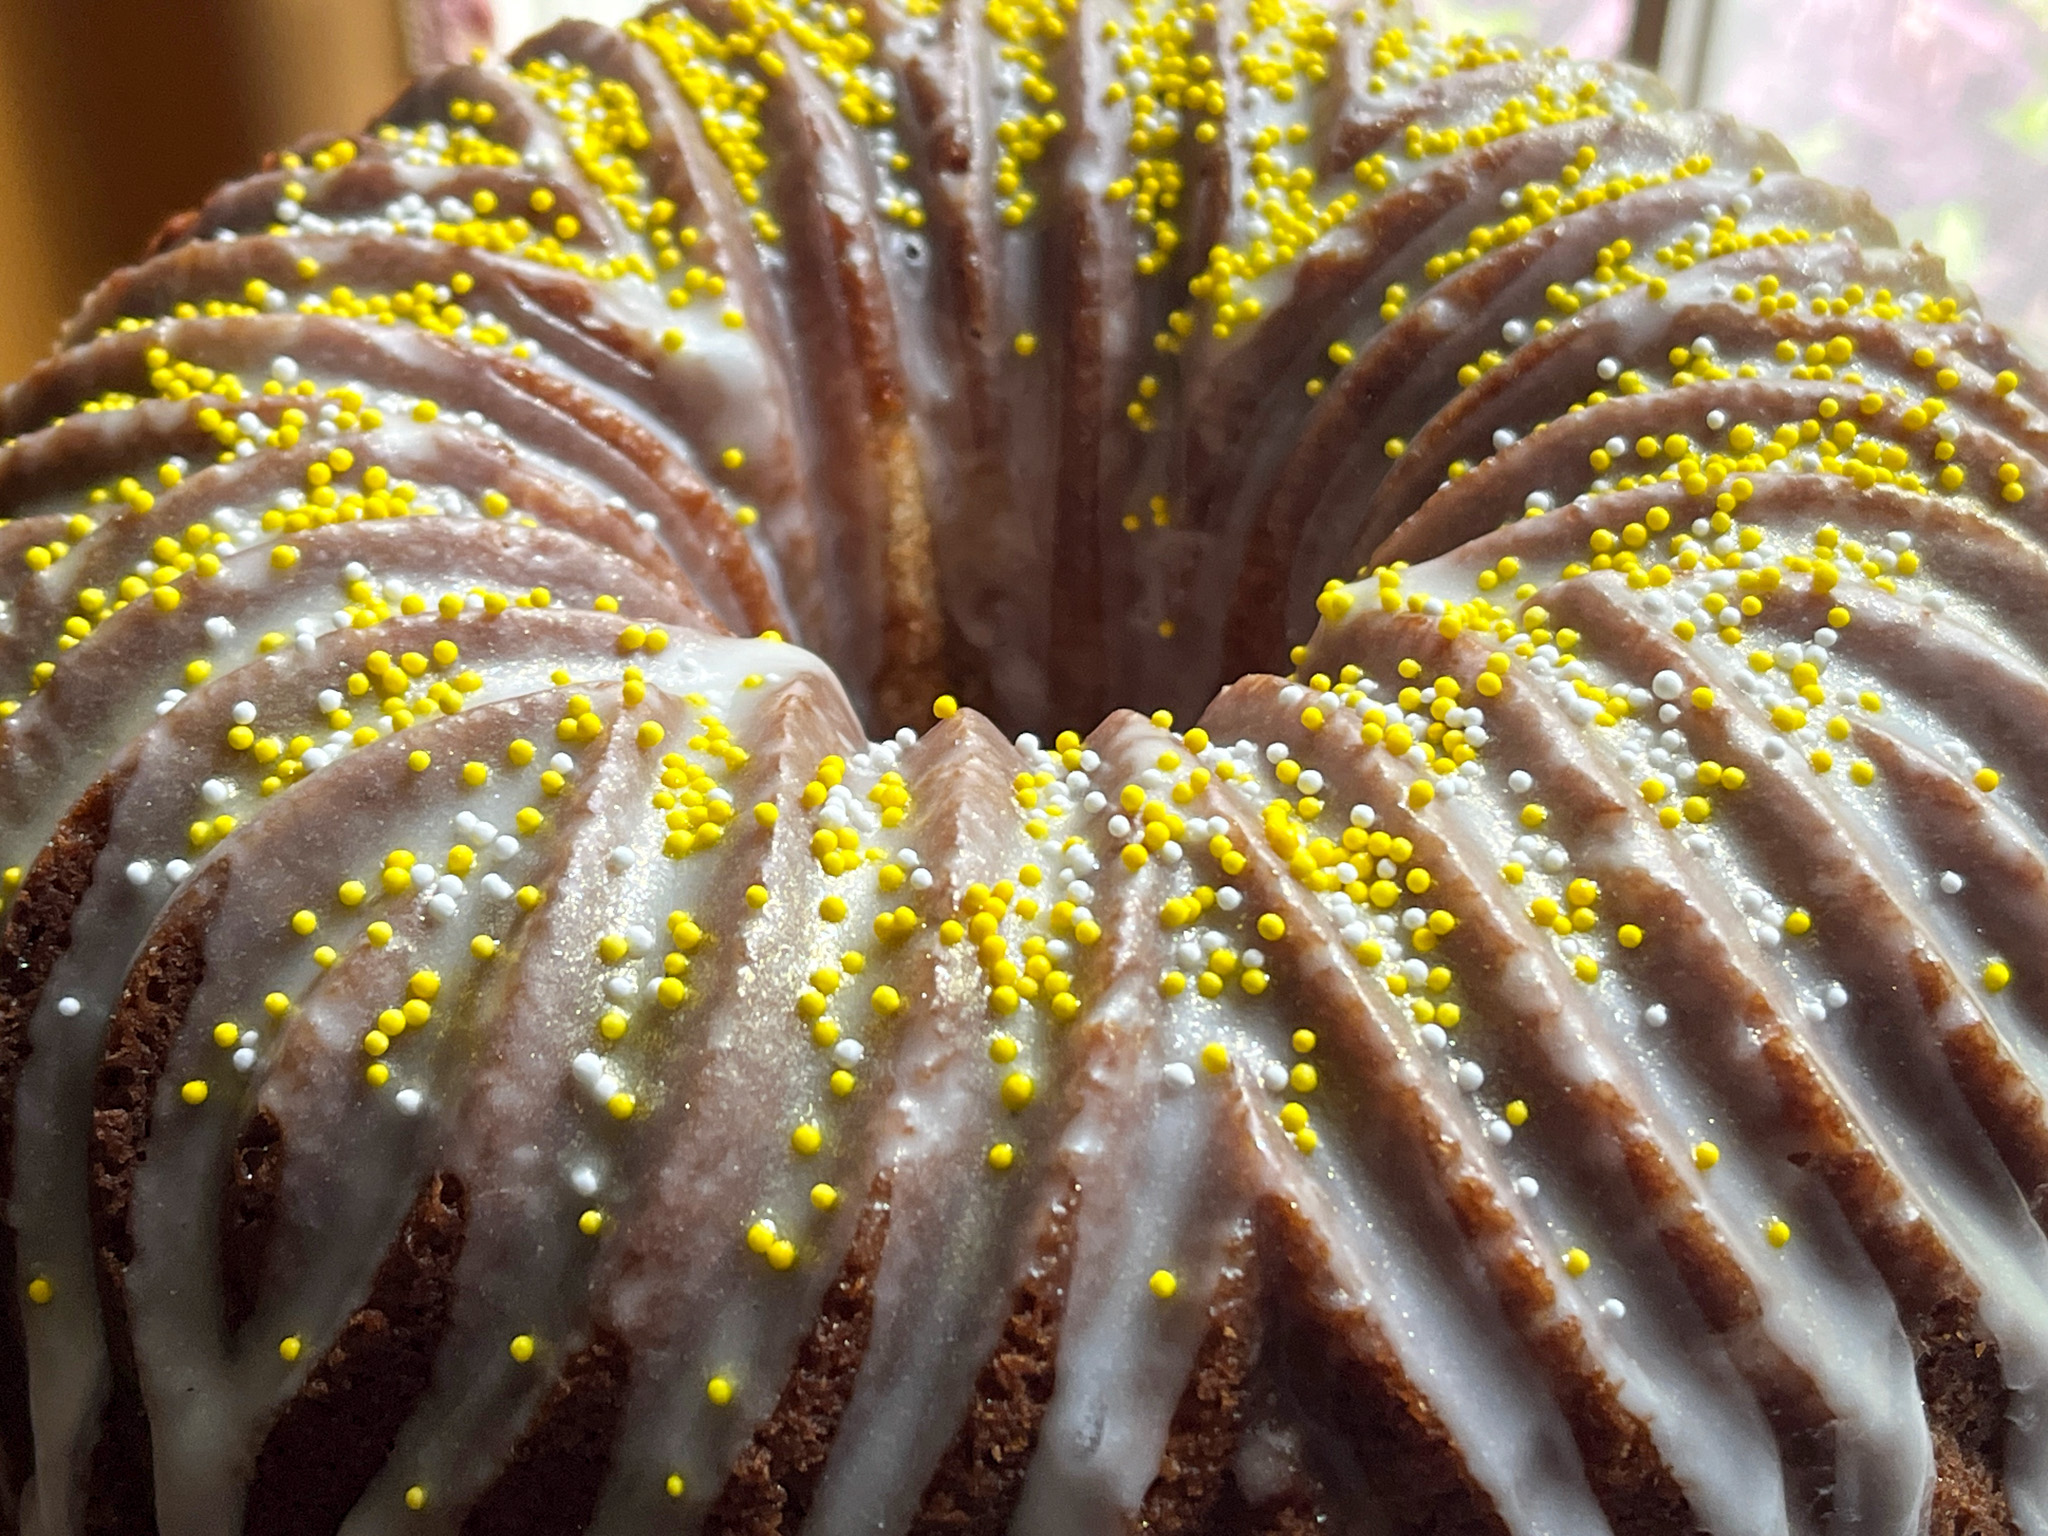
LEMON BUNDT CAKE, A REAL WINNER

Lemon Cakes can be a bit tricky as far as flavor goes. I have made a cake from a super reputable source that promised to deliver the most intense, most lemony flavor coupled with a moist and tender cake. It was tremendously convoluted, a ton of work and to be absolutely honest with you, the America’s Test Kitchen version delivered it all for 1/10 of the trouble. Which is saying a lot, as they are known for never cutting corners.


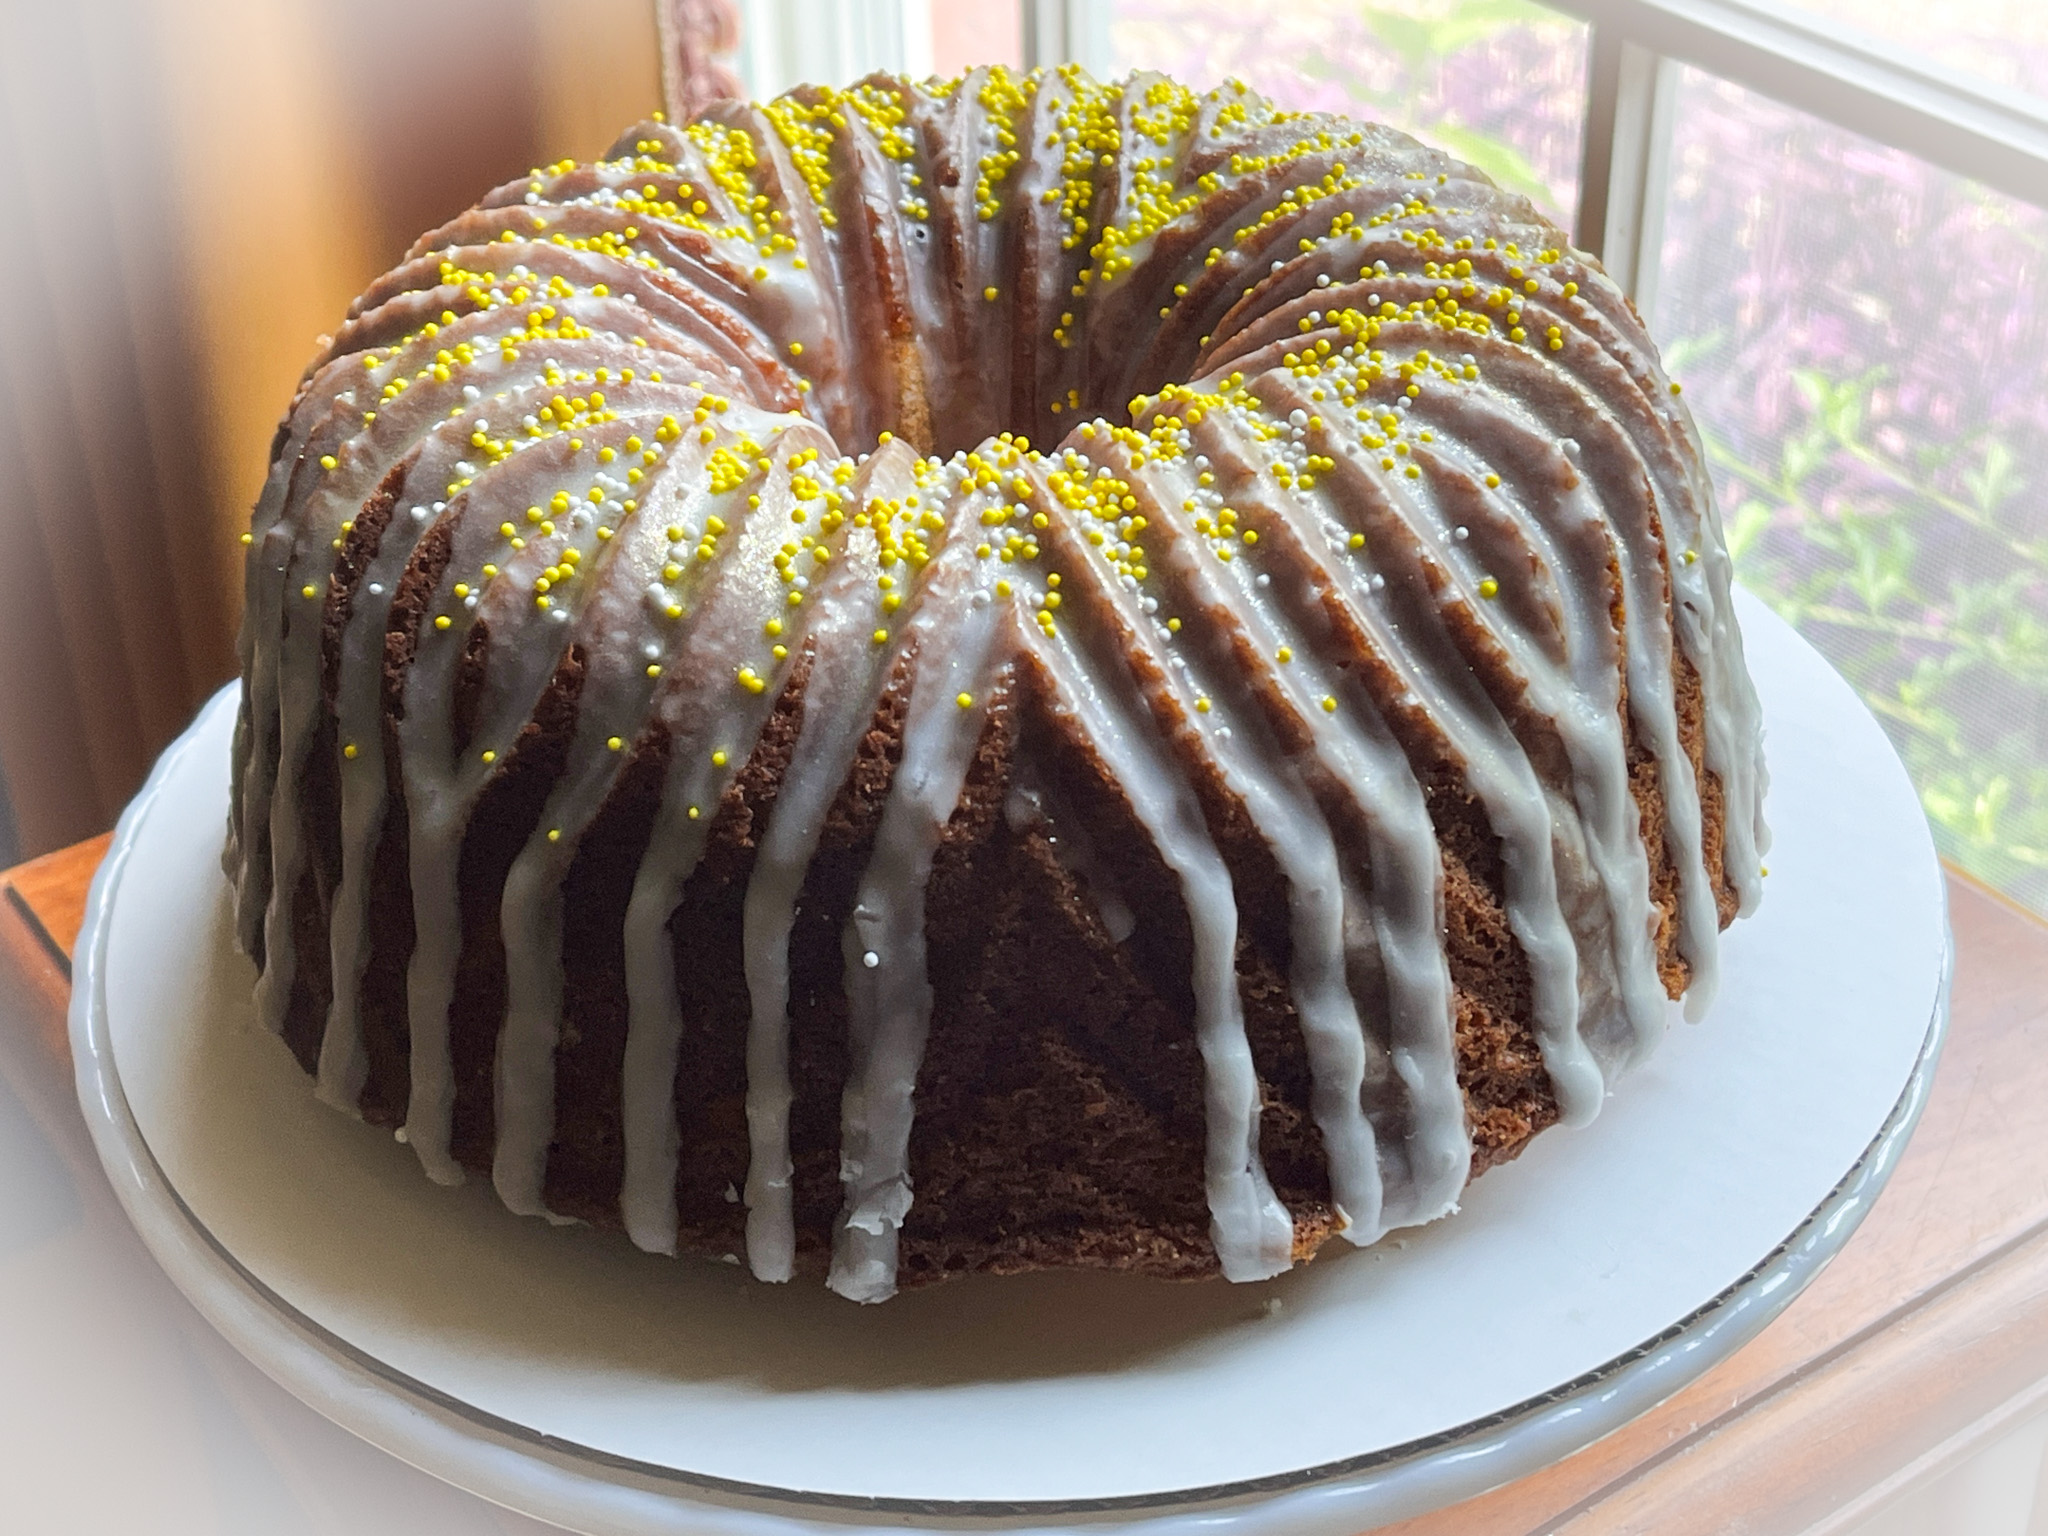
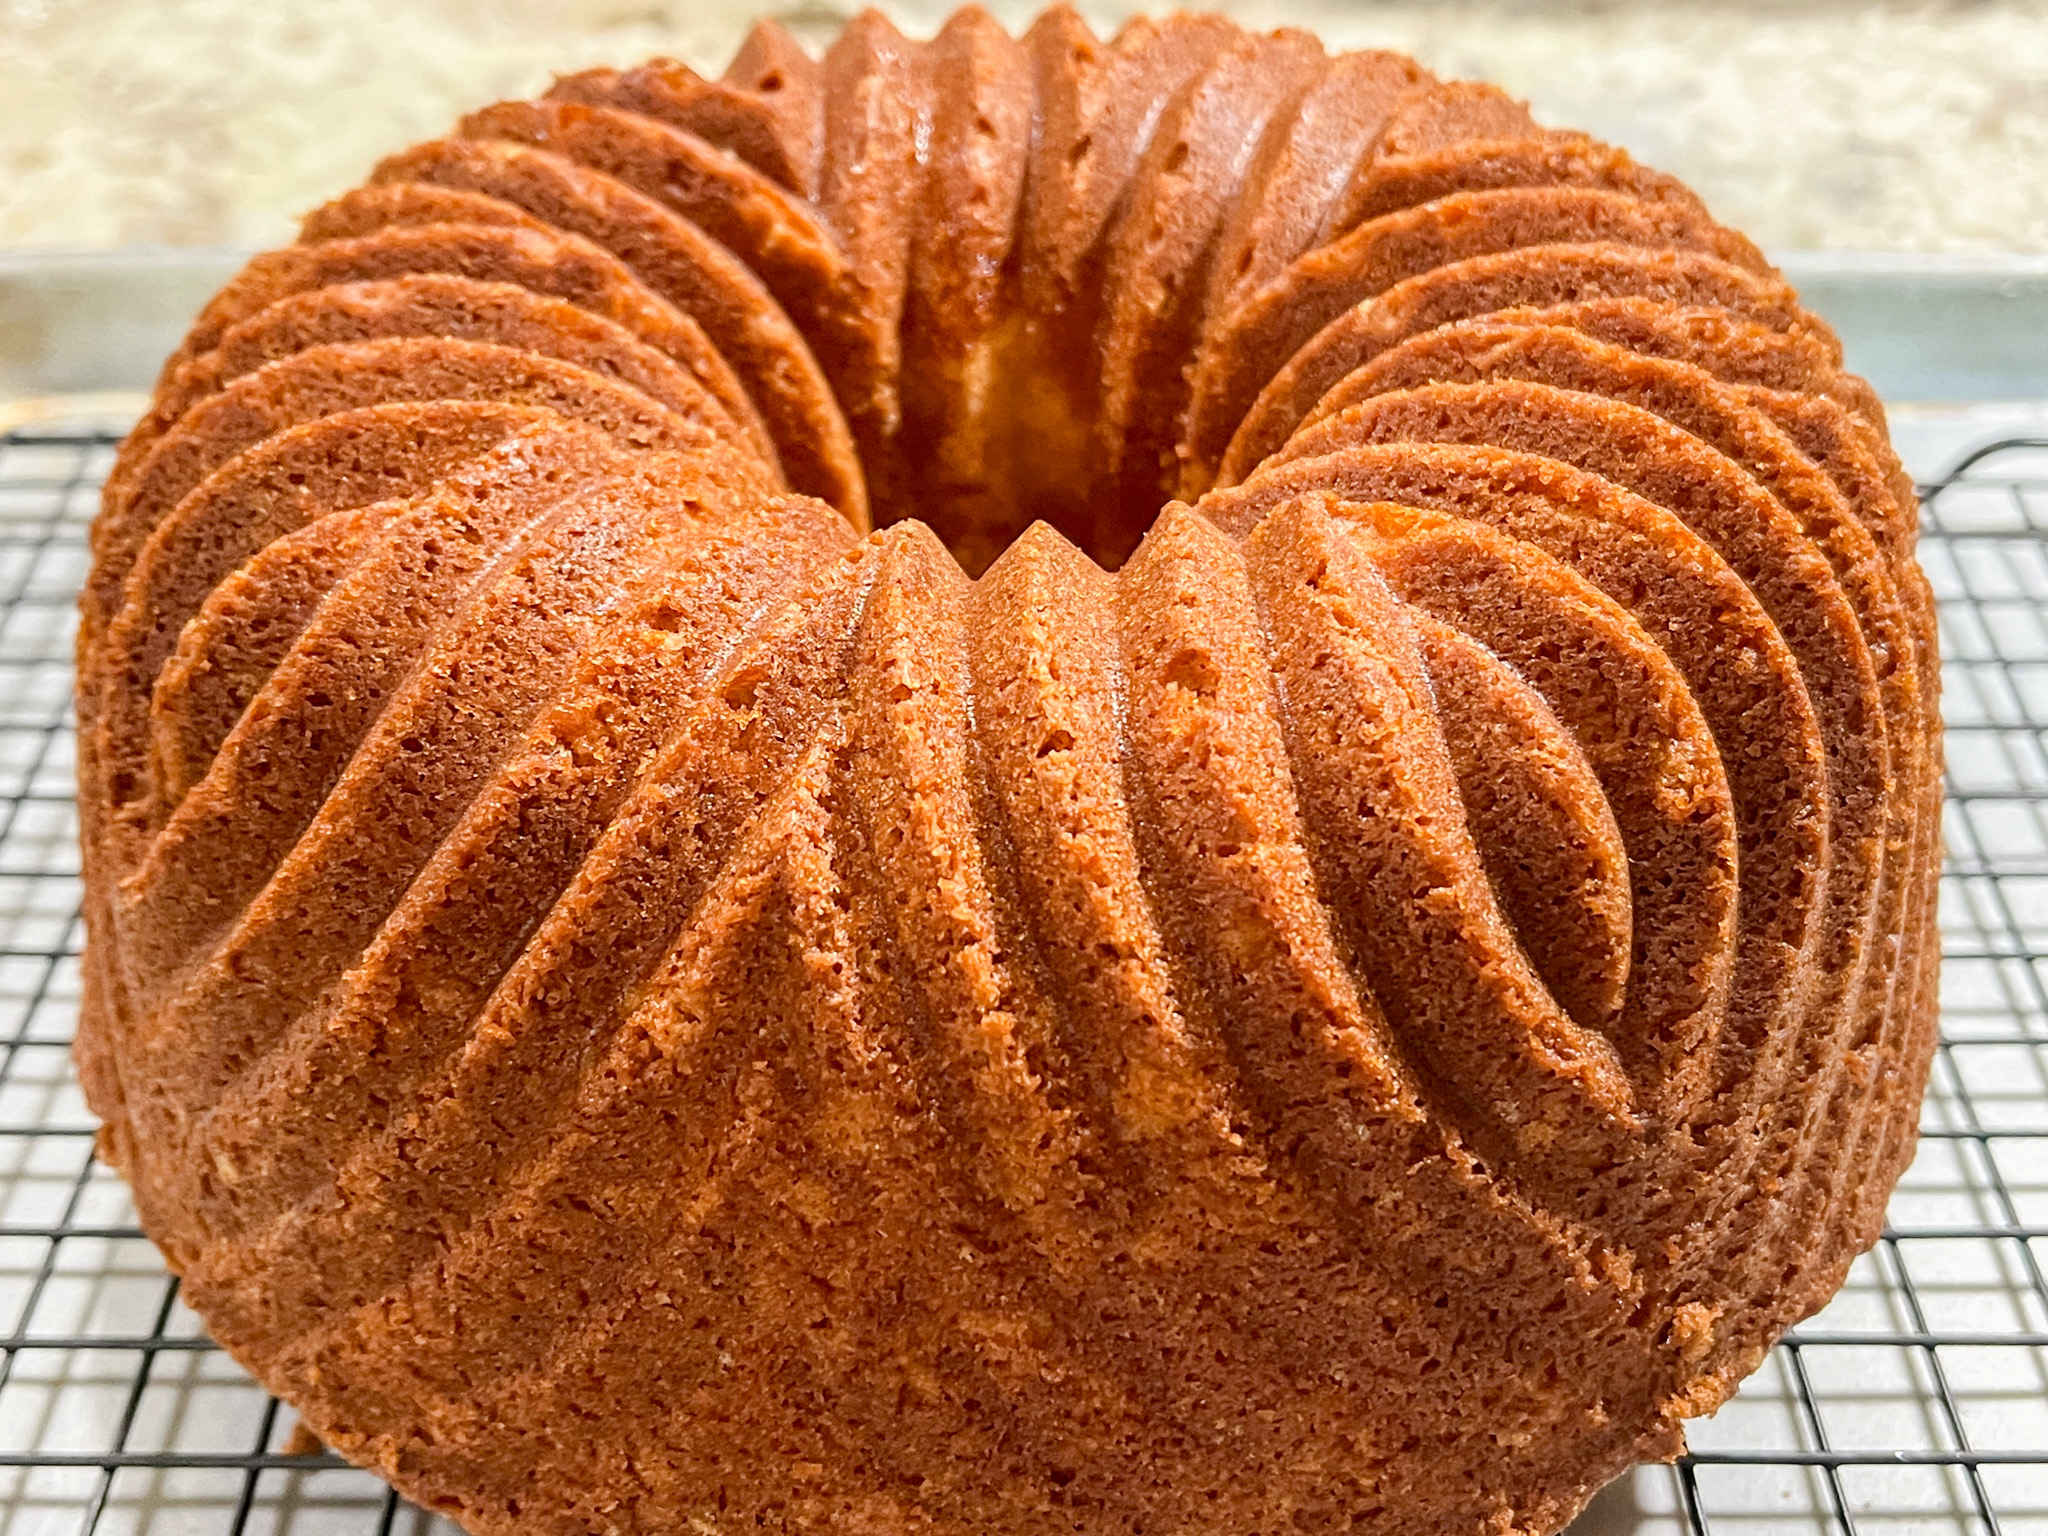
They are super strict about copyright issues, and rarely reply to requests asking permission to publish their recipes, however I was able to find this one online. If you’d like to make this deliciously lemony cake, pay a visit to this site. No difference from the recipe found in The Perfect Cake (2018), a cookbook I highly recommend. To bake this particular version, I used the Bavaria Bundt pan from Nordicware, but any pan with 10 to 12-cup capacity will do the job. I just love the way they un-mold like a dream!

When I make a Bundt cake, I donate it whole, so I cannot share a picture of the crumb, but I’ve had excellent feedback about this baby. In fact, I’ve made it three times already, using different Bundt pan shapes. Always a winner!

ONE YEAR AGO: Aji-Amarillo Roasted Chicken Thighs

TWO YEARS AGO: Karen’s Quick Shrimp Fried Rice

THREE YEARS AGO: OMG Peanut Butter Bars

FOUR YEARS AGO: Kansas Sunflower Seed and Black Walnut Macarons

FIVE YEARS AGO: Curry Turmeric Sourdough

SIX YEARS AGO: Black Olive Tapenade and Deviled Eggs

SEVEN YEARS AGO: Blueberry Crumble Coffee Cake

EIGHT YEARS AGO: Fresh Strawberry Yogurt Bundt Cake

NINE YEAR AGO: Quinoa Salad with Red Grapes and Avocado

TEN YEARS AGO: Strawberry Coffee Cake

ELEVEN YEARS AGO: Lemon-Poppy Seed Muffins

TWELVE YEARS AGO: Mascarpone Brownies

THIRTEEN YEARS AGO: Salmon Tacos

FOURTEEN YEARS AGO: Cinnamon Turban Bread

FIFTEEN YEARS AGO: Summertime Gratin