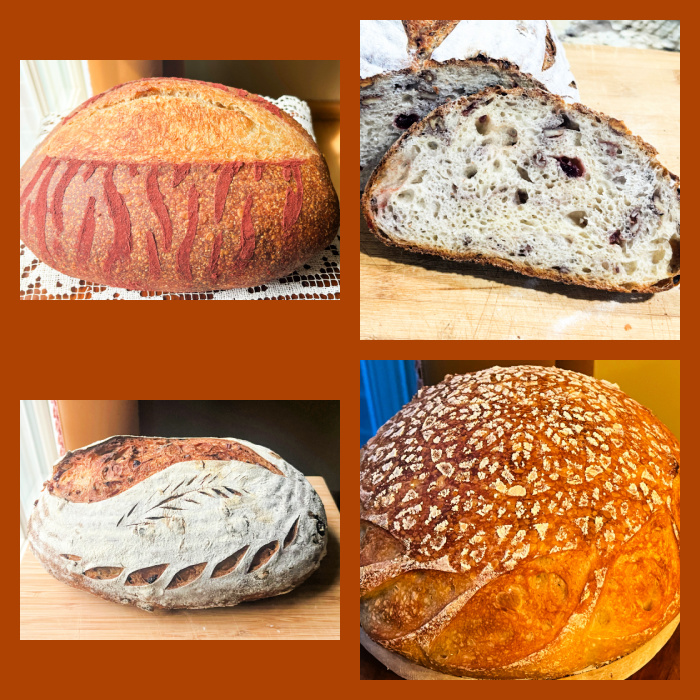
Two focus on their looks, using a very basic formula I love. The third one focuses on flavor, mixing cranberries and pecans for a truly special loaf of bread that is sure to please you…
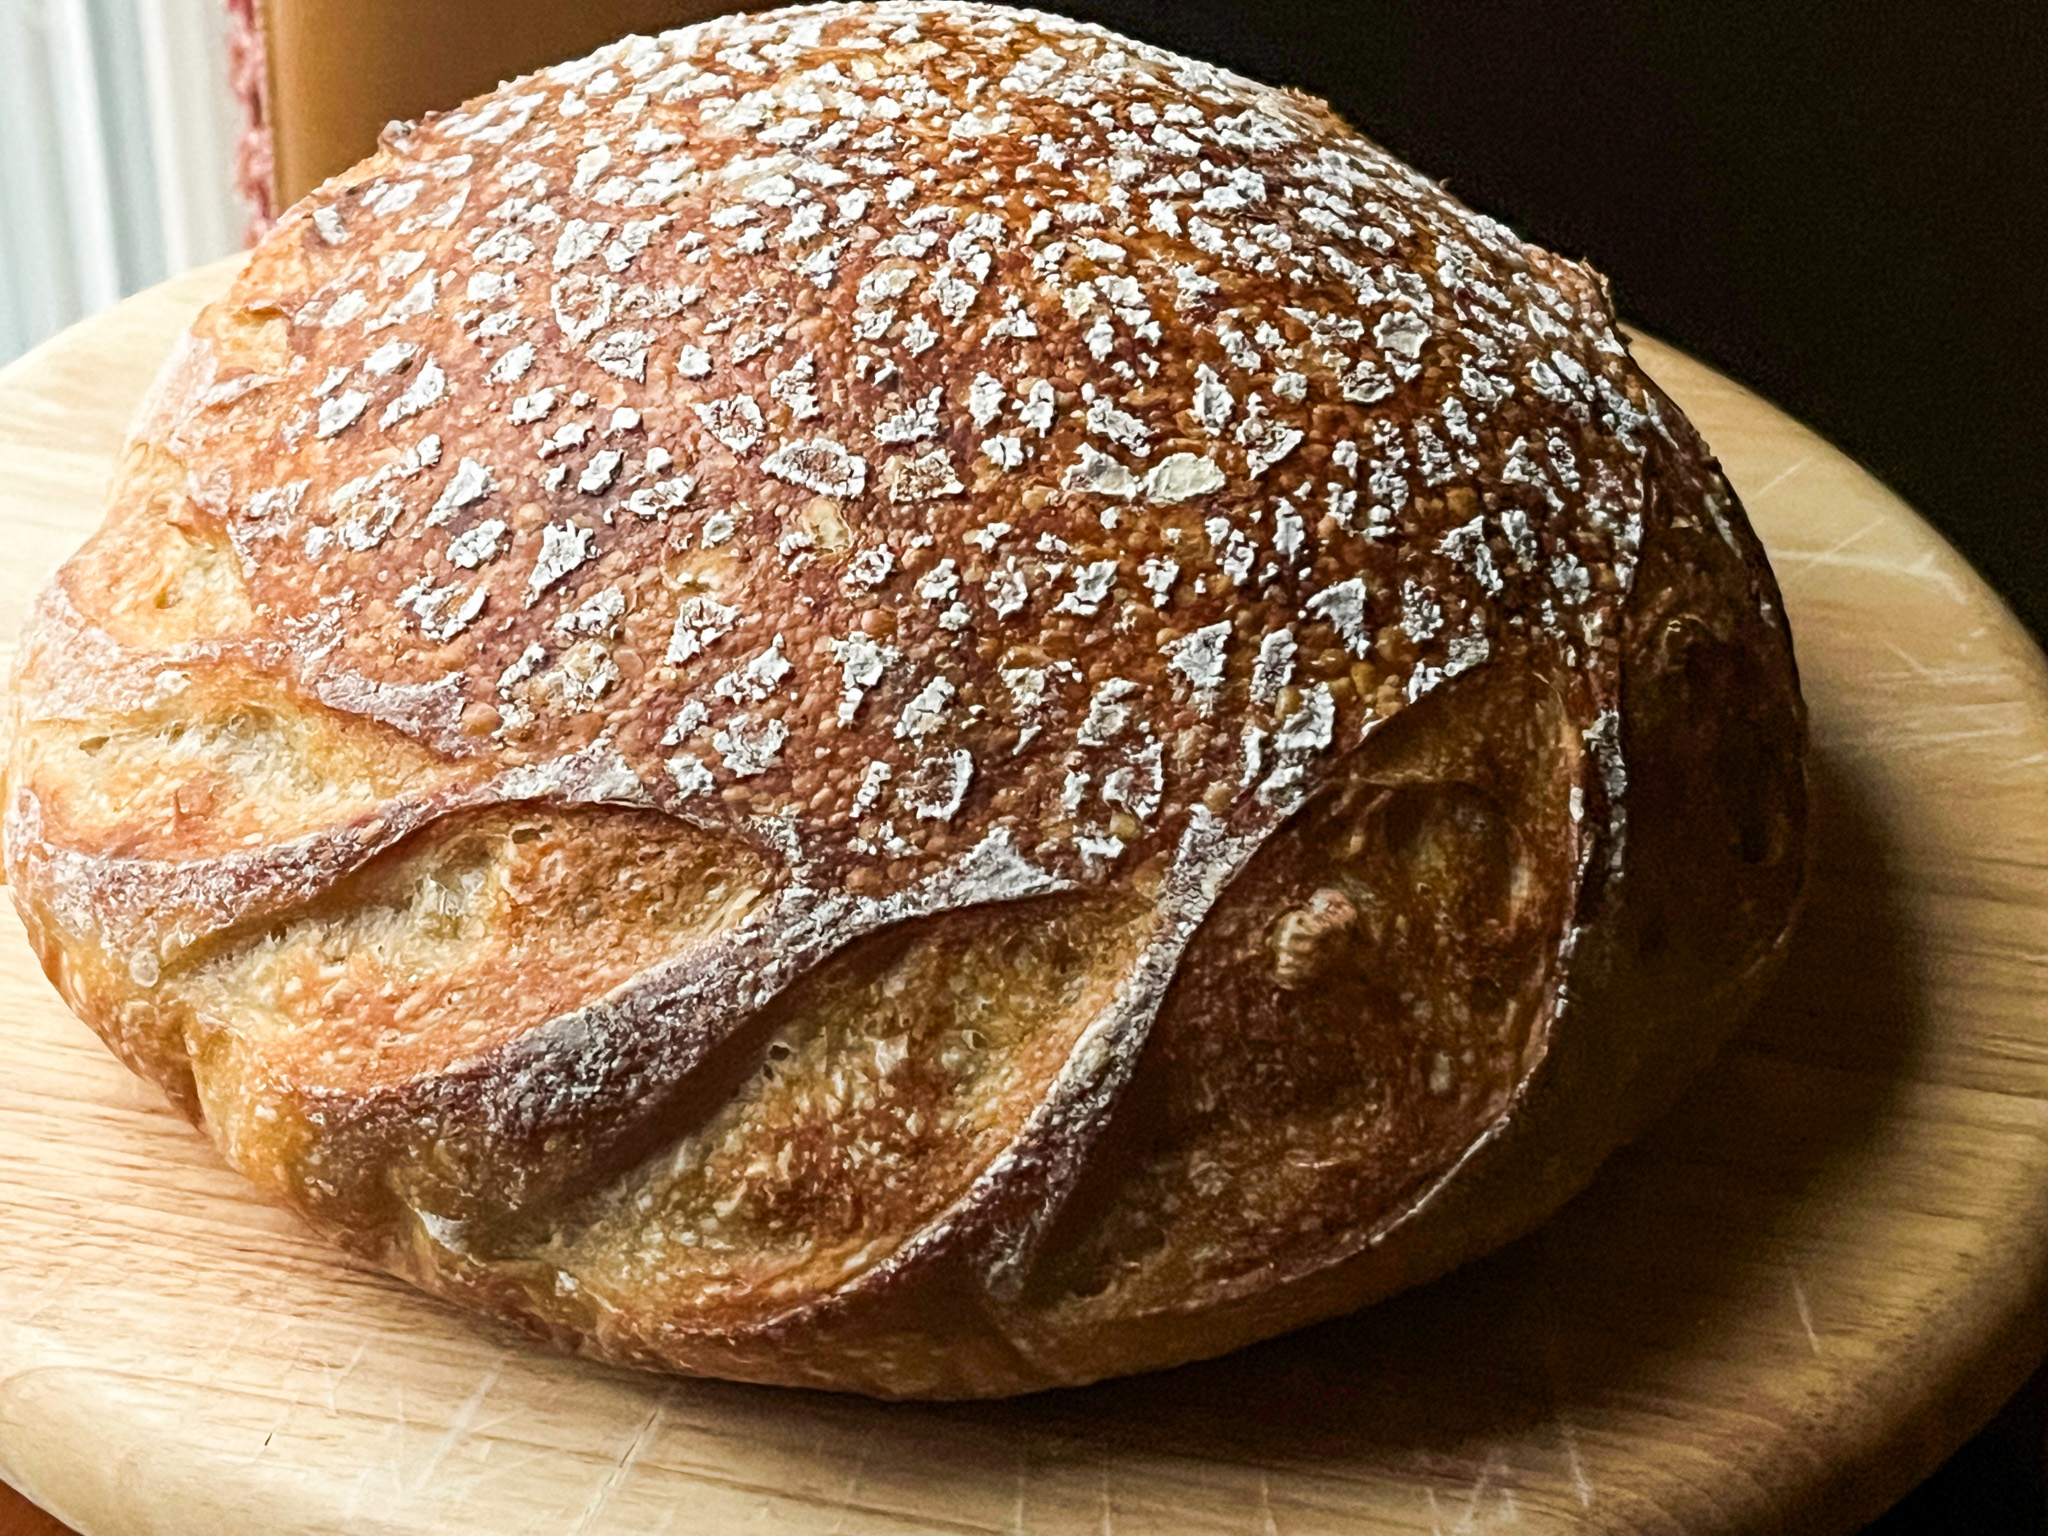
For the Red Striped and the Lace Decorated Loaves, I used this basic recipe.
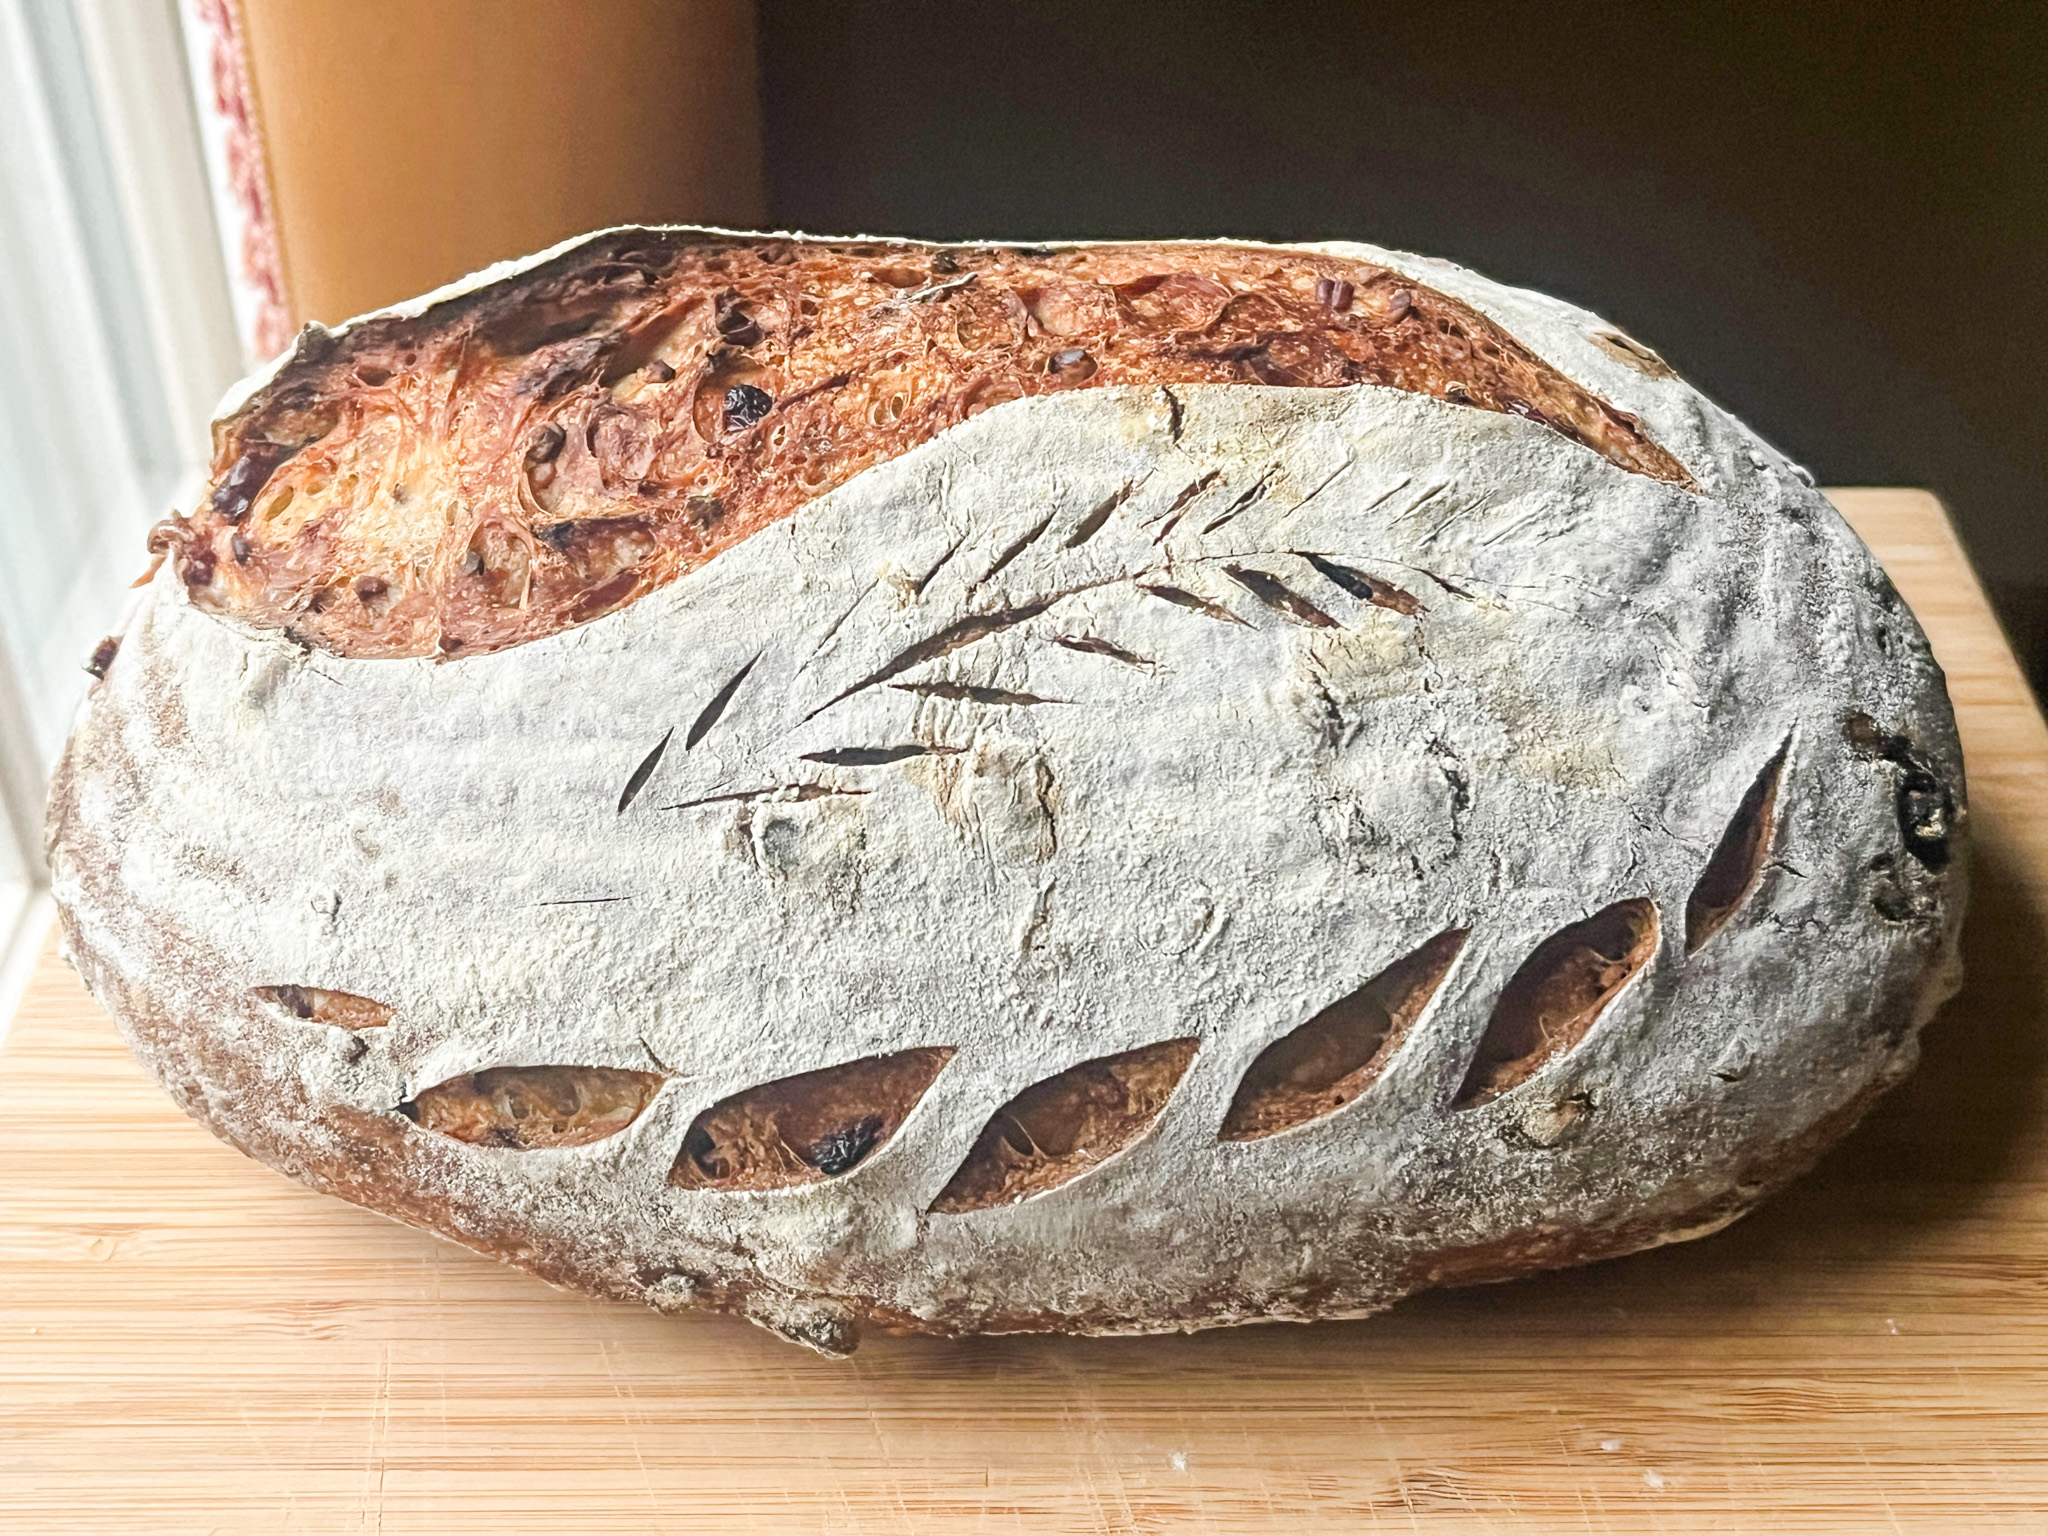
CRANBERRY-PECAN SOURDOUGH
(from The Bewitching Kitchen)
450g bread flour
50g whole wheat flour
75g sourdough starter (stiff or 100% hydration)
10g salt
360g water
75g pecans, finely cut
60g dried cranberries
tapioca flour for scoring (optional)
Mix all ingredients (except the nuts and cranberries) in the bowl of a KitchenAid type mixer fitted with the dough hook. Knead gently for about 4 minutes (first or second speed maximum).
Transfer dough to a lightly oil bowl and do a bulk fermentation with 4 folds made 45 minutes apart. Before you start the fermentation , remove a very small amount of dough to a small glass container (like those that hold spices), and mark where the level of the dough is with a permanent marker. Keep that at room temperature to monitor fermentation.
On the second folding cycle, open the dough slightly over the countertop and spread the cranberries and nuts all over it. Gently fold it al in. Don’t worry about working the dough too much, it will be ok during the next two folding cycles.
After the last folding cycle, keep an eye on the fermentation using the small vial. Ideally you want to let the dough ferment until it is double in size. Depending on the day, temperature of your kitchen, it might take 8 hours or more.
Once bulk fermentation is over, shape the dough as a batard and place in a banneton. Move it to the fridge, covered, and leave it there overnight.
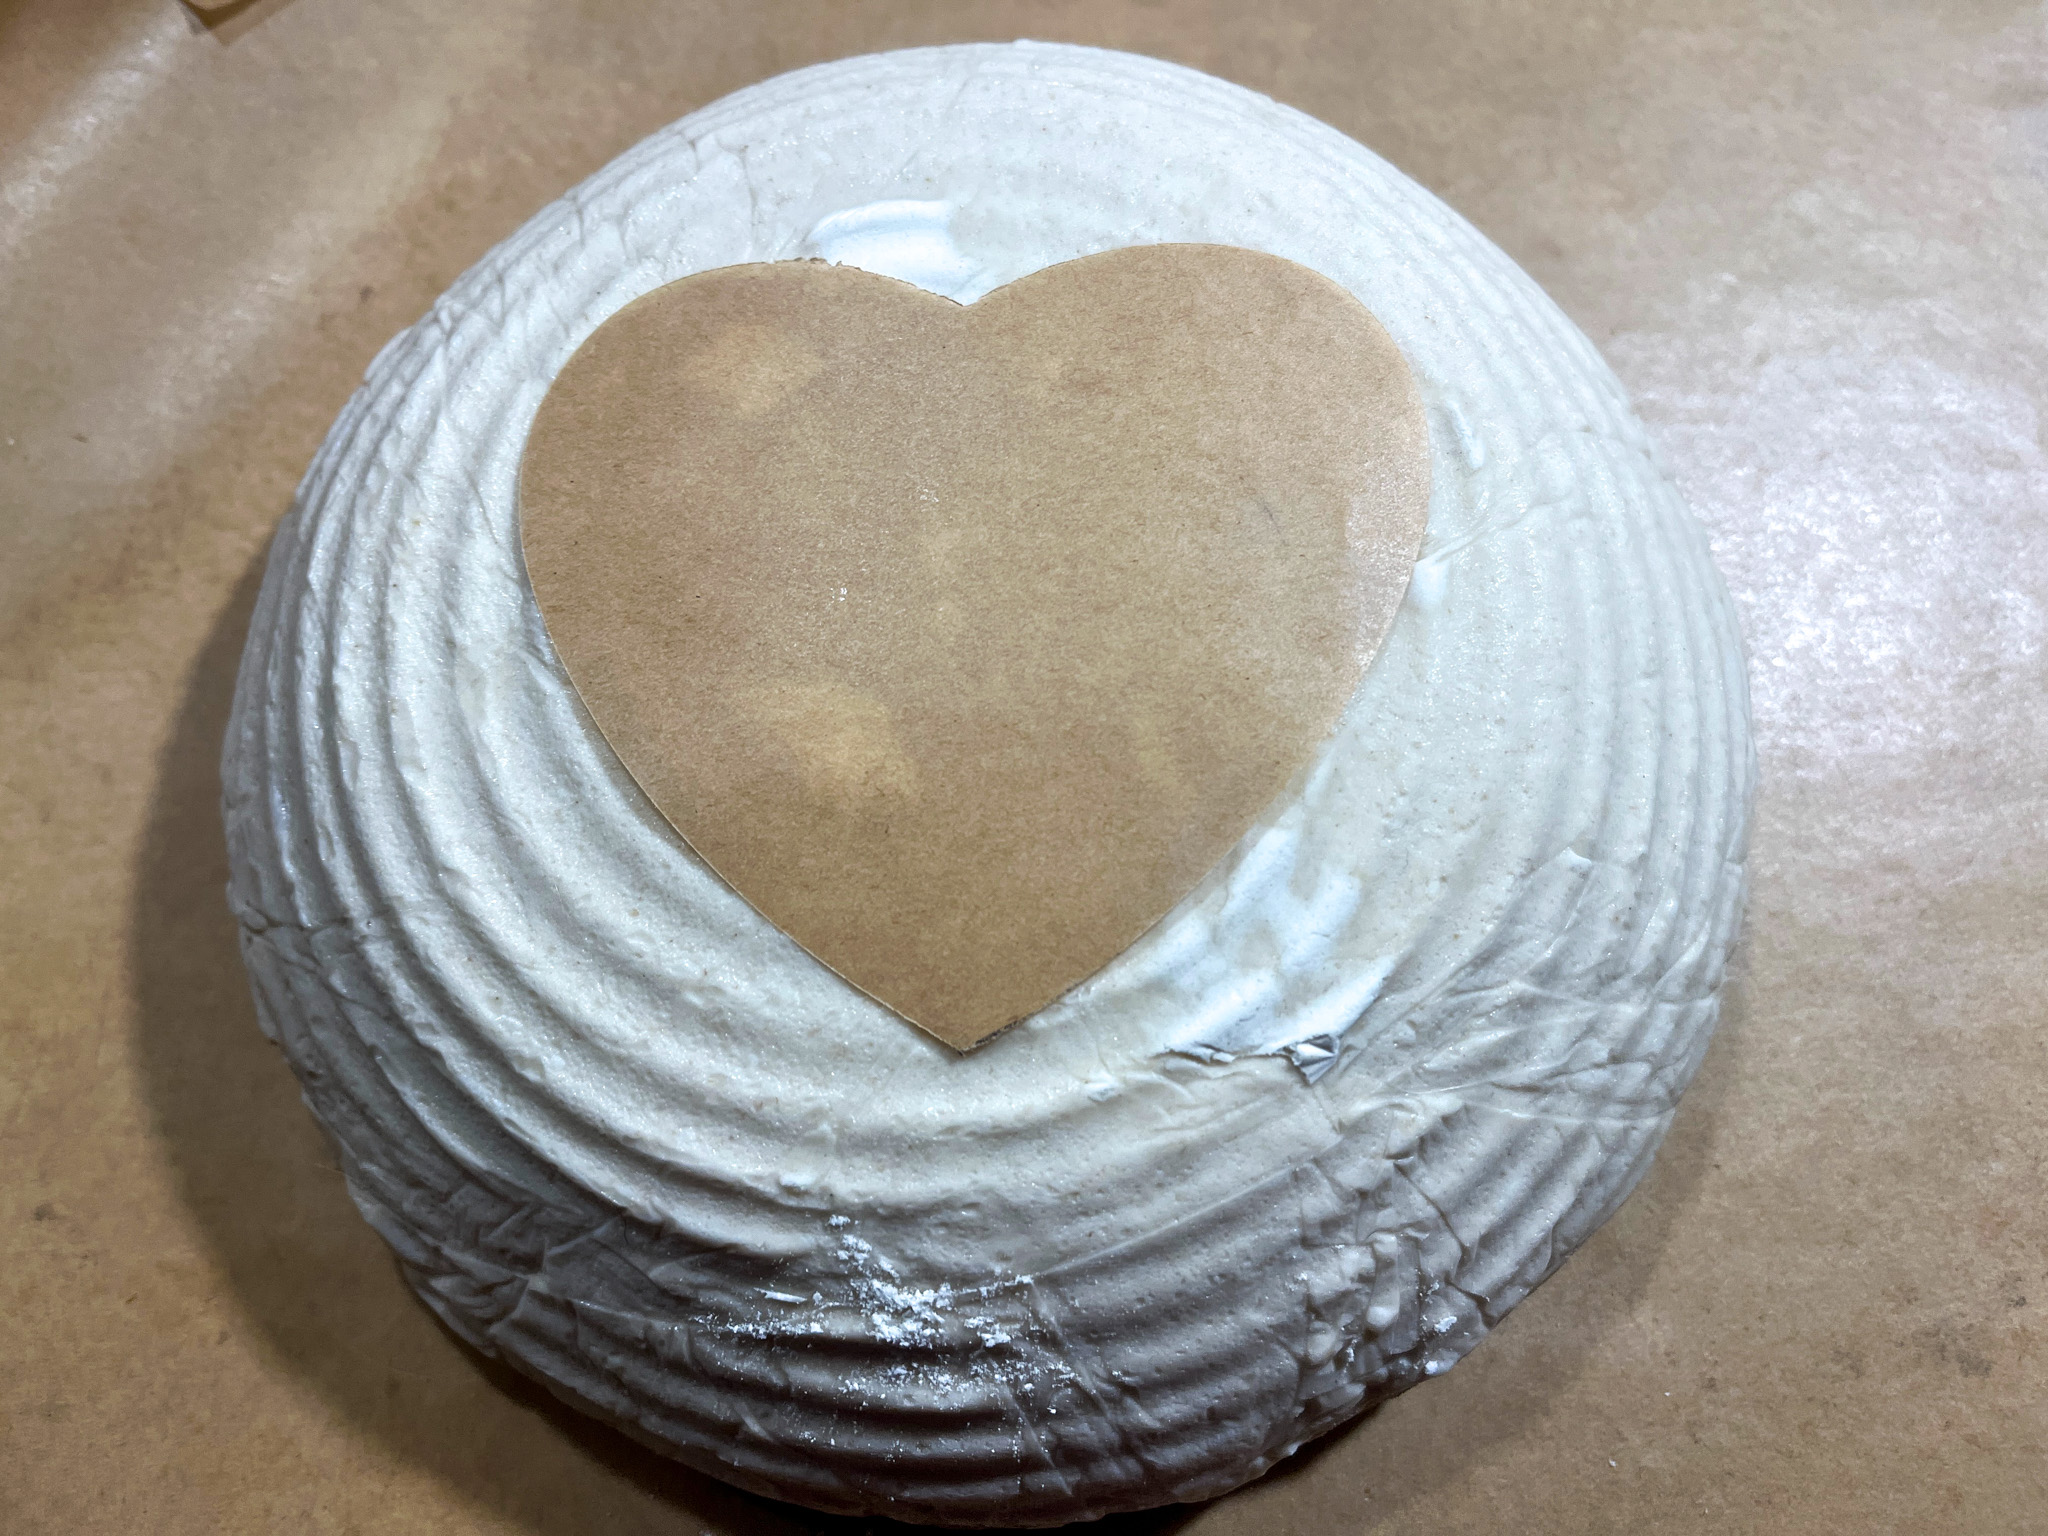
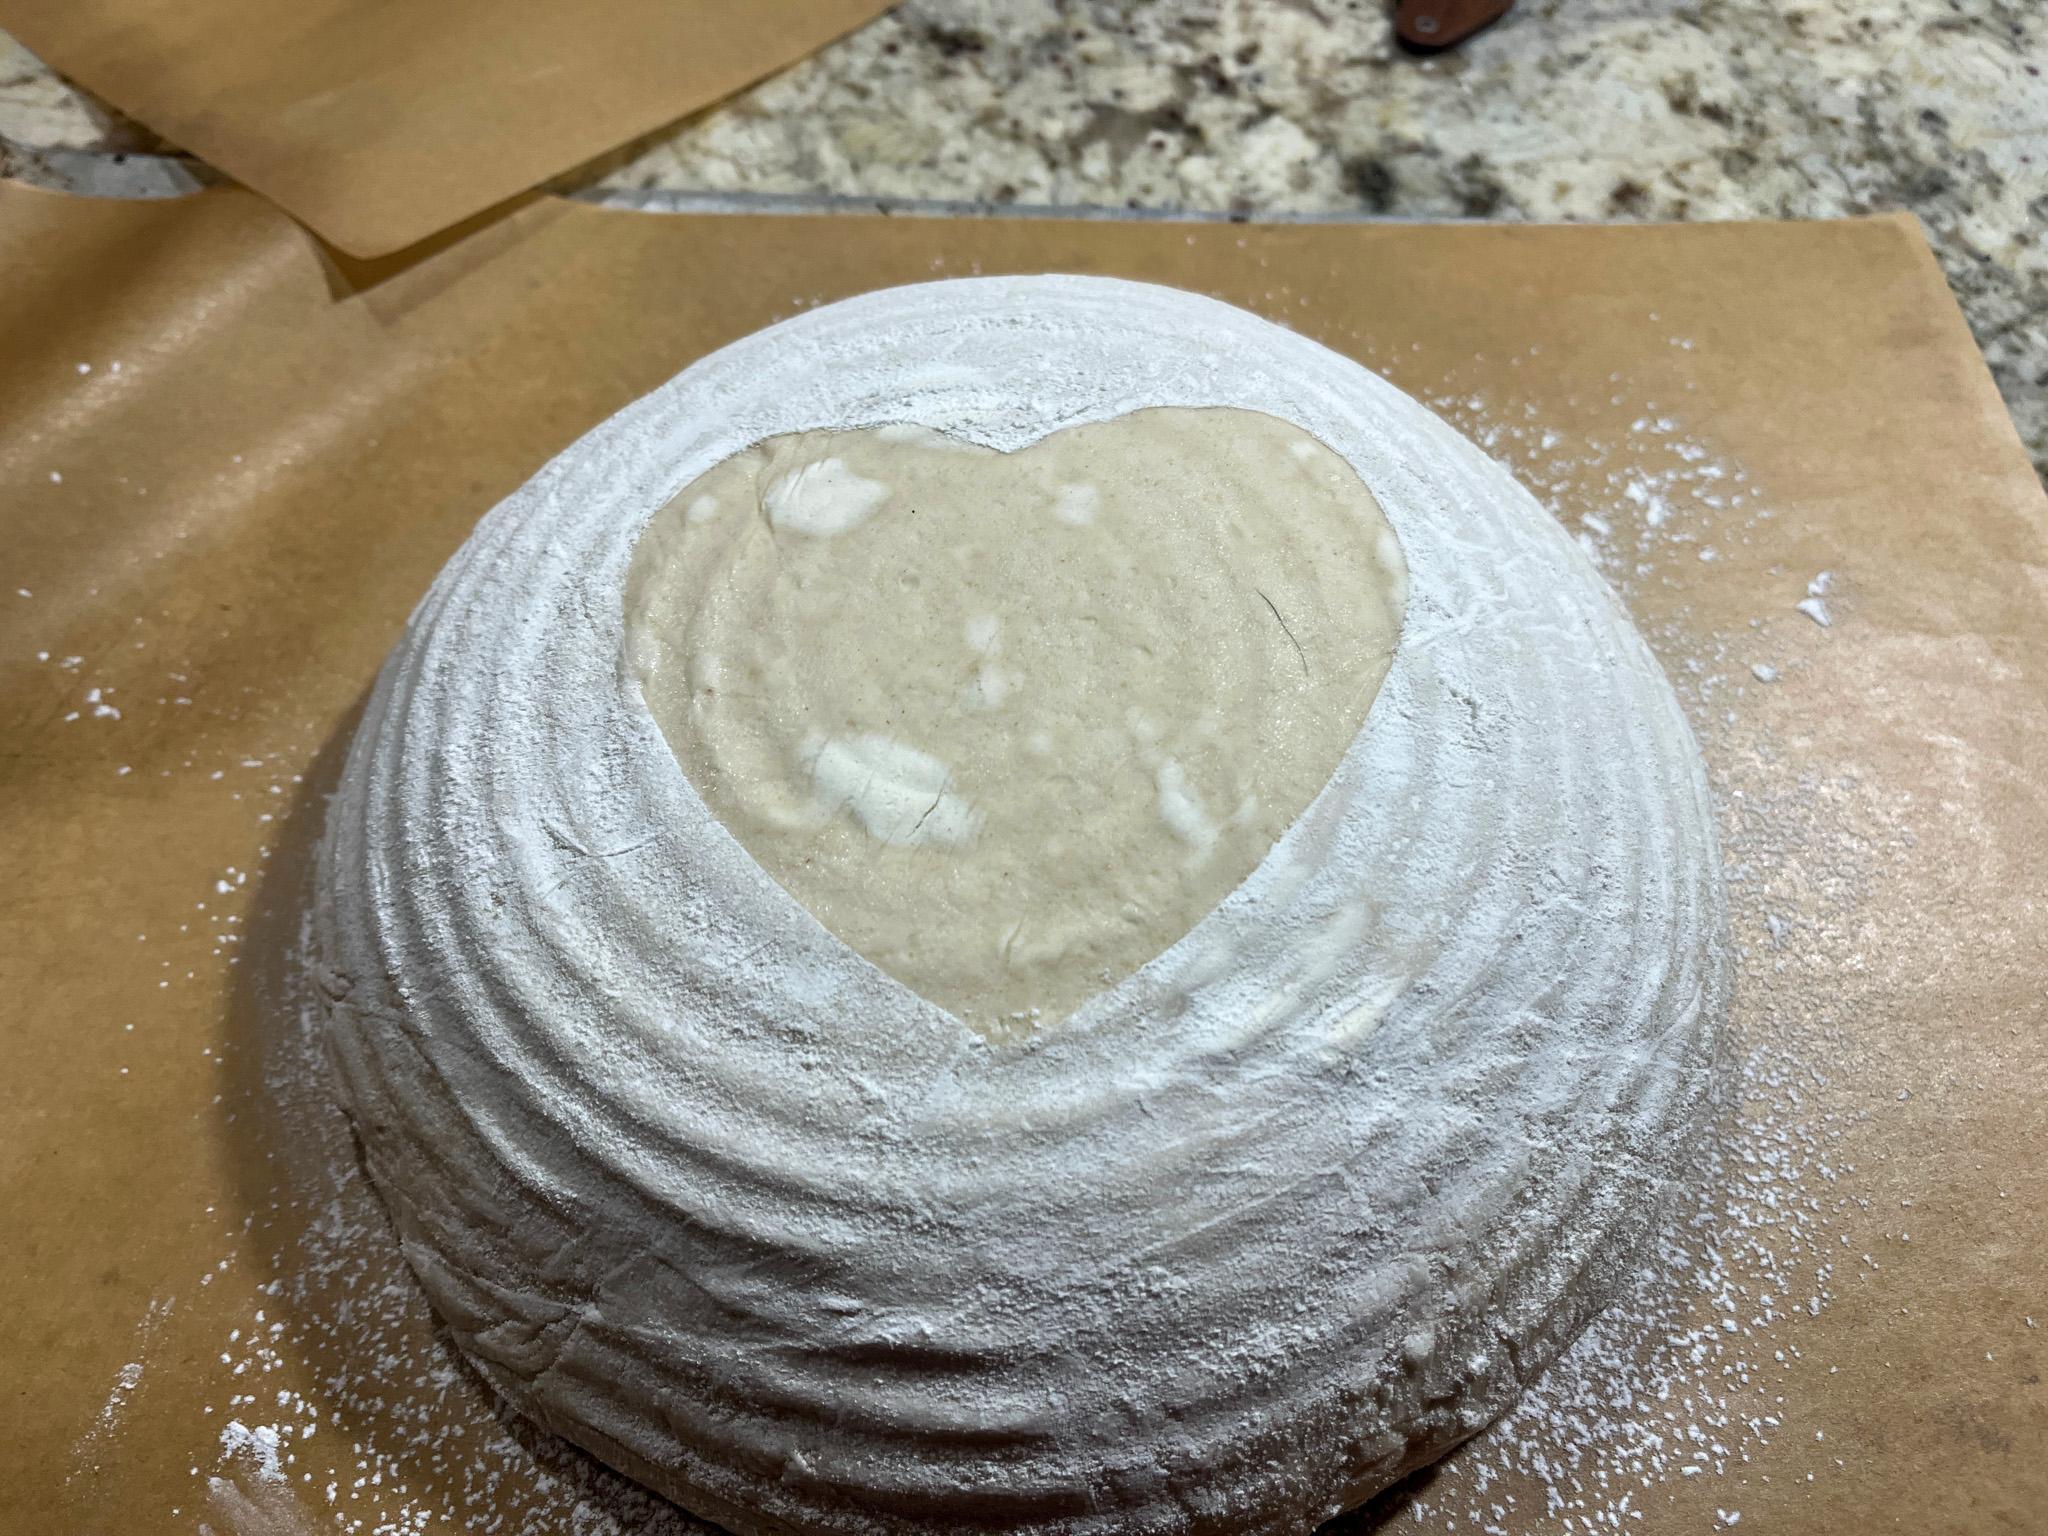
Next day, freeze the dough for 30 minutes in the banetton, to make it easier to score later. Invert the dough on a paper liner, sprinkle tapioca flour all over, rubbing it gently. Score with a sharp razor blade.
Bake in a Dutch oven with the lid on at 450F for 30 minutes, open and allow the bread to brown for a further 15 minutes.
Cool completely over a rack before slicing.
ENJOY!
to print the recipe, click here

Comments: Nine out of ten times my sourdough is very simple, no additions, just the basics. But every once in a while it is nice to change things a bit. This combination is heavenly. A bit of Roquefort on this baby and you are transported to a park in Paris – I am thinking Jardin du Luxembourg – sitting on the most perfect lawn, people watching and day dreaming. We will always have Paris…..
.x
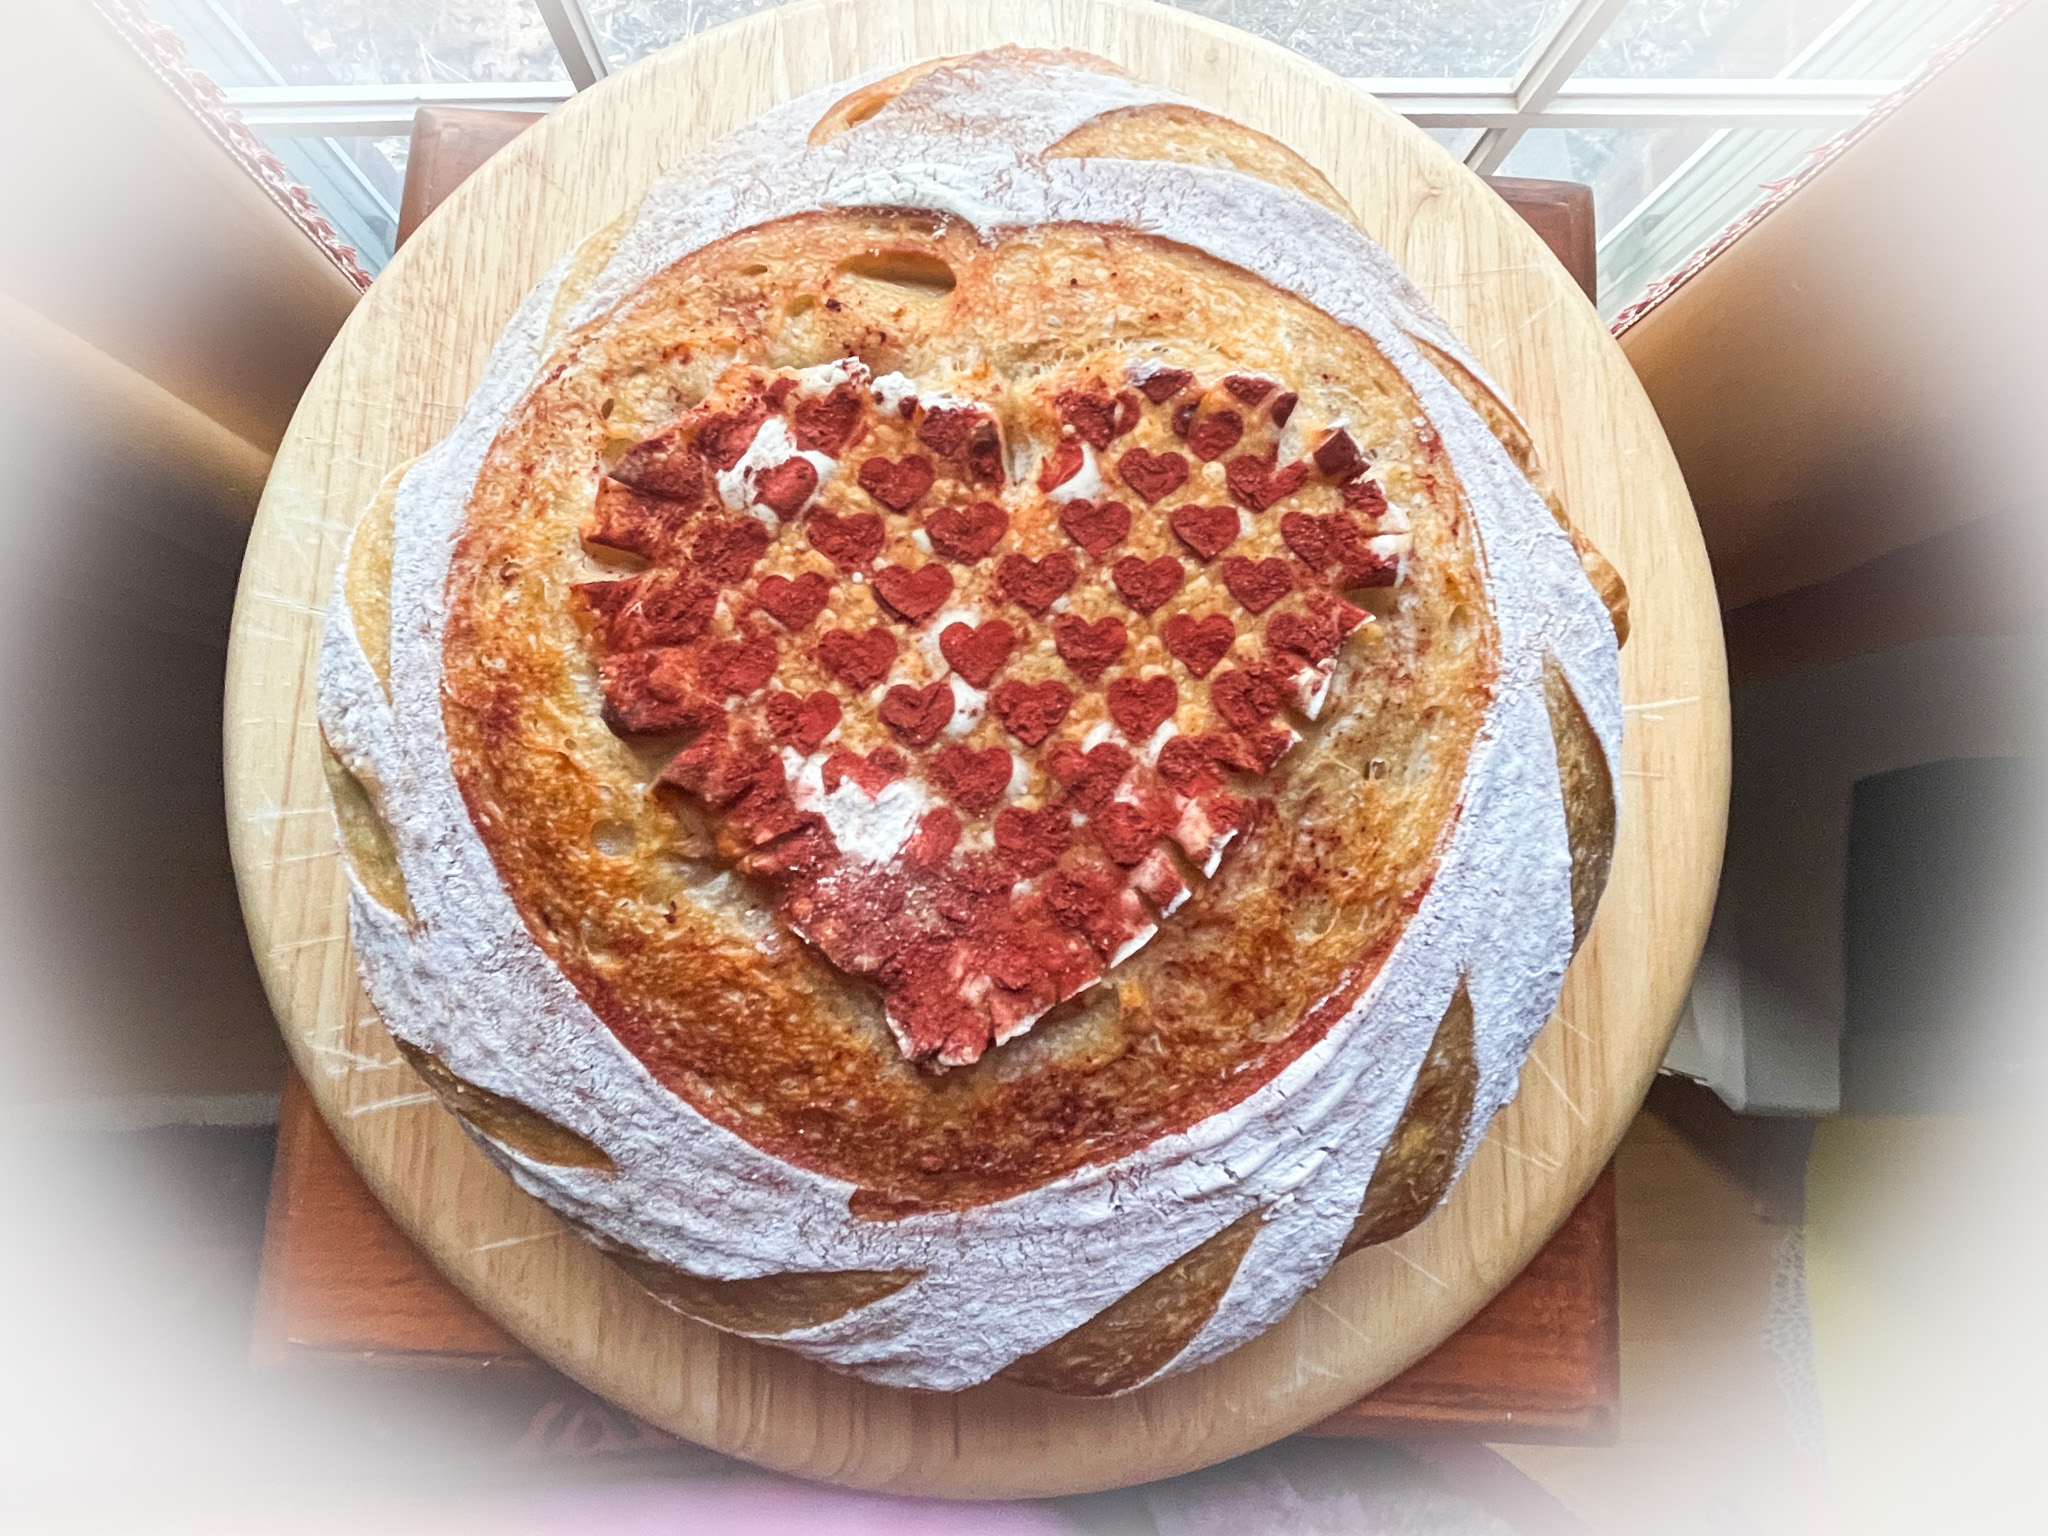
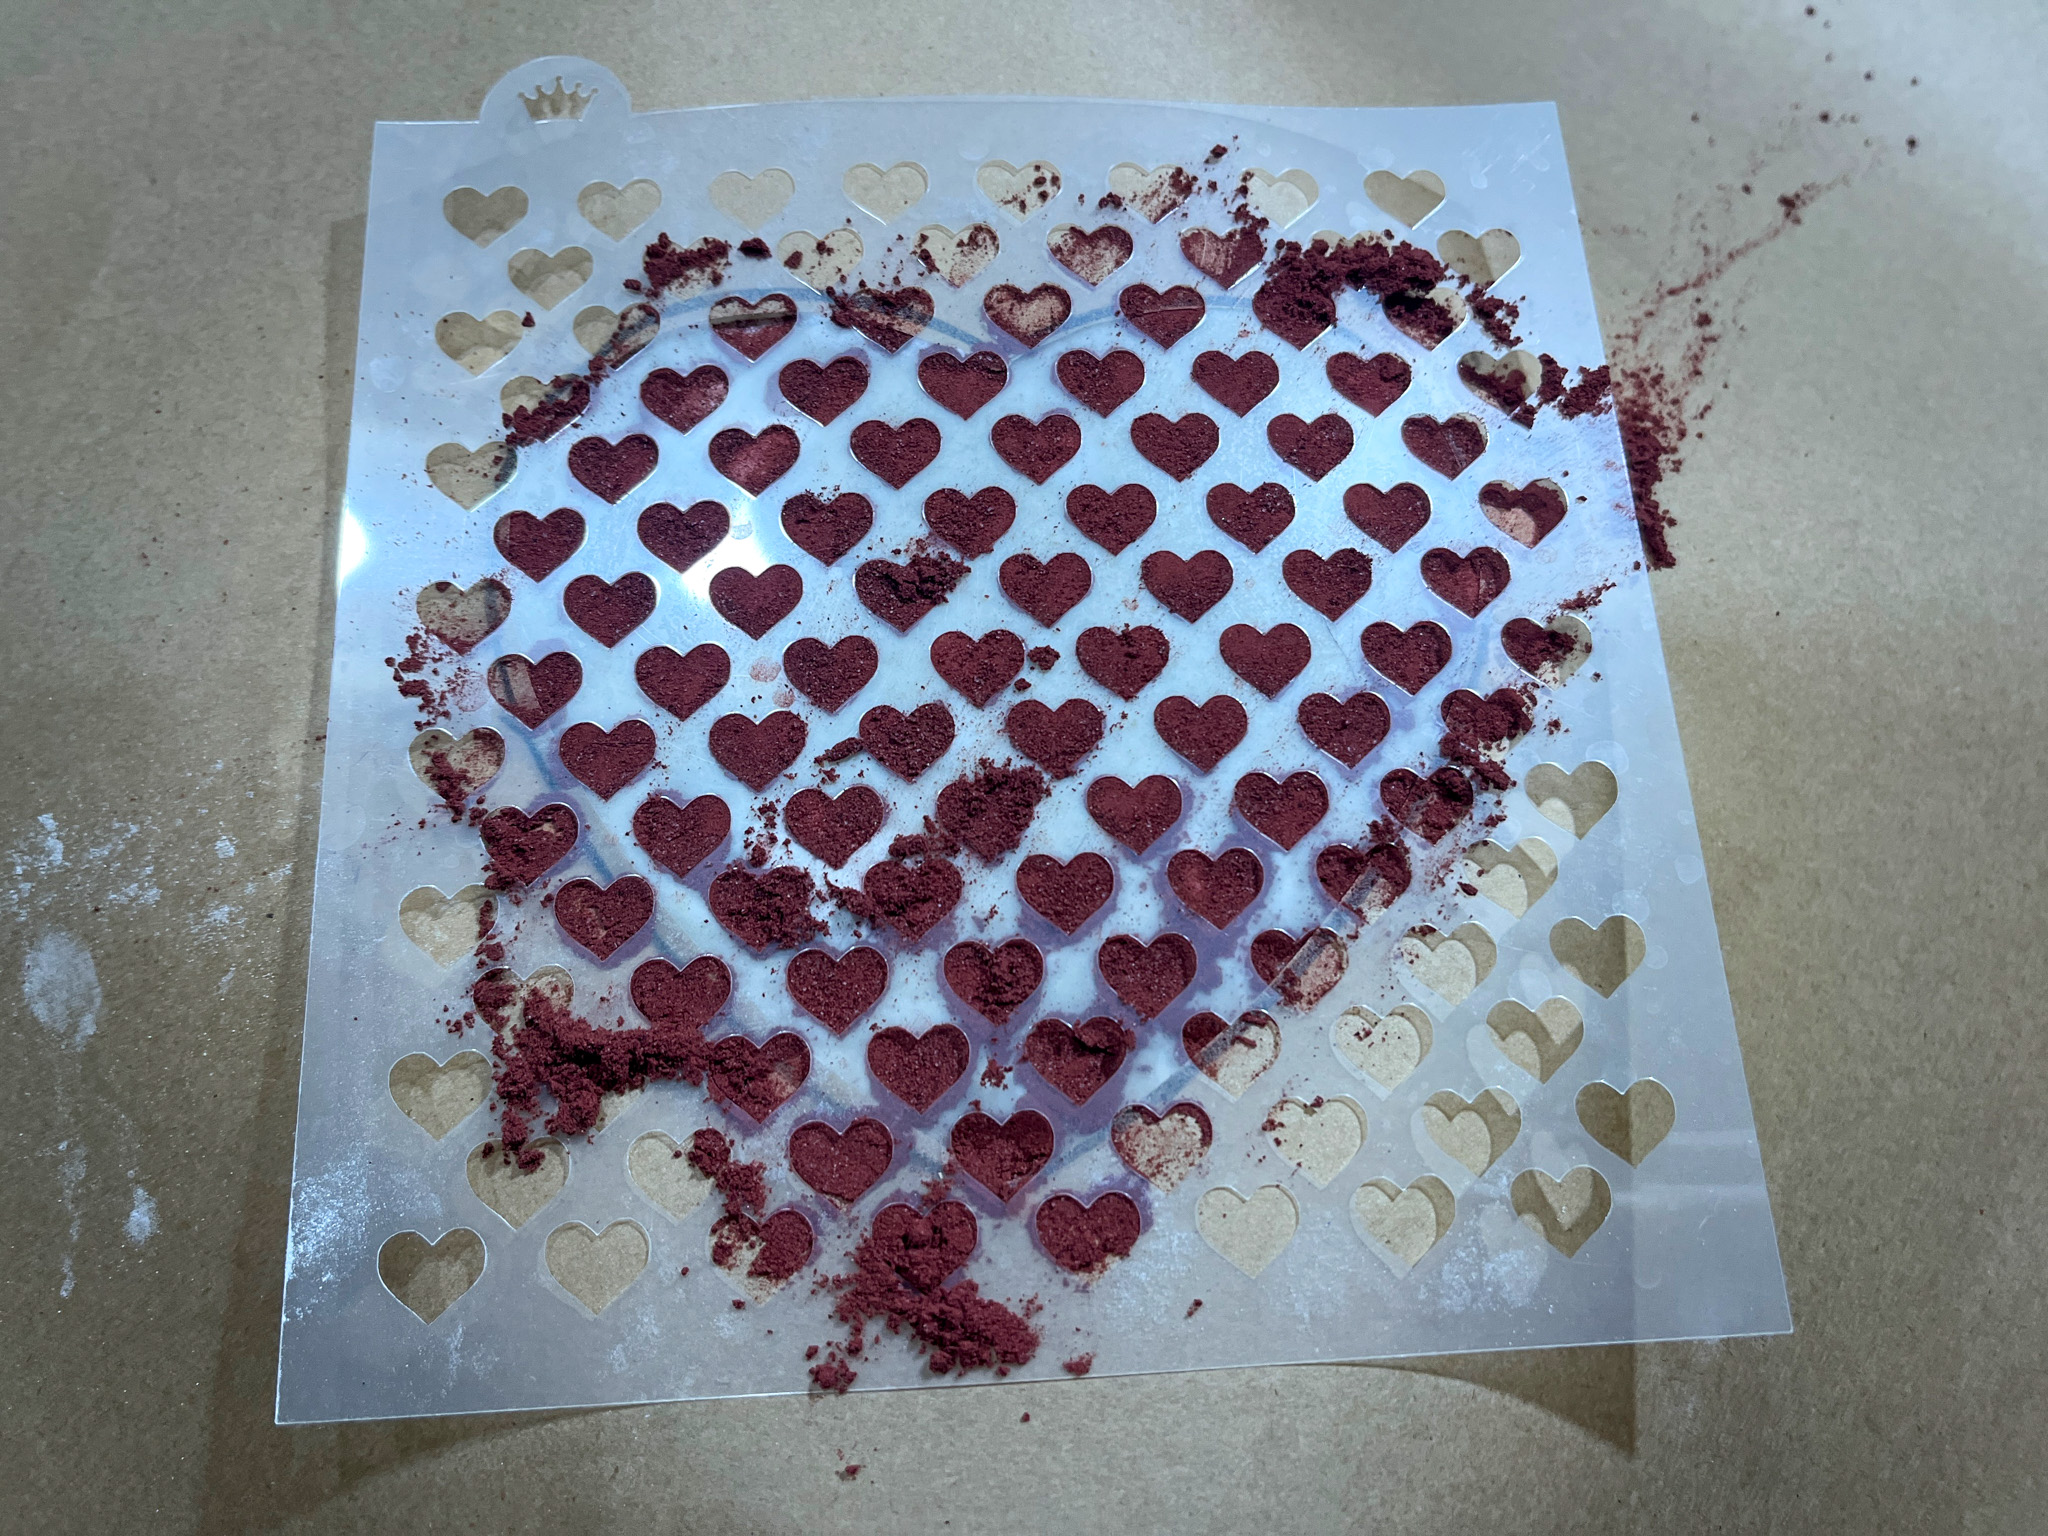
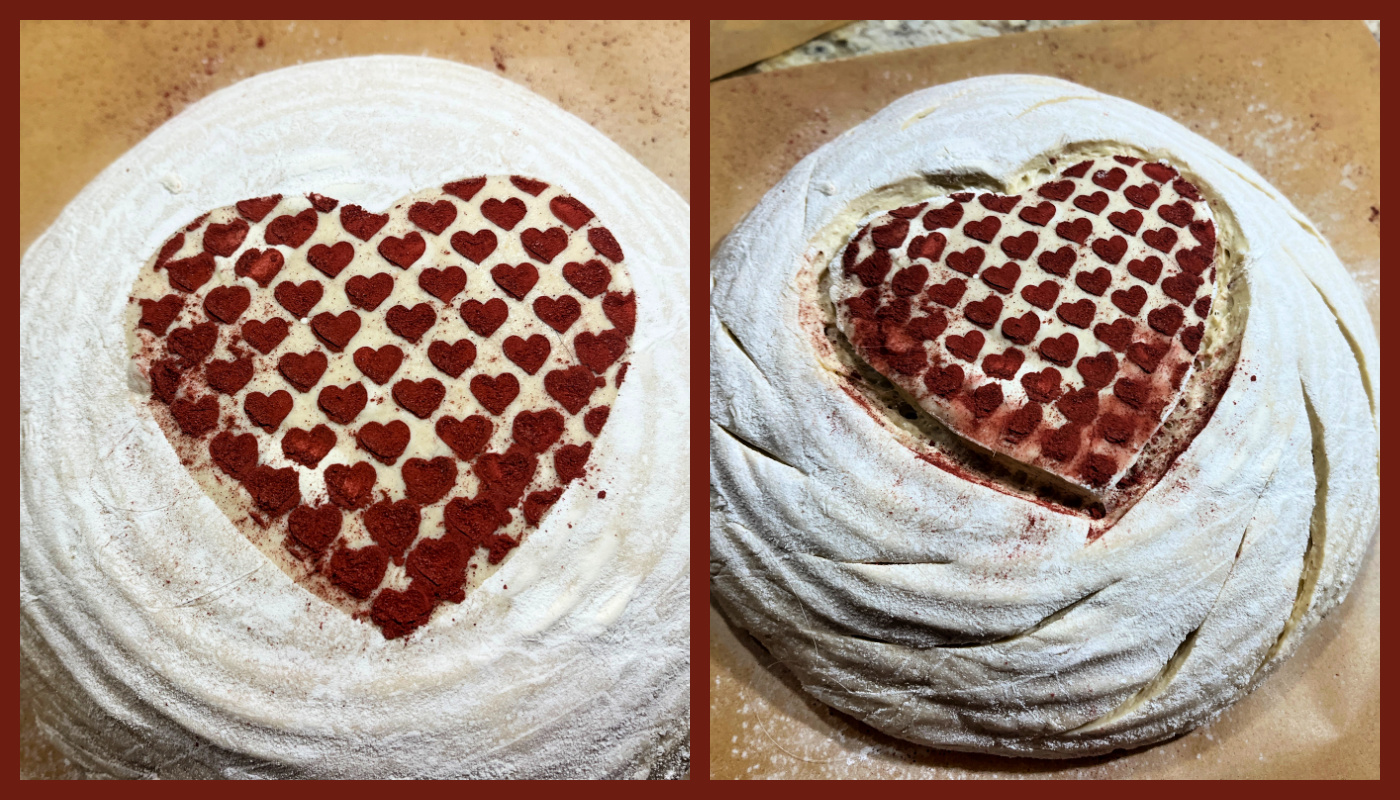
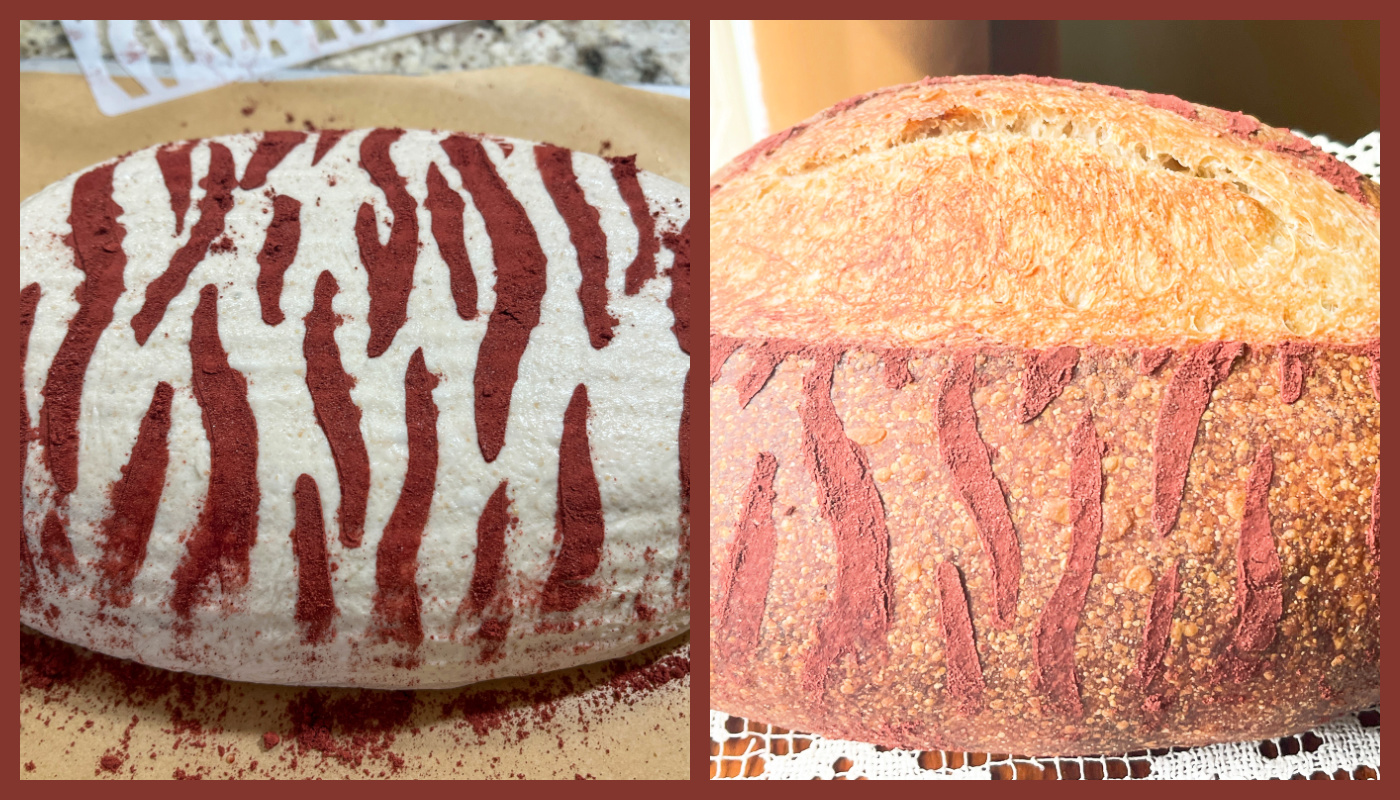
RED STRIPED SOURDOUGH
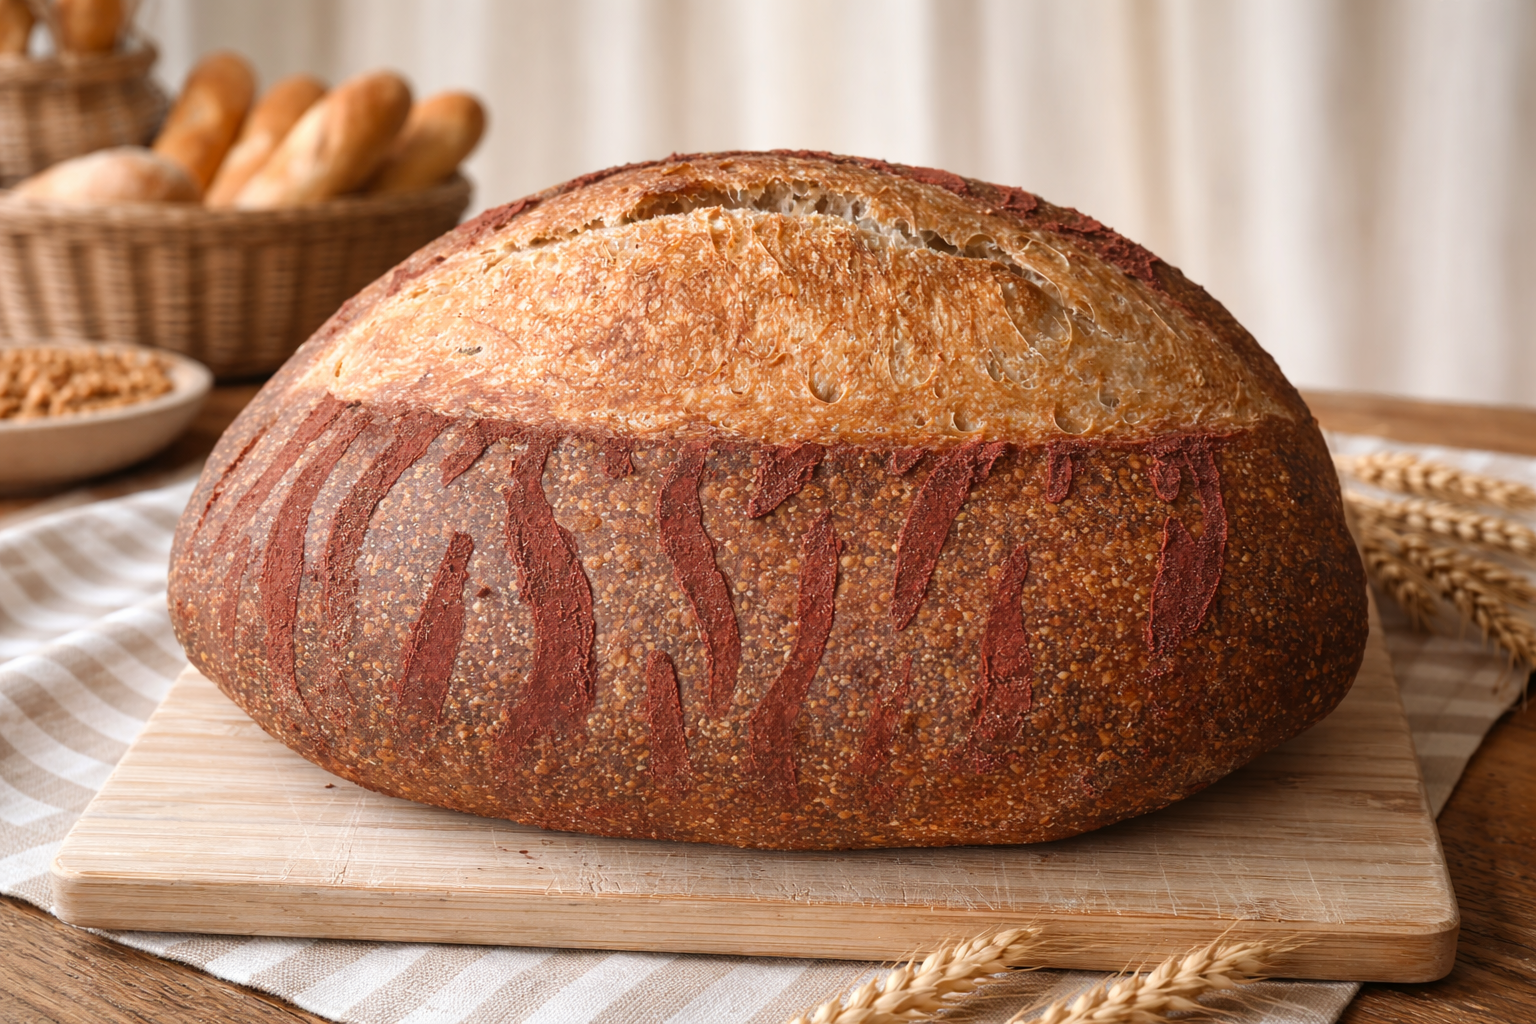
This was super simple and turned out just the way I expected. I used a stencil and Red Yeast powder (available here). Then it is just a matter of making one deep score in the center, and baking…
.
.
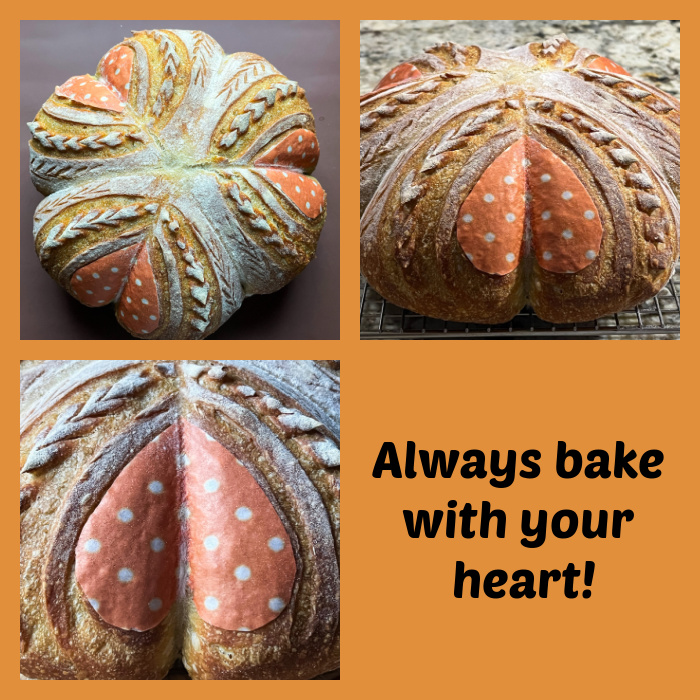
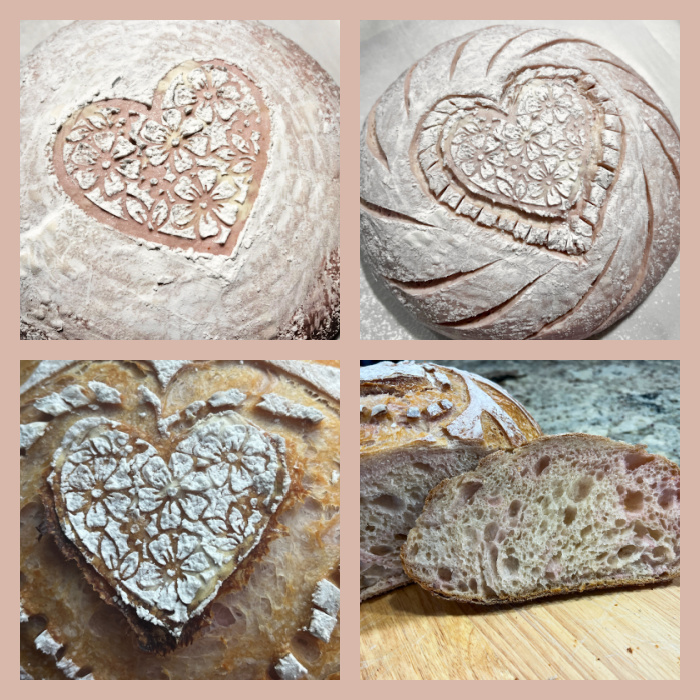
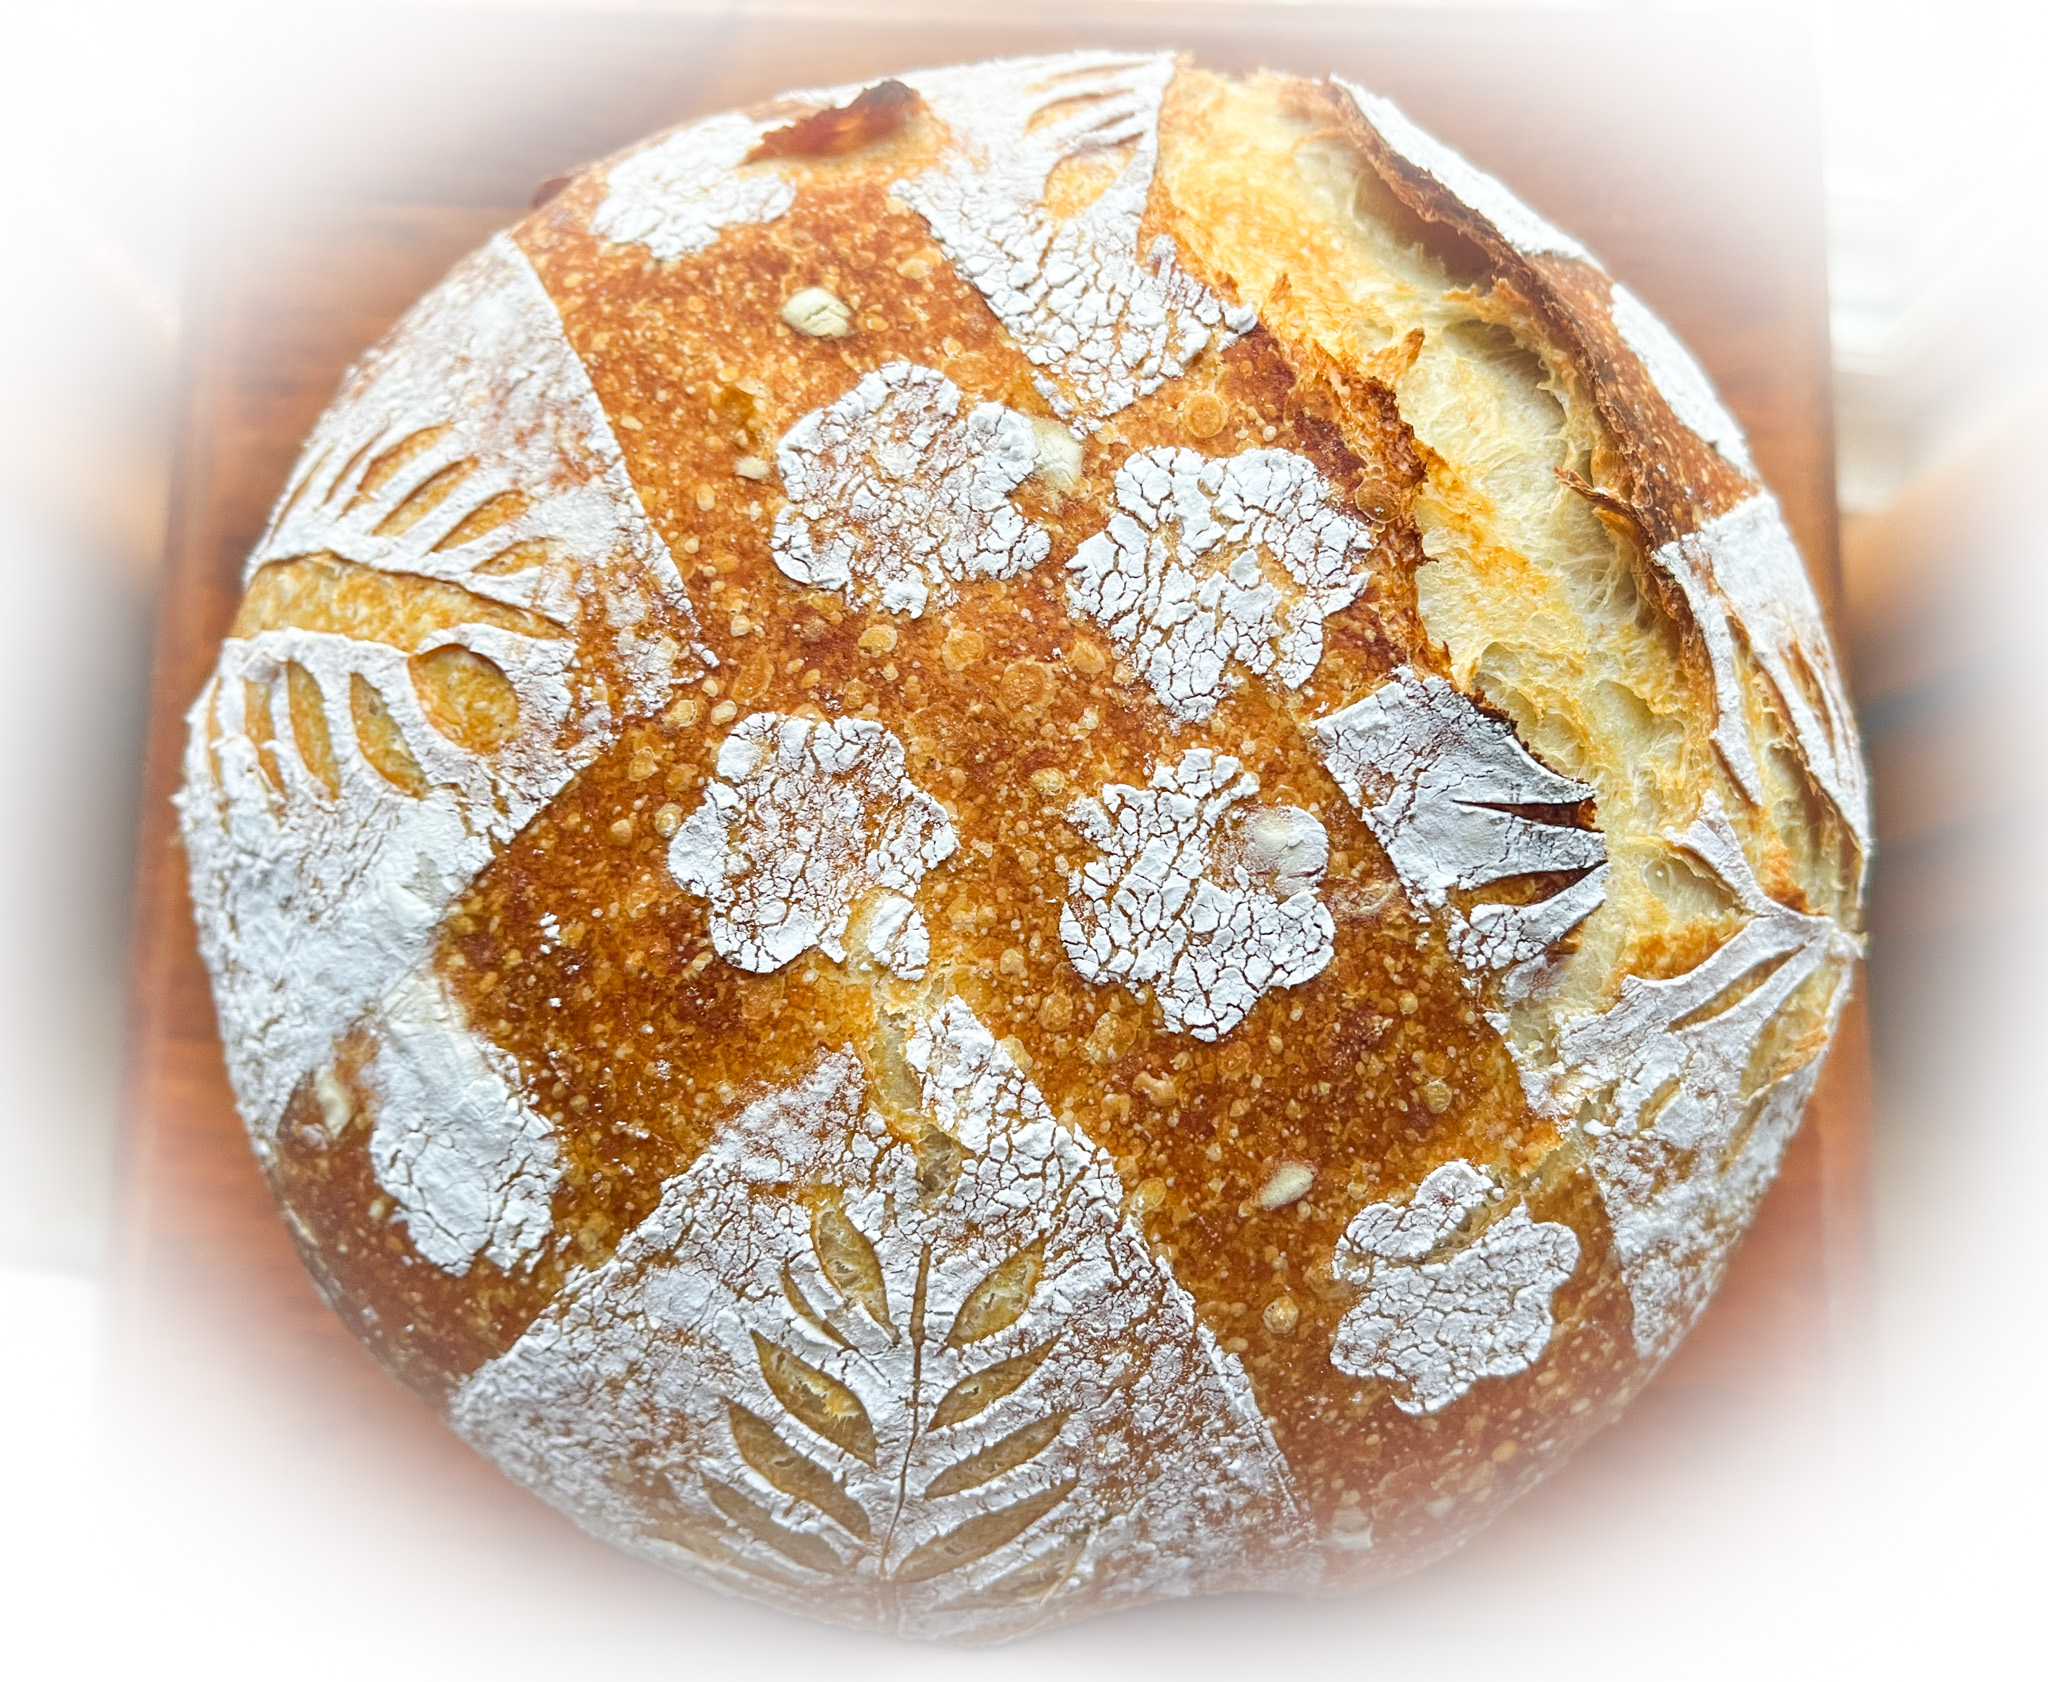
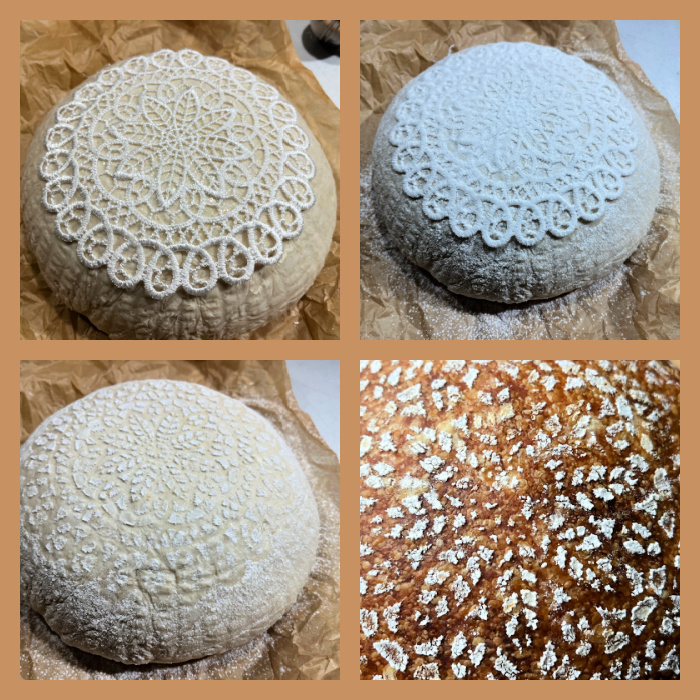
LACE DECORATED LOAF
I need more practice with this technique, although I think a lot has to do with the thickness of the lace used. Some fabrics might work better than others. Still, it is a fun method to play with, just grab your lace, place on the surface of the loaf, add flour and gently lift the lace. Add a few scores around, and bake.
I hope you’ll get inspired by this post, so feed your starter,
and go have some fun!
1 YEAR AGO: Easter Bakes
2 YEARS AGO: Bicolor Ravioli
3 YEARS AGO: Crispy Asparagus Salad with Toasted Bread Crumbs
4 YEARS AGO: Low-Carb Super Fast Chicken Parmigiana
5 YEARS AGO: Sundried Tomato Spelt Sourdough
6 YEARS AGO: A Duet of Chocolate Bonbons
7 YEARS AGO: Chocolate Tartlets with Honey-Caramel Filling
8 YEAR AGO: Zucchini Soup with Tahini
9 YEARS AGO: Black Sesame Macarons
10 YEARS AGO: Fine Tuning Thomas Keller
11 YEARS AGO: Cauliflower Tortillas
12 YEARS AGO: Majestic Sedona, Take Two
13 YEARS AGO: Secret Ingredient Turkey Meatballs
14 YEARS AGO: Swedish Meatballs and Egg Noodles
15 YEARS AGO: Italian Easter Pie