WALK STRONG 3: REVIEW OF JESSICA SMITH’S LATEST WORKOUT PROGRAM


It’ s been a while since we talked fitness, but that does not mean I changed my habits. Not at all, certain things are truly set in stone for me. My first fitness review was back in September 2011, when I shared my thoughts on the gruesome but efficient P90X. Since that time I’ve reviewed the other sequels of Tony Horton (P90X2 and X3), a program from Beachbody called Focus T25, and last March Jessica’s Walk Strong, which, together with countless options she offers online (for free), settled as my present routine of choice.

As I mentioned a year ago, the reason why I searched for new fitness programs was to avoid injuries. As you get older they take longer to heal, and frankly, I got tired of constantly dealing with them. Once I got introduced to Jessica Smith’s world, I realized that – with less investment of time and approaches that involve less weight but more repetitions – I could maintain my fitness level without torturing my body too much. And all that with the feeling I am exercising with a wonderful friend. You simply cannot beat Jessica’s personality, kindness, and gentle way to stimulate you into giving the best you can give to each workout.  But, what makes this new fitness system even more special to me?  I was a beta-tester for it!  Let that sink in, will you?  I got to watch it, test it, and give Jessica a little feedback before it was released to the public. I know, it is the coolest thing since Elon Musk! I still cannot quite believe it…

Let me then walk you through the program. If you are new to Jessica’s approach, you might wonder why her fitness routines all have the word “walk” in them. Basically every session involves walking, either in place of moving around front-to-back or side-to-side. Except, of course when you are doing floor exercises, but they are usually a minor component (time-wise) in the videos. What that means is that you are moving constantly. You might be targeting your shoulders, triceps, or upper back with dumbbells, but your legs will be moving at the same time, which also will bring your heartbeats up, for added aerobic boost.

It would be too long and convoluted to go through the 20 different workouts in a review, so I will go in detail through those comprising the first week as an example. The first day covers basics, going over proper form required for all videos ahead of you, and a short workout called 1-Mile of Motivation. On day 2, the fun begins, big time. As far as equipment goes, it is absolutely necessary to get dumbbells, and a mat. Without those, you won’t be able to perform many of the routines, although many require exclusively your body. Additional options (not required, but nice to include) are a small step, and a very light foam ball. I provided links to amazon, but I am not affiliated, so no bonus for me if you order any of those items. In my mind, those are worthy investments. I take exercising very seriously, and just like in cooking, having the right tools for the job is part of the equation. Again, you can do all videos without these last two items. So let’s dive in.

Metabolic Conditioning (Day 2) I can tell you this workout will catch you by surprise because it can be quite challenging. Not only – in typical Jessica’s fashion – you will not stop for a single second during the 30-minute session, but the mixing of dumbbells with step moves will turn what seems like a weight-training workout into aerobic territory. You will break a sweat.  First time I did it, I was a bit ambitious and set my step with two raisers. Big mistake, considering I am very petite (5 ft tall if I stretch my neck pretty hard). I also went a bit heavy on the dumbbells, but quickly realized my mistake and adjusted mid-way through.  A very nice opening video to start the program, pretty much a full body workout, with core exercises to wrap it all up.

Barefoot Cardio Core (Day 3).  You can use a foam ball for this, again it is not mandatory, and Jessica’s Mom demonstrates how to do the whole series without one. A very flow-y routine, that nicely targets the abdominal region, but all with stand-up exercises, and again, non-stop walking. My favorite part is the final 8 minutes or so. That final stretch mimics classic floor routines – think for instance laying down oblique bicycle moves – but since you are standing up, the neck is spared of any strain. Also, she incorporates Pilates and yogic moves that challenge balance and core strength. A winner of a routine, in my opinion. It targets the core and abdominal region with moves that you perform daily, grabbing things, twisting, lifting. Awesome. If you have issues doing exercises barefoot, no problem, put some shoes on and have fun.

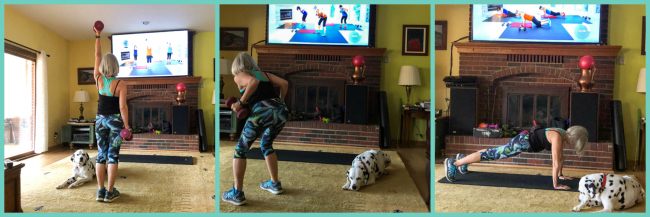
Total Body Workout. It is important to have a friend to check your form.

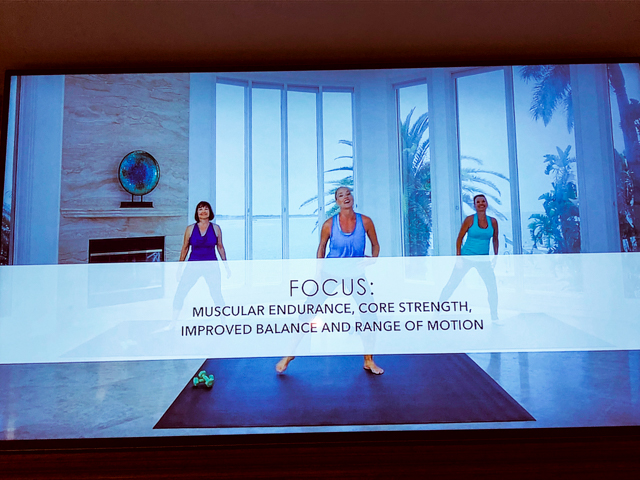
Total Body (Day 4). In the WalkStrong3 system, you have three videos that together could make up a very nice series to rotate over and over. Total Body (introduced in the first week), Upper Body (second week), and Lower Body (also second week). They do exactly what the title implies, using dumbbells in 30-min routines that target the full body (Total Body) or more geared towards upper (arms, shoulders, upper back), and lower regions (legs, hips, thighs). All of them devote some attention to the core, and all of them keep you moving full-time (Walk Strong, remember?). After I finished the 8-week cycle, I found myself going back to these three videos quite often. You can adapt each routine to your level of fitness by increasing or decreasing the weights, going lower on squats, adding a little jump to lateral or forward moves. Debbie usually demonstrates lower impact moves, and Beth pretty much goes for the kill. Follow Jessica’s words of wisdom and listen to your body. An advice I often disregard completely. Rebel. My middle name.

Boogie I.T. (Day 5). Interval Training. If you follow the trends, this is a big one right now. It is clear that short bursts of high intensity activity followed by more mellow moves is a great way to approach fitness. This is a fun DVD, the music is great, the moves are not complicated, and the high intensity component will have you grasping for air. But as is always the case, they are short enough that you can hang on and feel fantastic when that stretch is over. Quoting Tony Horton, “you can do anything for 30 seconds!” I think it is a good workout for beginners, even if you’ve never done interval training before, because you can tone down the intensity of 30-sec high intensity bits. You can also increase the overall challenge of the workout by jumping higher or moving with more intensity throughout the full 30 minute session. As is the case for all her DVDs, you can adapt according to what suits you. Cannot stress that enough.

Tone + Flow (Day 6).  A nice way to wrap up the first week. It is deceptive in the sense that the pace is slow, but exactly there lies its challenge. Sometimes fast pace makes exercising with weights easier, because we rely on momentum. In Tone and Flow, you are handling light weights, and going through each movement slowly, with focus and attention. It changes the game, for sure. There is also quite a bit of attention to balance, in Pilates fashion. I love it.

Final Day is rest, or you can follow the DVD called Deep Stretch. Every week closes with a rest day.

So that is your first week, summarized.  As you can see in the first picture on top, the calendar marks each day with one of three colors. Blue for moderate effort, Red for Moderate to Higher Intensity, and Yellow for Active Rest.  No week in the full program goes for more than four days of Higher Intensity. But you should keep in mind every single routine is adaptable to any level of fitness, from beginner to advanced. It is your body, it is your call. You are in charge.

Bonus Review: Barre Sculpt.  I love this one so much, I need to highlight it. This is a routine that shows up at the end of the second week. I had been exposed to Jessica’s barre workouts through her youtube routines, and fell totally in love with them. Before you pose the question, no, you don’t need to install a ballet bar in your home. Jessica adapts ballet exercising using any chair with a high back, or you can use a high countertop.  Pretty clever! I was thrilled when I realized that the WalkStrong3 incorporated Barre Sculpt. The routine involves simple ballet-inspired moves that are performed many, many times, with dumbbells and the optional foam ball. You take each muscle group pretty much to fatigue. I am always pleasantly sore next day, with that feeling of a full body workout under the belt.  Barre Sculpt is another routine I went back to over and over after I finished the program.

I would like to bring back six specific points I made in my first review of Jessica’s Walk Strong, because these are so important, particularly if you have never heard of her before.

1. Jessica does all the routines. No stopping to highlight details or correct someone else’s form. She does every single move, beginning to end. Even though she is actually doing each exercise and instructing, she never misses a beat. I have a huge pet peeve with fitness instructors who get lost in the number of repetitions, and might cut short the series in one side of the body versus the other. This never happens on Jessica’s videos. Plus, you are never lost in the flow of movements because she tells you what will happen next, will even tap quickly the leg that will start the next movement, so that from the first time you use a particular video, you can follow it.

2. No rest for the wicked.  Thirty minutes of exercise means non-stop action. Once you start, there will be NO break. Maybe for some this is a drawback, but I find it great. The heart rate keeps up, time is used very efficiently.  The closest thing to a break is having to switch from a lighter to a heavier set of dumbbells, or go from standing up to laying down. More on this later.

3. Thirty minutes are easy to stick with. One of the toughest things of the original P90X or other programs is the time involved. You need to spare sometimes one hour or more, which can be pretty hard to do when you have a busy schedule. Thirty minutes are easy to devote to it. C’mon, most people will sit and surf the net for longer than that when they get home from work… Why not devote these precious minutes to taking care of your body? It’s a no-brainer!

4. Real people in the videos. Cannot praise that enough. Every single video I’ve tried has “real people” in it. Healthy women with healthy bodies, wearing regular exercise clothes. The setting is nice, elegant and simple.

5. Background music. Another detail I fell in love with from the first video. The types of songs played are very diversified, from upbeat songs to Middle Eastern tunes, Japanese music, never too loud, and perfectly matching the exercises they go with.

6. Attention to form. Cannot stress this enough. Jessica will remind you constantly of details to pay attention to, from placement of your chin to tightening the core, where is your knee during a squat, how to position your hand while holding a dumbbell. And, something I do have trouble with, how to coordinate breathing with the moves.

With those in mind, now that I’ve been using Jessica’s videos for about 16 months, I want to reinforce one particular characteristic that makes her program special.


The fact that you exercise non-stop for 30 minutes.


Why would that be special? I’ve been exercising for a long, long time.  I’ve followed classes with instructors (15 years at the YMCA). I’ve followed online exercises, I’ve exercised at home with books, and even exercise apps. All of them involved short breaks. It can be 20 seconds, it can be longer, sometimes a minute or so. Running and swimming are classic examples of activities without breaks, and often people say they go “into the zone” with them. There’s something about starting a Jessica Smith DVD that often puts me into that zone frame. And I believe it is the non-stop aspect of it. I have no idea if she had that in mind when designing the programs, but it is a bit magical. It all flows, you don’t have to constantly re-set your mind to go from catching your breath to starting again. I had not noticed this effect until recently, but I believe it is worth mentioning. For you runner-addicts out there… 

Now, let me address some questions you might have.

I have not exercised for years. Will I be able to follow WalkStrong3? Yes, yes, emphatic yes to that. No doubt in my mind. Maybe you will be better off by taking two days off during the week, so the full program would take you closer to ten weeks rather than eight, but seriously, do you really care if you wrap it up on day 56 or 70? I think it is irrelevant. What you want is a program you can stick with long-term. A program that will bring results without injuring your body. Give it a try.

What is the minimum equipment I need to buy to do the program? I’d say two sets of dumbbells, one light, one medium-to-heavy for your size. One exercise mat. With that you can do all exercises in all videos. Modifications will be offered whenever a step or a foaming ball is used.

How long until I see results? That is a tricky question, very hard for anyone to address. It obviously depends on what you define as results. If you expect to see a 6-pack abdominal region, you should keep in mind that to reach that level most people need to couple a very restrictive nutritional system with super intense targeted routines. Think CrossFit, which I have strong opinions about, but will spare you of them for the time being. If you define results as muscle definition in arms, legs, abdominal area, I’d say in 4 to 6 weeks you will notice improvement. But more important than what you’ll see is how you’ll feel. The system covers so many different types of exercises, from aerobics to stretching, from weight training to balance, no muscle is left untouched. You will feel energized, and happy you’ve started this path. As designed, the program flows in a way that different areas of the body are challenged at different times, and after a very intense couple of days, she will bring a more mellow routine to prevent injury but keep your body moving.

How does it compare to Jessica’s previous program? I think WalkStrong3 is slightly more challenging, and also more “complete” due to the variety of routines. The inclusion of Barre workout definitely places it on a higher level, in my opinion. The weight-training component is more intense, and many of the routines incorporate advanced Pilates moves that were not present in the previous program. In all cases you can dial back if necessary. The yoga routines are about at the same level in both programs and they pop up in the schedule at very appropriate times. It is a very well-designed system you can see she put all her fitness knowledge to work to come up with WalkStrong3.

What happens after I finish the program? If you haven’t exercised in a long time, I hope that when you wrap up the 8 weeks, you will be so hooked into the routine of sparing 30 minutes of your day for fitness, that you’ll keep going. Not only you can repeat the system again (if you prefer not to think about changes and just stick to the printed schedule), but you can go to Jessicasmithtv and indulge into hundreds of exercise videos that she offers for free. Free. You read me right. You can search according to time (let’s say you only have 15 minutes to spare today), to the part of the body to focus on (legs, upper body, abdominals only), to type of exercise (barre, aerobics, weight training), and make a list of your favorites, hit play and exercise whenever you want. You can target exercises to the regions of your body you feel need more attention. Maybe it’s the inner thighs. Maybe the shoulders. Maybe you feel your flexibility needs extra attention. Jessica has countless yoga sessions that are user-friendly, in the sense you don’t need to turn your body into a pretzel to follow her.

After finishing her newest program, I now do a pretty varied schedule of exercises, but I’d say 90% of them involve some type of Jessica Smith video. The remaining goes for old favorites, like Chest and Back from P90X, The Challenge from P90X3, Plyometrics from 90X or 90X3. I go according to my mood, or to be completely honest, according to what hurts today from the excesses of yesterday (wink, wink).

I hope you enjoyed this little virtual tour of Jessica’s WalkStrong3. I strongly recommend her videos to anyone who wants to improve the level of fitness, no matter how old, no matter how much of an exercise-hater I’m talking to. Starting and sticking with a fitness program is by far the best move you can do to improve your health.  Jessica can make that move a very pleasant one.

To order, click here.

Before I leave, I would like to thank Jessica for including me in the group of beta-testers, I was floating on air for a while with joy! I wish you all the luck with the new program, and as usual, I look forward to walking with you again…


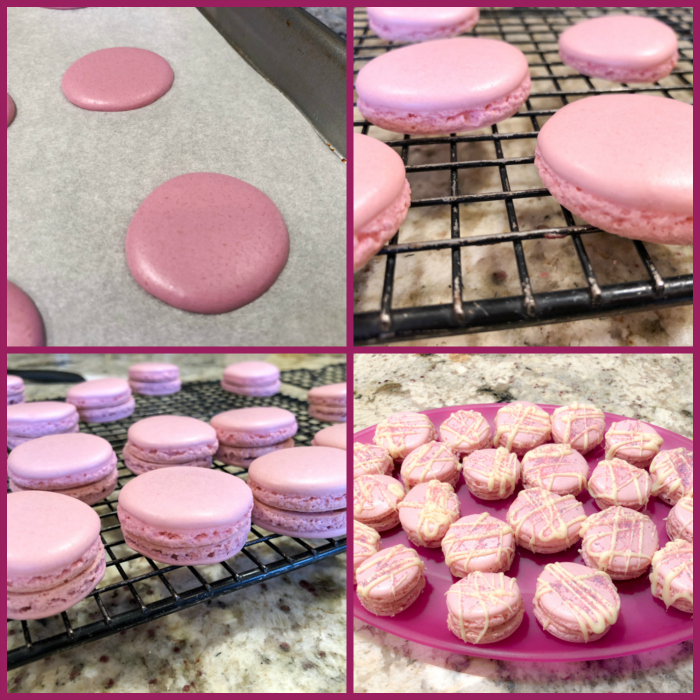
ONE YEAR AGO: Pork Medallions with Black Berry Compote

TWO YEARS AGO: Indian-Spiced Chicken with Chickpeas and Spinach

THREE YEARS AGO: Curry Cardamon Cookies

FOUR YEARS AGO: In My Kitchen, March 2014

FIVE YEARS AGOBoeuf Bourguignon for a Snowy Evening

SIX YEARS AGO: Chickpea Salad

SEVEN YEARS AGO: Soft Spot for Chevre

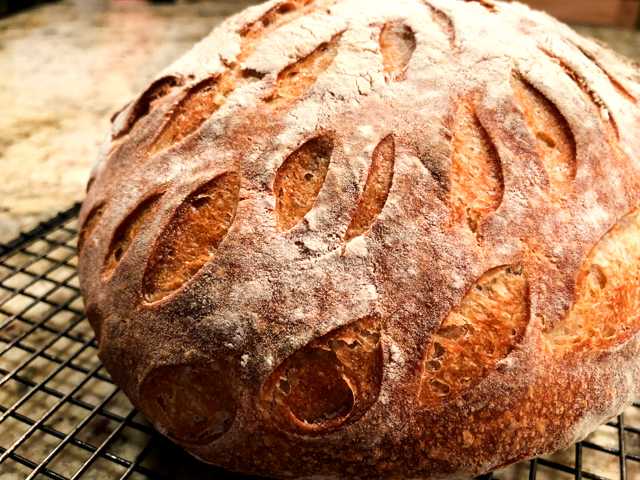
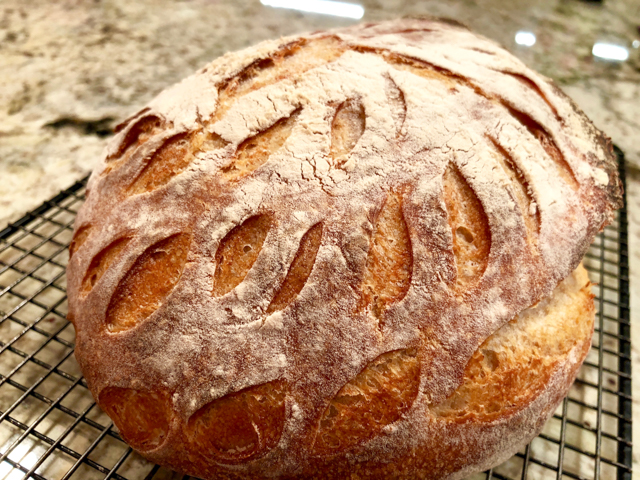
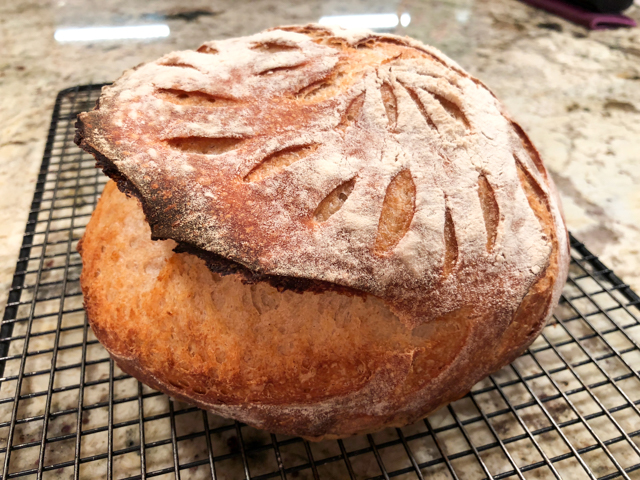
EIGHT YEARS AGO: Roasted Onion and Asiago Cheese Miche

SaveSave

SaveSave

SaveSave

SaveSave

SaveSave

SaveSave

SaveSave

SaveSave

SaveSave

SaveSave

SaveSave

SaveSave

SaveSave

SaveSave

SaveSave

SaveSave

SaveSave

SaveSave

SaveSave

SaveSave

SaveSave

SaveSave

SaveSave

SaveSave

SaveSave

SaveSave

SaveSave

BERGAMOT-CHERRY MACARONS

It was not intentional, but once I was done decorating my babies, I realized they would have been perfect for Mardi Gras, or as we call in Brazil, Carnaval. Made by the Italian meringue method, they were – full disclosure –   the second batch baked in a single day, after a macaron fiasco I intend to completely forget. It involved cocoa powder and despair. Enough said. Undeterred, I cleaned up all the kitchen, sat down, took many breaths in, as many breaths out, looked in the mirror and said “You’ve got this.”  Keep in mind the Winter Olympics were on, so I was contaminated by their unparalleled bravery. Did you watch those snowboarders in the half-pipe?  I mean, give me a batch or two of macarons to bake ANYTIME.


BERGAMOT-CHERRY MACARONS
(from the Bewitching Kitchen, inspired by several sources)

for the shells:
150g almond flour (I used fine ground from Bob Mill’s)
150g powdered sugar
110g egg whites, divided (55g + 55g)
red food gel color (I used Americolor)
pinch of salt
150g granulated sugar
40 mL water  (a little over 2 +1/2 tablespoons)

for the filling:
200g white chocolate (I used Lindt)
60g heavy whipping cream
2 drops bergamot essential oil (see comments)
1/4 cup sour cherry preserves

for decoration:
white chocolate, melted
sugar crystal sprinkles, purple and pink

Prepare the filling. Place chocolate cut in small pieces in a large Pyrex measuring cup. Heat the cream to almost boiling and pour over the chocolate. Let it sit for a couple of minutes, then gently stir. When totally dissolved, add the bergamot oil, then the raspberry preserves. Place in a food processor and pulse a few times to homogenize.  If necessary, add a little more cream, but do not allow the mixture to be too liquid. Place in the fridge until needed.

Make the shells. Heat the oven to 300 F. Line two baking sheets with Silpat or parchment paper, and prepare a pastry bag with a plain tip with 1/2 inch opening, or slightly smaller.

Grind together the powdered sugar and almond powder, using a food processor, to obtain a fine powder. Sift through a sieve into large bowl. Mix the first portion (55g) egg whites with red food color, then add it to the sieved mixture of almond and sugar. It will form a paste, a bit thick. Try to incorporate the color homogeneously, keep in mind it will be lighter when you add the meringue to it. You want a light pink in the end.

Make the Italian meringue.  Place the other 55g egg whites and pinch of salt into the bowl of a Kitchen Aid type mixer.  Set aside while you prepare the sugar syrup. In a small saucepan combine granulated sugar with water and place on medium heat. Using a candy thermometer measure syrup temperature. When it reaches 230 F start whipping the egg whites. When the syrup reaches 244 F pour it over the whipped egg whites while mixing continuously. Continue beating until the bowl has cooled slightly, and glossy peaks have formed.

Add the whipped whites over the almonds mixture and using a rubber or silicone spatula gently fold in until combined and smooth. Make sure to “paint” the mixture on the walls of the bowl so that you get a smooth, lava-like consistency. Transfer the mixture to the piping bag fitted with a 1/2 inch (1 cm) plain tip. Pipe the batter to make macarons the size you like. Rap the baking sheet a few times firmly on the counter top to flatten the macarons and to remove air bubbles.  Let them sit at room temperature until a skin forms, about 30 minutes.

Bake for 18 to 20 minutes. They are ready when the top doesn’t move freely when you hold them and twist gently. Let cool slightly before removing from baking sheet. Marry two by two of similar size, add the filling.  Melt white chocolate and add to a small bag. Cut a small opening with scissors and drizzle white chocolate on top of the filled macarons. White the chocolate is still warm, sprinkle the colored sugar on top.  Place in the fridge overnight before serving them, at room temperature.

ENJOY!

to print the recipe, click here

Comments: Hard to believe I baked two batches of macs in the same day… The thing with macarons is that when they go bad, they don’t fool around, they go royally bad. And of course, you can try to figure out the reasons, but more often than not, it is a collection of small things and they get together to create the perfect storm. At any rate, I am glad I regained my composure and made my colorful Mardi Gras creatures.  I think the filling worked very well because the shells tend to be so sweet, having a sour note is a must.  Our colleagues seemed to enjoy this batch quite a bit, I got compliments not only on the taste of the filling, but the texture of the shells. No hollows at all, very smooth surface, and reasonably sexy feet. I might be biased, though… they are my babies, after all…

If you do not have bergamot oil, use 1 teaspoon of freshly grated orange zest. I imagine a little bit of orange liquor could go well too, but you might have to play with amounts, as anything could get the delicate white chocolate ganache in trouble. And you definitely want to stay away from trouble whenever macarons are involved. 

Make my day, grab a pin!

ONE YEAR AGO: Roasted Veggies with Queso Cotija Dressing

TWO YEARS AGO: Creamy Broccoli and Mushroom Casserole

THREE YEARS AGO: Maple Walnut Biscotti

FOUR YEARS AGO: Barley Risotto with Peas

FIVE YEARS AGO: Oatmeal Fudge Bars

SIX YEARS AGO: Cauliflower Steaks

SEVEN YEARS AGO: Soft Spot for Chevre

EIGHT YEARS AGO: Quick sun-dried Tomato Crostini

SaveSave

SaveSave

SaveSave

SaveSave

SaveSave

SaveSave

SaveSave

SaveSave

SaveSave

SaveSave

EMILIE RAFFA’S HIGH HYDRATION SOURDOUGH

As you might imagine, I should stop buying cookbooks because I’d need to live to be 173 years old to go through the ones I already own. However, I am thrilled that I got the latest one from Emilie, pre-ordered the moment I saw it available: Artisan Sourdough Made Simple.


I’ve been following Emilie’s blog for a long time, and even reviewed her first cookbook a while ago (click here for a flashback).  The salad I chose to feature in that post is one of those rare recipes that ended up in our regular rotation. You know how it goes in the kitchen of a food blogger. We are always trying new recipes, it’s a bit compulsive sometimes, but when a truly spectacular thing lands on our table, we go back to it. With this new book, Emilie does exactly what the title states: simplifies the making of artisan sourdough bread. She offers a very detailed explanation on how to make your first sourdough starter (that method that collects microorganisms from the environment), how to keep it healthy and use it to make all sorts of wonderful concoctions, going beyond bread baking.  Formulas are simple, the timing is flexible, as exemplified in the recipe I share with you today. I was so fond of it that I made it four times in 5 weeks! Yes, talk about re-visiting something spectacular. I am not the only one smitten with Emilie’s book. Celia, the one and only blogger who lives in beautiful Australia, composed a wonderful review of Artisan Sourdough Made Simple, and I urge you to stop by and take a look… It might just be the push you need to take the book home with you (at least virtually, as I did with my Kindle version…). So, without further ado, my first sourdough bread from Emilie’s book…

HIGH-HYDRATION SOURDOUGH
(printed with permission from Emilie Raffa)

Tips from Emilie: The first step toward bigger holes is to add more water, or to increase the dough’s hydration. The second step is to expand your sourdough technique: Gently dimple the dough after the bulk rise and then shape it twice. Both techniques will help to open up the crumb and can be applied toward other doughs to achieve the same effect.

Suggested baker’s schedule: Thursday and Friday: Feed your starter until bubbly and active. Saturday Evening: Make the dough and let rise overnight. Sunday Morning: Shape the dough, let rise again, score and bake.

Bread formula
50 g (¼ cup) bubbly, active starter (mine was at 100% hydration)
375 g (1 ½ cups plus 1 tbsp) warm water
500 g (4 cups plus 2 tbsp) bread flour
9 g (1 ½ tsp) fine sea salt

Making the dough
In the evening, whisk the starter and water together in a large bowl with a fork. Add the flour and salt. Mix to combine, then finish by hand to form a rough dough. Cover with a damp towel and let rest for 1 hour.  After the dough has rested, work it into a ball, about 15 to 20 seconds.

Bulk fermentation
Cover the bowl with a damp towel and let rise overnight at room temperature, about 8 to 10 hours at 70 ° F (21 ° C). The dough is ready when it has doubled in size, has a few bubbles on the surface, and jiggles when you move the bowl from side to side.

Shaping the dough
In the morning, coax the dough onto a floured surface. Dimple the dough all over with floured fingertips. Gently shape it into a round and let rest for 5 to 10 minutes. Meanwhile, line an 8-inch (20-cm) bowl or proofing basket with a towel and dust with flour. Using a bench scraper, scoop up the dough and flip it over so that the smooth side is facing down. Shape it again, and then flip it back over. Cup the dough and gently pull it toward you in a circular motion to tighten its shape. Place into your lined bowl, seam side up.

Final fermentation
Cover the dough and refrigerate for 1 hour to set its structure. Note: You can chill this dough for up to 6 hours or more. When ready to bake, let sit at room temperature while the oven heats up.

Baking the bread
Heat your oven to 500 ° F (260 ° C). Cut a piece of 
parchment to fit the size of your baking pot. Place the parchment over the dough and invert the bowl to release. Dust the surface with flour and rub with your hands to coat. Using the tip of a small knife or a razor blade, score the dough with the pattern of your choice. Use the parchment to transfer the dough into the baking pot.  Place the pot on the center rack, and reduce the heat to 450 ° F (230 ° C). Bake the dough for 20 minutes, covered. Remove the lid, and continue to bake for 30 minutes. Lift the loaf out of the pot, and bake directly on the oven rack for the last 10 minutes. Cool on a wire rack for 1 hour before slicing.

ENJOY!

to print the recipe, click here

Comments: One of the advantages of a simple bread recipe is that you can concentrate on aspects other than the making of the dough, or its shaping, since it’s all so straightforward. This recipe was my gateway to practice different slashing patterns. My conclusion was that bread has a mind of its own. Almost every single time the final product was not exactly what I had in mind. But, isn’t that what life is all about? The more we try to control things, the more frustrated we might get. Until… until we learn to dance to the music and enjoy the unexpected, the stuff that does not go exactly as planned. No, I am not that wise yet, but working on it.

Indeed, for some members of our home, the way the bread looks is totally irrelevant…

Let me now show you my quartet of breads, all made with the same basic Emilie’s recipe, except that for the third loaf I increased the hydration even further (385 g water instead of 370g), and included one series of folds before the dough fermented at room temperature overnight.  I did that after the dough had rested for one hour, then waited 45 minutes more to shape it into a ball and leave it alone at room temperature until next day. The more you push the hydration up, the more you’ll need some type of folding or kneading to make sure you have some structure in it.  All things considered, I think Emilie’s formula as written is spot on,  considerably simplifying the process.

Slashing #1

That is the exact slashing that produced my featured bread.  You probably did not see anything wrong with it, but that’s because I picked the best angle of the bread to take the picture. Full disclosure? Here we go:

The slash at the base of the circle was probably a bit too deep, and the thing lift off like a lid! Looked pretty funny, almost like a Trilobite fossil in search of food. And the crust got a tad too dark in that spot.  Lesson to learn: be more gentle with the slashes at the base of the dough.

Slash #2

I was aiming for a yin-yang kind of thing.  Here’s the result after baking…

Nice, open ears, but definitely not what I expected. Not sure if I had to be more delicate with the depth of the central slashing… but I liked the way the bread looked.

Slash #3

I went with a star-type pattern, and diagonal small slashes all around….  This time I had no particular expectations, just decided to accept whatever the Gods of the Yeasty Things rewarded me with…

Slash #4

and the final, resulting loaf….

Probably my favorite… all plump and was singing out loud as it cooled…

All breads made with the high-hydration sourdough tend to have open crumb,
very creamy texture, with a hard crust.
The kind of bread we really love!

So there you have it, four loaves of bread made with a basic sourdough formula, according to Emilie’s Artisan Sourdough Made Simple.  The same formula produces amazing – let me state that again – produces AMAZING focaccia…

It is really a lovely book, Celia did a great job reviewing it, so let me just tempt you with a very simple list of breads included in one of her chapters. I want to bake every single one of them. Period.

Decadent Chocolate Chip (O.M.G)

Dill and White Cheddar

Olive, Thyme, and Parmesan

Seeded Pumpkin Cranberry (O.M.G. #2)

Cinnamon Raisin Swirl

Chocolate Peanut Butter Chip

Pickled Jalapeno, Cheddar and Chive (O.M.G. #3)

Roasted Garlic and Rosemary

Sticky Date, Walnut and Orange (I rest my case)

Emilie, thanks for giving me permission to share one recipe from your lovely book…  I am looking forward to baking more and more goodies from your tasty collection!

Note added after publication… I am thrilled to share with you a bread made by one of my followers, Sue (check her comment below). She used this recipe to make a real masterpiece in bread form! 

Great job, Sue!  Thanks for sharing your bread with me!

ONE YEAR AGO: Short-Ribs with Chickpeas and Chard & London Cookbook Review

TWO YEARS AGO: Asian-Style Short Ribs 

THREE YEARS AGO: Herbed Goat Cheese Souffles

FOUR YEARS AGO: Barley Risotto with Peas

FIVE YEARS AGO: Jammin’ Blueberry Sour Milk Pancakes

SIX YEARS AGO: Scallops with Black Pasta in Orange Cream Sauce

SEVEN YEARS AGO: Stir-fried Chicken with Creamed Corn

EIGHT YEARS AGO: Potato, Cheddar, and Chive Torpedo


SaveSave

SaveSave

SaveSave

SaveSave

SaveSave

SaveSave

SaveSave

SaveSave

SaveSave

SaveSave

SaveSave

SaveSave

SaveSave

SaveSave

SaveSave

SaveSaveSaveSave

SaveSave

QUICHE 101

Some people are intimidated by cake. Some by bread. Others by quiche. I am here to end your quiche-o-phobia once and for all. I promise you that you will be able to make any quiche you’d like without the need to look at a recipe. Yes, that easy. Your quiche will be slightly lighter in fat than the authentic concoctions from France, but you won’t even notice. All you need is a food processor, a skillet, and a bowl.  You could even skip the food processor and do the whole thing  by hand, just add a second bowl to the utensils needed.  Ready? Let’s go…

FOR THE CRUST

MEMORIZE  1 + 1 + 1/2

Add one cup of flour to your food processor bowl. All-purpose is fine.  Add to it one stick of butter, cold, cut in pieces.  Half a teaspoon of salt. Yes, it would be even easier if you could add a full teaspoon, so memorizing would be a triple “1.” But you don’t want to taste salt in the crust, so stick to half a teaspoon.

Pulse everything in the processor until the butter look crumbly, probably 6 times or so, not more than that.

Now I ask you. How many different items did you add to the food processor?  Three. So that’s the number of tablespoons of very cold water you will drizzle on top with the machine running.  The moment it threatens to start crumbling together, STOP. Stop right away!  Pinch a small amount with your fingers, if they hold together you are done.  Dump it over a plastic wrap on your counter top, wrap it bringing it all together, it will smooth out considerably as it rests.  Do not try to knead it or you will end up with a tough crust. Place in the fridge for 20 minutes to 1 hour. Or more. You can do that the day before.

When ready to roll out the crust, remove from the fridge, and roll it thin enough to cover a 9-inch pie plate, preferably with fluted edges and removable bottom.  Dock the surface, refrigerate while you heat the oven, or for several hours.

Blind bake it  at 375 F for 15 to 20 minutes, with pie weights or dry beans. I like to cover the surface with plastic wrap so that any type of weight I use has an easier time reaching the edges. Remove the weights once the pie has been in the oven for 10 minutes.  That is it, your crust is done!   

FILLING

Anything your heart desires.  Amounts are pretty flexible, just use common sense, you need to cover the surface of the quiche, but not crowd it too much.  In this example I used diced prosciutto (straight from the package, not cooked in any way), sautéed mushrooms, grated Gruyère cheese, and minced parsley.  Place your goodies over the surface of the blind-baked crust.  Now get ready to make the liquid component, enough for a 9-inch quiche.

MEMORIZE 1/2 + 6

Measure half a cup of whole milk. Place it in a bowl, season lightly with salt, pepper, and nutmeg. Add to it 6 eggs, except that 4 will be whole, and 2 will be egg whites only.  Whisk vigorously, and pour on the quiche with all the goodies already placed on its surface.

Bake at 375F for about 30 minutes. It will puff and get all golden and gorgeous. Remove it from the oven and wait 15 minutes to serve, so that it sinks down a bit and gets a nice texture.

Voilà!  You made quiche!


Now here is my detailed recipe for you

MUSHROOM AND PROSCIUTTO QUICHE
(from the Bewitching Kitchen)

for the crust:
1 cup all-purpose flour
1 stick butter, cold, cut in pieces
1/2 teaspoon salt
3 tablespoons ice-cold water

for the filling:
about 10 ounces of mushrooms
1 tablespoon olive oil
salt and pepper to taste
1/3 cup prosciutto, diced
1/3 cup grated Gruyère cheese
fresh parsley leaves, thorn into pieces
1/2 cup milk
4 whole eggs
2 egg whites
pinch of nutmeg

Make the crust by adding flour, butter and salt to the bowl of a food processor. Pulse a few times until butter is in large crumbs. With machine running, add the ice-cold water. Stop processing once it starts to come together in a mass.  Transfer to a plastic sheet, press delicately into a round disk, and refrigerate for at least 20 minutes, but you can leave it overnight in the fridge.

Roll the pastry out and cover a 9-inch pie dish with removable bottom. Dock the surface, chill the pastry for at least 30 minutes before blind-baking it in a 375 F oven, with weights. You can cover the surface with Saran-wrap, as long as the plastic does not touch the metal pan. Bake for 10 minutes, remove weights, bake for 5 to 10 minutes longer, until it is opaque, but not getting dark.

Make the filling. Sautee the mushrooms in olive oil, season with salt and pepper. Make sure the mixture is not watery. Allow it to cool slightly. Sprinkle prosciutto all over the surface of the baked crust. Add the mushrooms, the shredded cheese and parsley.

In a medium bowl, mix the milk with eggs and egg whites. Add a pinch of nutmeg, and a very light touch of salt and pepper. Whisk well, and pour over the filling. If you like, you can reserve some or most of the cheese to sprinkle on top, that gives the quiche a darker color on the surface.

Bake for 30 minutes, remove from the oven, allow it to cool for 15 minutes before slicing.

ENJOY!

to print the recipe, click here


Comments: This was part of our Valentine’s dinner menu. I made the dough and rolled the crust early in the day. Once we arrived home, all that needed to be done was blind-bake the crust and prepare the mushrooms. Piece of cake. So much better than going out. Last year we made that mistake, and were unlucky enough to wait 45 minutes for our order to arrive at the table. Keep in mind we don’t live in LA or New York, and were not enjoying our dinner at a super fashionable and crowded restaurant, where seeing and being seen trumps the quality of the service. Anyway, we could not make the same mistake two years in a row.

I was debating whether to cut the mushrooms in smaller pieces, but I’m glad I went with bigger chunks. Much more satisfying that way.  If you omit the prosciutto, this would be a perfect meal to entertain your vegetarian friends. Use sun-dried tomatoes in small pieces instead. I bet that would be lovely.

On the side, a version of a recent salad we truly enjoyed. This time I used dried cranberries and roasted pistachios, same dressing. No cheese, as we had enough of that in the quiche.

It was a lovely dinner, in the comfort of our home, fireplace on, pups happily snoring nearby, waiting for the time when the dishes get done and some bits and pieces of goodies might “accidentally” find them…

ONE YEAR AGO: Persian Butternut Squash Soup

TWO YEARS AGO: Walnut Cranberry Sourdough Bread

THREE YEARS AGO: Ottolenghi in Brazil?

FOUR YEARS AGO: Roasted Winter Vegetables with Miso-Lime Dressing

FIVE YEARS AGO: 2012 Fitness Report: P90X2

SIX YEARS AGO: Caramelized Bananas

SEVEN YEARS AGO: Roasted Lemon Vinaigrette

EIGHT YEARS AGO: Whole Wheat Bread

SaveSave

SaveSave

SaveSave

SaveSave

SaveSave

SaveSave

SaveSave

SaveSave

SaveSave

SaveSave

A VALENTINE’S DAY OPERA

Not everyone is fond of opera. I go as far as saying that it is an acquired taste. But if you switch from music to cake, the polls are reversed: most people will go weak in the knees anticipating a slice. Opera Cake is often described as a dessert in six acts. Layers of thin cake, moist with a delicate coffee syrup, separated by luscious coffee buttercream and chocolate ganache. A real French classic. A real beauty. A perfect way to say I love you on February 14th. Or any other day of the year. Because this is a cake that creates its own moment. And thanks to Colette Christian and  Craftsy lessons online, Sally, the cake-o-phobe produced a version that made her very happy…


OPERA CAKE – RECIPE OVERVIEW

(based on Colette Christian’s Miniature French Desserts at Craftsy.com)


It all starts with the mis-en-place for a Joconde sponge cake. With a name like that, you know it’s going to be special. Joconde is a cake leavened exclusively by beaten eggs, with a nice proportion of ground almonds (or almond meal) in the batter. Colette gives very nice tips to make it homogeneous in thickness, because the Opera Cake is all about precision. Any small mistake in a step, and the outcome might suffer.

You can use any formula you like for the cake, I will give you one example from BBC food, very similar to the one I used from Colette.

JOCONDE SPONGE CAKE

3 whole eggs
15g sugar
100g almond flour
100g icing sugar
3 egg whites
20g granulated sugar
30g cake flour
30g unsalted butter, melted and cooled

Almonds and icing sugar are sifted into a large bowl, eggs added and whisked to combine.

A meringue is made with the egg whites, raining the granulated sugar slowly, until soft peaks form. Increase the speed to medium-high, and mix until the whites are at a firm peak. Add 1/3 of the meringue to the almond mixture. Add half the cake flour and half the melted butter.  Add another 1/3 of meringue, the rest of the flour and butter. Finally fold in the remaining third of the meringue.

Spread the batter as homogeneously as possible on a half-sheet pan. Try not to deflate it and bake it right away for about 15 minutes at 375 F. The cake should not get any color, but it should spring back lightly when touched at the center.


After baking, the cake is cut in three rectangles. Try to be precise, but don’t worry too much, as the cake will be trimmed at the very end. One layer is painted with melted chocolate and allowed to set. That layer of chocolate will be the very base of the final cake, preventing any soaking syrup from forming a puddle in the bottom.

You will also need to make a coffee buttercream, more specifically a French buttercream, in which a mixture of sugar and water is cooked to 236 to 240 F (soft-ball stage).  You can use this recipe, which is again very similar to the one I got from Craftsy. Just include 1 tablespoon of coffee extract together with 1 teaspoon of vanilla extract. You need coffee extract to make sure the flavor will come through without diluting the buttercream too much and affecting texture.

Apart from the buttercream, you’ll need chocolate ganache for one of the cake layers.  A regular kind, equal weights of chocolate and heavy cream, allowed to cool to room temperature and placed in a piping bag.  The buttercream also goes in a piping bag, the easiest and less messy way to assemble the cake. No need to use a piping tip, just cut the bag to form a 1/2 inch opening.

To assemble, first start with the cake painted with melted chocolate at the base. A nice soaking of coffee syrup (water, strong coffee extract and sugar, cooked until the sugar fully dissolves). A layer of buttercream. A second layer of cake. More soaking. Ganache lavishly spread on top. Final layer of syrup-soaked cake, final top layer of buttercream. Now, the assembled cake rests in the fridge for a couple of hours, waiting for the final step. Don’t worry about the way the sides look now. It will all be fine in the end…

The pouring ganache, perhaps better described as a chocolate glaze. A good formula would be 227g chocolate (at least 60% cocoa), 170g heavy cream, and 28g light corn syrup. The glaze cannot be too hot, and cannot be too cold. A little colder than body temperature will be perfect. Colette shows a nice technique to pour the glaze, so that it sits as a very smooth layer on top. Once all that is done, the cake is refrigerated for several hours so that all layers are nicely set. Do not dare cutting it before it sets, you will not have defined layers unless you exercise patience. That gave me a bit of a chuckle. Me, advising patience, the virtue I lack the most…

Then what? Then the final fun begins… I decided to cut the cake in 2 inch squares, and for that I used a very cool gadget. I tell you, just getting that tool ready made me feel like some heavy hitter baker… I know, I’m easily amused. But, seriously, just look at how cool that is:

I also used this tool to cut the laminated dough for croissants and pain au chocolat, but failed to get a picture at the time.  All you need to do is measure the precise dimension of what you want to cut (or score the surface, as in the case of the Opera Cake), and lock the rolling blades in place.  Gently roll them over the surface of the fully set cake, and you will have perfect squares, ready to be sliced with a serrated knife. The edges are trimmed off to reveal clean layers on all sides of the cut pieces. The secret is to place the knife in very hot tap water, and clean the blade after every cut you make. If you’d like to order one, here is a link to amazon.com (I do not make any profit from your purchase, by the way).

A little buttercream goes in a small piping bag couple with a star tip. And you are ready to decorate the top. Or, you can do the more authentic decoration, writing Opera on each slice. Since I opted to cut the cake small, I went with the buttercream instead. What do you think?

This cake was so much fun to make!  I started early on a Sunday morning, and tried to work as relaxed as possible. It is cake, after all, and they make me a little nervous. But, less now than in the past.

For those who celebrate…

HAPPY VALENTINE’S DAY!


I know I’ll be repeating myself, but I must give high praise to the online baking classes from Craftsy, particularly those taught by Colette Christian.  Without her guidance, making the Opera Cake would have been a tragedy in six acts… 


ONE YEAR AGO: Incredibly Simple Times Four

TWO YEARS AGO: Raspberry Chocolate Truffles

THREE YEARS AGO: Red Velvet Cupcakes

FOUR YEARS AGO: Valentine’s Day: The Finale

FIVE YEARS AGO: Almond Butter Chocolate Chip Cookies

SIX YEARS AGO: Dan Dan Noodles

SEVEN YEARS AGO: Sophie Grigson’s Parmesan Cake

EIGHT YEARS AGO: Antibiotics and Food

SaveSave

SaveSave

SaveSave

SaveSave

SaveSave

SaveSave

SaveSave

SaveSave

SaveSave

SaveSave

SaveSave

SaveSave

SaveSave

SaveSave

SaveSave

SaveSave

SaveSave

SaveSave