FOR THE LOVE OF GAUDI

We just came back from a 2-week trip to France and my first time ever in Spain. We drove from Avignon to Arles and then to Barcelona and stayed there for a few days enjoying the company of great friends… Although I was familiar with Gaudi’s work, visiting Basilica de la Sagrada Familia and Casa Batlló were two experiences I will never ever forget. Today I celebrate Gaudi with a little sourdough bread.

GAUDI-LOVE SOURDOUGH BREAD
(from The Bewitching Kitchen)

Basic formula:
475g bread flour
25g rye flour
10g salt
1/2 tsp Baharat spice mix
75g sourdough starter at 100% hydration
350g water

Make the levain mixture about 6 hours before you plan to mix the dough. It should be very bubbly and active.

When you are ready to make the final dough, place the water in the bowl of a KitchenAid type mixer and dissolve the starter in it, mixing with a spatula briefly, then add the two types of flour, salt and spices. Turn the mixer on with the hook attachment and knead the dough for 4 minutes at low-speed all the time. You will notice the dough will gain quite a bit of structure even with just 4 minutes in the mixer. Remove from the machine, and transfer to a container lightly coated with oil, cover lightly with plastic wrap and allow it to ferment for 4 hours, folding every 45 minutes or so. Because the dough is already a bit developed from the initial time in the mixer, you should get very good structure after 3 and a half hours, or even sooner than that.

After four hours bulk fermentation, shape the dough as a ball, and place, seam side up, in a lightly floured banetton. Leave at room temperature one hour, and then place in the fridge overnight, from 8 to 12 hours.

Next morning, heat the oven to 450F.

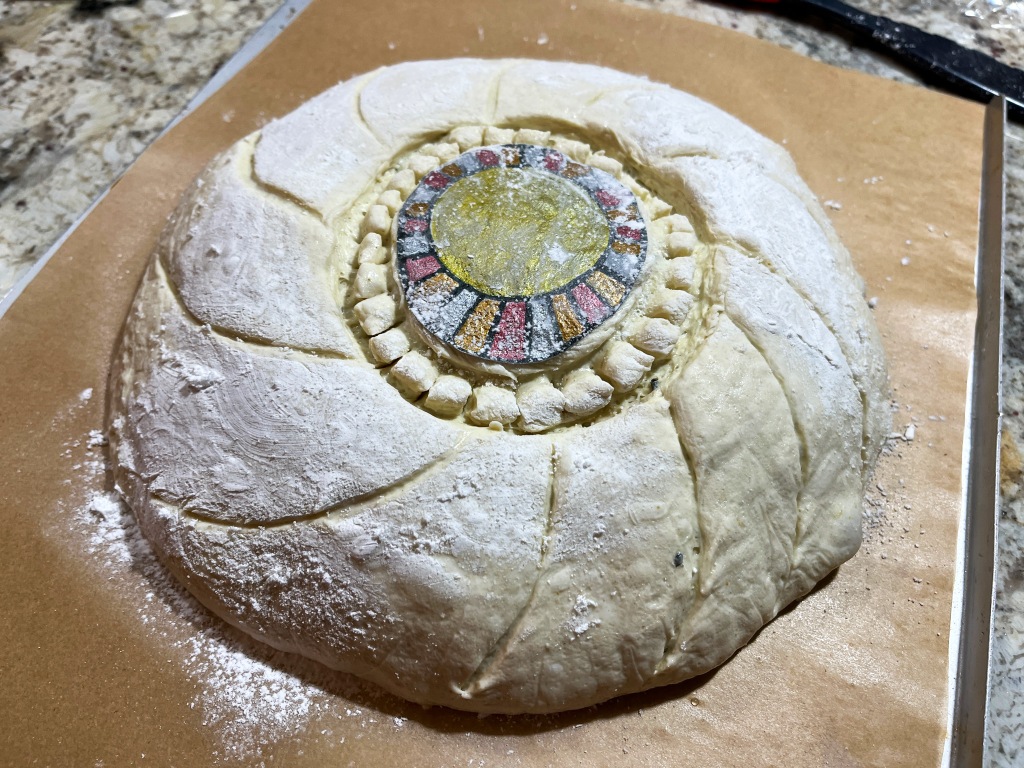
Place a parchment paper on top of the dough, a flat baking sheet, and invert the dough, flipping it out of the banneton. Slightly wet the top of the dough and place your wafer paper decoration on top. Flour the surface and score a little pattern with a razor blade.

Bake at 450F for 45 minutes, preferably covered for the first 30 minutes to retain steam. Cool completely over a rack before slicing.

ENJOY!

to print the recipe, click here

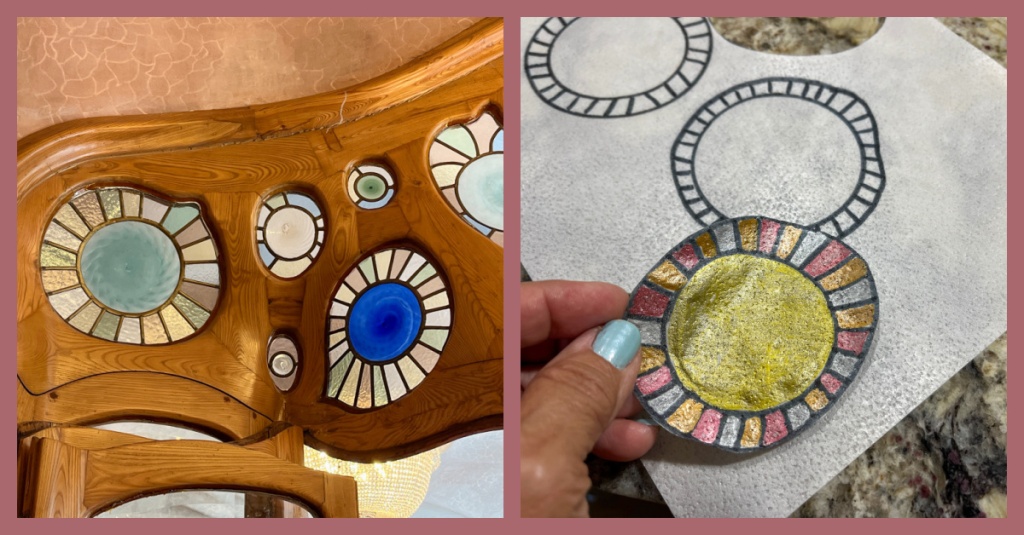
Comments: The picture above shows the inspiration for the design, artwork he included as a decorative panel above a door in Casa Batlló. I used wafer paper and food safe pens in metallic tones to make a similar design. I hope Gaudi would not get too mad at me…

After baking, I thought the colors of the design faded slightly, so I painted them again once the bread cooled completely.

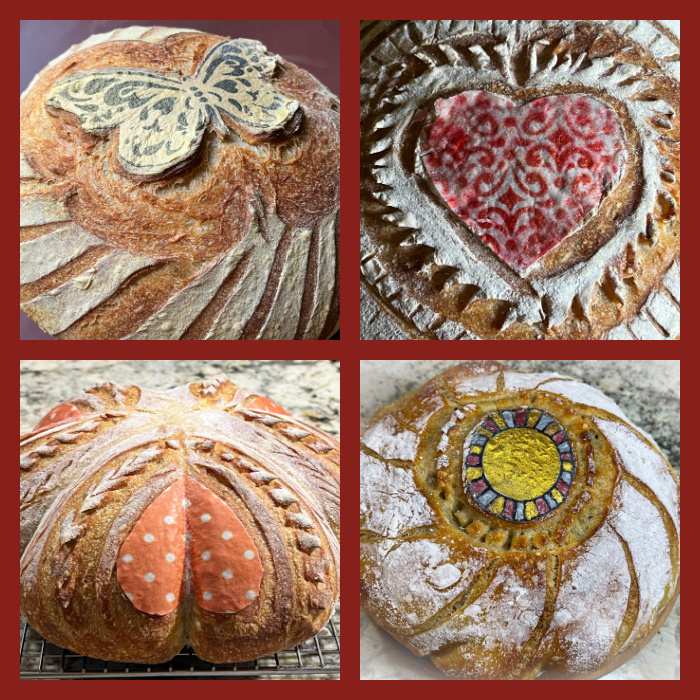
Wafer paper is fast becoming my favorite way to decorate bread… To see a couple of examples from my past, click here (butterfly) and here (polka dot).

ONE YEAR AGO: Hello There, Cupcake!

TWO YEARS AGO: Two Deliciously Refreshing Cucumber Salads

THREE YEARS AGO: Grilled Shrimp with Parsley Oil over Black Rice Noodles 

FOUR YEARS AGO: Chicken Shawarma, the Easiest Way

FIVE YEARS AGO: Marshmallow Macarons

SIX YEARS AGO: Mango-Lime Macarons

SEVEN YEARS AGO: Honey-Glazed Sriracha Meatballs

EIGHT YEARS AGO: Slow-cooker Braised Lamb Shanks

NINE YEARS AGO: How about some coffee with your steak?

TEN YEARS AGO: Celebrate Wednesday with a Spiral Kick

ELEVEN YEARS AGO: Carrot Flan with Greens and Lemon Vinaigrette

TWELVE YEARS AGO: Granola Bars

THIRTEEN YEARS AGO:  Awesome Broccolini

FOURTEEN YEARS AGO:  A Twist on Pesto

FIFTEEN YEARS AGO: Ciabatta: Judging a bread by its holes

CHICKEN ROLL-UPS WITH ASPARAGUS

The inspiration for this recipe came from Alex Snodgrass’ cookbook The Defined Dish, a favorite of mine. It was designed as a Paleo or Whole30 version, but I modified it to our style of cooking and we both loved the results.

CHICKEN ROLL-UPS WITH ASPARAGUS
(inspired by The Defined Dish)

makes 4 roll-ups, recipe can be doubled

2 chicken breasts, sliced in half lengthwise and pounded thin
4 slices prosciutto
2 tablespoons Dijon mustard
½ teaspoon kosher salt
½ teaspoon freshly ground black pepper
1 bunch asparagus, trimmed to fit the size of the roll-ups
4 fresh sage leaves
¼ cup all-purpose flour
¼ cup grapeseed oil + 1 tablespoon
1 shallot, minced
1 carrot, very finely diced
½ cup chicken broth
¼ cup dry white wine
juice of half a lemon

On a cutting board, arrange the prosciutto slices next to one another and layer one chicken cutlet on top of each slice. Spread a thin layer of the mustard on the top of each cutlet. Lightly season with salt and pepper. Lay 3 stalks of asparagus at the bottom, perpendicular to the cutlet . Use the prosciutto to gently roll the chicken and asparagus into little bundles, flipping the rolls over so the seam side faces up. Place a sage leaf on top of the seam and thread a toothpick through it to fasten the chicken roll together and secure the sage leaf on top. Pour the flour onto a large plate. Gently roll each bundle to coat lightly, shaking off the excess.

In an oven-safe skillet over medium-high heat, heat ¼ cup of the olive oil. Place the roll-ups in the skillet sage-side down and cook until golden brown and crispy, 3 to 4 minutes. Flip the bundles over and crisp the other side, cooking for an additional 3 to 4 minutes. Transfer the browned roll-ups to a plate. Wipe the skillet dry and heat the remaining 1 tablespoon of olive oil over medium heat. Add the shallot and carrot pieces and cook until fragrant. Add the chicken broth, white wine, and lemon juice and bring the mixture to a simmer. Nestle the bundles into the sauce, sage-side up, then transfer the pan to the oven, uncovered. Bake until the chicken is cooked through and the asparagus is tender, 10 to 12 minutes. To serve, remove the toothpicks and spoon the pan sauce over the roll-ups.

ENJOY!

to print the recipe, click here

Comments: I made this just for me and the husband, so four were enough, but if you intend to use it for a dinner party, or you have a big family, just double it all. It is elegant and quite flavorful. I also love the fact that the asparagus could go in without any pre-cooking, making it so easy. Delicious recipe, definitely goes into our rotation!

ONE YEAR AGO: Flower-Shaped Dinner Rolls

TWO YEARS AGO: Pride Macarons

THREE YEARS AGO: Blood Orange Macarons

FOUR YEARS AGO: One-Two-Three Macarons

FIVE YEARS AGO: Marshmallow Macarons

SIX YEARS AGO: Fujisan Bread

SEVEN YEARS AGO: Air-Fried Tomatoes with Hazelnut Pesto & Halloumi Cheese

EIGHT YEARS AGO: Red Velvet Layered Cake

NINE YEARS AGO: Lemon-Lavender Bars

TEN YEARS AGO: Quinoa Fried Rice

ELEVEN YEARS AGO: Carrot Flan with Greens and Lemon Vinaigrette

TWELVE YEARS AGO: The Secret Recipe Club: Granola Bars

THIRTEEN YEARS AGO:  Awesome Broccolini

FOURTEEN YEARS AGO:  A Twist on Pesto

FIFTEEN YEARS AGO: Ciabatta: Judging a bread by its holes

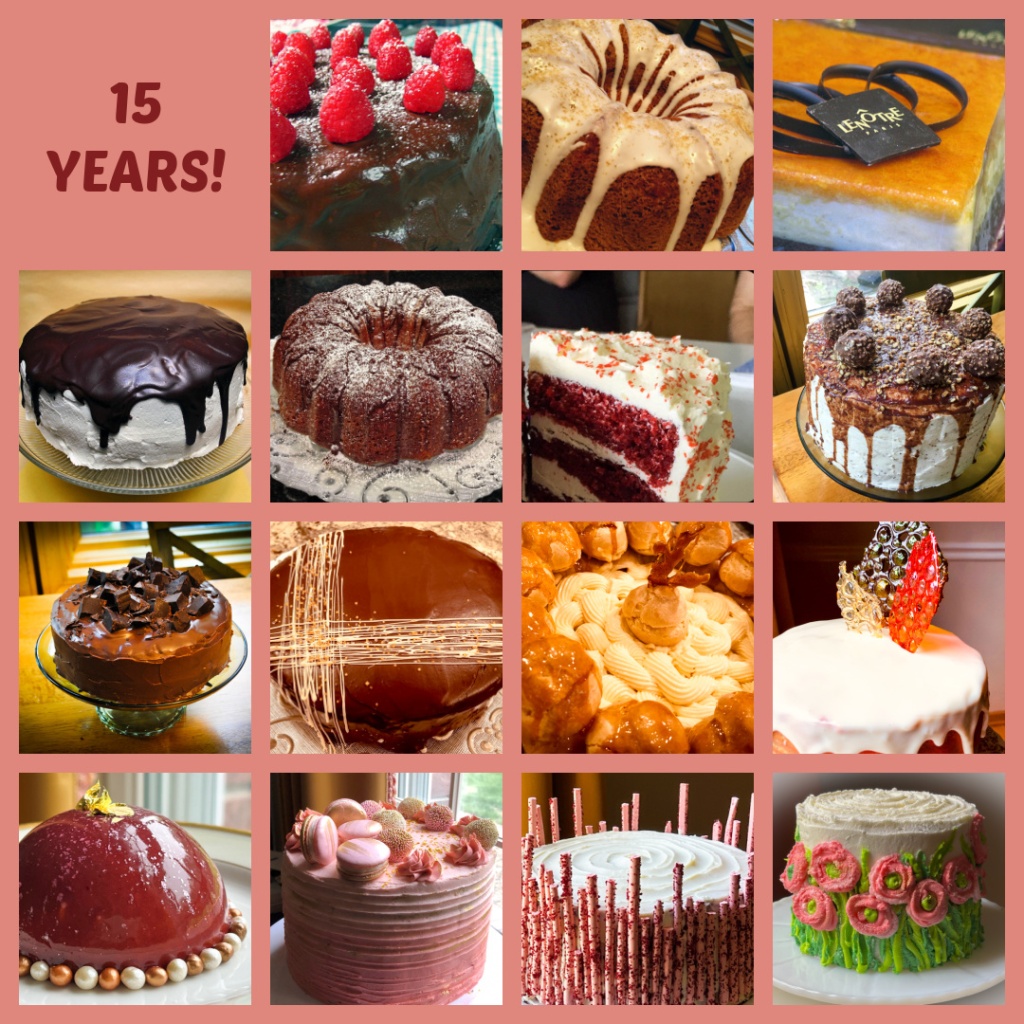
THE BEWITCHING KITCHEN TURNS 15 YEARS OLD!

Wow! Just WOW! Talk about a blogging milestone, I am having a hard time believing that for 15 years I’ve been cooking, baking, taking pictures, writing posts, and hitting PUBLISH, without a break… Last year I was feeling a bit discouraged and debating whether to quit, but I don’t feel the same way now. My love for blogging is renewed, maybe even a bit stronger. But what matters most in the anniversary of a blog is how to celebrate it. That brings cake to mind. And cake is what I have for you!

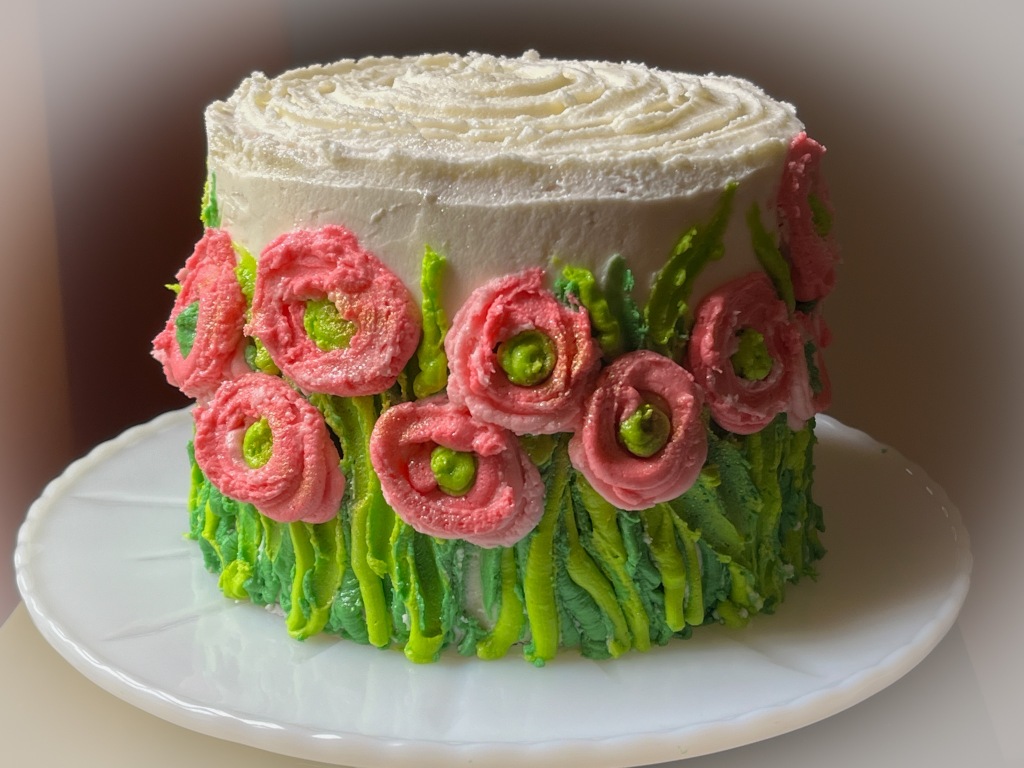
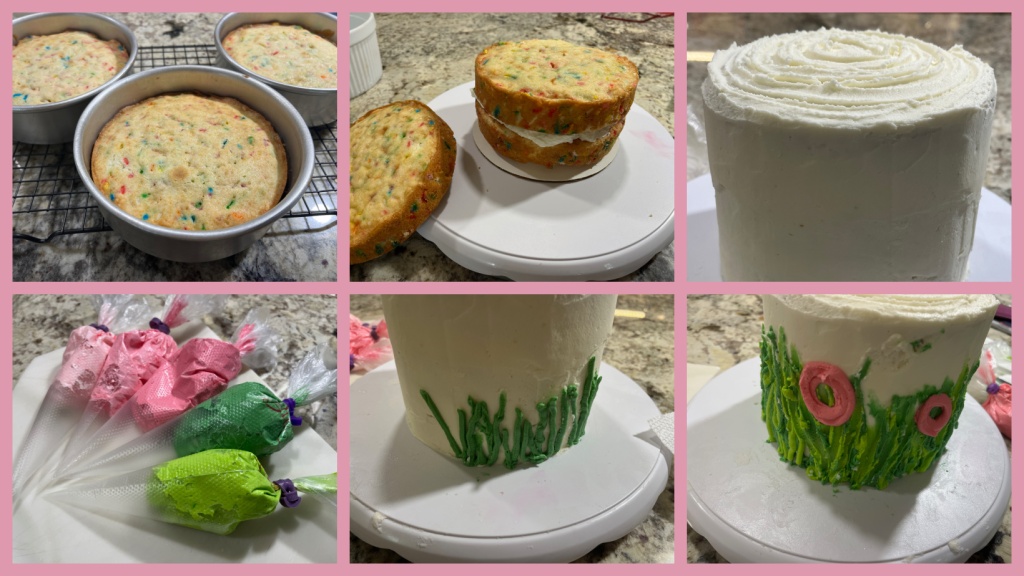
CONFETTI CAKE WITH RANUNCULUS BUTTERCREAM PAINTING
(cake from Sally’s Baking Addiction, buttercream and tutorial for cake painting from MyCakeSchool)

for the cake:
207g cake flour (1 + 3/4 cup)
3/4 teaspoon baking powder
1/4 teaspoon baking soda
1/4 teaspoon salt
113g unsalted butter, softened to room temperature (1/2 cup)
200g granulated sugar (1 cup)
3 large egg whites, at room temperature
120g full-fat sour cream, at room temperature (1/2 cup)
2 teaspoons pure vanilla extract
120ml whole milk, at room temperature (1/2 cup)
1/2 cup rainbow sprinkles

for the buttercream:
910g confectioners’ sugar (2 pounds)
113 g unsalted butter softened (1/2 cup)
286 g solid vegetable shortening such as Crisco (1 + 1/2 cup)
2 Tablespoons clear vanilla extract
¼ cup milk 57 g full-fat milk (1/4 cup)
½ teaspoon salt to cut the sweetness

Heat the oven to 350°F. Grease three 6-inch cake pans, line with parchment paper rounds, then grease the parchment paper. Whisk the cake flour, baking powder, baking soda, and salt together. Set aside.
Using a handheld or stand mixer fitted with a paddle or whisk attachment, beat the butter and sugar together on high speed until smooth and creamy, about 3 minutes. Beat in the egg whites on high speed until combined, about 2 minutes, then beat in the sour cream and vanilla extract. Scrape down the sides and up the bottom of the bowl as needed.

With the mixer on low speed, add the dry ingredients just until combined. With the mixer still running on low, pour in the milk and mix just until combined. Gently fold in the sprinkles. The batter will be slightly thick.

Pour batter evenly into cake pans. Bake for around 18-21 minutes or until the cakes are baked through. To test for doneness, insert a toothpick into the center of the cake. If it comes out clean, it’s done. Allow cakes to cool completely in the pans set on a wire rack.

Make the buttercream: Cream butter, shortening , salt and extracts until creamy and smooth. Add powdered sugar and milk. Mix thoroughly on medium speed for approximately 8 minutes. For the last two minutes decrease the mixing speed to very slow until creamy and smooth. Scrape the sides of the bowl occasionally during the mixing process. Frost the cake fully with white frosting, make portions of buttercream with the colors needed, and follow the instructions on the video to decorate the cake.

ENJOY!

to print the recipe, click here

Comments: I wanted a colorful cake for the 15th anniversary of the Bewitching, and felt that this Springtime motif would be perfect… Now for a little bit of “behind the scenes” disclosure: while you read this post, we will be in Europe, in fact almost getting ready to fly back home. It turns out that before we left I prepared a bunch of posts to be published while we were away, but thought the anniversary of the blog was later in the month. I noticed my mistake just a few days before our departure… My first reaction was to forget all about it, deal with it later, but Phil said “you’ve been in the tent, you can do this! pretend it is a technical challenge”. What can I say? He definitely knows me well, so the outcome is this blog post… This was a cake baked in full frantic mode, my friends… what won’t I do for the love of blogging?

.

FLASH BACK


ONE YEAR AGO: The Bewitching Kitchen turns 14!

TWO YEARS AGO: The Bewitching Kitchen turns 13!

THREE YEARS AGO: The Bewitching Kitchen Turns 12!

FOUR YEARS AGO: The Bewitching Kitchen turns 11!

FIVE YEARS AGO: The Bewitching Kitchen Turns 10, and a Giveaway…

SIX YEARS AGO: The Bewitching Kitchen turns 9!

SEVEN YEAR AGO: The Bewitching Kitchen turns eight!

EIGHT YEARS AGO: The Bewitching Kitchen Turns Seven!

NINE YEARS AGO: Bewitching Kitchen Turns Six!

TEN YEARS AGO: The Bewitching Kitchen turns Five!

ELEVEN YEARS AGO: The Bewitching Kitchen turns Four!

TWELVE YEARS AGO: The Bewitching Kitchen Turns Three! 

THIRTEEN YEARS AGO:  The Bewitching Kitchen turns Two!

FOURTEEN YEARS AGO:  Bewitching Birthday!

FIFTEEN YEARS AGO: Welcome to my blog!
BRIOCHE ROLLS WITH PISTACHIO FILLING

I went back to a favorite recipe to make brioche dough, found in Helen Fletcher’s blog Pastries Like a Pro (click here to retrieve it). After the overnight proofing in the fridge, I took 60g amounts and shaped as little rolls, enclosing a tasty pistachio filling.


BRIOCHE ROLLS WITH PISTACHIO FILLING
(from Helen Fletcher and The Bewitching Kitchen)

for the dough, click here

for the filling:
3/4 cup granulated sugar
1/4 cup unsalted butter, at room temperature
1/8 teaspoon salt
1 large egg white
1/4 teaspoon vanilla extract
1 + 1/4 cup pistachio flour

In a medium bowl, mix together the granulated sugar and butter with a wooden spoon or rubber spatula until combined. Mix in the salt and egg white (reserve the egg yolk for the egg wash), and then add the vanilla extract. Stir in the pistachio flour. Place in a large piping bag and reserve.

To shape the rolls: grab 60g portions of the dough, still cold from the fridge and roll as a rectangle so that the shorter dimension will fit in your baking pan of choice. Cut small strands on 3/4 of the length as shown in the pictures below. Add the filling to the top and roll it to close. Place in your baking pan and let it rise covered loosely for 1 hour to 90 minutes. Brush the surface with the egg yolk reserved, and bake at 375F for 20 to 25 minutes, until golden brown.

ENJOY!

to print the recipe, click here

Comments: I saw this cool shaping technique over at Instagram in the page of Chef Antonis, from Greece (click here to visit his page. Worked like a charm with this brioche dough, I intend to try other shaping methods in the future.

The picture above is slightly out of focus, but when I noticed it was too late and I did not want to cut another one, as they were to be donated later that day. The dough has the right amount of sweetness, and the pistachio cream complemented it well. I highly recommend you play with this recipe and come up with new combinations of flavors and shaping.

Once again, a huge thank you to Helen for her great method to make brioche dough!

ONE YEAR AGO: Shrimp with Pickled Jalapeños and Broccoli

TWO YEARS AGO: Sticky Spicy Pork Over Golden Rice

THREE YEARS AGO: Mini-Pullman Sourdough Bread

FOUR YEARS AGO: Gibassier

FIVE YEARS AGO: Sundried Tomato Twist Bread

SIX YEARS AGO: And now for something completely different….

SEVEN YEARS AGO: Parsnip, Coconut, and Lemongrass Soup

EIGHT YEARS AGO: In My Kitchen, October 2016

NINE YEARS AGO: Paleo Moussaka

TEN YEARS AGO: In My Kitchen, October 2014

ELEVEN YEARS AGO: In My Kitchen, October 2013

TWELVE YEARS AGO: Crimson and Cream Turkey Chili

THIRTEEN YEARS AGO: Taking a break from the nano-kitchen

FOURTEEN YEARS AGO: Chocolate Chip Cookies

CHOCOLATE-COVERED OREOS STRIKE AGAIN

My last round up was back in February (check them out clicking here), so it is time to share the designs I’ve made since the last post. Without further ado, here they are…

One of my favorite ways to decorate is adding discs of chocolate decorated with transfer sheets. It is quite convenient because normally I have some leftover melted chocolate after filing the molds, so I use that to spread a thin layer over the transfer sheet, let it set in the fridge and then cut circles. Those last forever at room temperature, so normally I make them and save them to use the following week.

FLOWERS ON WHITE

FLOWERS ON PINK

STRIPES ON TURQUOISE

SWIRLS ON BROWN

This series had a new technique, I used textured parchment paper to spread the chocolate and after setting, cut circles. I need more practice, it was hard to avoid bubbles, but I got a few to work ok. The background used the tie-dye technique I shared in my previous post about Oreos (link in first paragraph).

TEXTURED CIRCLES ON TIE-DYE BACKGROUND

Moving on, some designs relied on Royal Icing…

GOLD BRUSH EMBROIDERY

MINIMALIST BLACK ON WHITE

LITTLE FONDANT FLOWER

As I always say, making Chocolate-Covered Oreos can be addictive. I am always thinking about the next batch, as I try to make them every single week… I hope you enjoyed this series, and stay tuned for more soon!

ONE YEAR AGO: Sesame-Miso Yakitori

TWO YEARS AGO: Marinated Chickpeas with Slow-Roasted Red Peppers

THREE YEARS AGO: Mini-Pullman Sourdough Bread

FOUR YEARS AGO: Gibassier

FIVE YEARS AGO: Sundried Tomato Twist Bread

SIX YEAR AGO: And now for something completely different….

SEVEN YEARS AGO: Parsnip, Coconut, and Lemongrass Soup

EIGHT YEARS AGO: In My Kitchen, October 2016

NINE YEARS AGO: Paleo Moussaka

TEN YEARS AGO: In My Kitchen, October 2014

ELEVEN YEARS AGO: In My Kitchen, October 2013

TWELVE YEARS AGO: Crimson and Cream Turkey Chili

THIRTEEN YEARS AGO: Taking a break from the nano-kitchen

FOURTEEN YEARS AGO: Chocolate Chip Cookies