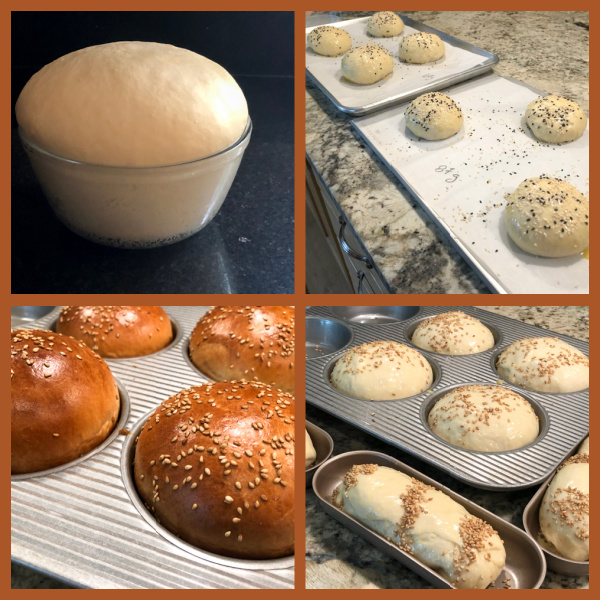
There are hamburger buns, and hamburger buns with Zen. These will Zen you out. Tanzhong is a method of Japanese baking in which part of the flour is cooked before being incorporated into the dough. What that does is create quite a unique crumb, with more moisture and tenderness. Perfect for hamburger and hot dog buns in which the crust is secondary. All you want is pillowy bread. You will need about 30 minutes of extra time before mixing the dough, but the outcome it totally worth it.

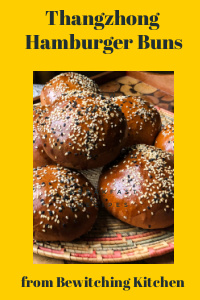
TANGZHONG HAMBURGER BUNS
(slightly modified from Domestic Gothess)
for tangzhong:
20 g (2tbsp) strong white bread flour
100 ml water
for the dough:
350 g strong white bread flour
7 g (2 tsp) fast-acting dry yeast (or regular instant yeast, but expect longer rising times)
1 tsp salt
50 g (1/4 cup) sugar
125 ml (1/2 cup) full fat milk
1 large egg
35 g softened butter
to glaze:
1 egg, beaten with a splash of milk
sesame seeds
To make the tangzhong, place the flour in a small saucepan and gradually whisk in the water. Place over a medium heat and cook, whisking constantly until it has thickened to a wallpaper paste-like consistency. Remove from the heat, scrape into a bowl and cover with clingfilm directly on the surface, set aside to cool.
Place the flour, yeast, salt and sugar in the bowl of a stand mixer fitted with the dough hook, lightly stir together and make a well in the center. Add the egg, milk and tangzhong to the well and mix on a low speed until it comes together into a dough.
Add the butter and mix on medium-high speed until the dough is very stretchy and comes away from the sides of the bowl, about 10 minutes. Transfer the dough to a lightly greased bowl, cover with clingfilm and either place somewhere warm to rise until doubled in size, about 1-2 hours (dough can be refrigerated overnight at this point if you prefer).
Line a baking sheet with baking parchment. Divide the risen dough into 8 equal pieces (or fewer if you like bigger buns) and shape each piece into a ball on a lightly floured surface. Spread the balls out well spaced apart on the baking sheet and loosely cover with oiled clingfilm. Leave to rise for about 1 hour until puffy.
Heat the oven to 400F. Brush the risen buns with the beaten egg and sprinkle with sesame seeds. Bake for 20 to 25 minutes until deep golden. Transfer the buns to a wire rack to cool. They are good for couple of days stored in an airtight container, or for a few months frozen.
ENJOY!
to print the recipe, click here
Comments: Mitsuo Ayano was the person who first came up with the idea of making a water roux (yu-dane) and use it to bake bread. Later the process was simplified by a baker from Taiwan. In the US and Europe it is more widely known by its Chinese name, Tangzhong. At any rate, it is a nice technique to have in your repertoire, and pretty much all kinds of breads can be adapted to take some cooked flour in the formula. Check out this great version, made a few years ago by my friend Karen.

The crumb is so tender and flavorful! I’ve been making this recipe regularly, the moment we have 2 buns left in the freezer, another batch gets started. They can be shaped of course as regular buns or oblongs for hotdogs. I now settled on shaping each bun with around 110g dough, because the husband likes to slice each large roll in four thin slices crosswise, so it’s easier if the buns start big. I get about 6 large buns from one batch buy doing so.

ONE YEAR AGO: Potato Soup with Spicy Shrimp
TWO YEARS AGO: Rose-Harissa Chicken Thighs
THREE YEARS AGO: Caramel-Chocolate Tartlets
FOUR YEARS AGO: Chicken Korma-ish
FIVE YEARS AGO: Sunday Gravy with Braciola
SIX YEAR AGO: In My Kitchen, February 2015
SEVEN YEARS AGO: Avocado and Orange Salad with Charred Jalapeno Dressing
EIGHT YEARS AGO: Green Olive, Walnuts and Pomegranate Salad
NINE YEARS AGO: Romanian Flatbreads
TEN YEARS AGO: Ziti with Artichokes and Meyer Lemon Sauce
ELEVEN YEARS AGO: Blasted Broccoli, Stove-top version