That Sally? She’s all about cauliflower and macarons. Hopeless. Since my reputation is already in shambles, I will share yet another recipe for macarons designed to kick a Poltergeist-ish year into the past and embrace 2021 as a light in the end of a very dark tunnel. Vaccines in sight, we just need to hang in there and keep doing all we can to avoid the virus while it still lingers unchecked out there. A single recipe, a single filling, and two designs. A dressed-up version to enjoy at at New Year’s Eve, and a playful take perfect pretty much anytime in January.

REVEILLON MACARONS
(from the Bewitching Kitchen)
For the shells:
200g Icing/powdered sugar
115 g almond flour
115 g egg whites at room temperature (approx. 4 eggs)
1/8 tsp of cream of tartar (optional)
100 g granulated sugar
¼ tsp vanilla paste or extract
white food gel color
toothpick drop of purple gel color
For filling:
160g powdered sugar
57g unsalted butter, softened (4 tablespoons)
1/2 to 1 teaspoon peppermint extract (depends on your taste and the extract you are using)
pinch of salt
heavy cream or milk to adjust consistency, if needed
Line 3 heavy baking sheets with parchment/baking paper or Silpat mats. Layer the powdered/icing sugar and ground almonds/almond meal in a food processor. Pulse until the mixture looks like fine meal, about 12 pulses. Pass through a sieve and transfer to a small bowl or to a sheet of parchment/baking paper. Set aside.
Place the egg whites and cream of tartar in the bowl of a stand mixer fitted with the whisk attachment. Make sure that the bowl and the whisk are impeccably clean. Starting on medium speed, whip the whites with the cream of tartar until they look like light foam. The whites should not appear liquid. The foam will be light and should not have any structure.
Slowly rain in the granulated sugar in five additions, trying to aim the stream between the whisk and the side of the bowl. Turn the speed up to high. Continue to whip the meringue until it is soft and shiny. It should look like marshmallow creme (marshmallow fluff). Add the vanilla and food colors. Whip the egg whites until the mixture begins to dull and the lines of the whisk are visible on the surface of the meringue. Check the peak. It should be firm. Transfer the whites to a medium bowl.
Fold in the ground almond/almond meal mixture in two increments. Paint the mixture halfway up the side of the bowl, using the flat side of a spatula. Scrape the mixture down to the center of the bowl. Repeat two or three times, then check to see if the mixture slides slowly down the side of the bowl. Put the mixture in a piping bag fitted with your choice of piping tip (round, ¼ or ½ inch in diameter or 6 – 12 mm). If you don’t have a macaron mat, draw circles on baking/parchment paper about 2inches/5cm in diameter & turn the paper over before placing on the baking sheets. Pipe shells, I like to count numbers in my head and use the same count for each shell so they end up similar in size. If making snowmen, make a template with two circles joined together to form head and body, and pipe each section.
Slam each sheet hard four to six times on the counter/worktop. Let the unbaked macarons dry until they look dull but not overly dry. Drying time depends on humidity. In a dry climate, the macarons can dry in 15 to 20 minutes; in a humid climate, it can take 35 to 40 minutes.
While the macarons are drying, heat the oven to 300 F (150 C/130C Fan oven/Gas Mark 2). Bake one sheet at a time on the middle rack. Check in 11 minutes. If the tops slide or move (independently of the ‘feet’ when you gently twist the top), then bake for 2 to 3 more minutes. Check one or two. If they move when gently touched, put them back in the oven for 1 to 2 more minutes until they don’t move when touched. Let the macaroons cool for 10 minutes before removing from the pan. The macarons should release without sticking.
For the filling, use a hand-held electric mixer and whisk the butter until creamy. Add the powdered sugar, peppermint extract and salt. Whisk in low-speed at first, the increase speed and whisk until creamy and smooth. If needed, add a very small amount of milk or heavy cream. Pipe the filling in shells, close them, and leave in fridge overnight to mature.
Assemble the macarons: find two macarons similar in size and add a good amount of filling to the bottom of one of them. Place the other on top and squeeze gently to take the filling all the way to the edge. Store in the fridge for 24 hours for perfect texture.
Decorate with Royal icing and sprinkles, if so desired.
ENJOY!
to print the recipe, click here

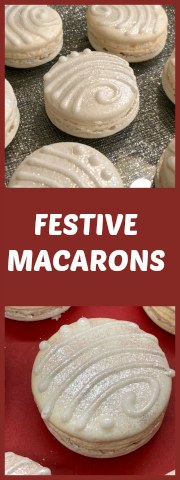
Comments: For the dressed-up version, I added white Royal icing to make abstract swirls, and immediately sprayed the shells with Diamond Dust, a product I will feature very soon in my next In My Kitchen post. Love it.
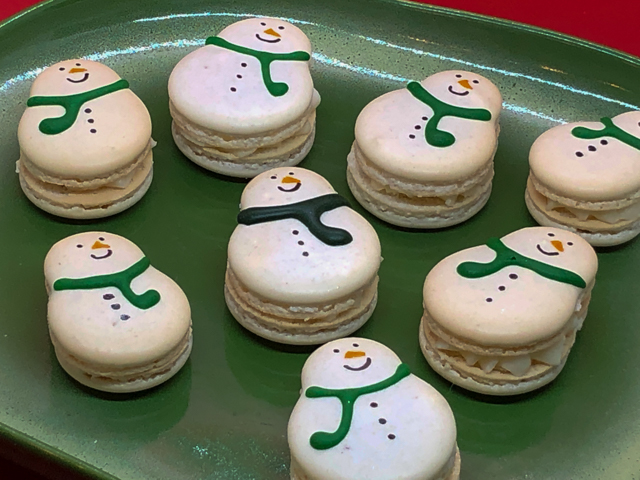
For the playful version, I piped the shells as two circles, baked them, and decorated the shells with Royal icing dyed orange and green, leftover from sugar cookies projects. The details of eyes, mouth, and buttons were made with a very fine tip edible marker. I am still not confident enough to pipe extremely fine lines with Royal icing, need more practice to get to that point.
Making white shells is a bit of a challenge, they tend to get some color in the oven in the final stages of baking. To help things a bit, you can add a tiny amount of purple food gel, that counteracts the yellow tone as it bakes. But you might get a little bit of browning anyway. That’s where the Diamond dust comes nicely into play. That stuff is amazing.
ONE YEAR AGO: Episode 6, Cookies in The Great American Baking Show
TWO YEARS AGO: Brazilian Chicken and Heart of Palm Pie
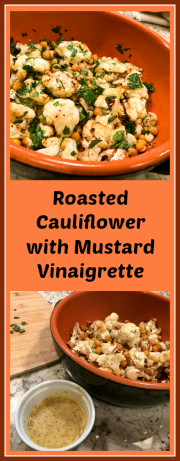
THREE YEARS AGO: Roasted Butternut Squash with Walnuts and Tahini Sauce
FOUR YEARS AGO: The Complicit Conspiracy of Alcohol
FIVE YEARS AGO: Candy Cane Cookies
SIX YEARS AGO: Macarons: Much better with a friend
SEVEN YEARS AGO: Our Mexican Holiday Dinner
EIGHT YEARS AGO: The Ultimate Cranberry Sauce
NINE YEARS AGO: Edamame Dip
TEN YEARS AGO: Gougeres
ELEVEN YEARS AGO: Beef Wellington on a Special Night