SPRINGERLE PAINTING 101

Some of my friends have been asking me to make a little video on Springerle painting. So I finally did one, using a stand for my cell phone and a little hyperventilation. If you need a recipe for the dough, check my recent post on the subject with a click here. All luster dust I use for the cookies are from ohsugarart.com.

I hope the video gives you a general idea of the whole process. I used a small, simple cookie to demonstrate the technique, but of course the exact same approach is used for larger cookies. The colors dry very quickly and you can move from one to the next without any need to wait, which is not the case with Royal Icing, unless you are doing wet-on-wet. When I am painting a series of cookies, I like to pick one color and use it on several of them, clean the brush and change to another color. That streamlines the whole thing.

Most of my molds come from KitchenVixenMolds, Gingerhaus, and TexturraWorkshop.

ONE YEAR AGO: Mincemeat Pies, when the third time is a charm

TWO YEARS AGO: Shibari Bread]

THREE YEARS AGO: Incredibly Simple Times Four – January 2018 

FOUR YEARS AGO: Two Salads and a Blog Award!

FIVE YEARS AGO: When Three is Better than Two

SIX YEARS AGO: Somebody Stop Me!

SEVEN YEARS AGO: Zucchini Pasta with Cilantro-Cashew Pesto

EIGHT YEARS AGO: Bran Muffins, Take Two

NINE YEARS AGO: Brown Butter Chocolate Chip Cookies

TEN YEARS AGO: Mogo Mojo

ELEVEN YEARS AGO: Slow-Roasted Chicken Thighs: an Ice-Breaker

COOKIES FOR THE HOLIDAYS: SPRINGERLE

Springerle cookies have been around for more than 700 years, and just that thought brings me a smile. It fascinates me that after hundreds of years we still talk about them and so many bakers – particularly in Europe – preserve the tradition by baking batches and batches during the holiday season. The name translates from German as “little jumpers”. Some say that indicates the way they seem to jump in the oven when they bake. Others believe that in the beginning the images imprinted on the cookies showed men on horses, like little jumpers. We’ll probably never know for sure, but what we do know is that they are flavored with anise, leavened with a special ingredient (ammonium carbonate, aka Hartshorn), and the dough takes a large amount of eggs beaten for a long time. Back in the 1300’s, a baker not only had to make the cookies, but also carve the wooden molds they were shaped in. The reputation of a baker would rest not only on the cookies themselves, but in the complexity and beauty of the mold he had produced. Absolutely amazing. Disclaimer: I did not carve my own molds. Please don’t judge.

SPRINGERLE COOKIES
(scaled down from House on the Hill)

1/4 teaspoon baker’s ammonia (Hartshorn)
1 tablespoons milk
3 large eggs, room temperature
360g powdered sugar
57g (1/4 cup) unsalted butter, softened but not melted
1/4 teaspoon salt
1/4 teaspoon of anise oil
454g sifted cake flour (I used Softasilk)
grated rind of orange

to paint the cookies (optional):
powder luster (mine are from Oh Sweet Art)
vodka or lemon extract

Make the cookies: Dissolve baker’s ammonia in milk and set aside (avoid the temptation to take a sniff, you will regret it). Beat eggs until very thick, this will take from 10 to 15 minutes. Slowly beat in the powdered sugar, then the softened butter. Add the the mixture of baker’s ammonia and milk, salt, anise oil and orange zest.

Gradually beat in as much flour as you can with the mixer, then stir in the remainder of the flour to make a stiff dough. Turn onto floured surface and knead in enough flour to make a good print without sticking. Refrigerate for one hour, but keep in mind the dough can be refrigerate the dough for up to 3 days.

On a floured surface, roll dough depending on the depth of the carving in the cookie press you are using. Shallow carvings will need to be thinner while deeper carvings will need to be thicker. Flour your cookie mold for each and every pressing. Press the mold firmly and straight down into the dough, then lift, cut with the cookie cutter of your choice, and place the formed cookie onto a flat surface to dry.

Do not cover the cookies while they dry. The goal of drying is to set the design. Let the cookies dry at least for 24 hours. It is better to leave them alone for a couple of days, so the design will be better retained during baking.

On baking day, heat the oven to 255F to 325F (depending on the size of your cookie and how white you like to have them), for 10 to 15 minutes. Let the cookies cool and paint, if you so desire.

ENJOY!

to print the recipe, click here

Comments: I cannot lie to you, Springerle baking can be tricky. I only do it in December, because it is so deeply associated with this time of the year. In fact, it is quickly becoming a personal holiday tradition for me. First thing to keep in mind, you need the special leavening agent. It has a crystal, grainy structure and gives the cookie its unique texture. If you bake them with regular baking powder, you lose that component. Second, be patient. These cookies cannot be baked on the same day you shape them because the pattern needs to set by drying, sometimes it can take 3 days, depending on your environment. I never had to wait more than 48 hours.

most of my molds are from www.springerle.com

If they are not dry, when they go into the oven, the pattern will be quickly lost as the cookie expands. If they are fully dry but the oven a little too hot, they will form cracks and might even explode, like you can see on my first composite photo above. That brings me to my third advice: always, always, ALWAYS bake a test cookie. I normally place three, one large, one medium, one small, and see how they behave. The temperature that works best for me (for all cookie sizes, in fact) is 275F. It might be different for your oven.

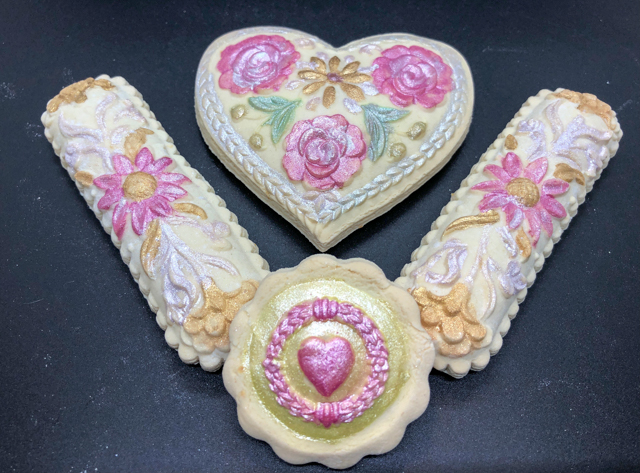
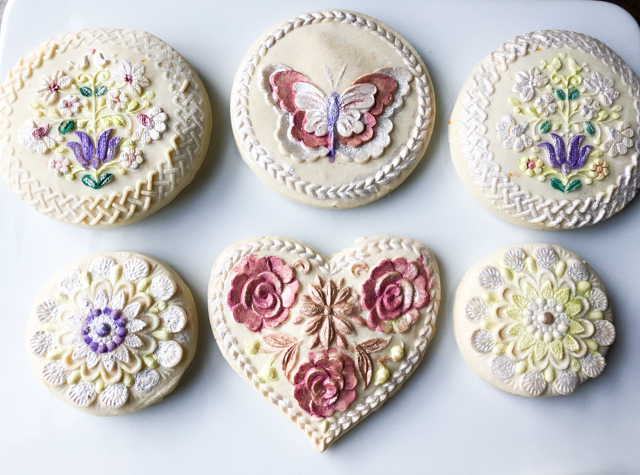
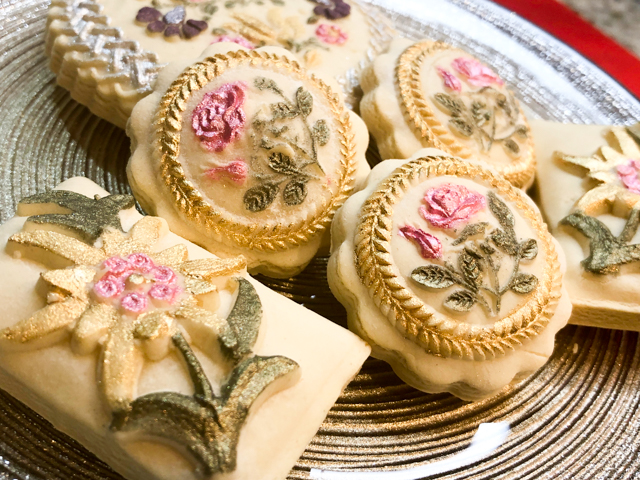
Painting them is the part I enjoy the most. It is a good idea to get very fine brushes so that you can highlight details. I think pastel tones, silver, white and gold are my favorites, particularly to decorate more classic designs.

But this year I pushed the boundaries a bit and used more dramatic colors in some of my cookies…

I also used more modern shapes, that would quite likely horrify bakers from old Swabia…

These were bought from Fun Food Tools (at etsy.com). They definitely take Springerle into a totally new direction… My apologies to the purists. Since they were already such a dramatic departure, I went crazy with the colors also…

As you know, the main flavor of these cookies is anise, which not everyone is fond of. For real anise lovers, you can go one step further and bake them over a layer of anise seeds. I like the flavor, but don’t care for the texture of the seeds at the bottom, so I always skip this step.

I hope you enjoyed this final post on Holiday Cookies. Springerle baking will definitely be part of my end of the year routine. As to the other 11 months, I will practice baking molded cookies using regular baking powder and different flavors. Stay tuned!

ONE YEAR AGO: Bread – Episode 2 of Great American Baking Show

TWO YEARS AGO: Apple and Sobacha Caramel Dome Cake

THREE YEARS AGO: Cocktail Spiced Nuts

FOUR YEARS AGO: How the Mighty Have Fallen

FIVE YEARS AGO: Festive Night at Central

SIX YEARS AGO: The Perfect Boiled Egg

SEVEN YEARS AGO: Light Rye Sourdough with Cumin and Orange

EIGHT YEARS AGO: Homemade Calziones

NINE YEARS AGO: Plum-Glazed Duck Breasts

TEN YEARS AGO: Holiday Double-Decker

ELEVEN YEARS AGO: New York Deli Rye

SPRINGERLE COOKIES


My love for macarons should be quite obvious, but there’s something about Springerle Cookies that speaks straight to my soul. These cookies, not unlike macarons, have been around for centuries. In terms of flavor, they are a lot more strict, as there is no filling to play with. But they are so elegant, so magical, and the anise oil makes them unique. Oddly enough I don’t like licorice but find the anise flavor of Springerle quite enticing. I share with you one authentic recipe for these cookies that is a bit of a labor of love, and also time-consuming, as the cookies have to dry for a couple of days before baking.  But, if you want to just use those beautiful molds in a simpler recipe, I’ll share my favorite also. A special thank you to my friend Margie, who sent me two beautiful molds, and perhaps not intentionally, turned me into a Springerle-mold-addict.

SPRINGERLE COOKIES
(traditional recipe, based on The House on the Hill)

for the cookies:
1/4 teaspoon baker’s ammonia (Hartshorn)
1 tablespoons milk
3 large eggs, room temperature
360g powdered sugar
57g (1/4 cup) unsalted butter, softened but not melted
1/4 teaspoon salt
1/4 teaspoon of anise oil
454g sifted cake flour (I used Softasilk)
grated rind of orange

for the glaze (optional):
240g powdered sugar
3 tablespoons water
1/2 teaspoon flavoring of your choice (I used vanilla)
pearl dust colors and lemon extract

Make the cookies: Dissolve baker’s ammonia in milk and set aside (avoid the temptation to take a sniff, you will regret it). Beat eggs until very thick, this will take from 10 to 15 minutes.  Slowly beat in the powdered sugar, then the softened butter. Add the the mixture of baker’s ammonia and milk,  salt, anise oil and orange zest.

Gradually beat in as much flour as you can with the mixer, then stir in the remainder of the flour to make a stiff dough. Turn onto floured surface and knead in enough flour to make a good print without sticking. Refrigerate for one hour, but keep in mind the dough can be refrigerate the dough for up to 3 days.

On a floured surface, roll dough depending on the depth of the carving in the cookie press you are using. Shallow carvings will need to be thinner while deeper carvings will need to be thicker. Flour your cookie mold for each and every pressing. Press the mold firmly and straight down into the dough, then lift, cut with the cookie cutter of your choice, and place the formed cookie onto a flat surface to dry.

Do not cover the cookies while they dry. The goal of drying is to set the design. Let the cookies dry at least for 24 hours. It is better to leave them alone for a couple of days, so the design will be better retained during baking.

On baking day, heat the oven to 255F to 325F (depending on the size of your cookie and how white you like to have them), for 10 to 15 minutes. Let the cookies cool and glaze or paint, if you so desire.

Make the optional glaze: Combine all ingredients and mix until well combined and smooth.
Add more water if necessary. Brush glaze on each cookie after baking. Paint with pearl dust alone or with the powder dissolved in a little lemon extract.

ENJOY!

to print the recipe, click here

Comments: The molds on the top left corner of the composite picture were a gift from Margie. Aren’t they gorgeous?  I love them!

 If you visit The House on the Hill  you can watch a very detailed video in which Connie, the author of the recipe, goes over all the minor details. Her recipe is for a really big batch, and I decided to make just half. I actually baked these back in December and took them to a departmental holiday party, but a full batch would be way too much. Keep in mind these cookies last forever, and although they can get a bit tough after a couple of weeks, the flavor keeps getting better (that’s what I heard).

Now, if you prefer to make a quicker version, and take it in different directions as far as flavor is concerned, I highly recommend King Arthur’s recipe.

SHORTBREAD SPRINGERLE-LIKE COOKIES
(slightly modified from King Arthur Flour)

227g butter, room temperature
106g brown sugar
2 teaspoons granulated sugar
1/2 teaspoon salt
1 large egg
1 teaspoon vanilla extract
1/8 tsp anise oil
360g all-purpose flour

Beat together the butter, sugars, and salt until light and creamy. Beat in the egg and vanilla, and fold in the flour. Divide the dough in half, shape both halves as disks, wrap in plastic, and refrigerate for at least 1 hour.

Heat the oven to 350F. Line with parchment) two baking sheets.

Working with one disk at a time, flour your work surface and roll the dough 1/4″ thick. To shape cookies using a springerle mold: Brush a very light coating of flour onto the dough and your springerle mold. Press the mold firmly into the dough, then remove and cut around the design with a cookie cutter.

Transfer the cut cookies to the prepared baking sheets. Freeze for 10 minutes. Bake the cookies for 10 to 12 minutes, until lightly golden around the edges. Remove them from the oven, and allow them to cool before painting, if so desired.

ENJOY!

to print the recipe, click here

Comments: It takes a little bit of patience to get these cookies right, and each mold is a slightly different universe. You need to get the thickness of the dough and the pressure you use with the mold just right, so that the full pattern is transferred.  The main thing to keep in mind is that you need a cookie recipe with a very small amount of leavening agent, or even without any at all. Be careful with baking powder, and make sure you use a recipe that someone had success with before. You can use the basic recipe from King Arthur and change the flavors, as they suggest in the site. I really like using Fiori di Sicilia, and added it to the heart-shaped batch.

I hope you’ll consider baking a batch of these cookies during the upcoming holiday season. I am sharing the recipes early enough, so you can browse the many wonderful sites that sell Springerle molds (like this one) and keep me company in my latest addiction.

ONE YEAR AGO: Chickpeas and Zucchini with Tahini Sauce

TWO YEAR AGO: Mokonut’s Rye Cranberry Chocolate Chip Cookies

THREE YEARS AGO: Incredibly Simple Times Four

FOUR YEARS AGO: Going naked, and my husband loved it

FIVE YEARS AGO: Cream Cheese Mini-Pancakes with Smoked Salmon

SIX YEARS AGO:  Star-Shaped Chocolate Brioche Bread

SEVEN YEARS AGO: Blueberry-Banana Bread 

EIGHT YEARS AGO: Into the Light Again

NINE YEARS AGO: Five Grain Sourdough Bread

TEN YEARS AGO: The Nano-Kitchen

ELEVEN YEARS AGO: Kaiser Rolls