YOGURT TART

Not too long ago I was browsing the internet searching for entremet cakes, and stumbled on a site that was new to me: Cooking Me Softly, hosted by Arianna, a chef from Italy. All I can say is that I had a very hard time moving away from the computer. Her concoctions are things of complete beauty, her flavor combinations unique and her presentation style superb. Not only she shares detailed recipes, but also short videos with the crucial stages of preparation. Basically, her site is culinary gold for those into patisserie. She blogs in Italian, but I can follow most of it closely enough to get the important points. Or so I hope. I fell in love with her Yogurt Tart the moment I first saw it, and could not wait to try and make it. The use of semi-spheres of mousse on top of the tart? Genius.

YOGURT TART
(slightly modified from Cooking Me Softly)

for Sablé Breton:
80 g egg yolks
100 g granulated sugar
125 g very soft butter
125 g pastry flour
2 g salt
5 g baking powder
grated lemon peel (1 lemon)
MyCryo cocoa butter (optional)

for white chocolate ganache:
340 g Lindt white chocolate
85 g heavy cream

for yogurt mousse:
120 g full-fat Greek yogurt
30 g granulated sugar
15 g of lemon juice, sieved
240 g fresh cream
6 g gelatin, 200 bloom
18 g cold water for gelatine hydration

for decoration:
small meringues
Gold dust
sprinkles of choice

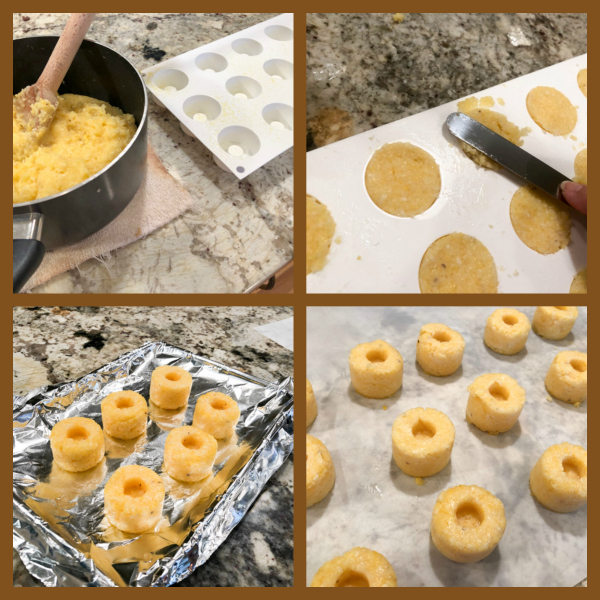
Make the cookie base. In a Kitchen Aid type mixer, whisk the yolks with sugar and lemon zest until pale. Replace the whisk with the leaf beater, add the sifted flour with baking powder, salt, and then the butter. Mix well until creamy.  Place in a piece of plastic wrap, form as a disc and refrigerate for 8 hours.

Roll between two sheets of parchment paper to 1 mm thickness an put in the fridge for another hour, as you heat the oven to 350 F.

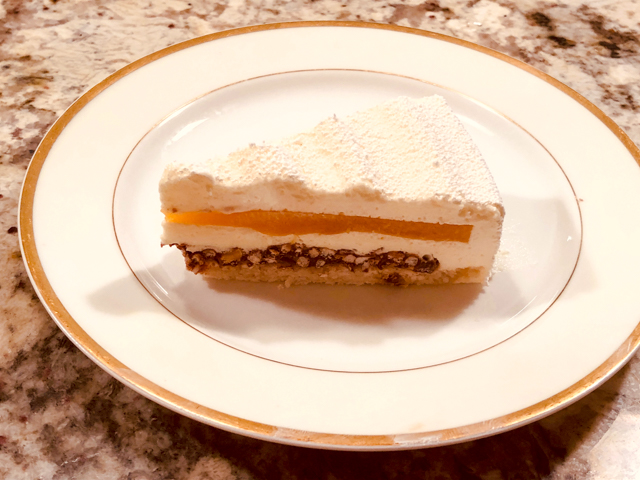
Cut a disc of dough with a 20 cm ring (7 + 3/4 in), and bake inside the ring for 20 to 25 minutes. Remove from the oven, and while still hot sprinkle MyCryo over the surface. Allow it to cool completely. Before continuing with assembling, place the base inside the ring and add a band of acetate around it so that the ganache will be poured nicely on top. I like to use a ring that is adjustable, so that I can tighten it better around the base. Often the base shrinks a little during baking.

Make the chocolate ganache. Melt the chocolate gently in the microwave or in a double boiler. Heat the cream to simmering (about 175 F). Add to the chocolate in three additions, whisking gently to fully incorporate the chocolate and the cream.  Reserve. Cool to about 90F before pouring into the cool base. Place in the fridge to cool completely and then in the freezer overnight.

Make the yogurt mousse. Hydrate the gelatin in the water indicated in the recipe. Heat part of the yogurt with the sugar to about 140 F.  Melt the gelatin heating gently for a few seconds in the microwave (do not boil it). Add the melted gelatin to the warm yogurt/sugar mixture.

Add the lemon juice, the remaining cold yogurt and mix. Whip the cream to the consistency of melted ice cream, and fold gently into the yogurt base. Spoon the mousse into a piping bag (no need for a piping tip) and fill half-sphere molds (3.4 and 5 cm in diameter), smoothing the surface well. Put in the fridge to cool and then freeze overnight.

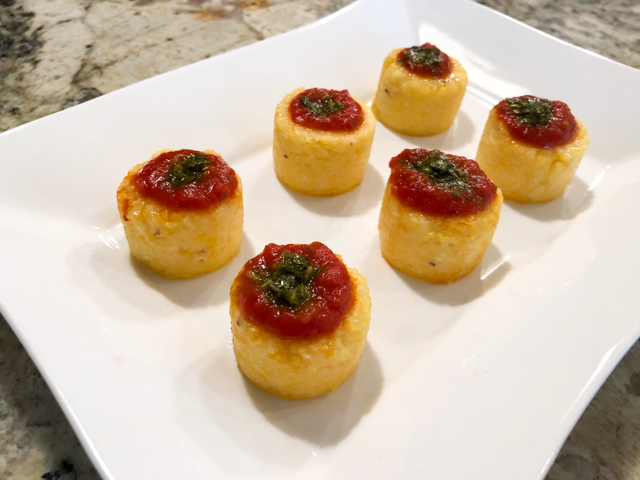
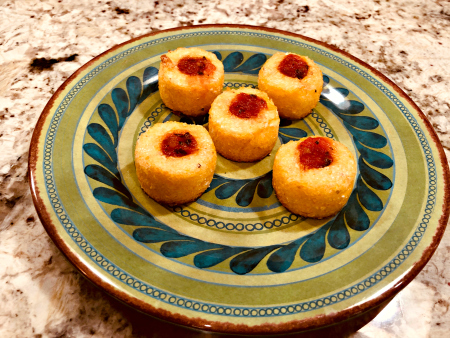
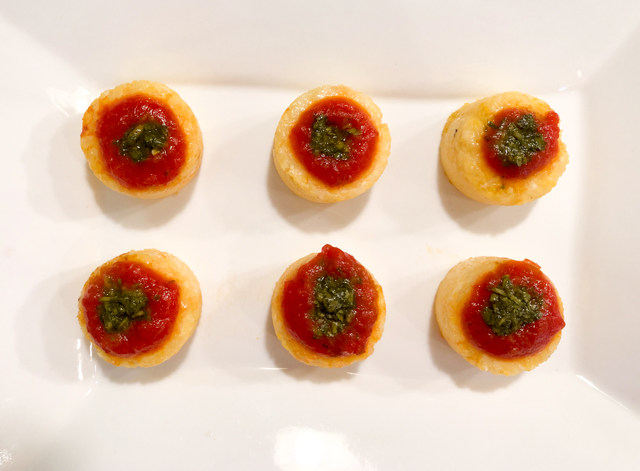
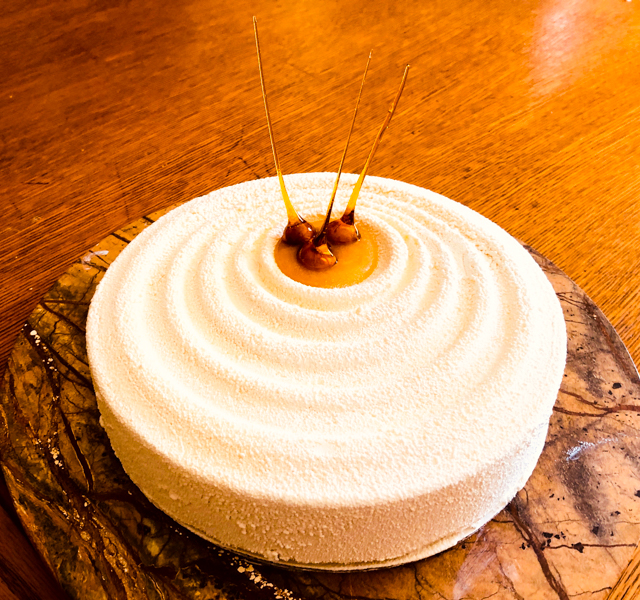
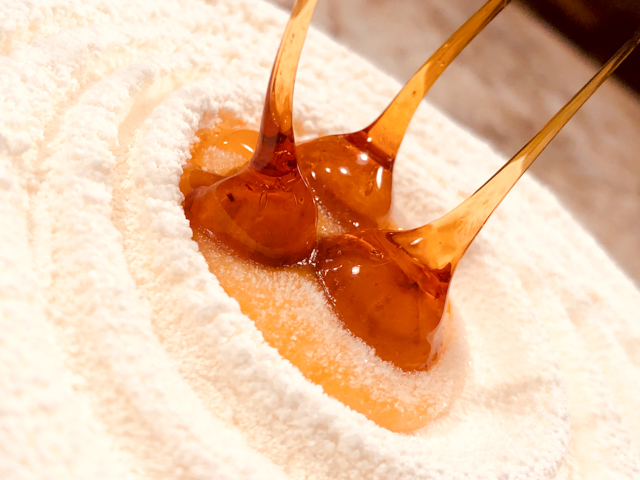
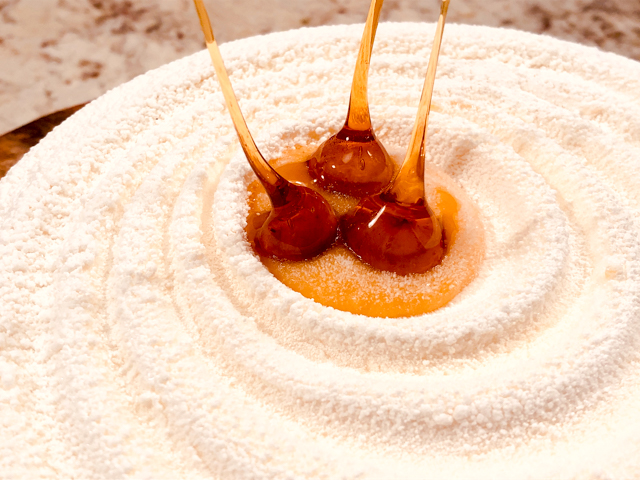
Assemble the tart. Remove the base with chocolate ganache from the freezer, place in a serving tray and remove the acetate. Arrange the mousse spheres of different diameters over the ganache. Decorate with mini-meringues plain and painted with gold spray. Put in the fridge for about 6 hours to allow the ganache to soften and the mousse to thaw.

ENJOY!

to print the recipe, click here

Comments: I truly enjoy making desserts that involve multiple components particularly because they can be made in advance and wait in the freezer or fridge. Finishing the dessert then is easy and fun (assuming it all worked well in the previous steps). For this preparation, Arianna’s video was very helpful, as the Sable Biscuit is quite a bit softer than I anticipated. Watching how she handled it was key to succeed. Also make sure you make the dough the day before you intend to bake it, it needs those 8 hours in the fridge. Another important point is the white chocolate ganache: you need it to be firm enough to slice and hold its shape. Arianna uses a specific brand of chocolate that would be a bit of a hassle for me to find. Using her proportions with the Lindt bar, the ganache ended up way too loose, so I made another batch using a 4:1 ratio chocolate to cream. You can probably get by with a 3.5:1, but not much less than that.

My schedule went like this: I made the biscuit dough on a Friday evening, baked it Saturday morning and made the mini-meringues, the chocolate ganache and the mousse on Saturday afternoon. Once the ganache cooled enough I spread it over the biscuit base and froze it. Sunday afternoon I un-molded the frozen mousse spheres, sprayed some of the meringues with edible gold color, and assembled the tart.

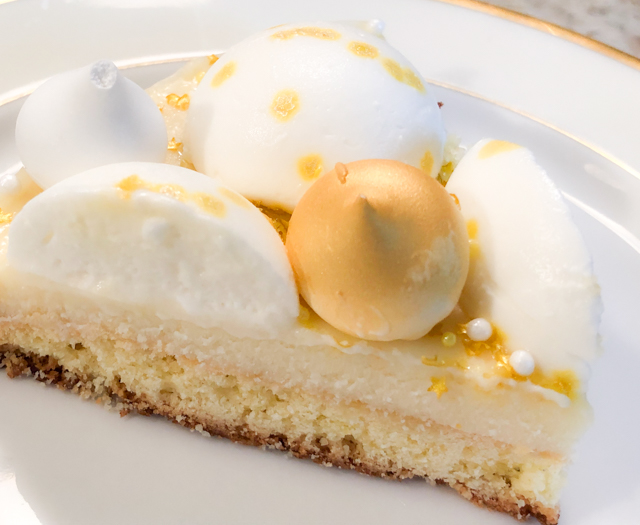
The only issue I had was the golden stars used for decoration. The ones in contact with the ganache held their shape well, but the yogurt mousse (probably due to its acidity) melted the stars within an hour or so.

The flavors were quite amazing, as the sweetness of the white chocolate ganache stood well to the bright flavor of the yogurt mousse. The biscuit base had excellent texture, even if I overbaked it slightly. It was hard to see it inside the ring, next time I’ll be more careful.

Arianna has a cookbook published online and I could not resist getting my copy. It is absolutely amazing, you can get it with a click here.  The name is just too clever: Aria di Dolci. Loved it! Keep in mind it is in Italian, so you need to have some level of understanding of the language.


ONE YEAR AGO: Grilled Lamb-Stuffed Pita Bread

TWO YEARS AGO: Elderflower Macarons

THREE YEARS AGO: A Duet of Sorbets

FOUR YEARS AGO: Sobering Peach Sorbet

FIVE YEARS AGO: Spiralizer Fun

SIX YEARS AGO: Beer-Marinated Grilled Skirt Steak

SEVEN YEARS AGO:  Secret Recipe Club: Corn Chowda

EIGHT YEARS AGO: Page-A-Day Calendar (Pits and Chief 5 minutes of fame…)

NINE YEARS AGO: Home Sweet Home (our beloved Pits in one of his last photos)

TEN YEARS AGO: Marbled Rye

POLENTA BITES WITH SPICY TOMATO SAUCE

I like to think I’m a person who resists temptations. You know, self-control, determination, that sort of thing. It all goes reasonably well until I am confronted with a new, sexy silicone mold. Or a pair of colorful earrings. But that’s about it. Ok, maybe nail polish is hard to say no to at times. I swear, that’s it now. Back to cooking. Silikomart has been my obsession for a very long time. Today I share with you a cute appetizer idea using one of their molds: Sushi. Adorable. Can you make it without the mold? Absolutely!  But… if you also suffer from Silikomart-weakness, maybe you should bring one home…

POLENTA BITES WITH SPICY TOMATO SAUCE
(from the Bewitching Kitchen)

200 g corn flour (for polenta, quick-cooking or regular)
500 ml water
salt to taste
1 T butter
1 cup tomato sauce (store bought or home made)

for the spicy cilantro sauce (makes more than you’ll need):
1 cup cilantro leaves
1/4 cup lime juice
2 tsp Asian fish sauce
1/8 cup rice vinegar
2 tsp sugar
1 tsp Sriracha sauce 

Bring salted water to a boil in a saucepan. Pour the corn flour slowly constantly stirring with a spoon. Cook according to the brand of corn flour you are using. I used regular polenta, and it took about 30 minutes to get fully smooth. Once the polenta is cooked, stir in the butter.

Make the spicy cilantro component. Place the cilantro leaves in a food processor and whirl until finely minced. Add the remaining ingredients and process until well combined. Reserve. Leftovers keep a few days in the fridge. 

Pour the polenta into the Sushi Maki silicone moulds and level with a spatula. Let rest until solidified, then unmold them, spoon the tomato sauce in the small cavity, and a touch of spicy cilantro dressing.

Serve warm or cold.

ENJOY!

to print the recipe, click here

Comments: These polenta bites can stand very well with just the tomato sauce and if you like, a bit of cheese on top, a quick run under the broiler. It turns out I had made a mahi-mahi sous-vide just a couple of days before, and the spicy cilantro sauce was part of that recipe. I decided to add just a little touch to top the tomato sauce and it all worked surprisingly well, so I incorporated in this post. I realize that I went overboard with the sauce and hid the nice little hole on the top of the mold. Oh, well… no major harm done. But I exercised a little more restraint on my second batch…

In this case, I finished them with a brushing of olive oil and a visit to the air-fryer for about 10 minutes at 390 F. Delicious texture, probably even better if serving tem as finger food. If you don’t have an air-fryer, just place them in a 450 F oven until golden brown.  Then top with some warm sauce, and serve.

You can use mini-muffin tins to make the exact same type of preparation, but there’s something about the Sushi mold that I find pretty irresistible. I got mine on ebay last year, but The Place that Sells it All carries it. Obviously.

ONE YEAR AGO: Vague Mousse Cake

TWO YEARS AGO: Cottage Loaf, my very own technical challenge

THREE YEARS AGO: Pork Ribs: Sticky, Spicy and Awesome

FOUR YEARS AGO: Sobering Peach Sorbet

FIVE YEARS AGO: Buttermilk-Blueberry Breakfast Cake

SIX YEARS AGO: Silky Cauliflower Puree with Almond Milk


NINE YEARS AGO:
 Popeye-Pleasing Salad
.
TEN YEARS AGO: Summer’s Finale


MANGO HAZELNUT ENTREMET CAKE

It’s been a while since I made what is probably my favorite type of dessert. As far as entremet goes, this is a reasonably simple example, with a single insert in the center (mango gelée) and only two components in the base, a hazelnut dacquoise and a crunchy chocolate layer. I used the Silikomart Vague mold, I love its design and how easy it is to remove the frozen cake for final decoration, which involved chocolate spray and a few caramel-coated hazelnuts.

MANGO HAZELNUT ENTREMET CAKE
(from the Bewitching Kitchen)

For the hazelnut dacquoise:
75 g egg whites, at room temperature
50 g sugar
70 g hazelnut flour (I processed toasted hazelnuts)
50 g sugar
20 g all-purpose flour

Heat oven to 350F.

Beat the egg whites (with whisk attachment) until you can see a trail forming as the beater moves through them. Add the sugar slowly and beat until firm peaks form, but do not overbeat or it will get grainy (and ruined).  Add the hazelnut flour mixed with remaining 50 g of sugar and the flour, folding delicately. Pour or pipe the mixture in a circle about 8-in diameter over parchment paper. Cook for about 10 minutes, let it cool on a rack, while still a bit warm cut a circle of the exact dimension of the mold you’ll use to make the dessert (if using Vague mold, that will be 20 cm or 7 and 3/4 in).

For the mango insert:
150 g mango puree (I used frozen mango chunks)
25 g sugar
5 g gelatin in sheets (230 Bloom)

Soak the gelatine cut into pieces in cold water for 10 minutes.

Bring the puree together with the sugar to 120F, add the drained gelatin, mix and pour in a 6-inch ring, covered on the bottom with film and placed on a tray. Remove a small amount (about 2 tablespoons) for the decoration on top.

for the chocolate-crisp:
113 g Lindt milk chocolate with hazelnuts
10 g pistachio paste (or add 2 tsp coconut oil)
10 g puffed quinoa (or rice crisps cereal, or crumbled corn flakes)

Toast the puffed quinoa in a 350F oven for a few minutes, until fragrant. Melt the chocolate gently and mix it with the toasted quinoa and the pistachio paste. Spread as a thin circle on parchment paper, with dimensions a bit bigger than the bottom of the dessert mold.  Once it cools slightly,  cut it to fit exactly on top of the hazelnut dacquoise (20cm or 7 and 3/4 in).

For the white chocolate mousse:
175 g whole milk
35 g sugar
70 g egg yolks
7 g gelatin in sheets
175 g white chocolate
1/4 tsp vanilla paste
350 g cream

Soak the gelatin in cold water for 10 minutes. Break up the chocolate and place it in a bowl with the vanilla paste.

Bring the milk to a simmer in a saucepan. Whisk the egg yolks and sugar by hand in a bowl, pour over a bit of the simmering milk to temper it, then transfer the whole mixture to the pan and bring the temperature to 180F. Remove from heat, add the squeezed gelatin, pour into the bowl with the chocolate and emulsify using an immersion blender or a whisk. Make sure it is all very well combined and smooth. Allow it to cool.

Meanwhile whip the heavy cream to a consistency of melted ice cream. When the custard is around body temperature or just a bit warmer, fold the cream into it. Pour about 1/3 of the mixture into the Vague mold , place the frozen mango insert, pour chocolate mousse almost to the top, allowing just enough room for the crunchy chocolate layer and the dacquoise.  Add them, and fill any gaps on the sides with mousse. Wrap with plastic and freeze overnight.

for the chocolate spray:
300 g white chocolate
200 g cocoa butter

Melt together and place in sprayer at 90 F (I use a normal paint sprayer dedicated to chocolate only).

Turn out the frozen cake and spray immediately with a light coating of white chocolate suspension.  Melt the reserved mango gelatin very gently, and spoon some in the center of the mold. Keep in the fridge for at least 4 hours before serving. Decorate with caramel-coated hazelnuts.

ENJOY!

to print the recipe, click here

Comments: I am very happy with the flavors and textures of this baby. The tricky part of this type of dessert is assembling it, because it’s a process that is a bit “in the dark”, so to speak. With a regular layered cake, you can visualize the layers well, because you either bake them individually or cut slices from a bigger cake. As the cake is assembled, it is also easier to judge how much filling to add so that the layers end up as uniform as you want them to be. In mousse cakes like this one, it becomes a bit of a guessing game. For instance, how much to allow the insert to sink in, how to make sure it is properly leveled,  how to prevent large air bubbles to form, or to make sure the sides are smooth.  Small details can go wrong, but you may not realize until unmolding the frozen cake next day. Talk about cake-anxiety…  😉

You can see that part of the mango insert got a little wavy. That happened because when I first made the insert and set it in the fridge overnight, the pan got a bit tilted and I had to melt the layer again and re-freeze it, not an ideal situation. Lesson learned.  It is crucial to have space in your freezer that allows all components to lay flat and absolutely leveled.

The most fun part? Making the hazelnut with the pointy caramel bits. I followed the method described in Martha Stewart’s site, and it worked like a charm. My only advice is that you make more hazelnuts than you need. Some end up cracking as you stick the skewer, so it’s better to start with more. Also, some might roll a bit as the caramel drips compromising the shape of the drip. It is very important to let the caramel rest before coating the hazelnuts, but once it reaches the right viscosity, you must work fast. It is possible to re-warm the caramel briefly to continue using it, but it’s a bit of a hassle. I prefer to hit that magical point and work with it right away.

Finally, don’t let the lack of a Silikomart mold stop you from making this dessert. A simple ring or springform pan will work, as long as you have a second ring with smaller diameter to form the insert. And the velvet coating is also optional (although you can also buy a spray can with the suspension ready to use; be ready for sticker shock!). The surface is very smooth to start with (see the large photo in the composite picture), so you could leave it as it is, or melt some white chocolate and drizzle it all over the top, in a Pollock-manner.  You could dye the chocolate orange and then add the hazelnuts here and there.

ONE YEAR AGO: Lebanese Lentil Salad and a Cookbook Review

TWO YEARS AGO: Cottage Loaf

THREE YEARS AGO: Sourdough Loaf with Cranberries and Walnuts

FOUR YEAR AGO: Sichuan Pork Stir-Fry in Garlic Sauce

FIVE YEARS AGO: Our Green Trip to Colorado

SIX YEARS AGO: Ditalini Pasta Salad

SEVEN YEARS AGO: Celebrate Wednesday with a Thai Seafood Curry

EIGHT YEARS AGO:  Post-workout Breakfast

NINE YEARS AGO: Semolina Barbecue Buns

TEN YEARS AGO: Lavash Crackers


BRITISH BAPS, A TECHNICAL CHALLENGE

Baps. Very popular in the UK, these are what on this side of the pond we know as rolls or buns. When I was in London, I realized that breakfast baps are all the rage, you slice one of these babies, and add the usual suspects: bacon & eggs, sausage, ham & cheese, or whatever you crave early in the morning. I don’t eat breakfast, but had to try one of these classics at lunch during my visit. Soft, delicate, quite delicious. And as you can see from this post, pretty simple to make.  I modified a bit a recipe from Paul Hollywood to add a touch of whole wheat. Just because. These were the technical challenge last week in the Great British Bake Off. Some of the contestants committed the shameful sins of underbaking or underproofing, but most did pretty good. They also had to make a veggie burger pattie to go with the buns, so the challenge also involved sizing baps and filling appropriately. That is not as easy as one might think, as the patties had to be made while the dough was proofing. Great fun was had by all. Or almost all…

BRITISH BAPS
(adapted from Easy Online Baking Lessons)

350 g bread flour
25 g whole-wheat flour
7 g salt
7 g fast-acting yeast
30 g sugar
30 g butter
250 mL water (I used a little less)

Add all ingredients (but hold back a bit of the water, maybe 25 mL or so) to the bowl of a Kitchen Aid type mixer and knead on low-speed for about 8 minutes. If needed, add the rest of the water.

Place in a large oiled bowl and ferment at room temperature for about 90 minutes.

Punch the dough down (delicately) and divide it in 8 equal portions (about 85 g each). Roll each as a tight little bun. Place each roll on a mat lightly coated with flour and flatten it in one direction with a rolling pin, making it into an oval shape. Turn it 90 degrees and do the same. You will end up with a round, more flat type of roll.  Do the same for all other buns, then place at room temperature covered with a cloth for 30 to 45 minutes, while you heat the oven to 425 F.

Coat the buns lightly with flour, bake for 12 to 15 minutes. Remove to a rack to cool completely.

ENJOY!

to print the recipe, click here

Comments: Even if you are not comfortable baking bread, I think this would be a very nice recipe to try. Yes, it was a technical in the GBBO, but a lot of the complexity in the show has to do with timing (pretty tight) and the preparation of the veggie burger component plus toppings as the dough rises. If you just tackle the bread and don’ worry about a timed deadline, it’s quite doable.

The bread has a tight but moist crumb, if made with white flour only will be even softer, but I like the more assertive taste that the whole-wheat offers. They freeze well, and defrost quickly, so it’s the perfect type of bread to have around.

ONE YEAR AGO: Japanese-Style Cupcakes with Cherry Blossom Icing

TWO YEARS AGO: Quick Weeknight Soups

THREE YEARS AGO: Sourdough Loaf with Cranberries and Walnuts

FOUR YEARS AGO: Sichuan Pork Stir-Fry in Garlic Sauce

FIVE YEARS AGO: Our Green Trip to Colorado

SIX YEARS AGO: Ditalini Pasta Salad

SEVEN YEARS AGO: Celebrate Wednesday with a Thai Seafood Curry

EIGHT YEARS AGO:  Post-workout Breakfast

NINE YEARS AGO: Semolina Barbecue Buns

TEN YEARS AGO: Lavash Crackers


CHICKPEAS AND ZUCCHINI WITH TAHINI SAUCE

This side dish was the marriage of two regular appearances in our kitchen: quickly sauteed zucchini and air-fried chickpeas. The union was celebrated with a nice amount of tahini sauce.  I tell you, this worked very very well. If you don’t have an air-fryer, roast the chickpeas in a 400-420F oven. It takes longer and the texture won’t be quite as crunchy, but it will work just fine.  I intended to sprinkle pomegranate seeds right before serving for a little extra bling, but of course that day the grocery store had ran out of them. Best laid plans.

LEMONY ZUCCHINI AND CHICKPEAS WITH TAHINI-SAUCE
(from the Bewitching Kitchen)

for the tahini-sauce:
1/3 cup plain full-fat yogurt
1/8 cup tahini paste
juice and zest of 1 lemon
2 tsp honey
salt to taste
water if needed
for the veggies:

3 small zucchini, sliced in half lengthwise, then thinly sliced
1 tablespoon olive oil
salt and pepper
juice of 1 lemon
1 can chickpeas, well drained and dried
olive oil to coat chickpeas
1 tsp smoked paprika
1/2 tsp cumin
salt to taste
fresh parsley
(pomegranate seeds if you have them)

Make the tahini sauce: whisk all ingredients in a small bowl. Reserve.

Make the air-fried chickpeas.  Coat them lightly with olive oil, add the spices and place them in the air-frier set at the highest temperature (usually 390F) for about 12 minutes. They should be crunchy and golden brown.  Reserve.

Heat the olive oil in a 12-inch non-stick skillet, add the zucchini covering the whole surface, season with salt and pepper. Let the slices cook undisturbed until the side in contact with the pan is well seared. Move the slices around and cook until done. Sprinkle lemon juice all over, cover the pan for a minute, remove the lid, add the chickpeas and parsley.  Serve immediately with the tahini sauce on top.

ENJOY!

to print the recipe, click here

Comments: When I was a child, teenager or even young adult, you could not bribe me to eat chickpeas, which in Portuguese have the non-appealing name of “grão-de-bico”. It translates – loosely – as “the grain of the beak”. They can also be called “ervilha-de-galinha”, which ends up as “chicken’s green peas”. Yeah, very sexy. How could anyone consider that a delicacy? Anyway, now I crave it. Go figure.

Leftovers were delicious a couple of days later. In fact, I found out that air-fried chickpeas, when microwaved just enough to make them warm, get a nice texture, a bit more creamy inside. My lunch coupled this tasty concoction with a fried egg on top.  I was smiling the whole afternoon.

ONE YEAR AGO: Mokonut’s Rye Cranberry Chocolate Chip Cookies

TWO YEARS AGO: Incredibly Simple Times Four

THREE YEARS AGO: Going naked, and my husband loved it

FOUR YEARS AGO: Cream Cheese Mini-Pancakes with Smoked Salmon

FIVE YEARS AGO:  Star-Shaped Chocolate Brioche Bread

SIX YEARS AGO: Blueberry-Banana Bread 

SEVEN YEARS AGO: Into the Light Again

EIGHT YEARS AGO: Five Grain Sourdough Bread

NINE YEARS AGO: The Nano-Kitchen

TEN YEARS AGO: Kaiser Rolls