The filling for these French macs started with a pâte noisette concoction, which was suggested to me by my friend Jennifer, Pâtissière Extraordinaire. You can see a detailed description (in French) with a jump here. I used part of this amazing paste in a cake (stay tuned) and what was left metamorphosed into macaron filling. The mixture of pâte noisette with ganache is the most gastronomically sensual thing in the known universe. Too superlative for you? Try it. If you disagree, we can discuss the matter further, sharing a few macarons while we are at it…

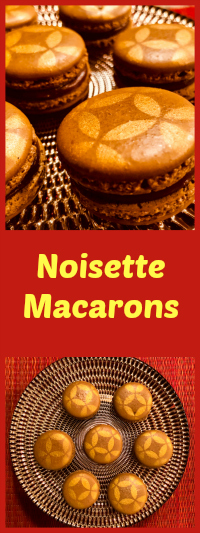
MACARONS WITH GANACHE NOISETTE
(from Bewitching Kitchen, inspired by this site)
for the pâte noisette (it makes more than you’ll need):
125 g hazelnuts, peeled
125 g almonds
160 g sugar
5 g water
for the ganache noisette:
100 g milk chocolate
160 g pâte noisette
140 g heavy cream
for the shells:
198 g powdered sugar
113 g almond meal
113 g egg whites at room temperature
a pinch of cream of tartar
100 g granulated sugar
3:1:1 brown, green and yellow food coloring
1/8 teaspoon vanilla paste
Make the pâte noisette. Start by placing water and sugar in a large saucepan. Heat up to 245 F. Then add the hazelnuts and almonds. Gradually, they will be covered with a white film. Cook until the sugar dissolves and caramelizes, stirring constantly. Be patient, it is going to take a little time. Pour the mixture on a sheet of parchment paper and let cool completely. Coarsely chop and add to a blender, the more powerful the better. In a Vitamix blender, in less than 5 minutes you should have a very smooth paste, which is what you want.
Make the ganache. Heat the heavy cream almost to boiling point. Add to the chocolate, cut in pieces. Wait a couple of minutes and stir to completely dissolve the chocolate. Let it cool for half an hour, add the pâte praline made as described. Keep in the fridge for at least a couple of hours to get into spreadable consistency. Reserve to fill macarons.
Make the shells. Place the egg whites and pinch of cream of tartar in the bowl of a stand mixer fitted with the whisk attachment. Make sure that the bowl and the whisk are impeccably clean. Starting on medium speed, whip the whites with the cream of tartar until they look like light foam. The whites should not appear liquid. The foam will be light and should not have any structure.
Slowly rain in the granulated sugar, trying to aim the stream between the whisk and the side of the bowl. Turn the speed up to medium-high. Continue to whip the meringue until it is soft and shiny. It should look like marshmallow creme. Add the gel color and the vanilla. Staying at medium-high speed, whip the egg whites until the mixture begins to dull and the lines of the whisk are visible on the surface of the meringue. Check the peak. It should be firm. Transfer the whites to a medium bowl.
Fold in the almond meal mixture in three increments. Paint the mixture halfway up the side of the bowl, using the flat side of a spatula. Scrape the mixture down to the center of the bowl. Repeat two or three times, then check to see if the mixture slides slowly down the side of the bowl. Put the mixture in a piping bag fitted with your tip of choice. Pipe on the prepared baking sheets.
Slam each sheet hard four to six times on the counter. Then fist bump each end of the sheet’s underside twice. Let the unbaked macarons dry until they look dull but not overly dry. Drying time depends on humidity. Ina dry climate, the macarons can dry in 15 to 20 minutes; in a humid climate, it can take 35 to 40 minutes.
While the macarons are drying, heat the oven to 300 F. Bake one sheet at a time on the middle rack. Check in 12 minutes. If the tops slide, then bake for 2 to 3 more minutes. The macarons should release without sticking. Check one or two. If they stick, put them back in the oven for 1 to 2 more minutes. Let the macaroons cool for 10 minutes before removing from the pan.
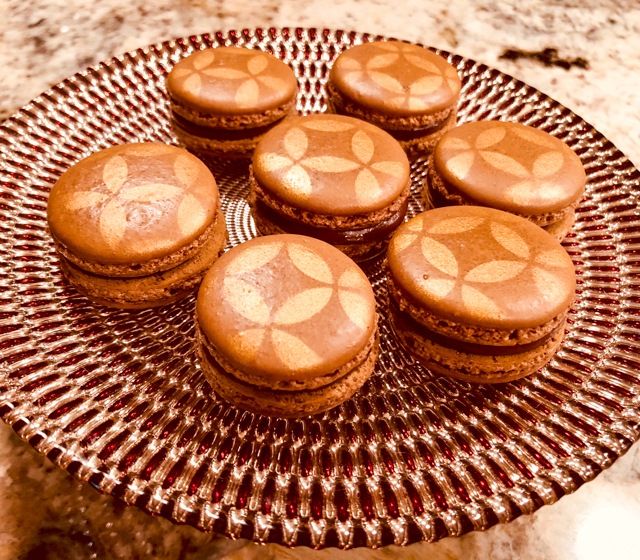
Use the air-brush and a stencil to decorate each shell. Pair them according to size and fill.
Filled macarons should stay overnight in the fridge before consumed. The texture is much better on the following day.
ENJOY!
to print the recipe, click here

Comments: The air-brusher. I got it with a special discount from Groupon, after a tip from macaron-obsessed folks from a Facebook group. I am in love. First, it is pretty small and very easy to use. They advise you to practice on a piece of parchment paper, I did so, but realized it was pretty much a no-brainer. It has three speeds of spraying, I used the lowest, it gave good coverage without getting out of control. I mean, who wants to have a dalmatian with the ears sprayed gold? Second, it is super easy to clean. For me, that matters. Something that takes a lot of work to clean makes me think twice before using. This was a breeze. Warm water gets poured through the opening, sprayed inside a bowl with more warm water, done! You need special food color for the air-brusher, but I know it’s possible to improvise with normal dyes diluted in vodka or some other type of alcohol. I used Chefmaster.

The filling. I suppose you can make a similar preparation using Nutella. But I tell you, making the pâte noisette from scratch and incorporating it in the ganache is a game-changer. It is nutty, almost smoky (it’s the caramel speaking), sweet but with a sharp twist to it. For my taste, it is close to perfection. I had a little bit of ganache noisette left. It was enjoyed one tiny teaspoon at a time, standing up by the fridge, while telling myself: make this again, roll as truffles, coat in chocolate sprinkles, give to all the special human beings in your life.
Make your life sweeter, grab a pin!
ONE YEAR AGO: Quiche with Asparagus and Fennel
TWO YEARS AGO: Fakebouleh
THREE YEARS AGO: Yellow Squash Soup
FOUR YEARS AGO: Grilled Chicken with Tamarind and Coconut Glaze
FIVE YEARS AGO: Chicken-Apricot Skewers
SIX YEARS AGO: Asparagus Quiche
SEVEN YEARS AGO: Two-stage Pea and Prosciutto Risotto
EIGHT YEARS AGO: Mellow Bakers: Corn Bread