STRAWBERRY-MANGO ENTREMET CAKE

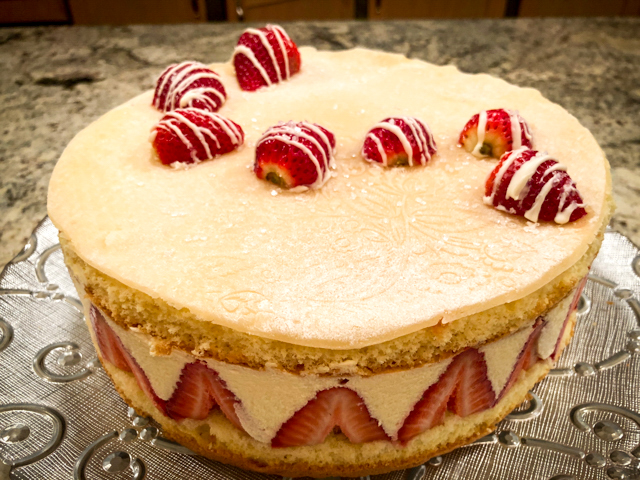
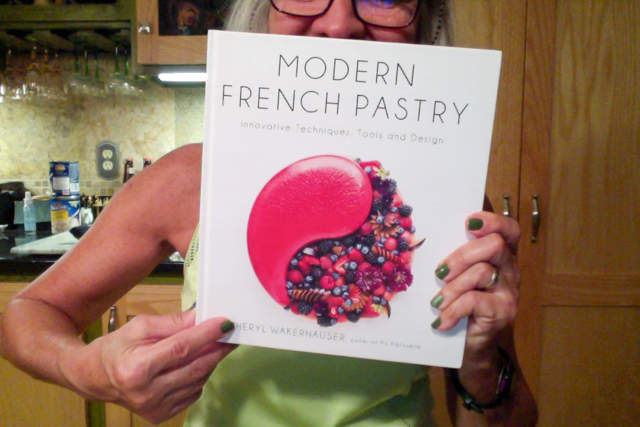
Pushing a little bit the boundaries of my comfort zone, with this cake I practiced making a pattern on the sponge component, baking a mango-flavored meringue, and using a gelatin-based topping. The basic recipe was from the book Modern French Pastry. The cake, called Moulin Rouge, is a looker. I modified the recipe quite a bit, so I share my version with you. Make sure to read my comments, as I consider this cake still a work in preparation.

STRAWBERRY-MANGO ENTREMET CAKE
(adapted from Modern French Pastry)

for the side-decoration:
50 g butter
56 g powdered sugar
60 g egg whites (about 2 eggs)
56 g all-purpose flour
red food coloring

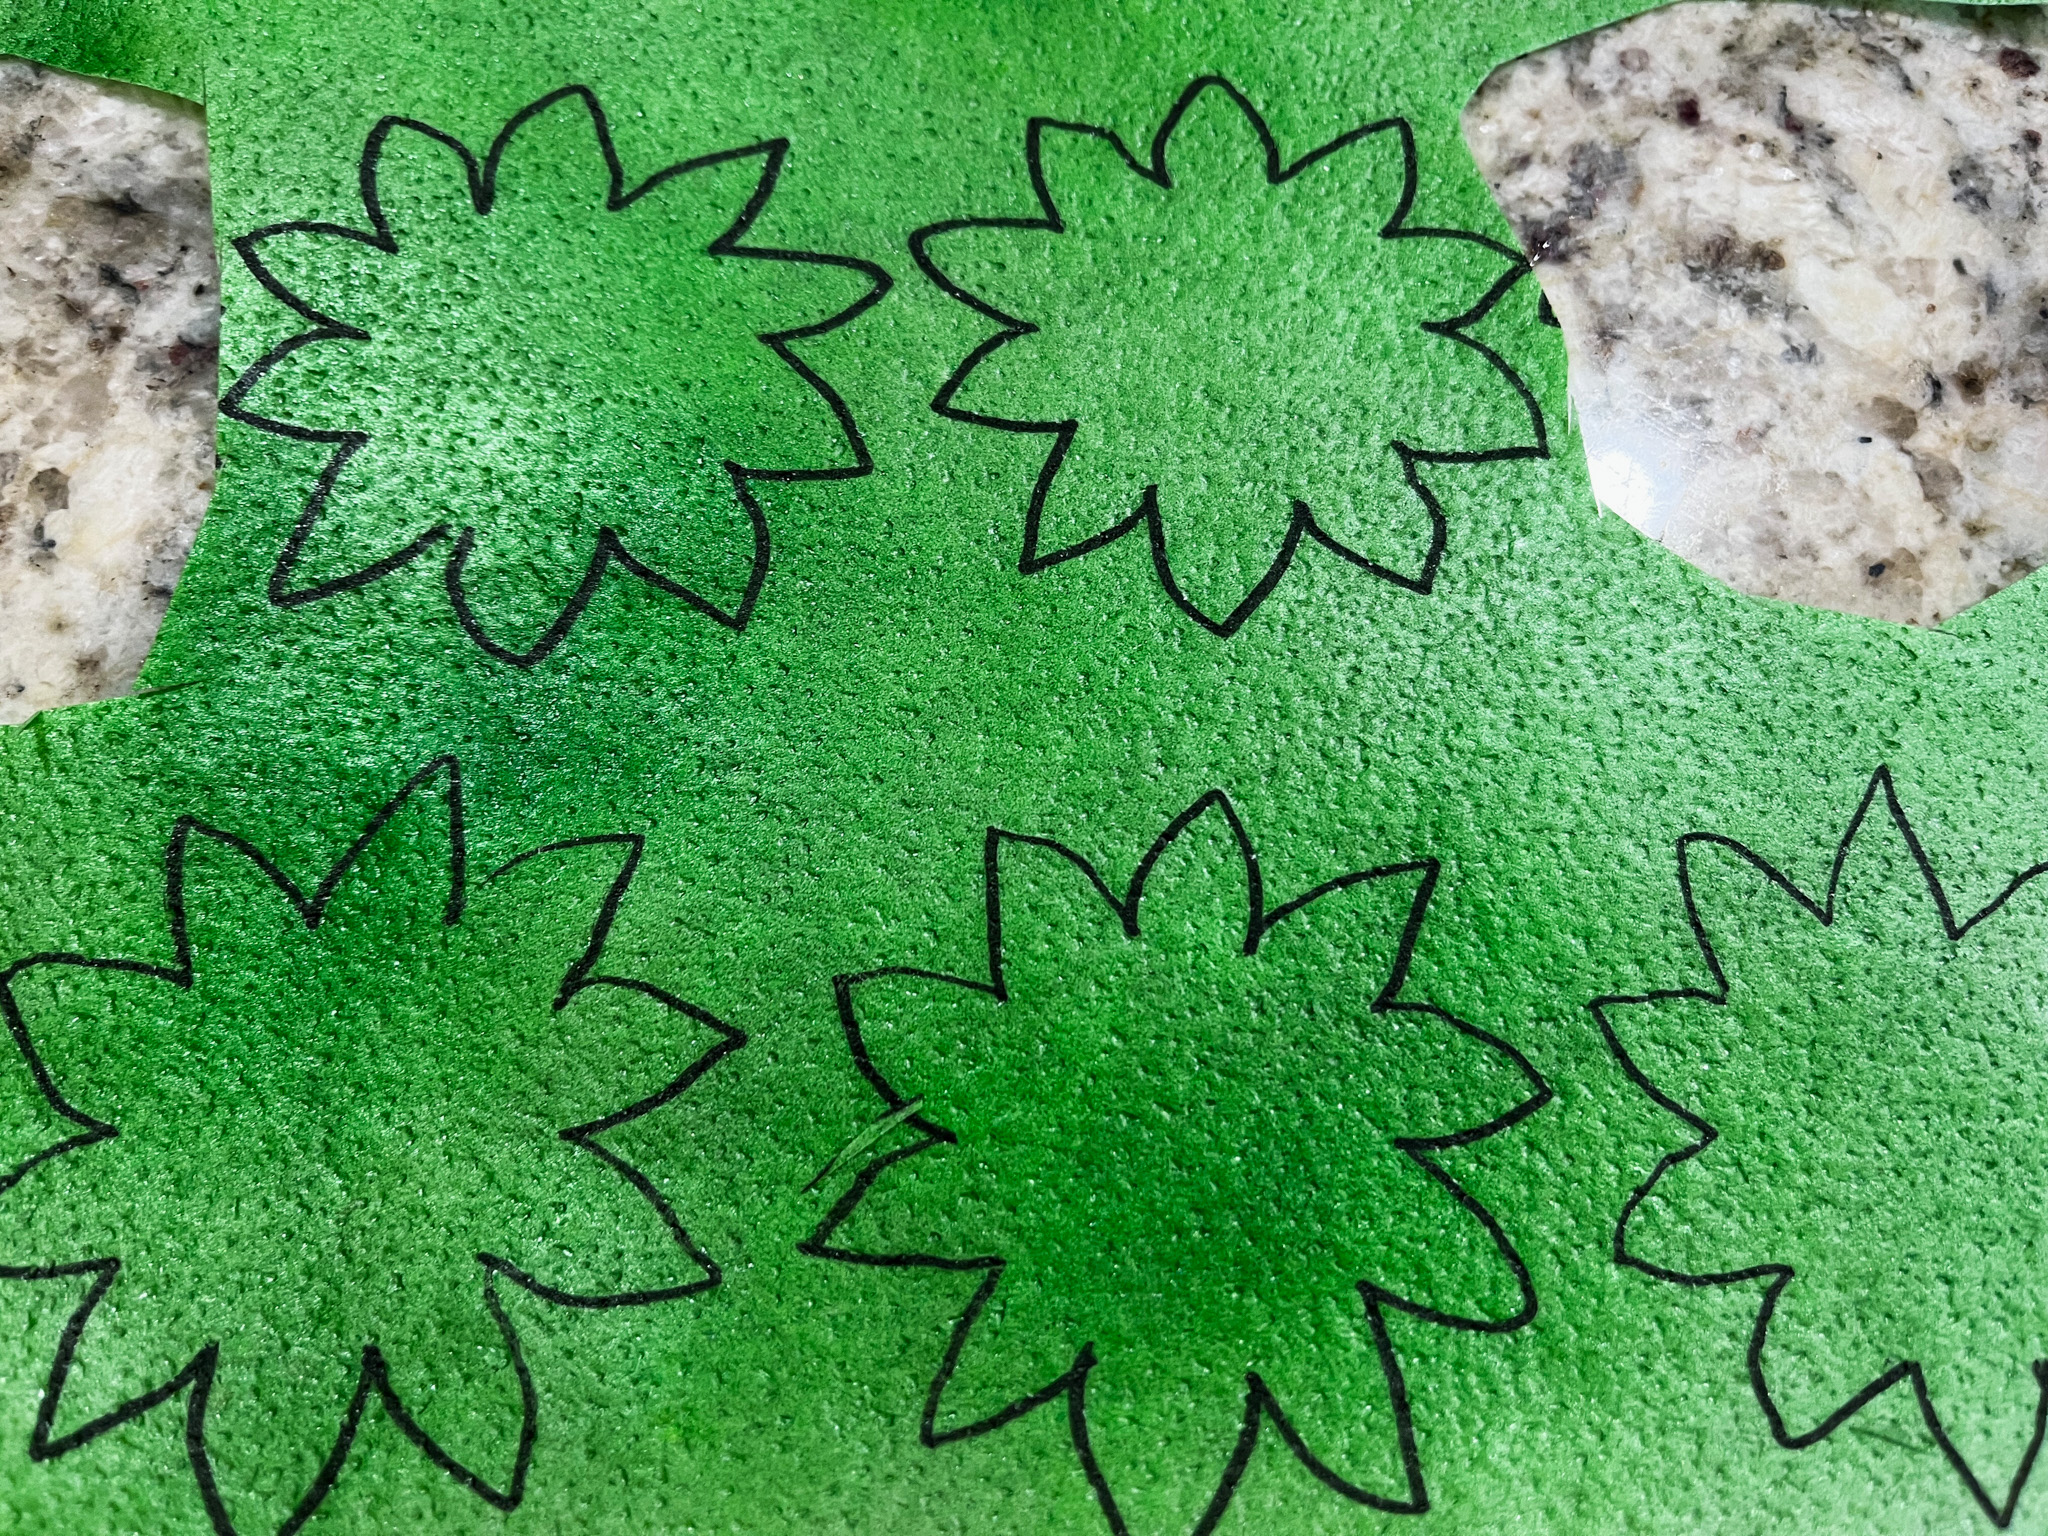
Mix the butter and sugar in a Kitchen Aid type mixer with the paddle attachment until creamy. Add the egg whites very slowly, a little at a time. Clean the sides of the bowl often. Add the flour and gently mix on very low-speed, then add the food dye.  Lay the stencil you intend to use on a Silpat, or if drawing a pattern free-hand, lay the design on parchment paper to make it easier to draw with the batter.  Brush the batter on the stencil, then scrape all excess off with a bench scraper. You will not use all the batter made, but it is easier to work with more than you need.  Gently pull the stencil up. See my composite photo under the recipe.

Freeze the design for an hour or so. You can do this step the day before.  Do not remove from the freezer until you are ready to bake the cake layer.

Joconde Cake Layer
65 g powdered sugar, sifted
36 g pastry flour
65 g almond flour
100 g eggs  (whole eggs, at room temperature)
120 g egg whites (from about 4 eggs)
30 g granulated sugar
75 g unsalted butter, melted and cooled

Heat the oven to 400 F. Add powdered sugar, flour and almond meal to the bowl of a mixer. Mix gently to incorporate them.  Add the eggs and beat on high-speed for about 5 minutes, until very fluffy. Reserve.

Make a meringue with the egg whites and sugar, bringing it to soft peaks. Start with the egg whites in the mixer on low-speed, increase to medium, once you see a trail forming as the mixer is going, start adding the sugar slowly.  Once you get to soft peaks, stop. Over-beating the meringue will make it hard to incorporate it in the cake batter.  Gently fold the meringue on the egg-flour mixture that you reserved.  Add a bit of the mixture to the bowl with melted butter, mix gently. Pour that into the cake batter and gently fold.

Remove the stencil design from the freezer, pour the batter over it, trying to level it as best as you can with an off-set spatula. You want to keep the air incorporated in the batter, so be gentle. Run the spatula just over the surface, you don’t want to risk disturbing the pattern underneath it.

Bake for 12 to 14 minutes. You need to start noticing a little browning on the surface, but not much. If you notice the edges getting crunchy, remove from the oven. Let it cool before proceeding.

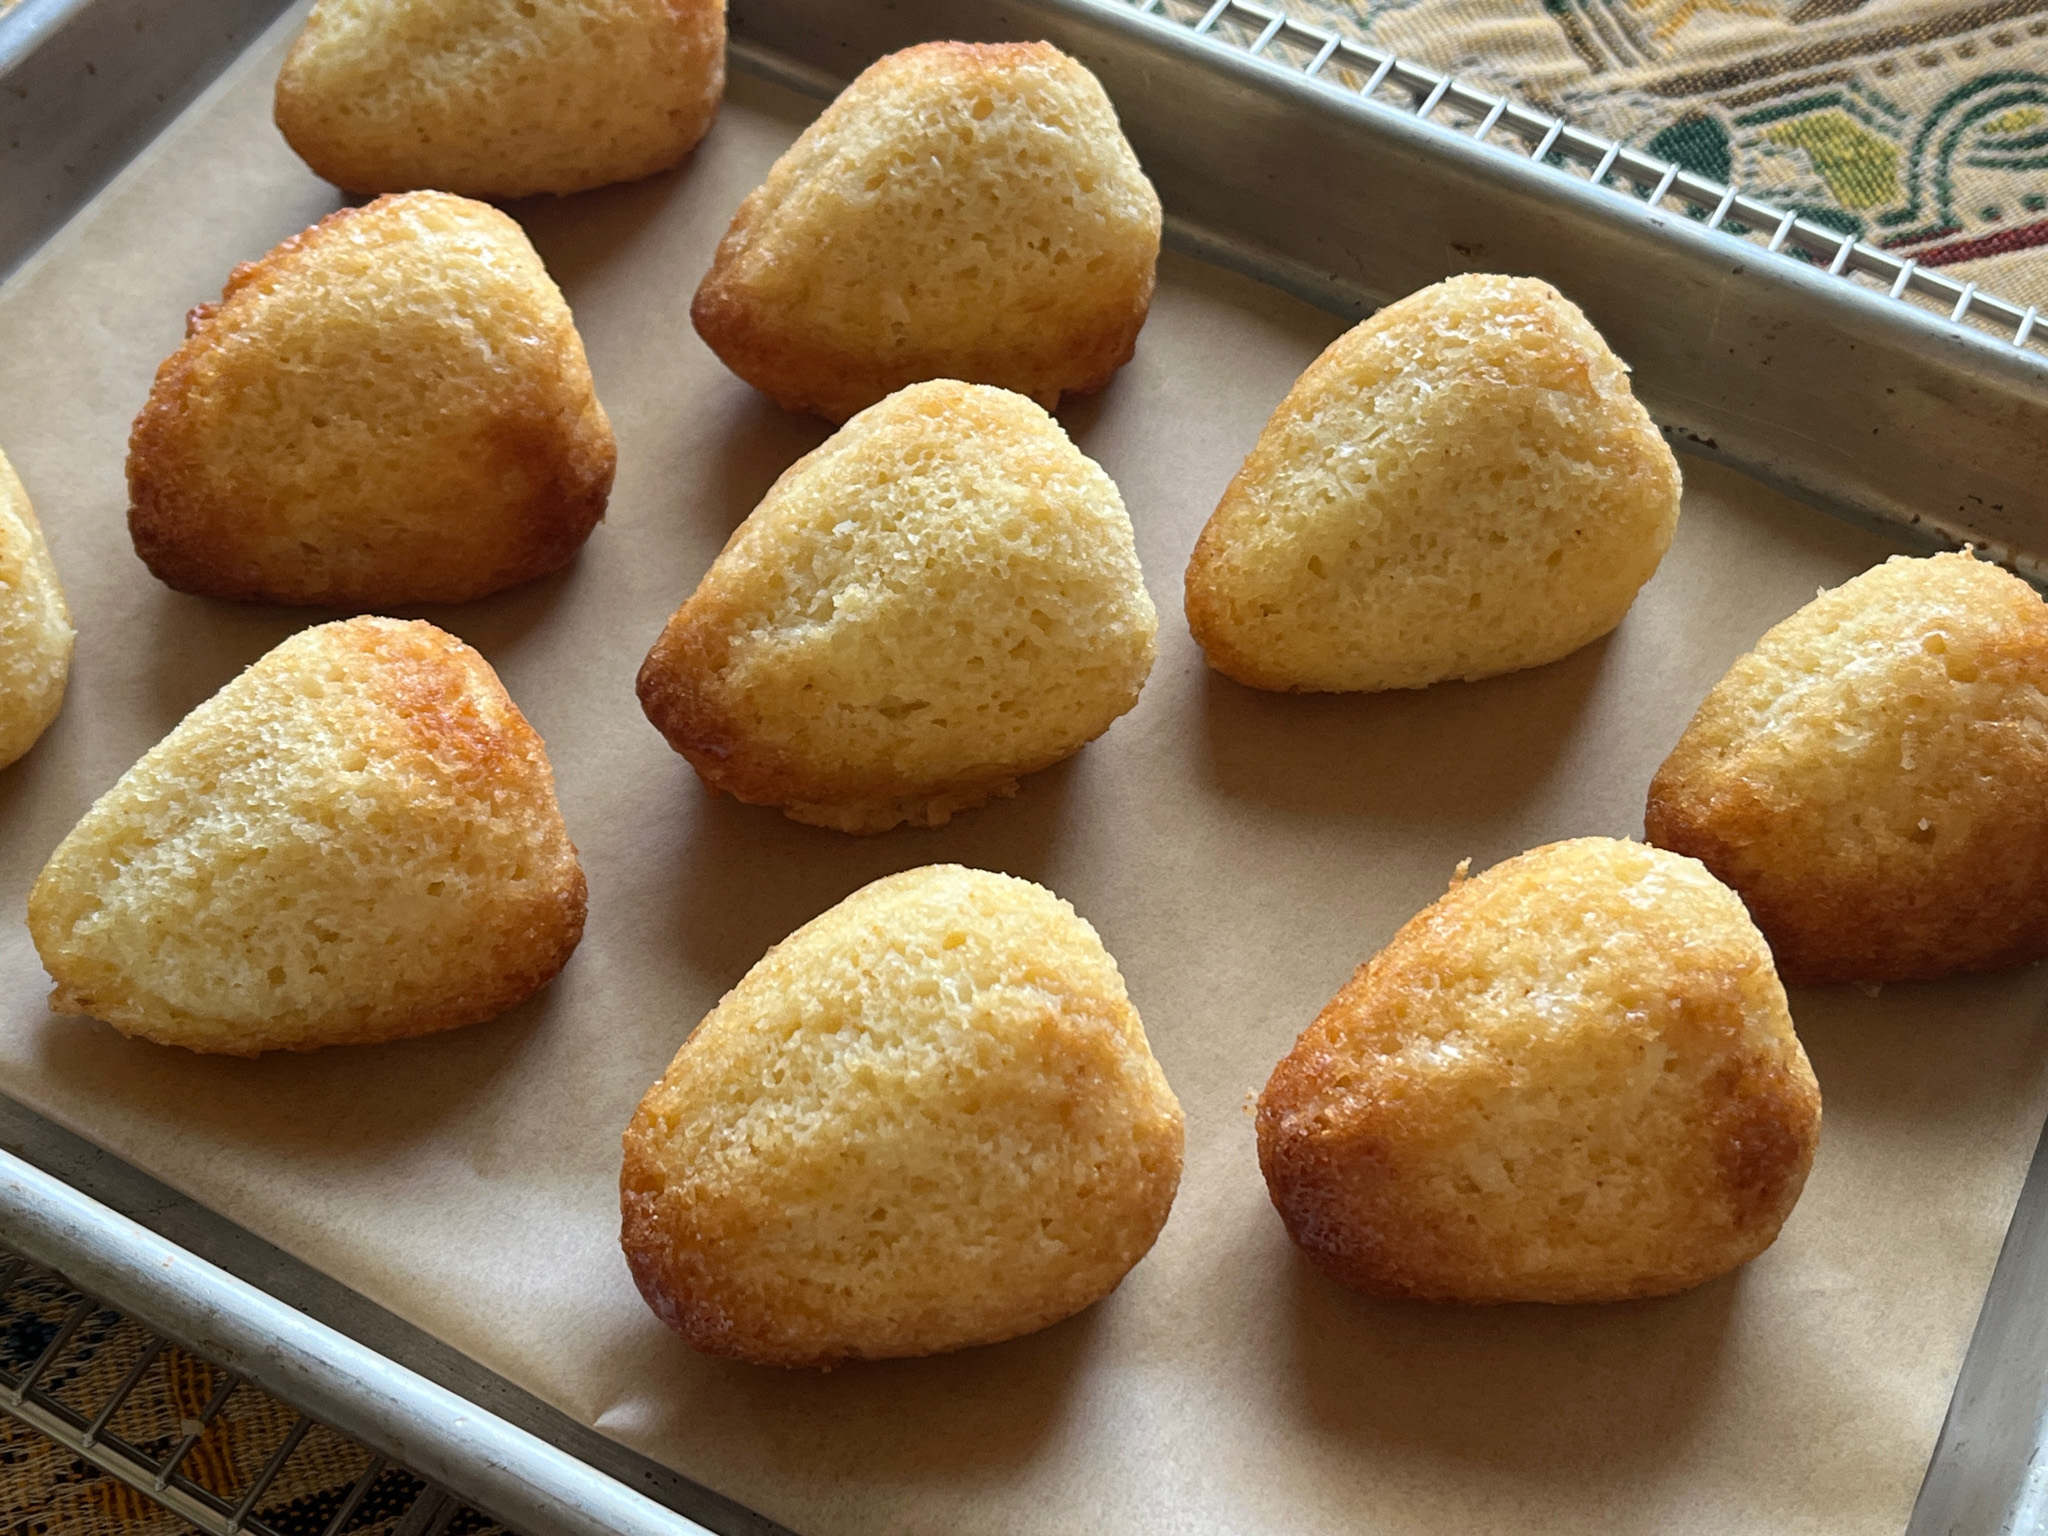
Mango-Flavored Meringue
30 g powdered sugar, sifted
30 g pulverized freeze-dried mangos (use a food processor)
80 g egg whites
80 g granulated sugar

Heat the oven to 350 F. Trace two 8 inch circles on parchment paper, and place it over Silpat. Prepare a large piping bag fitted with either a large (1/2 inch) piping tip, or just cut the bag with that dimension.

Mix the powdered sugar with the pulverized mango and reserve.  Make a meringue with the egg whites and sugar as described for the Joconde layer. There is a lot of sugar in this version, so you don’t have to worry about over-beating.  Once you get to stiff peaks, mix the mango-sugar mixture, folding it delicately. 

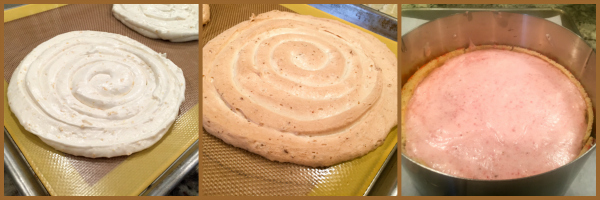
Spoon the mixture in the prepared piping bag, and pipe it on the Silpat, in each of the circles, starting from the center.  Leave a little border empty, as you want the meringue to be smaller than the diameter of the cake. You can see in the central picture of the meringue composite that the pencil drawing is about 0.5 inch larger. You could conceivably draw a smaller circle, but it is easier to see where you are and stop short, then risk going too much over it. Still, do whatever feels better for you.

Bake for 20  to 22 minutes. Meringue should feel dry to the touch and just be starting to brown.

Strawberry Mousse
12 g powdered gelatin
60 g cold water to boom gelatin
350 g strawberry puree (use the food processor)
175 g powdered sugar
350 g heavy cream

Combine gelatin with cold water and allow it to bloom for a few minutes. Place the strawberry puree in a saucepan, add the powdered sugar and mix gently over low-heat until warm.

Whisk the cream in a Kitchen Aid type mixer to soft peaks. Do not over-beat.  Reserve.

Melt the gelatin in a microwave, in very short bursts, keeping a close eye, as you don’t want it to boil, just melt smoothly.  Add some of the strawberry puree to the gelatin to incorporate it in, then pour the mixture into the rest of the puree. Mix gently, but well, you want the gelatin to be fully distributed throughout the fruit.  Add 1/3 of the puree to the whipped cream, fold. Add the remaining of the puree, fold gently. The mousse is now ready to use.

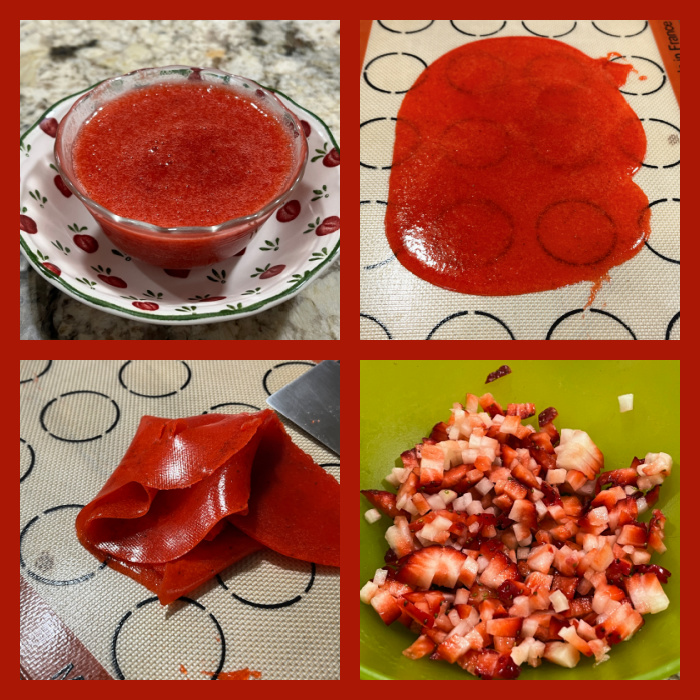
Strawberry Gelatin Topping
5 g powdered gelatin
25 g cold water
75 g soaking syrup (water and sugar in equal weights, dissolved by heating)
75 g strawberry puree (passed through a sieve to remove seeds)
red food dye, just a tiny drop (optional)

Combine the gelatin with water to bloom for a few minutes. Heat the soaking syrup, add the gelatin and stir until fully melted. Slowly stir the strawberry puree, and the food coloring, if using. Refrigerate until needed. When ready to finish the cake, warm it in a microwave in very short bursts of heat, until it’s about 90 F.

ASSEMBLING THE CAKE
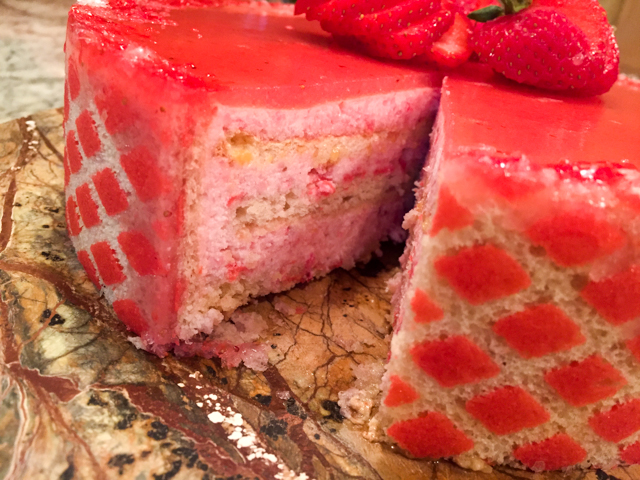
Dust the cold Joconde cake with granulated sugar. Place a parchment paper on top, and flip it. Remove the silicone sheet slowly, and marvel at the pattern that you see! Now you need to decide the dimension of the cake strips. In the book he recommends 1.75 inches, but I did about 2 inches. You need two strips of cake with the exact same dimension, and they will go around the perimeter of an 8-inch diameter cake ring.  With what is left of the cake, cut one circle a little smaller than 8-inches in diameter, as it will sit inside the perimeter laid by the cake strips.

Place an acetate strip inside the cake ring. Lay the cake strips with the design facing out, they should fit very snuggly, so it is best to allow them to overlap slightly, then force them into place. Now place one meringue ring at the bottom. Add one-third of the mousse over it. Top the mousse with the cake circle, the design can be facing up or down, it does not matter as you won’t see it.  Add another third of the mousse.  Place the second meringue ring on top, add the rest of the mousse, and spread as flat as you can, trying to make it almost leveled with the top of the cake strips.  Freeze overnight. If needed, you can trim the top of the cake layer with scissors before finishing the cake.

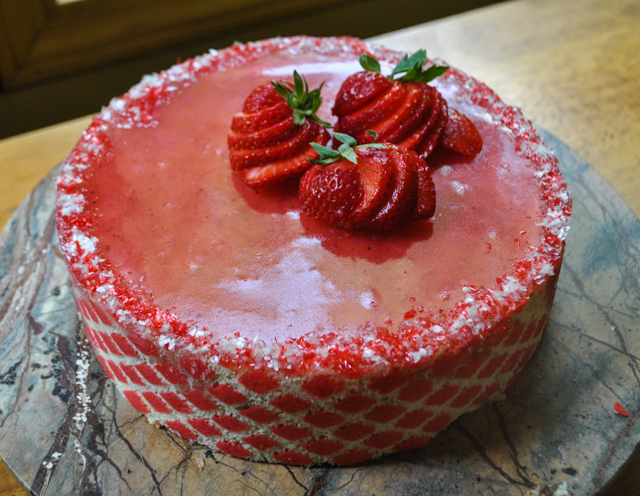
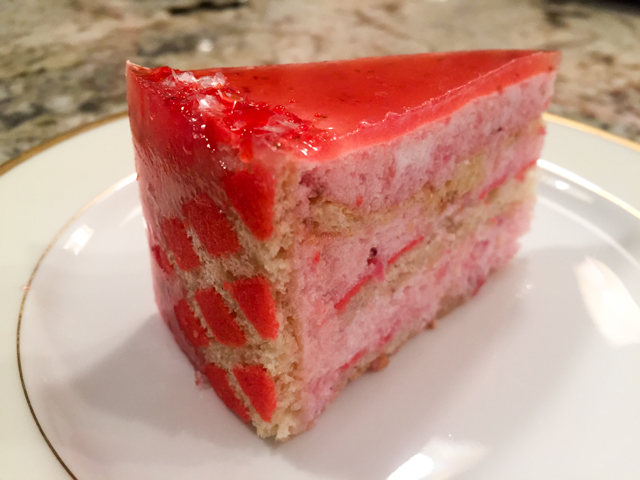
Remove from the freezer, and pour the warmed up strawberry topping. Do it quickly, as it will solidify. Remove the cake from the ring, pushing it from the bottom, gently but with authority… Place it on a serving platter, and decorate with freshly cut strawberries.

ENJOY!

to print the recipe, click here

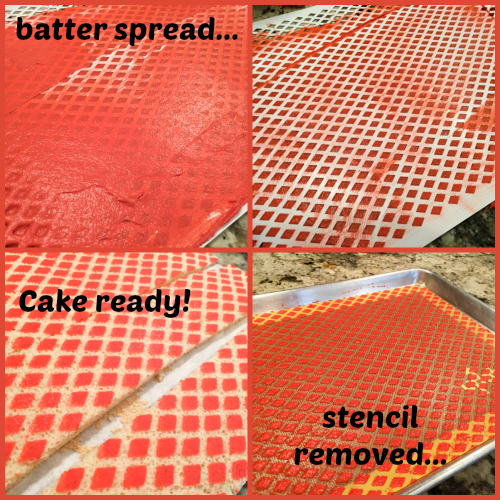
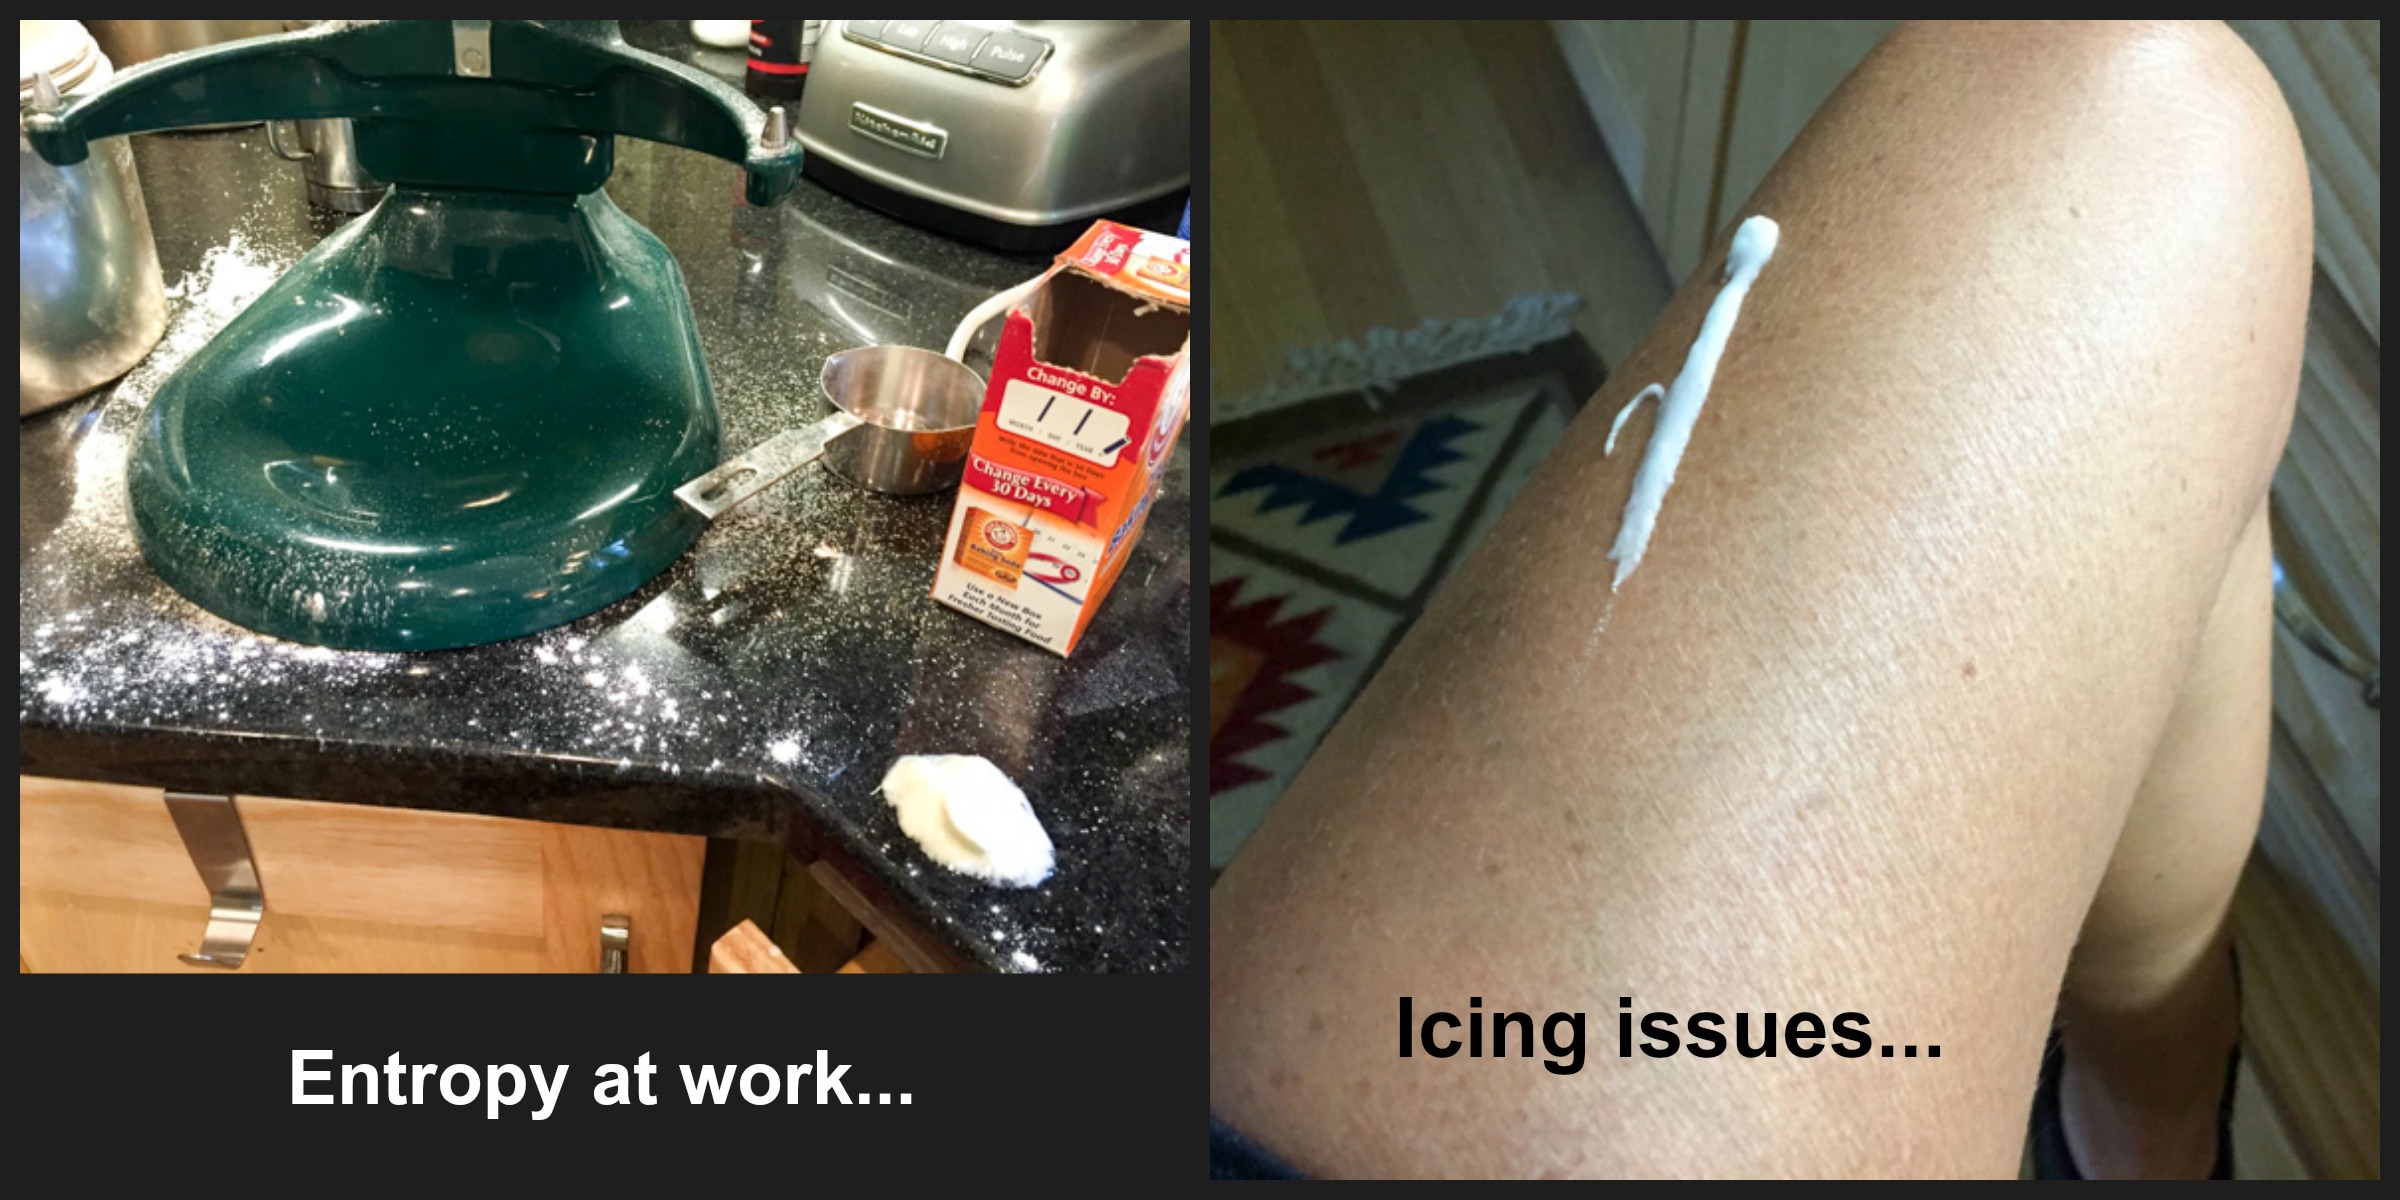
Comments: You know that thrill of opening the lid of the Dutch oven and getting the first glimpse of the sourdough loaf inside? That is quite similar to the thrill of inverting the cake after baking, and peeling that Silpat to – hopefully – reveal the design. My heart was going at 100 bpm… The stencil I have is really big. I wish they made it in half-sheet size. I’ve been flirting with the idea of cutting it, as I will never need to lay such a huge pattern during my lifetime. Since it is so huge, I had to lay it over the Silpat on my countertop, with the stencil extending way beyond it, and making quite a mess on the granite. No way to avoid it, actually. But the process went more or less smoothly. I had to do it twice because on the first time I lifted the stencil too quickly and messed up the pattern on one of the sides. Live and learn.  Once the pattern is laid and frozen, the rest should go smoothly. The cake batter is poured right over the frozen design before it goes into the oven.

The meringue component was a bit challenging for me, particularly judging when the disk was properly baked. You do not want to have it too dark, because it gets brittle and breaks when moving it around. But under-baking is not a good idea. Mine was slightly over-baked in parts, but not fully baked in the center. I need to get a better “feel” for it, and also practice the piping to get a more uniform surface. Still, since the disk is hidden in the final dessert, any catastrophic events becomes a secret between the baker and the cake. What happens in The Bewitching Kitchen, stays in The Bewitching Kitchen.

I had to modify quite a few details in the recipe, mostly because the texture of my meringue was far from perfect. I strongly advise you to get the book if you enjoy this type of baking challenge, and try their version. Their meringue is flavored with coconut and black pepper (yes, you read that correctly). And they also add another layer of complexity with some jam. I say no more. You must get the book. Which, by the way, has one amazing recipe after another.  Like the one in the cover, yin and yang of mousse and fruits. Can you imagine bringing that to the table after a dinner party?

When I make this cake again, I will substitute the meringue layer for something else. Maybe a genoise with praline on top for texture. I have to agree with my friend Jennifer, that the meringue does not freeze as well as a sponge cake. For this type of entremet that needs to spend hours in the freezer, I think sponge layers work better. I cannot believe I am considering modifying a pretty complex cake recipe but… strange things happen in the universe. We are living in a twilight zone in ways that go beyond politics (wink, wink).

The topping reminded me of a mirror glaze, because you need to exercise patience and wait for it to cool to below body temperature. I actually find it easier to make it the day before, and warm it up for a few seconds at a time in the microwave, with super gently mixing (no whisking!), to avoid bubbles. Then it will be just a matter of minutes until you are done. Well, not actually you, but the cake.

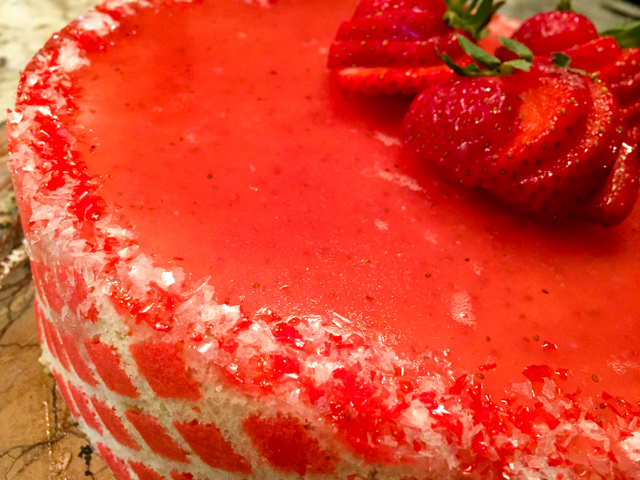
The edges of my cake did not look as perfect as the picture in the book, so I added some sparkling sugar. Nothing like a little sparkle to cover sins. The flavor was spectacularly strawberry-ish, and the mango in the meringue a subtle added tropical bonus. By the way, when I was processing the dried mango to add to the meringue something quite funny happened. As I opened the processor, a fine dust of mango powder hit my nose. I got a severe case of…. Hiccups. Pretty funny. It passed quickly, though, but just in case you process dried mangos, avoid getting a deep sniff of the powder. Or, go for a full sniff and tell me if you get the hiccups too.

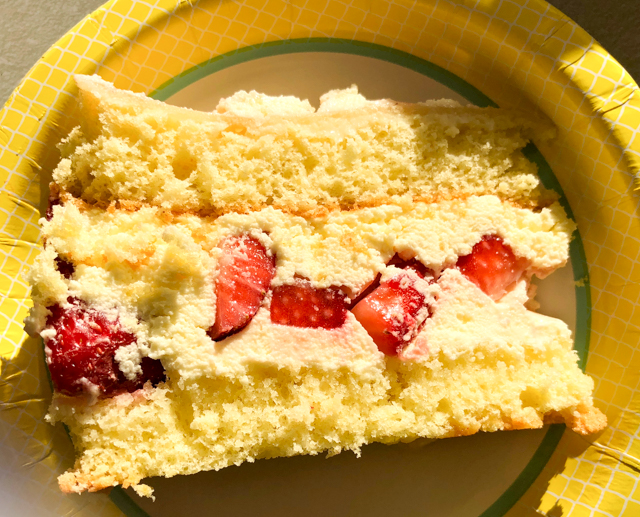
I feel I’m getting a little more comfortable with entremet cakes. The layers in this cake were better defined than my previous attempts, and the cake cut very nicely. Still,  there is a lot of room for improvement. One cake at a time, I hope to get there.

ONE YEAR AGO: Hommage to the Sun

TWO YEARS AGO: Tomato and Cucumber Salad with Almond Vinaigrette

THREE YEARS AGO: Eggplant Tomato Stacks

FOUR YEARS AGO: The Couscous that Wasn’t

FIVE YEARS AGO: Apple-Cinnamon Bread

SIX YEARS AGO: Blueberry Galette

SEVEN YEARS AGO: In My Kitchen, August 2011

EIGHT YEARS AGO: Journey to a New Home

NINE YEARS AGO: Friday Night Dinner

FRAISIER CAKE: A CELEBRATION OF SPRING

Fraisier is a classic cake in French patisserie. You will find countless versions for it. The cake can be round, square, rectangular, the topping also quite varied:  meringue, a thin layer of gelatin, or some marzipan. You can also go with a more rustic version topped with just a dusting of powdered sugar. The common denominator is two layers of cake, separated by a filling of strawberries in buttercream (preferably mousseline, which is buttercream on steroids). Some of the strawberries must be cut in half lengthwise and sit at the edge, so that they will be visible in the assembled cake.  What’s not to like? For my version I used a simple genoise brushed with Cointreau-syrup, a mousseline cream with a touch of white chocolate, and for the topping a thin layer of almond paste.

FRAISIER CAKE
(adapted from many sources)

for the cake:
6 eggs
5 tbs butter
1 cup (225g) sugar
1 + 3/4 cup (210g) flour
1/2 tsp vanilla paste

For simple syrup:
6 Tablespoons water
6 Tablespoons sugar
3 tsp Cointreau

For creme mousseline:
2½ cups (600ml) whole milk
1/2 tsp vanilla bean paste
3 large eggs
2 egg yolks
3/4 cup (150g) granulated sugar
1/2 cup (56g) corn starch
454g  butter, softened, divided
100 g white chocolate, melted and cooled

For decoration:
Hulled and halved strawberries for perimeter of the cake (I used 19 halves)
Diced strawberries for the filling (about 12 large strawberries)
100 g almond paste
powdered sugar for rolling

Equipment: One 10-inch round cake pan; one 9.5-inch cake ring or springform pan.

Heat the oven to 350 F. Prepare a 10 inch cake pan by buttering the interior. Then dust with flour and set aside.  

Place the butter in a small dish and cover then melt in the microwave. Set aside to let cool. Fill a pot with about 1 inch water over medium high heat. Once it starts to simmer, sit the bowl of a stand mixer over the pot. Put the eggs and sugar in the bowl and beat with a whisk until it warms up to a temperature between 130 to 140 degrees F. Return the bowl to the stand mixer with a whisk attachment. Whisk the mixture on high-speed. Continue to beat until the batter is cool to the touch. The end result should be a light batter that has tripled in volume.

Set aside 2 tbs of the batter in a small bowl. Add the flour to the large bowl of batter in increments, gently folding until no dry streaks remain. Blend together the 2 tbs of batter with the melted butter. Pour into the large bowl of batter and stir until incorporated. Fill the prepared cake pan with the batter. Place pan in oven and bake until cake springs back when lightly touched. Baking time should be about 30 minutes. Remove pan and invert cake onto a rack to cool.

While the cake is cooling, make the simple syrup by heating the water and sugar in a small saucepan. Once it comes to a boil, remove from heat and stir the Cointreau. Set aside to cool.

Make the mousseline cream by combining in a saucepan the milk and vanilla paste, then bringing to a simmer over low-heat. Do not let the milk come to a boil. Reserve. Place the eggs, egg yolks and sugar in a mixing bowl. Whisk vigorously until the mixture turns a light shade of yellow and becomes slightly thick and frothy, about 3 minutes. Add the cornstarch and whisk vigorously until completely incorporated.

Slowly pour about 1/4 cup of the warm milk into the egg mixture, and whisk continuously to temper the eggs.  Add the rest of the milk, always whisking. Once all the milk has been added to the eggs, pour everything back into the saucepan, and over low heat keep whisking until the cream comes to a full boil, but do it slowly. Keep removing from the heat and placing it back if you feel it is boiling too quickly. Do not stop whisking, and make sure to go over each little spot of the bottom of the pan to prevent the cream from scorching.

When large bubbles start coming to the surface, continue whisking for 15 seconds, then remove from heat, let it stand for a couple of minutes and add half of the butter, then the melted and cooled chocolate. Pass it through a fine sieve to remove any little lumps and place in the fridge for a couple of hours or overnight, with a plastic film on top to prevent a skin from forming.

When fully cold, remove from fridge, place in a Kitchen Aid and beat at full speed for 5 minutes or longer, to bring it to room temperature. Now add the other half of the butter, which must be softened.  Beat until fully smooth. The mousseline cream is ready to use.

Assemble the cake: Place a piece of acetate film against the inner surface of the cake ring. If needed, trim the top crust of the sponge cake, to level it. Split in half and place the bottom half (cut side face up)in a 9 1/1 inch cake ring set over a cardboard cake round of the same size. Brush with half of the Cointreau syrup.

Place each strawberry half upright inside the ring, forming an interior circle. The stem top should be face down and the cut side facing the inside of the flan ring. Smooth one cup of the mousseline cream over the split cake inside the flan ring. The cream should cover all exposed cake. Then place diced strawberries covering the center of the cake.  Fill all spaces with the mousseline cream by using a piping tip and covering until you reach the top of the flan ring. Then place the other cake half over the cream layer and brush the top with the remaining syrup. Refrigerate for 30 minutes.

Roll a piece of almond paste very thin, make a pattern on the surface if you have an embossing rolling-pin. Cover the cake with a very thin layer of mousseline cream, then set the rolled almond paste on top, with the pattern facing up. Decorate with strawberries, if desired.

Refrigerate until serving time.

ENJOY!

to print the recipe, click here

Comments: One thing that makes it easier to assemble a Fraisier is placing acetate film to line the  perimeter of the pan. I used my beloved elephant pins (a gift from my niece) to keep the acetate in place (see 2nd of the smaller photos in the composite above). The film makes sure that once you lift the ring the sides of the cake won’t be messed up, by smearing the cream or moving the strawberries in the process. Super clever.

Some recipes instruct you to cover the center of the cake with whole strawberries standing with the pointed end up, but I think that would make a bit harder to cut the cake in slices. I decided to dice the fruit instead and distribute the pieces more or less evenly on the surface. I like the way it turned out.

The sun shinning through the window, cast a bright yellow tone on the slice of cake I served in our department mail room. Interesting effect…

For the topping, my goal was to imprint a pattern on the thin layer of almond paste. I used a wooden rolling-pin, but unfortunately the effect was barely visible.

Points to consider in the future

Exchanging thoughts with Patissiers Extraordinaires Gary and Jennifer I realize a few things that could be improved. First, instead of baking a single round cake and slicing it in half, it would be nice to bake a cake in a sheet pan and cut two layers of the desired size. They could be any shape, circular, square, rectangular. The advantage of that method is that you don’t have to worry about slicing the cake horizontally and both layers would be absolutely equal in height.

As to the design on the almond paste, Gary suggests using a silicone mat instead of the rolling-pin. I think that is a great idea, and will definitely incorporate it on my next time. Perhaps even adding a bit of green food color to the paste, I’ve seen many examples that do so.

Another possibility that makes this cake even more appealing is to completely hide the cake when assembled. You achieve that by placing the strawberries outside the perimeter of the cake, which is then cut about one inch smaller than the ring. The mousseline will be outside, on the sides and top of the cake. You can see one beautiful example here.

All things considered, I am happy with the way my first attempt turned out. The almond paste layer gives a nice almond-y flavor to the cake, and the texture is not harsh at all, it gets quite a bit softer in contact with the mousseline cream underneath. No doubt there is room for improvement, but isn’t that the case for many things in life?

🙂


ONE YEAR AGO: Zucchini Frittata with Roasted Tomatoes and Goat Cheese

TWO YEARS AGO: Playing with Pectinase

THREE YEARS AGO: Poached White Asparagus with Lemon and Pistachios

FOUR YEARS AGO: Dan Lepard’s Saffron Bloomer

FIVE YEARS AGO: Fesenjan & The New Persian Kitchen

SIX YEARS AGO: Quinoa Salad with Roasted Beets

SEVEN YEARS AGO: Pasta Puttanesca

EIGHT YEARS AGO: Miche Point-a-Calliere

SaveSave

SaveSave

SaveSave

SaveSave

SaveSave

SaveSave

SaveSave

SaveSave

SaveSave

SaveSave

SaveSave

SaveSave

SaveSave

SaveSave

SaveSave

SaveSave

SaveSave

SaveSave

SaveSave

SaveSave

SaveSave

SaveSave

SaveSave

SaveSave

SECRET RECIPE CLUB: FRESH STRAWBERRY YOGURT BUNDT CAKE & A BONUS RECIPE

First Monday of August, summer going at full blast, many many days in the triple digits which means triple joy for yours truly. I know it will end too soon, but for the time being, allow me to celebrate the joys of this fantastic season…  Apart from the weather, I have even better reasons to celebrate: this month at The Secret Recipe Club I was paired with a food blogger who is very dear to my heart, Dorothy from Shockingly Delicious. Both Dorothy and I are “old timers”  with the group, we’ve been members for many years, together first in Group D, and now in Group A. A lot goes on behind the curtains in the club, did you know that? For instance, we have a closed Facebook page in which announcements are made, reminders are sent by the moderators so that no one forgets to sign up for next assignment, or to post on Reveal Day. And of course there is a bit of chit-chat that goes on.  Years ago I noticed that Dorothy is incredibly efficient. Assignments would go out, and within a day or two she would come back and say that her post was pretty much ready to go. Everyone else was perhaps only starting to stalk the assigned blog. To make a long story short, we  became fierce friendly competitors, every month trying to beat each other  in picking the recipe, cooking it and composing the post.  I always have a ton of fun with it, although she is pretty hard to beat. But seriously, now, she is a top-notch blogger, with 25 years of experience in food writing. Did you get that part? Twenty-five years. And she is quite active in recipe development, as you can tell by the many recipes listed here.  I urge you to read her About page, because it reflects so well the type of person she is: witty, positive, intelligent, upbeat. We almost met in person last month, but unfortunately she had family issues that prevented her from joining a fun lunch I had with two other fellow secreters, Karen, from Karen Kitchen’s Stories, and Lauren from Sew you Think you can Cook. We had a blast! Next time, I hope she can join us…   But, back to her blog, I’d like to quote one paragraph from her About page, one I could sign below with gusto (literally!):

Even if I trim the fat, or salt, or sugar, it has to taste fabulous. If it tastes like cardboard, I don’t care how healthy it is, no one will eat it. And where’s the joy in that?

I have a shockingly long list of stuff that I bookmarked as possibilities for this post. A few examples to water your mouth are: Farro Date Salad with Mango and ArugulaChicken Brie and Apple TurnoversSticky Lemon Oregano ChickenPopeye Pasta… World’s Best Smoky Burger (oh, yeah…), Angel Hair Pasta with Lemon, Kale, and PecansFlourless Oat Caramel Cookies (swoon!)…  Crunchy Granola Bars better than Nature Valley… or how about Slow-Cooker Paleo Ribs in Tablecloth Stainer Sauce? So, what did I pick? I had to go with two recipes, just because…. first, a Fresh Strawberry Yogurt Bundt Cake, because if you cannot face your cake baking demons in the name of a great food blog, there’s gotta be something wrong with you! And the following week I made the cutest meatloaves ever: Cherry Chipotle Meat Loaf Cupcakes.  Both were… how should I put it?  Shockingly Delicious!  

Fresh Strawberry Bundt Cake

FRESH STRAWBERRY YOGURT BUNDT CAKE
(from Shockingly Delicious)

for the cake:
2 1/2 cups all-purpose flour
1/2 teaspoon baking soda
1/2 teaspoon salt
Zest of 1 lemon
1 cup (2 sticks) butter, at room temperature
2 cups sugar
3 eggs
1 tablespoon lemon juice
1 teaspoon almond extract
8 ounces plain or vanilla Greek yogurt
12 ounces fresh strawberries, diced
for the glaze:
1 1/4 cups powdered sugar
1-2 tablespoons lemon juice
.
Heat oven to 325 degrees. Grease and flour a 10-inch Bundt pan and set it aside.
.
In a bowl, stir together flour, baking soda and salt. Mix in the lemon zest and set aside.
With an electric mixer, cream together the butter and sugar until light and fluffy. Beat in the eggs one at a time, then stir in lemon juice and almond extract. Alternate beating in the flour mixture and the yogurt, mixing just until incorporated. Gently stir strawberries into the batter.
.
Pour the batter into the Bundt pan. Bake for 70-75 minutes, or until a wooden pick inserted into the center of the cake comes out clean. Allow to cool 25 minutes in the pan, then turn out onto a wire rack and cool completely. Once cooled, whisk together the powdered sugar and lemon juice in a small bowl. Drizzle glaze over top of the cake, letting it drip down the sides.

Makes 12-16 slices.

ENJOY!

to print the recipe, click here

compositecake

Comments: One of the things I loved about this cake is that the recipe calls for enough batter to actually fill the Bundt pan to the appropriate level. More often than not, I face the problem of the disappearing cake batter: no matter how closely I follow the instructions, it seems the amount is never adequate. Not this time. And the smell, while baking was intoxicating, in the best possible way…   Of course, un-molding a cake from a Bundt pan can be quite stressful, I could feel my heart pounding as I negotiated the big hot pan, the rack underneath it, the kitchen cloth, and the hot pad. Tap, tap, tap, hope, hope, hope, and voilà the thing of beauty, smooth and fragrant, out of the pan in a single piece!  There was a happy dance. With a shriek (a la Karen).  I glazed the cake next morning, very early, then sliced it and took the full batch to our department, because the best part of baking a cake is sharing it. The cake disappeared fast. It was exactly what Dorothy promised it to be, very moist, excellent lemony flavor, the sweetness of the strawberries a perfect addiction to the smooth crumb.

pieces

Of course, where there is cake, there is agony. Turning the Kitchen Aid on with the paddle still up, that was a mistake. Flour in the eyebrows, anyone? And the correct place for icing is definitely not the human thigh, although the pups could disagree. They were following me around for a while even after I washed it all off.

compositecake2

Strawberry Bundt Cake, from Bewitching Kitchen

Before I say goodbye, one more featured recipe from Dorothy’s great blog!


BONUS RECIPE


Meatloave Cupcakes221

CHERRY CHIPOTLE MEATLOAF CUPCAKES
(slightly modified from Shockingly Delicious)

2 teaspoons olive oil
1 medium shallot, finely chopped
3 carrots, peeled, trimmed, finely chopped
2 celery stalks, trimmed, finely chopped
1 cup sliced mushrooms
1/2 yellow bell pepper, chopped mini sweet bell peppers, stemmed, finely chopped
1 teaspoon dried oregano
1 teaspoon dried thyme
1/2 teaspoon sea salt
A few grinds black pepper

1 pound organic ground grass-fed beef
1/4 cup almond flour (or almond crumbs, see notes)
1 tablespoon Dijon mustard
1 egg, beaten
1/4 cup Cherry Chipotle Not Ketchup
1/2 cup minced Italian parsley

Heat oven to 375 degrees. Make vegetable mixture: Heat oil in a skillet on medium heat. Add shallots, carrots, celery, mushrooms, peppers, oregano, thyme, salt and pepper and sauté until vegetables are soft, about 5 minutes.  Turn heat off and remove pan from burner; set aside to cool for 5-10 minutes.

Make meat loaf cupcakes: In a large mixing bowl, combine vegetable mixture, beef, almond flour, Dijon, egg, Not Ketchup, and parsley. Use hands to combine well. Lightly oil 8 muffin tins. Divide meat loaf mixture among 8 muffin cups. Bake for 25 minutes or until cooked through. Remove pan from oven and cool for a couple of minutes.

ENJOY!

to print the recipe, click here

quadruple

Comments: How could I resist meatloaves in cupcake format? User friendly, impossibly cute, and giving me the chance to try a new product, the “Not Ketchup”, praised by Dorothy in her blog. Not Ketchup comes in several flavors and is  produced by another food blogger I follow, Erika from Erika’s Kitchen.  It is very tasty, like a grownup ketchup with very complex flavor and not as sweet as your regular kind.  I loved it so much that I placed another order for her Tangerine Hatch Chile version, apparently even lower in carbs.  For the meatloaves I replaced regular breadcrumbs with Toasted Almond & Pecan Breading, a product that was a bit of an impulse buy on amazon. They often show a list of suggestions based on your previous searches, and I fell for this one. I do realize I could make my own almond-based crumbs, but every once in a while I like to splurge. I was very pleased by this product, actually. It smells amazing, and offered the right texture to the loaves, not dry at all.  If you’d like to try it, click here. (I am not affiliated with amazon, and will not make a single penny from your purchase).

We loved these little loaves!  The recipe made eight little servings, half of them were gone for our dinner, the others enjoyed for lunch two days in a row, they re-heat beautifully in the microwave. Between you and me, they taste fantastic straight from the fridge, but if you do that, be discreet and take tiny morsels from the bottom, so no one will notice.

Cherry Meatloaf Cupcakes, from Bewitching Kitchen

Dorothy, as you imagine, I could hardly contain  my excitement when the email arrived with your blog as my assigned site to stalk…  I hope you had a blast with yours too this month!  And be ready to jump on the next one, because I am revving my engines, baby…. 

As usual, my readers are invited to browse through the collection of recipes posted by other members of Group A of The Secret Recipe Club. Just poke the frog and be ready for some virtual fun!

ONE YEAR AGO: Quinoa Salad with Red Grapes and Avocado

TWO YEARS AGO: Strawberry Coffee Cake

THREE YEARS AGO: Lemon-Poppy Seed Muffins

FOUR YEARS AGO: Mascarpone Brownies

FIVE YEARS AGO: Salmon Tacos

SIX YEARS AGOCinnamon Turban Bread

SEVEN YEARS AGO: Summertime Gratin