MINI-FRITTATAS WITH BROCCOLI AND CHEESE

Another great recipe from Kalyn, who knows her way around a low-carb way of life. If you feel like taking a step back from the excesses of Thanksgiving, this is a very nice option for breakfast, brunch, or a light lunch.  I used my beloved tart pan, but  you can  make it in muffin tins, or even go for a single, larger pie type pan, increasing baking time a little bit.

MINI-FRITTATAS WITH BROCCOLI AND CHEESE
(slightly modified from Kalyn’s Kitchen)

2 1/2 cups broccoli flowerets (cut into small, bite-sized pieces)
1 cup grated cheddar cheese
6 T coarsely grated Parmesan cheese
8 eggs
1 cup cottage cheese
1 tsp. thyme
1/2 tsp oregano
salt and fresh-ground black pepper to taste

 Heat oven to 375F/190C.   Spray tart pan or muffin cups with non-stick spray.
.
Place the broccoli pieces into a bowl, cover with cling wrap, and microwave on high for about 1-2 minutes, or until broccoli just starts to cook. Divide broccoli among the tart wells. Put a generous pinch of cheddar cheese on top of the broccoli, then add coarsely grated Parmesan on top of the cheddar.
 .
Put the cottage cheese into a fine-mesh colander, rinse with cold water, and let drain. Break eggs into a glass measuring cup with a pour spout, and beat with a fork until egg yolks and whites are combined. Add drained cottage cheese, thyme, oregano, salt and pepper. Stir to combine. Pour egg mixture over broccoli and cheese, dividing the eggs evenly among the tart wells.  Stir gently with the fork so ingredients are evenly distributed.
 .
Bake for about 30 minutes, or until eggs are firm and frittatas are starting to get slightly browned on top. Frittatas can be kept in the fridge for several days and microwaved to reheat.  Don’t microwave for more than about a minute or the eggs will get rubbery.
.
ENJOY!

to print the recipe, click here


.
Comments: I absolutely love this type of recipe that I can  make in the weekend and then enjoy for lunch the following week. I prefer to warm them up in my little electric oven, because it gives much better texture than the microwave, but if you follow Kalyn’s advice and keep the microwave time short, it will still prevent the dreadful rubbery-egg-syndrome.
 .
Cottage cheese was – for me – an acquired taste. When I first moved to the US, I did not like it at all.  But for one reason or another I kept trying it and started to enjoy its unique texture and mild taste. Nowadays I can even eat it straight from a spoon, as long as it is crowned with a little shower of salt and coarsely ground black pepper. A little za’atar would not hurt either.  In this preparation, it offers a perfect creamy texture to the frittata.
 .
I love to pair these babies with some juicy tomatoes, but the time for that is unfortunately over…. Must wait for Spring, which obviously cannot come quickly enough for me (sigh).
.
.
.
.


FOUR YEARS AGO:
Cappuccino Panna Cotta

FIVE YEARS AGO: Chicken Parmigiana, the Thriller

SIX YEARS AGO: Wild Mushroom Risotto

SEVEN YEARS AGO: Tartine Bread:  Basic Country Loaf 

EIGHT YEARS AGO:  Pugliese Bread

SaveSave

SaveSave

SaveSaveSaveSave

SaveSave

SaveSave

SaveSave

SaveSave

SaveSave

YOU SAY EBELSKIVER, I SAY FALAFEL


Have you heard of ebelskivers? With a fun name that twists the tongue around, ebelskivers are creatures conceived in Denmark, designed to make your mouth water and your waistline expand. Think pancakes in round shape, served as a bite-size delicacy. To properly make them, you need a pan like this one.

With that pan calling the Bewitching Kitchen home, I was eager to make my first batch of ebelskivers. The perfect opportunity shaped up: a bunch of golfing friends came to stay with us and play in a tournament with Phil. My plan was to offer them a special breakfast on Sunday morning before they headed to the golf course. But, I kept that plan well hidden. It would be a surprise. Guess who was really surprised? Yours truly. Their performance on the golf course on Saturday made them all want to get up at the crack of dawn and go practice for a couple of hours before the final outing. Breakfast? Who needs breakfast when there’s golf? They grabbed a bunch of cereal bars and off they went. Oh, well. So much for a carefully planned ebelskiver extravaganza…

So I was left with a virgin ebelskiver pan. Then serendipity hit. I was talking to my friend Elaine and she mentioned making falafel in her “special pan.”  She had no idea I had the same type of pan! You can check her recent blog post about it with a jump here. It turns out hers is a slightly different version, with a larger number os smaller cavities. Falafel… We both love falafel. My pan would no longer be a virgin.

FALAFEL
(adapted from Elaine’s foodbod)

250g dried chickpeas, placed in a large bowl of water and soaked overnight
1 medium shallot, peeled and roughly chopped
1 bunch flat leaf parsley
1 tsp ground coriander
1 tsp ground cumin
1/4 cayenne pepper (optional)
Juice of 1 lemon
Salt to taste
chickpea flour, about 1/4 cup (depending on moisture of your mixture)
1/2 teaspoon baking powder

Wash and drain the chickpeas.

Put everything except the flour in a food processor and chop to a chunky crumb, then put it all into a large bowl. Add the baking powder and enough flour to bring the mixture together in your hands, then create small balls of the mix and flatten them slightly to make the falafel shape.

Put your ebelskiver pan over a low/medium heat and place a small amount of oil in each dip and allow it to heat up briefly. Place a falafel in each dip and cook until done, moving the pan around to make sure it heats evenly.  Turn the falafels gently with a fork when the underside is golden brown, to brown the other side. Remove them to a low oven while you prepare the rest of the meal, or serve right away.

ENJOY!

to print the recipe, click here


Comments: These turned out delicious! At first I thought that it would make too much filling and I would have a bunch of falafel mixture leftover. Not the case. For my size pan, with the seven medium-sized cavities, it was almost the exact amount. Because my falafels were bigger than Elaine’s, I decided to add a little baking powder  to help lift them a little more. After I “fried” them on both sides, I placed them in our small toaster oven just to keep warm while I finished the rest of the meal. Great to have an additional use for this pan, in fact I have a few savory recipes that might cook very well in it. A fun toy to play with, that’s for sure….

I served ours drizzled with a mixture of yogurt and tahini, seasoned with a touch of salt and lemon juice. It was quite tasty,  but unfortunately the photo did not do it justice, so I skipped sharing it. Elaine served hers over hummus, her picture is worthy of a cooking magazine. Go check it out…

😉

Sharing is caring… while you’re here, grab a pin!

ONE YEAR AGO: Happy Thanksgiving!

TWO YEARS AGO: Two Takes on Raspberries

THREE YEARS AGO: Spice Cake with Blackberry Puree & The Global Pastry Review

FOUR YEARS AGO: Own Your Kitchen with Cappuccino Panna Cotta

FIVE YEARS AGO: Chicken Parmigiana, the Thriller

SIX YEARS AGO: Wild Mushroom Risotto

SEVEN YEARS AGO: Tartine Bread:  Basic Country Loaf 

EIGHT YEARS AGO:  Pugliese Bread


SaveSave

SaveSave

SaveSave

SaveSave

SaveSave

SaveSave

SaveSave

SaveSave

SaveSave

SaveSave

ZUCCHINI NOODLES WITH SUNDRIED TOMATO PESTO

One of the best acquisitions for our kitchen was the spiralizer. It is the type of gadget that requires a little bit of getting used to. When I first got it, the idea of dragging it out of the cabinet, setting it on the countertop, and getting my technique right so that the strands would be uniformly gorgeous… seemed a bit much. But trust me, the more you use it, the better you’ll be and the more you’ll fall in love with it. Now I don’t even blink, grab it, and try it on all sorts of veggies, broccoli stalks being the most recent. Stay tuned for that one… Should I call them “broodles?” Yeah, broodles. Mind. Blown. But anyway, zucchini is probably the number one veggie that everyone uses. They have the perfect shape and give super long and beautiful strands. Plus, they marry well with so many sauces: Oriental style like soy with peanuts plus a little fish sauce to hip-it-up, tomato based sauces, cashew cream, real cream, pesto, browned butter… Today I am sharing a recipe from a favorite food blog of mine. I’ve cooked many dishes from  The Iron You. Mike raved about the combination of sun-dried tomato pesto and zoodles. He is one smart cookie. It is superb! You must try it.

ZoodlesSundried11

ZUCCHINI NOODLES WITH SUN-DRIED TOMATO PESTO
(adapted from The Iron You)

for the sun-dried tomato pesto:
½ cup  oil-packed sun-dried tomatoes, drained
⅓ cup roasted almonds
4 tablespoons grated Parmesan cheese
4 tablespoons grated Pecorino Romano cheese
small bunch of fresh basil leaves
salt to taste
4 tablespoons olive oil

for the noodles:
6 medium-large zucchini

In a food processor (or blender) add roasted almonds and basil and pulse until roughly chopped. Add sun-dried tomatoes, Parmesan cheese, and Pecorino Romano cheese and process until a uniform paste has formed. Season with a little salt. With the food processor (or blender) running, stream in the olive oil and continue blending until the olive oil is emulsified into the pesto and the sauce looks uniform. Pesto can be stored in the refrigerator with a thin film of olive oil on top.

Using a spiralizer create zucchini noodles using your favorite blade, thin or thick, whatever you prefer.

Boil the zoodles in salted boiling water for 2 minutes, drain and mix with the pesto sauce while still very hot.  Sprinkle with additional Parmigiano cheese before serving.

ENJOY!

to print the recipe, click here

comp1


Comments:
Talk about a tasty pesto!  The texture of mine was not as smooth as the one Mike made, at least from the photos, but I don’t think that matters that much. If you prefer a smoother texture, process further and maybe add a little more olive oil.  I used roasted unsalted almonds, so I adjusted the seasoning with salt. Mike used salted almonds and he also used garlic, which I am sure most of my readers will enjoy too.  I fully agree that it was a match made in heaven with the zoodles.  We enjoyed it as a side dish with grilled pork tenderloin, but of course you could make it into a fully vegetarian meal if you add a few more goodies on the plate, like roasted asparagus, a big salad, or a crostini with a smear of goat cheese run under the broiler. Yeah, that sounds about right!

served11

Dinner is served!


Zoodles with Sundried Tomato Pesto


ONE YEAR AGO: Caprese Salad with Toasted Walnuts

TWO YEARS AGO: Oh, my God! I think I saw something!

THREE YEARS AGO: Celebrate Wednesday with Hoisin-Grilled Chicken and Soba Noodles

FOUR YEARS AGO: The Manhattan Project

FIVE YEARS AGO: Carrot “Nib” Orzo

SIX YEARS AGO:  A Sticky Situation

SEVEN YEARS AGO:  The Garden

SILKY GINGERED ZUCCHINI SOUP

For the last couple of months I became interested in the Paleo nutritional system, as most people who follow it appear to be very fit. It got me curious. It also did not hurt that Dr. Loren Cordain,  the man behind the Paleo approach is now part of our extended family: Phil’s sister recently married his uncle-in-law. Small world! Anyway, fully aware of my self-inflicted moratorium on cookbooks in 2015, I did what a sensible food blogger would do and bought some Paleo-oriented publications last November. As you can see, I have an amazing ability to outsmart myself.  If you have any interest in the subject, I highly recommend Well Fed2, The Frugal Paleo Cookbook, and Nom Nom Paleo Food for Humans. Don’t worry, the Bewitching won’t turn into a Low-carb, Paleo, Vegan, or “insert any diet system here” blog.  There will be bread, pasta, rice, couscous, a lot of meat, and sweets. Omnivore, and loving it! –  has always been my motto, and that isn’t changing. But the truth is that one can cook a ton of tasty stuff under the Paleo approach. Plus, it’s all reasonably low in carbohydrates and high in protein, a kind of eating I’ve favored for the past 4 or 5 years. This soup is a perfect example of deliciousness that is low in fat, low in carbs, and keeps me satisfied from lunch until dinner.  As you may notice,  I included a cheese crisp that would not be blessed by Paleo folks.  It would make this version Primal, I suppose. Still hanging around caves, but with a little more pizzazz, sipping the occasional wine from a coconut shell.

ZucchiniSoup


SILKY GINGERED ZUCCHINI SOUP OVERVIEW

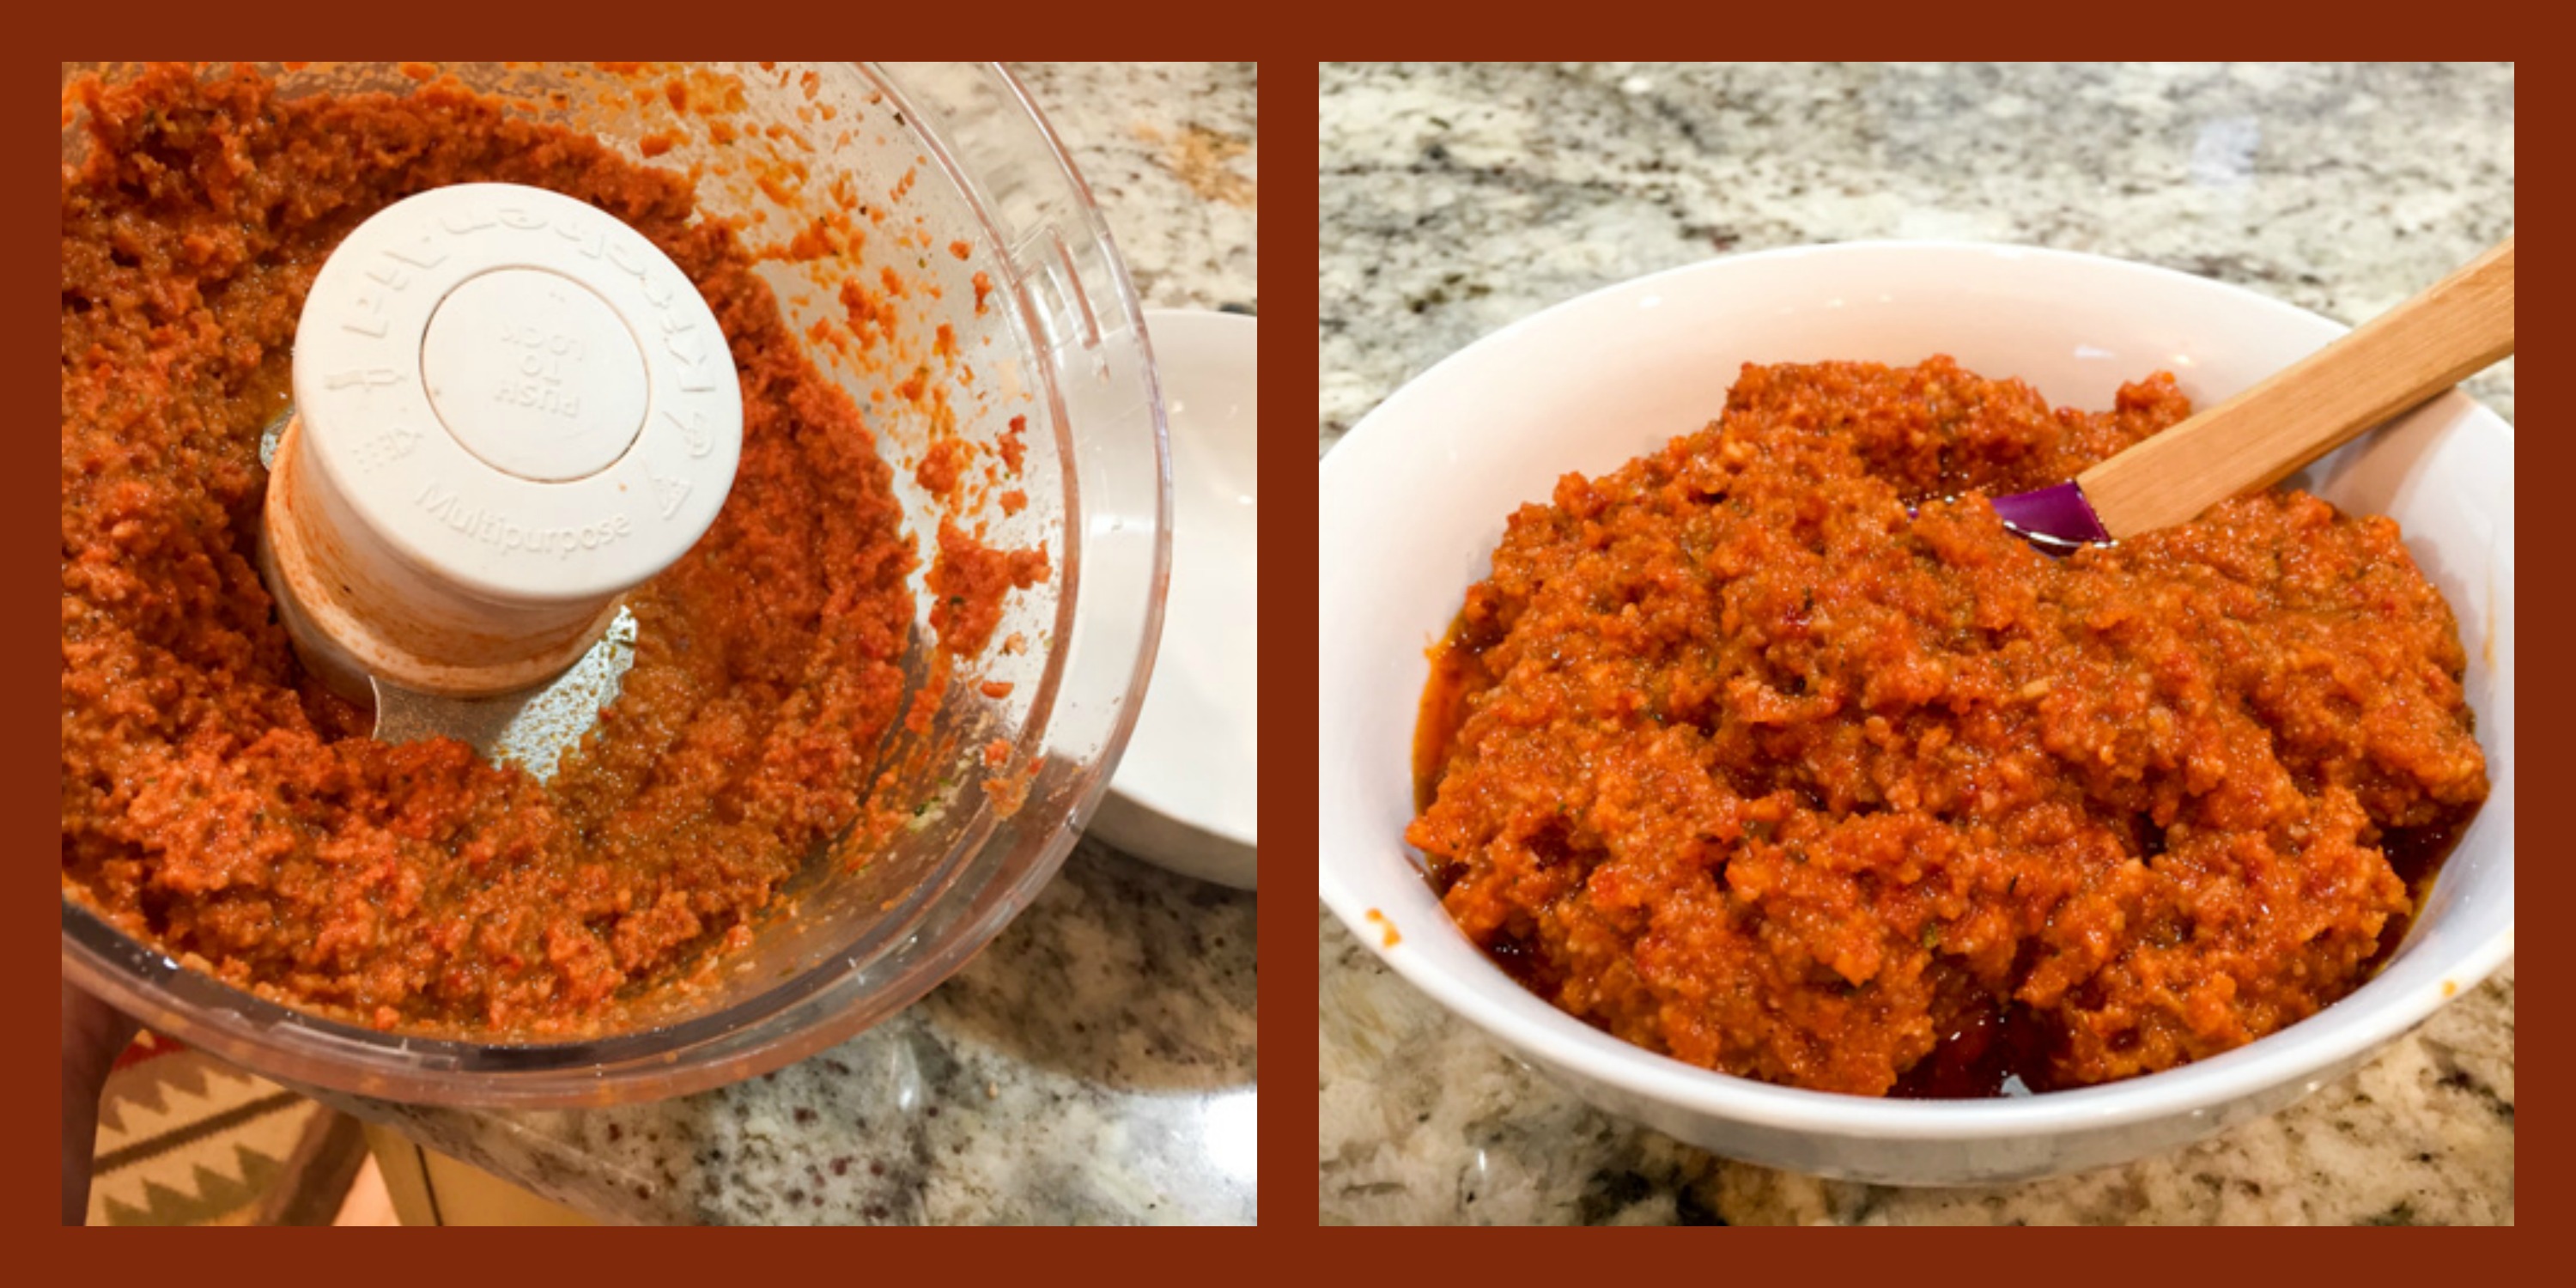
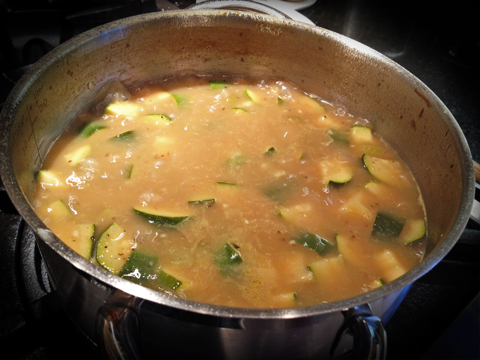
The secret for this smooth and delicious soup is the use of ginger and coriander as background spices. The soup starts with a simple saute of onion and garlic, then ginger and coriander in powdered form are added, releasing their flavors in the hot oil. Next, zucchini pieces join the party, and the whole thing will be simmered for about one hour in your favorite type of broth (chicken, veggie, or beef).  When the zucchini is super tender, the soup is blended and ready to be enjoyed.

You can find the recipe in Melissa’s site with a click here.
It is also in her cookbook Well Fed2.

simmering

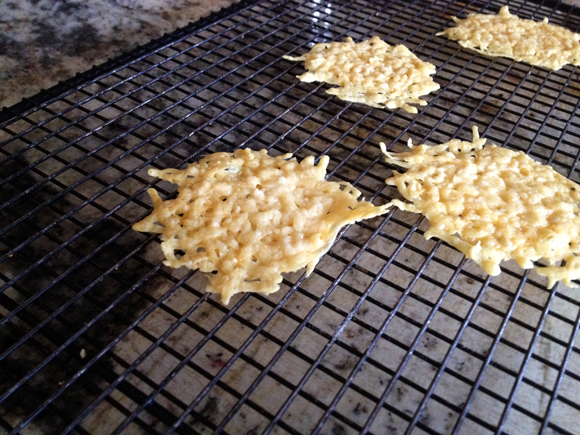
I’ve made this soup almost as many times as I made Mike’s Creamy Broccoli Soup. Sometimes I used chicken broth, sometimes a mixture of chicken broth and water.  A squirt of lemon juice right before serving is a nice touch too. Cheese crisps pair very well with the zucchini. To make them I followed the method that Mike described in his original post for the broccoli soup.  On the first photo of this post, I used a Cheddar type cheese, and in the photo below I went with Parmigiano-Reggiano.  I like Parmigiano better, because it releases less oil as it bakes, and has that unique sharpness that contrasts very well with the silky soup.

unnamed-5

I confess I was afraid of making the crisps from scratch, due to traumatic experiences of a distant past. At that time I tried making them on a non-stick skillet on the stove top, and ended up with a complete mess, pretty much inedible.

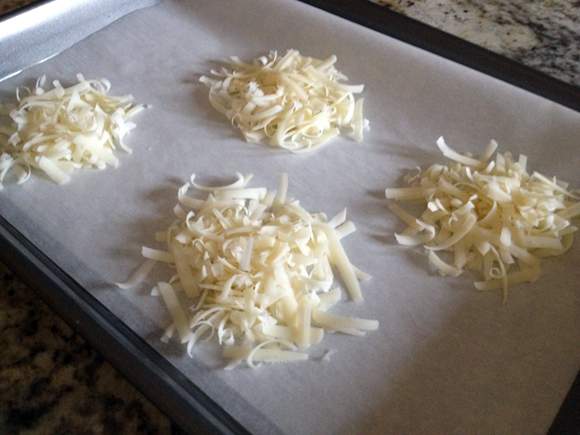
But preparing them in the oven was a totally different experience. First, place parchment paper over a baking sheet (or use Silpat).  Then add small amounts of shredded cheese of your choice separated by about 1-inch.  They won’t spread too much, but better safe than sorry.

cheese

Watch them carefully, because they will go from perfect to burned in a matter of seconds….

crisps

Carefully transfer them to a rack, so that they get crisp. You can use them right away, or store for later.
crisps_rack

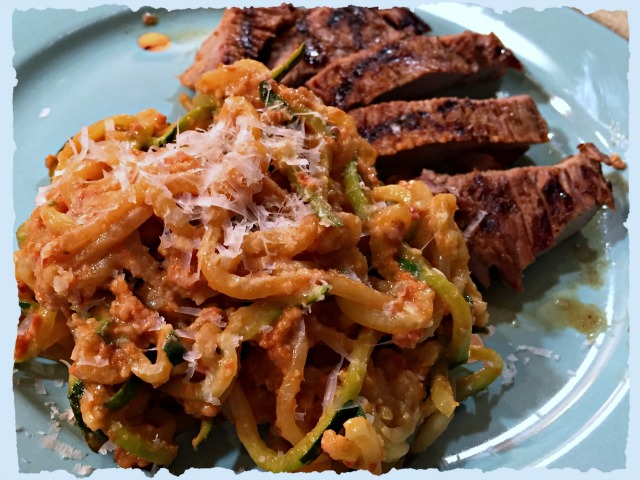
You will find all sorts of uses for these crisps… This beautiful Mexican-Caprese was made by my beloved husband…  and embellished by the crisps…

TexMexCaprese
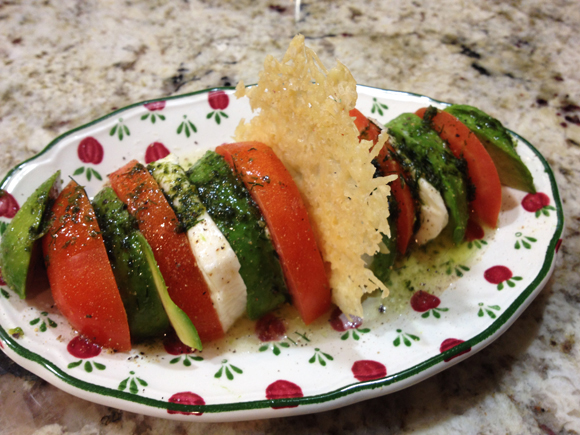
Dressing was avocado oil infused with basil (he used the handy cubes from Dorot), a little lemon juice for good measure.

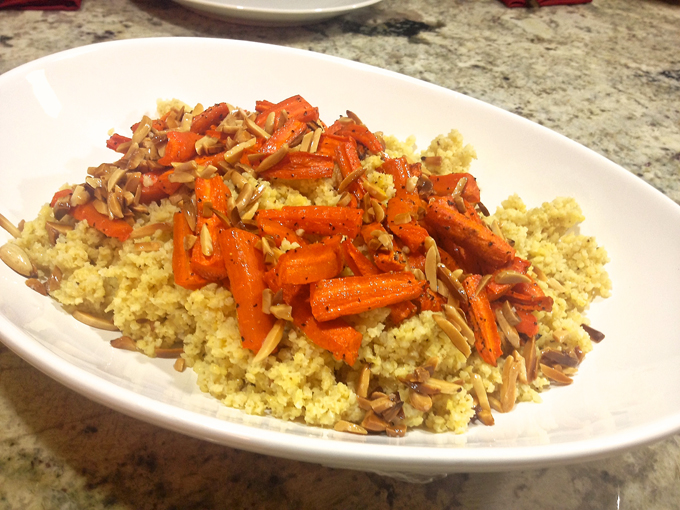
But back to the zucchini soup: a real winner of a recipe. I normally make a batch in the weekend, and it becomes my lunch for three days in the following week. If I don’t  have cheese crisps I top it with toasted almonds, or a diced hard-boiled egg. Simple, and quite nutritious.

Before I leave you, I want to share the best text I’ve seen in a long time concerning healthy-eating. It is a well-written satire on the state of nutritional advice these days. Hilarious, but unfortunately quite close to our reality these days.  Enjoy it with a click here. A little quote as a teaser:

The ONLY way to eat is seasonally, locally and sustainably.  If you live in a place where snow falls and kills crops and animals starve you should eat snow and only snow.  To do anything else will cause immediate and untimely death”.  
(from Sarah Yates, A Little House in the Hills).

🙂

ONE YEAR AGO: Sweet Fifteen!

TWO YEARS AGO: Sesame and Flaxseed Sourdough

THREE YEARS AGO: Green Beans with Miso and Almonds

FOUR YEARS AGO: Saturday Morning Scones

FIVE YEARS AGO: White Bread


MILLET COUSCOUS WITH ROASTED CARROTS

Saw this recipe in Bon Appetit.  Made it that same evening for dinner. Lightning speed. Not that usual for me, but I had all the ingredients and was also anxious to cook millet for the first time. One of our grocery stores carries a very nice assortment of grains, seeds & flours in bulk. It is quite convenient when I feel like baking a special bread but do not want to carry home 1kg of oat flour or some other exotic being.  Millet was one of the goodies I brought home from a recent visit.   This recipe, a perfect way to welcome it in our kitchen.

MilletCouscous3


MILLET COUSCOUS WITH ROASTED CARROTS
(from Bon Appetit)

4 tablespoons olive oil, divided (I used a bit less)
1 cup millet
½ teaspoon cumin seeds
2 + ¼ cups chicken broth
6 medium carrots, peeled, cut into 1” pieces
Kosher salt, freshly ground pepper
¼ cup roasted almonds, chopped
¼ teaspoon cayenne pepper
¼ cup fresh cilantro leaves with tender stems (I omitted, did not have any around)

Heat oven to 400°. Toss carrots with 2 Tbsp. oil on a rimmed baking sheet; season with salt and pepper. Roast until tender and golden brown, 20 to 25 minutes.

Heat 1 Tbsp. oil in a medium saucepan over medium-high heat. Add millet and cumin seeds and cook, stirring, until beginning to brown, about 2 minutes. Add broth and bring to a boil. Reduce heat, cover, and simmer, stirring occasionally, until millet is tender, 25–35 minutes (it took me closer to 35 minutes).

Heat remaining 1 Tbsp. oil (I used about 1 teaspoon instead) in a small skillet over low heat; cook almonds and cayenne, stirring occasionally, until fragrant, about 2 minutes. Serve millet topped with carrots, cilantro, and almond mixture.

ENJOY!

to print the recipe, click here

comosite
When I told Phil we were not having “real couscous”, he was a bit surprised. It looks almost exactly the same as semolina couscous. It takes longer to cook, though, and has a firmer texture. The flavor is slightly more “nutty”, but still quite mild.  I imagine most people will love it, there’s really nothing not to like about it. Plus, like your regular couscous, it will absorb the flavors of everything else you cook with it. Use  a flavorful chicken or veggie stock if you have it around.  The roasted carrots and sautéed almonds turn it into almost a complete meal.  Of course, we enjoyed it with a nice roast chicken, just because… Full disclosure: the roast chicken was prepared at the grocery store.  And I am not even slightly ashamed to admit it.

On a slight tangent,  a couple of years ago I read a pretty good article written by one of the popular celebrity chefs, I don’t remember who it was,  it was not Thomas Keller, but some other star almost as bright.  Anyway, he went on and on about never buying a roast chicken from a rotisserie. That he could have a much better dinner by buying the chicken (organic, of course), sticking it in the oven with just a sprinkle of salt, pepper, a lemon or two quickly placed inside the bird.  I am all for cooking from scratch, but I must say a chicken ready for me on my way home from work is very handy. It makes life so much easier! I don’t have to deal with the raw chicken, I don’t have to wait for my oven to warm up to temperature (it does take a while with our potent Supernova), and I can concentrate on making a quick and easy side dish such as couscous, or from now on, millet…   So, yes, 8 times out of 10, I reach for a rotisserie chicken.  And 6 times out of 10, I resort to cheese pre-shredded, from a bag.

Confession: good for the food blogger 😉

ONE YEAR AGO: Mozarella-Stuffed Turkey Burger

TWO YEARS AGO: Happy Halloween!

THREE YEARS AGO: Clay Pot Roast Pork

FOUR YEARS AGO: Panmarino

FIVE YEARS AGO:  A Classic Roast Chicken