LA COURONNE LYONNAISE, TWO WAYS

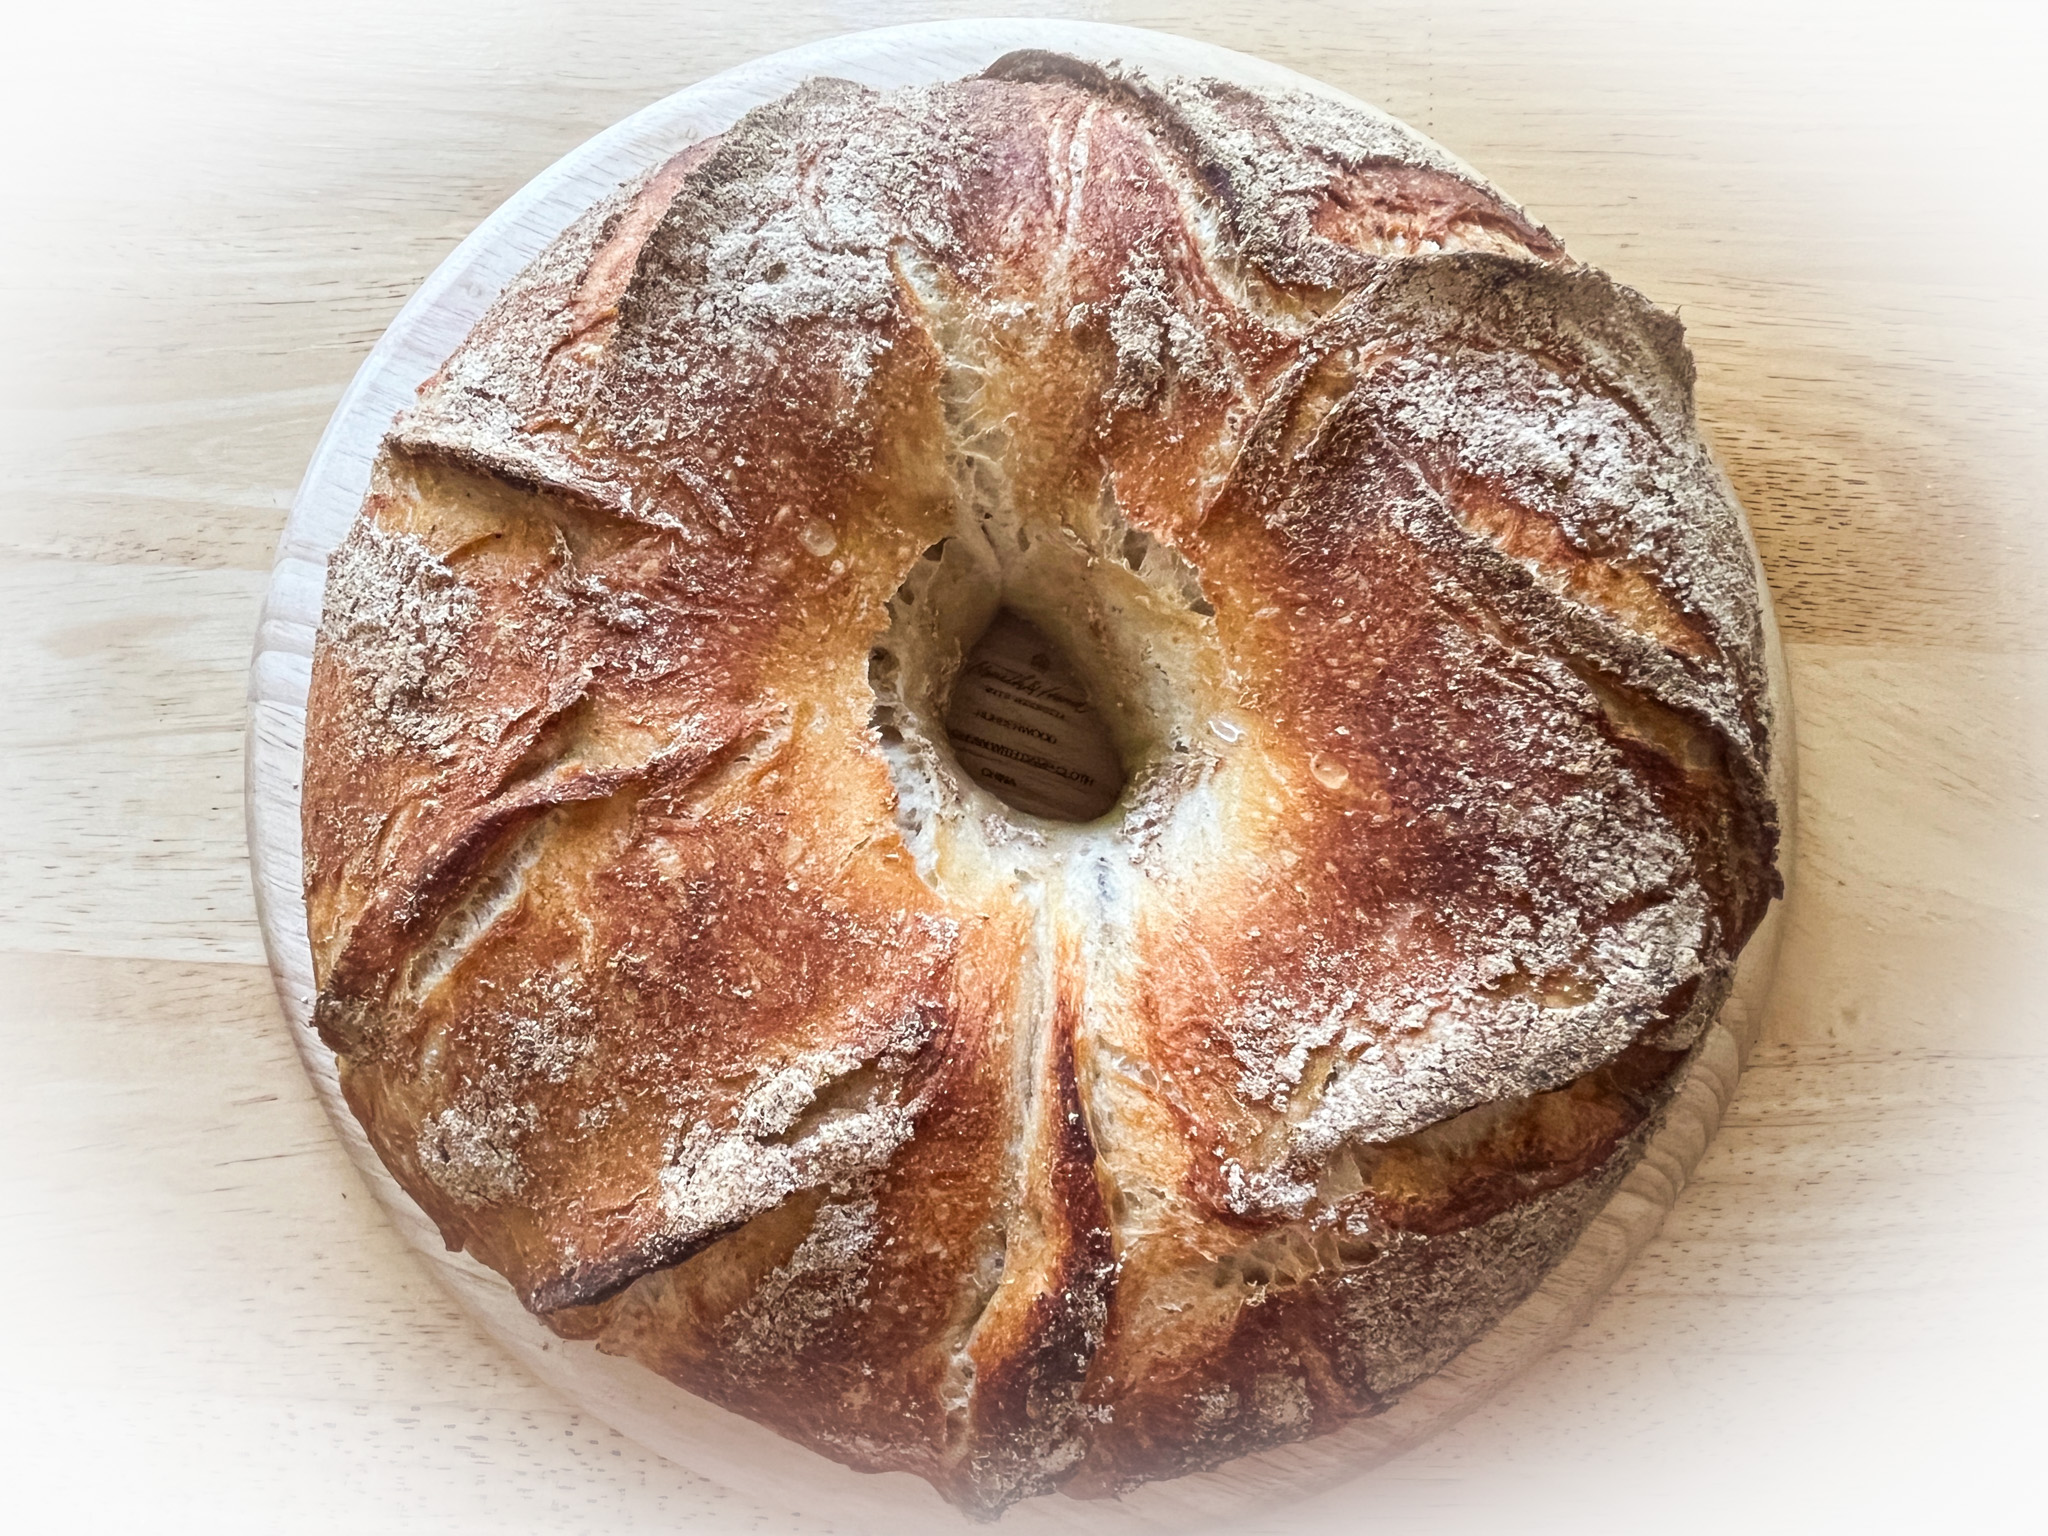
This bread originates in Lyon, and is shaped as a crown, therefore the name “couronne”. However, there are several ways to gild this lily. I am sharing two methods, the first one worked exactly the way I hoped, the second I consider a work in progress. So, yes, I will be back, hopefully with improvements on the second version…

.

METHOD ONE
A SIMPLE COURONNE


LA COURONNE LYONNAISE
(adapted from Henri-Luc’s blog)

530g bread flour
10g salt
160g sourdough starter at 100% hydratioin
300g water
rye flour for dusting

Mix sourdough starter in water and whisk to distribute well. Add bread flour and salt, incorporate either by hand or with a KitchenAid type mixer fitted with a hook dough for a few minutes. Proof at room temperature for 4 to 5 hours with folds at every 45 minutes.

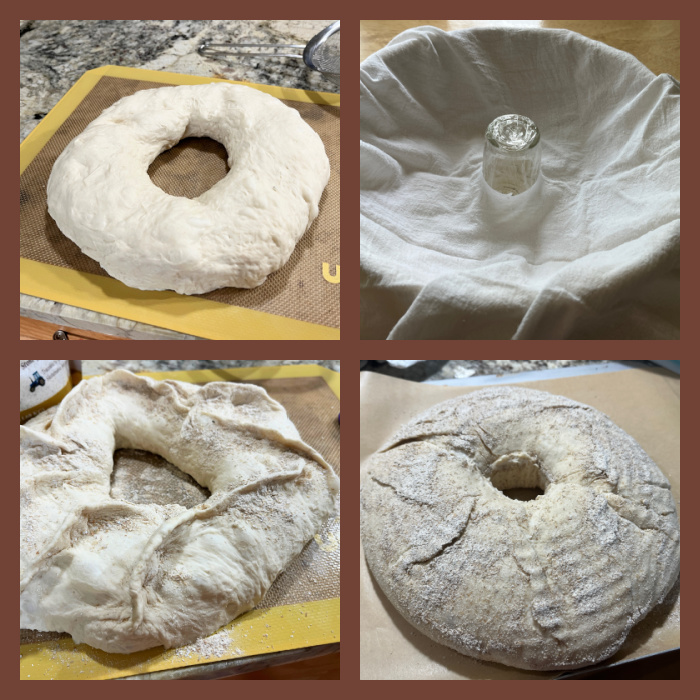
Prepare your round banetton to proof a crown, by placing a small glass or plastic container in the center. Cover with a cloth and flour it lightly with rye flour.

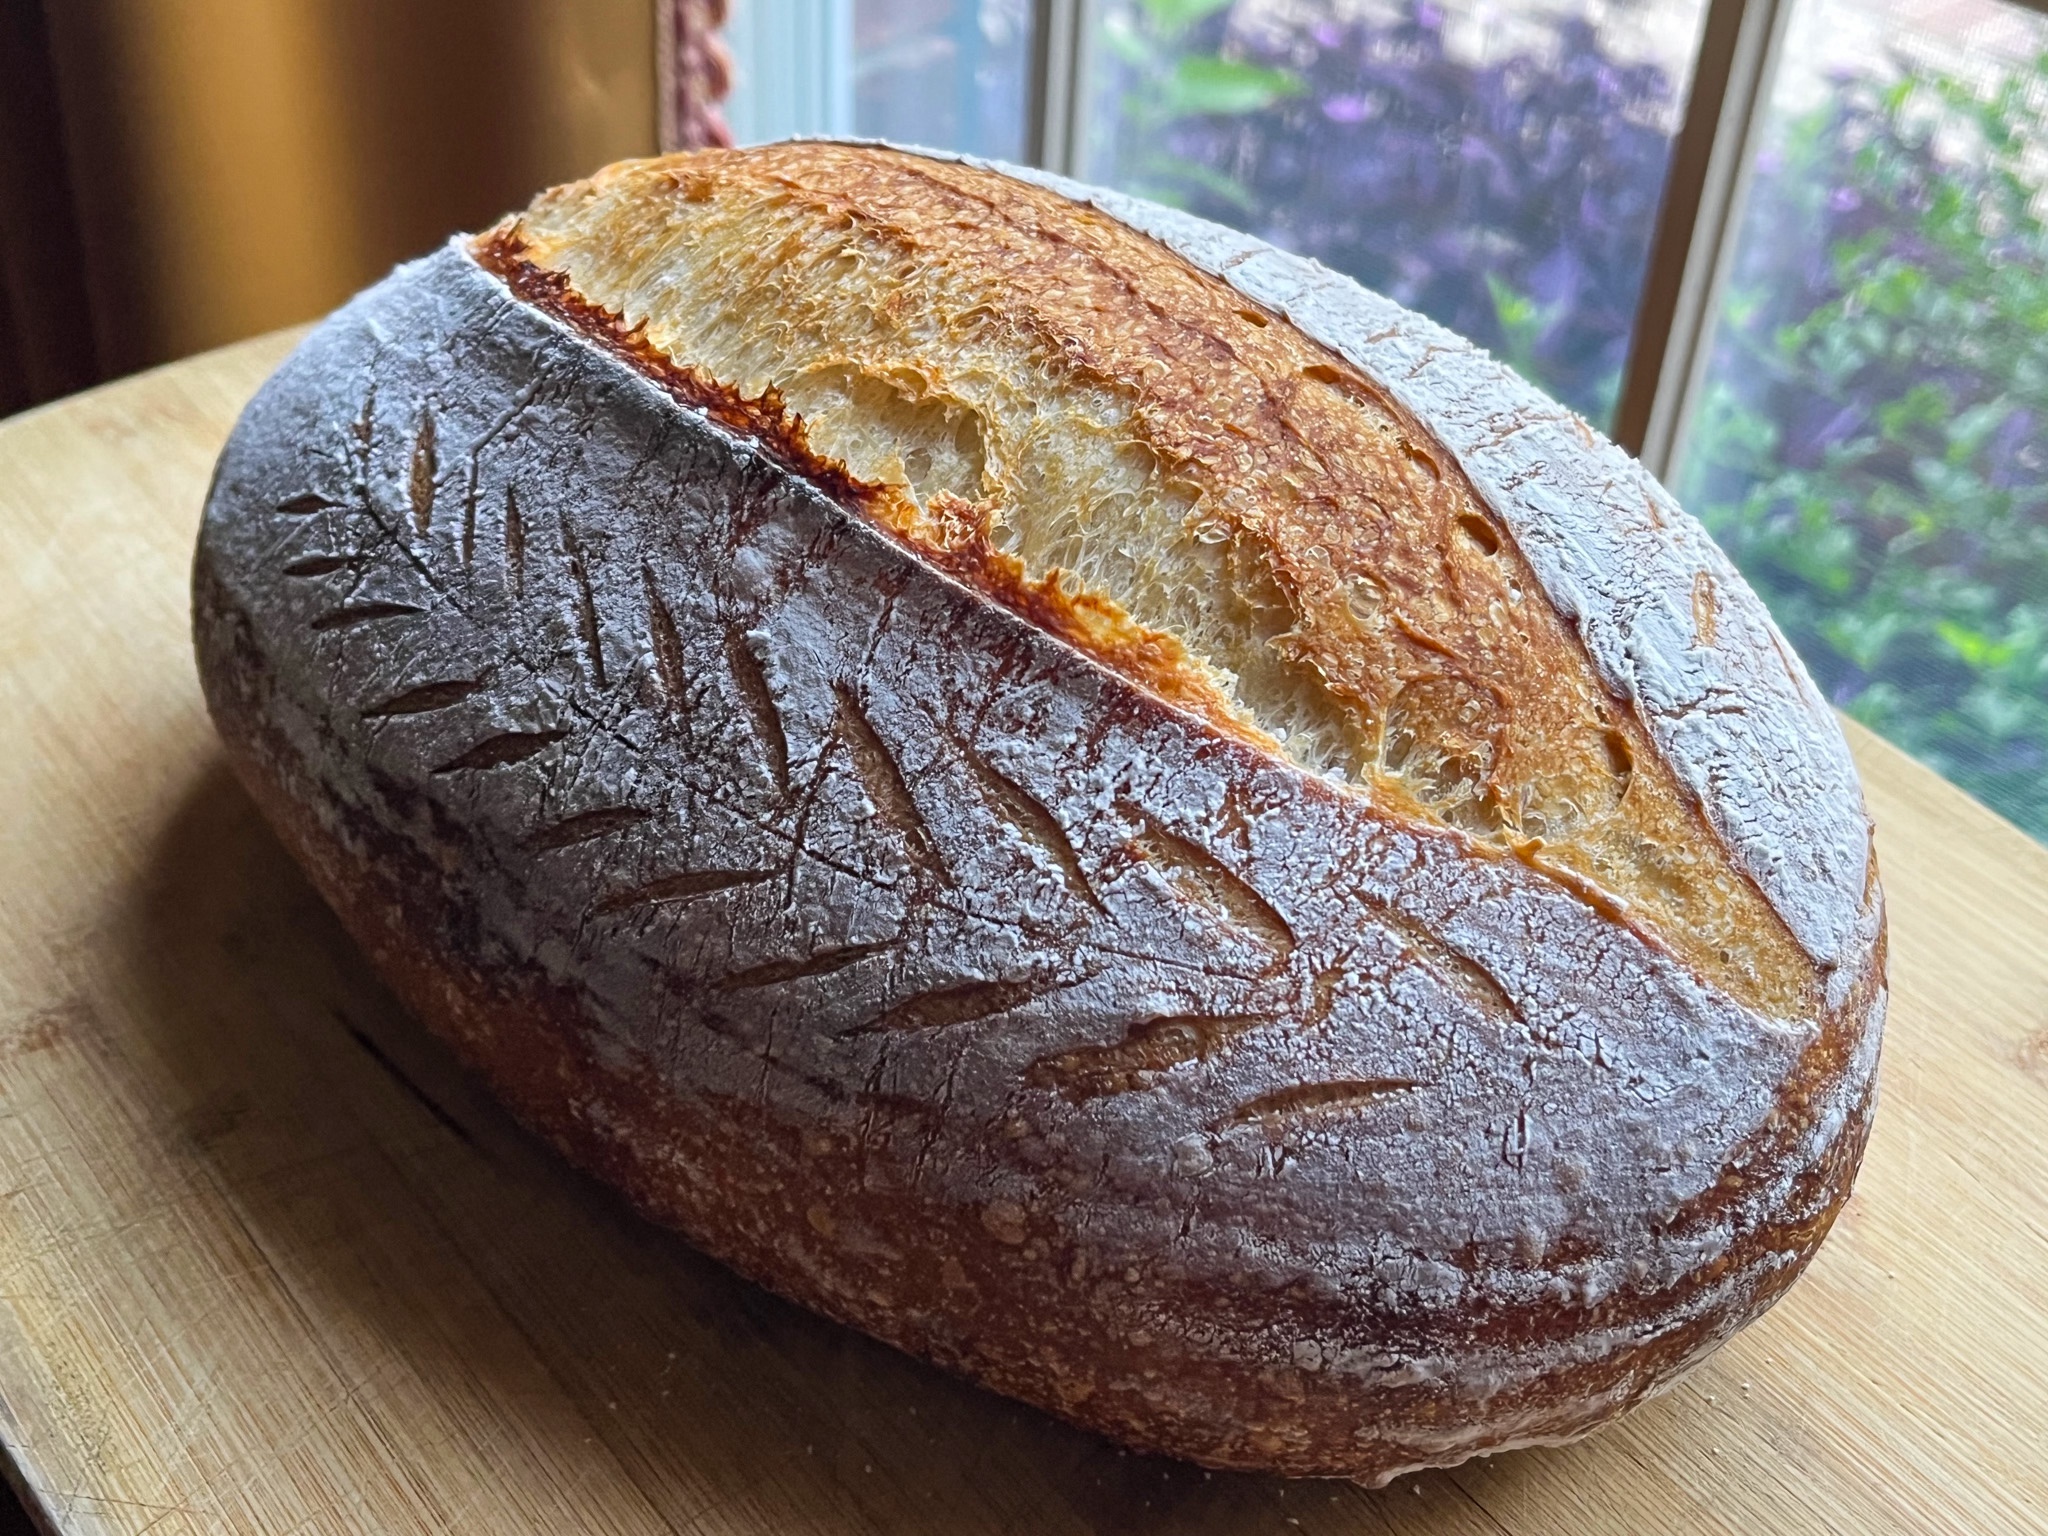
Pre-shape the dough as a round ball. Allow it to relax for 15 minutes. Make a hole in the center (traditionally bakers use their elbow, do what you feel is right…). Enlarge the whole until you get to the size of your round banetton. Now grab some rye flour with your fingers and pinch a series of alternating straight lines on the surface. Pinch the dough well to make a super sharp line of dough raising up. Then flour the surface lightly again and invert the dough on the banetton. Side with the ridges should go down. Proof at room temperature for 2 hours. Place a parchment paper on top, invert the bread over it and slide into the hot oven right away.

Bake at 450F over a stone with steam for 20 minutes, then remove the steam (I used a large roasting pan inverted over the stone as a lid). Bake for 20 to 25 minutes longer. If the bread darkens too much cover it with foil. Internal temperature should be around 210F.

Cool completely before slicing.

ENJOY!

to print the recipe, click here

Comments: This was such a fun bread baking adventure! I loved making the ridges and the way they gave the bread that incredibly nice rustic look once it baked. Make sure to use rye flour to dust the surface, it is going to make a big difference if you skip it. White flour won’t have the same effect.

.

METHOD TWO
COURONNE WITH FLAPS

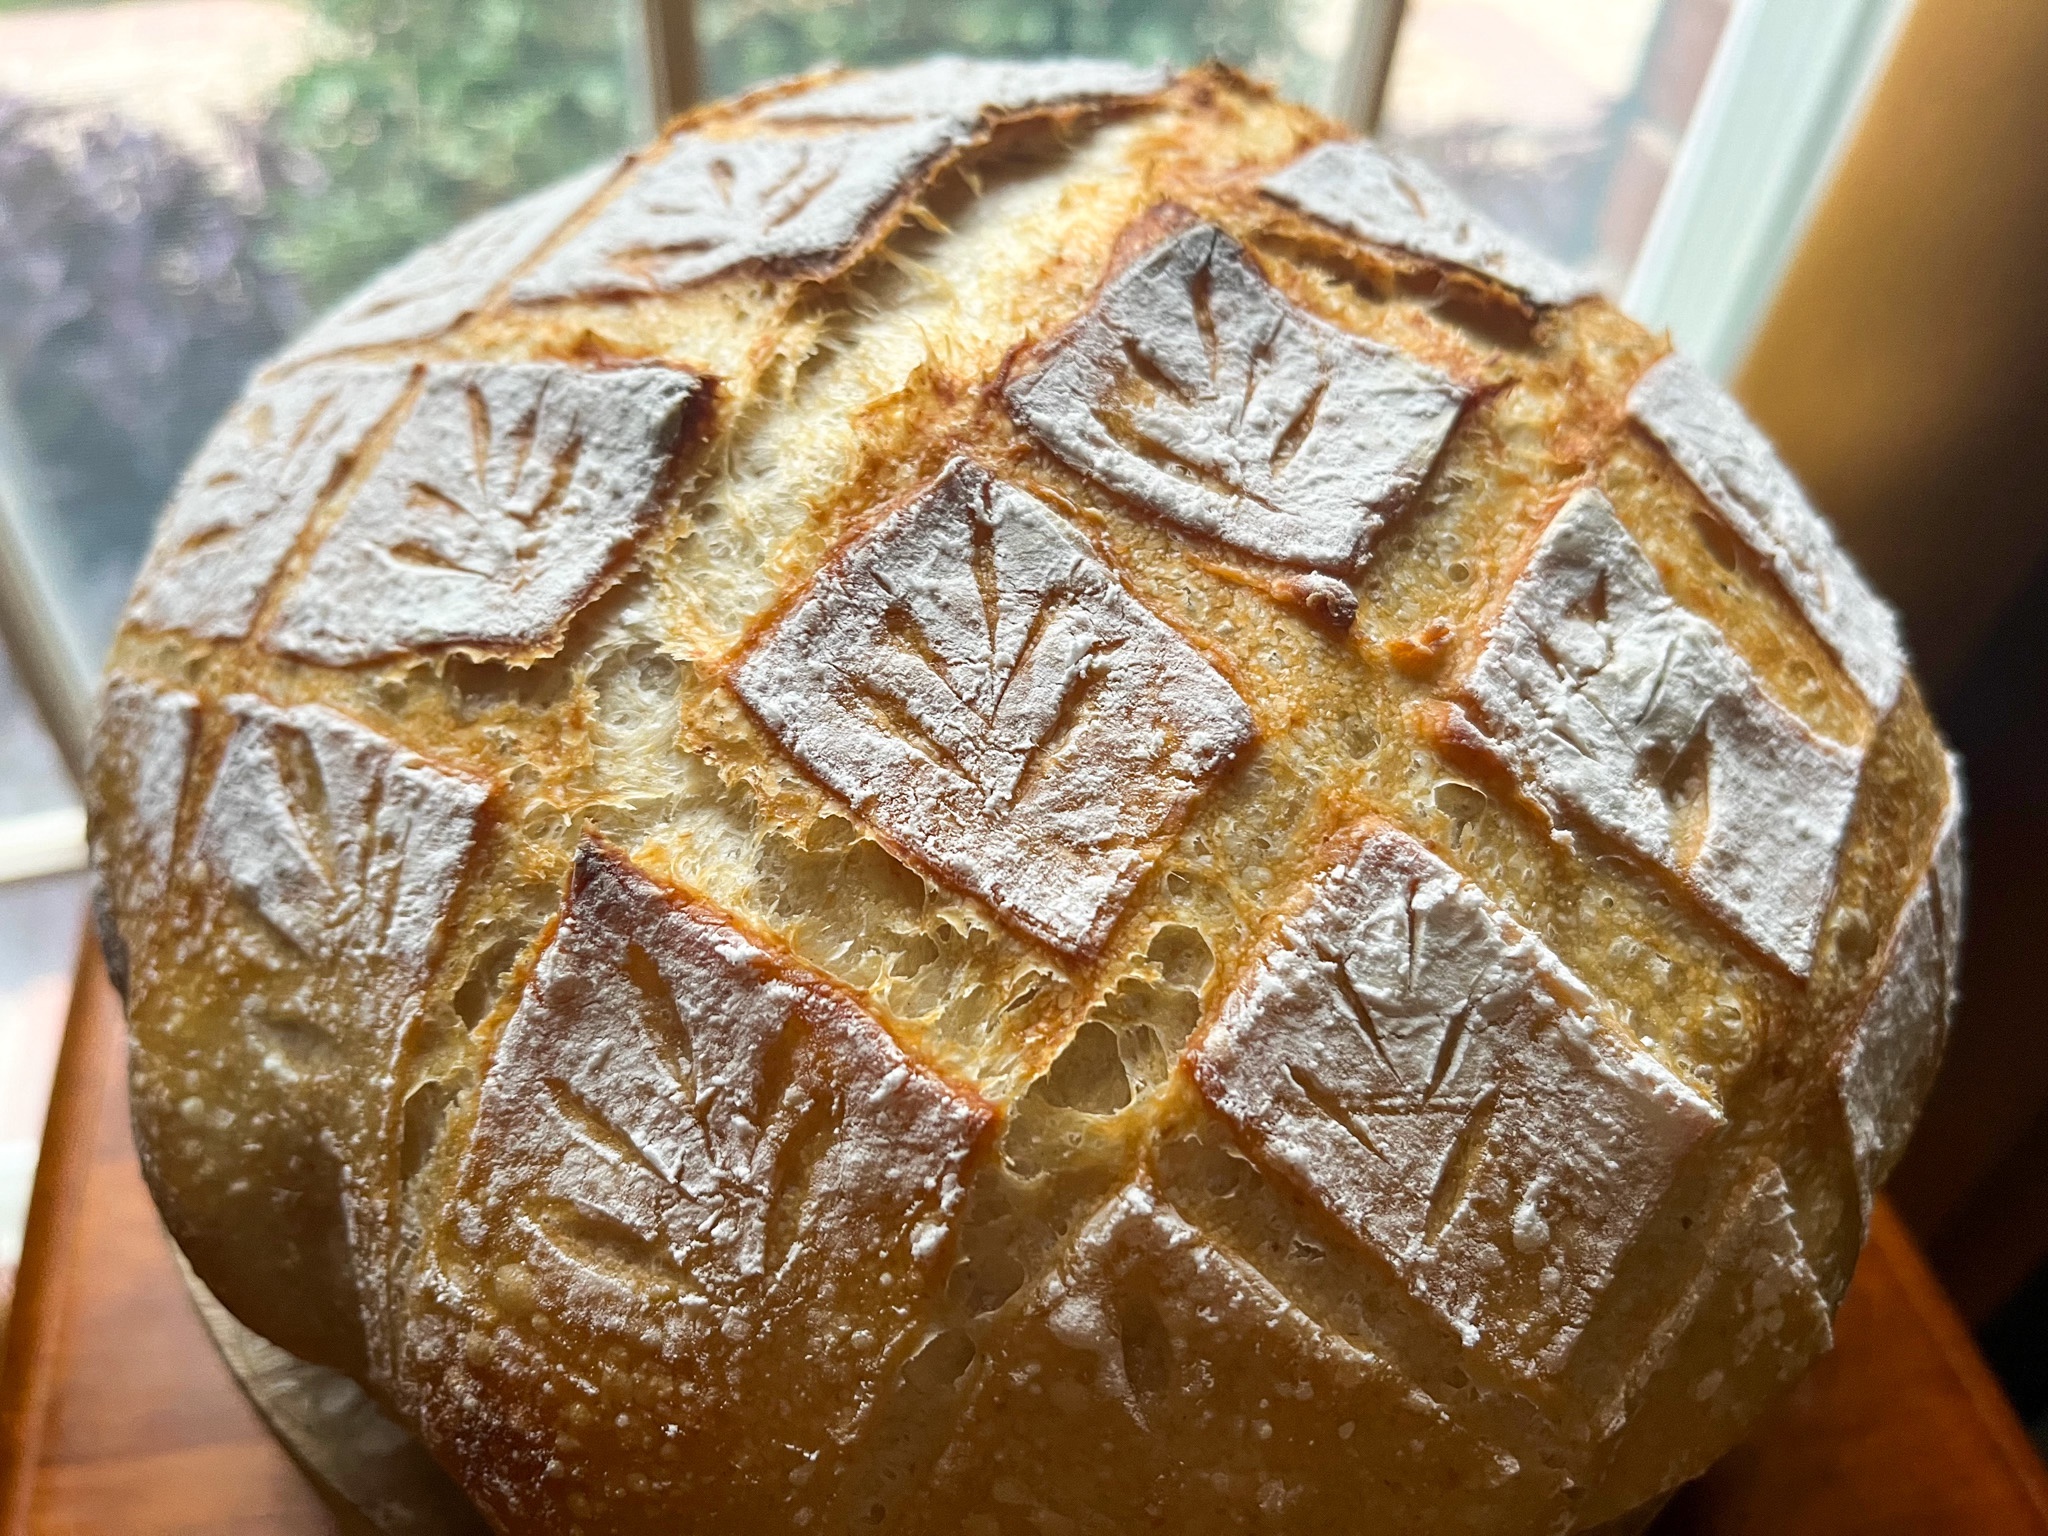
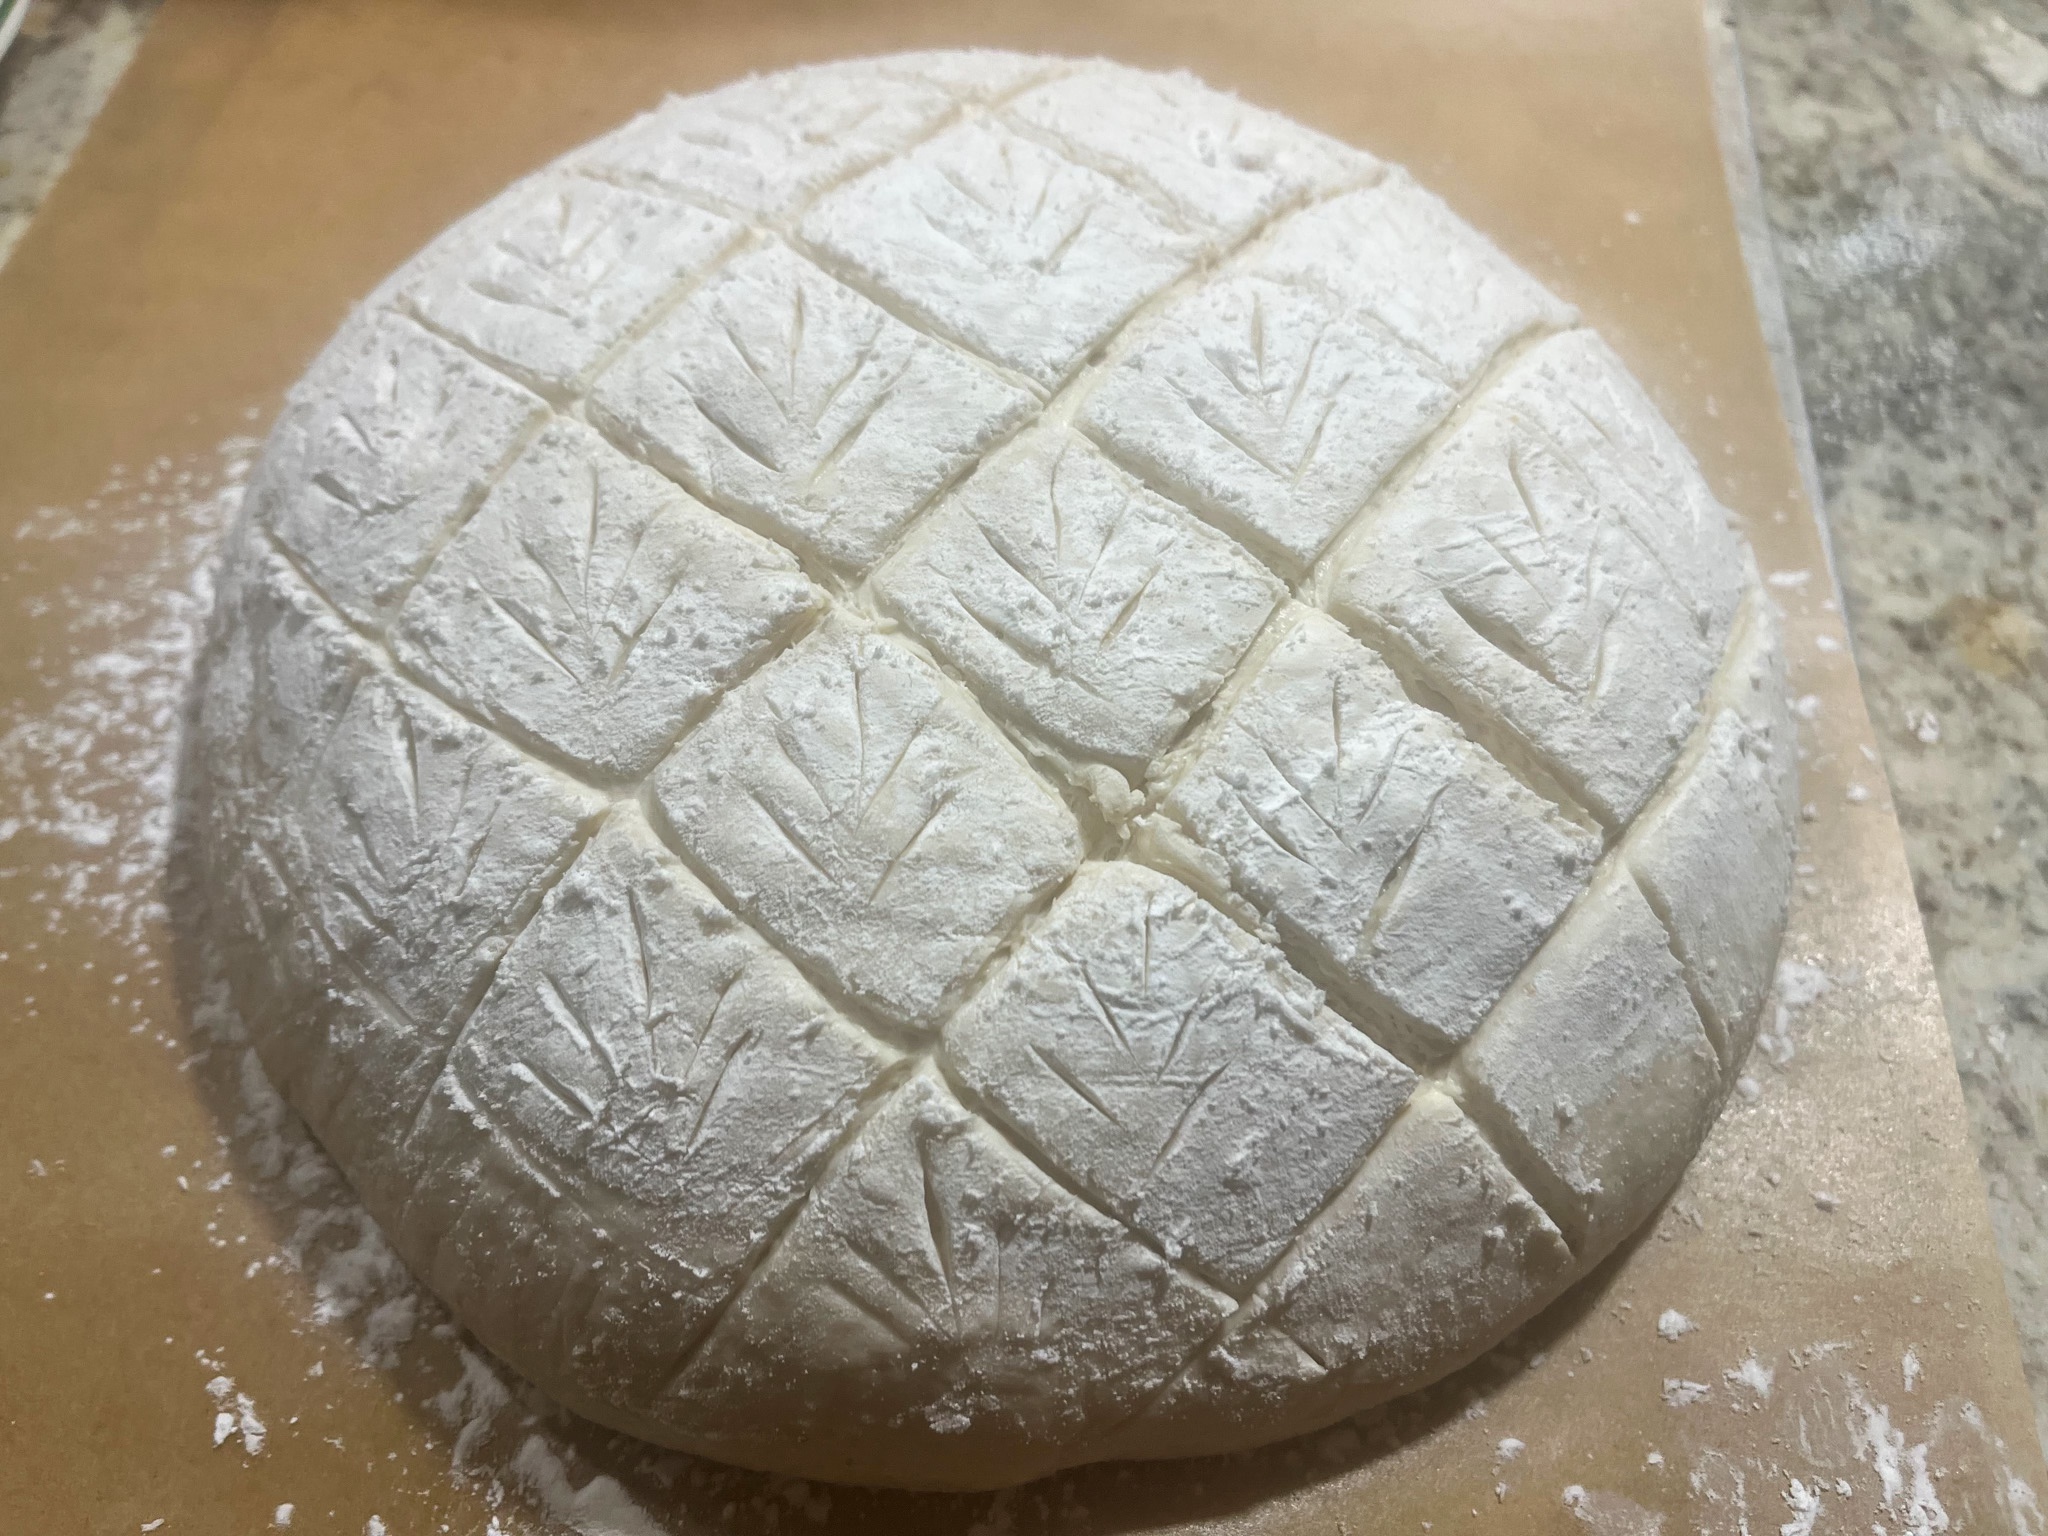
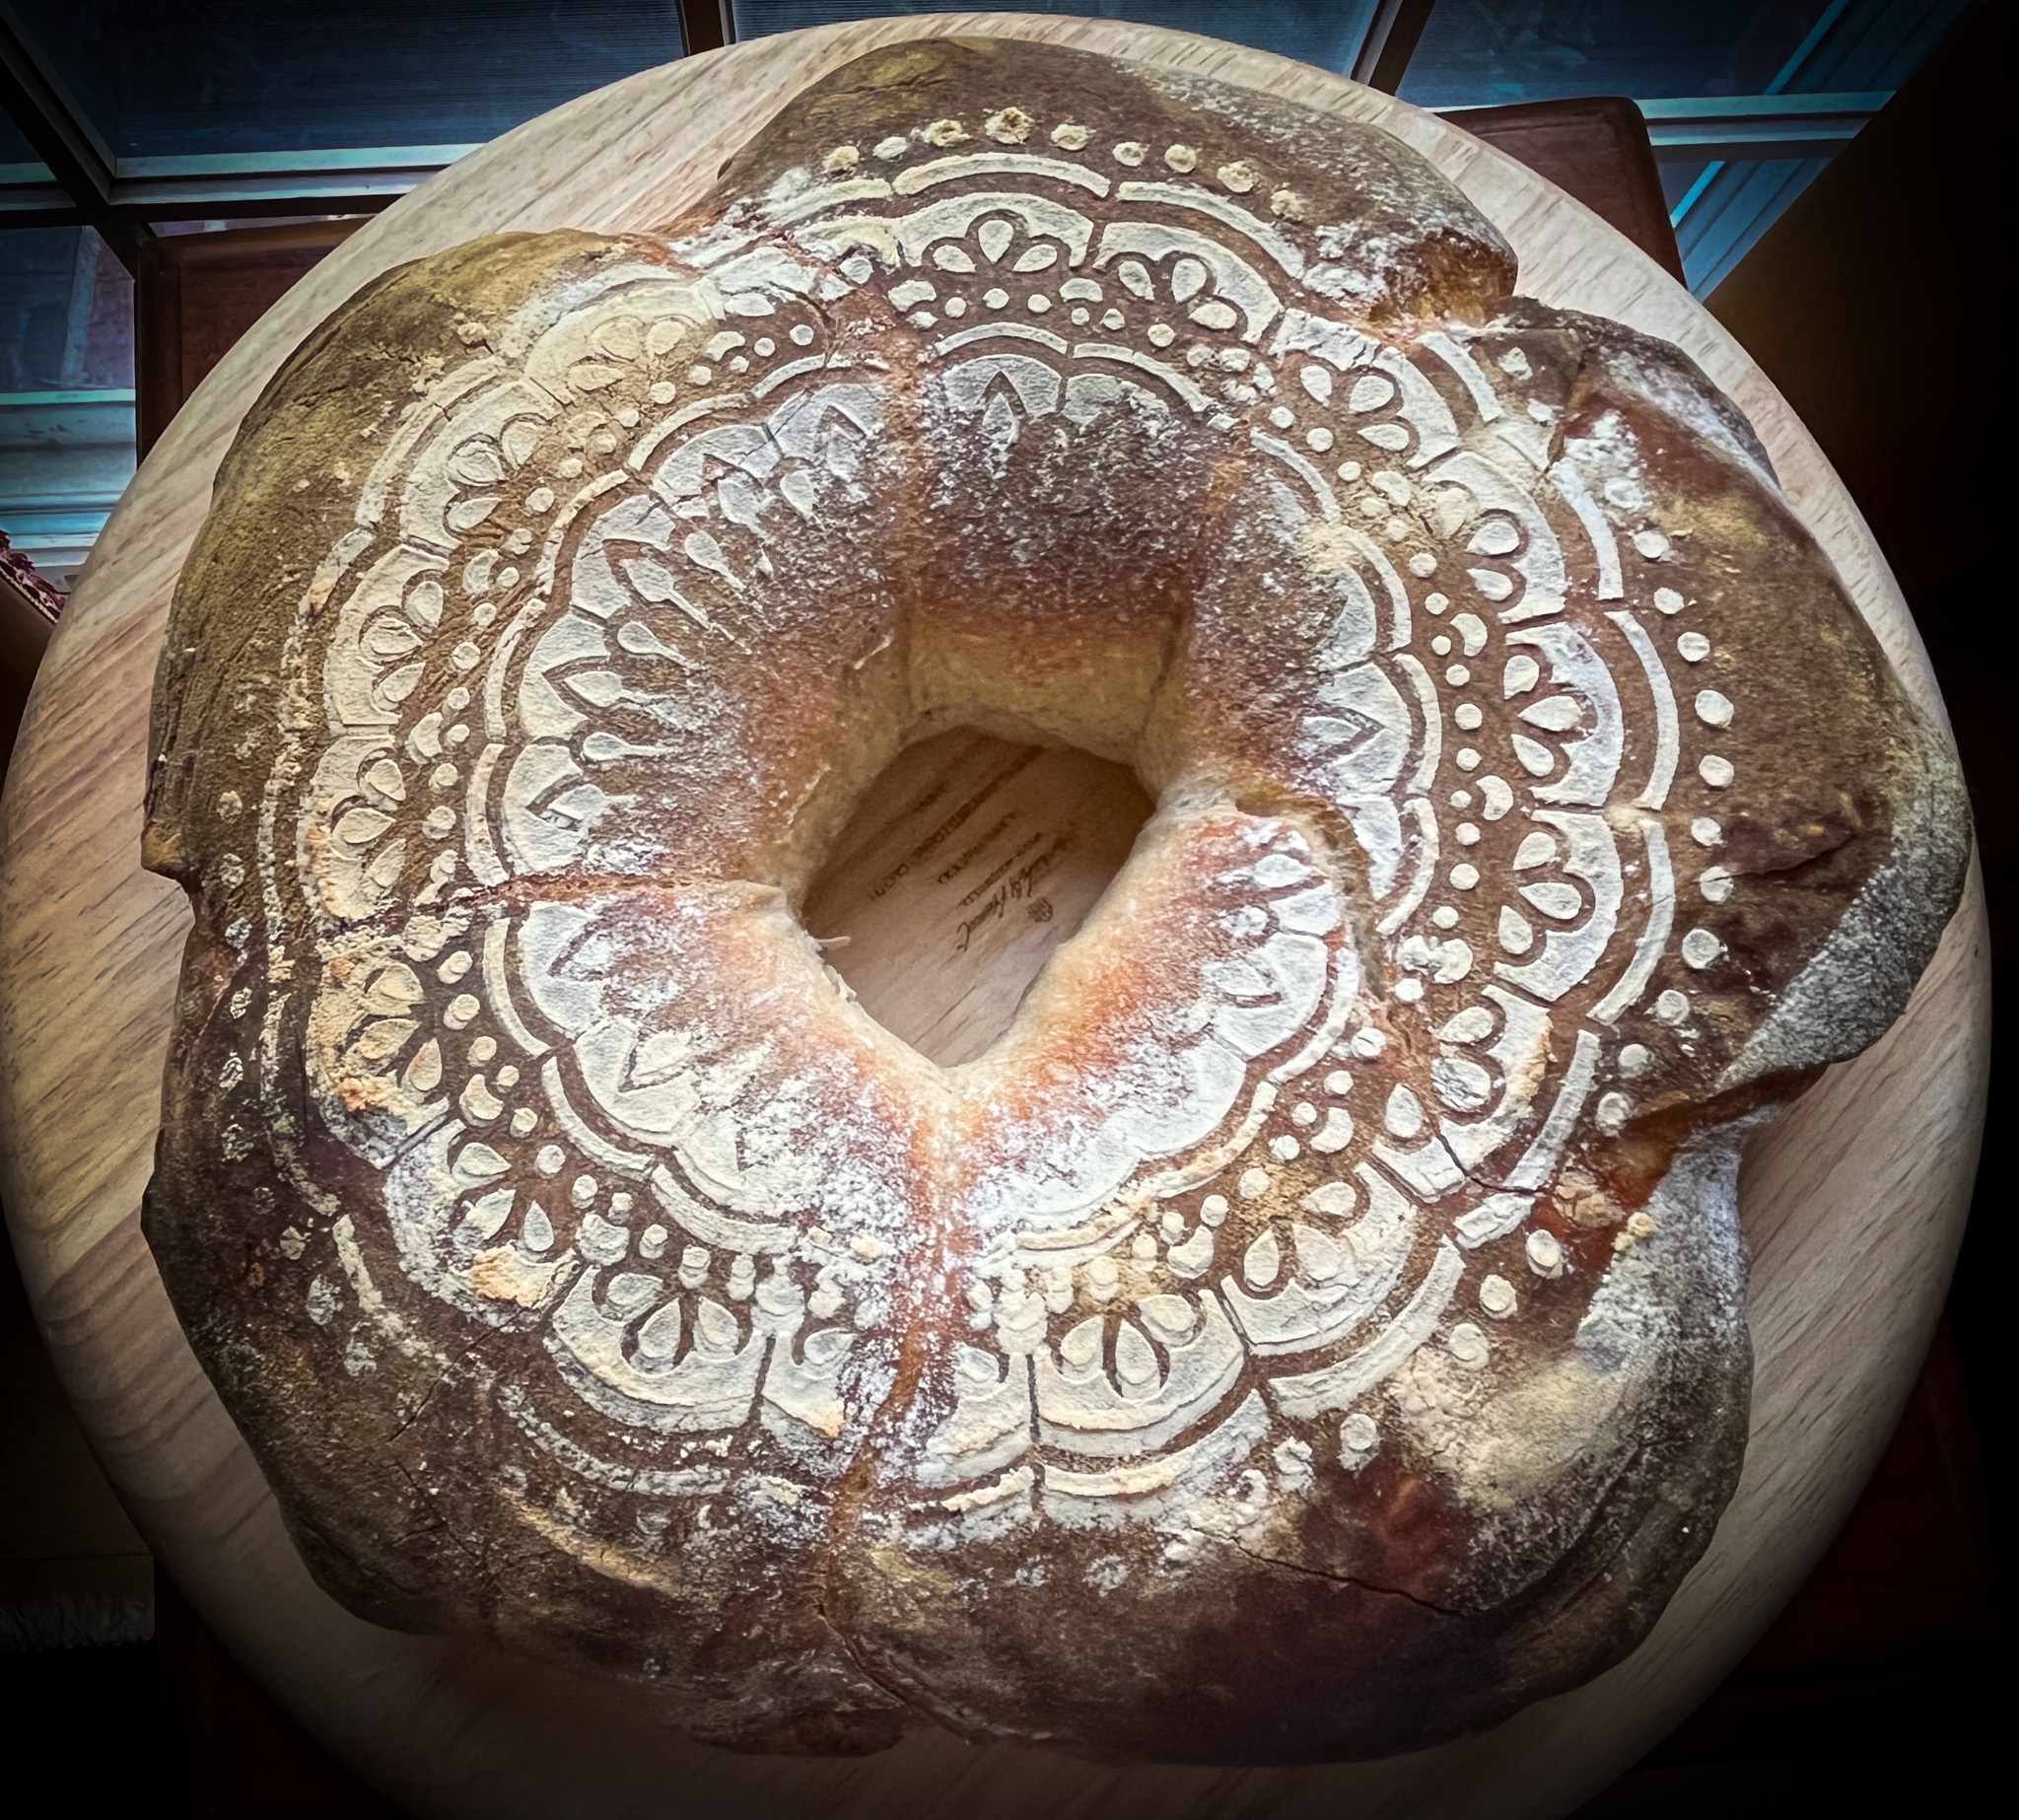
The flaps were a big flop. What can I say? The real beautiful version would have them all lifted up from the surface of the bread, mine stayed more or less glued to the surface. This was my second attempt, the first one was worse, so you won’t be seeing that (wink, wink). The shaping is quite a bit more elaborate. You form pieces of dough that are about 200g in weight, then roll a flap coming out of it, and roll the ball into it. Place to proof with the flap down, open side to the edge of the banetton. Before closing the flap over the ball of dough, a little olive oil is used to brush the edge, so the dough won’t stick and will instead lift during baking. Pictures below give you a general idea of the shaping method.

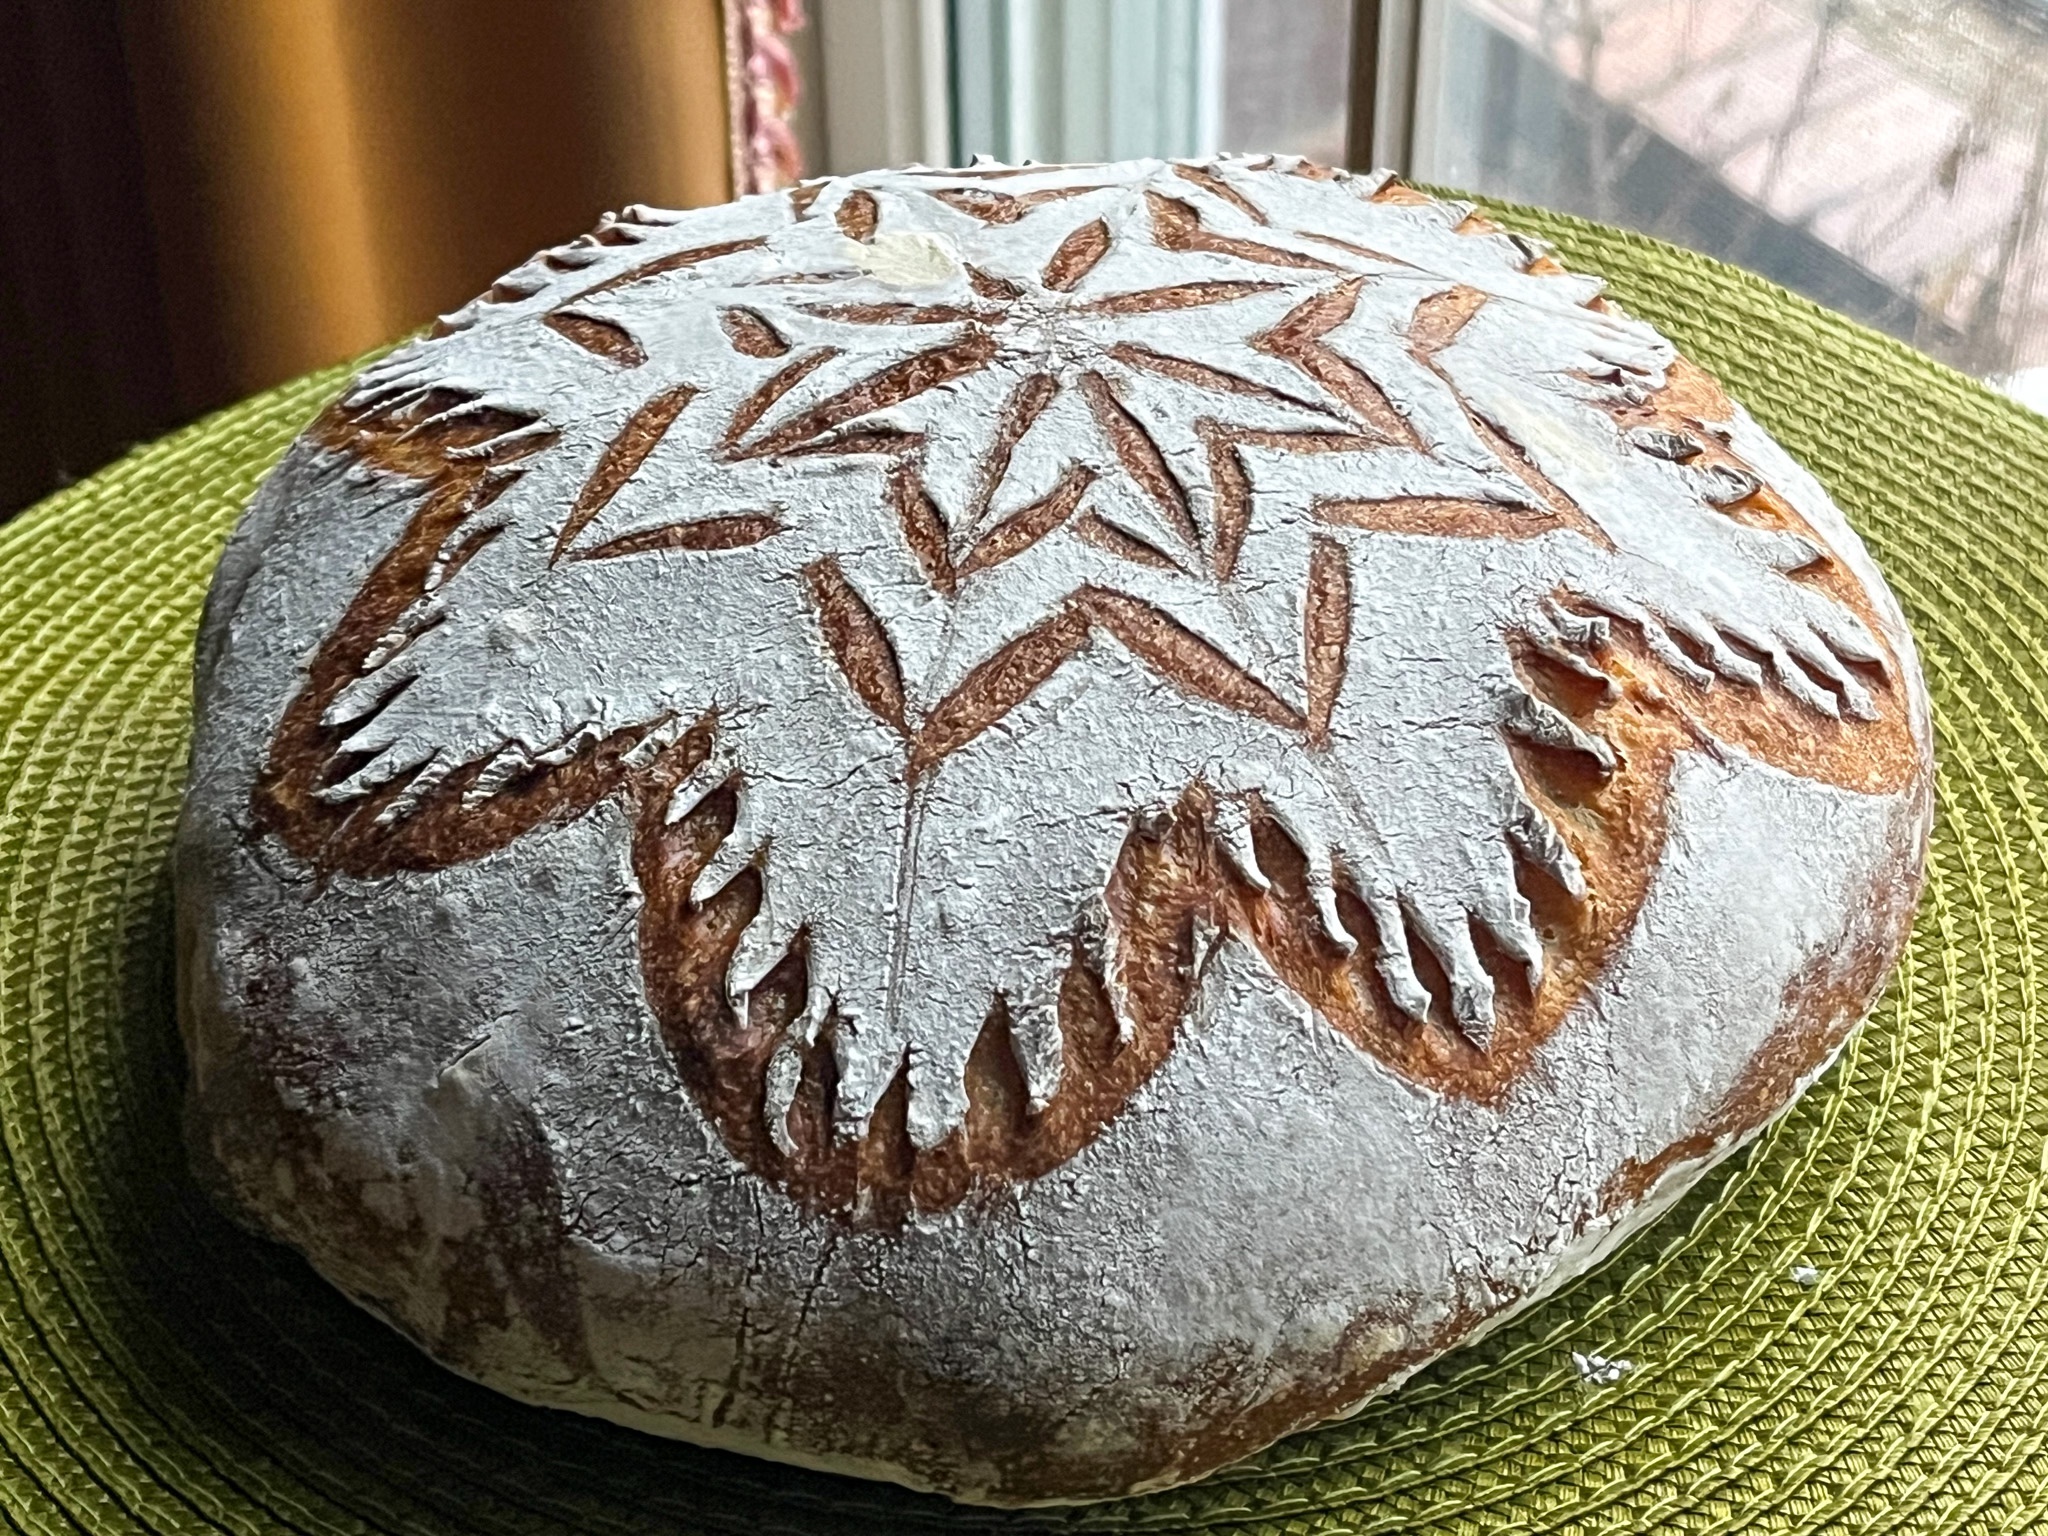
I had several issues, including the fact that 200g per ball of dough was probably too much. I will revise the whole thing and try again, because I really REALLY want to make it work right. I love the stencil decoration made right before baking (I will share info on the stencil and banetton in my upcoming In My Kitchen post, on October 1st).

I hope you enjoyed this post, and maybe you can give this method a try. If you get your flaps not to flop, let me know your secret!

ONE YEAR AGO: Have a Heart

TWO YEARS AGO: Chocolate-Hazelnut Tartlets

THREE YEARS AGO: Turkey Taco Salad

FOUR YEARS AGO: Cheese and Pesto Emmer Roll-ups and Elaine’s Cookbook Review

FIVE YEARS AGO: Mango-Hazelnut Entremet Cake

SIX YEARS AGO: Lebanese Lentil Salad and a Cookbook Review

SEVEN YEARS AGO: Cottage Loaf

EIGHT YEARS AGO: Sourdough Loaf with Cranberries and Walnuts

NINE YEARS AGO: Sichuan Pork Stir-Fry in Garlic Sauce

TEN YEARS AGO: Our Green Trip to Colorado

ELEVEN YEARS AGO: Ditalini Pasta Salad

TWELVE YEARS AGO: Celebrate Wednesday with a Thai Seafood Curry

THIRTEEN YEARS AGO:  Post-workout Breakfast

FOURTEEN YEARS AGO: Semolina Barbecue Buns

FIFTEEN YEARS AGO: Lavash Crackers

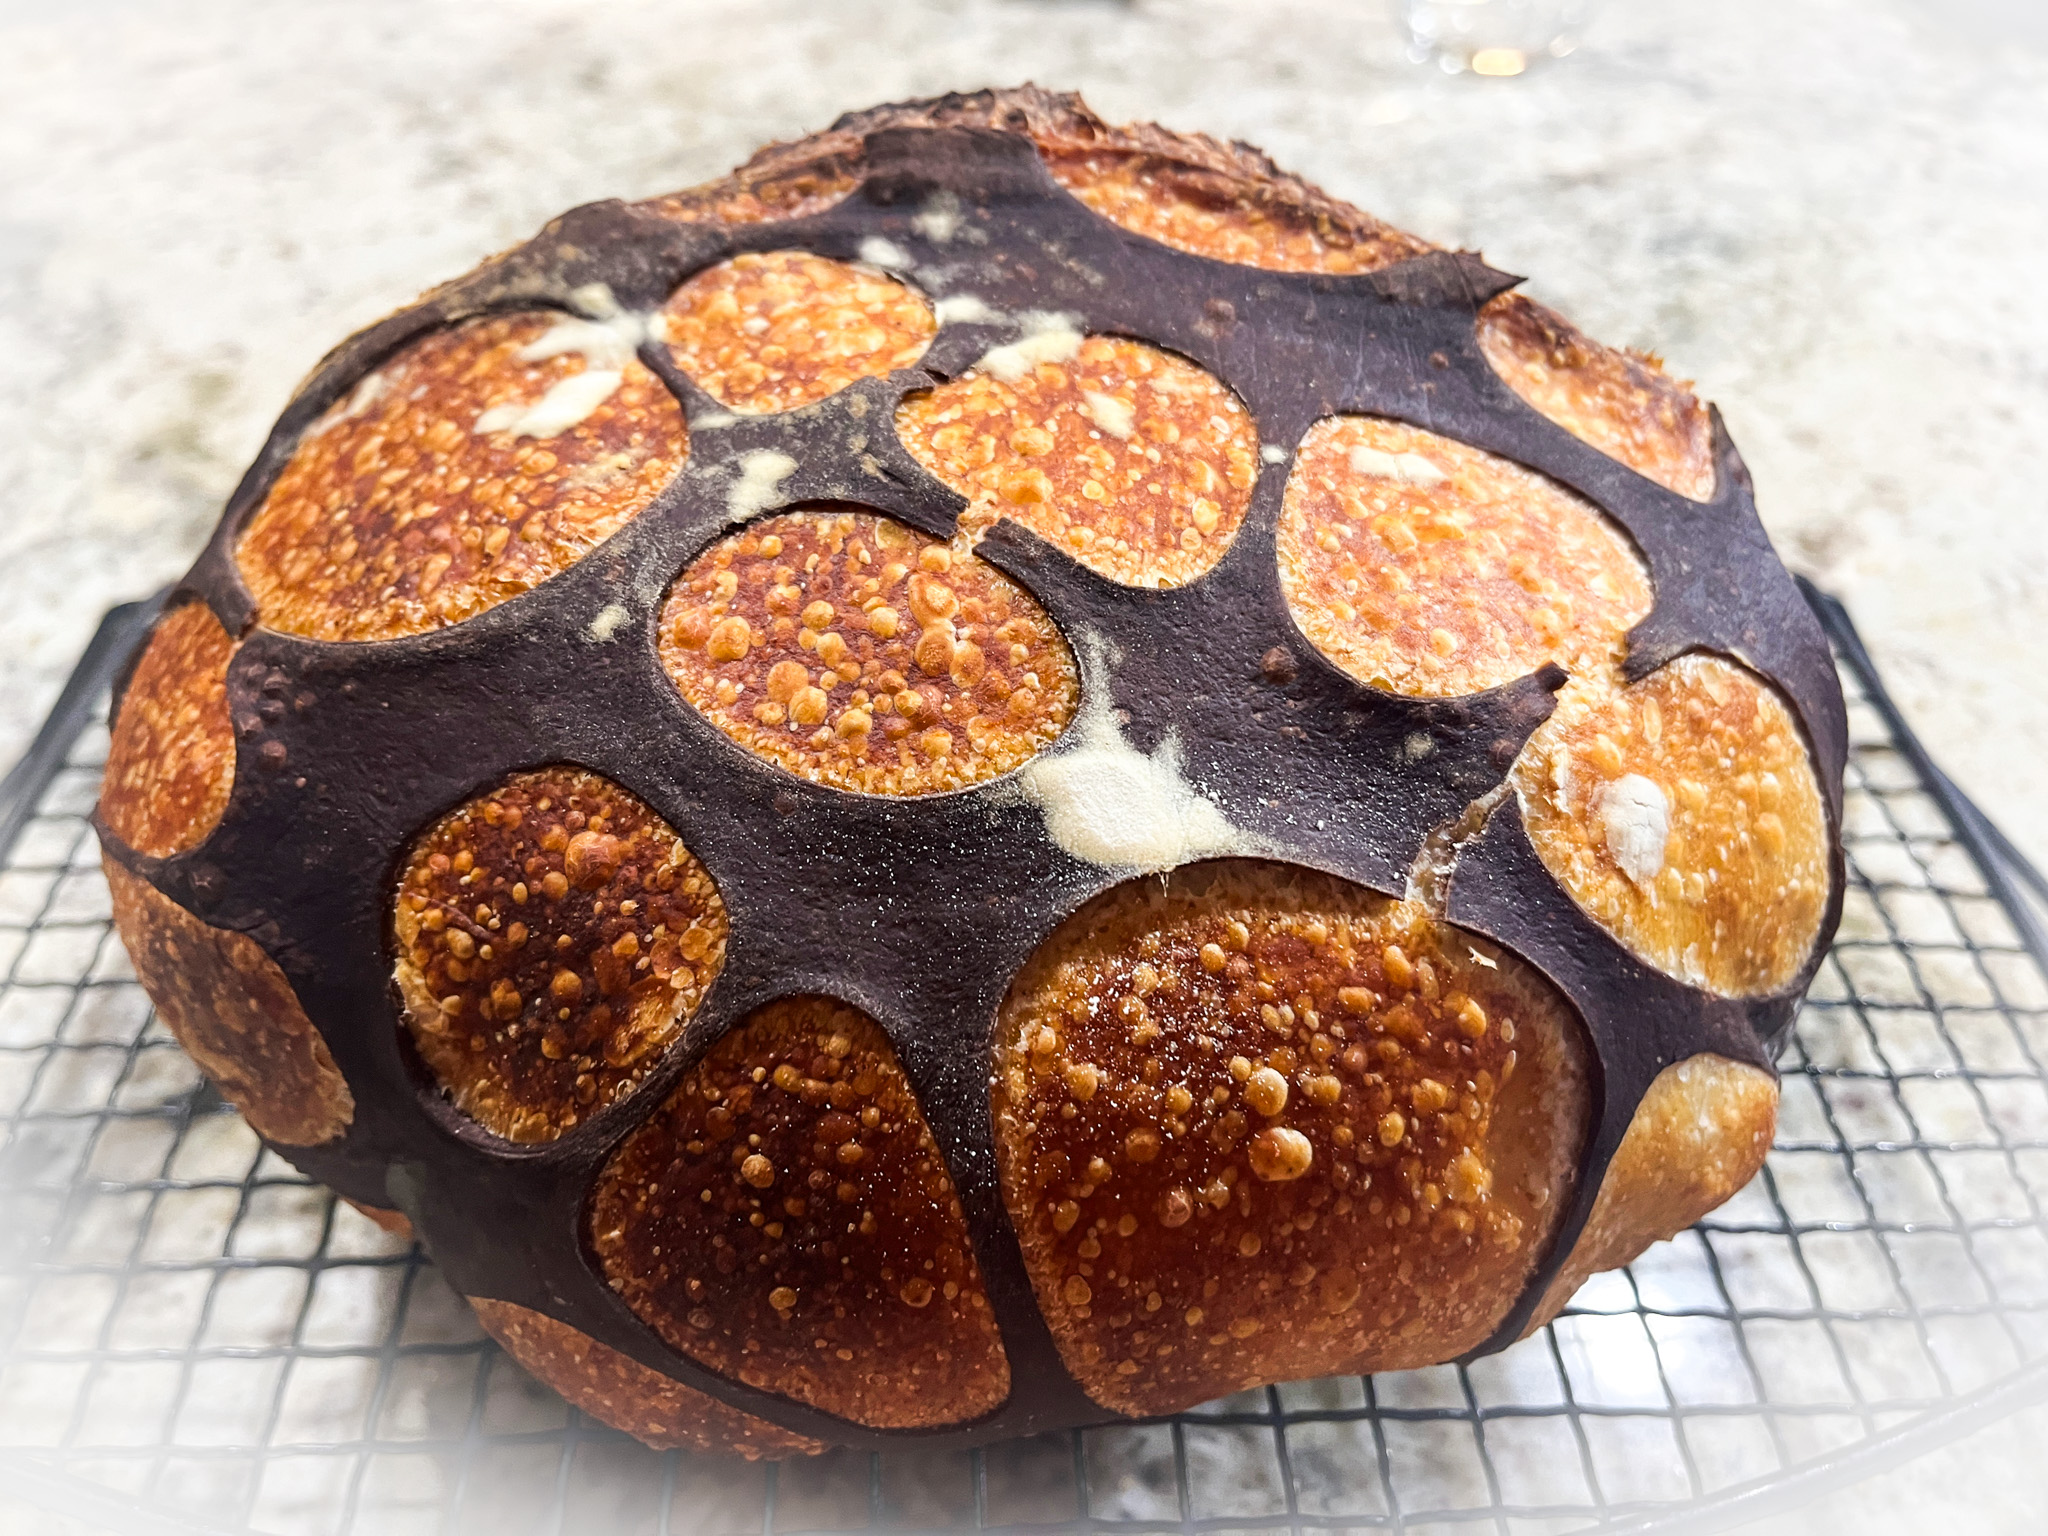
SOURDOUGH BUBBLE BREAD

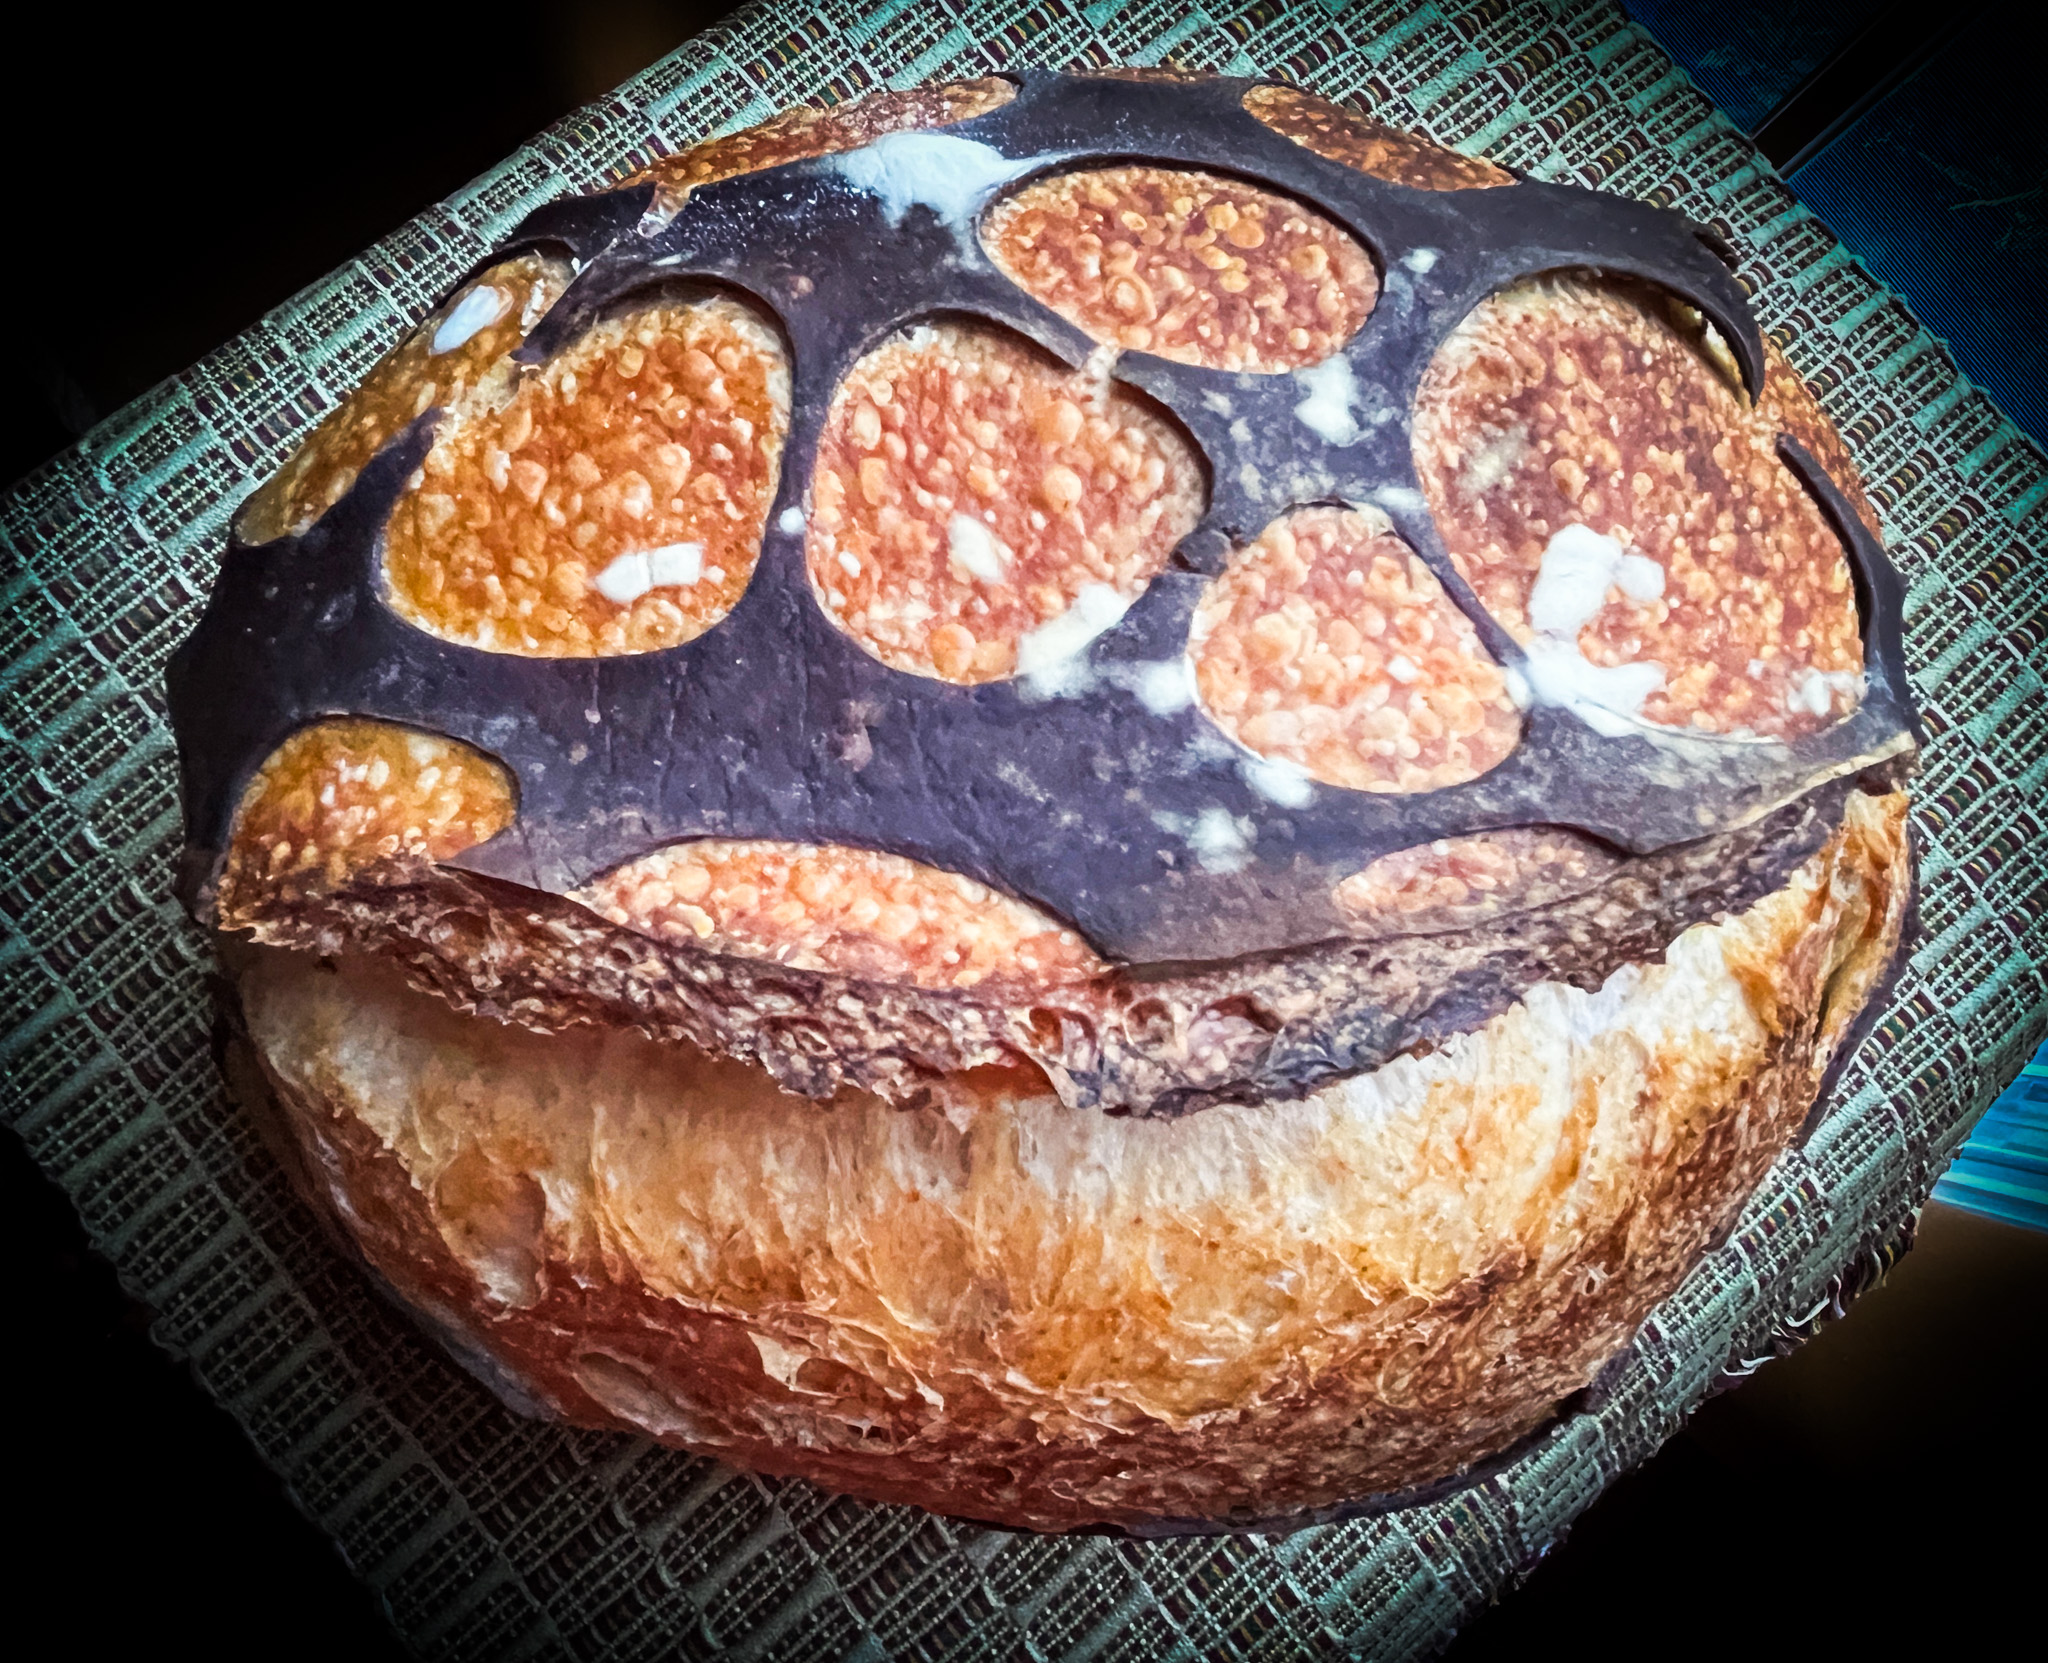
This is my third attempt at covering sourdough with a thin layer of a cocoa-dyed wrap. I stumbled by accident on a youtube site that got me lost for a while in the many possibilities of sourdough fun. She does incredibly beautiful loaves, pushing the envelope with gilding the lily. This is my first adventure following her overall method. The Bubble Bread.

Contrary to my usual method, which I consider simple and straightforward, this one involved autolysis, adding the starter and salt at different stages, and a lamination step. I followed her recipe to a T, although I opted for making only one loaf instead of two. The real game changer was the way she handled the cocoa-dyed dough. That is a must!

SOURDOUGH BUBBLE BREAD
(slightly modified from Hungry Shots)

for the main dough:
88g sourdough starter (100% hydration)
388g bread flour
50g spelt flour
270g water
9g salt

for the cocoa-wrap:
85g discarded sourdough
85g all-purpose flour
30g water
7g cocoa powder

Mix water with the two types of flour until combined. Leave at room temperature, covered, for one hour. Add the starter and mix until combined. Leave for 1 hour at room temperature. Add the salt and mix by kneading gently for about 4 minutes until incorporated. Leave at room temperature for 1 hour.

Spray a little water on your countertop and place the dough over it. Do a set of stretch and folds, and let it proof for one more hour at room temperature.

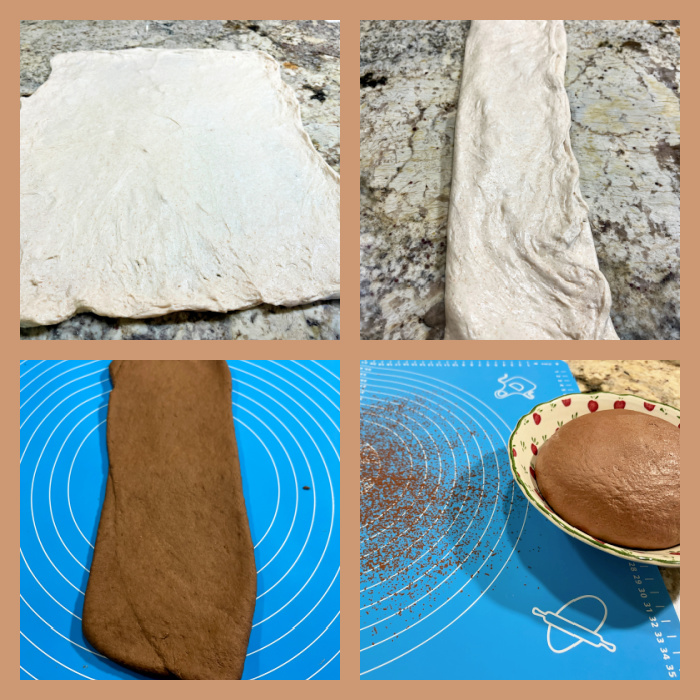
Laminate the dough (you can watch her youtube video if you have never done it). Allow it to rest for 90 minutes. Right after lamination, make the cocoa-dyed dough by mixing all the ingredients and kneading until fully smooth. To help with flexibility of the dough, roll it thinly with a rolling pin, fold it, and knead it again. Make sure the dough is very smooth and pliable before you form is into a ball and let it ferment at room temperature until you are ready to cover the dough with t.

Go back to the main dough: Do three sets of gentle foil colds (watch her video for details). Do the first one, wait 30 minutes to do the second one, 1 hour to do the third one. One hour after the third coil fold is done, you are ready to shape the dough and cover it with the cocoa wrap.

Roll out the cocoa dough to an extension that allows you to wrap the whole bread. Cut circles of different sizes with a cookie cutter. Shape the main dough as a batard (or round if you prefer), cover it with the cocoa dough, and place in the banneton. Proof for 30 minutes at room temperature, then place in the fridge overnight.

Next morning, heat oven to 450F. Invert the dough over parchment paper, make a deep slice off-center, and bake covered in a Dutch oven for 30 minutes, remove the cover and bake for 20 minutes more. Allow it to cool completely before slicing.

ENJOY!

to print the recipe, click here

.

Comments: This was so much fun to make! I have tried to cover sourdough with a dark wrap using the pie lattice cutter, but I did not care for the way it turned out (see it on this post of my past). However, the key is making the dough extensible enough, and that is achieved by thorough kneading, rolling, kneading again. If you go through the process, your outcome will be much better.

I would cut holes of different sizes next time, some a lot smaller, like she did, but this time I was a bit too anxious and nervous about the whole thing, so I kept is simple. Used only two sizes of circles. I could not take pictures of the wrapping of the dough, as I was alone in the house and it was impossible to do it on my own, but her videos show it all in great detail. Check the bubble bread video here.

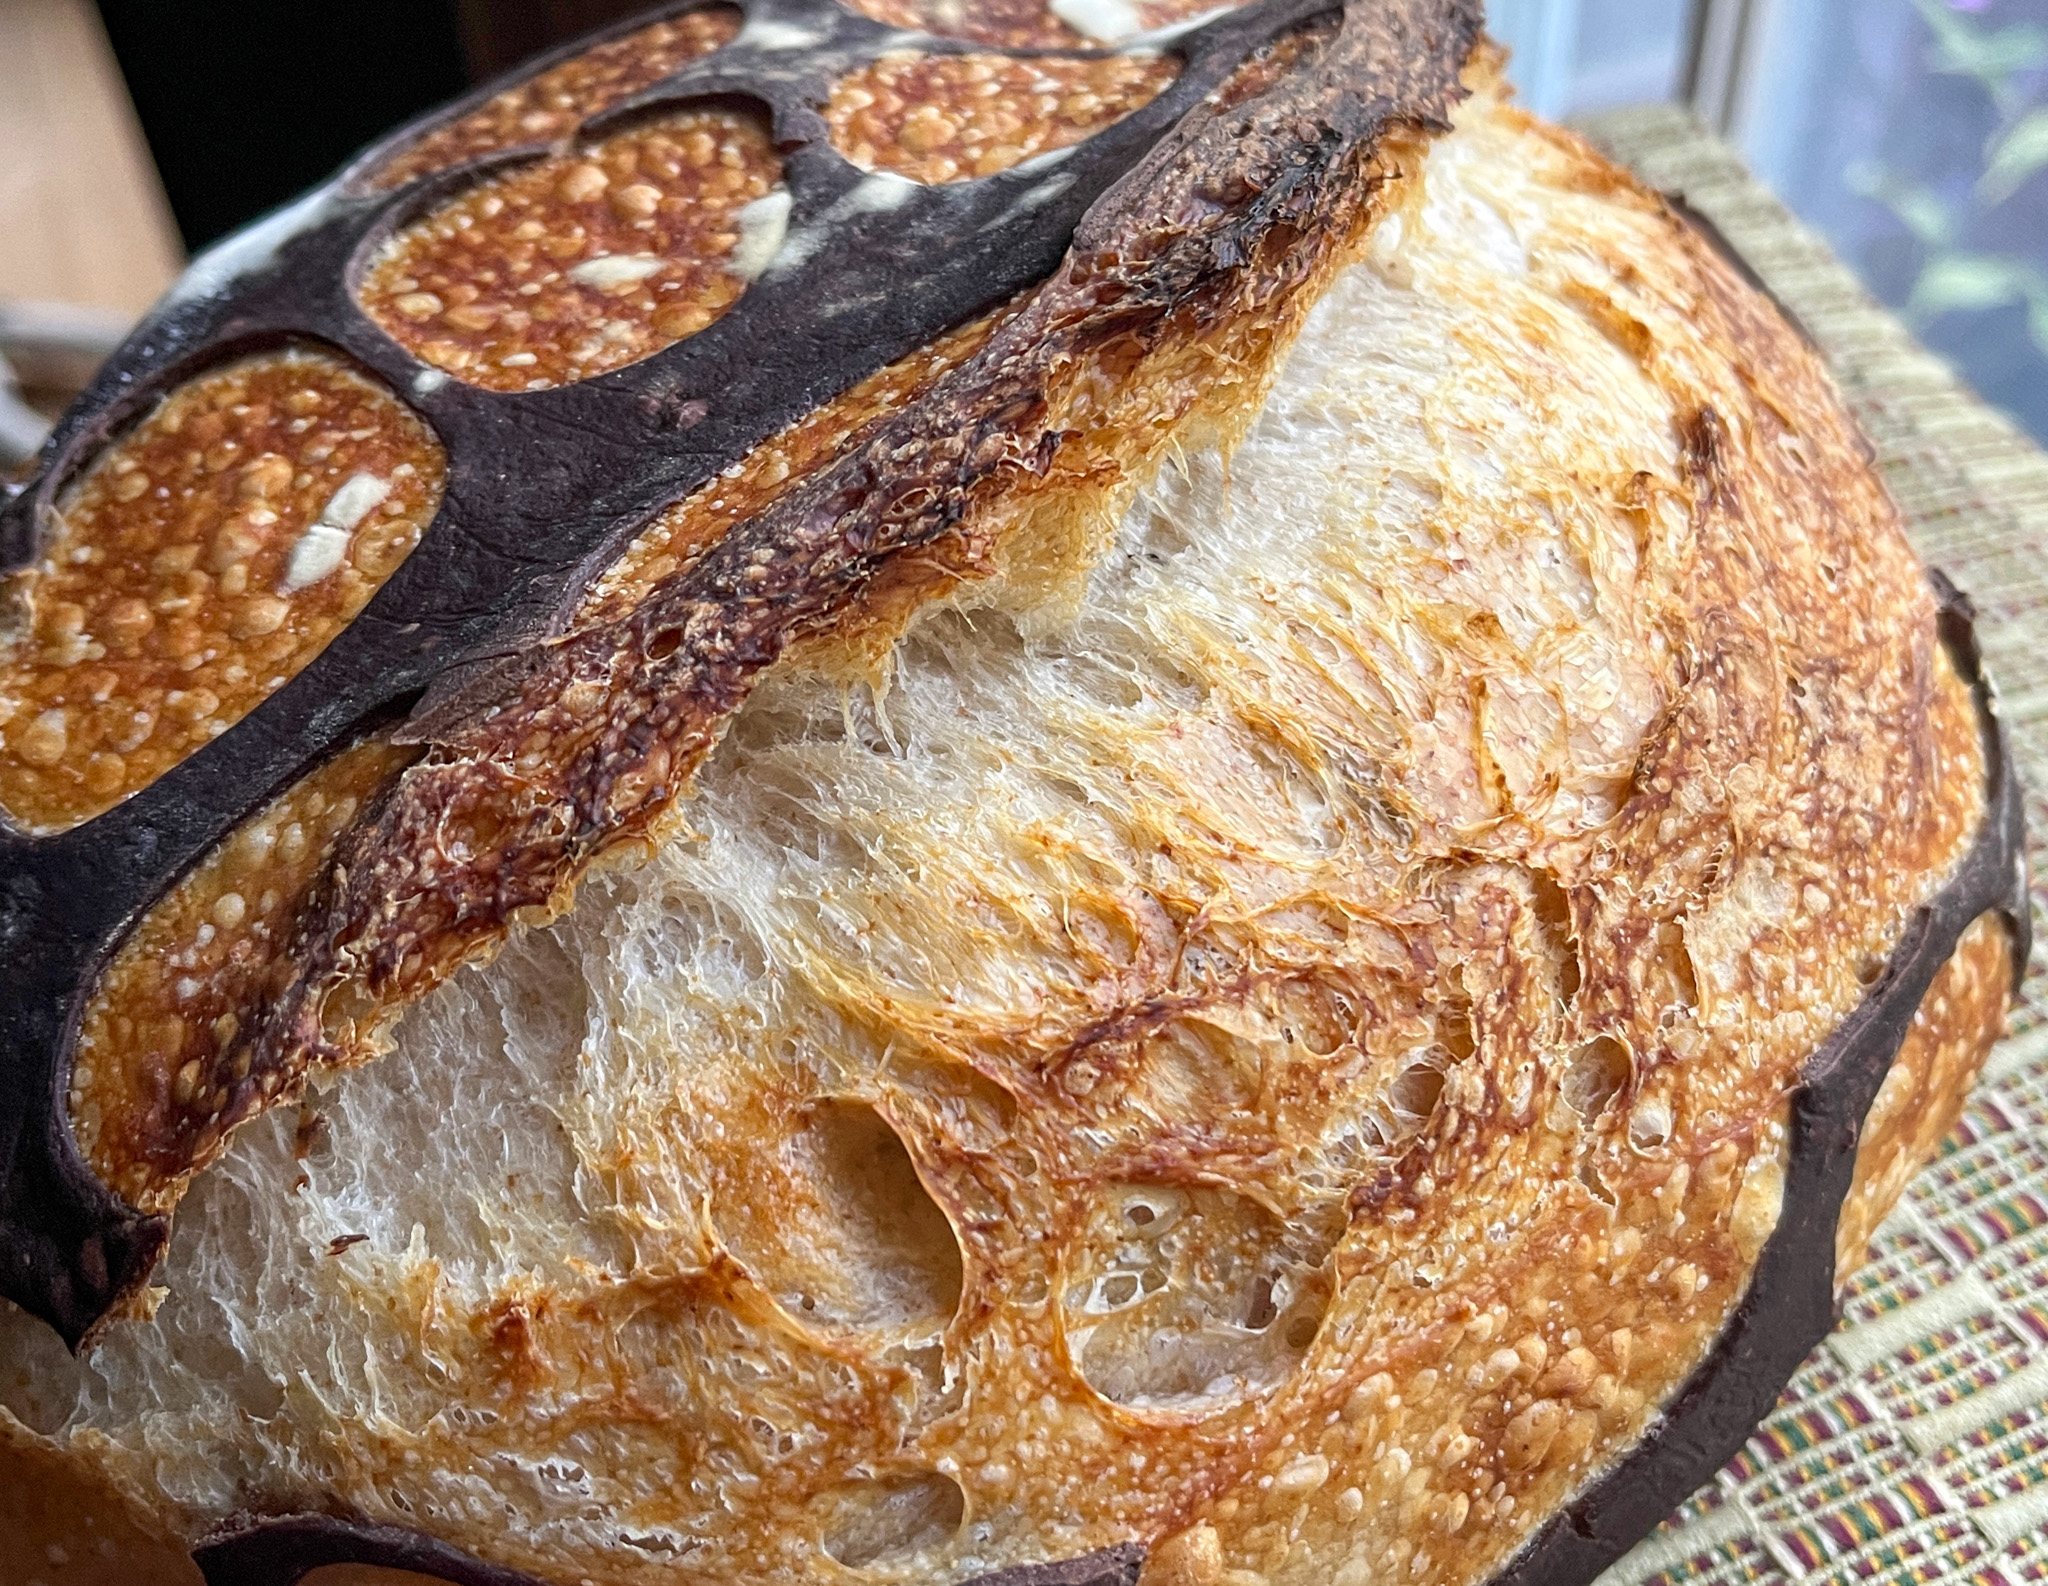
The bread had amazing oven-spring, particularly considering that the wrapped dough constrains it quite a bit. As to the crumb, it was very moist and tender, in fact the husband professed it to be his very favorite of this year! Can you say mission accomplished?

I am not convinced that the lamination and coil-folding are absolutely necessary to bake this type of bread, but definitely the handling of the cocoa dough will be key. I hope you give this method a try, it is so cool to see the outcome when you get that lid open after 30 minutes!

ONE YEAR AGO: Watermelon Salad

TWO YEARS AGO: Kashmiri Chicken Thighs

THREE YEARS AGO:  A Vegan Trilogy

FOUR YEARS AGO: The Mystifying Hurricane Roll

FIVE YEARS AGO: Pop-Tarts with Strawberry Balsamic Jam

SIX YEARS AGO: Ptichye Moloko, a Russian Dessert

SEVEN YEARS AGO: Cheesy Low-Carb Zucchini Tarts

EIGHT YEARS AGO: Blogging Hiatus

NINE YEARS AGO: Apricots, Three Ways

TEN YEARS AGO: Up Close and Personal with Kale

ELEVEN YEARS AGOBlack Berry Cherry Sorbet

TWELVE YEARS AGO: Asparagus Pesto

THIRTEEN YEARS AGO: Chocolate and Chestnut Terrine

FOURTEEN YEARS AGO: Under the spell of lemongrass

FIFTEEN YEARS AGO: Greens + Grapefruit + Shrimp = Great Salad!


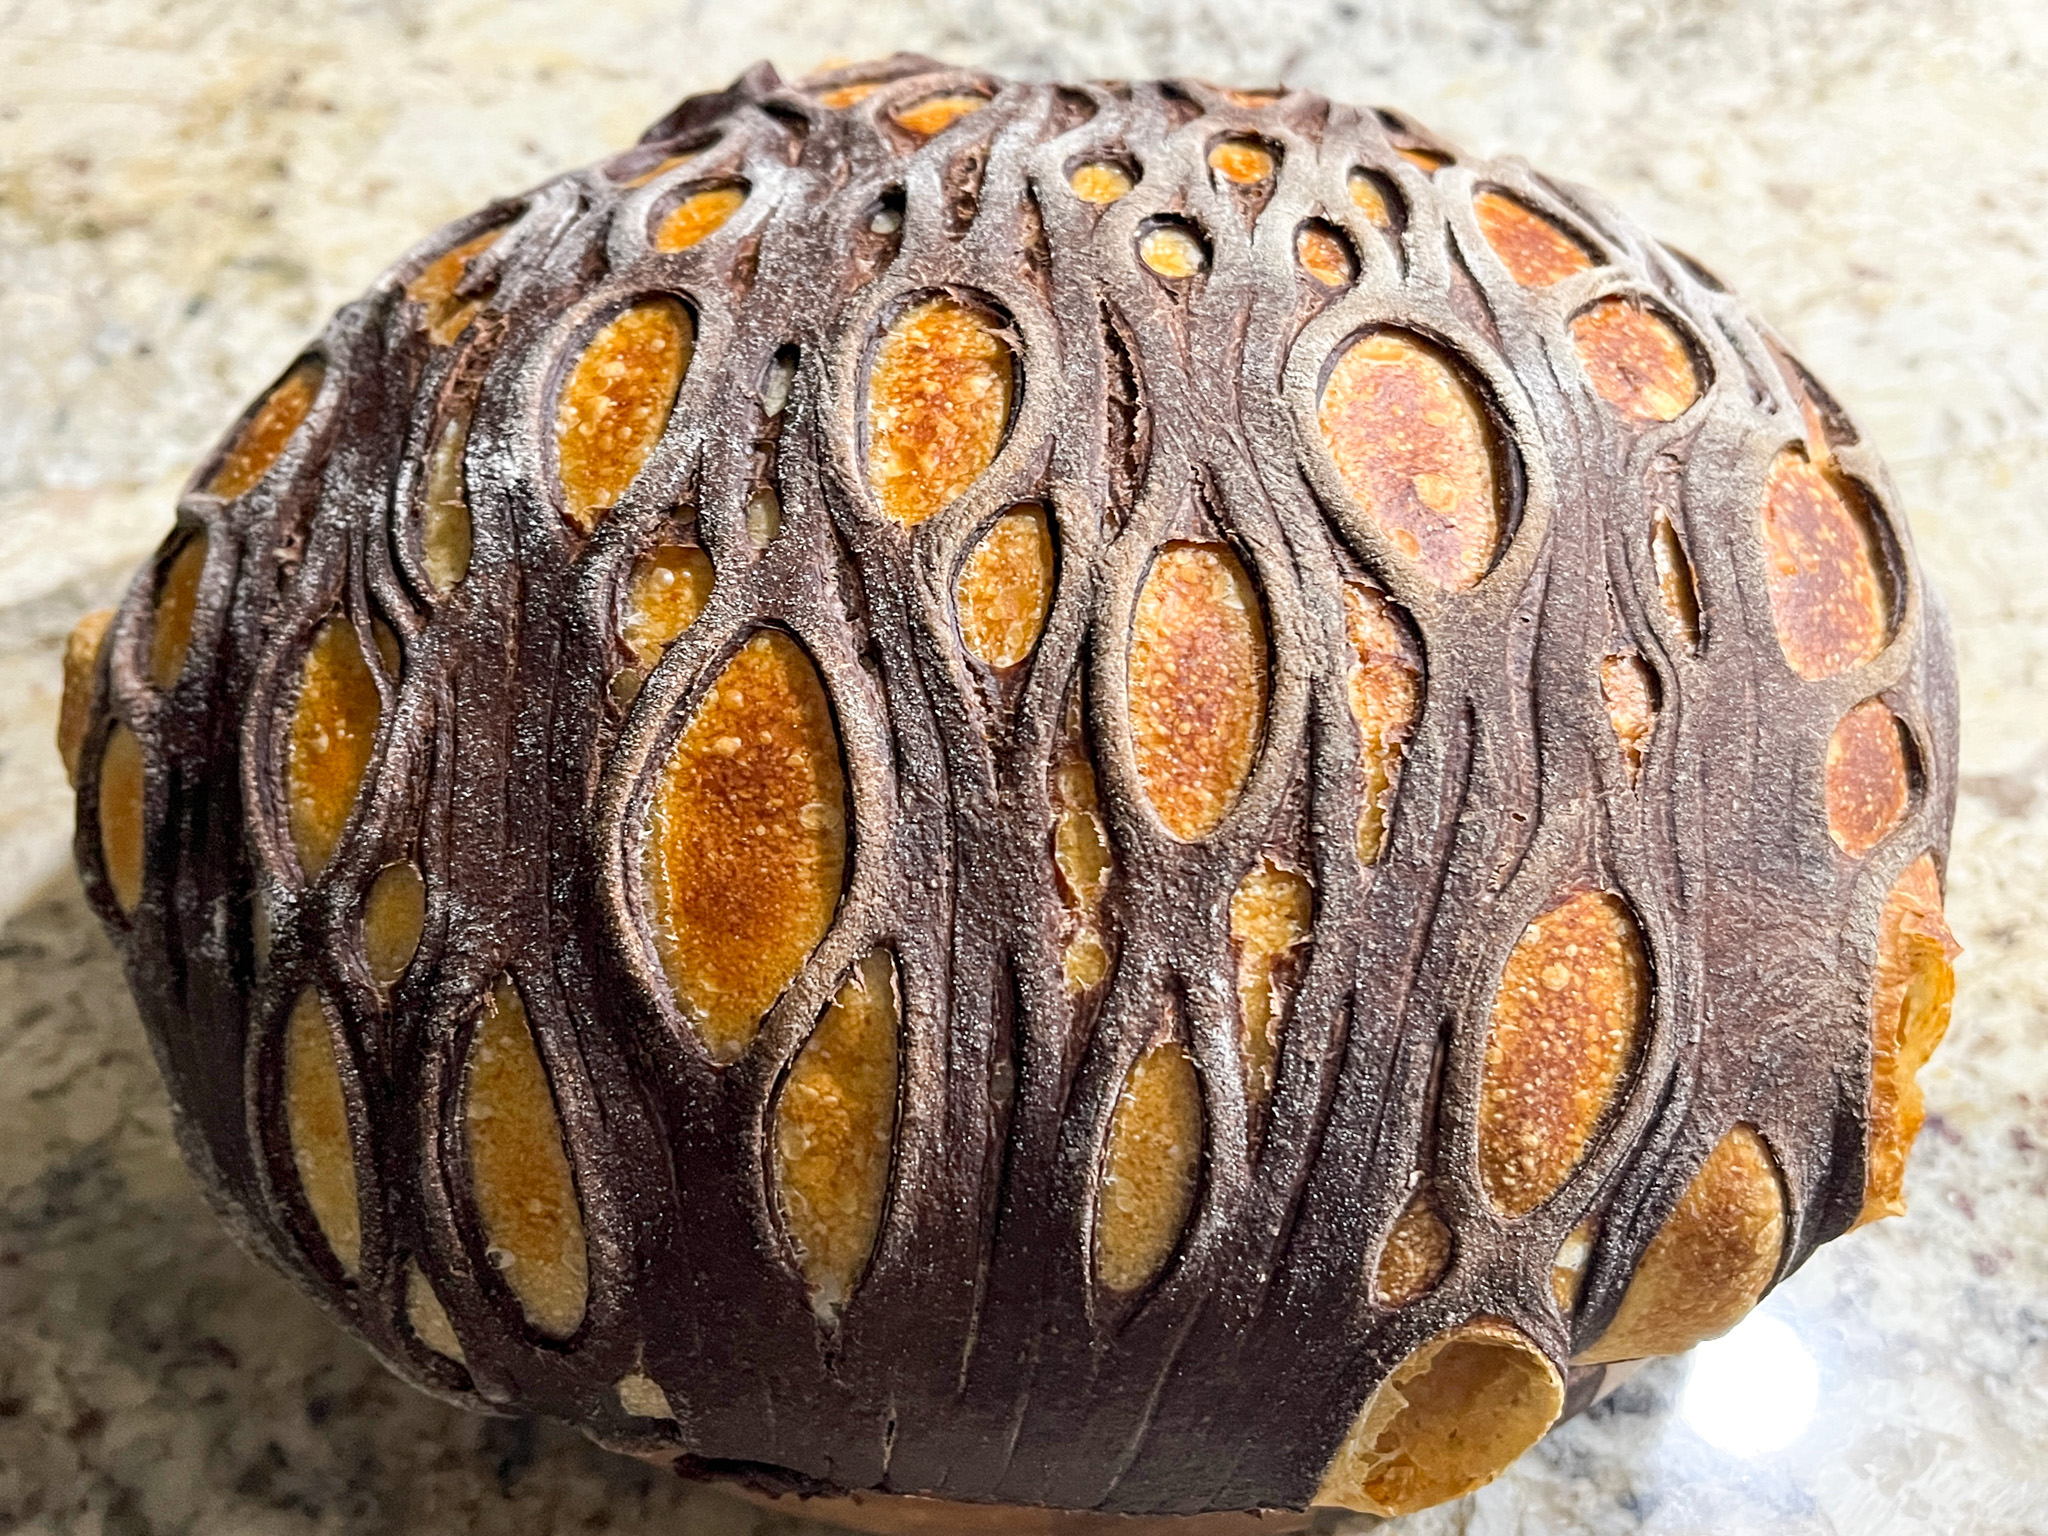
COCOA LATTICE SOURDOUGH

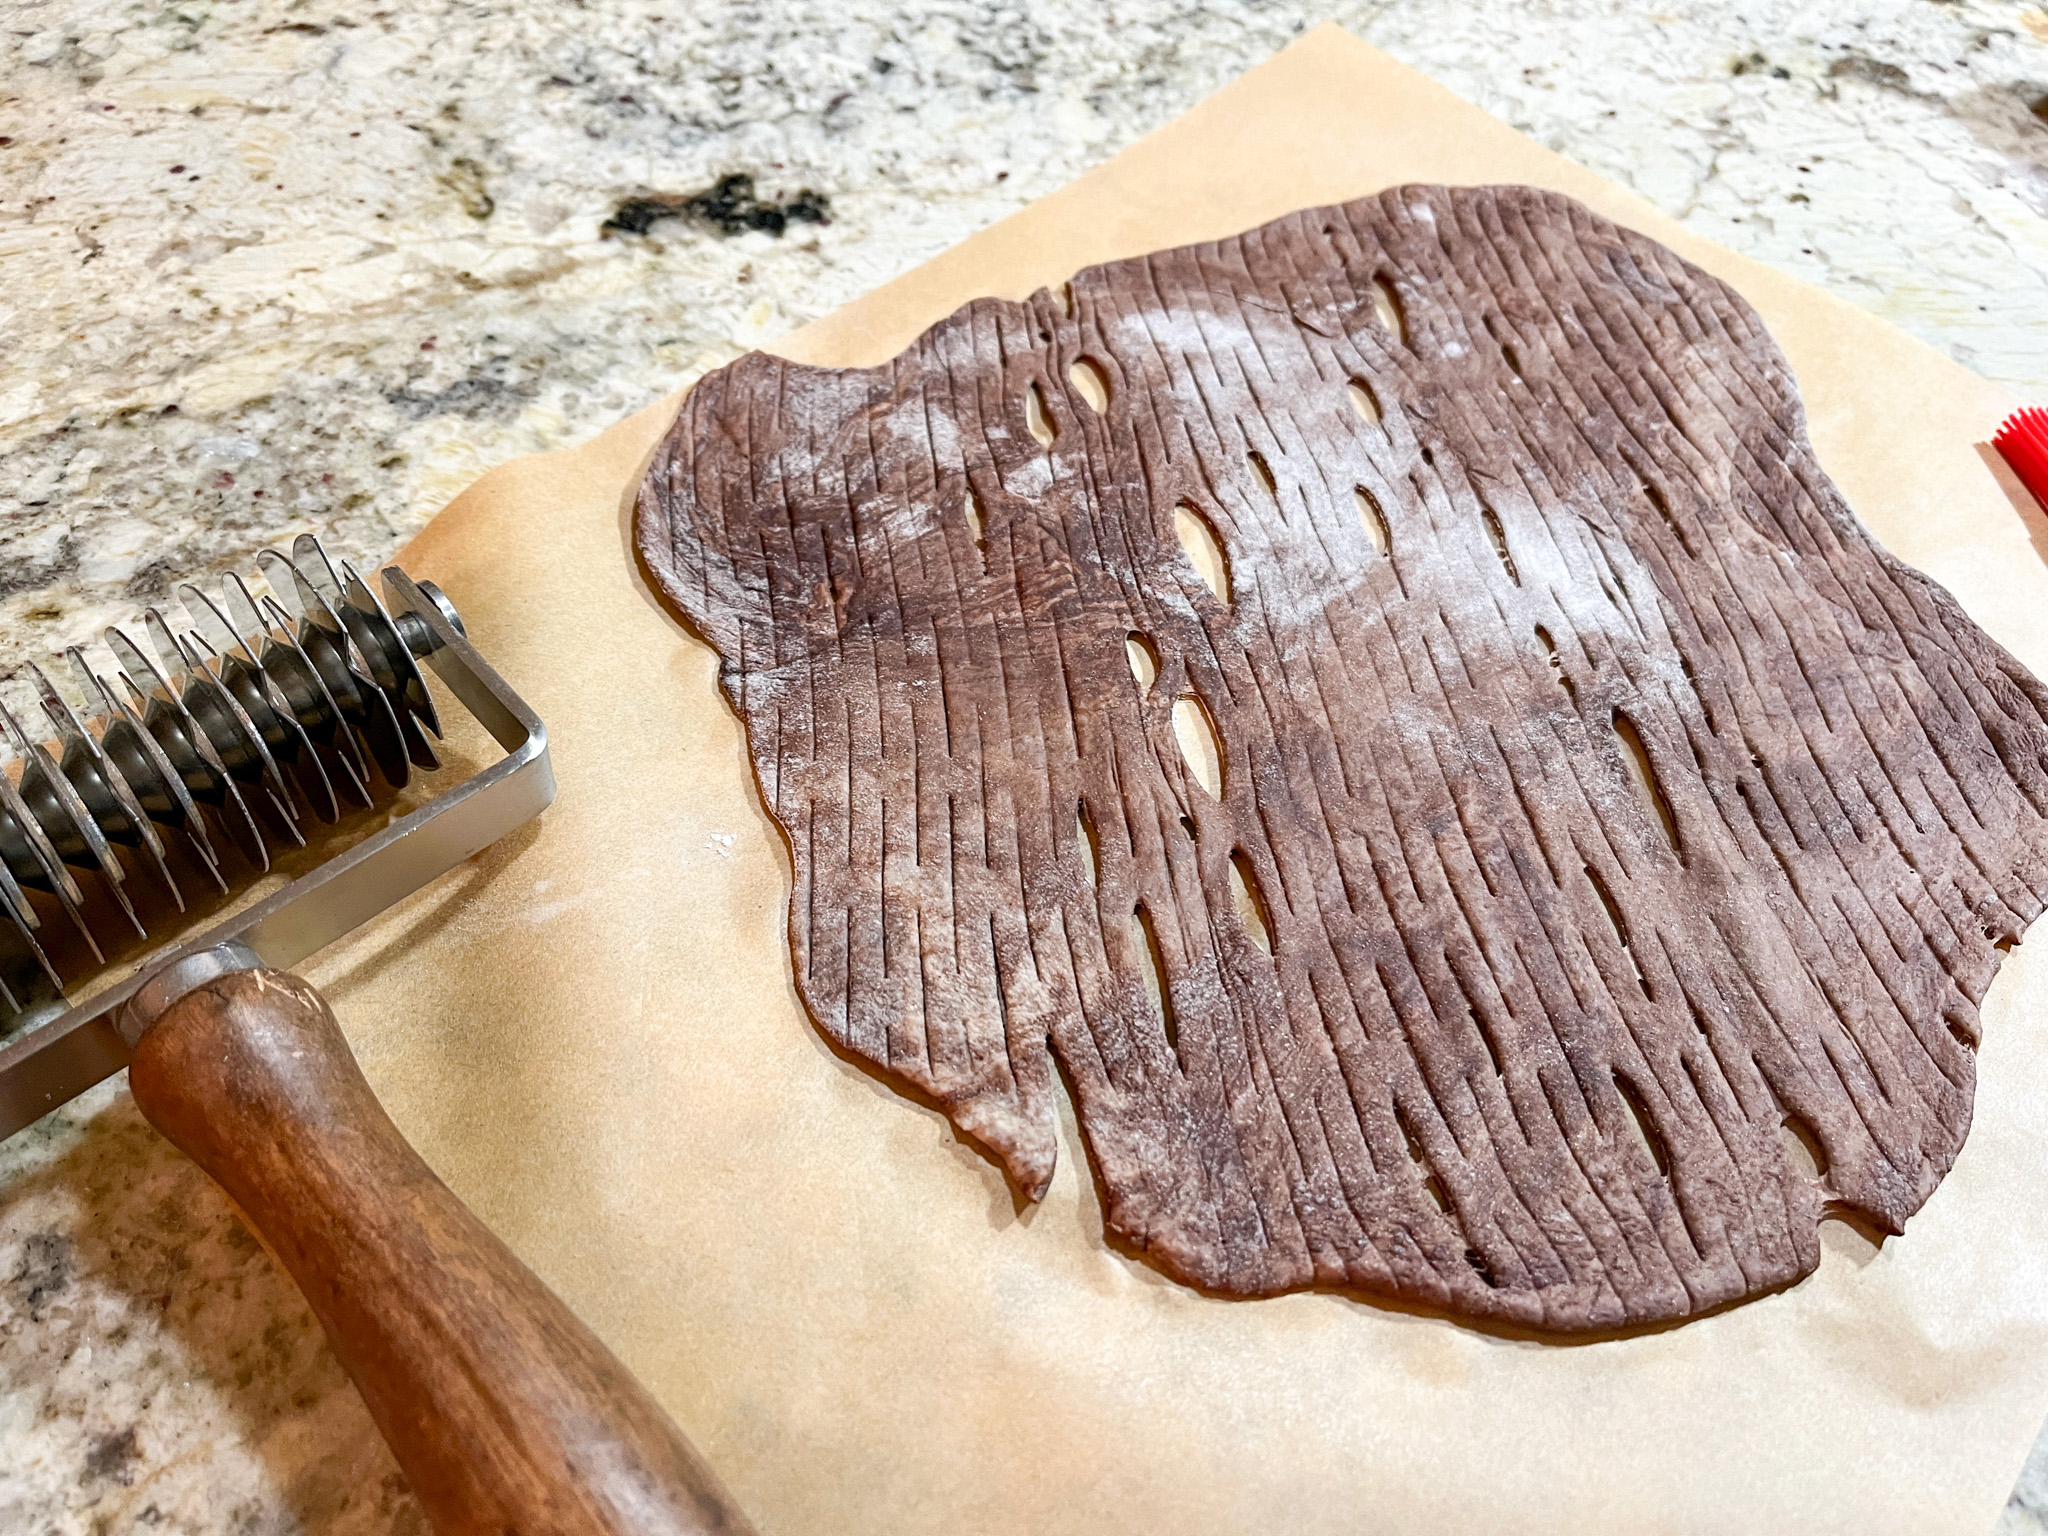
I consider this a work in progress, but for a first time using this technique, I am happy with it. You can use pretty much any formula you like, but go for a minimum of 500g total flour, as you will be removing 150g of dough to make the lattice. To cut the lattice, consider getting this gadget. You can always try to cut it by hand, but I imagine that would be quite tricky… at least for me!

COCOA LATTICE SOURDOUGH
(from The Bewitching Kitchen)

400g white bread flour
150g whole wheat
80g sourdough starter at 100% hydration
9 g salt
360g water (I had to add flour as I mixed the dough, it was too sticky)
30g cocoa powder (see comments about it in the method description)

After mixing the dough in the Kitchen Aid for 4 to 5 minutes as I normally do, I went through a series of folding/kneading at 45 minutes intervals for a total of 5 cycles. At that point, I removed 150g of the dough and added the cocoa powder, kneading it into the dough, as best as I could. Not all the amount was incorporated, but the dough was dark enough.

The main dough was shaped as a boule and placed in the fridge overnight. The dark, smaller portion was covered with plastic wrap and also placed in the fridge. Next morning the dark dough was rolled as thinly as possible and cut with the pie lattice gadget. That was carefully placed on top of the main dough right before baking. Keep in mind that the moment the lattice touches the dough you won’t be able to move it and adjust it.

The bread was baked at 450F for 30 minutes covered, and 15 minutes without a lid. Slice after completely cool.

ENJOY!

to print the recipe, click here

Comments: The picture above was my first attempt at rolling the lattice, and it was too thick, it barely opened at some parts. So I gathered that dough and rolled it again. Try to go as thinly as possible, which was not very easy, the gluten tends to put up a fight. I definitely want to do it again, using other colors, but mainly making sure to roll the lattice thinner. Wish me luck! Why don’t you try it also and let me know how it goes for you? 😉

We did not detect any particular cocoa taste on the bread. The dark part gets a different texture, almost like a cracker. We both loved it… Stay tuned for more lattice adventures in the bread world!
.

ONE YEAR AGO: Pistachio Sugar Cookies, the Uzbek Way

TWO YEARS AGO: Carrots and Zucchini Stir-Fry with Peanut Sauce

THREE YEARS AGO: Cookie Therapy, Anyone?

FOUR YEARS AGO: The Quasi-Vegan Quiche

FIVE YEARS AGO: Not Quite Moqueca

SIX YEARS AGO: Roasted Butternut Squash with Cashew Nuts

SEVEN YEARS AGO: Mississippi Roast and the Open Mind

EIGHT YEARS AGO: Walnut-Raisin Bran Muffins

NINE YEARS AGO: A Star is Born!

TEN YEARS AGO: Chestnut Flour Sourdough Bread

ELEVEN YEARS AGO: Kinpira Gobo and Japanese Home Cooking

TWELVE YEARS AGO: Walnut Sourdough

THIRTEEN YEARS AGO: Thai Chicken Curry

FOURTEEN YEARS AGO: Zen and the art of risotto

UBE SOURDOUGH, TWO WAYS


Back in December last year I had a lot of fun playing with ube, the Filipino ingredient that was new to me. Today I share two ways to make sourdough bread incorporating ube. The basic recipe is the same, but in the first version I substituted some of the flour with ube powder. The second version incorporates 1/4 tsp ube extract in the dough. The one with the ube powder got a super light purple tone and the texture and structure of the bread was slightly different from a regular sourdough. If you are looking for color impact, definitely go with ube extract. A little goes a long way, and the taste is very mild.

UBE SOURDOUGH, TWO WAYS
(from the Bewitching Kitchen)

480g white bread flour
20g ube powder
10g salt
350g water
75-90g sourdough starter at 100% hydration

Make the levain mixture about 6 hours before you plan to mix the dough. It should be very bubbly and active.

When you are ready to make the final dough, place the water in the bowl of a KitchenAid type mixer and dissolve the starter in it, mixing with a spatula briefly, then add the flour, ,ube powder and salt. Turn the mixer on with the hook attachment and knead the dough for 4 minutes at low-speed all the time. You will notice the dough will gain quite a bit of structure even with just 4 minutes in the mixer. Remove from the machine, and transfer to a container lightly coated with oil, cover lightly with plastic wrap and allow it to ferment for 4 hours, folding every 45 minutes or so. Because the dough is already a bit developed from the initial time in the mixer, you should get very good structure after 3 and a half hours, or even sooner than that.

After four hours bulk fermentation, shape the dough as a ball, and place, seam side up, in a lightly floured banetton. Leave at room temperature one hour, and then place in the fridge overnight, from 8 to 12 hours.

Next morning, heat the oven to 450F.

Place a parchment paper on top of the dough, a flat baking sheet, and invert the dough, flipping it out of the banneton. Flour the surface of the dough, add the stencil and air-brush if so desired. Score with a razor blade.

Bake at 450F for 45 minutes, preferably covered for the first 30 minutes to retain steam. Cool completely over a rack before slicing.

FOR VERSION #2
Use 500g bread flour and add 1/4 tsp ube extract to the dough, following the same method to prepare and bake the bread.

ENJOY!

to print the recipe, click here

Comments: You will notice that the crumb is tighter than usual for a sourdough, and also the color purple is super subtle, quite light.  Version #2, with ube extract got a lot more color.


I used a different method to decorate it, with oats to form little flowers and black sesame seeds in the center. Just wet the surface of the dough a little bit and that acts like a glue.

It was a bit time-consuming to do, so I ended up forming just 4 little flowers. Maybe next time I can go for full-coverage…

The crumb was open and super purple!

So, if you like to play with this ingredient, I would recommend the extract, because I felt the dough was quite affected in its structure when some of the flour (therefore gluten) was removed and replaced with the powder. Also, the color that the extract provides is quite spectacular and stayed unchanged with baking. Flavor is very subtle.

ONE YEAR AGO: Brown Butter Dulce de Leche Cookie Cups

TWO YEARS AGO: Chicken Poblano Tortilla Soup

THREE YEARS AGO: Kung Pao Chicken

FOUR YEARS AGO: Galette de Rois

FIVE YEARS AGO: Sous-Vide Overnight Oatmeal

SIX YEARS AGO: A Valentine’s Day Opera

SEVEN YEARS AGO: Incredibly Simple Times Four

EIGHT YEARS AGO: Walnut-Cranberry Sourdough Bread

NINE YEARS AGO: Ottolenghi in Brazil?

TEN YEARS AGO: Roasted Winter Vegetables with Miso-Lime Dressing

ELEVEN YEARS AGO: 2012 Fitness Report: P90X2

TWELVE YEARS AGO: Caramelized Bananas

THIRTEEN YEARS AGO: Roasted Lemon Vinaigrette

FOURTEEN YEARS AGO: Whole Wheat Bread

CHRISTMAS SOURDOUGH

A sourdough loaf to celebrate the season…

RAS-EL-HANOUT CHRISTMAS SOURDOUGH
(from the Bewitching Kitchen)

480g bread flour
20g spelt flour
75g sourdough starter at 100%
10g salt
335g water
1/2 tsp Ras-El-Hanout

Make the levain mixture about 6 hours before you plan to mix the dough. It should be very bubbly and active.

When you are ready to make the final dough, place the water in the bowl of a KitchenAid type mixer and dissolve the starter in it, mixing with a spatula briefly, then add the two types of flour, salt and spices. Turn the mixer on with the hook attachment and knead the dough for 4 minutes at low-speed all the time. You will notice the dough will gain quite a bit of structure even with just 4 minutes in the mixer. Remove from the machine, and transfer to a container lightly coated with oil, cover lightly with plastic wrap and allow it to ferment for 4 hours, folding every 45 minutes or so. Because the dough is already a bit developed from the initial time in the mixer, you should get very good structure after 3 and a half hours, or even sooner than that.

After four hours bulk fermentation, shape the dough as a ball, and place, seam side up, in a lightly floured banetton. Leave at room temperature one hour, and then place in the fridge overnight, from 8 to 12 hours.

Next morning, heat the oven to 450F.

Place a parchment paper on top of the dough, a flat baking sheet, and invert the dough, flipping it out of the banneton. Flour the surface of the dough, add the stencil and air-brush if so desired. Score with a razor blade.

Bake at 450F for 45 minutes, preferably covered for the first 30 minutes to retain steam. Cool completely over a rack before slicing.

ENJOY!

to print the recipe, click here

Comments: I think I’m finally getting the gist of stenciling bread. You need to really keep the stencil tightly on the surface, and get just a drop or two of air-brush color in the machine so that you can hold it vertically and get the spray to go exactly where you need. Work in small passes instead of trying to add a heavy layer all at once. I did not even wash the container, I started with green, sprayed it, emptied the air-brush, added the red and tested on a piece of paper until the color came out truly red.

For the scoring I used a razor blade combined with scissors, and after 6 minutes in the oven I opened the lid quickly and scored it deeply again around the design to make sure it would lift during baking.

We all loved this bread, I think the mixture of spices gives it a super subtle extra flavor, not overpowering at all. And of course, the stencil on top is perfect for the season!

ONE YEAR AGO: Christmas Sourdough

TWO YEARS AGO: Star-Shaped Sun-dried Tomato Bread

THREE YEARS AGO: Cranberry White Chocolate Tart

FOUR YEARS AGO: I dream of Madeleines and a Tower of Cheesecakes

FIVE YEARS AGO: Dominique Ansel’s Chocolate Mousse Cake

SIX YEARS AGO: Slow-Roasted Eye of the Round Beef

SEVEN YEARS AGO: Steam-Roasted Indian-Spiced Cauliflower

EIGHT YEARS AGO: Creamy Zucchini-Mushroom Soup

NINE YEARS AGO: Ken Forkish’s Pain au Bacon

TEN YEARS AGO: Carrot and Cumin Hamburger Buns

ELEVEN YEARS AGO: Potato Galettes a l’Alsacienne & Book Review

TWELVE YEARS AGO: Caramelized Carrot Soup

THIRTEEN YEARS AGO: Miso-Grilled Shrimp

FOURTEEN YEARS AGO: Pain Poilane