OREO BALLS, FUN AND EASY

For those who are not into complicated baking recipes but want to impress friends, here is a great idea: Oreo balls. All you need is a food processor, Oreo cookies and cream cheese. The real step that takes them to a higher level is covering them with chocolate, and yes you can use compound chocolate without feeling guilty and inadequate. Nothing wrong with making life a little easier. Decorating them with a fondant bit is optional, you can add sprinkles, or paint with a brush of gold luster mixed with vodka. Or leave them plain. Keep them in the fridge and enjoy them either still pretty cold or after allowing to sit at room temperature for 10 minutes or so.

OREO BALLS
(from The Bewitching Kitchen)

24 Oreo cookies, any flavor
90g cream cheese, at room temperature or slightly cold
200g compound chocolate or regular chocolate with 30g vegetable oil
fondant to decorate (optional)

Coarsely chop the Oreos and place them in a food processor. Add the cream cheese and process it all until a kind of sticky dough forms. Make little balls, each with 20g of the mixture. It they got too warm in the food processor, place in the fridge for a few minutes before forming the balls. Transfer the balls to the freezer for a full hour, that will make the coating set faster.

Melt the compound chocolate and dip each ball using a stick to help it get fully coated. Stick on a base of styrofoam until full set. Make fondant decorations if so desired, paint with gold and stick to the top once the chocolate is set. Keep in the fridge, they stay good for a week or so.

ENJOY!

to print the recipe, click here

Comments: You need some type of a stick to help coat the balls with melted chocolate and to stand them up to set. I used a little styrofoam board to keep them upright. You can of course re-use the sticks, just clean them up after removing from the little balls.
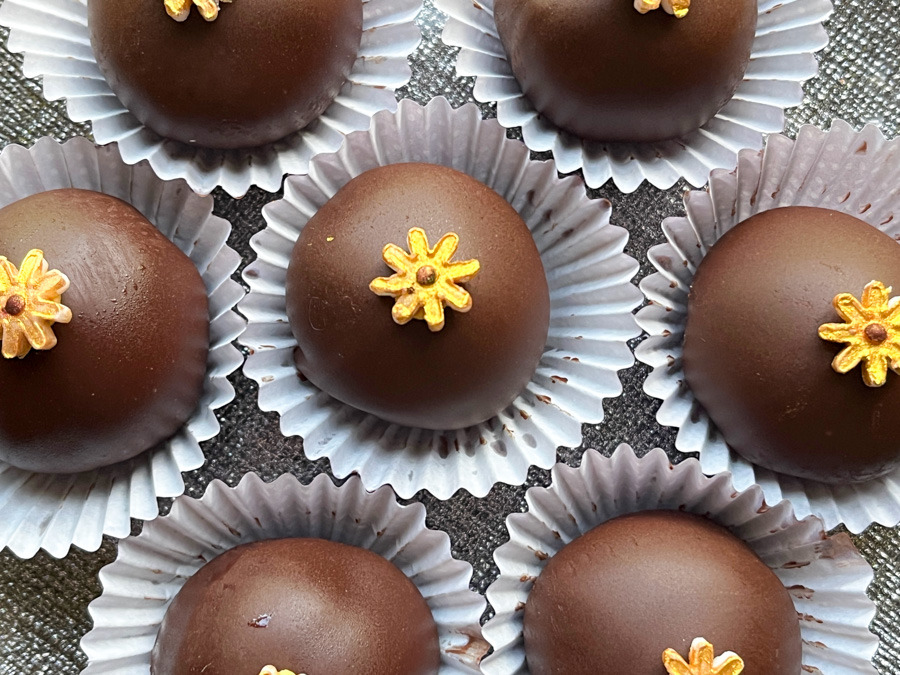
To glue the fondant I used some royal icing I had hanging around, but you can also use melted chocolate. Consider using white chocolate plain or dyed with different colors, and different kinds of Oreo cookies to make the balls. Really a super fun project that you can definitely do with kids.

ONE YEAR AGO: Pork with Prunes

TWO YEARS AGO: Honeyed-Jalapenos on Spelt Pizza

THREE YEARS AGO: Bulgur and Chickpea Salad with Pomegranate Seeds

FOUR YEARS AGO: Purple Star Macarons

FIVE YEARS AGO: Smoked Salmon, Fait Maison

SIX YEARS AGO: Kouign-Amann, Fighting Fire with Fire

SEVEN YEARS AGO: In My Kitchen, Yin and Yang

EIGHT YEARS AGO: Chocolate Toffee Banana Bread

NINE YEARS AGO: In My Kitchen, June 2014

TEN YEARS AGO:  Strawberry Frozen Yogurt

ELEVEN YEARS AGO: Baked Coconut and “The Brazilian Kitchen”

TWELVE YEARS AGO: Honey-Glazed Chicken Legs

THIRTEEN YEARS AGO: French-Style Rolls

SPRINGTIME CUPCAKES

Spring is taking its time to show up, we even had a light snow the other day, but apparently now things are headed in the correct direction (knock on wood). These cupcakes celebrate the season. You can use any recipe you like for the cake component. I went with a very basic vanilla concoction. The frosting is your humble American buttercream. Honestly, I don’t see the need to go through the extra work of a Swiss buttercream to cover cupcakes. It crusts well, so transporting the cakes (which matters a lot to me) is not a problem. They also stand well to sitting at room temperature for an hour or more.

The basic formula is simply 1X amount of butter + 2X amount of powdered sugar. Change the starting weight of butter according to how many cupcakes and how many colors you’ll need, as you will see in the individual cupcakes after the recipe.

BASIC BUTTERCREAM FOR CUPCAKES
(from The Bewitching Kitchen)

226g butter, unsalted, softened
452g powdered sugar
pinch of salt
Vanilla extract, about 1 tsp or more to taste
a couple or more tablespoons of milk (to adjust consistency)

Place the softened butter in the bowl of a KitchenAid type mixer with the paddle attachment, add the pinch of salt, and whip at high speed for about 7 minutes. It needs to be really soft and lighter. Stop the mixer. Eyeball the amount of powdered sugar, add 1/3 and mix at low speed at first, once the sugar is starting to get incorporated, increase the speed to medium-high.

Add the second portion of the sugar, and incorporate the same way. Add the final portion, start at low speed, clean the sides of the bowl well with a spatula, add the vanilla and increase the speed slowly all the way to high. Whip it until very smooth. Add milk to desired consistency. If desired, add any flavoring ingredients, about 1/4 cup (Nutella, jam, teaspoon of emulsions). If working with different colors, divide the buttercream into small bowls and dye each one with food gel color.

Fill piping bags fitted with the icing tips of your choice. Ice fully cooled cupcakes.

ENJOY!

to print the recipe, click here

LUCK OF THE IRISH CUPCAKES

For 12 cupcakes my starting point was 150g butter + 300g powdered sugar, plus 1/4 cup Nutella as flavoring.
I used 1M tip to make rosettes, and gilded the lily with sprinkles and a fondant clover.

HYDRANGEA CUPCAKES

For these cupcakes, I made buttercream with 200g butter + 400g powdered sugar. Divided in three portions and dyed them very very lightly with pink, lavender, and blue. The colors were spread as bands over plastic, and a little sausage was formed, then dropped in an icing bag with the1M tip. To make the flowers, I piped small blobs all over anda second layer going up towards the center.

RUFFLED FLOWER CUPCAKE

These cupcakes were made together with the last one (multiple colors) so for the full batch (12 cupcakes) I used the recipe as published (226g butter). I was playing with several colors and did not want to run out of any of them. A more experienced baker might get by with a smaller amount of icing to start with.

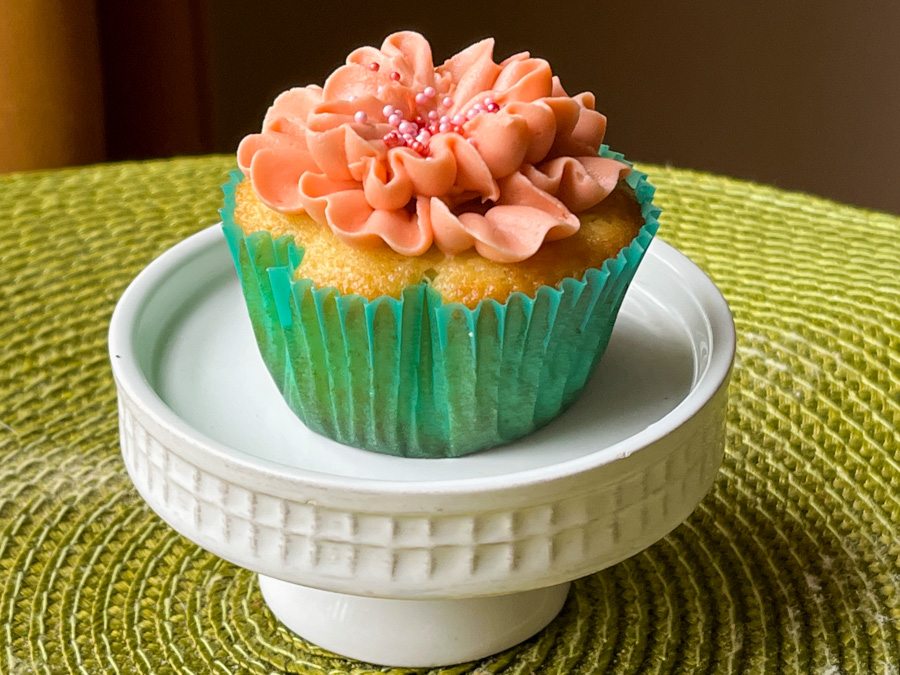
This flower was made with the petal tip 104, laying very flat on the surface of the cake, in two rows to give more lift and volume. Sprinkles added just because. You could make a center with buttercream dots in a contrasting color, if you prefer.

MULTICOLOR FLORAL CUPCAKES

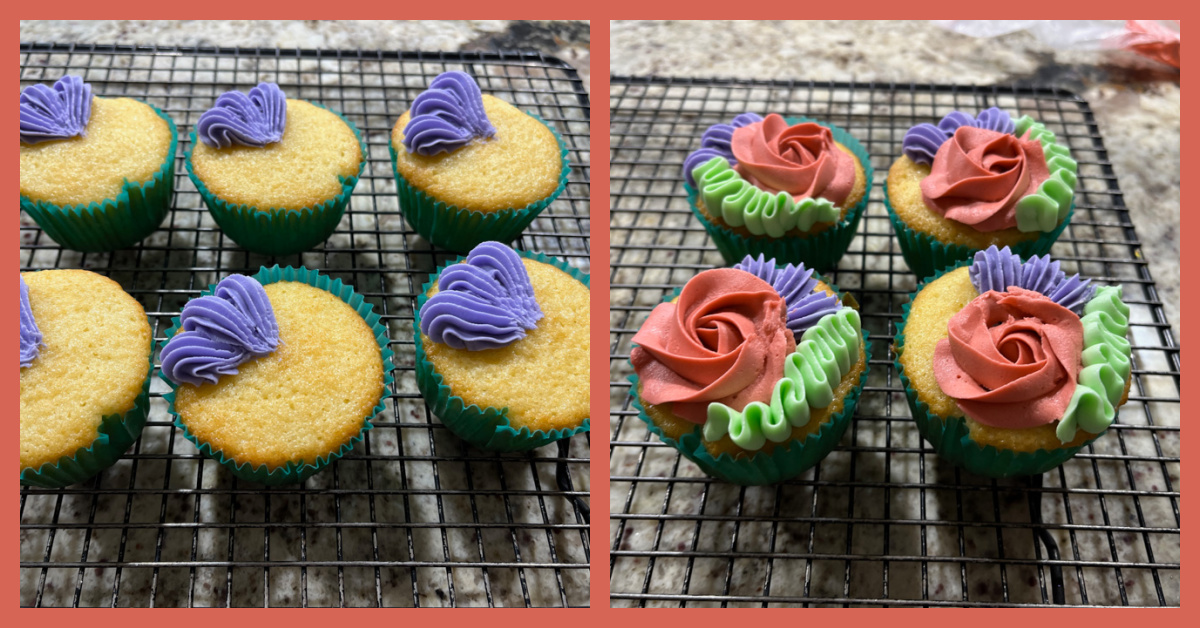
I divided the buttercream in four batches and dyed them pink (toned down with a touch of brown), purple, green and yellow. Four tips were used. Wilton 1M for purple, closed star for flower (Wilton 2D), petal tip for green (Wilton 104), and a small open star for the yellow (Wilton 18).

Inspiration to decorate these cupcakes came from this video available on youtube.

Cupcakes are so much fun to decorate….
ALMOST as much as cookies!

ONE YEAR AGO: Eggplant-Hummus Phyllo Rolls

TWO YEARS AGO: Happy Easter!

THREE YEARS AGO: Brioche Pepin

FOUR YEARS AGO: Sakura Buche du Printempts

FIVE YEARS AGO: Clay Pot Roast Chicken

SIX YEARS AGO: In My Kitchen, April 2017

SEVEN YEARS AGO: Secret Recipe Club: Chicken Korma and a Bonus Recipe

EIGHT YEARS AGO: Josey Baker’s Olive Bread

NINE YEARS AGO: Almonds, A Cookbook Review

TEN YEARS AGO: Pomegranate-Molasses Glazed Carrots

ELEVEN YEARS AGO: Codruta’s Rolled Oat Sourdough Bread

TWELVE YEARS AGO: Roasted Corn and Tomato Risotto

THIRTEEN YEARS AGO: Light Rye Bread

BRAZILIAN-STYLE BANANA CAKE

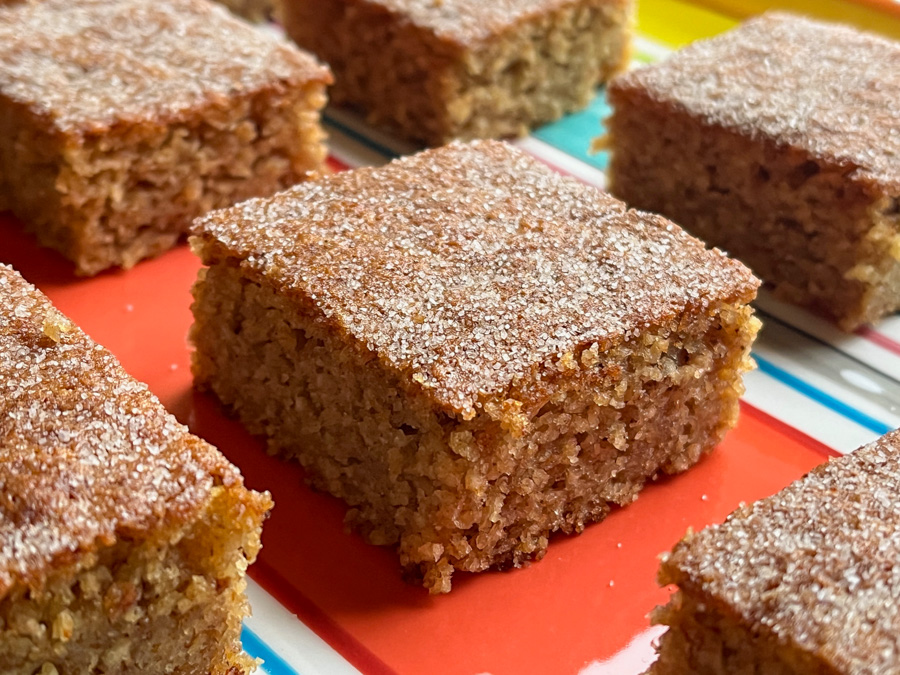
This is quite likely one of the easiest cakes to make, and I just know you will fall in love with it at first bite. One very unusual ingredient goes into the batter: bread crumbs instead of any type of flour. Don’t twist your nose, and please don’t run away! This is a deliciously moist, not too sweet cake, with intense banana flavor. I slightly modified the recipe my friend Alberto sent me. It is a winner!

BRAZILIAN-STYLE BANANA CAKE
(slightly modified from our friend Alberto’s recipe)

5 very ripe bananas
4 eggs
80g oil (grape seed or canola)
100g granulated sugar
100g brown sugar
1/2 tsp cinnamon
2 cups breadcrumbs (unseasoned, about
1 tablespoon baking powder
1/2 tsp salt

cinnamon + sugar to dust the top after baking

Spray a 9 x 13 pan with baking spray and cover with parchment paper coming up the sides. Reserve. Heat the oven to 350F.

Place in a blender all the ingredients up to cinnamon. Blend at full speed until the batter is smooth.

Place the bread crumbs, baking powder and salt in a large bowl, whisking to combine. Pour the blended mixture on top, and mix gently with a spatula. Pour the batter in the prepared pan and bake for 40 minutes, until a toothpick inserted in the center comes out clean and the sides look dry and golden. Sprinkle cinnamon sugar lightly on top while the cake is still hot.

Let it cool completely before cutting in slices.

ENJOY!

to print the recipe, click here

Comments: Phil fell in love with this cake, and he is a serious banana cake critic! The version we had in Brazil baked by our friend had a more intense banana flavor, but then again, it is hard to beat the flavor of a Brazilian banana in the height of the Summer… The texture of the cake is very unique, and it stays moist and tender for days. I highly recommend you give this recipe a try…

ONE YEAR AGO: Tiger Shrimp in Chili Sauce

TWO YEARS AGO: Tangzhong Hamburger Buns

THREE YEARS AGO: Potato Soup with Spicy Shrimp

FOUR YEARS AGO: Rose-Harissa Chicken Thighs

FIVE YEARS AGO: Caramel-Chocolate Tartlets

SIX YEARS AGO: Chicken Korma-ish

SEVEN YEARS AGO: Sunday Gravy with Braciola

EIGHT YEAR AGO: In My Kitchen, February 2015

NINE YEARS AGO: Avocado and Orange Salad with Charred Jalapeno Dressing

TEN YEARS AGO: Green Olive, Walnuts and Pomegranate Salad

ELEVEN YEARS AGO: Romanian Flatbreads

TWELVE YEARS AGO: Ziti with Artichokes and Meyer Lemon Sauce

THIRTEEN YEARS AGO: Blasted Broccoli, Stove-top version

INCREDIBLY SIMPLE APPLE CARPACCIO

I love to bake but we rarely have dessert at home. Only dinner parties will find us enjoying sweets after a meal. Still, when it is your perfect match’s Birthday, it is nice to close the meal with some sweetness. We wanted something light, no heavy laminated dough, no cake, no pie. I stumbled on this recipe by accident, simplified it quite a bit and we absolutely loved it! At the end of the post, I will give you a suggestion to turn it into a verrine, in case you do not want to go through the trouble of slicing the apples so thin.

APPLE CARPACCIO
(from the Bewitching Kitchen)

1 apple (I used honey crisp)
1/3 cup pistachios, toasted
1/2 cup full-fat yogurt
honey to taste
1/3 cup pomegranate seeds
lemon juice

Cut the pistachios in small pieces, mix half with the yogurt, add honey to taste. Reserve the remaining pistachios.

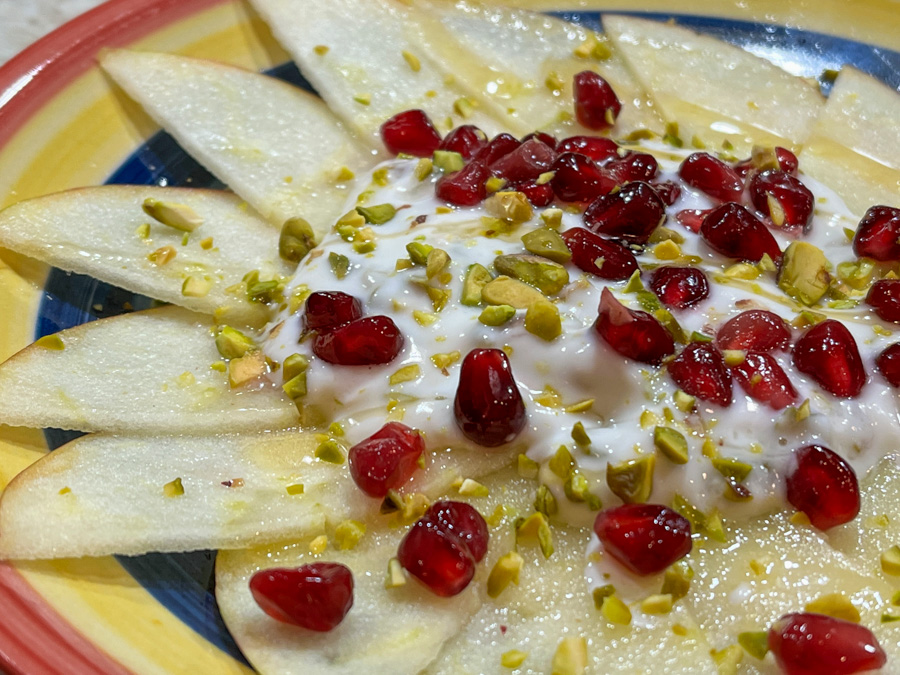
Quarter the apple, core it, but do not peel it. Slice it super thin, ideally using a mandolin. Spread the slices over a plate, squirt lemon juice all over.

Place a dollop of yogurt in the center of the slices, top with pomegranate seeds and reserved pistachios. Drizzle with a little bit of honey and serve.

ENJOY!

to print the recipe, click here

Comments: This was delicious, refreshing and light. I highly recommend it if you want to serve dessert but keep it on the light side. If you don’t own a mandolin and don’t want to go through the effort of cutting the apples by hand, dice the fruit and layer on a little glass. A layer of apple, some lemon juice, yogurt-pistachio layer, more apple, and top with the yogurt mix, finishing with pistachios, pomegranate seeds and a drizzle of honey. It will be a different serving style, but equally delicious.

ONE YEAR AGO: Chocolate-Cherry Miroir Cake, A Vegan Showstopper

TWO YEARS AGO: Bee Happy Honey Macarons

THREE YEARS AGO: Episode 7 of Great American Baking Show, Canapes, Opera Cake and Running out of Gas

FOUR YEARS AGO: Raspberry Ganache Macarons

FIVE YEARS AGO: Pain au Chocolat

SIX YEARS AGO: Two Unusual Takes on Roasted Veggies

SEVEN YEARS AGO: Kadoo Boranee: Butternut Squash Perfection

EIGHT YEARS AGO: Creamy Broccoli Soup with Toasted Almonds

NINE YEARS AGO:
 Fennel and Cheddar Cheese Crackers

TEN YEARS AGO: A Festive Pomegranate Dessert

ELEVEN YEARS AGO: My First Award!

TWELVE YEARS AGO: A Message from WordPress

THIRTEEN YEARS AGO: Turkish Chicken Kebabs

CREMINO ALLA NOCIOLLA

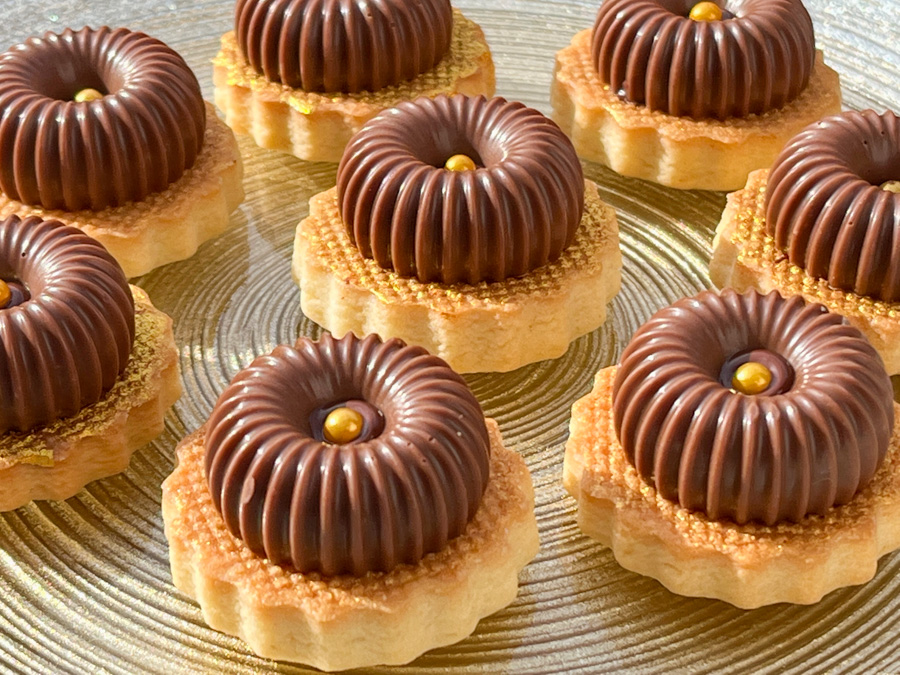
Or, if you prefer, Creamy Hazelnut… paired with a sugar cookie, also flavored with hazelnut and a touch of orange. I adapted this recipe from Gabriella’s blog Siula Golosa (click here for her original version). I’ve been meaning to make these elegant cookies ever since I read her post, but for some reason it only happened now. Better late than never, I say.


HAZELNUT CREAM OVER SUGAR COOKIE
(adapted from Siula Golosa)

for the cookie base:
1 cup (226g) butter
1 cup (200g) sugar
zest of one orange
2 eggs
1 tsp hazelnut bakery emulsion
1/4 tsp orange extract
420g flour
60g cornstarch
1/2 tsp salt
1/4 tsp baking powder

for the hazelnut cream:
54g white chocolate
27g dark chocolate
19g Nutella or Nocciolata paste (I used this one)
11g cocoa butter

melted chocolate
gold luster powder
sprinkle to decorate


Make the cookie base: Mix flour, cornstarch, salt and baking powder. Reserve. Rub orange zest on the sugar with your fingers until fragrant. Cream butter with sugar. Whisk eggs with hazelnut and orange extracts, add to the butter/sugar with mixer on low speed, a little bit at a time. Once incorporated, add the dry components and mix on low-speed until a dough forms. Divide in two and refrigerate for 10 minutes before rolling out and cutting small circles. Freeze for 10 minutes, then bake at 350F until edges start to get some color, about 12 minutes. Recipe makes a lot more than you will need.

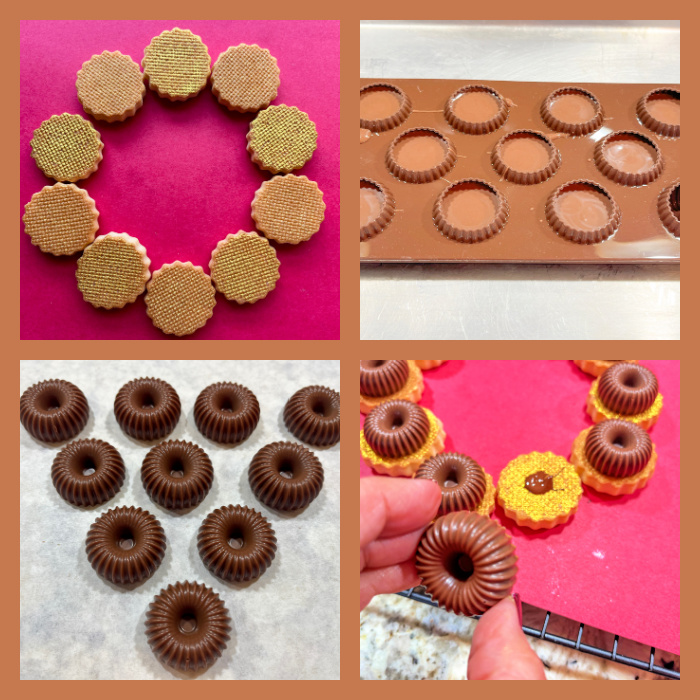
Make the hazelnut topping: Add all ingredients to a microwave save bowl, and heat at 50% power, in 30 second increments, removing from the microwave and whisking gently. Once melted, pour over a countertop or over acetate sheet and bring the temperature down to 78F by moving it around with a spatula. It is a small volume, so it will get there quickly. Pour into an icing bag, and fill the mold to the top. Allow it to set at room temperature for 1 hour, transfer to the fridge for 20 minutes, and un-mold.

Use a little melted chocolate to glue the hazelnut cream to the top of the cookie. If desired, you can paint the cookie with luster gold and vodka. Decorate the center with a golden bead.

ENJOY!

to print the recipe, click here


Comments: For the topping you will need this mold from Silikomart. I was very worried about it, because there is so much detail on the surface. But, as always, Silikomart products are excellent and the flexibility of this one was perfect to release the hazelnut component. The mold has 11 cavities, the recipe made exactly 10. Not a single one had any issues, they were all perfect.

Next time I will use the base from Gabriella’s blog, because I think it will be pretty nice, and will also roll it a bit thinner. This was in fact an impulse bake, I had a little bit of cookie dough leftover, and thought that the taste of hazelnut would go well with the creamy top. All things considered, this is a very easy concoction to put together, but it looks like you slaved over it for hours. Perfect to impress your favorite guests!


ONE YEAR AGO: Roasted Broccoli and Apple Salad with Tahini Dressing

TWO YEARS AGO: A Different Kind of Cookie Swap

THREE YEARS AGO: Scary Good Recipes for your next Halloween

FOUR YEARS AGO: Pumpkin Sourdough

FIVE YEARS AGO: First Monday Favorite

SIX YEARS AGO: Secret Recipe Club: Paalak Paneer, a Farewell Post

SEVEN YEARS AGO: In My Kitchen, November 2015

EIGHT YEARS AGO: Helen Fletcher’s Oatmeal Cookies

NINE YEARS AGO: Thai-Style Pesto with Brown Rice Pasta

TEN YEARS AGO: Shrimp with Spicy Orange Sauce

ELEVEN YEARS AGO:  A Simple Appetizer (Baked Ricotta)

TWELVE YEARS AGO: Sour Cream Sandwich Bread

THIRTEEN YEARS AGO: Pasta with Zucchini Strands and Shrimp