A real nice recipe that has Fall written all over it. I was inspired by a blogger I follow but was a bit disappointed when I made it exactly as published. So I tweaked things around and also incorporated a step in which the chicken is cooked under pressure, giving the wonderful melt-in-your-mouth texture I love. I will give you an alternative to skip the pressure cooking.

CHICKEN THIGHS WITH APPLES AND SAGE
(from The Bewitching Kitchen)
for the chicken:
1 Tbsp olive oil
6 boneless skinless chicken thighs
3/4 tsp each salt and black pepper, or to taste
3/4 tsp paprika
for the apples:
2 Tbsp olive oil
2 medium gala apples, cored and sliced thin
2 large stalks celery, sliced 1/4 inch thin
1 shallot, minced
1/2 tsp ground cinnamon
1/4 tsp ground nutmeg
1 tsp each minced fresh thyme, rosemary and sage (or 1/2 tsp each dried)
for the sauce:
1 cup apple juice
1 Tbsp honey
1 Tbsp apple cider vinegar
1 tsp Dijon mustard
1 1/2 tsp cornstarch dissolved in 1 tablespoon cold water, reserved
In liquid measuring cup whisk together the apple juice, honey, apple cider vinegar, and dijon mustard. If cooking chicken in a pressure cooker, separate that amount in two parts (no need to be exact, eye balling is fine).
Heat a skillet over medium high heat, or if using a pressure cooker, do this step right in the pan. Sprinkle chicken on both sides evenly with paprika, salt and pepper. Drizzle olive oil into skillet or pressure cooker, when very hot add the chicken and brown on both sides. If using a pressure cooker, add half of the cooking liquid, bring to a gentle boil, close the pan and cook under pressure for 12 minutes. Release pressure under running water, reserve the meat. If the liquid does not reach halfway up the pieces of chicken, complete that volume with water.
If cooking the chicken on a skillet, remove the pieces to a platter, add more oil to the pan, and sautee the celery, shallots and pieces of apple, seasoning with cinnamon and nutmeg. If cooking the chicken under pressure, sauté the apples and veggies using a clean skillet the same way described above. When the apples are soft, add the apple juice mixture, season with a little more salt and pepper, if so desired. Return the chicken to the pan. If the chicken was cooked in the pressure cooker, simply warm everything together for a couple of minutes, then add the cornstarch slurry and the fresh sage. Serve immediately. If the chicken was not prepared under pressure, simmer with the pan covered until fully tender, probably 15 minutes. Add the sage and the cornstarch slurry right before serving.
ENJOY!
to print the recipe, click here
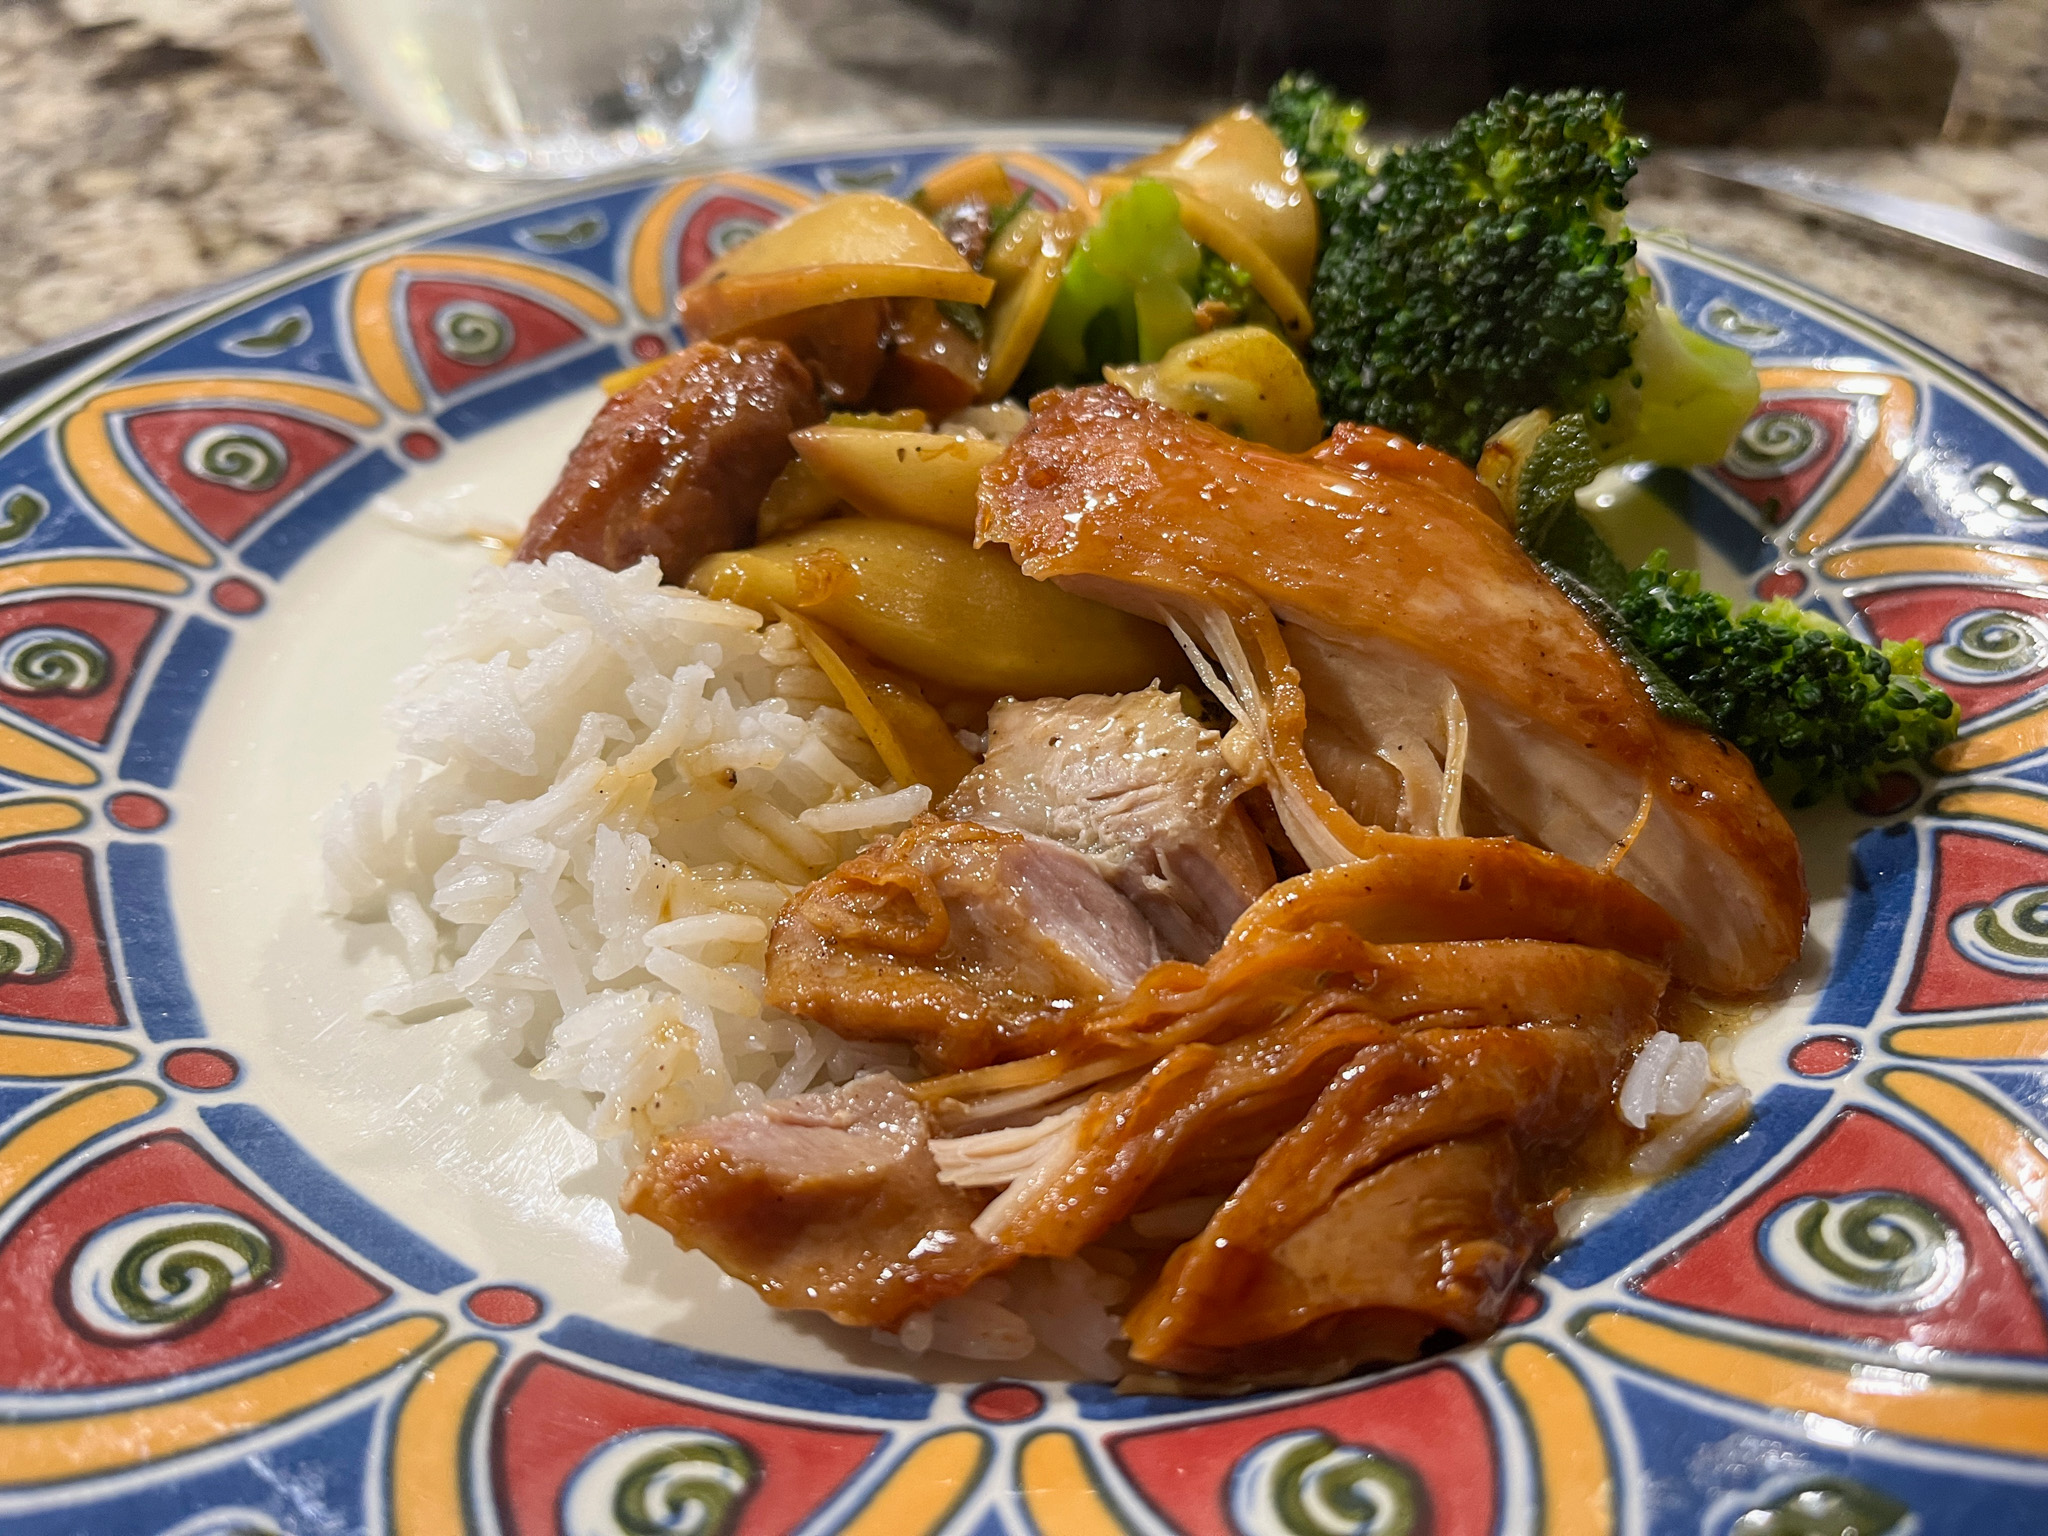
Comments: We really loved this preparation for chicken, in fact I made it twice in the same week per husband’s request! I am totally comfortable with the pressure cooker, so for me it’s really not a big deal to use it, but I realize it can be intimidating. For this reason I included the instructions to cook without it. But there is something about the texture that I absolutely love. It gets tender and never rubbery. I like to start the pressure cooking step right away, because the veggies and apples are ready so quickly. Once the chicken has been cooking for 5 minutes I start sautéing the celery, shallots and apples, and everything comes to the finish line harmoniously. A little white rice, and steamed broccoli, nothing else needed…
ONE YEAR AGO: Gochujang Grilled Chicken Thighs
TWO YEARS AGO: Feta Eggs with Zucchini
THREE YEARS AGO: Poilane-Style Bread, a simplified version
FOUR YEAR AGO: Broccoli Salad with Pomegranate Seeds and Tahini Dressing
FIVE YEARS AGO: Turkey-Spinach Meatballs with Cardamon-Tomato Sauce
SIX YEARS AGO: British Baps, a Technical Challenge
SEVEN YEARS AGO: Japanese-Style Cupcakes with Cherry Blossom Icing
EIGHT YEARS AGO: Quick Weeknight Soups
NINE YEARS AGO: Sourdough Loaf with Cranberries and Walnuts
TEN YEARS AGO: Sichuan Pork Stir-Fry in Garlic Sauce
ELEVEN YEARS AGO: Our Green Trip to Colorado
TWELVE YEARS AGO: Ditalini Pasta Salad
THIRTEEN YEARS AGO: Celebrate Wednesday with a Thai Seafood Curry
FOURTEEN YEARS AGO: Post-workout Breakfast
FIFTEEN YEARS AGO: Semolina Barbecue Buns
SIXTEEN YEARS AGO: Lavash Crackers