IT IS NOT THE RECIPE

No recipe today, quite the opposite. My passion for baking has made me join many groups on Facebook related to cookie decorating, macarons, patisserie in general. One of the most common requests in those groups is “I want to start baking macarons… please give me a foolproof recipe”… or… I want to make decorated sugar cookies, but I want a cookie recipe that won’t spread, and the BEST Royal icing that will be easy to work with. Similar requests for bread baking, or pie crust, or laminated dough… Basically they believe that “the best recipe” is the answer to all issues. Guess what? It is not. Just to give one basic example, you can make macarons using three very different methods for the meringue (French, Swiss, Italian), and they will ALL work, if you add to it the one key ingredient no one lists in any recipe: PRACTICE. 

About a year ago, I fell for something I saw advertised. A cookie recipe that was so good that you could only get it by paying for it through the author’s etsy shop. I was so intrigued, that I confess I did pay. I paid almost $20 to get ONE recipe for cookie dough, which is probably the price I pay for most cookbooks I own. It turns out that magical recipe was almost exactly the one I’ve been using for a long time, with minor differences. It taught me a big lesson. It is NOT the recipe. It is your experience, the “feel” you develop for something once you do it over and over and over. 

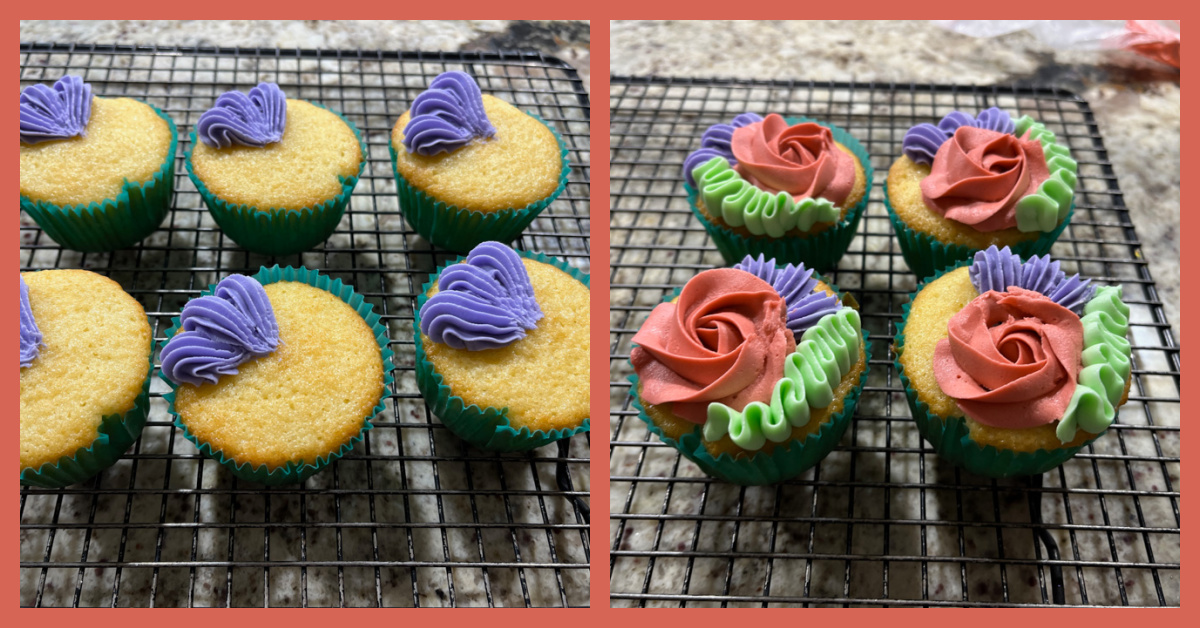
Royal icing is tricky. Consistencies need to absolutely perfect depending on what you want to do with it. I’ve been decorating cookies on a regular basis for at least 3 years and I can tell you that every single recipe out there will work once you get used to it, once you PRACTICE. No recipe will replace practice. Some recipes tend to attract a lot of attention, because all of a sudden a group of seasoned bakers start praising it and then those who are just beginning their baking journey will try it. If that fails, they assume THEY are the failure. Trust me, most recipes can work if you allow yourself to get acquainted with the different steps, and commit to practicing it. Yes, I do sound like a broken record today… 


Do I have recipes I consider excellent and tend to go back to all the time? Yes. My Grown-up Spicy Chocolate Cookie dough is one. My default French macaron recipe is another. But even those, it took me MANY attempts at making and optimizing it, until I felt comfortable with them. I now add different flavorings to the chocolate dough, omit the chipotle, take it into different directions with orange or cardamon, but the overall procedure is the same and I am confident about tweaking it because I have made it more than 100 times. If my dough behaves different one day, I can tell, and I can do the adjustments because I got the “feel” for it. No recipe gave it to me, it was just practice. Over, and over.


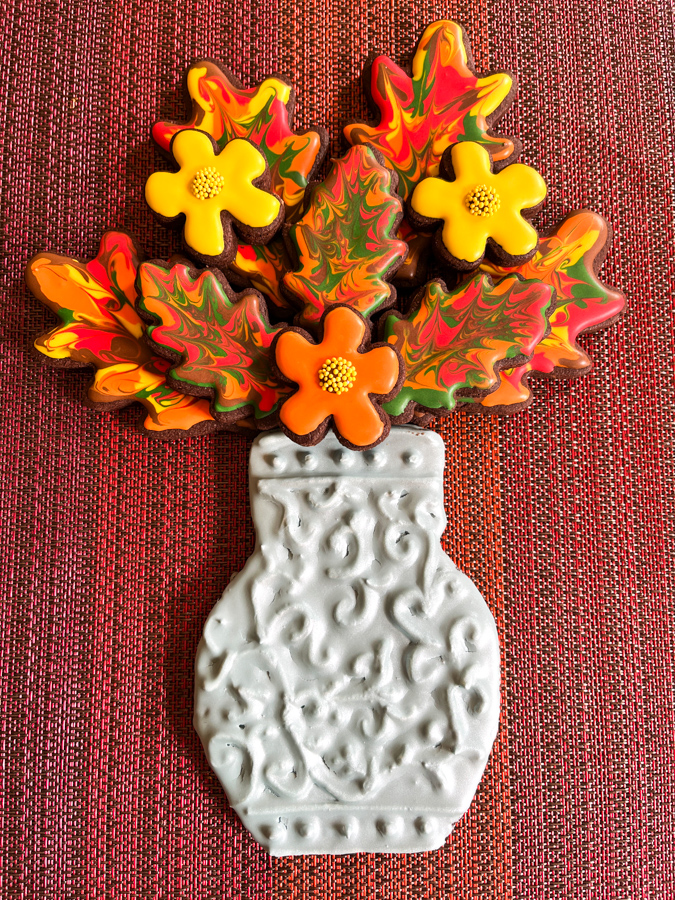
Sugar cookies are another example. Some recipes omit baking powder and add cornstarch. I am quite fond of that basic approach. After trying many different versions, for my particular goals, a little bit of baking powder is a good thing, but not as much as most recipes call for. Yes, baking powder makes the cookies rise UP, which is not a bad thing. But it also gives them a rounded edge I don’t care for if I am decorating with Royal icing. I rather have a more flat surface all the way to the edge. Omitting baking powder completely is perfect in that sense, but the texture of the cookie suffers. So I use 1/4 tsp of baking powder for a nice compromise (a favorite recipe of mine is this one, but I vary the flavors all the time). It works for me, but it took me months of tweaking, observing the results and testing again. And again. Another whole universe is stamped cookies in which keeping the design is a must . Different molds behave better with some recipes than others. No single recipe will be a winner. But once you commit to finding what works for you, it will all fall in place.


Bottomline is, every time someone begs for the perfect recipe and expects success, I tend to roll my eyes to the ceiling a bit. You want the perfect recipe? Be ready to work for it. You have to make it happen in your kitchen, with your oven, your ingredients and for your personal taste. No one, absolutely no one can do it for you. Baking is one of the most rewarding activities, if you enjoy the path. Including the failures, the mistakes, the less than stellar results. Don’t expect the perfect recipe to be handed to you, instead make it materialize. Work with it, and above all, make your path fun! 

ONE YEAR AGO: Pfeffernusse

TWO YEARS AGO: Clay Pot Pork and Tomatillo Braise

THREE YEARS AGO: Vegan Chocolate-Dipped Cinnamon Cookies

FOUR YEARS AGO: Lemony Barley with Shrimp and Spinach

FIVE YEARS AGO:Black Rice with Roasted Cauliflower

SIX YEARS AGO:
La Couronne Bordelaise

SEVEN YEARS AGO: A Special Birthday Dinner

EIGHT YEARS AGO: Duck Confit for a Special Occasion

NINE YEARS AGO: Tuscan Grilled Chicken and Sausage Skewers

TEN YEARS AGO: Celebrate Wednesday with Pork Tenderloin & Apples

ELEVEN YEARS AGO: Salmon Wellington

TWELVE YEARS AGO: The Green Chip Alternative

THIRTEEN YEARS AGO: Weekend Pita Project

FOURTEEN YEARS AGO: Let it snow, let it snow, eggs in snow

LA BUCHE DE NOEL

Not my first time making it, but in the past I was not fully happy with the results. I show you two ways to decorate it, but will share only the most recent recipe, cake portion courtesy of Helen Fletcher, my beloved virtual mentor!

BUCHE DE NOEL
(adapted from Helen Fletcher’s Pastrieslikeapro)

for the chocolate spongecake:
¾ cup sifted cake flour (75 grams)
¼ cup sifted cocoa (25 grams)
¼ teaspoon baking powder
6 eggs separated
⅔ cup sugar, divided (140 grams)
1 teaspoon vanilla

for the filling:
1 cup unsalted butter softened (226g)
3 cups confectioners’ sugar (380g) or more if needed
1 teaspoon pure vanilla extract
1/4 cup 60-80ml heavy cream (60mL) or more if needed
1/3 cup black cherry jam or other jam of your choice

for the ganache coating:
170g semi-sweet chocolate, finely chopped
3/4 cup (180ml) heavy cream

Heat the oven to 350. Spray the bottom of ½ sheet pan (11×17 inches) with cooking spray. Line with parchment paper and spray the paper. Do not spray sides of pan. Set aside.

Whisk together the flour, cocoa and baking powder, mixing well. Set aside. Combine the egg yolks, ⅓ cup sugar and vanilla in a mixing bowl fitted with the whisk attachment. Beat until very thick and very pale yellow.

In a clean mixing bowl with a clean whisk, beat the egg whites until soft peaks form. Slowly add the remaining ⅓ cup sugar and beat until fairly stiff. Place the egg yolks over the egg whites and sift half the flour/cocoa mixture over the beaten eggs. Fold together. Fold in the remaining flour/cocoa. Gently pour into the prepared pan and spread out evenly. Bake 10 to 12 minutes. The top will spring back when lightly touched. Immediately cover directly with foil and place on a rack to cool completely. When ready to assemble, it will roll out easily.

Make the filling: In a stand mixer fitted with the paddle attachment, mix together the butter and confectioners’ sugar. Begin on low speed until crumbly, and then increase to high and beat for 3 minutes.
Add vanilla extract and beat again for another minute. Add heavy cream 2 tablespoons at a time while mixing on high until the mixture is light and fluffy. Transfer the frosting to a piping bag.

Make the ganache: Place chopped chocolate in a medium bowl. Heat the cream in a small saucepan until it begins to simmer. Pour over chocolate, then let it sit for 2-3 minutes to gently soften the chocolate. Slowly stir until completely combined and chocolate has melted. Refrigerate, uncovered, for about 1 hour to thicken.

ASSEMBLE THE CAKE: Lay a large piece of aluminum foil and dust it with powdered sugar. Remove the foil on top of the cake and go around the edges of the pan with a spatula. Pick the spongecake up by the parchment and turn it out onto the powdered sugar lined foil. Remove the parchment paper. Spread the jam over the surface of the cake, then the buttercream, starting by piping large stripes of the cream over the surface (see my composite photo after the recipe). Using the foil as an assist, roll up the spongecake jelly roll style. The last roll should put the spongecake on the board. Cut the ends of the cake at a diagonal and use one or both cut pieces to make branches sitting next to the main log. 

Cover the log with ganache, making a design on top with the tines of fork. Decorate with fondant pieces or meringue mushrooms, sugared cranberries, chocolate leaves, whatever you desire. Refrigerate for a few hours before serving, and allow to come to room temperature before cutting your first slice.

ENJOY!

to print the recipe, click here

Comments: I advise you to go to Helen’s site to get all the details of making her cake. She uses a different method to deal with the sponge cake, and it does work like a dream. The cake is covered with aluminum foil as soon as it gets baked, and is allowed to cool like that. As a result, it steams during cooling and becomes very flexible. No harm to the texture of the cake in the finished product.

I have made a Buche de Noel in the past using a different recipe for the cake, but I am much happier with Helen’s version, that calls for a classic sponge cake. You can also find in her blog post a detailed recipe for the meringue mushrooms, which I did not use this time. They are fun to make, for sure.

I love making fondant pieces, so that is what I went with… I cannot show you a picture of the cut cake because I donated it whole, but I got very nice feedback about it, and that of course made me super happy!

I wish you a wonderful 2024!

ONE YEAR AGO: Incredibly Simple Apple Carpaccio

TWO YEARS AGO: Chocolate-Cherry Miroir Cake, A Vegan Showstopper

THREE YEARS AGO: Bee Happy Honey Macarons

FOUR YEARS AGO: Episode 7 of Great American Baking Show, Canapes, Opera Cake and Running out of Gas

FIVE YEARS AGO: Raspberry Ganache Macarons

SIX YEARS AGO: Pain au Chocolat

SEVEN YEARS AGO: Two Unusual Takes on Roasted Veggies

EIGHT YEARS AGO: Kadoo Boranee: Butternut Squash Perfection

NINE YEARS AGO: Creamy Broccoli Soup with Toasted Almonds

TEN YEARS AGO:
 Fennel and Cheddar Cheese Crackers

ELEVEN YEARS AGO: A Festive Pomegranate Dessert

TWELVE YEARS AGO: My First Award!

THIRTEEN YEARS AGO: A Message from WordPress

FOURTEEN YEARS AGO: Turkish Chicken Kebabs


BAKE IT BETTER WITH A FRIEND

Time flies. No other expression is more accurate. More than four long years passed since I met the contestants of the Great American Baking Show, Season 5, in the lobby of a hotel in London, not too far from Heathrow Airport. We were all exhausted, and not just for the long trip. For several weeks prior, we had been through the toughest baking marathon one could ever imagine, and even though we were aware that a few other people in the US were going through that exact same ordeal, only then we got to meet in person. Most of our group has kept in touch virtually over these years. But only now Tanya and I got to meet again in person. We spent a weekend together, the four of us, bakers and respective husbands. We baked, we talked, we laughed, and we baked some more. I screwed up a sourdough bread that turned out as one of the worst loaves I’ve made in the past couple of years… But Tanya and I were both in a certain tent, so we know too well that things can go wrong when we really hope them not to… Today I share our best adventure of the weekend, the making of a fantastic dessert from Matt Adlard’s book Bake it Better. Chocolate Souffles… To die for!

When Tanya and Jamie came to visit us, she brought her copy of Bake it Better, as I own the Kindle version and it is easier to use in the kitchen a real book, especially if you are cooking with friends. We had settled on the soufflés for our dessert after a meal of grilled salmon, quick tahdig rice and asparagus. The recipe is actually available online, and you can find it here. It makes a little more than 4 individual portions, I would say 6 or 7 using the ramekins he calls for.

We had no issues with the recipe, worked great, gave the exact lift that we expected and that Matt showed in his beautiful pictures in the book, which, by the way I highly recommend you get. Click here for the amazon link.

Main conclusion from the weekend?

BAKING IS BETTER WITH A FRIEND!


And the excitement was definitely shared by the pups, here is their recollection of the weekend….


We had THE BEST WEEKEND EVER! Imagine this, our Kingdom received the visit of two brand new Peasants, and we had a total blast teaching them how to properly play, and how to share their food and shoes. We were certain Zenless (aka our Mom) and The Dad would be proud of our way to make them feel welcome, but then here we are, getting our ears full. Apparently, Star did a big no-no by French kissing the man – repeatedly – and the fact that I got all excited and decided to hump her while she was all affectionate with our guest, only made matters worse. We were told we generated chaos and embarrassment. Squeaking the toy loudly at 5:50am on a Sunday was also a big no-no, and invading the privacy of the bathroom when the nice lady was trying to be there in peace goes into the list of capital doggie sins. Life can be very tricky at times. Can you put a good word for us and tell the New Peasants to come back? We miss them!

ONE YEAR AGO: Bison a la Mode de Bourgogne

TWO YEARS AGO: Masala Mashed Potatoes

THREE YEARS AGO: Lessons from Tanya: Sugar Cookie Silhouettes

FOUR YEARS AGO: Cherry-Chipotle Chicken Thighs

FIVE YEARS AGO: White Chocolate Mini-Mousse with Sugared Cranberries

SIX YEARS AGO: You Say Ebelskiver, I say Falafel

SEVEN YEARS AGO: Happy Thanksgiving!

EIGHT YEARS AGO: Two Takes on Raspberries

NINE YEARS AGO: Spice Cake with Blackberry Puree & The Global Pastry Review

TEN YEARS AGO: Own Your Kitchen with Cappuccino Panna Cotta

ELEVEN YEARS AGO: Chicken Parmigiana, the Thriller

TWELVE YEARS AGO: Wild Mushroom Risotto

THIRTEEN YEARS AGO: Tartine Bread:  Basic Country Loaf 

FOURTEEN YEARS AGO:  Pugliese Bread

OREO BALLS, FUN AND EASY

For those who are not into complicated baking recipes but want to impress friends, here is a great idea: Oreo balls. All you need is a food processor, Oreo cookies and cream cheese. The real step that takes them to a higher level is covering them with chocolate, and yes you can use compound chocolate without feeling guilty and inadequate. Nothing wrong with making life a little easier. Decorating them with a fondant bit is optional, you can add sprinkles, or paint with a brush of gold luster mixed with vodka. Or leave them plain. Keep them in the fridge and enjoy them either still pretty cold or after allowing to sit at room temperature for 10 minutes or so.

OREO BALLS
(from The Bewitching Kitchen)

24 Oreo cookies, any flavor
90g cream cheese, at room temperature or slightly cold
200g compound chocolate or regular chocolate with 30g vegetable oil
fondant to decorate (optional)

Coarsely chop the Oreos and place them in a food processor. Add the cream cheese and process it all until a kind of sticky dough forms. Make little balls, each with 20g of the mixture. It they got too warm in the food processor, place in the fridge for a few minutes before forming the balls. Transfer the balls to the freezer for a full hour, that will make the coating set faster.

Melt the compound chocolate and dip each ball using a stick to help it get fully coated. Stick on a base of styrofoam until full set. Make fondant decorations if so desired, paint with gold and stick to the top once the chocolate is set. Keep in the fridge, they stay good for a week or so.

ENJOY!

to print the recipe, click here

Comments: You need some type of a stick to help coat the balls with melted chocolate and to stand them up to set. I used a little styrofoam board to keep them upright. You can of course re-use the sticks, just clean them up after removing from the little balls.

To glue the fondant I used some royal icing I had hanging around, but you can also use melted chocolate. Consider using white chocolate plain or dyed with different colors, and different kinds of Oreo cookies to make the balls. Really a super fun project that you can definitely do with kids.

ONE YEAR AGO: Pork with Prunes

TWO YEARS AGO: Honeyed-Jalapenos on Spelt Pizza

THREE YEARS AGO: Bulgur and Chickpea Salad with Pomegranate Seeds

FOUR YEARS AGO: Purple Star Macarons

FIVE YEARS AGO: Smoked Salmon, Fait Maison

SIX YEARS AGO: Kouign-Amann, Fighting Fire with Fire

SEVEN YEARS AGO: In My Kitchen, Yin and Yang

EIGHT YEARS AGO: Chocolate Toffee Banana Bread

NINE YEARS AGO: In My Kitchen, June 2014

TEN YEARS AGO:  Strawberry Frozen Yogurt

ELEVEN YEARS AGO: Baked Coconut and “The Brazilian Kitchen”

TWELVE YEARS AGO: Honey-Glazed Chicken Legs

THIRTEEN YEARS AGO: French-Style Rolls

SPRINGTIME CUPCAKES

Spring is taking its time to show up, we even had a light snow the other day, but apparently now things are headed in the correct direction (knock on wood). These cupcakes celebrate the season. You can use any recipe you like for the cake component. I went with a very basic vanilla concoction. The frosting is your humble American buttercream. Honestly, I don’t see the need to go through the extra work of a Swiss buttercream to cover cupcakes. It crusts well, so transporting the cakes (which matters a lot to me) is not a problem. They also stand well to sitting at room temperature for an hour or more.

The basic formula is simply 1X amount of butter + 2X amount of powdered sugar. Change the starting weight of butter according to how many cupcakes and how many colors you’ll need, as you will see in the individual cupcakes after the recipe.

BASIC BUTTERCREAM FOR CUPCAKES
(from The Bewitching Kitchen)

226g butter, unsalted, softened
452g powdered sugar
pinch of salt
Vanilla extract, about 1 tsp or more to taste
a couple or more tablespoons of milk (to adjust consistency)

Place the softened butter in the bowl of a KitchenAid type mixer with the paddle attachment, add the pinch of salt, and whip at high speed for about 7 minutes. It needs to be really soft and lighter. Stop the mixer. Eyeball the amount of powdered sugar, add 1/3 and mix at low speed at first, once the sugar is starting to get incorporated, increase the speed to medium-high.

Add the second portion of the sugar, and incorporate the same way. Add the final portion, start at low speed, clean the sides of the bowl well with a spatula, add the vanilla and increase the speed slowly all the way to high. Whip it until very smooth. Add milk to desired consistency. If desired, add any flavoring ingredients, about 1/4 cup (Nutella, jam, teaspoon of emulsions). If working with different colors, divide the buttercream into small bowls and dye each one with food gel color.

Fill piping bags fitted with the icing tips of your choice. Ice fully cooled cupcakes.

ENJOY!

to print the recipe, click here

LUCK OF THE IRISH CUPCAKES

For 12 cupcakes my starting point was 150g butter + 300g powdered sugar, plus 1/4 cup Nutella as flavoring.
I used 1M tip to make rosettes, and gilded the lily with sprinkles and a fondant clover.

HYDRANGEA CUPCAKES

For these cupcakes, I made buttercream with 200g butter + 400g powdered sugar. Divided in three portions and dyed them very very lightly with pink, lavender, and blue. The colors were spread as bands over plastic, and a little sausage was formed, then dropped in an icing bag with the1M tip. To make the flowers, I piped small blobs all over anda second layer going up towards the center.

RUFFLED FLOWER CUPCAKE

These cupcakes were made together with the last one (multiple colors) so for the full batch (12 cupcakes) I used the recipe as published (226g butter). I was playing with several colors and did not want to run out of any of them. A more experienced baker might get by with a smaller amount of icing to start with.

This flower was made with the petal tip 104, laying very flat on the surface of the cake, in two rows to give more lift and volume. Sprinkles added just because. You could make a center with buttercream dots in a contrasting color, if you prefer.

MULTICOLOR FLORAL CUPCAKES

I divided the buttercream in four batches and dyed them pink (toned down with a touch of brown), purple, green and yellow. Four tips were used. Wilton 1M for purple, closed star for flower (Wilton 2D), petal tip for green (Wilton 104), and a small open star for the yellow (Wilton 18).

Inspiration to decorate these cupcakes came from this video available on youtube.

Cupcakes are so much fun to decorate….
ALMOST as much as cookies!

ONE YEAR AGO: Eggplant-Hummus Phyllo Rolls

TWO YEARS AGO: Happy Easter!

THREE YEARS AGO: Brioche Pepin

FOUR YEARS AGO: Sakura Buche du Printempts

FIVE YEARS AGO: Clay Pot Roast Chicken

SIX YEARS AGO: In My Kitchen, April 2017

SEVEN YEARS AGO: Secret Recipe Club: Chicken Korma and a Bonus Recipe

EIGHT YEARS AGO: Josey Baker’s Olive Bread

NINE YEARS AGO: Almonds, A Cookbook Review

TEN YEARS AGO: Pomegranate-Molasses Glazed Carrots

ELEVEN YEARS AGO: Codruta’s Rolled Oat Sourdough Bread

TWELVE YEARS AGO: Roasted Corn and Tomato Risotto

THIRTEEN YEARS AGO: Light Rye Bread