BLOOD ORANGE ENTREMET CAKE


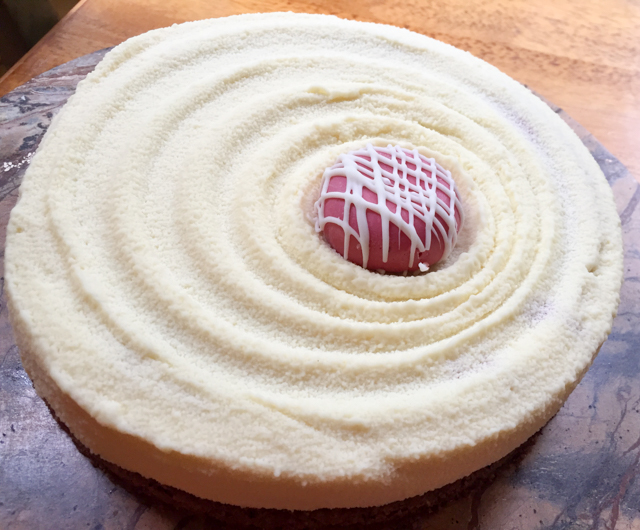
Entremets seem to be the rage at the moment. Originally, entremets were small portions of sweet concoctions served in between savory items in a multi-course banquet type meal. We are talking royalty stuff, from the Middle Ages to the overindulgence that was happening in France before 1789 (wink, wink). Nowadays, the term is applied to cakes that involve multiple layers with different textures and flavors. Basically it is a layer cake with severe superiority complex. My version was closely based on a Craftsy class taught by Kathryn Gordon, Contemporary Layer Cakes.  I don’t have permission to publish the recipe but will share an overview.

BLOOD ORANGE ENTREMET CAKE
Recipe Overview
(from Craftsy)

For the cake component, a Jaconde sponge is prepared using the following ingredients:
6 egg yolks beaten with 90g sugar
110g  almond flour sifted with 60g cake flour
a touch of vanilla and salt
60g melted butter
meringue made with 6 egg whites and 90g sugar

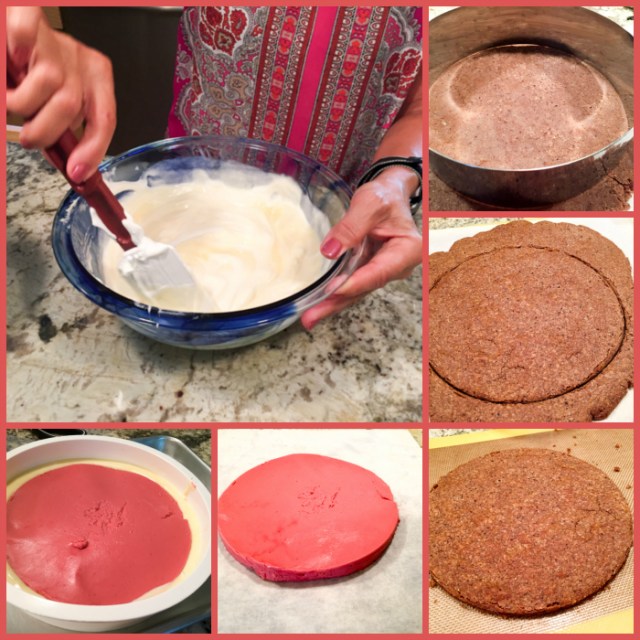
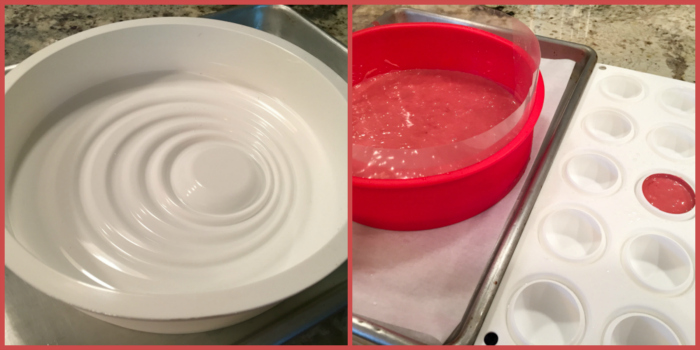
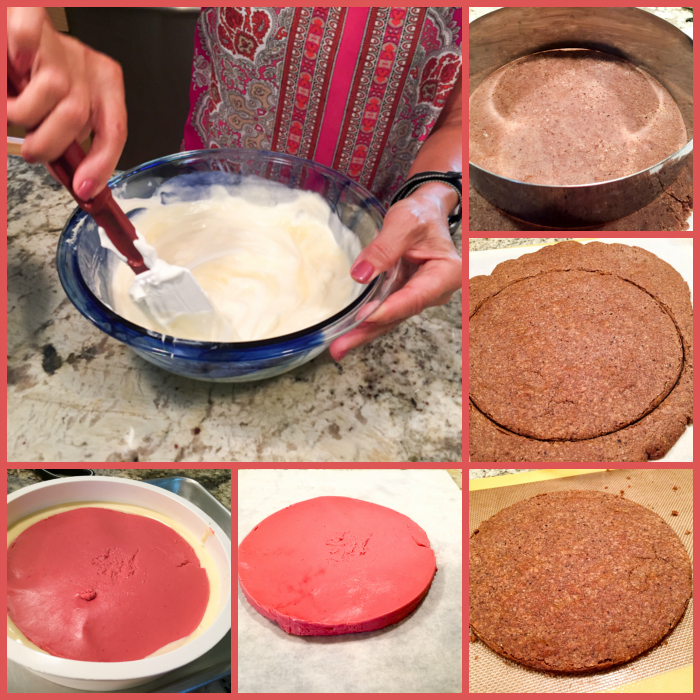
The cake batter will be enough to bake one round 8 inch cake and you will have leftover batter to spread as a thin rectangle for the sides (for lack of a better term) of the cake. The round cake will be halved crosswise so that you’ll have two layers for the entremet. To line the pan, make sure you will have 2 pieces that will cover its whole circumference. You can use the mathematical formula C = π x D or cut a piece of string that goes around the pan, and measure it. In any case, you will arrive at the need for two pieces of cake 13 inches long. The height depends on how tall your cake will be in the end. Make it around 6 inches so you have some flexibility. The top can be trimmed once assembled. I placed a Silpat on top of the paper and spread the cake batter on it, using the drawing underneath to guide me.

For the marble effect you have two options: paint some food color on the Silpat and pour the batter on top, or divide the batter in two portions, add orange food color to half, and pour the two batters together, spreading them gently so that the color is not fully distributed.  I prefer the second method because it gives a much more subtle effect.  But, if you are in a Pollock frame of mind, go wild with a brush.

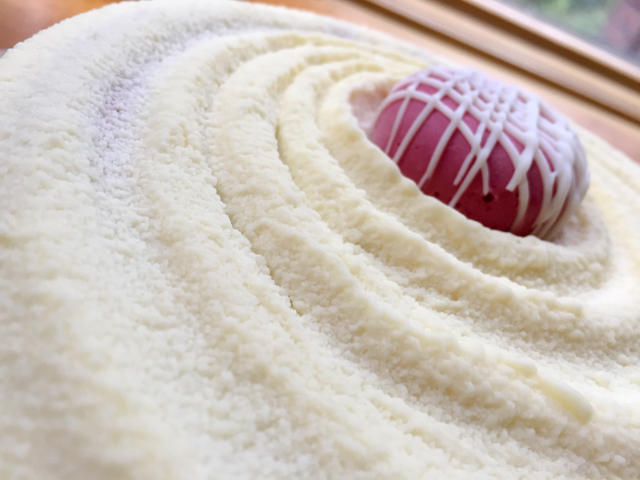
In the center you see the full rectangle of very thin cake, that was split in half lengthwise and placed inside the ring. Those are technically called “sponge strips” and I thank Gary, patissier extraordinaire for enlightening me. Please keep in mind that the photos are not on the same scale. The cake is assembled inside an 8-inch ring. First the sides are set in place, with the swirl facing the outside. Then the bottom layer.

Filling components:
Blood Orange Cremeux:  cream made with 8 egg yolks tempered and cooked with 360mL heavy cream previously infused with the zest of two blood oranges and 3/4 cup of blood orange juice.  Once the mixture coats the back of a spoon, it is poured over 200g white chocolate and 6g sheet gelatin, softened in cold water.
Caramelized rice cereal: 1/4 cup sugar is heated in a heavy pan until amber. To that 1/2 cup popped rice cereal is added, quickly mixed and poured on a Silpat or parchment paper.
Caramelized blood orange segments: Make a syrup with 100g sugar and 4 tablespoons water. Heat until fully dissolved, then pour over the segments of one blood orange. Let the fruit sit in the syrup until cold, drain before using in the cake.

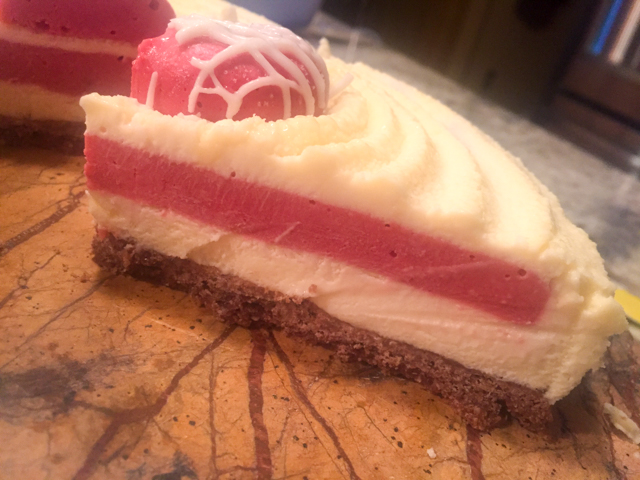
To the bottom cake layer, a little cremeux is added and spread. Then pieces of caramelized puffed rice. A bit more cremeux, caramelized orange segments, and more cremeux on top. The second piece of cake goes over it, pushing down to make sure it’s all well compacted.

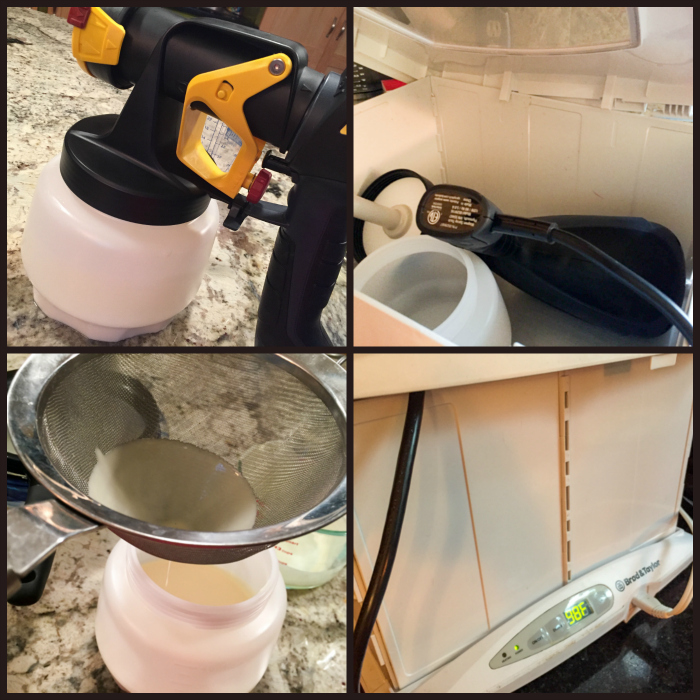
The top of the cake is brushed with a bit of melted white chocolate and oil, to seal the layer. The whole thing is frozen for several hours, then the cake is covered with a very thin layer of white chocolate mirror glaze, made with sugar (50g dissolved in 2 T water), heavy cream (2 T), corn syrup (1 T) and white chocolate (150 g). Kathryn explains exactly how to do it in a way that the top will be very smooth.

The cake is then removed from the ring, the top edge is trimmed, if so desired, and the top is decorated with bits of caramelized rice cereal and blood orange zest.

Comments: First of all, my apologies for not posting the full recipe, but without permission to do so, I cannot do it. You can find the basic method of preparing a Jaconde sponge, as well as all other components online. In fact, many different cake formulas and fillings will work to produce a similar entremet cake. All you need to keep in mind is a contrast of textures and flavors.

The blood orange cremeux turned out very refreshing, so even considering this is a rich, indulgent dessert, it had a light and bright quality to it. Rice puffed cereal is a good alternative to the famous Gavottes cookies that were part of my recent Gateau Royal. You can definitely caramelize it and  use it to add crunch to any layer cake. Those things are sold in huge bags, and we don’t eat puffed rice as a cereal, so I see a few aventures with this caramelized version in my future.

This Craftsy class by Kathryn is really wonderful, because not only she explains every single step of the recipe in real-time, but she encourages you to plan and make your own version of this elaborate cake. Although it might seem a bit too involved, each component can be made in advance. I actually baked the cakes and made the cremeux on a Saturday, the other components Sunday morning, assembled the cake, froze it, and added the mirror glaze in the end of the day. Piece of cake! (Literally).

Just like macarons are my favorite cookies, I suspect entremets are quickly becoming my favorite type of cake. The possibilities of cake, fillings, textures, and icing are endless.

ONE YEAR AGO: Flourless Chocolate Pecan Cake

TWO YEARS AGO: A Tale of Two Macarons

THREE YEARS AGO: Chocolate Chip Shortbread Cookies

FOUR YEARS AGO: Chicken in Green Pipian Sauce, Sous-vide Style

FIVE YEARS AGO: Classic Shrimp Gobernador Tacos

SIX YEARS AGO: A Walk Towards the Sunset

SEVEN YEARS AGO: In My Kitchen

EIGHT YEARS AGO:  Heavenly Home-made Fromage Blanc

NINE YEARS AGO:  A Perfect Sunday Dinner

SaveSave

SaveSave

SaveSave

SaveSave

SaveSave

SaveSave

SaveSave

SaveSave

SaveSave

SaveSave

SaveSave

SaveSave

SaveSave

SaveSave

SaveSave

SaveSave

SaveSave

THE BEWITCHING KITCHEN TURNS NINE!!!!

I can hardly believe it. For nine years I’ve been sharing recipes, stories, dog tales, kitchen mishaps, happy and not so happy news in my virtual spot. The thrill of writing it is still with me, in many ways more intense now than ever. The overall atmosphere of my blog might be changing a little because my cooking interests have changed.  I used to be a certified cake-o-phobe, but now I get more excited about concocting a genoise than making an exotic risotto. Go figure. To celebrate my 9th year of food blogging, I wanted to bake a special cake that would push the boundaries of my comfort zone a little. Thanks to help and advice from my friend Jennifer, Patissiere Extraordinaire, I share with you a French classic: Gateau Royal. Chocolate lovers, this is your dream come true in cake form.

GATEAU ROYAL
(based on Il etait une fois la patisserie and Rock the Bretzel)

for the chocolate genoise:
(makes a 9 x 13 cake, you will use only part of it)
70 g butter, melted, warm
90 g cake flour
45 g cocoa powder
6 eggs
200 g sugar
1 tsp vanilla paste

for the pate praline:
125 g hazelnuts
125 g almonds
160 g sugar
5 mL water

for the filling:
40 g milk chocolate
160 g pate praline
80 g Gavottes cookies (or rice Krispies)

for the mousse:
115 g egg yolks (about 6)
100 g syrup (35 mL water + 70 g sugar)
200 g chocolate
400 g heavy cream

for the pouring ganache:
227g chocolate (at least 60% cocoa)
170g heavy cream
28g light corn syrup

Make the genoise. Heat the oven to 350 degrees F. Butter a 9 x 13 inch pan and line the bottom with parchment paper. Sift the flour with the salt and cocoa powder. In a heatproof bowl whisk together the eggs and sugar. Place the bowl over a saucepan of simmering water. Whisking constantly, heat the eggs and sugar until warm to the touch, and the sugar feels dissolved if you test it with your finger. Remove from heat and transfer the mixture to the bowl of your electric mixer, fitted with the whisk attachment.

Beat on high-speed until the egg mixture has cooled, and tripled in volume. It will fall like a ribbon from the beater, and form a distinct pattern on the surface when it drops. Beat in the vanilla extract. Add the flour-cocoa mixture in three increments, mixing gently by folding.  Remove about half a cup of batter and mix with the hot butter. Pour that back into the cake batter and mix gently. 

Pour on the prepared pan and smooth the surface with an offset spatula. Do not be aggressive, the batter is delicate and the air you beat into it is all that will lift the cake. Bake for 18 to 20 minutes. Cool completely before inverting and moving on with the recipe.

Make the pate noisette. Start by placing water and sugar in a skillet or a large saucepan. Heat up to 240 F.  Add the hazelnuts and almonds. Gradually, they will be covered with a white film, that looks like sand.  Cook until the sugar re-dissolves and caramelizes, stirring gently often.  Pour the mixture on a sheet of parchment paper and let cool completely. If you have a Vitamix, use it to process the praline, in about 5 minutes you should have a very nice, flowing paste.  Reserve. You will not use the full amount for the cake. 

Cut the sheet of cake to form an 8-inch circle. Freeze the trimmings for other uses. Center it inside a 9-inch cake pan with removable bottom and tall sides. To make removal easier, place a sheet of acetate film all around the inside of the pan.

Make the praline filling: melt the milk chocolate and allow it to cool slightly. Add to 160g of pate praline, mix well. Crush the required amount of Gavottes or rice crispies and add to the mixture. Immediately spread it over the cake, bringing it to the edges in a layer as uniform as possible. Work fast because the mixture will get harder to spread as it cools.  Reserve.

Make the chocolate mousse. Place the cream in the bowl of a Kitchen Aid and place it in a cool place for at least 30 minutes. Beat until firm. Transfer to a bowl and keep in the fridge. Wash the Kitchen Aid bowl, you will use it to whip the egg yolks. Melt the chocolate in a bain-marie. Reserve. Heat the sugar with the water in a saucepan. When the mixture reaches 230 F, start whipping the yolks in the mixer.   When the mixture reaches 240 ° C, pour it on the yolks while continuing to whip. Continue to beat until completely cool. The mixture should be clear and form a ribbon. Delicately stir in the melted chocolate. Your mousse is now ready.

Spread the mousse all over the cake, making sure it completely covers the space between the cake and the wall of the pan. Add all the mousse to the top of the cake, forming a thick smooth layer that will almost reach the top of the pan. Smooth the surface with an offset spatula, cover with plastic wrap and freeze for at least 6 hours, preferably overnight.

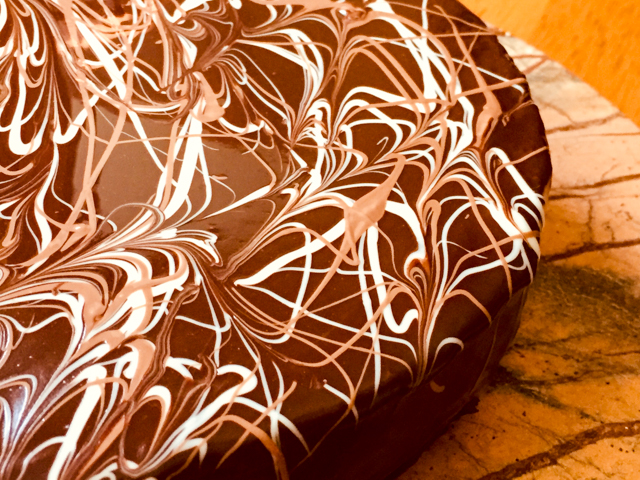
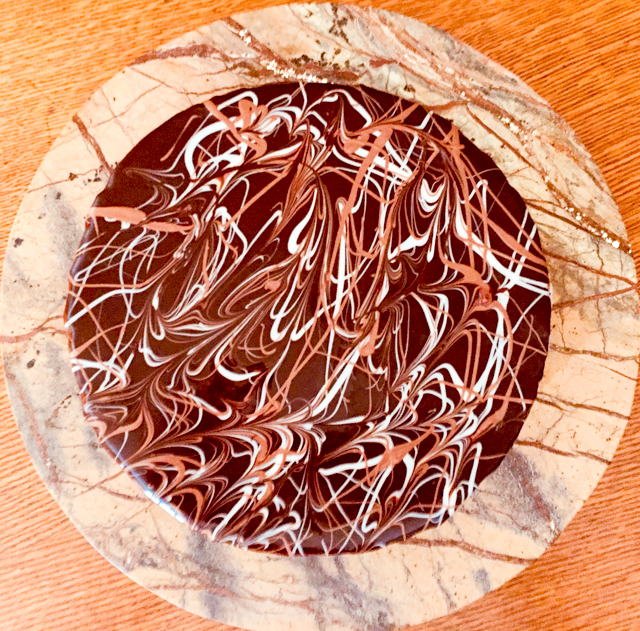
Prepare the icing. Cut the chocolate in small pieces, pour the almost boiling cream on top, wait a couple of minutes and gently mix. Add the corn syrup. Cool until it is around body temperature, and working very fast, in a single movement, pour it over the still frozen cake. Once the icing sets, decorate with white chocolate drizzle, or in any other way you envision.  Keep in the fridge until serving time. Slice using a knife moist with warm water, cleaning it after each cut.

ENJOY!

to print the recipe, click here

Comments:  Traditionally, the Gateau Royal is made with a base of almond sponge, similar to the Joconde used in the Opera Cake. Jennifer likes it better with a genoise, because the cake needs to be fully frozen after assembling, and the genoise performs better upon freezing-defrosting. She speaks, I listen. Chocolate genoise it was. My other departure from tradition happened in the final step, the icing. A real Royale shines (literally) with the coating of a mirror glaze. I had a few issues and resorted to plan  B, a more humble pouring ganache. The mirror glaze adventure shall be re-visited in the future. And I promise you won’t have to wait for the Bewitching to turn ten.

I will not lie to you. Making this cake will be a labor of love. One of the components, the crunchy topping for the genoise, requires making pate noisette. The photo above shows the overall process. The nuts are coated with the syrup and you must cook them until it all caramelizes and forms a nice shiny coating on the nuts. It takes a little time, and constant attention. Once you get to that stage, a powerful mixer like a Vitamix is the method of choice to liquefy it, so that the result will be a luscious, thick and smooth cream. Once the pate noisette is ready, it will be combined with special French cookies called Gavottes, which will probably require a virtual trip to the Store That Sells It All, aka amazon.com. Adaptations in the US often call for rice krispies. Their job is only to provide texture. Since it’s not every day that a food blog turns nine years old, I went the extra mile and used the real deal. When folks at the department tasted the cake, the ALL wanted to know what was the crunchy filling. It is that good, my friends. Leftover pate noisette is the stuff Nirvana is made of. I put it to good use in some macarons, remember?

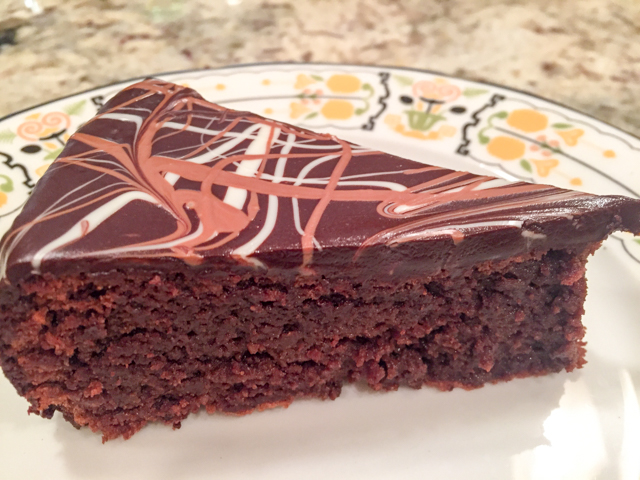
Assembling this cake is a ton of fun. It needs to freeze for several hours before the icing is poured on top, so in case you make it, keep that in mind. Definitely better to spread the process. You can bake the cake on day one, make the praline and the mousse on day two, and coat it on day three. Easy peasy. The resulting cake has everything a choco-holic loves: intense chocolate flavor in each layer, perfect contrast of texture thanks to the praline, and that Nutella-aura that turns us all into happy kids. Cannot imagine a better cake to celebrate a special occasion.

A little slice of chocolate heaven!

So here I am, inviting you to follow me as I start my 10th year of food blogging. Expect a lot more baking, by the way. I want to learn different skills, from tempering chocolate to working with choux pastry, from sugar work to entremets. Petit fours? Yeah, I want to tackle them too…

If you’ve been with Bewitching Kitchen for a while, or happened to stumble on my site today for the first time, thanks for being here! 

Special thanks to Jennifer, who virtually held my hand during the preparation of the cake,
calming me down in some particularly thrilling moments
(wink, wink).

Celebrate, grab a pin!

ONE YEAR AGO: The Bewitching Kitchen turns eight!

TWO YEARS AGO: The Bewitching Kitchen Turns Seven!

THREE YEARS AGO: Bewitching Kitchen Turns Six!

FOUR YEARS AGO: The Bewitching Kitchen turns Five!

FIVE YEARS AGO: The Bewitching Kitchen turns Four!

SIX YEARS AGO: The Bewitching Kitchen Turns Three! 

SEVEN YEARS AGO:  The Bewitching Kitchen turns Two!

EIGHT YEARS AGO:  Bewitching Birthday!

NINE YEARS AGO: Welcome to my blog!

SaveSave
SaveSave
SaveSave

SaveSave

SaveSave

SaveSave

SaveSave

SaveSave

SaveSave

SaveSave

SaveSave

SaveSave

SaveSave

SaveSave

SaveSave

SaveSave

SaveSave

SaveSave

SaveSave

SaveSave

SaveSave

SaveSave

SaveSave

SaveSave

SaveSave

SaveSave

SECRET RECIPE CLUB REUNION 2018

Talk about a flash back!  Those who follow my blog for a while might remember my favorite group virtual event, The Secret Recipe Club.  Food bloggers were paired in secret, and had a few weeks to stalk the assigned blog, pick a recipe and blog about it on Reveal Day. Every post would go live at the exact same time, midnight of the first Monday of the month, New York time. I was a member for years, and had a lot of fun with it. Not only for the cooking aspect, but for its social component. SRC had it’s last appearance in November 2016, but our beloved organizer, Sarah, had the idea of a special encore that celebrates the 10th year anniversary of its creation. So here we are, one final time! I was assigned pure royalty in food blog shape. I got Sarah’s food blog, Fantastical Sharing of Recipes!  Can you believe it? The queen behind my favorite event!  I was assigned her blog in the past as pretty much every member rotated through every blog in the group.  At that time, I made a fantastical recipe as you can see here.  Now I share another fantastical recipe, a Carrot Cake Roll with Cream Cheese Icing. OMG OMG OMG. Because this is such a special occasion, I felt like dressing it up a little, and tried my hands at adding a pattern on the surface of the cake. One word: THRILL!

CARROT CAKE ROLL
(from Fantastical Sharing of Recipes)

for the decoration (optional):
50g  butter, softened
50g powdered sugar
50g  egg whites
50g  all-purpose flour
orange food coloring (I used gel)

for the cake:
3 eggs
2/3 cup granulated sugar
1 tsp. vanilla extract
1/2 tsp. salt
1 tsp. baking powder
1 tsp. ginger
1/4 tsp. nutmeg
2 tsp. cinnamon
3/4 cup flour
2 cups shredded carrots (about 2 medium carrots, pat dry)
Powdered sugar

for the filling:
6 oz. cream cheese, at room temp
4 Tbsp. unsalted butter, at room temp
2 cups powdered sugar
1 tsp. vanilla

Make the piping decoration by beating the butter with powdered sugar in a small bowl until fully combined. I used a hand-held electric mixer. Add the egg whites and beat for a couple of minutes. Add the flour and mix by hand with a spoon, add a couple of drops of orange food color.  Reserve.

Draw the design you want to have on the surface of the cake with a pencil on parchment paper that fits a half-sheet baking pan. Invert the paper so that the pencil mark is at the bottom. Pipe the icing using a very thin piping tip. Freeze the whole tray with the decoration for at least one hour. When the time is almost up, prepare the cake batter.

Heat the oven to 350F.

Beat eggs on high-speed for 5 minutes until they are dark yellow and frothy. Add sugar and vanilla and beat. In a medium bowl, whisk together salt, baking powder, ginger, nutmeg, cinnamon, and flour. Stir dry ingredients into wet until just combined. Then stir in carrots.

Remove baking sheet from the freezer, and quickly spread the batter on top of the decorations. Gently bang the pan so that the batter gets well into the design.  Bake for about 15 minutes until done, it should spring back gently when you press your finger at the center of the cake.

You will need to flip the cake twice, first time the pattern will be up, but you will need to flip it again so that it will be down, and once the cake is rolled, it will be on the outside surface. On the second time, flip it over parchment paper sprinkled with sugar. Roll the cake while still warm, and let it cool completely, about one hour.

Make the filling: beat butter and cream cheese together until smooth. Add powdered sugar and vanilla, and beat again until nice and smooth. Unroll cake, spread filling evenly, then roll it back. Chill in fridge for at least one hour to firm it up.

ENJOY!

to print the recipe, click here

Comments: Public thank you goes for my dear friend Gary, Patissier Extraordinaire, for his advice on the piping technique. I used my new gadget, the silicone bulb with a very fine piping tip (featured here), and was pretty pleased with the way it worked. The amount of piping icing made would be enough to cover three cakes, but particularly on my first time doing it, I decided that having extra icing was better than not enough. And, by the way, this was also my first time making a rolled cake!  I was quite happy with the outcome, although as usual, there is room for improvement. A small crack happened in one side of the cake, but it was not too bad. Considering the types of tragedy I’ve endured during cake baking, this was nothing.

Our departmental colleagues loved the cake! It was very moist, warm due to all spices, and the cream cheese filling takes it over the top. I cannot wait to try another type of rolled cake and a bit more elaborate patterns. The trickiest part of this recipe was flipping the cake twice, I think it would be easier to wait maybe a few more minutes before doing that, the crack actually happened during flipping, not rolling. The cake was a bit too warm and still very moist from the oven. Live and learn.

Sarah, I am so thrilled I got your blog for this special reunion!  
Really felt like closing the Secret Recipe Club chapter with a golden key!

I invite all my readers to browse through the recipes posted by all members of SRC following the link at the end of my post.

ONE YEAR AGO: Parsnip and Tomato Soup

TWO YEARS AGO: A Retro Dessert

THREE YEARS AGO: Cauliflower Tortillas: Going low-carb and loving it!

FOUR YEARS AGO: Clementines in Cinnamon Syrup

FIVE YEARS AGO: In My Kitchen, April 2013 

SIX YEARS AGO: Thrilling Moments

SEVEN YEARS AGO: Maple-Oatmeal Sourdough Bread

EIGHT YEARS AGO: Pork Trinity: coffee, mushrooms, and curry

SaveSave

SaveSave

SaveSave

SaveSave

SaveSave

SaveSave

SaveSave

SaveSave

SaveSave

SaveSave

SaveSaveSaveSave

SaveSave

SaveSave

SaveSave

TRES LECHES CAKE: THREE TIMES A WINNER!

I baked this cake three times in the same month.
I shall now pause briefly so you can recover from the shock.

Breathe in…. Breathe out….
(image from Wikimedia)

Allow me to explain. I had never paid much attention to this cake, until a scientist from our department who joined another university in Kansas, mentioned that he would travel all the way back to our town if he knew I would be baking a Tres Leches. His all-time favorite cake. I filed that information in my neuronal system, and a few months later guess what happened? He needed to do some experiments with bacterial membranes and joined our group for the duration of the work. I decided to bake that cake for his first day in our lab, which, quite conveniently, fell on a Monday. And that’s when my best laid plans degenerated. He texted me to say he would be driving to the lab in a few minutes, and I assumed he was already in town since the evening before. Nope. He was not. What he was about to start was a 90 minute drive to our lab. When he arrived, not even a crumb of the cake was left.  Can you feel his pain, and my pain when I found out about this harsh outcome?  Undeterred, I made another Tres Leches on Thursday.  And you know what? The second turned out better than the first… Sweet mission finally accomplished!

TRES LECHES CAKE
(slightly modified from The Pioneer Woman)

for the cake and soaking:
1 cup all-purpose flour
1-1/2 teaspoon baking powder
1/4 teaspoon salt
5 whole eggs, at room temperature
1 cup sugar, divided
1 teaspoon vanilla (I used Mexican vanilla)
1/3 cup milk
1 can evaporated milk
1 can sweetened, condensed milk
1/4 cup heavy cream

for the icing:
1 pint heavy cream
3 Tablespoons Sugar

Heat oven to 350 degrees. Spray a 9 x 13 inch pan liberally until coated. Combine flour, baking powder, and salt in a large bowl. Separate eggs.

Beat egg yolks with 3/4 cup sugar on high-speed until yolks are pale yellow. Stir in milk and vanilla. Pour egg yolk mixture over the flour mixture and stir very gently until combined.

Beat egg whites on high-speed until soft peaks form. With the mixer on, pour in remaining 1/4 cup sugar and beat until egg whites are stiff but not dry. Fold egg white mixture into the batter very gently until just combined. Pour into prepared pan and spread to even out the surface.

Bake for 35 to 40 minutes or until a toothpick comes out clean. Turn cake out onto a rimmed platter and allow to cool.

Combine condensed milk, evaporated milk, and heavy cream in a small pitcher. When cake is cool, pierce the surface with a fork several times. Slowly drizzle all but about 1/3 cup of the milk mixture—try to get as much around the edges of the cake as you can.

Allow the cake to absorb the milk mixture for 30 minutes. I actually allowed it to sit in the fridge overnight, lightly covered with aluminum foil. To ice the cake, whip the heavy cream with the sugar until thick and spreadable.

Spread over the surface of the cake, you might not need all the amount made, but a thick layer of icing should be your goal. Decorate cake with maraschino cherries. Cut into squares and serve.

ENJOY!

to print the recipe, click here

Comments: This is a fantastic cake. Period. It is sweet, it is rich, but it does not feel heavy. It is obviously super moist, with a very delicate crumb, and the icing goes perfectly with it. I’ve been baking cookies, cakes, tarts, pies, brownies on a regular basis to share with our departmental colleagues.  No other bake got even remotely close to this one in terms of praise. The second time around there was a migration of people to the mail room because they heard that “the best cake ever” was there. I know, I know, it sounds as if I’m bragging. I promise you, I’m not. It’s not my recipe, and as I mentioned, I had no idea what this cake was all about until then.

Tres Leches means “three milks” in Spanish. The name reflects the use of evaporated milk, condensed milk, and heavy cream to soak the cake. Since there is a little regular milk in the cake, I suppose a more accurate description should be “Cuatro Leches“, but let’s not split hairs. We go with the soaking milk component only, as that is what gives the cake so much flavor and sweetness.  My only modification from the original recipe was to increase a little the amount of liquid in the cake (yeah, imagine that!). Ree advises to leave one full cup of the three milks  behind. I did it that way on my first time, but on the second cake I left just 1/3 cup behind. I liked the cake better that way, particularly when soaking it overnight. The extended time in the fridge allows the crumb to retain additional moisture. Consider making the cake the day before you intend to serve it.

You might be wondering why the title “Three times a winner?”  I actually baked it again just a couple of weeks later, as one a graduate student from another lab asked me if I could make one for his Birthday. It turns out he grew up enjoying Tres Leches baked by his family, and professed mine to be “the best one he’d ever had.”  I still carry a permanent internal smile for that. Complete gratitude should be directed to Ree Drummond as I followed her recipe to a T.  “T” for Total Winner!

(photo by Dr. P. Sukthankar)

ONE YEAR AGO: The Joys of Grating Squash

TWO YEARS AGO: Auberge-Pecan Walnut Bread

THREE YEARS AGO: Gluten-free and Vegan Raspberry Bars

FOUR YEARS AGO: Lasserre, a French Classic

FIVE YEARS AGO: Sourdough Bread with Walnuts and Dates

SIX YEARS AGO: Braised Brisket with Bourbon-Apricot Glaze

SEVEN YEARS AGO: The Real Vodka Sauce

EIGHT YEARS AGO: Pork Tenderloin and Blue Cheese

SaveSave

SaveSave

SaveSave

SaveSave

SaveSave

SaveSave

SaveSave

SaveSave

SaveSave

SaveSave

SaveSave

SaveSave

SaveSave

RASPBERRY ALMOND BRUNCH CAKE FOR A SWEET MONDAY

Almost exactly three years ago I reviewed The Global Pastry Cookbook, a cookbook that is very dear to my heart, as I’d been following Gayle’s blog for a very long time. Today I share with you one more recipe from the book, which Gayle gave me permission to publish in full. It is a delicious cake, easy to prepare, with a soft crumb, intense raspberry flavor, and the perfect textural topping given by sliced almonds. Perfect. Just perfect. As it’s often the case, this cake was a Sunday baking project to be shared with our departmental colleagues next day. My goal? To turn the least appreciated day of the week into… something sweet…

RASPBERRY ALMOND BRUNCH CAKE
(from Gayle Gonzales’ Global Pastry Table)

6 oz fresh raspberries
2 tablespoons (26 grams) sugar
1 teaspoon lemon juice
1 cup (5 oz) flour
1/ 2 teaspoon baking powder
1/ 4 teaspoon baking soda
1/ 4 teaspoon salt
1 egg at room temperature
1/ 2 cup + 2 tablespoons (4 1/ 2 oz) sugar
1/ 2 cup (4 oz) buttermilk at room temperature
3 oz (6 tablespoons) butter, melted
1 teaspoon vanilla
1/ 4 cup (3/ 4 oz) sliced almonds

Heat oven to 350ºF. Lightly grease an 8” x 2 1/ 2” cake pan and line the bottom with parchment.

Combine raspberries, sugar and lemon juice and set aside to macerate. In a separate bowl, whisk together the flour, baking powder, baking soda and salt. In another bowl, whisk the egg, sugar, buttermilk, melted butter and vanilla. Use a fork to stir in the flour mixture and mix until moistened and there are no streaks of flour.

Spoon a little over half of the batter into the prepared pan, making sure to cover the entire bottom surface. Top with the raspberry mixture. Dollop the remaining batter over the raspberries and spread out in an even layer. There will be some raspberries exposed and that’s fine. Sprinkle with sliced almonds.

Bake until a tester comes out clean, about 30 minutes. Cool on a wire rack for 10 minutes. Run a thin knife around the edges and gently turn out the cake. Invert again and cool.

ENJOY!

to print the recipe, click here

It’s hard to find a more beautiful color than that of fresh raspberries…  I always catch myself smiling at the bowl, feeling it’s almost rude to cook them or hide them in a cake batter. But it’s for a great cause. They melt down into a single layer, topped by the moist cake and crowned with the almonds and their delicate crunch. Almonds and raspberries, at the risk of repeating myself, it is one of those perfect matches. This is a cake you can make with kids, very easy and it will be a hit with anyone who tries a slice. Or three…

Before I leave you, let me invite you to re-visit my old post and get a tour of Gayle’s book. Hard to believe it’s been three years. When I wrote her to ask permission to publish this recipe, I though the review was maybe a year old, 18 months tops. Almost fell off my chair when I realized it was written in November 2014.  This type of time-shock happens to me quite often these days. I wonder why… (sigh)

ONE YEAR AGO: Paalak Paneer, a Farewell Post

TWO YEARS AGO: In My Kitchen, November 2015

THREE YEARS AGO: Helen Fletcher’s Oatmeal Cookies

FOUR YEARS AGO: Thai-Style Pesto with Brown Rice Pasta

FIVE YEARS AGO: Shrimp with Spicy Orange Sauce

SIX YEARS AGO:  A Simple Appetizer (Baked Ricotta)

SEVEN YEARS AGO: Sour Cream Sandwich Bread

EIGHT YEARS AGO: Pasta with Zucchini Strands and Shrimp

SaveSave

SaveSave

SaveSave

SaveSave

SaveSave

SaveSave

SaveSave

SaveSave

SaveSave

SaveSave

SaveSave