PAUL HOLLYWOOD: THE WEEKEND BAKER

In the past year, I was hit hard by two addictions. The Game of Thrones, and The Great British Baking Show. Odd to see them mentioned together in the same phrase. I caved to GoT despite my adamant stance against violent movies. That show is awesome, brilliant, irresistible. I can hardly wait for the next season, already feeling deprived. But The Great British Baking Show is a lot easier to watch, and so much better than ANY cooking show made in the US, it’s not even funny. They really hit a magical formula to entertain and teach at the same time. The right amount of humor, the right amount of anxiety, great atmosphere among the contestants, and so much talent! I also love the fact that they do blind judging of the technical challenge, to me that immediately sets the show on a higher level.  Then, there is the chemistry between Paul Hollywood and Mary Berry. I realize she won’t be part of the new season, and from what I heard the new person does a stellar job too, the show should follow its natural path of glory. Paul is something else. Those penetrating blue eyes probably turn the blood of some contestants cold when he deeply stares at them and asks “have you really tried this before?“, or “is this slashing going to be alright?”    Analogy for my hard-core biochemist readers: if Paul asks “are you telling me that a low Kd means higher affinity for this enzyme? you sure about that?”  you would probably doubt all the biochemistry that until then was solid in your brain…

When you are so in love with GBBS. you do two things.

  1. You move to binge watching Master Class, in which Paul and Mary actually bake all that stuff they inflicted on the contestants, spilling some of the secrets for success.
  2. You buy their cookbooks. I now own several written by Paul and Mary, as well as a few from the show itself. Yes, I have a problem. No, I do not intend to go for therapy.

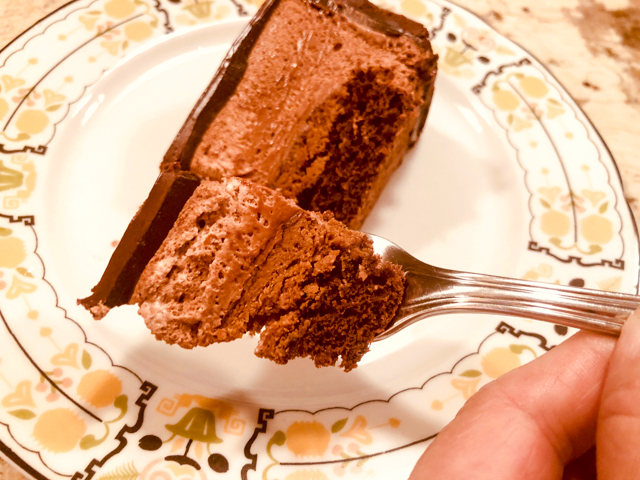
One of the cookbooks I own is The Weekend Baker by Mr. Hollywood. And I got his and Penguin Books permission to share with you one recipe from it (insert happy dance here). After a lot of mental struggles to pick just one, here it is. Chocolate to the limit, an Italian classic from Capri. Gluten-free, which might be a bonus to some, and decadently rich. A small slice will be enough, making it perfect to share with many friends, or in my case, co-workers. A certain Monday morning was made quite a bit sweeter in our department.

TORTA CAPRESE
(Reproduced from THE WEEKEND BAKER by Paul Hollywood, published by Penguin Books Ltd (2016). With permission from Penguin Books Ltd. Recipes © Paul Hollywood, 2016. Photography © Issy Croker)

 to buy the book, follow this link:  The Weekend Baker

for the cake:
100 grams (3.5 ounces) blanched whole almonds
50 grams (1.75 ounces) plus 160 grams (5.6 ounces) superfine sugar
1 whole egg, plus 5 eggs, separated
265 grams (9.3 ounces) dark chocolate, melted and cooled
50 grams (1.75 ounces) chopped almonds

for the topping:
70 grams (2.5 ounces) water, plus for softening the gelatin
90 grams (3.2 ounces) superfine sugar (superfine)
30 grams (1 ounce) cocoa powder
25 grams (.9 ounces) liquid glucose (I used light corn syrup)
2 gelatin sheets (about 2.4 grams/.1 ounces)

Candied lemon peel or chopped almonds, for decorating

Heat the oven to 180 degrees C/Gas 4 (355 degrees F). Grease a deep 20-centimeter (8-inch) round cake tin. To make the cake, grind the whole almonds with 50 grams of fine sugar in a food processor. Reserve.

With an electric mixer, beat the whole egg and 5 yolks with the 160 grams fine sugar until the mix is pale and creamy and leaves a trail on the surface. In a separate bowl, whisk the egg whites to soft peaks. Do not over mix.

Add the cooled melted chocolate with the egg yolk mixture. Stir in the ground almond mixture and the chopped almonds. Beat in a spoonful of the egg whites to loosen the mixture. Now, a spoonful at a time, gently fold in the remaining egg whites.

Pour the batter into the prepared cake pan and bake for 40 to 45 minutes. Once the cake is cooked, leave it in the pan to cool before turning it out onto a serving plate.

To prepare the topping, place the water, fine sugar, cocoa powder and glucose (or corn syrup) into a saucepan and bring to the boil. Simmer for 5 minutes and stir.

Soften the gelatin sheets in a little water. Remove the saucepan from the heat. Squeeze any liquid from the gelatin sheets and then add the sheets to the pan. Stir until the gelatin has dissolved. Leave to cool. Once cool, but still liquid, pour the chocolate topping just onto the surface of the cake and decorate with candied lemon peel or extra chopped almonds.

ENJOY!

to print the recipe, click here

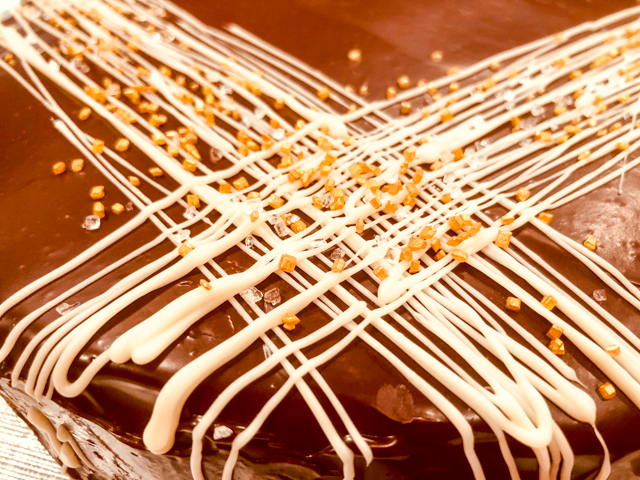
Comments: Please notice that instead of almond flour, Paul prefers to grind whole almonds with sugar. He states to get better taste and texture this way. So resist grabbing that bag of Bob Mill’s you’ve got on your pantry. The glaze. Oh, the glaze. Very intense chocolate flavor topping a cake that also has a punch of chocolate, but mellowed down by the almonds, both in taste and texture. In fact, when you look at the Torta Caprese you’ll expect your classic flourless creature, very fudge-like. It is not, the ground & diced almonds turn it into a different type of cake, one that in fact will feel a tad bit less rich. When I bite into a flourless chocolate cake, I always have the filling that it is so rich, a small slice seems tricky to finish.  This cake? Not the case. It is rich, but you’ll feel that keep working on that slice is the most natural move… Consider yourself warned. Plus, the glaze… Oh, the glaze…


And now, a quick virtual tour of Paul Hollywood’s book.


The book is organized in ten chapters, and contrary to most cookbooks, these are not your regular ‘Breads”, “Pies”, “Cakes” categories. Instead, Paul dedicates one chapter to each place he’s been to, showcasing the recipes that impressed him most during his visit.  Consider it a gastronomic tour. His introduction to the book will have you excited to jump on a plane (or as he puts it, start a very long swim from UK all the way to New York), and, book in hand, try every one of the delicacies he talks about.  So, without further ado, a few of my favorites from each chapter.

SUN BAKED, MADRID: I’ve never been to Spain, so baking from this chapter would be a nice way to tempt myself to finally go visit. My favorites include Churros and Spanish Hot Chocolate (for dipping them into), as churros were actually quite popular in Brazil when I was growing up.  But how about Iberico Ham and Manchego Empanadas? I am crazy for Manchego… Buñuelos de Viento sound great too, these are very light puff pastry entities, filled with chocolate or cream. But I am really intrigued by the last recipe in this chapter, quite simply called Torta. It is like a focaccia, but made with 70% olive oil in its formula. I bet it is amazing!

LA DOLCE VITA, NAPLES: My showcased recipe, Torta Caprese, comes from this chapter, where you will find many of the most authentic examples of Italian baking, like Pizza Margherita, Ciabatta, Focaccia. But the one that captured my imagination is Gatto di Santa Chiara, a cross between a quiche and a pie. The dough calls for some mashed potato in it, which I know results in incredible texture. Definitely something to make in the near future.

FRENCH FANCIES, PARIS: My home away from home! He opens the chapter with royalty, Croissants… And offers some other classics like Quiche Lorraine, Eclairs (be still, my heart), and Madeleines (made with brown butter). Baguettes are there too, just in case you are wondering…  I have my mind set on Chocolate and Hazelnut Meringues, though.

PUDDING LANE, LONDON: A city I visited three times, and find absolutely amazing, definitely want to go back. You will find a basic recipe for Scones that you can adapt for any flavor you like, the famous Victoria Sponge, Chelsea Buns, Lemon Drizzle Slices (similar to a cake I just blogged about, but with fancier icing), and Battenberg (a two-color cake that is calling my name).

DANISH TASTIES, COPENHAGEN: Another place I’ve never visited but hope to stop by some day, to get fully acquainted with the meaning of hygge, a very fashionable word. Danish is in there, a version with Apricot and Passion Fruit,  Seeded Rye Bread, and the recipe I almost picked to showcase, Danish Raspberry Slices. They look so cute, I know I’ll be making them for our graduate students in the very near future.

BAVARIAN BITES, MUNICH. I’ve been there, years ago, ate superbly well. Beautiful place! Paul offers a recipe for Pretzels that has some unexpected twists, I am a lover of soft pretzels, and have been meaning to try and bake them at home for…. forever.  Stollen, the famous bread is in this chapter, as well as Lebkuchen Biscuits, a sort of soft spice cookie that I’m sure I would fall in love with at first bite. Prinzeregententorte (say that three times fast) seems like the kind of cake that could be the weapon of my self-destruction. Seven layers of sponge cake that must be absolutely identical, as they represent the regions of Bavaria in 1886. Are you amazed yet?

AMERICAN PIE, NEW YORK: There we are at the Big Apple, the chapter opens with Bagels, rightfully so! Also a big nod to Bittman’s No Knead Bread, New York Cheesecake with details for baking that definitely take it to the smoothest consistency ever.  I really want to try my hands at it. So many recipes, so little time!

FUN IN THE SUN, MIAMI: Still in the US,  dear friends…  Paul loved the beat of Miami – who doesn’t? – it is packed full of Brazilians (sorry could not resist a little wave to my home country). Great items in this chapter, starting of course with Key Lime Pie, passing by  Best- Ever Chocolate Chip Cookies,  Waffles, and American Pancakes.

PRIDE OF POLAND, WARSAW: Would I be repeating myself too much if I say I’d love to visit Poland? Not only I have great Polish friends, but all my friends who visited were mesmerized by it. Seems like a fantastic place indeed.  Here are the recipes I loved the most: Babka, for obvious reasons. A bread, beautifully swirled with chocolate. And Polish Cheesecake. Yes, I need to get to know this, if not in Warsaw, in our kitchen.

THE RUSSIAN OVEN, SAINT PETERSBURG: Paul was really smitten by that city, and I also heard plenty of great things about it. Of course, I would never go in the winter, just looking at the photos of Paul in full winter gear when he landed there, made me cringe. No, a Brazilian cannot face that ever. But the recipes seem just amazing. Russian Pies (much more involved and complex than the name implies), the famous Blinis, Medovik (a gorgeous honey cake), Sweet Berry Pancakes, but what really won my heart is something call Vatrushka. Go ahead, google, and drool…

So there you have it, my little tour of Paul Hollywood’s The Weekend Baker is over. The book has a little introduction to each recipe, with interesting bits about them, gorgeous photos, not only of the finished product, but of the places he visited.  Well-balanced, actually. You will not be bombarded with personal photos like some cookbook authors do (not naming any names), but you’ll have enough to tease you, make you dream about that plane trip to see the world.

Paul, thank you and Penguin Books for allowing me to publish your recipe.

Before I leave my dear readers… yes, a lower Kd will always indicate higher affinity. For any enzyme in the known universe. I am sure you can all sleep better now…


ONE YEAR AGO: Texas Sheet Cake

TWO YEARS AGO: In My Kitchen, September 2015

THREE YEARS AGO: Sour Cherry Sorbet: A Labor of Love

FOUR YEARS AGO: In My Kitchen – September 2013

FIVE YEARS AGO: Raspberry Sorbet at Summer’s End

SIX YEARS AGO: When three is better than two  (four years with Buck!)

SEVEN YEARS AGO: Grating Tomatoes (and loving it!)

EIGHT YEARS AGO: A Peachy Salad for a Sunny Day

SaveSave

SaveSave

SaveSave

SaveSave

SaveSave

SaveSave

SaveSave

SaveSave

SaveSave

SaveSave

SaveSave

SaveSave

SaveSave

SaveSave

SaveSave

BLUEBERRY CRUMBLE COFFEE CAKE

As I mentioned before, one great food blogger I follow is Helen Fletcher. She is an expert baker, and also a natural teacher. Each of her posts is a detailed tutorial that allows even the most insecure baker (Sally raises her hand…)  to feel comfortable to face a little baking challenge. A few months ago she blogged on a Blueberry Coffee Cake that had a nice twist to it, the inclusion of a crumb topping.  I was intrigued. It turned out as a delicious, moist and tender cake, one that prompted Phil to grant me an unexpected compliment: “this is exactly the type of cake my Aunt Mildred would bake and we loved so much!”  Can you grasp the full impact of those simple words put together? Me and his Aunt Mildred, joined in the same level of cake baking.  I had to hold myself on the side of the counter top, my knees went a bit weak as my blood pressure dropped from the sheer shock of it. And then… then I could not stop smiling.

EASY BLUEBERRY CRUMB COFFEE CAKE
(from Pastries Like a Pro)

for the cake:
2 + 1/4 cups all-purpose flour, divided (315 grams)
1 cup sugar (200 grams)
3/4 cup butter, cold (170 grams)
1 teaspoon baking soda
1 egg
1/2 cup buttermilk
9 ounces frozen blueberries (255 grams)
for the lemon glaze:
1 cup powdered sugar (130 grams or 4 1/2 ounces)
3 tablespoons lemon juice (plus more if needed)

Heat the oven to 350°F. Spray a 9″ cheesecake pan or springform pan and set aside.

Combine 2 cups flour and sugar in the bowl of a mixer. Cut the butter into small pieces and add it to the bowl. Mix on low at first until most of the butter has been cut in. Raise the mixer and continue to mixing until crumbs form. Aim for fine, not large crumbs.

Remove 1/3 of the crumbs (about 210 grams) and set them aside. They will be used for the topping.

Add the remaining 1/4 cup flour, baking soda, egg and buttermilk to the remainder of the crumbs in the bowl. Beat on low to bring it together then on medium to smooth it out. Stir half of the frozen blueberries into the batter. Spread it evenly in the pan.

Place the second half of the blueberries over the top of the batter. Sprinkle the reserved crumbs over the blueberries. Bake for 50 to 55 minutes until a tester comes out clean. The crumbs will be light in color. My cake took a little more than 1 hour in the oven.

Let cool before removing from the pan.

For the glaze, combine the powdered sugar and lemon juice in a bowl and stir until smooth and with the right consistency to be drizzled. Place the cake on a rack over waxed or parchment paper for easy clean up. Drizzle one way,turn the cake and drizzle in the opposite direction. Allow the glaze to set before serving.

ENJOY!

to print the recipe, click here

Comments: for a step by step tutorial, make sure to stop by Helen’s site using the link I provided under the recipe’s title. Once you pour the cake batter in the pan, it will seem as if it’s not enough.  Don’t worry, just go on and follow the recipe as specified. I suppose my glaze could have been slightly thicker so that it would stay more as a drizzle, but even if a bit thin, the taste was not compromised.

As usual, this was shared with our co-workers on a Monday morning. It is one of my favorite things to do, bake something on Sunday and share with our departmental colleagues. The cake was gone before 9:30hs, which is an excellent indication of approval. But, truth is, I could not ask for a better compliment than that of my beloved husband, the resident cake-critic, the one who was raised by bakers probably as talented as… Helen Fletcher!

Helen, thanks so much for another great recipe, I now need to take a deep breath and make your Portokalopita! If anyone is puzzled by the name, go visit her site, it is a cake that uses phyllo dough in the batter!  Can you imagine that?  Mind blowing!

ONE YEAR AGO: Fresh Strawberry Yogurt Bundt Cake

TWO YEARS AGO: Quinoa Salad with Red Grapes and Avocado

THREE YEARS AGO: Strawberry Coffee Cake

FOUR YEARS AGO: Lemon-Poppy Seed Muffins

FIVE YEARS AGO: Mascarpone Brownies

SIX YEARS AGO: Salmon Tacos

SEVEN YEARS AGOCinnamon Turban Bread

EIGHT YEARS AGO: Summertime Gratin


SaveSave

SaveSave

SaveSave

SaveSave

SaveSave

SaveSave

SaveSave

SaveSave

SaveSave

SaveSave

MAPLE PUMPKIN PECAN SNACKING CAKE

SOMEONE TURNS SEVENTEEN TODAY!

Happy Birthday, Chief! You’ll always be a puppy for us…

ChiefNewBed
Birthday requires cake. Obviously.

The other day I saw a compilation of cakes by Food & Wine, a sort of  “bucket list of cakes.” You can check it out here. According to the article, if you bake one of those cakes each month, at the end of the year you will become a very accomplished baker, mastering all techniques that matter.  Danger attracts me, because I was immediately mesmerized by the list and next think I knew, the first one was in the oven. No idea what makes it a “snacking cake” but the name has a good vibe. Plus, it mixes two flavors I love, maple and pumpkin. I am not too wild about pecans, but it’s always good to have an excuse to crack open that bag hibernating in the freezer.  This cake is incredibly easy to make, smells amazing, and everyone raved about it.  Now, before  you get too excited: NO, I am not baking the other 11 cakes.  And YES, this is my final answer.

Snacking Cake

MAPLE PUMPKIN PECAN SNACKING CAKE
(adapted from Food and Wine magazine)

1/2 cup whole wheat flour (I used white whole wheat)
1/4 cup all-purpose flour
1/2 teaspoon cinnamon
1/4 teaspoon salt
7 ounces pecans (about 1 to 1 + 1/3 cups)
1/2 cup pumpkin puree
2 large eggs, at room temperature
2/3 cup dark brown sugar, packed
1/4 cup maple syrup
1/4 cup plus 2 tablespoons coconut oil, melted
1/2 teaspoon vanilla
3 tablespoons demerara sugar for sprinkling

Heat the oven to 325° and grease an 8-inch square cake pan,

In a medium bowl, whisk together the two types of flour, cinnamon, and salt and set aside.

In a small frying pan over medium-high heat, toast the pecans until fragrant, stirring occasionally, about 4 minutes. Transfer half of the nuts to a small food processor and pulse until a coarsely ground flour forms. Roughly chop the remaining pecans over a cutting board into small-sized pieces. Add both the pecan meal and loosely chopped pieces to the bowl of dry ingredients.

In a large bowl, whisk together the pumpkin puree, eggs, brown sugar, maple syrup, coconut oil, and vanilla extract until very smooth. Gently fold in the dry ingredients until incorporated. Using a spatula, scrape the batter into the prepared pan. Smooth out the surface of the cake batter with the spatula and sprinkle the demerara sugar evenly over the top. Bake for 45 minutes until a toothpick inserted in the center comes out clean. The top of the cake should be crispy from the scattered sugar-coating.

Let the cake cool for 15 minutes before slicing and serving.

ENJOY!

to print the recipe, click here

compositesnack


Comments: The cake is baked in an 8-inch square pan, so it is reasonably small. Food and Wine lists 8 servings, but I cut it into 20 small squares so that more colleagues could be happy in a cold and foggy Monday morning.  Perfect antidote for that type of day, if you ask me.  What I loved the most about it was the crust that the demerara sugar formed while baking. Delicious contrast with the brownie-type cake underneath.  Notice the lack of leavening agents, the cake is pretty similar to a one-pan brownie, easy and straightforward. Pecans were perfect, but I bet walnuts would work equally well.

Cake number one was pretty painless, I must admit. I like to leave the game while I’m winning, so I’ll stop right here. Although a certain gentleman is lobbying quite heavily for a particular six-layer coconut nightmare. Yeah, when pigs fly over Kansas wearing pink tutus.

molly-in-tutu

Hi, my name is Molly Merlot, I am awfully cute, but I promise you, I don’t fly!

(photo published with permission from Wilson Creek Winery)


ONE YEAR AGO: Silky Gingered Zucchini Soup

TWO YEARS AGO: Sweet Fifteen!

THREE YEARS AGO: Sesame and Flaxseed Sourdough

FOUR YEARS AGO: Green Beans with Miso and Almonds

FIVE YEARS AGO: Saturday Morning Scones

SIX YEARS AGO: White Bread


CARREMENT CHOCOLAT: THE SHOW-STOPPER


Carrement Chocolat Cake

Grab a chair, make yourself comfortable, this will take a while.

I suppose I could call this post A Convoluted Approach to Cake Baking.  I won’t publish the full recipe, as that would not be fair with Dorie Greenspan. After all, it’s the cake on the cover of her book, a cake she developed as an alternative for one of those masterpieces conceived by Pierre Hermé, and I am sure a lot of sweat and who knows, maybe a few tears were involved in her culinary quest to perfect it. Those truly interested can get a copy of her latest book, which by the way, I reviewed not too long ago (shameless self-promotion).

The cake has five components. FIVE. Which proves I was not in the right frame of mind when I decided to go for it. Let’s count them together:

1. A chocolate cake that must be sliced in half.
2. A chocolate filling, custard-type.
3. A syrup to soak the cake.
4. A ganache to ice the cake.
5. A topping of cubed bittersweet chocolate, salted. Surprisingly, those cubes are not simple pieces of chocolate that you can grab in the store. You are supposed to make them yourself.

That was the cake chosen to celebrate my 6 years of blogging.  Excuse me while I wipe tears from my face, I laughed so hard I cried a little…   Moving on…

The cake is a typical French layer cake, supposed to be shorter than your regular American type layer cake. Short and sweet… A single cake, baked in a 8 x 2 inch round pan, sliced in half, etc etc.  Please notice that the composite photo below clearly shows two cakes instead of one. Has Sally gone mad? I won’t answer this specific question. Let’s just say that I allowed the first cake to cool for 5 minutes in the pan, then inverted it on a rack  as instructed. One fourth of the cake stayed inside the pan, laughing at me (insert crass language here). I scraped it all as carefully as I could, pasted the pieces together, but of course realized that slicing that poor baby in half would be impossible for someone with my skills. Quickly, I assembled all the ingredients again and baked a second cake. The level of distress was getting a bit high, and it was only 8:30 am on a sunny Saturday.

composite
For the second cake, I used parchment paper to cover the bottom of the pan, and greased the living bejesus out of it. I also waited 30 minutes to invert it. That cake unmolded like it was baked by an expert  on Ace of Cakes. I danced a little to celebrate, and moved on to the making of the chocolate custard filling. The recipe starts mixing whole milk with sugar, so I promptly mixed the 3 tablespoons of sugar called for in the ingredients and proceeded to warm up the milk, only to find out that in that stage you add only 1.5 tablespoons of sugar.  The remaining sugar is beaten with egg yolks a little later in the method (Sally visualizes Dorie Greenspan giving a small lecture on how to read a recipe carefully before starting to make it). Poured the milk down the drain (please, don’t lecture me on waste), started all over.  The custard almost curdled on me, but it did not.  I danced a little to celebrate, and moved on to the making of the salted chocolate cubes and shards.

SaltedChoc

That involves melting good quality semi-sweet chocolate, gently and carefully, and adding the correct amount of Maldon salt flakes.  I did all that, but thought that the amount of chocolate seemed a little small. What the heck, Dorie knows what she’s doing when it comes to cakes. Placed the concoction in the freezer, where it would stay until next day. In theory. Not in practice. Later, much later that day, while I was making the icing, I noticed something under the stove peeking out. Four squares of semi-sweet chocolate that somehow found their way there, and only by a miracle were not consumed by Buck, the forever famished Jack Russell who sniffs and swallows food items within a mile in 1 second flat.

Puzzled, I tried to find out in which step of the recipe I lost that chocolate. I had just weighed the chocolate for the icing, and those pieces were the exact weight I expected them to be. So the missing pieces had to be for the chocolate cubes, the salted chocolate now in the freezer. Hummmm… that doesn’t bode well, does it?   Already worried, I went to the freezer, grabbed the salted batch, unwrapped it, whacked a little piece and tasted it… Aaargh!!!!!!  Way way WAY too salty, absolutely horrible, it would have ruined my cake…  Back to square one, I quickly re-made the salted chocolate and put it in the freezer at 9 pm on a Saturday evening that felt as if I had run a marathon in Arizona, mid-July.

Next day, the big day of assembling my masterpiece!  I had an important decision to make, go for a single cake sliced in half, or do a double cake using both layers.  Thinking back, I should have used the good cake, sliced in half, and frozen the other one to make something like a trifle, maybe? But I got greedy. Made the simple syrup, spooned some on the first cake, placed it over a rack on a baking sheet.  Added the filling. Topped with the second cake, added syrup, and placed the whole thing in the fridge for one hour.  I have a picture for you from that stage, and those who are experienced cake bakers might be able to see the type of trouble I set myself for.

fridge

Two problems… I think the cakes, although baked in the exact same pan (I simply washed it after the first cake played that nasty trick on me), ended up with slightly different diameters, so the top one was just a tiny bit bigger. I did not even notice at first.  Second problem, I did not allow the filling to ooze out, thinking that it would be too messy.  I am the daughter of my Dad, and we both hate any type of sugary mess. That was a major faux-pas, because I did not end up with a smooth surface in between the layers. Once I was done covering the cake (with not enough icing, I should add), the whole thing looked like Pillsbury Dough Boy going out for a karate lesson with the belt tightened too tight.  No bueno, folks, no bueno.  By then, I was in complete distress, rushed to the backyard where the husband was covered in sweat and mud while trimming trees, and informed him that my cake had been ruined. I also informed him that I would never ever be taking a picture of that “thing”, or any other cake again. And, finally I made it clear that my blogging days were over. I know for a fact that he rolled his eyes to the skies above, but he refuses to admit it, saying it was my imagination. Still, after pointing out the harsh reality that I often receive a lot more sympathy from our dogs, he promised to go back inside and help me out. Then, he reminded me that his Grandma was a fantastic cake baker and he’s got her genes (insert my own eye roll here, it’s appalling the type of stuff I have to put up with; I’ve got some great genes too, just don’t walk around bragging about them).

Staring at the cake, he said “it’s not that bad.”  That, in Phil’s speech means “Holy cow, you really screwed this one up big time!”.  He analyzed the situation and asked me to make a second batch of icing. At that point the cake was already costing me three times as much as it should, but who am I to count pennies in such a situation?  A full batch of icing was made and cooled while we had dinner. Late that Sunday, my dear husband put perfect icing music on, and patiently covered all boo-boos, smoothing out the surface as best as he could. Then I topped the cake with a properly salted batch of chocolate cubes and shards. And collapsed on the sofa.

Slice

THE OUTCOME

All the struggle was more than worthy!  The cake was absolutely delicious, rich, decadent, and the topping of salted chocolate, salted just right, by the way… was the perfect match for the cake underneath it.   My advice for those who want to try it:  read the recipe carefully, spread the preparation over a couple of days, and make it short and sweet as intended. One cake, sliced in half, no need for more.  Squish the cake filling so that it oozes out, like a competent brick layer would do with cement. Don’t worry about the mess. It will ensure that the layers will be well matched, and the icing will cover it all as icing is meant to do. On a side note, there must be some type of literally prize for someone who manages to use cake filling and cement in the same phrase. No? Well, that’s a shame!

Dorie, thanks for a fantastic recipe, it was a great opportunity to push my limits.  And of course, a special thank you to the man who stands by me when even I can hardly stand myself… Thanks to him, I shall keep on blogging…

Most important lesson learned: never underestimate your opponent. Never!

😉

ONE YEAR AGO: Salmon Sous-Vide with Miso-Maple Glaze

TWO YEARS AGO: Avocado “Hummus”.

THREE YEARS AGO: Moving is not for sissies!

FOUR YEARS AGO: Awesome Broccolini

FIVE YEARS AGO: Pizza! Pizza!

SIX YEARS AGO:  From Backyard to Kitchen

RASPBERRY RICOTTA CAKE

This cake recipe was published in a recent issue of Bon Appetit magazine, and I wanted to make it right away.  I subscribe to several cooking magazines but they tend to accumulate by my bedside table, untouched. Then, a trip comes up and they go with me in the plane. I read and rip the pages that interest me, tossing the magazine before coming back home. I know that for some this might be a huge no-no, but ever since we moved from OK to KS and I donated my collection of Fine Cooking magazines, I stopped saving them. The cut out recipes are glued in a notebook, a system that works great for me.  Anyway, as I was reading that issue on a flight to Hawaii (yeah, you got that right…. we’ve been to paradise last month), this recipe screamed at me: MAKE ME! MAKE ME! MAKE ME! Glad I finally did, it’s a great cake, moist, tender, and not overly sweet, thanks to the natural tartness of raspberries.

RaspberryRicottaCake

RASPBERRY RICOTTA CAKE
(from Bon Appetit, March 2015)

Non-stick vegetable oil spray
1½ cups all-purpose flour
1 cup sugar
2 teaspoons baking powder
¾ teaspoon salt
3 large eggs, at room temperature
1½ cups ricotta
½ teaspoon vanilla extract
½ cup (1 stick) unsalted butter, melted
1 cup frozen raspberries, divided

Heat oven to 350°. Line a 9”-diameter cake pan with parchment paper and lightly coat with nonstick spray. Whisk flour, sugar, baking powder, and salt in a large bowl.

Whisk eggs, ricotta, and vanilla in a medium bowl until smooth; fold into dry ingredients just until blended. Then fold in butter, followed by ¾ cup raspberries, taking care not to crush berries. Scrape batter into prepared pan and scatter remaining ¼ cup raspberries all over the surface of the batter.

Bake cake until golden brown and a tester inserted into the center comes out clean, 50–60 minutes. Let cool at least 20 minutes before removing from the pan.

ENJOY!

to print the recipe, click here

Composite
Comments: This cake was so easy to make that I got into hyperventilation from excessive confidence. Basically, there is no way out for me, cakes make me suffer, even when nothing goes wrong. I thought that the raspberries sitting on top of the batter looked awfully cute, but after a few minutes in the oven, I pushed some of them a little into the batter, just in case.  I bet it made no difference whatsoever, the cake experts might be shaking their heads at my naiveté.  Oh, well.

As you know, food blogging is a very social activity. We leave comments, we follow food bloggers we enjoy, sometimes for their cooking alone, sometimes for the “whole package”.  I love bloggers who are witty (hard to beat Maureen on that category) make me laugh, make me think, teach me something. I normally stay clear from sites that push endless surveys or advertisements. But, anyway, some bloggers seem to always cook stuff I want to make. One such example is Steve, from Oui, Chef.  He subscribes to the same magazines I do, so quite often I bookmark a recipe and, being the slow self I am, next thing I know, the recipe is on his site!  This is exactly what happened with this cake. Take a look at Steve’s post by clicking here.  Obviously, great minds read alike, bookmark alike, and bake alike.

This cake was absolutely delicious! I added a sprinkle of powdered sugar on top because I felt the raspberries would be happy. And everyone who tried this cake in our department seemed to be happy too.  Such a great simple treat to celebrate spring…  Make it, and tell me what you think.

sliceHow about a slice?
😉


ONE YEAR AGO:
In My Kitchen, April 2014

TWO YEARS AGO: Whole-wheat Pasta with Lemony Tomatoes and Spinach

THREE YEARS AGO: Blood Orange Duck: A work in progress

FOUR YEARS AGO: Grilled Mahi-mahi with citrus marinade

FIVE YEARS AGO: Memories of Pastéis (and my Dad)