Lemon Cakes can be a bit tricky as far as flavor goes. I have made a cake from a super reputable source that promised to deliver the most intense, most lemony flavor coupled with a moist and tender cake. It was tremendously convoluted, a ton of work and to be absolutely honest with you, the America’s Test Kitchen version delivered it all for 1/10 of the trouble. Which is saying a lot, as they are known for never cutting corners.
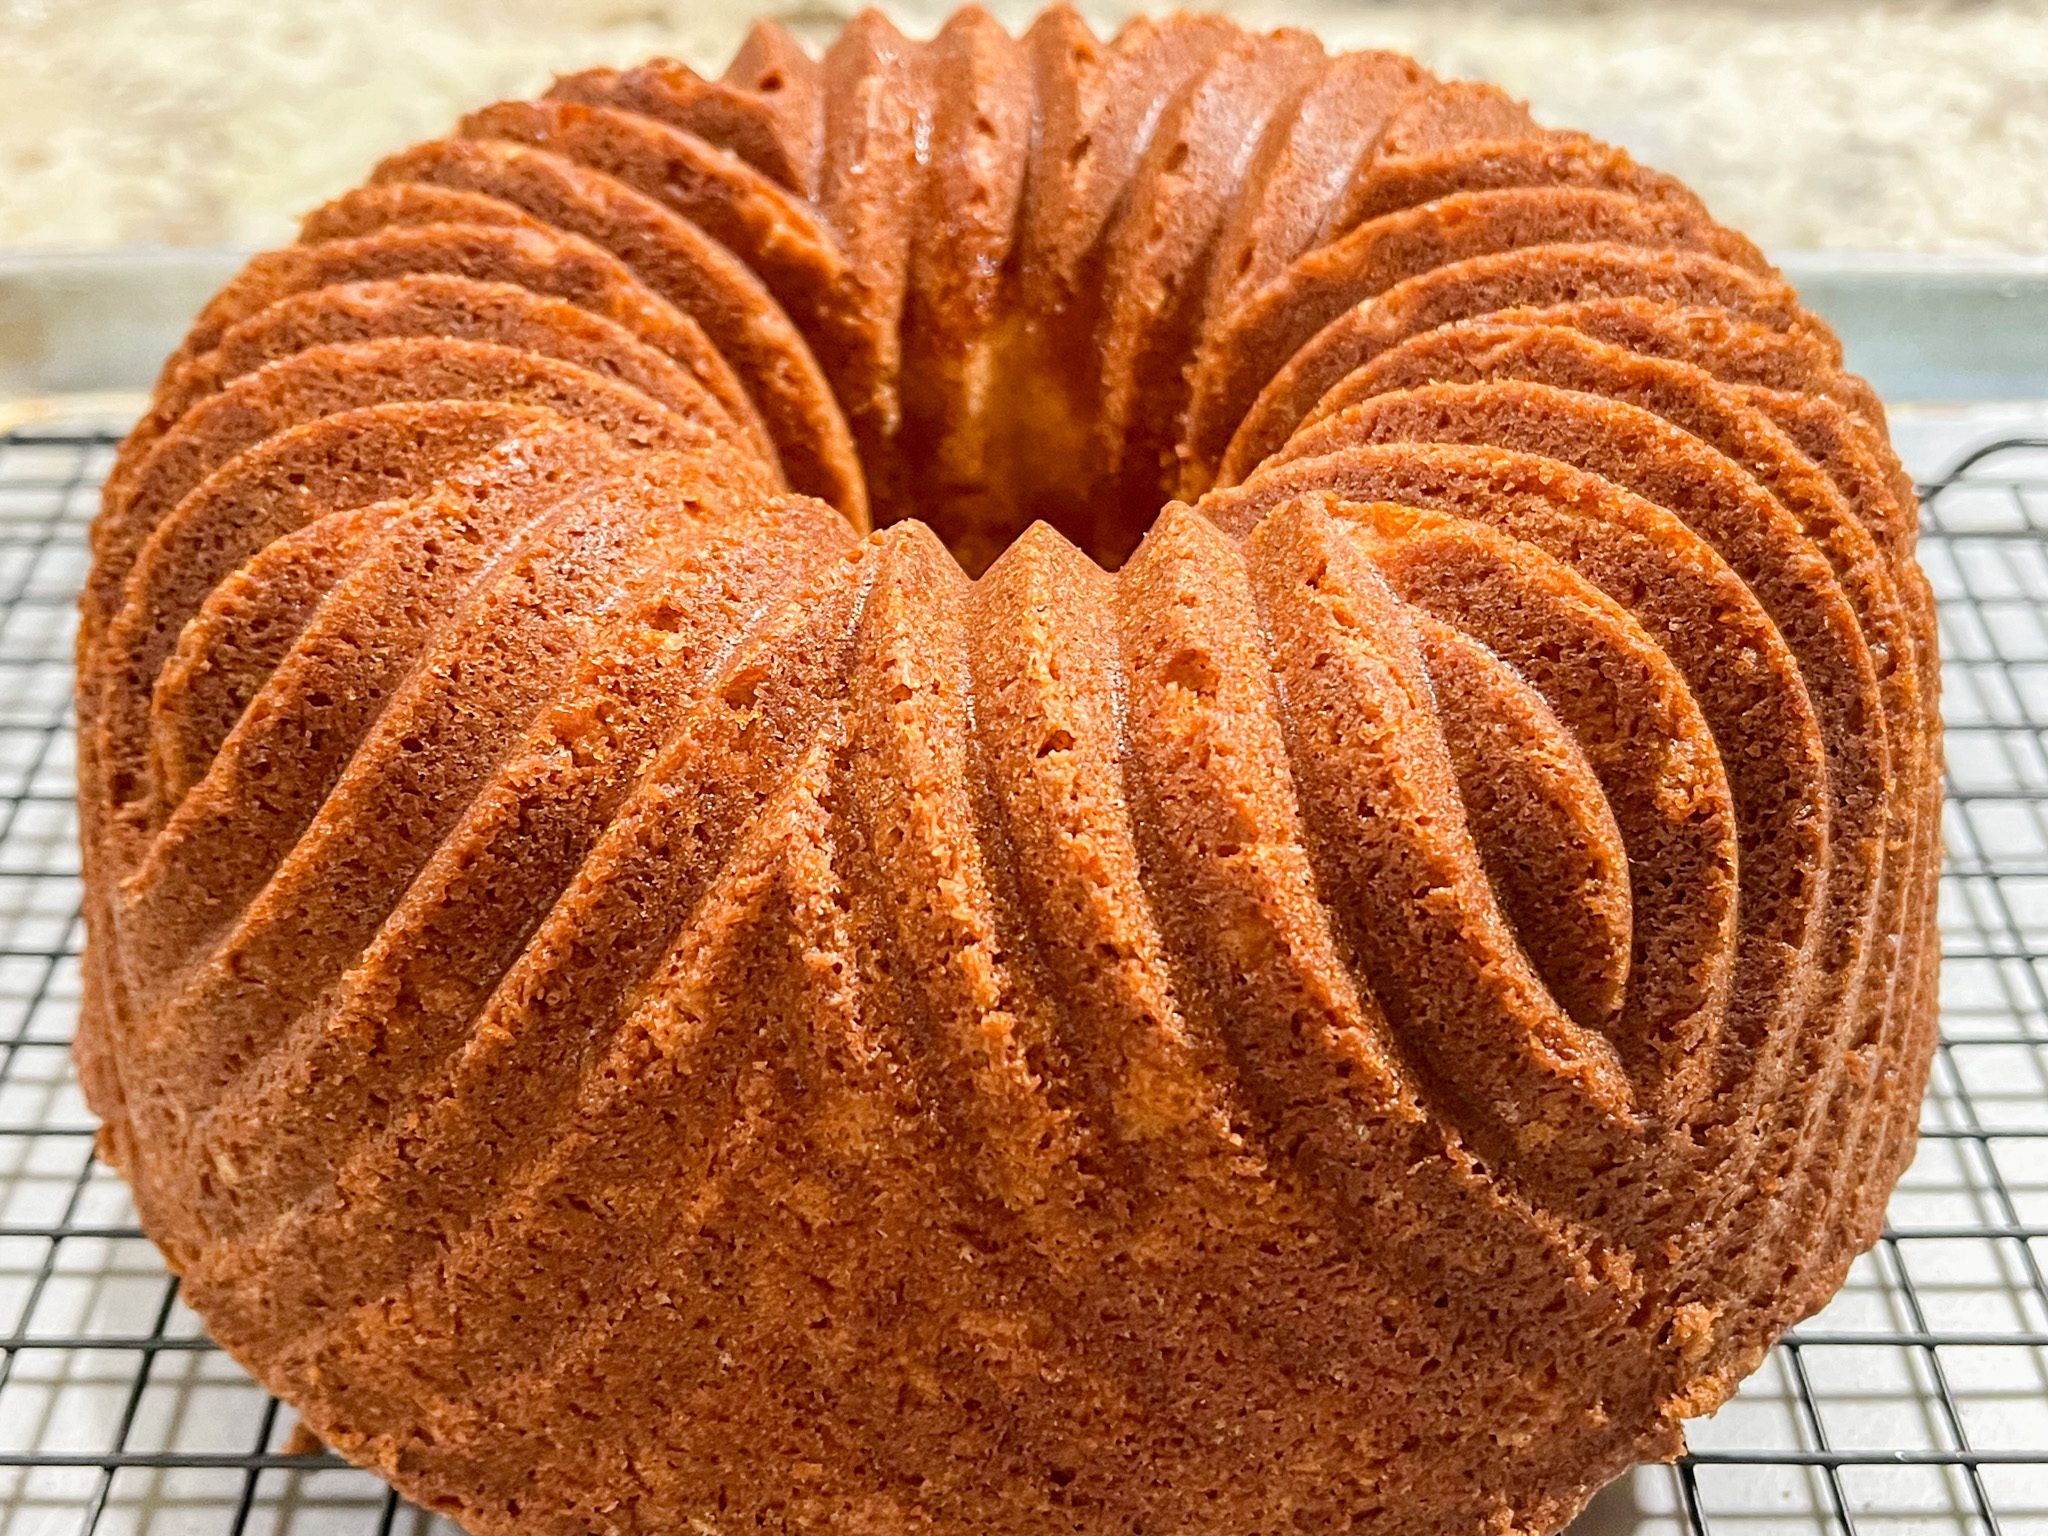
They are super strict about copyright issues, and rarely reply to requests asking permission to publish their recipes, however I was able to find this one online. If you’d like to make this deliciously lemony cake, pay a visit to this site. No difference from the recipe found in The Perfect Cake (2018), a cookbook I highly recommend. To bake this particular version, I used the Bavaria Bundt pan from Nordicware, but any pan with 10 to 12-cup capacity will do the job. I just love the way they un-mold like a dream!
When I make a Bundt cake, I donate it whole, so I cannot share a picture of the crumb, but I’ve had excellent feedback about this baby. In fact, I’ve made it three times already, using different Bundt pan shapes. Always a winner!
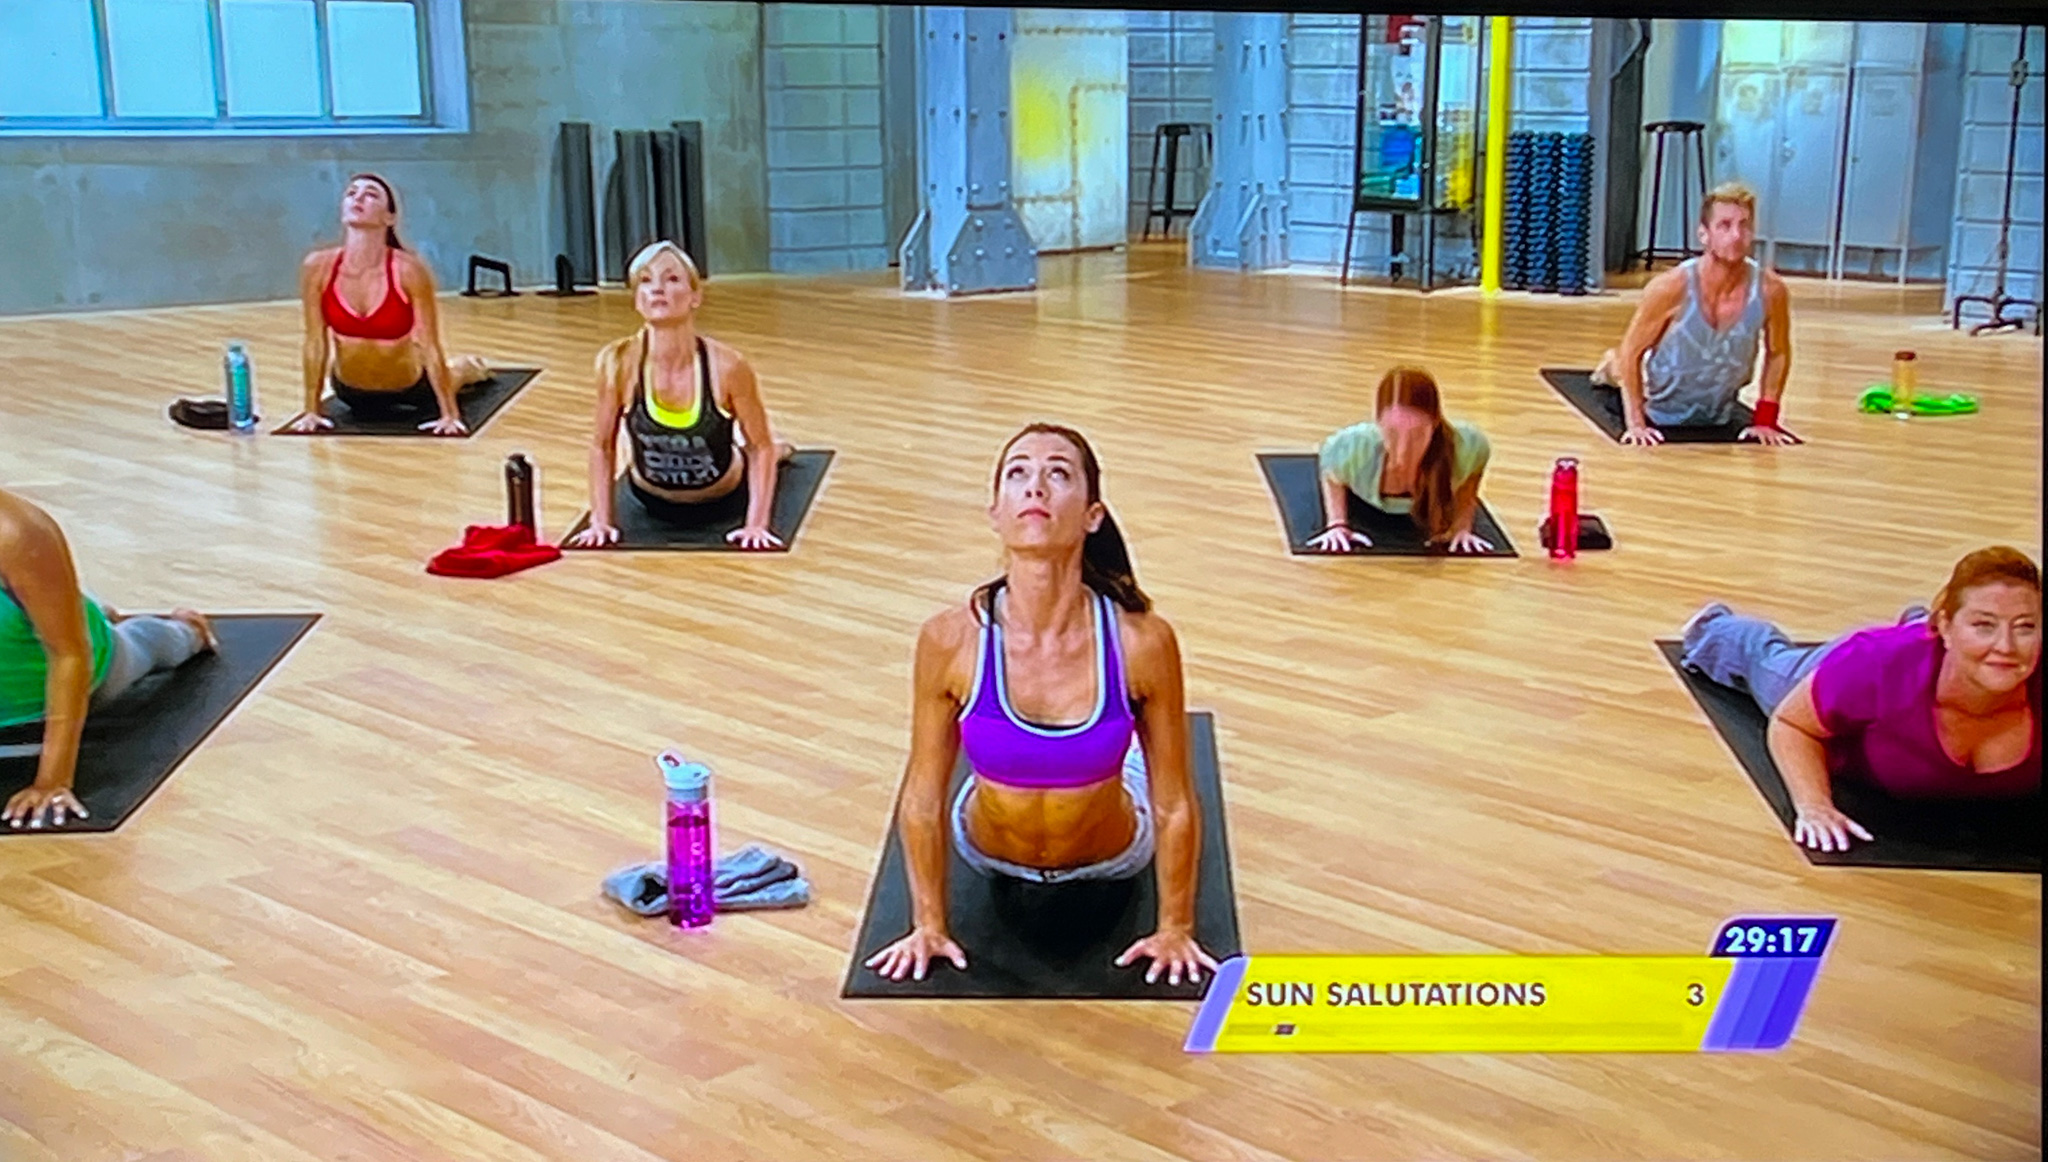
Time flies! Last time I wrote a fitness-related post was in April 2020 (click here). In that post you can also find links to all my previous reviews of exercise systems such as the three series of P90X. Today I share my review of 21 Day Fix, by Autumn Calabrese. I have been using her videos for almost 3 years, and love them! She has the perfect personality to make you challenge yourself, says the right things, mixes the right amount of fun with work. The little quotes spread around this post all came from the her classes, as short messages to focus on and be inspired by.
First let me start with my single criticism of the whole thing. I do not like the underlying message of “change (fix) your body in 3 weeks”. That is simply unreal and a huge turn off for me. However, I decided to ignore this pet peeve and give it a try. So glad I did.
You are supposed to exercise daily – yes, daily – for 21 days straight, following the schedule provided and it goes as shown below (this calendar uses a slightly different version of 21 Day Fix, mine did not have the Barre Legs). Source: Pinterest. When I first got the system, I did the full three weeks with no changes or substitutions of workouts, and after that I just went back to my own routine, which in fact changes a lot depending on what goes on. For instance, I did have a ski accident in March 2023 that affected my workouts quite a bit, I could not do much lower body and walking. You can see what I’ve been doing regularly now in the end of this post.
Basically you do the same exercise each day of the week, no rest, although Both Yoga Fix and Pilates Fix are “easy days”. Could be almost regarded as rest days. Keep in mind to follow the system to a T, you are also supposed to incorporate all the nutritional guidelines, which I fully ignore. I do not measure portions and I don’t count calories, so my review only centers on the exercise component.
Since warm-up is short and breaks are kept to a minimum, the whole thing flows nicely and the 30 minutes go by super quickly. I love that! Now let me go over the different videos.
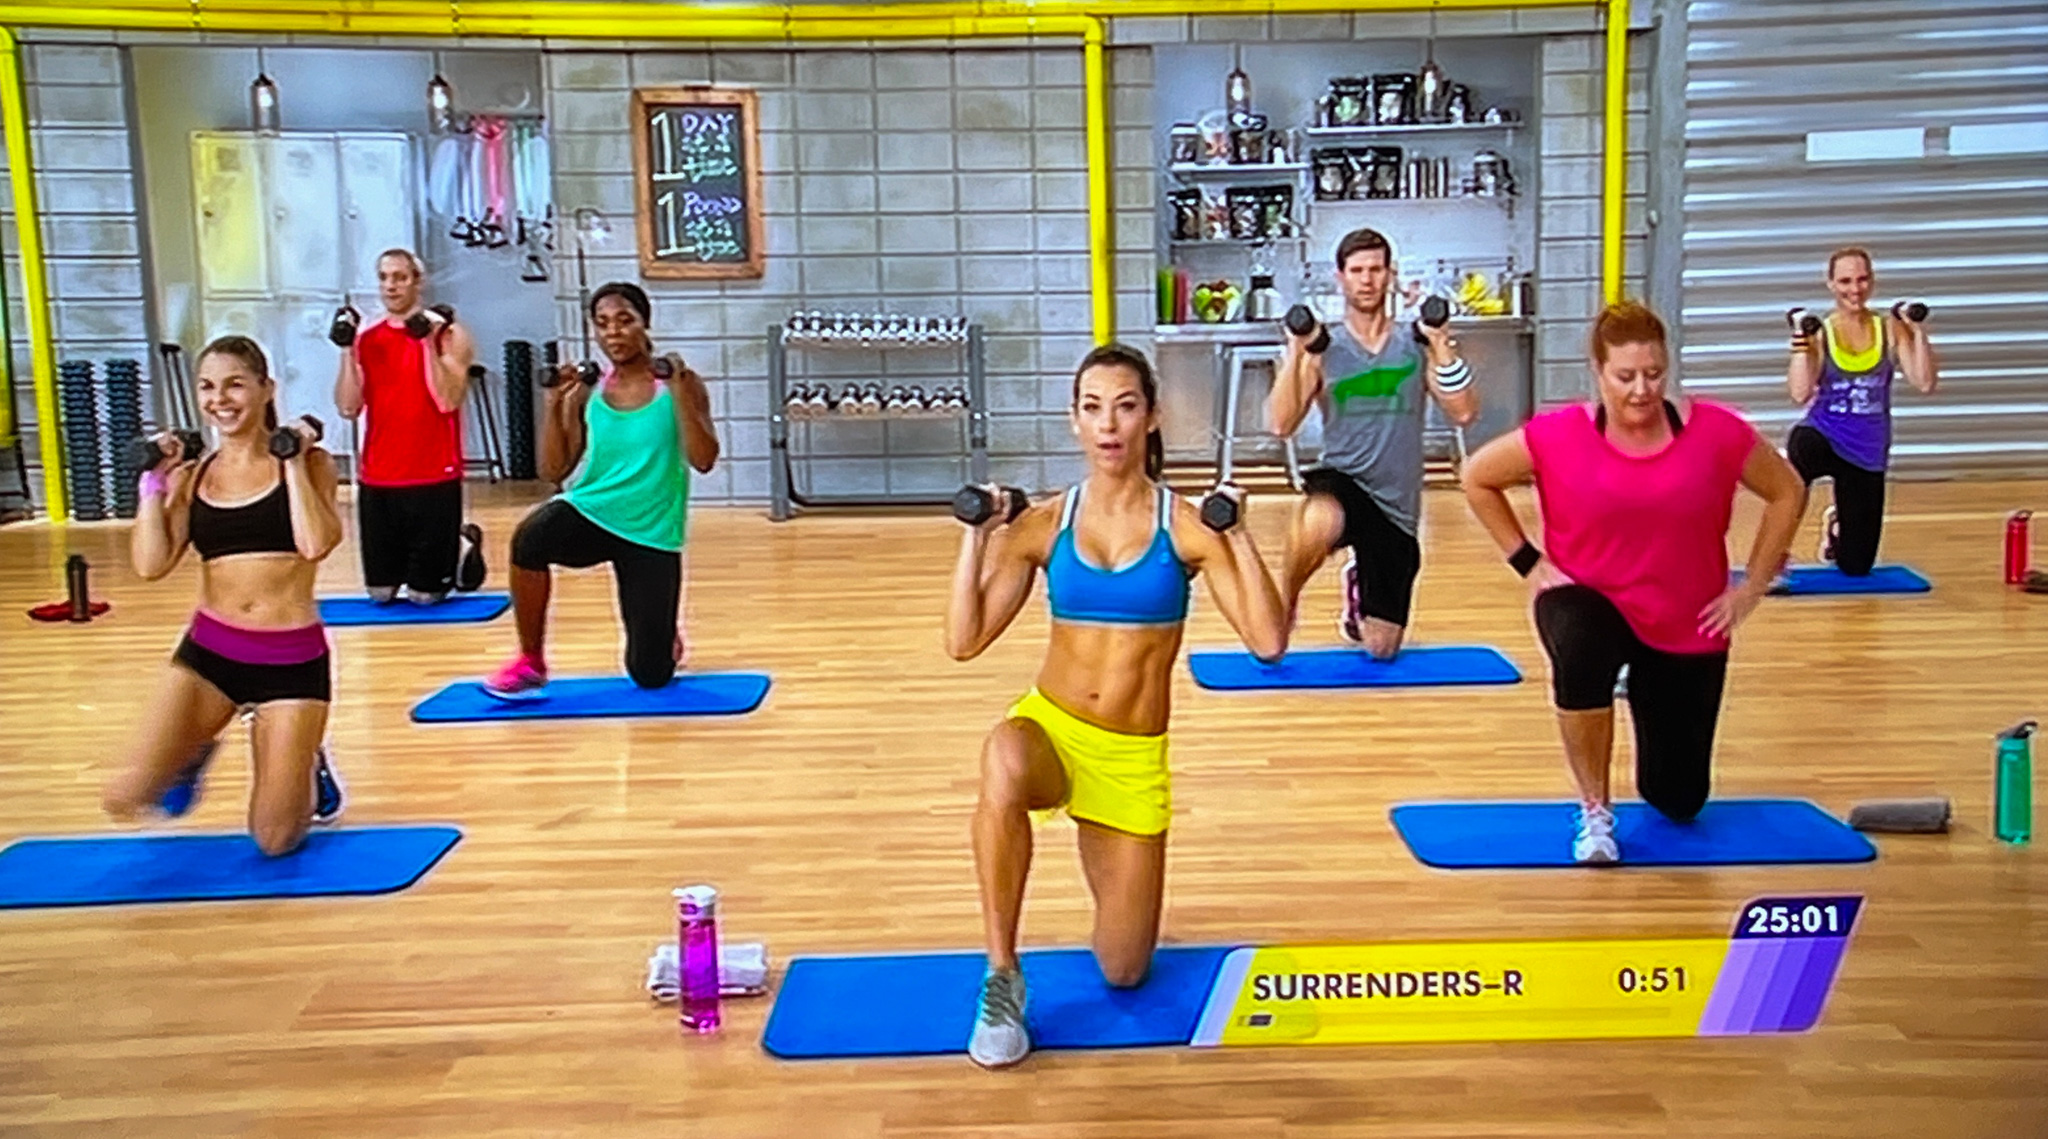
TOTAL BODY CARDIO
This is the starting video, and let me be honest, it is the hardest. The first exercise is not for sissies, she starts with SURRENDERS. If you are not familiar with fitness lingo, Surrenders are exercises in which you start standing up, kneel on one knee first, then the other side, gets up using the first leg only, then the other one. All that holding weights on your shoulders. Weights are optional, and you can instead help lifting with your hand assisting the movement. So every single exercise has a modified, easier version.
After 60 long seconds of surrendering yourself to discomfort, come side-shuffles, squats, jumping with weights, weighed jogging (pretty tough), knee pulls (challenging also), oblique crunches. Overall a great way to work your whole body with a bit of aerobics also in a few of the moves.
UPPER FIX
One of my favorite routines of the program! Next day I always feel my biceps and triceps have done some work, my favorite move is the one from the picture above, “Transverse Twist”, as it goes into a pretty nice rhythm with the music. You can challenge yourself more if you grab heavier weights, or go easy. No matter what you decide to do, it is a fun routine that targets not only upper body (shoulders, arms, upper back), but also the abdominal area (you will do some floor routines in the end, circle crunches and scissors for instance). I do Upper Fix once a week for sure (more about my personal schedule in the end of this post).
LOWER FIX
Another great routine with heavy focus on legs, just a few exercises with some aerobic component. I normally do this routine on the days I don’t go jogging or for a long walk, so it is not a video I use often. Maybe once every couple of weeks.
PILATES FIX
Pilates is going to feel pretty good compared to what came before and will come next. Some exercises are very challenging for me, for instance the Superman, which I dread with every cell of my body. Maybe it is my scoliosis speaking. But I still try it. Overall, as expected from Pilates, it will target nicely the abdominal, lower back region of your body, and also work a bit on flexibility. The routine starts with the famous 100’s, which wakes up the abs right away… Several exercises in plank position, something I am particularly fond of. I should probably do it more often than once every couple of weeks.
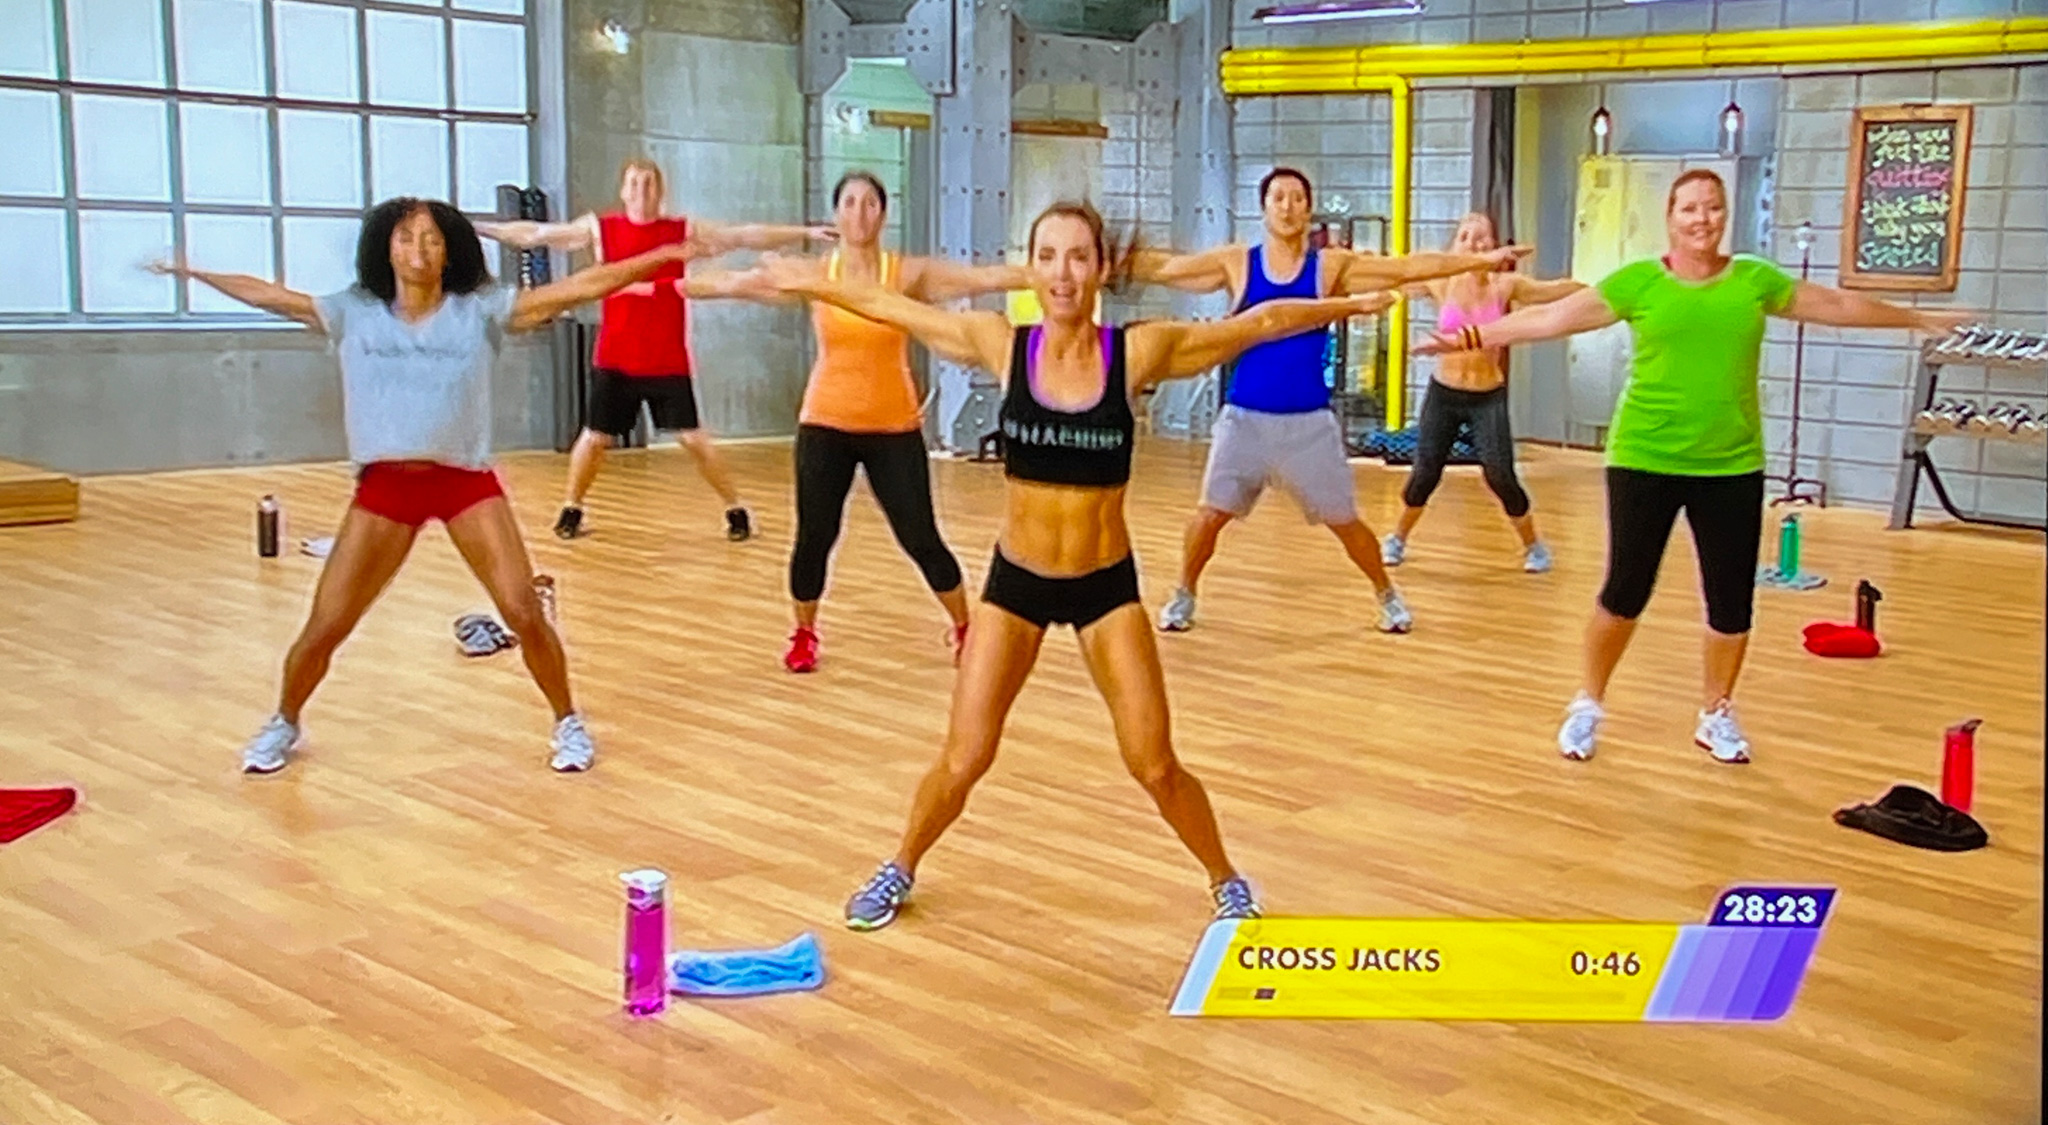
CARDIO FIX
Back into the tough side of life! This is challenging because it is mostly aerobic but often including weights. I sometimes drop the weights just to concentrate better on the rhythm and try to keep up with their pace. If I grab the weights I have to go considerably slower. Skater jumps brings me memories of P90X, and Mountain Climbers are nice and although done in plank position, they make your heart pump fast.
.
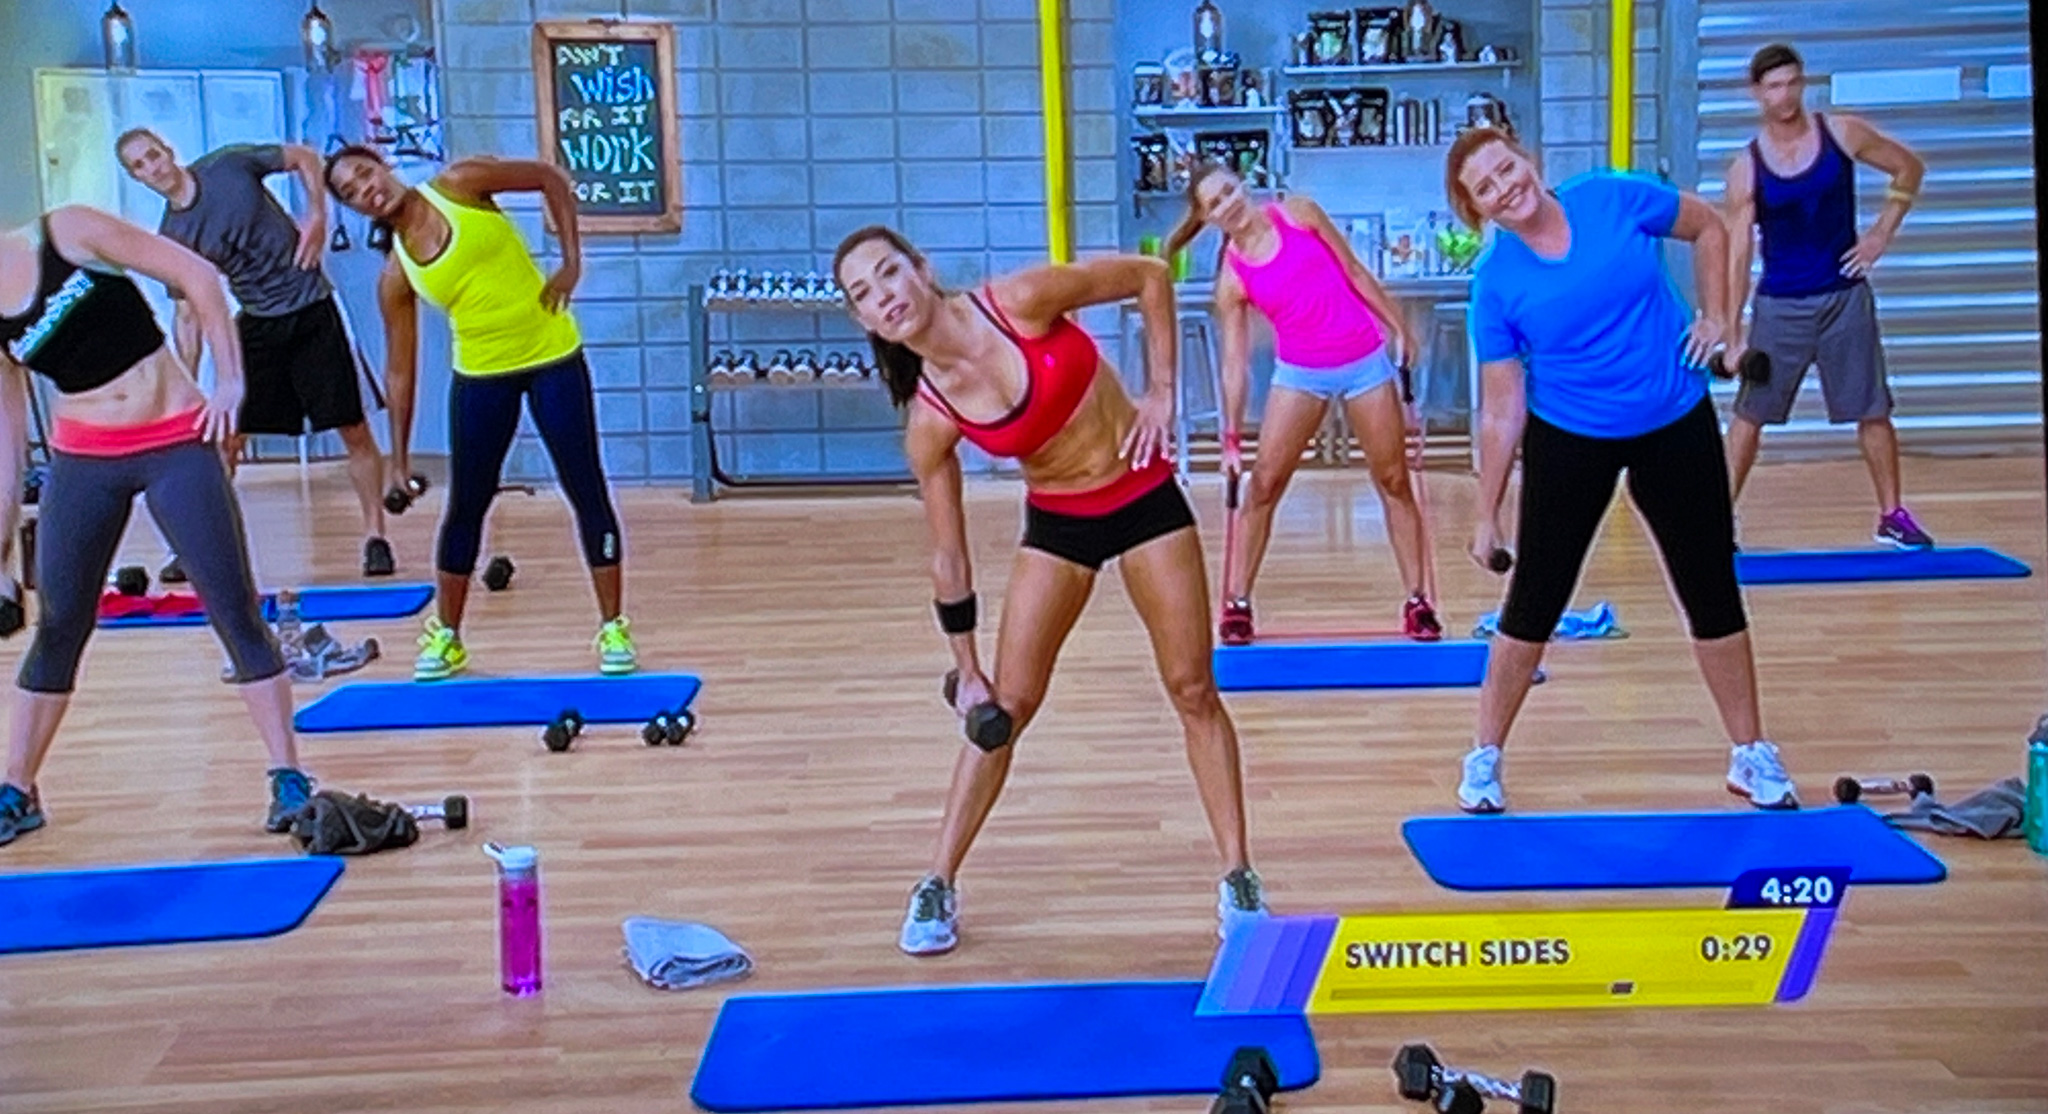
DIRTY 30.
This set is slightly aerobic, but it requires weights so there’s a bit of resistance training. Side lunges, Renegade Rows (love those, from plank position you lift weights one arm at a time from the floor to work the back muscles). Squats are a big part of the series too. It is not extremely challenging but it will make you sweat.
YOGA FIX
Absolutely perfect to finish the seven days of workout! All the usual suspects, Sun Salutations, Crescent Pose, Chair Pose, Warrior 1, Warrior 2, Triangle Pose, all done in a nice slow pace to stretch your body and soothe the muscles.
TEN MINUTE ABS
Ok, I must tell you this is in my opinion worth the price of the full set of DVDs. I used to think that nothing could beat the famous AbRipperX from P90X, but this one did it. Ten minutes of ab exercises, each one performed 20 times, you go the full cycle of 11 moves, then repeat them. I do them so often that I don’t even put the DVD to play, I do them from memory. Love it!
So my thoughts on 21 Day Fix: this system will be great for anyone, starting from any fitness level, as every exercise can be toned down to your goals.
MY PERSONAL FITNESS ROUTINE
My personal routine now is one in which I exercise every single day, except maybe one or two days each month for one reason or another. Every other day I start my morning super early with a treadmill HIIT. I walk fast for 4 minutes and then run at full-speed (7 to 7:30 min per mile pace, that is as fast as I can safely go) for 30 seconds. Repeat that 6 times. It takes me 30 minutes and I am absolutely drenched in sweat when I am done. I usually follow that with a nice walk later in the day to loosen the muscles a bit. Most days I also pick one video to hit other parts of the body. I have so many to choose from, but these are the ones that are part of my rotation. All these systems have been reviewed in the past (I actually started P90X 15 years ago!). All links available in this post.
21 Day Fix: all videos of the system, according to my mood. Ten minute Abs usually twice each week, Upper Fix once.
From P90X original system: Plyometrics, KenpoX (kickboxing), Shoulders & Arms, Legs& Back, Yoga, and Ab RipperX
From P90X III – The Challenge (push-ups and pull-ups non stop), The Incinerator (heavy arm and shoulders workout)
From Jessica Smith – Abs 360, Metabolic Conditioning, several of her walk strong videos.
Systems that I reviewed before but totally abandoned: T25, P90X II
I hope you enjoyed this review, and if you have been wondering about a nice way to exercise at home, think about 21 Day Fix. Order it here. (I am not affiliated and as you probably know by now, I don’t get anything for reviewing or recommending products. I only review things I love).
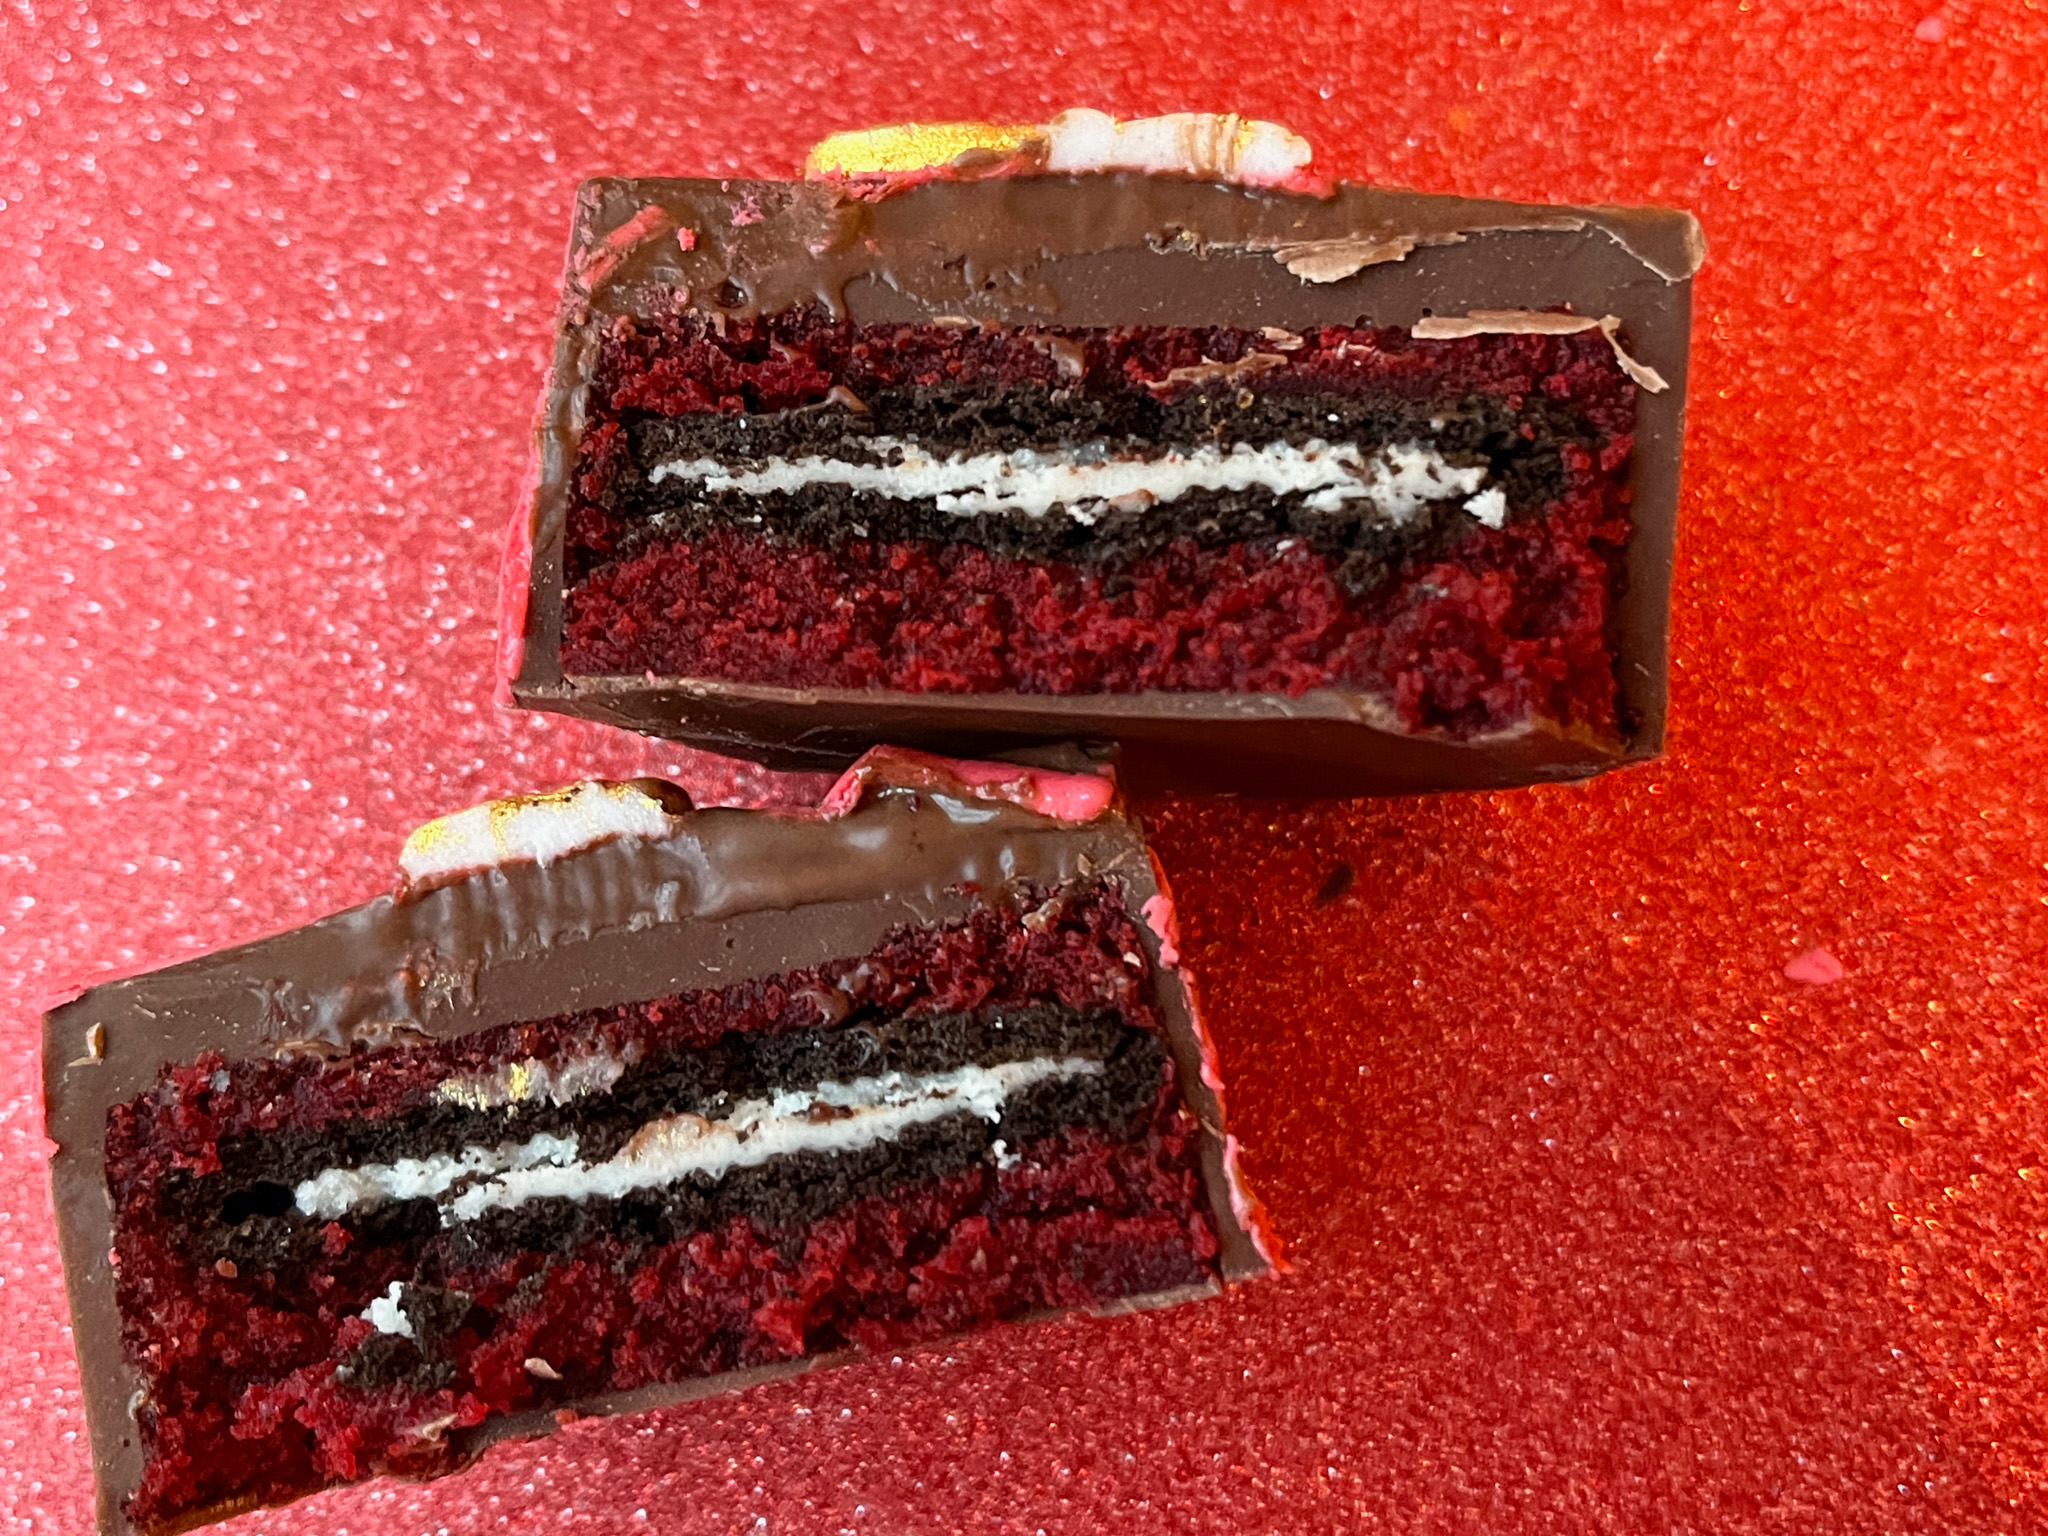
My first time making these, after flirting for a long time with the concept, while staring at my molds in a state of paralysis. In a way, they are not too different from Chocolate-Covered Oreos – that I make often – but the level of complexity goes up a bit. With cake pucks, you can use all flavors and kinds of cakes, as well as cookie dough, rice crisps, as long as you adjust the consistency to make…. the PUCK component. I see many of those in my future… For my first time, I chose Red Velvet with a thin Oreo inside. Check them out!
RED VELVET CAKE PUCKS WITH THIN OREOS (adapted from this recipe)
1 red velvet cake mix 1 cup water 1/3 cup oil 2 eggs 1tsp vanilla Oreo thins 1/2 cup buttercream Ghirardelli melting wafers, dark chocolate
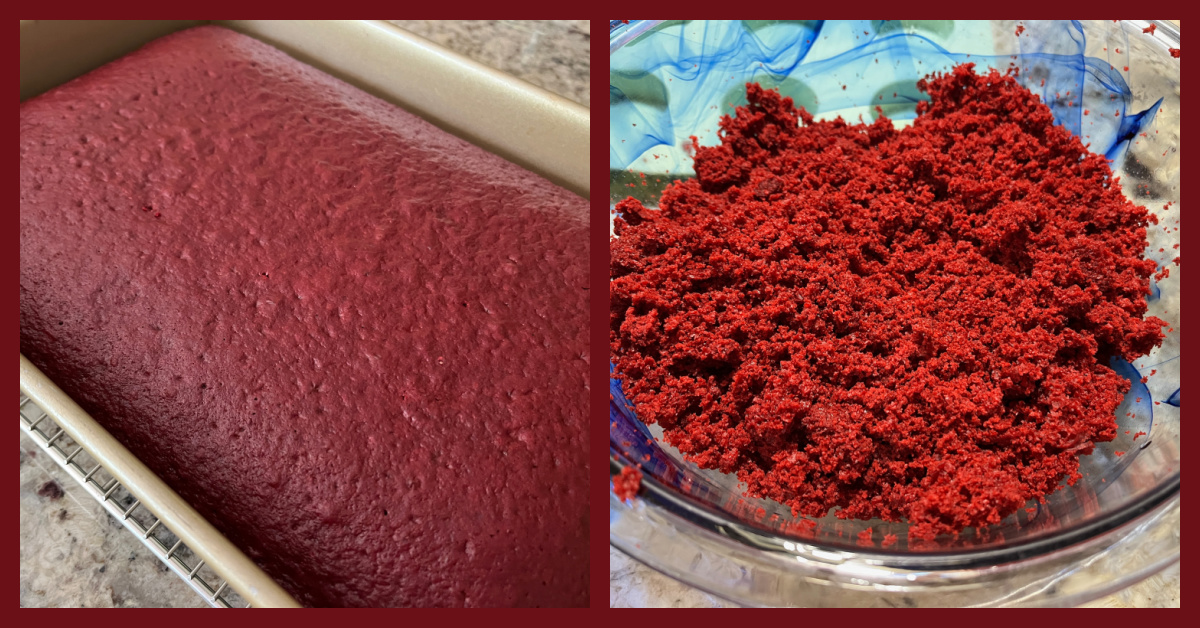
Combine cake mix, eggs, water, oil and vanilla until fully mixed. Pour mixture in a greased 9×13 baking pan and bake at 350 F until done, with toothpick coming out clean as tested in the center of the cake (about 25 minutes).
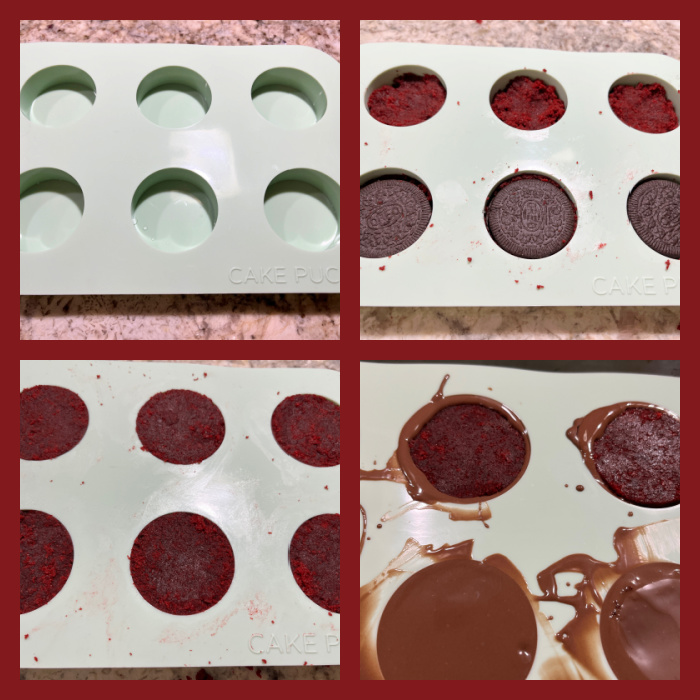
Allow cake to cool, then crumble and mix in buttercream. Add about a tablespoon of cake mix to your small cake puck mold. Place one Oreo thin on top of the mix and then continue to fill the mold with cake mix. Use bottom of a measuring cup to gently pat the top of the cake puck centers down so they are level with the mold. Scrape off any excess mix.
Place mold in the fridge for 3 hours or freezer (45 min) to chill.
Melt 17 ounces chocolate (or the amount compatible with the number of cakes you will make) with one tablespoon of refined coconut oil for 1 minute. Continue to microwave in increments of 20 seconds until chocolate is smooth and fully melted.
Fill cavities of larger mold with chocolate a little less than half-full. Place chilled center on melted chocolate. Gently apply even pressure as you slowly press the center down until chocolate comes up from the sides and covers the top of the center. Scrape off any excess chocolate. If there is not enough chocolate to cover the center. Add chocolate and scrape away excess. Tap the mold tray on the counter to eliminate air bubbles.
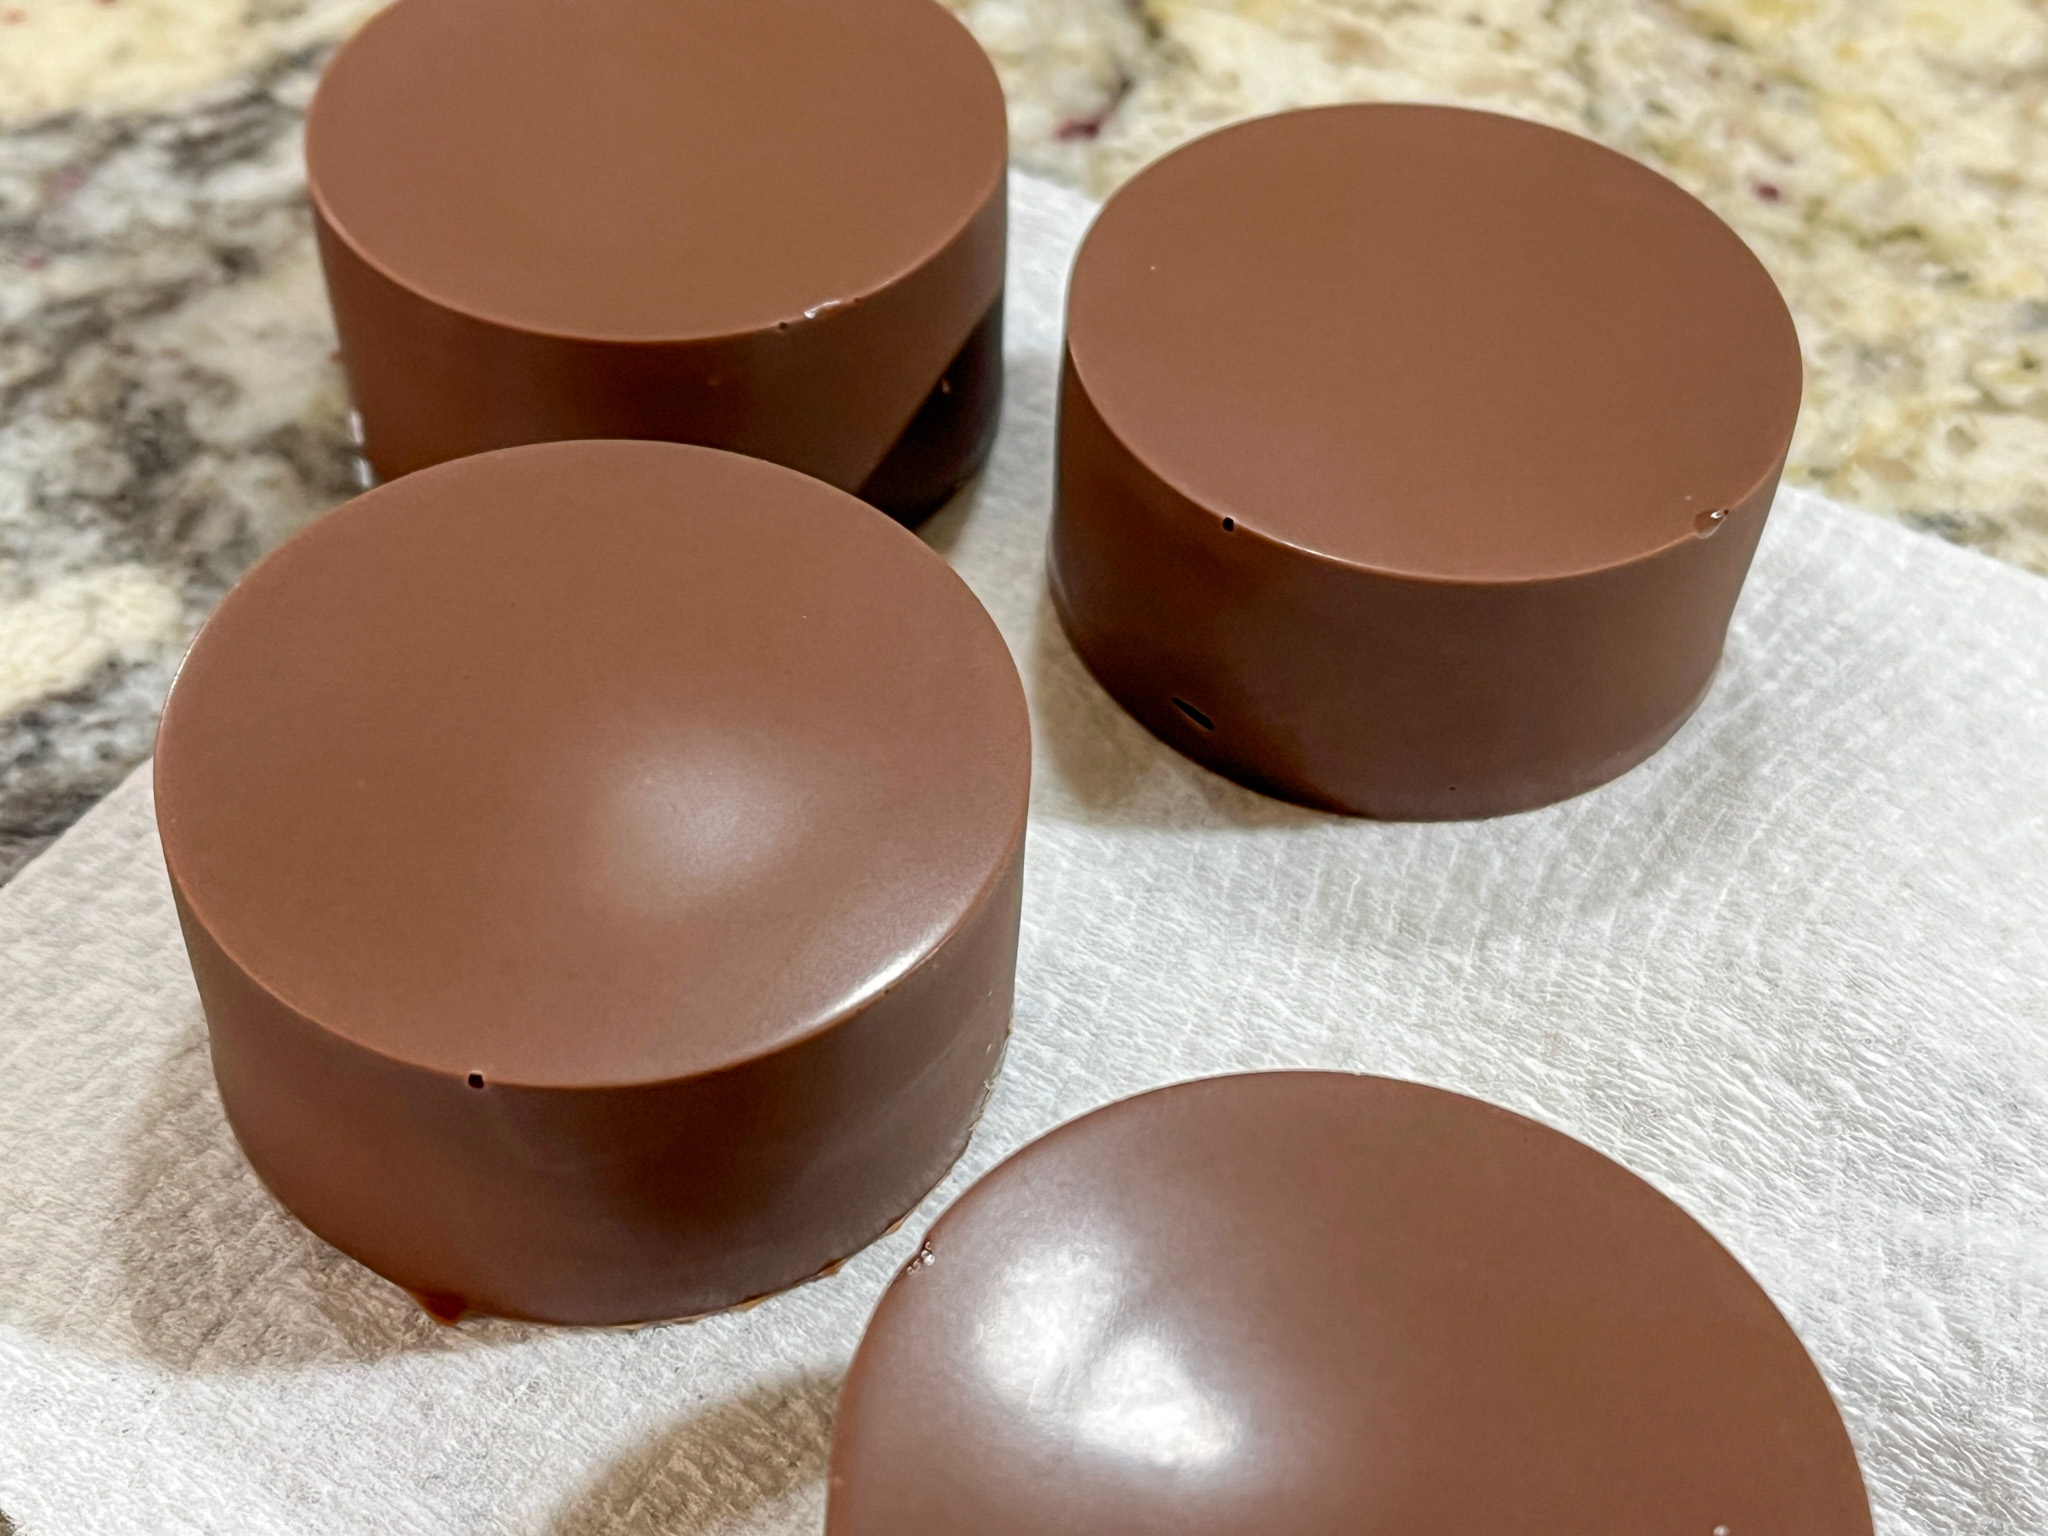
Place mold in freezer for 10 minutes, they should set quickly because the cake component is very cold. Un-mold and have fu decorating your little cake pucks!
Comments: Before I started this new adventure, I joined this group on Facebook to see what others were doing and learn from their shared experiences. For the most part they use cake mixes for the “puck” component because home-made cakes can be overly moist. I decided to take that approach for my first time, as I was absolutely clueless about the whole thing. So I started from a boxed Duncan Hines Red Velvet, adapting the recipe as advised by the experts. Bake, let it cool, and crumble it. Mix with buttercream (I had some leftover from another project made with butter & cream cheese), add to the puck mold.
Once that part is done, marvel at how well they un-mold to reveal the smoothest little cake puck!
For the set covered with dark chocolate, I opted to decorate with Royal icing drizzle and molded fondant painted with luster powder gold + vodka.
Once you cut through, the little Oreo inside adds a lot of cute to the equation… and of course, a bit more contrast in texture.
The ones covered with white chocolate dyed pink, got a simpler decoration, just the white fondant sprayed with PME luster pearl.
That decoration also works well on a dark chocolate background…
Of course, the possibilities to make other types of cake pucks are endless, and I am just getting started. My next goal is to use warm cake crumbled without adding buttercream, as I heard it can work well, and of course opens the horizons to cakes made from scratch. Stay tuned for more “pucking” adventures!
For the most part our food is super simple. We always opt for a main dish that involves meat (although about one day each week we go the vegetarian route), a starchy side, and veggies. We alternate cooking days, but both of us follow this approach for our meals. Today I share the exact dinner we had a couple of days ago, all preparations are simple and I’ve done them so often I don’t even need to look at the recipes.
.
STARTING WITH THE MAIN DISH
.
GRILLED CHICKEN THIGHS WITH YOGURT PAPRIKA MARINADE (from The Bewitching Kitchen)
6 chicken thighs 1/2 cup yogurt (low-fat or full-fat) 1 tablespoon paprika 1 tsp salt 1 tablespoon agave nectar squirt of lemon juice drizzle of olive oil
Make the marinade by mixing all ingredients from yogurt to olive oil. Whisk well, add to the pieces of chicken, massaging them to coat well. Place in the fridge for at least a couple of hours.
When ready to grill, remove from the marinade, season lightly with additional salt (omit that if you ar not a “salt person”), and grill until done, on both sides.
Comments: I make these all the time, actually. The paprika amount might seem excessive, but trust me, it is not. You can use part of it as smoked paprika, I just don’t like to use the full amount as the smoked version because I find it overpowering. They turned out very moist and tender. I tend to eye-ball everything, just making sure the pieces of chicken are well coated with the marinade until grilling time. If I remember, I go back and move them around a bit in the bag. Honey works in place of the agave nectar, and you can add garlic if you are a fan…
Moving on, the side dishes…
This is a total non-recipe. Slice juicy tomatoes, drizzle olive oil, balsamic vinegar, salt and pepper to taste. You are done! We are addicted to this, it shows up at our table very very often…
For the broccoli recipe, which I made probably once every week, click here. SIX MINUTES. Perfect broccoli every time. The version I make all the time is even simpler than the one from the past. After the broccoli is cooked for the total of 6 minutes, I transfer to a bowl, drizzle lemon juice and olive oil, eye-balling it all. Adjust seasoning with salt and pepper. DONE.
For my quick version of Persian rice, click here. Another constant presence at our table, as Phil simply adores it. So there you go, a typical dinner “chez nous”, I hope you incorporate some of these dishes into your weekly rotation!
What a completely fun concept! Bake a pie, but make it small. Really small. And don’t forget to get a stick going, for that pop experience… The idea comes from Cook’s Desserts Illustrated (available at amazon.com), which is a must-have for any baker out there. I cannot publish the exact recipe and method from the book, but let me share the overall process.
Get your favorite, preferably all-butter pie crust recipe, roll it out thin, and cut 3 inch rounds…
Transfer half of the rounds to a large rimmed baking sheet, add a stick to it, and one tablespoon of the filling of your choice (I used apple butter + cream cheese, as suggested in the book).
Freeze that for 10 minutes, then brush egg wash on the edges and add the second set of pie rounds on top. Crimp the edges, cut small slits with a sharp knife, brush with more egg wash…
and bake them at 375F for about 25 minutes…
You can conceivably use any filling but make sure it is not too wet. Keep in mind these are to be enjoyed just holding on the stick, no plate, nothing. You don’t want to have filling running all over the place. It is such a cute concept, and perfect to share! I hope you’ll give this method a try soon…