For the most part our food is super simple. We always opt for a main dish that involves meat (although about one day each week we go the vegetarian route), a starchy side, and veggies. We alternate cooking days, but both of us follow this approach for our meals. Today I share the exact dinner we had a couple of days ago, all preparations are simple and I’ve done them so often I don’t even need to look at the recipes.
.
STARTING WITH THE MAIN DISH
.
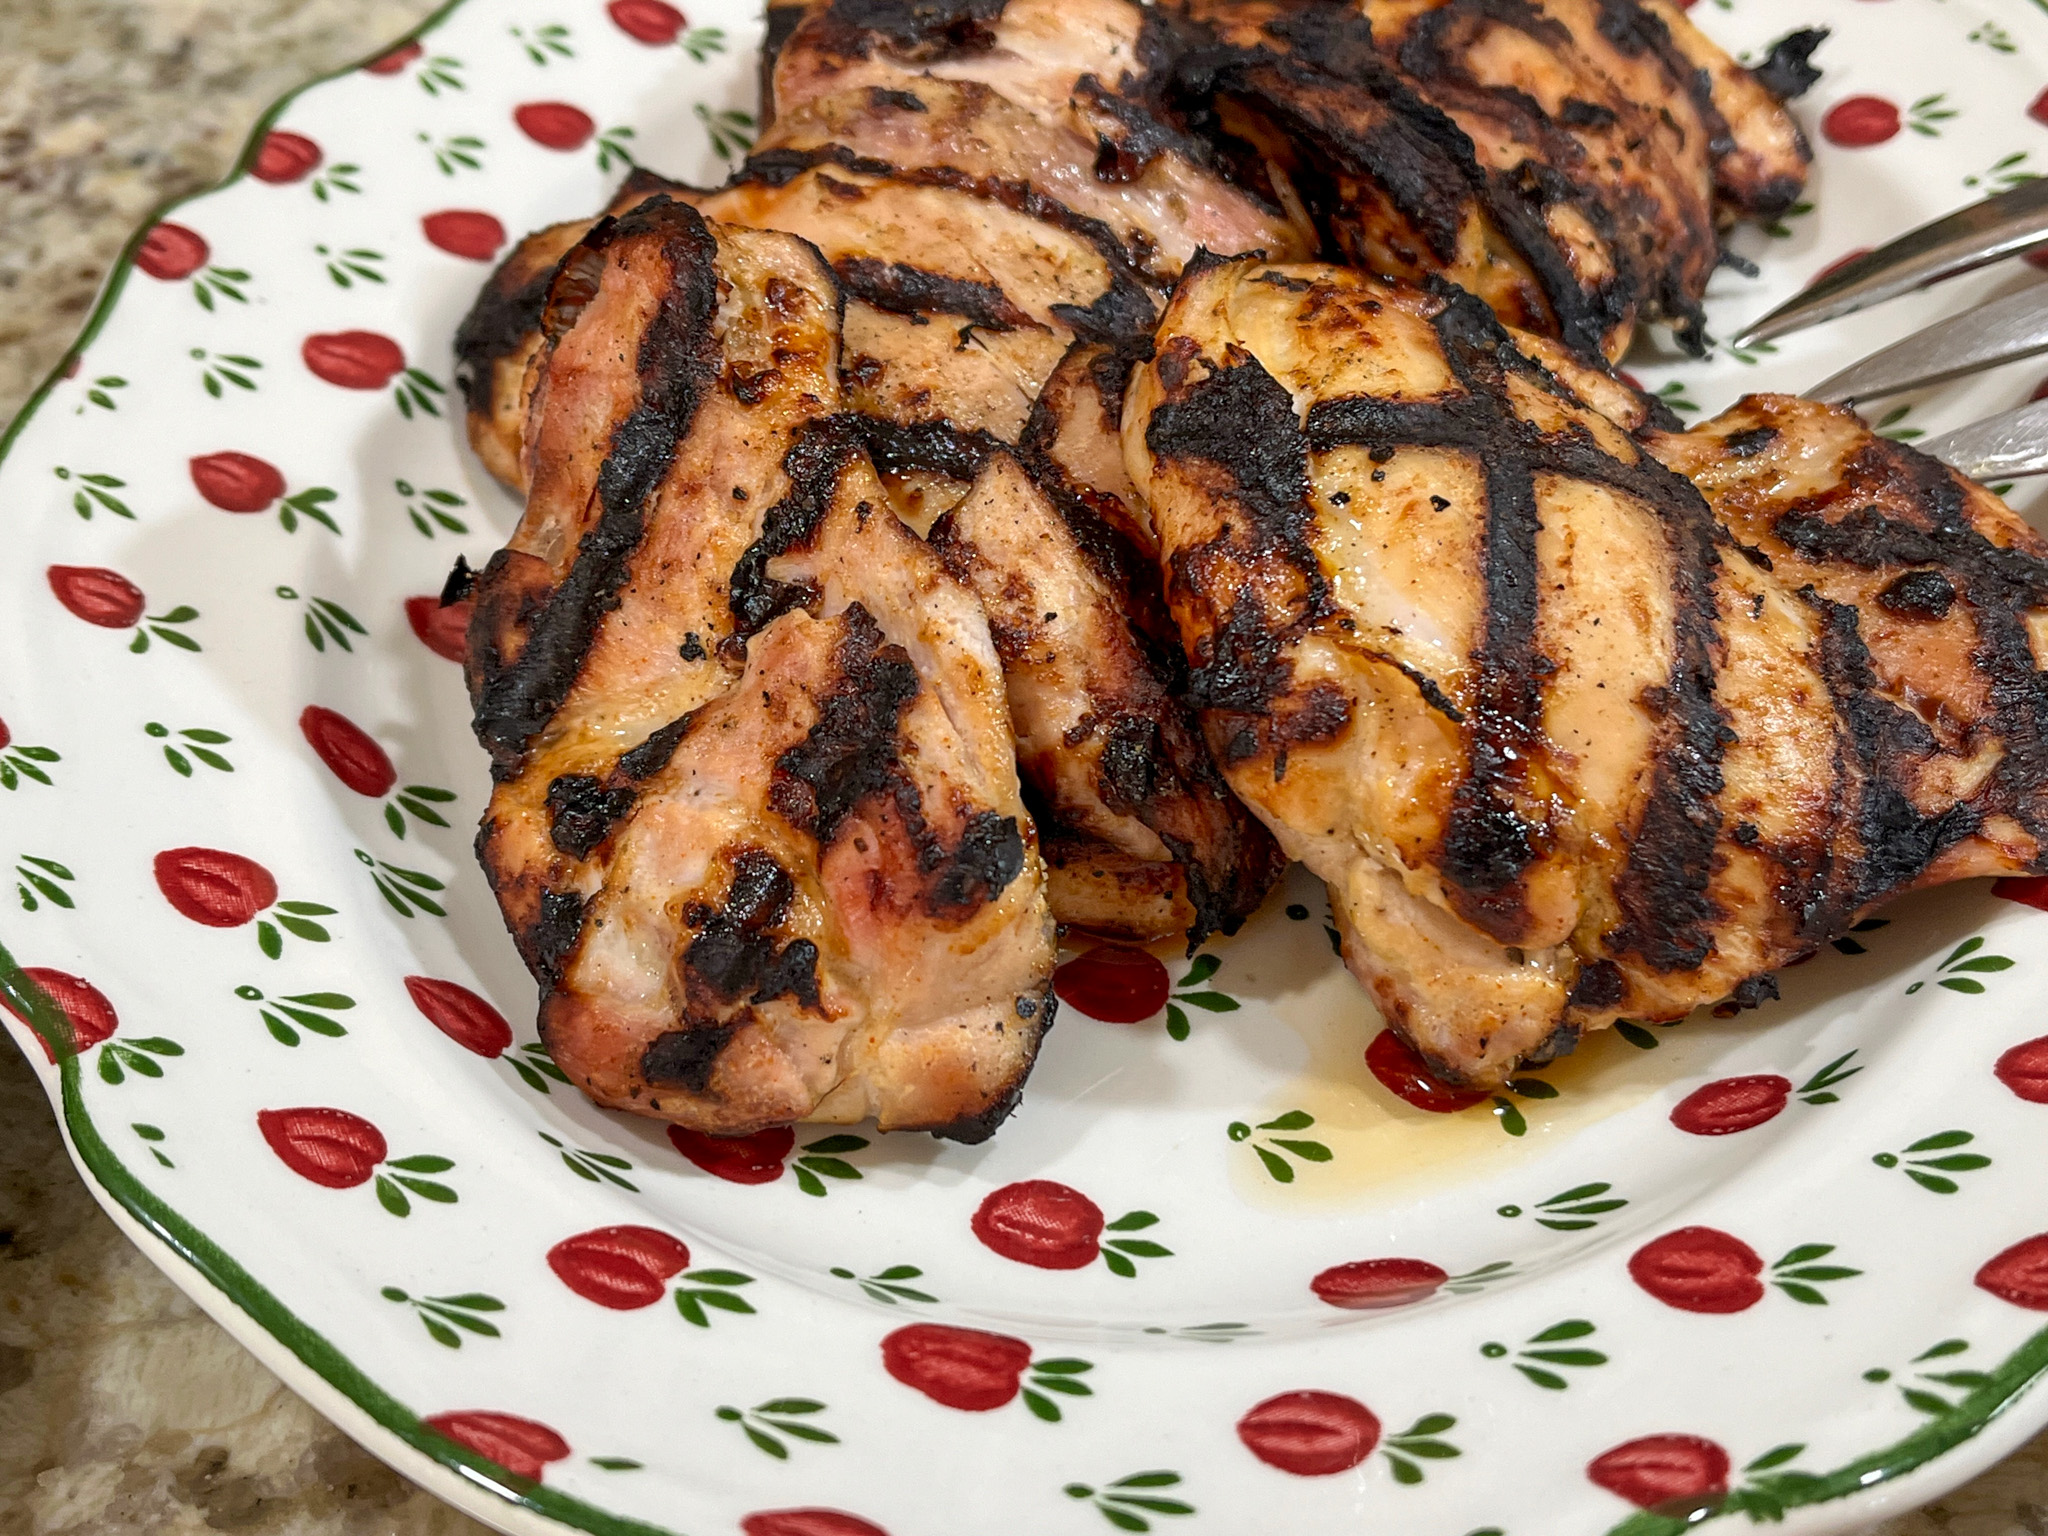
GRILLED CHICKEN THIGHS WITH YOGURT PAPRIKA MARINADE (from The Bewitching Kitchen)
6 chicken thighs 1/2 cup yogurt (low-fat or full-fat) 1 tablespoon paprika 1 tsp salt 1 tablespoon agave nectar squirt of lemon juice drizzle of olive oil
Make the marinade by mixing all ingredients from yogurt to olive oil. Whisk well, add to the pieces of chicken, massaging them to coat well. Place in the fridge for at least a couple of hours.
When ready to grill, remove from the marinade, season lightly with additional salt (omit that if you ar not a “salt person”), and grill until done, on both sides.
Comments: I make these all the time, actually. The paprika amount might seem excessive, but trust me, it is not. You can use part of it as smoked paprika, I just don’t like to use the full amount as the smoked version because I find it overpowering. They turned out very moist and tender. I tend to eye-ball everything, just making sure the pieces of chicken are well coated with the marinade until grilling time. If I remember, I go back and move them around a bit in the bag. Honey works in place of the agave nectar, and you can add garlic if you are a fan…
Moving on, the side dishes…
This is a total non-recipe. Slice juicy tomatoes, drizzle olive oil, balsamic vinegar, salt and pepper to taste. You are done! We are addicted to this, it shows up at our table very very often…
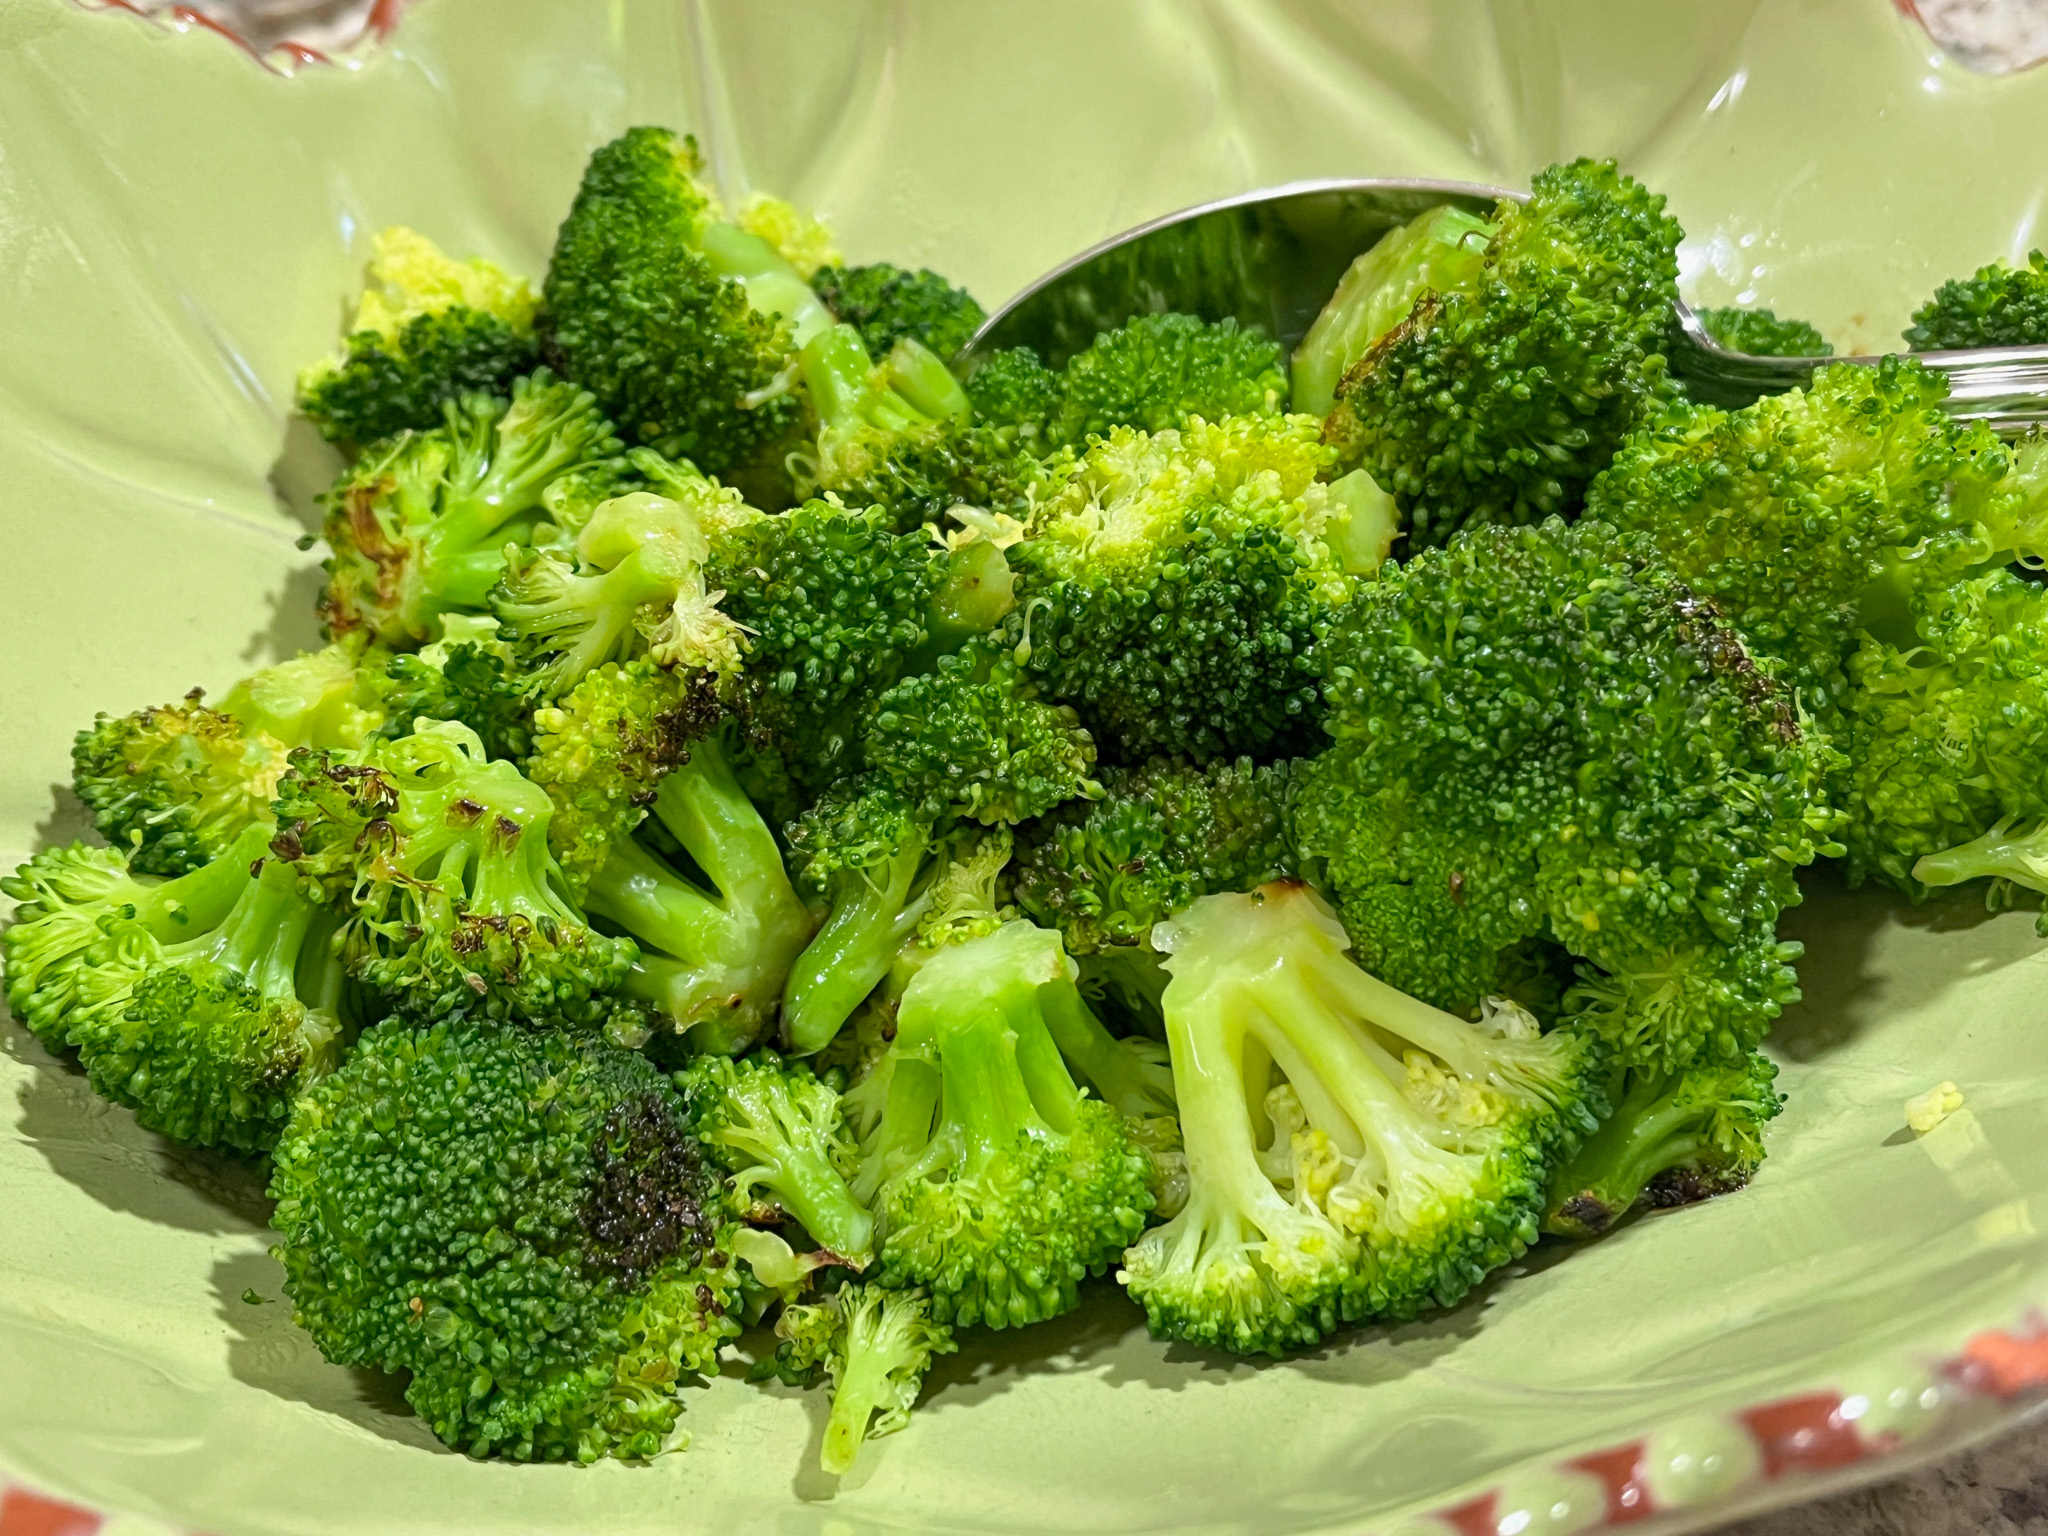
For the broccoli recipe, which I made probably once every week, click here. SIX MINUTES. Perfect broccoli every time. The version I make all the time is even simpler than the one from the past. After the broccoli is cooked for the total of 6 minutes, I transfer to a bowl, drizzle lemon juice and olive oil, eye-balling it all. Adjust seasoning with salt and pepper. DONE.
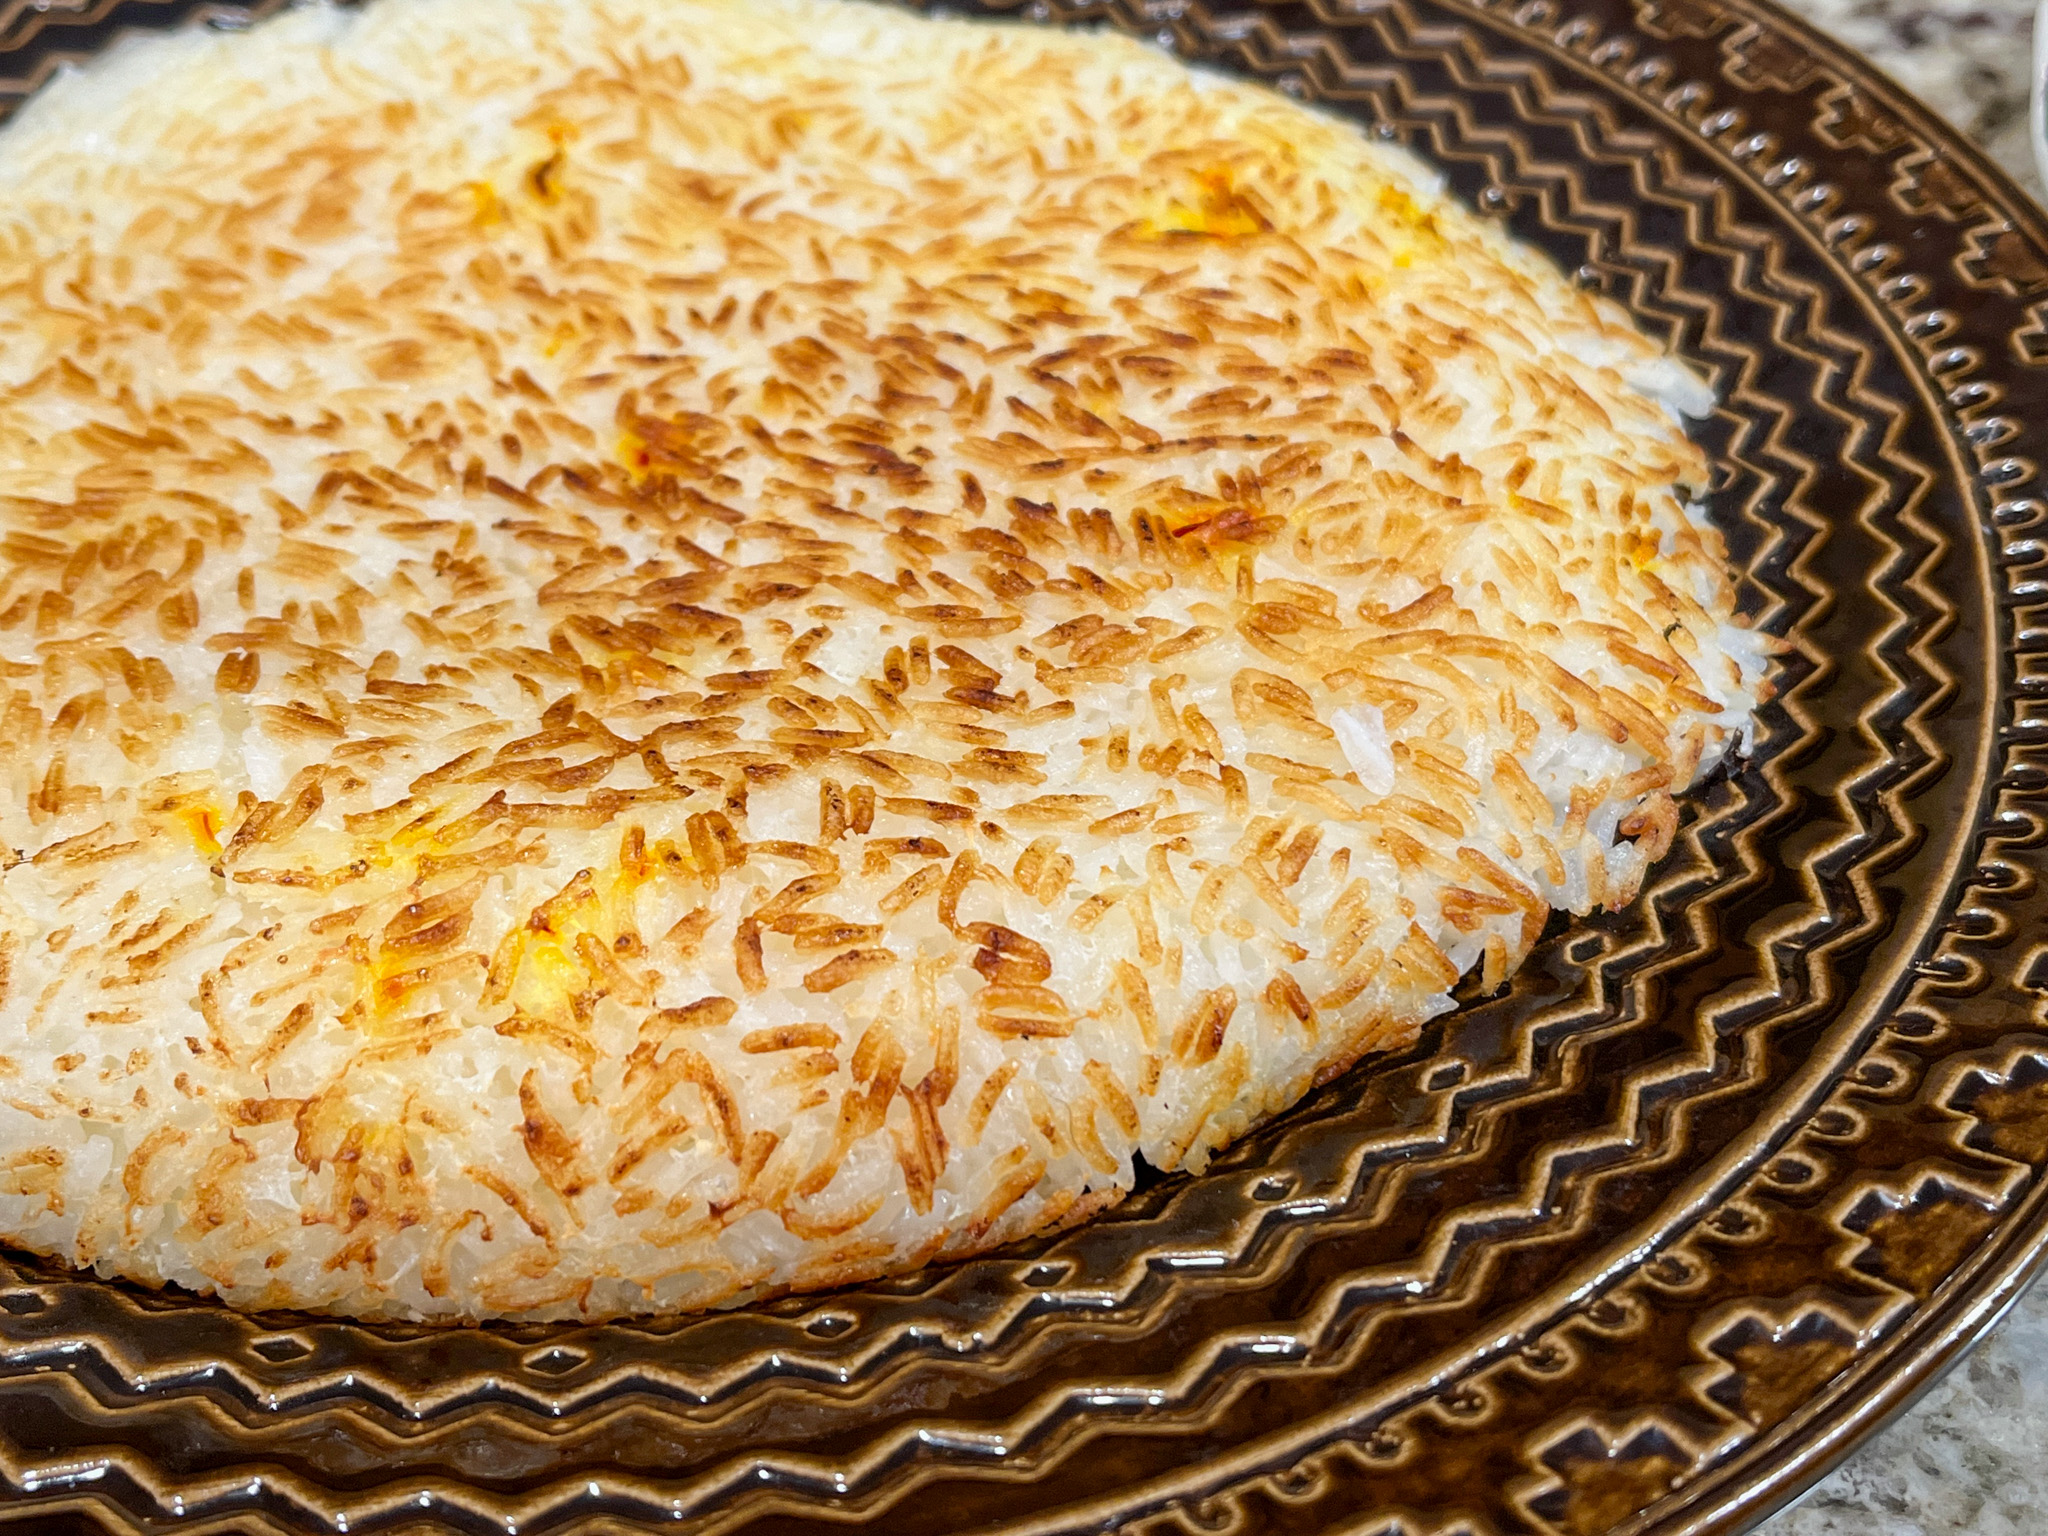
For my quick version of Persian rice, click here. Another constant presence at our table, as Phil simply adores it. So there you go, a typical dinner “chez nous”, I hope you incorporate some of these dishes into your weekly rotation!
Hawaij (or Hawaj) is a spice mixture from Yemen that came to my attention very recently. I ordered a bottle, as you can see in my previous In My Kitchen post, and put it to use. Here you have three ideas, a sourdough, a tahdig type rice, and a delicious carrot cake with cream cheese topping, super easy to make. I have a soft spot for spice mixtures. I know that I could make my own version but I love the convenience of opening the bottle and having it ready to go. This mix of flavors is right up my alley! Read more about it here.
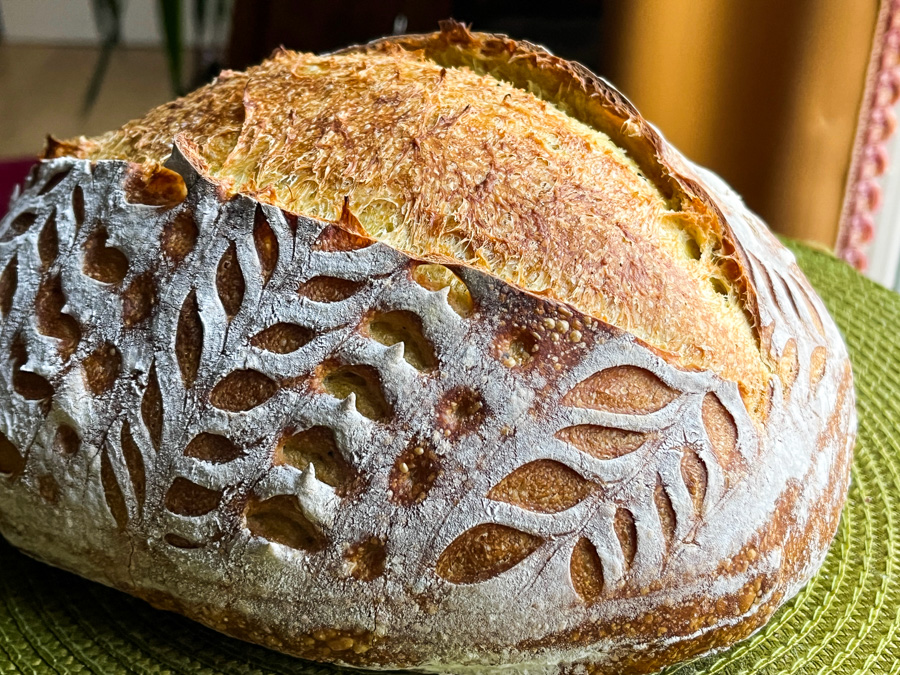
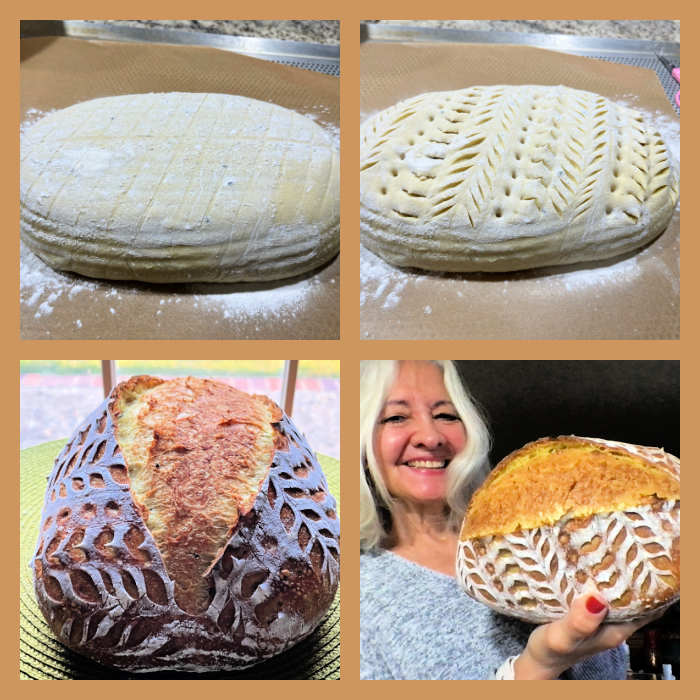
. HAWAIJ SOURDOUGH (from the Bewitching Kitchen)
365g water 75g sourdough starter at 100% hydration 470g white bread flour 30g spelt flour 1 tsp Hawaij spice mix 10g salt
Make the levain mixture about 6 hours before you plan to mix the dough. It should be very bubbly and active.
When you are ready to make the final dough, place the water in the bowl of a KitchenAid type mixer and dissolve the starter in it, mixing with a spatula briefly, then add the two types of flour, Hawaij mix, and salt. Turn the mixer on with the hook attachment and knead the dough for 4 minutes at low-speed all the time. You will notice the dough will gain quite a bit of structure even with just 4 minutes in the mixer. Remove from the machine, and transfer to a container lightly coated with oil, cover lightly with plastic wrap and allow it to ferment for 4 hours, folding every 45 minutes or so. Because the dough is already a bit developed from the initial time in the mixer, you should get very good structure after 3 and a half hours, or even sooner than that.
After four hours bulk fermentation, shape the dough as a ball, and place, seam side up, in a lightly floured banetton. Leave at room temperature one hour, and then place in the fridge overnight, from 8 to 12 hours.
Next morning, heat the oven to 450F.
Invert the dough on a piece of parchment paper and score with a pattern with a new razor blade.
Bake at 450F for 5 minutes, quickly remove the bread from the oven, and slash it with the blade just where you want the bread to open. Cover the bread with the lid, place back in the oven for 30 minutes, uncover and bake for 15 more minutes. Cool completely over a rack before slicing.
Comments: I really love the way the bread opens up with the second slashing once the dough has been in the oven for 5 to 7 minutes, not longer. It is a bit tricky to open the pan and do the second scoring, but totally worth it. Just be careful not to burn yourself. I’ve seen this tip on several IG posts and I am quite fond of it now. Whenever you want to coach your bread to open in a specific spot to preserve your design, think about incorporating this step in your baking.
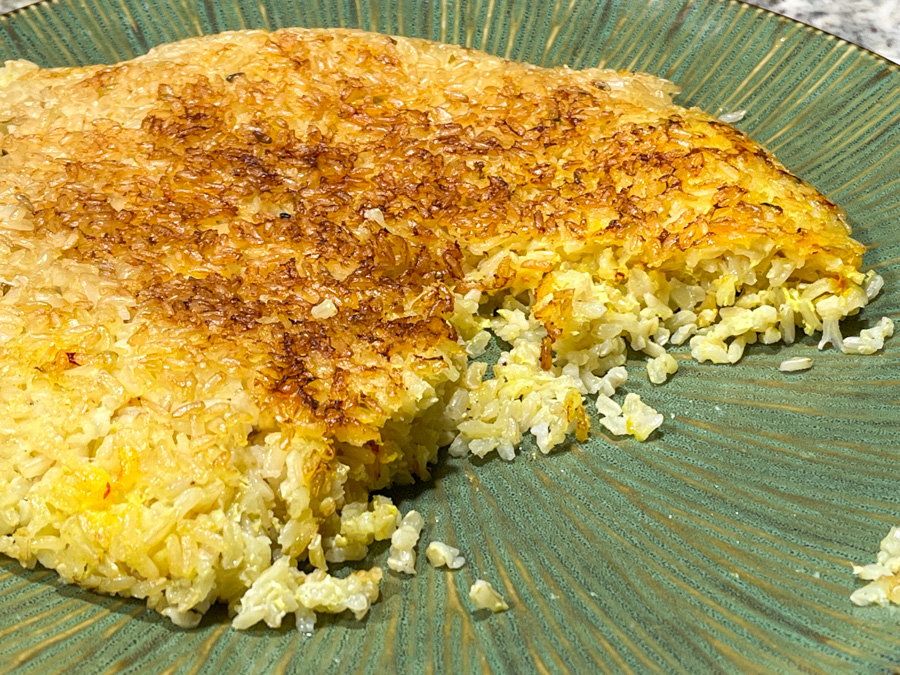
. QUICK BROWN RICE TAHDIG WITH HAWAIJ SPICE (from the Bewitching Kitchen)
1 cup brown rice 3 cups lightly salted water 1/3 cup full-fat yogurt 1/4 tsp salt 1/2 tsp Hawaij mix drizzle of olive oil
Mix the yogurt with the salt and Hawaij mix. Reserve.
Cook the rice for 20 minutes in salted boiling water and immediately drain and rinse with cold water to stop cooking. Rice and yogurt mixture can sit separately for a couple of hours before continuing.
Mix the rice with the yogurt. Heat a 10-inch non-stick skillet and add olive oil, swirling around the whole surface. When the oil starts to get hot, add the rice-yogurt mixture and spread it all over the pan, smoothing the surface with a silicon spoon. Cover the rice with a paper towel moistened with water, then place a lid. Don’t worry if the lid is not totally tight.
Place on a low-burner for exactly 30 minutes. At the end of 30 minutes check to see if the bottom is golden, if not, increase the heat lightly and remove the lid. Leave it for a minute or two, should be enough to make a nice crust at the bottom. Carefully place a platter on top and invert the rice on it. Cut in wedges to serve.
Comments: We love this quick version of tahdig made with brown rice instead of white. You will probably have to tweak the time to first parboil the rice a bit depending on the brand you use, but it is truly delicious. Again, not the most authentic version of tahdig out there, but we are hooked. I probably make it once a week ever since I first blogged about it (click here for flashback).
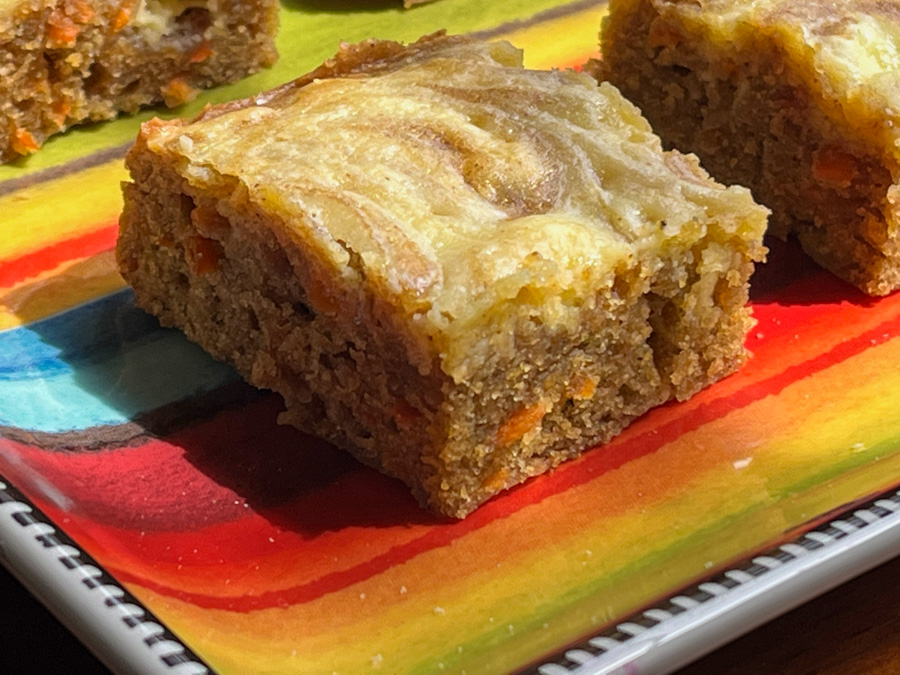
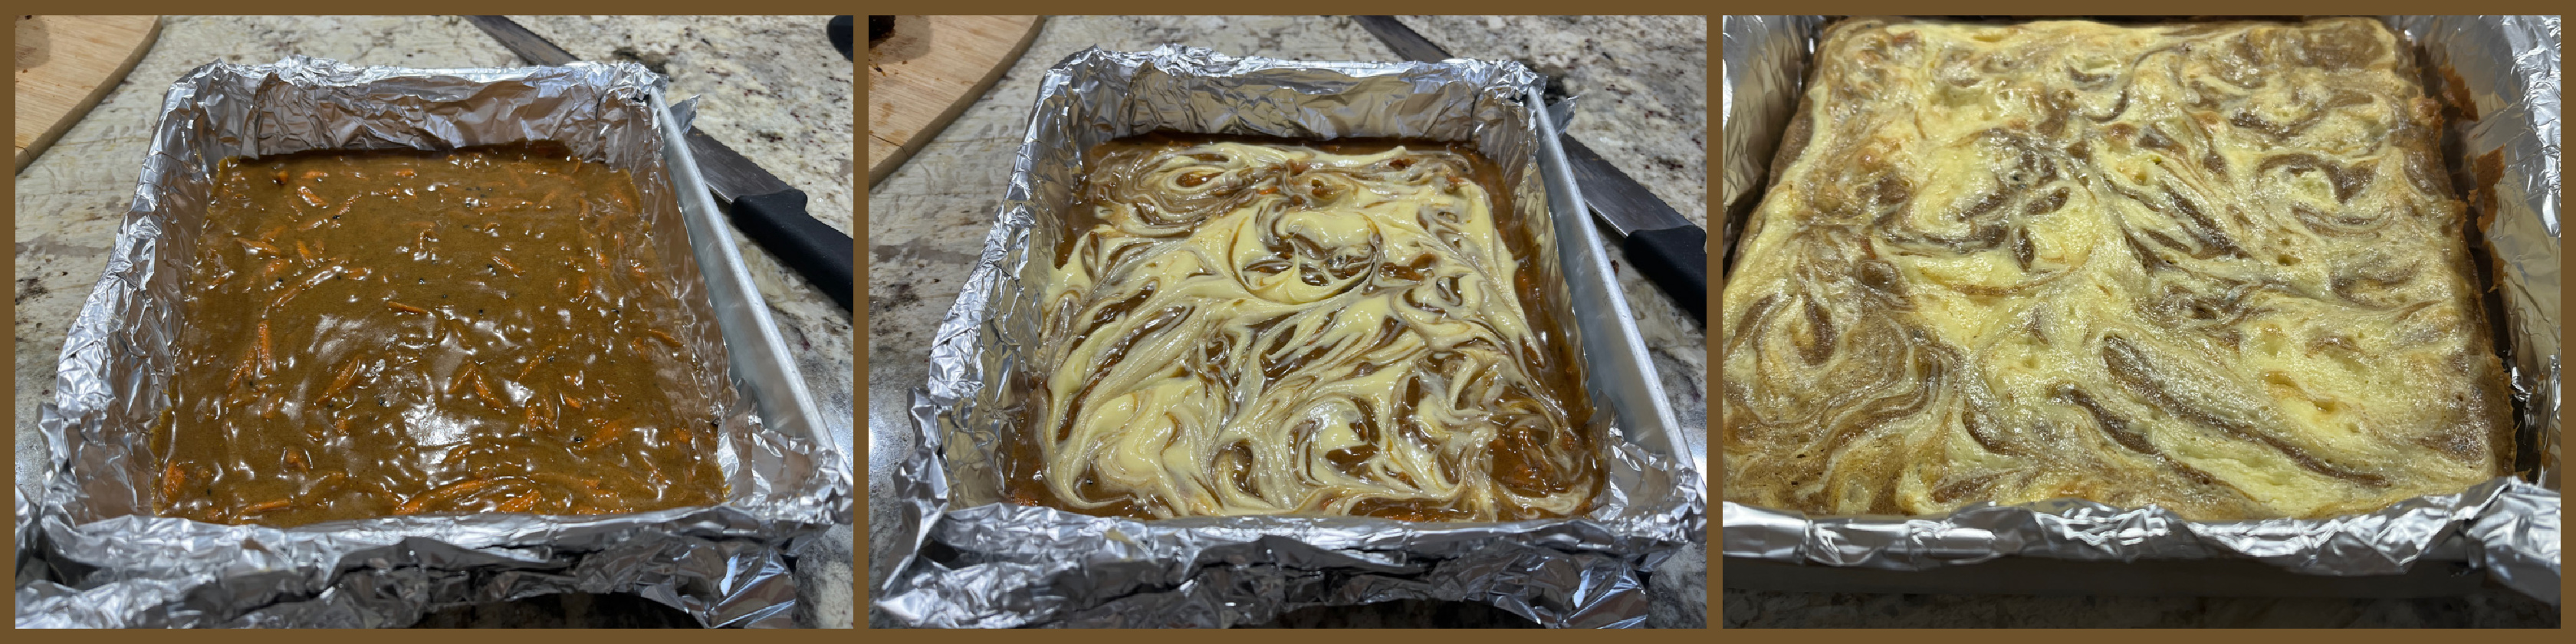
CARROT CAKE BARS WITH HAWAIJ MIX (adapted from Averie Cooks)
1/2 cup unsalted butter, melted 1 large egg 1 cup brown sugar, packed 1 teaspoon cinnamon 1 teaspoon Hawaij spice mix 1 teaspoon vanilla extract 1 cup all-purpose flour 1/2 teaspoon salt 1 cup grated carrots, loosely packed 4 ounces brick-style cream cheese, softened to room temp 1 egg yolk 1/4 cup granulated sugar
Heat oven to 350F, line an 8×8-inch pan with parchment paper, and spray with cooking spray.
To a large microwave-safe bowl, add the butter and heat on high power to melt, about 1 minute. Allow the melted butter to cool slightly, then whisk in the egg, brown sugar, spices, and vanilla. Once it is all smooth, add the flour and salt, mixing gently. Add the carrots, fold them in, then pour the batter into the prepared pan. Smooth the top with a spatula.
Prepare the topping: into a medium bowl, add the cream cheese, egg, sugar, and beat on high with a handheld electric mixer until smooth and fluffy, about 4 minutes. Turn the cream cheese out over the carrot batter using the blade of a butter knife or the tip of a spatula, and lightly swirl the cream cheese into the carrot batter. Bake for about 25 to 30 minutes, or until a toothpick inserted in the center comes out clean.
Allow to cool, uncovered in the pan, at room temp, for at least 2 hours (overnight is preferred) before slicing and serving.
Comments: These bars/blondies were a huge hit with our colleagues from the department, and I got a few emails of praise for them. They are not too sweet and the spice mixture goes perfectly with the carrot and cream cheese topping. I highly recommend you give them a try!
So that closes my first series of recipes using Hawaij. I do hope you’ve found something to inspire you!
With this post I will upset a lot of people. First, by mixing a classic Middle Eastern recipe with a Mexican component. And second, by making it a much quicker version than the authentic. However, since I first made this version back in 2019, I never stopped. It is by far the most requested side dish by the resident food critic, and I adore it too. My only problem lies with that portion control thing. I tend to over-eat because it’s just too good. The basic method is the same, and to be honest I don’t even measure anything now, because it always works. This version rocked our little world.
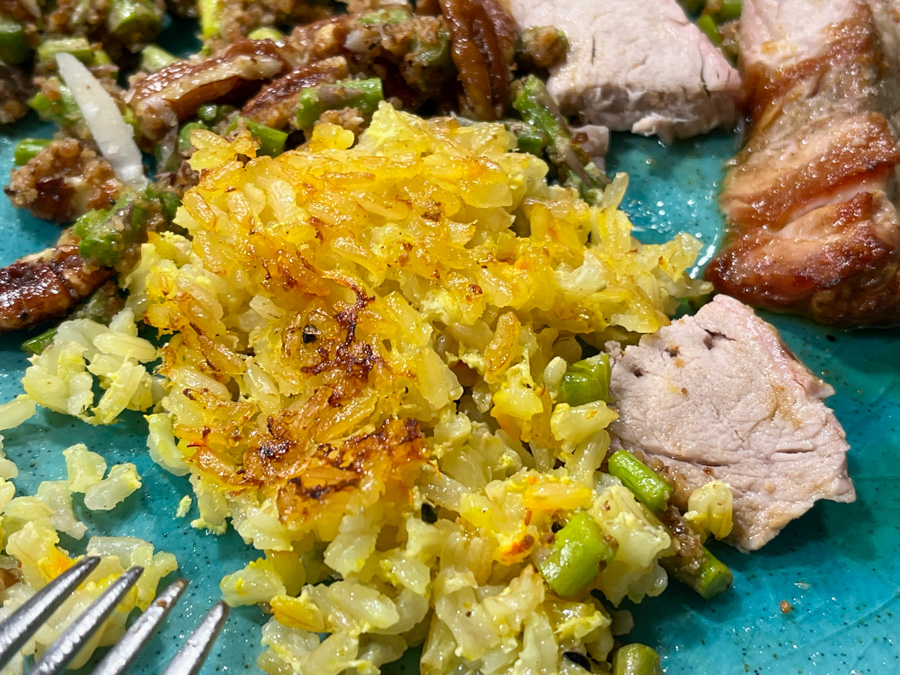
POBLANO TAHDIG (from The Bewitching Kitchen)
1 cup rice 3 cups lightly salted water 1 Poblano pepper, roasted with a touch of olive oil until soft 1/3 cup full-fat yogurt 1/4 tsp salt 1/4 tsp chipotle pepper (or other pepper of your choice) drizzle of olive oil
Mix the yogurt with the poblano pepper, salt and chipotle pepper. Process with a mini-food processor until smooth. Reserve.
Cook the rice for 12 minutes in salted boiling water and immediately drain and rinse with cold water to stop cooking. Rice and yogurt mixture can sit separately for a couple of hours before continuing.
Mix the rice with the yogurt. Heat a 10-inch non-stick skillet and add olive oil, swirling around the whole surface. When the oil starts to get hot, add the rice-yogurt mixture and spread it all over the pan, smoothing the surface with a silicon spoon. Cover the rice with a paper towel moistened with water, then place a lid. Don’t worry if the lid is not totally tight.
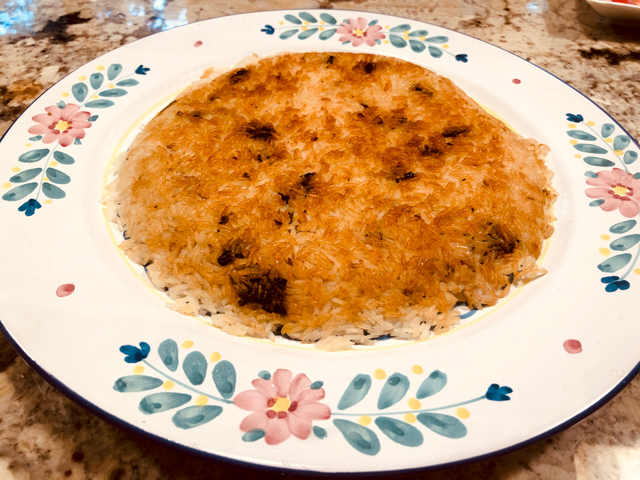
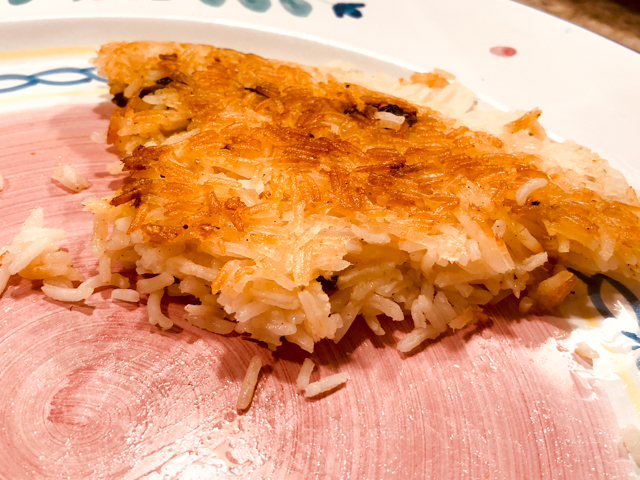
Place on a low-burner for exactly 30 minutes. At the end of 30 minutes check to see if the bottom is golden, if not, increase the heat lightly and remove the lid. Leave it for a minute or two, should be enough to make a nice crust at the bottom. Carefully place a platter on top and invert the rice on it. Cut in wedges to serve.
Comments: The above picture shows what was left once we finished our dinner. We could have inhaled it all, but I decided to consider my lunch next day. If you are a rice lover, please try this method. And now that we loved the poblano version so much, I have plenty of other variations to try. The only thing to keep in mind is under-cooking the rice in the beginning, and choosing a skillet that is right for the amount of rice you have. For 1 cup dry rice, the 10-inch skillet is perfect. Thirty minutes on low-heat. DONE.
In case you’ve missed my big announcement:
4 days to showtime!
It is a bit hard to believe but my last Incredibly Simple post was 7 months ago, back in May. Better late than never, here I am to share with you four non-recipes that are a regular rotation in our kitchen.
1 or 2 eggs
heavy cream to coat a non-stick pan
salt and pepper
Pour the cream in the skillet. Break the egg(s) and place them gently over the cream. Season with salt and pepper. Turn the heat to medium and let the cream come to a boil.
When the eggs are almost fully set, remove from heat and cover with a lid for a couple of minutes (this will finish the egg cooking to a perfect texture)
Sprinkle more salt and pepper if so desired, and serve over your favorite side dish.
INCREDIBLY SIMPLE #2
BREAD CRUMBS
I used to make bread crumbs in the food processor. I thought I was so virtuous and clever. Until I got a particularly hard baguette that refused to cooperate with the efforts of my Cuisinart.
First picture shows the “crumbs” made in the processor. The other two show a before and after using the Vitamix, pulverized in less than 30 seconds! I am so in love with it, will never use any other method. I apologize if this is common knowledge but I decided to share just in case someone was living in the same cave I’ve been living, as far as bread crumbs are concerned.
INCREDIBLY SIMPLE #3
AIR-FRIED CROUTONS
Cut bread into crouton size. Place in bowl. Spray with olive oil or drizzle a little oil all over and mix well. Season with Herbes de Provence, a touch of salt and pepper.
Place in air-fryer set at the highest temperature for 5 to 8 minutes, shaking the basket a couple of times if you remember to do that (no big deal if you just leave them there unattended).
The croutons will have perfect texture and just the right amount of oil.
INCREDIBLY SIMPLE #4
RICE WITH TAHDIG (adapted from several sources)
We love rice, particularly Persian-style, with that delicious crust called tahdig. Most recipes are pretty involved, but I got this shortcut method that works surprisingly well. My apologies if I abuse a very traditional recipe, but let this be a profession of my love for it, and the desire to have it as quickly as possible at the dinner table.
white rice, cooked, about 2 cups
2 Tablespoons full-fat yogurt
pinch of saffron
pinch of salt
drizzle of olive oil
Mix the yogurt with the saffron and salt. Add to the cooked rice. If rice was in the fridge, warm it in the microwave for just a minute to bring it closer to room temperature before adding the yogurt.
Drizzle olive oil on a 10 inch non-stick skillet. Place over medium-high heat, when the oil starts to get nice and hot, spoon the rice/yogurt mixture in a layer covering the bottom of the pan. Place a towel on top, close the lid. Keep it on low-heat for 20 minutes, check to see if it is golden underneath, increase the heat to medium-high until it gets to the color and crust you enjoy.
You might have to make the recipe once or twice until you get it just right.
So there you have it, four super simple recipes for you to choose from. Fried egg is my favorite kind of lunch, and since I have no cholesterol issues, I can fry it in heavy cream without feeling too guilty. Obviously, I don’t do it on a daily basis. The tahdig is definitely a weekly thing. If I want to cook it from scratch, I bring a large amount of salted water to a rolling boil, pour 1 cup of rice in the pot, cook it stirring every once in a while for 12 minutes. Drain, and proceed with the recipe. It turns out a little better in terms of texture than using pre-cooked rice from the fridge. It does add another 15 minutes or so to the preparation, but it’s worth it.