I guess it is the season to turn the oven on at high temperatures and help the house stay warm. Do I like this weather? What do you think? I despise it. BUT, I do love roasted veggies, so I try to concentrate on that instead of the fact that someone decided to make repairs in the heating system of our building and the labs were freezing from Christmas break all the way through the first week of January. I could see my breath while working, and confess to snapping at a couple of colleagues who had the nerve of greeting me with a “Good morning, Sally.” Anyway, I digress. Roasted veggies are a beautiful thing, and today I share two recipes, both delicious, but the second one, the second one blew my little mind away! I kept munching on those little morsels of deliciousness and beating myself for never trying them before. Without further ado, Roasted Pears and Parsnips and…. drum roll… drum roll increasing…. drum roll at maximum blast: Roasted Radishes. Now, do not leave. Do not. Even if you hate radishes with all your being. Trust me. You need to roast them. You just do.
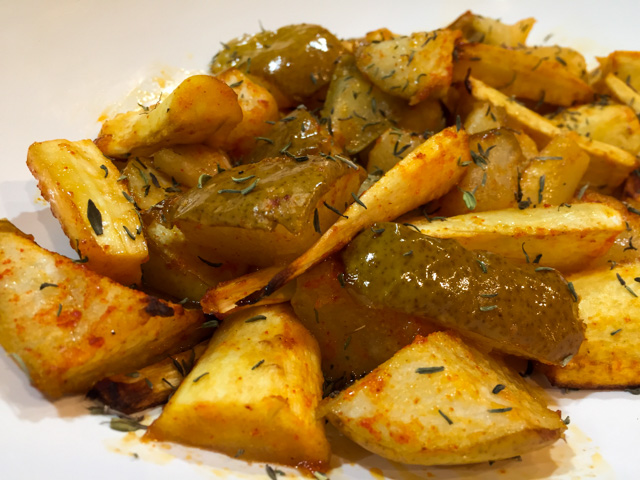
ROASTED PEARS AND PARSNIPS
(adapted from Fine Cooking magazine)
1-1/2 lb. parsnips cut into 1-inch pieces
2 firm pears, cored and cut into 1-inch pieces
2 Tbs. olive oil
1/2 tsp. smoked paprika
1/2 teaspoon salt
1 Tbs. white balsamic vinegar (or regular balsamic)
1 tsp Herbes de Provence
Heat oven to 425 F.
Toss the parsnips and pears with the oil, paprika, and 1-1/2 tsp. salt.
Roast the vegetables in the oven until tender and browned, about 25 minutes. Toss with the vinegar and Herbes the Provence. Adjust seasoning and serve.
ENJOY!
to print the recipe, click here
Comments: As I was composing this post, I noticed a new blog entry by my dear friend Maureen, from Orgasmic Chef. She professed her love for Jacques Pepin (we are twin sisters, obviously) and included a short video with our guru talking about what constitutes a recipe, and how we should never follow it blindly. So many variables at play, if you follow a recipe without being aware of its ultimate goal (taste great), you might be doomed for failure. I strongly suggest you visit her post and watch the short video.
These roasted parsnips and pears are a perfect example of Pepin’s wise lesson. First of all, I think of all fruits, pears might be the most finicky to cook with. So many different kinds, if the recipe doesn’t specify which one to use, you could already be set for trouble. Plus, even if a specific type is called for, its level of ripeness will have a huge impact on the outcome. In my first time making this dish, I used regular white pears with light green skin. They were ripe, not overly so, but definitely ripe. What happened is that they were a bit too soft once the parsnips were perfectly cooked. The taste was superb, but had I thought more carefully about it, I would have added the pears a mere 10 minutes before serving time. On my next attempt, I intend to use Bosc pears and roast them from the beginning with the parsnips. They are very sturdy and will stand better to the oven. But don’t let this small detail prevent you from making this unusual veggie roast. It turned out spectacular, paired very well with a juicy, medium-rare standing rib roast, lovingly prepared by my perfect match.

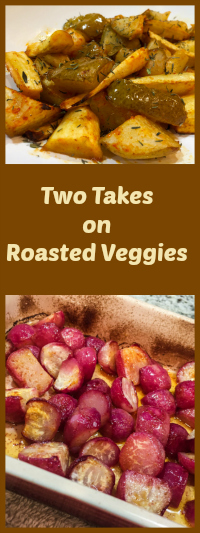
And now, let’s talk radishes, shall we? Let’s suppose when you see a bag of radishes you look the other way, and your lips pucker a little just thinking of how harsh they are. Do not let that prevent you from making this. Talk about a full transformation by heat, that’s what it is. Magic in radish form.

ROASTED RADISHES
(from the Bewitching Kitchen)
1 bag of radishes (or any amount to serve two)
olive oil to coat
1/2 teaspoon smoked paprika
salt and pepper
water
squirt of lemon juice
Heat the oven to 400F.
Cut each radish in half, if you have very large ones in the bag, quarter them. Place in a bowl and drizzle olive oil to coat them. Season with paprika, salt and pepper.
Place as a single layer on a baking dish, add about one tablespoon of water, cover the baking sheet with aluminum foil. Place in the oven and roast, covered for 20 minutes. Remove the foil and roast for 15 to 20 minutes more, moving them around occasionally, until fully tender and starting to get golden brown. Squirt lemon juice right before serving, not too much, just a light drizzle.
ENJOY!
to print the recipe, click here
Comments: I own several cookbooks that include recipes for braised radishes. I promptly ignored them all. Who would braise a radish, I kept asking myself? Radishes are supposed to be enjoyed raw. Thin slices over baguette smeared with the best possible quality butter, seasoned with salt flakes. That is the way it’s done. So, why did I finally roast these babies? I was browsing a forum on ketogenic recipes, and people were going nuts about them. Granted, it was a more substantial version, one that goes around the net as “Loaded Radishes.” It is radishes plus olive oil plus butter plus cheese plus bacon. I kid you not. I was not that interested in the super high fat content, but what intrigued me was that every single person who made it compared the radishes to potatoes in taste. Gone was the sharp, almost bitter taste that makes radish… a radish! I had to find out if they were onto something, so I more or less used the steam-roasted method of my recent past, and came up with this recipe. It is absolutely delicious, and yes, think about very light potatoes, and you’ll be on the right taste path. Of course, braised radishes will be on our menu very soon. I just know I’ll fall in love with them too…
Note to self: a mind open is a beautiful mind.


ONE YEAR AGO: Kadoo Boranee: Butternut Squash Perfection
TWO YEARS AGO: Creamy Broccoli Soup with Toasted Almonds
THREE YEARS AGO: Fennel and Cheddar Cheese Crackers
FOUR YEARS AGO: A Festive Pomegranate Dessert
FIVE YEARS AGO: My First Award!
SIX YEARS AGO: A Message from WordPress
SEVEN YEARS AGO: Turkish Chicken Kebabs