SMOKED PORK TENDERLOIN WITH ROASTED PARSNIPS

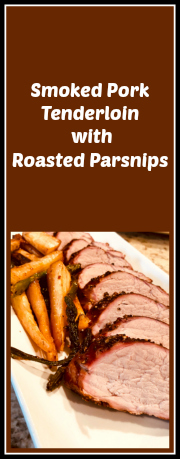
You know those dinners you think might turn out pretty tasty and they go on to blow your mind in the deliciousness department? This was it. I had never smoked a pork tenderloin, but it sounded like a simple, new way to enjoy one of our favorite cuts of meat. Parsnips are the classical example of under-rated root veggie, but paired with maple syrup and harissa? Yes, please. Great dinner, and thanks to social isolation quite doable any day of the week.

SMOKED PORK TENDERLOIN
(from the Bewitching Kitchen)

1 pork tenderloin, silverskin removed
olive oil to rub, about 2 Tablespoons
coarsely crushed peppercorns, about 1 Tablespoon
1 Tablespoon turbinado sugar
salt to taste
applewood for smoking

Mix the peppercorns and sugar in a small bowl. Dry the meat well. Rub with olive oil, then coat with a small amount of the spice mixture. Season with salt to taste.

Place in smoker set at 225 F with a small amount of applewood chips. Smoke for 3 hours.

Let it sit for 10 minutes, tented with foil. Slice the meat and serve.

ENJOY!

to print the recipe, click here

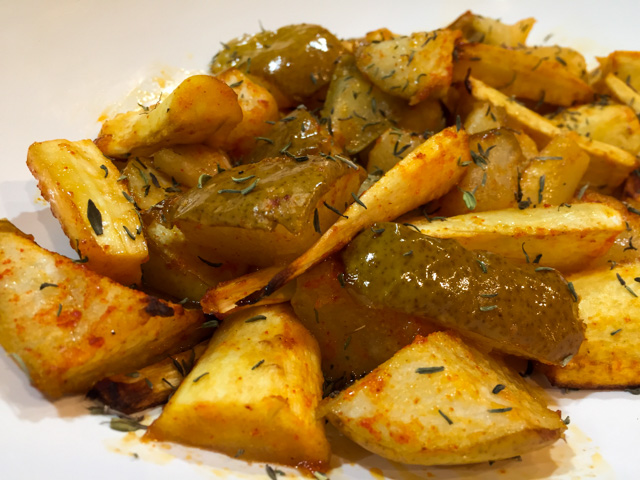
ROASTED PARSNIPS WITH MAPLE AND HARISSA
(from the Bewitching Kitchen)

Parsnips, peeled and cut in steak-fries style
4 Tablespoons olive oil
1 Tablespoon maple syrup
1/2 tsp Rosey Harissa (or substitute smoked paprika + harissa or other seasoning of your choice)
Salt to taste
(asparagus are optional)

Heat oven to 425F. Make a spice mixture with the olive oil, maple and Rosey Harissa or another seasoning of your choice.

Coat the pieces of parsnips with the mixture. Add to a roasting pan covered with aluminum foil, season with salt. Add a splash of water to the pan, cover with aluminum foil and roast for 20 minutes. Remove foil, add asparagus (if using), mix well and roast for 20 minutes more, until veggies are nicely browned.

ENJOY!

to print the recipe, click here

Comments: The Rosey Harissa spice has been on my list of things to try for a long time. I don’t even remember where I read about it for the first time, it’s been a while. I finally caved and ordered a bottle (it is a bit pricey), but I’m glad I did. It conveys a similar flavor of my recent passion (Ottolenghi’s Rose Harissa paste), but because it is dry, you can use it in different ways and it can sit in your pantry for a longer time. Smells wonderful.

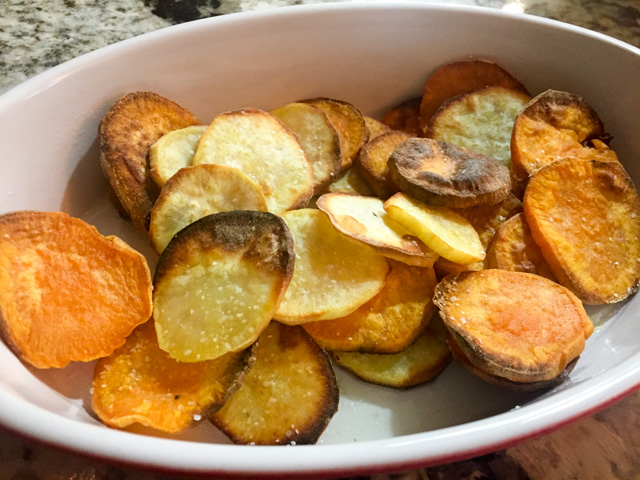
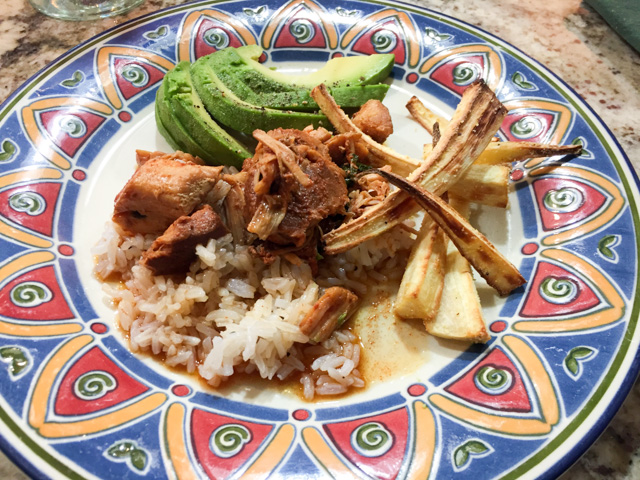
The meat was tender, juicy, and with a nice hint of smoke. It went perfectly well with the roasted veggies.  I had some leftover asparagus sitting in the fridge, so I roasted with the parsnips, but you can omit that or even add other root veggies, just keep in mind their roasting times. Sweet potatoes, butternut squash, turnips, they would all work great.

I know not everyone has a smoker, so you can do a similar preparation cooking the pork tenderloin in the oven, after searing it on the stove top. Use smoked paprika to season it, and you will be on your way for a delicious meal.

ONE YEAR AGO: Fresh Take on Farro with Roasted Veggies

TWO YEARS AGO: Secret Recipe Club Reunion 2018

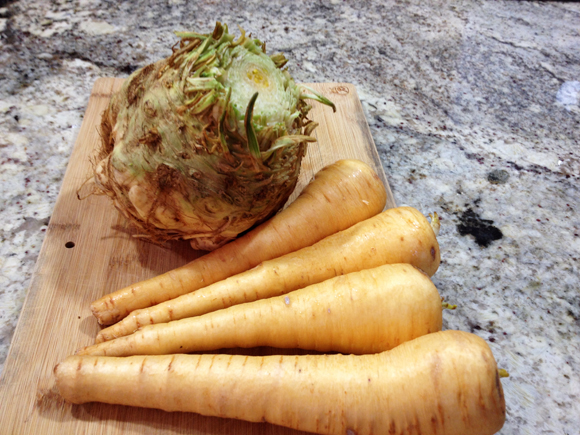
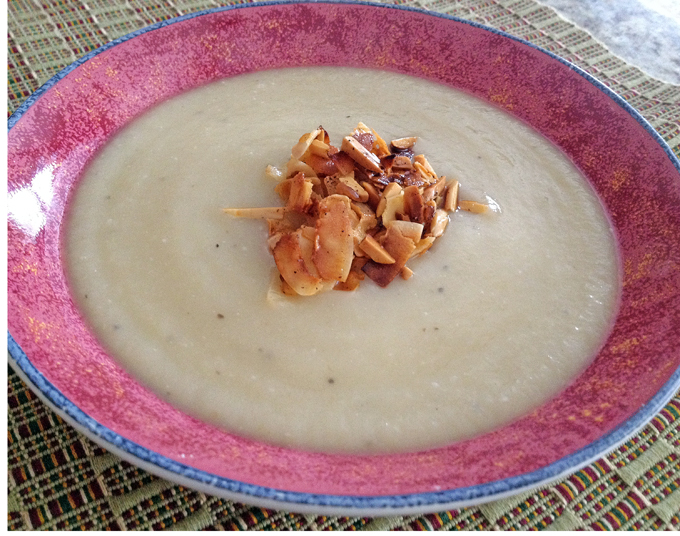
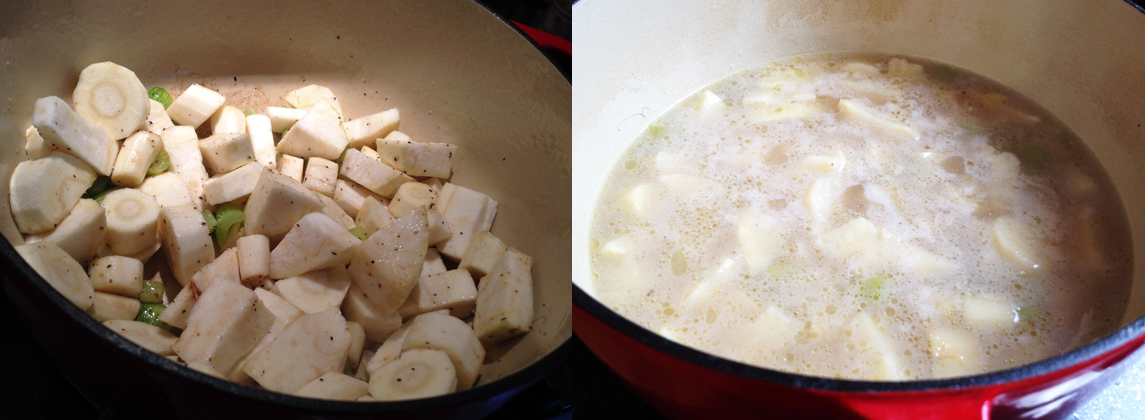
THREE YEARS AGO: Parsnip and Tomato Soup

FOUR YEARS AGO: A Retro Dessert

FIVE YEARS AGO: Cauliflower Tortillas: Going low-carb and loving it!

SIX YEARS AGO: Clementines in Cinnamon Syrup

SEVEN YEARS AGO: In My Kitchen, April 2013 

EIGHT YEARS AGO: Thrilling Moments

NINE YEARS AGO: Maple-Oatmeal Sourdough Bread

TEN YEARS AGO: Pork Trinity: coffee, mushrooms, and curry

A TRIO OF AIR-FRIED GOODIES

For those who follow my blog for a while, it’s obvious that I love a new gadget. In the kitchen, in the lab, I am always excited to try something new. Then comes the flip side of that coin. The after-taste of guilt after brining a new toy home. “Did I really need that?”  Next, I make solemn promises to never ever fall to temptation again (yeah, right). Lolita, our Philips air-fryer, was no exception, I went through intense mea culpa sessions every time I passed by the laundry room and saw her in all her shiny beauty sitting on the countertop. Ready and waiting. Guilty feelings are not fun, so I fight them with my best weapon: putting Lolita to work as often as possible. You know what? It seems to work. So here I am to share three guilt-removing dishes made in the air-fryer.

GOODIE #1
FRIED MANIOC ROOT, A BRAZILIAN CLASSIC

I’ve published quite a few years ago a full tutorial on how to make “mandioca frita.” You can read it here,  so that you learn how to prepare it. Please, don’t ever try to fry the root without cooking it first.

Once you got your pieces of yucca root cooked, they can sit in the fridge for a few days, or even be frozen. To cook them in the air-fryer, simply coat them with a little olive oil, season with salt, and place in the fryer at 390F for 20 minutes or so.  The time will vary depending on the size of your fries. Watch them as they start to get dark brown, then remove them and salt the pieces before enjoying them.

Just like potato fries and sweet potato fries, there will be a difference in texture, as the fried pieces will not be soaked in oil. That, of course, may turn off some traditionalists, but I find it a brilliant way to reduce the fat content still allowing us to enjoy this delicacy.

GOODIE #2
SWEET POTATO CHIPS

I’ve blogged about sweet potato chips made using the spiralizer. In this simpler version, I cut them by hand and omitted the soaking. The idea was to get them to the table as quickly as possible on a weeknight. I used a mixture of orange and white sweet potatoes, cut them more or less uniformly in 1/4 inch slices, coated them very lightly with salt and into the basket they went. Temperature was set to 390F, which is the highest setting the Philips will go to, and they took about 18 minutes to get brown, shaking the pan every once in a while.  I must say I preferred the batch made with the spiralizer, but if you need to take a simpler, faster route, these are still pretty pretty pretty good (any Curb your Enthusiasm fans out there?).

GOODIE #3
PARSNIP FRIES

These turned out excellent! The only problem with them was the amount. I ended up with a smaller portion than anticipated. It so happened that when I was peeling the parsnips, the largest of all slipped from my hand and fell on the floor. A race took place between Sally and a certain dog that attends by the name of Bogey Quit That. Against all odds, since the cook happened to be closer to the fallen root, BQT won, and thought it was super fun to grab it and run around the house with it, as fast as his powerful legs would allow. There was a bit of profanity involved, some screaming, until he finally dropped the badly mangled veggie on the second floor of our home, near the bed in a guest bedroom. Into the trash it went. Serial killer, folks. As I mentioned many times, I must have been a serial killer in a past life. Eternal karma.

But, back to the recipe. Cut the parsnips as uniformly as possible. Not an easy thing to do, those are creatures shaped in exotic ways. Coat them with a little olive oil, salt, pepper, and then add one to two teaspoons of cornmeal all over, shake gently. Any cornmeal that doesn’t stick, it’s ok, you just want a very subtle coating. Place them in the basket of the air-fryer, and set it to 360F. Cook for 10 minutes, increase the heat to 390F and cook a few more minutes, shaking the pan every once in a while. As they brown, remove them and adjust seasoning with salt if needed. Due to their shape, some bits will be more cooked than others. No big deal, it’s all good. They have this wonderful sharp taste, like fries that had a date with a lemon. Yeah, that’s about right. Love them.

We really love the air-fryer, and I have no regrets about buying it. It makes portions that are perfect for the two of us, it is not too noisy, it doesn’t smoke, it is super easy to clean, and it doesn’t require a lot of time to reach temperature. Two minutes at most, but I don’t even worry about that. I put everything inside, turn it on and add two minutes to the cooking time to compensate for the heating.

Of the three goodies, I think the parsnips were my favorite. I might try to make them in the spiralizer as chips, just for fun. We enjoyed them with a New Mexico Pork Chile, rice, and avocado slices. Simple, but very tasty dinner. Of course, a little more parsnip fries would have been nice… But life with BQT has its complexities…


ONE YEAR AGO: Focaccia with Grapes, Roquefort and Truffled Honey

TWO YEARS AGO: Moroccan Carrot Dip Over Cucumber Slices 

THREE YEARS AGO: White Chocolate Macadamia Nut Cookies

FOUR YEARS AGO: Cilantro-Jalapeno “Hummus”

FIVE YEARS AGO: A Moving Odyssey

EIGHT YEARS AGO:
 Shrimp Moqueca

SaveSave

TWO UNUSUAL TAKES ON ROASTED VEGGIES

I guess it is the season to turn the oven on at high temperatures and help the house stay warm. Do I like this weather? What do you think? I despise it. BUT, I do love roasted veggies, so I try to concentrate on that instead of the fact that someone decided to make repairs in the heating system of our building and the labs were freezing from Christmas break all the way through the first week of January.  I could see my breath while working, and confess to snapping at a couple of colleagues who had the nerve of greeting me with a  “Good morning, Sally.”  Anyway, I digress. Roasted veggies are a beautiful thing, and today I share two recipes, both delicious, but the second one, the second one blew my little mind away! I kept munching on those little morsels of deliciousness and beating myself for never trying them before.  Without further ado, Roasted Pears and Parsnips and…. drum roll… drum roll increasing…. drum roll at maximum blast:  Roasted Radishes. Now, do not leave. Do not. Even if you hate radishes with all your being. Trust me. You need to roast them. You just do.

roasted-parsnips-and-pears

ROASTED PEARS AND PARSNIPS
(adapted from Fine Cooking magazine)

1-1/2 lb. parsnips cut into 1-inch pieces
2 firm pears, cored and cut into 1-inch pieces
2 Tbs.  olive oil
1/2 tsp. smoked paprika
1/2 teaspoon salt
1 Tbs. white balsamic vinegar (or regular balsamic)
1 tsp Herbes de Provence

Heat oven to 425 F.

Toss the parsnips and pears with the oil, paprika, and 1-1/2 tsp. salt.

Roast the vegetables in the oven until tender and browned, about 25 minutes. Toss with the vinegar and Herbes the Provence. Adjust seasoning and serve. 

ENJOY!

to print the recipe, click here

Comments: As I was composing this post, I noticed a new blog entry by my dear friend Maureen, from Orgasmic Chef. She professed her love for Jacques Pepin (we are twin sisters, obviously) and included a short video with our guru talking about what constitutes a recipe, and how we should never follow it blindly. So many variables at play, if you follow a recipe without being aware of its ultimate goal (taste great), you might be doomed for failure. I strongly suggest you visit her post and watch the short video.

These roasted parsnips and pears are a perfect example of Pepin’s wise lesson.  First of all, I think of all fruits, pears might be the most finicky to cook with. So many different kinds, if the recipe doesn’t specify which one to use, you could already be set for trouble. Plus, even if a specific type is called for, its level of ripeness will have a huge impact on the outcome. In my first time making this dish, I used regular white pears with light green skin. They were ripe, not overly so, but definitely ripe. What happened is that they were a bit too soft once the parsnips were perfectly cooked. The taste was superb, but had I thought more carefully about it, I would have added the pears a mere 10 minutes before serving time. On my next attempt, I intend to use Bosc pears and roast them from the beginning with the parsnips. They are very sturdy and will stand better to the oven. But don’t let this small detail prevent you from making this unusual veggie roast. It turned out spectacular, paired very well with a juicy, medium-rare standing rib roast, lovingly prepared by my perfect match.

dinner-served

And now, let’s talk radishes, shall we? Let’s suppose when you see a bag of radishes you look the other way, and your lips pucker a little just thinking of how harsh they are. Do not let that prevent you from making this. Talk about a full transformation by heat, that’s what it is. Magic in radish form.

roasted-radishes

ROASTED RADISHES
(from the Bewitching Kitchen)

1 bag of radishes (or any amount to serve two)
olive oil to coat
1/2 teaspoon smoked paprika
salt and pepper
water
squirt of lemon juice

Heat the oven to 400F.

Cut each radish in half, if you have very large ones in the bag, quarter them.  Place in a bowl and drizzle olive oil to coat them. Season with paprika, salt and pepper.

Place as a single layer on a baking dish, add about one tablespoon of water, cover the baking sheet with aluminum foil. Place in the oven and roast, covered for 20 minutes. Remove the foil and roast for 15 to 20 minutes more, moving them around occasionally, until fully tender and starting to get golden brown.  Squirt lemon juice right before serving, not too much, just a light drizzle.

ENJOY!

to print the recipe, click here

Comments: I own several cookbooks that include recipes for braised radishes.  I promptly ignored them all. Who would braise a radish, I kept asking myself? Radishes are supposed to be enjoyed raw. Thin slices over baguette smeared with the best possible quality butter, seasoned with salt flakes. That is the way it’s done. So, why did I finally roast these babies? I was browsing a forum on ketogenic recipes, and people were going nuts about them. Granted, it was a more substantial version, one that goes around the net as “Loaded Radishes.”  It is radishes plus olive oil plus butter plus cheese plus bacon. I kid you not. I was not that interested in the super high fat content, but what intrigued me was that every single person who made it compared the radishes to potatoes in taste. Gone was the sharp, almost bitter taste that makes radish… a radish!  I had to find out if they were onto something, so I more or less used the steam-roasted method of my recent past, and came up with this recipe. It is absolutely delicious, and yes, think about very light potatoes, and you’ll be on the right taste path. Of course, braised radishes will be on our menu very soon. I just know I’ll fall in love with them too…

Note to self: a mind open is a beautiful mind.

two-takes-on-roasted-veggies-from-bewitching-kitchen

Add to FacebookAdd to DiggAdd to Del.icio.usAdd to StumbleuponAdd to RedditAdd to BlinklistAdd to TwitterAdd to TechnoratiAdd to Yahoo BuzzAdd to Newsvine

ONE YEAR AGO: Kadoo Boranee: Butternut Squash Perfection

TWO YEARS AGO: Creamy Broccoli Soup with Toasted Almonds

THREE YEARS AGO:
 Fennel and Cheddar Cheese Crackers

FOUR YEARS AGO: A Festive Pomegranate Dessert

FIVE YEARS AGO: My First Award!

SIX YEARS AGO: A Message from WordPress

SEVEN YEARS AGO: Turkish Chicken Kebabs

ARE YOU AFRAID OF CELERY ROOT?

If I had to choose a word to define my childhood and even teenage years, fear would be it. To name a few of my fears: darkness, sleeping alone, mirrors, clowns, dolls, sleepovers,  odd numbers (don’t ask), heights, cockroaches. There were many more, but let’s keep it simple, shall we? Glad to report that just as my pickiness to eat, those fears are a thing of the past. Except heights and cockroaches. The former I still try to work on, cockroaches are out of question. I am talking about the tropical kind, with their scary dimensions and uncanny ability to fly across a room. I shiver just to think about them. Growing up, I don’t remember ever seeing  celery root in our home, but being the easily scared self I was,  I bet I would be afraid of it too. It does look like a large potato under the spell of black magic. Something that belongs in the setting of Hansel and Gretel’s tale (which as a matter of fact gave me nightmares for months after reading it as a child).

ingredients
But, don’t let celery root (aka celeriac) looks prevent you from enjoying it. Under that harsh appearance, lies a beautiful white entity, with a flavor vaguely reminiscent of celery, but much more complex.  Yes, it is a bit hard to peel, and if you are not careful a finger or two could be hurt in the process, but keep calm, peel on, and make soup before the weather gets too hot.  Too hot. What a silly statement. Sorry, sometimes I make no sense.

Parsnip&CeleriacSoupCELERIAC AND PARSNIP SOUP WITH TOASTED COCONUT
(from the Bewitching Kitchen)

1 tablespoon olive oil
1 medium celery rib, diced
1 shallot, minced
1 large celeriac, peeled and cut in chunks
3 to 4 medium-sized parsnips, peeled and cut in chunks
salt and black pepper
dash of nutmeg
4 cups water
lemon juice to taste

Heat the olive oil in a pan large enough to accommodate all ingredients. Sautee the shallot with the celery until fragrant and shallots become translucent. Season lightly with salt and pepper.  Add the pieces of parsnips and celeriac, saute for a few minutes, moving them around.

Add water, making sure it cover the veggies. Bring to a boil, cook until parsnips and celeriac pieces are tender, 20 to 30 minutes. Transfer the veggies with some of the water to a blender or food processor, blend until smooth. You might need to do it in two batches, being careful while processing hot liquids (using a blender keep the lid open and cover the top with a kitchen cloth).  Use only enough water to get the consistency you like.

Return the processed soup to the pan on low heat, adjust consistency with the reserved water if needed. Season with nutmeg, add a squeeze of lemon juice, taste and adjust seasoning.

Serve with coconut flakes (unsweetened) sautéed in olive oil or butter, lightly seasoned with salt, or with any other topping you like.

ENJOY!

to print the recipe, click here

composite
This was a delicious soup, the lemon juice at the end does that citric magic I am very fond of. If I had a dollar bill for every time I use lemon juice in my cooking, I’d be rich. You can make this soup a bit more luscious adding a touch of cream if you want, or using chicken stock instead of water, but I often like to keep things simple and let the flavor of the veggies take the spotlight.  I am not quite sure about the nutmeg. I love nutmeg with cauliflower and in bechamel sauce, but I might omit it in this soup next time. Maybe I used too heavy a hand, I thought the flavor was a bit too strong. Anyway, if you make it, go easy with it and taste it.

Before I say goodbye, here is a small collection of recipes to help you lose any residual fear of celery root… just in case you need it  😉

SWEET AND SOUR CELERIAC SEPHARDIC STYLE, from Tasty Eats

CELERY ROOT, APPLE AND WALNUT SALAD from Cooking and Traveling in Italy and Beyond

CELERY ROOT LETTUCE WRAPS from The Wimpy Vegetarian

CELERY ROOT REMOULADE, from Kitchen Riffs

FRENCH LENTILS WITH CARAMELIZED CELERY ROOT, from Martha Stewart

POACHED EGGS OVER CELERY ROOT LATKES, from Fresh Start

POTATO AND CELERY ROOT ROSTI, from Martha Stewart

I hope you enjoyed this small tour on celeriac possibilities, and if you are a celeriac virgin, you will give it a try in the near future. Nothing to fear, I promise!

**********************************************************************************

ONE YEAR AGO: Prime Rib Roast, Mexican Style

TWO YEARS AGO: Sourdough Bread with Walnuts and Dates

THREE YEARS AGO: Braised Brisket with Bourbon-Apricot Glaze

FOUR YEARS AGO: The Real Vodka Sauce

FIVE YEARS AGO: Pork Tenderloin and Blue Cheese


ORANGE POMEGRANATE CHICKEN: A WORK IN PROGRESS

This recipe, from a recent compilation in Fine Cooking called “One Pot Meals”, went from the page to a pot in the blink of an eye.  It called for all kinds of goodies that I love: chicken, root veggies, pomegranate and the perfect spices to tie them together.  The glaze roasted into a sexy ruby color, and the skin of the chicken will make anyone smile.  So, why is it a work in progress, you might ask?   Read on….

ORANGE POMEGRANATE CHICKEN
(adapted from Fine Cooking magazine)

1 large orange, zested and juiced
1 cup pomegranate juice
1-1/2 tsp dried thyme leaves
1/8 tsp. ground cinnamon
Freshly ground black pepper
6 tsp. olive oil
Kosher salt
3/4 cup chicken broth
2 sweet potatoes, peeled and cut into 1-inch pieces
2 medium parsnips, peeled and sliced 1/4 inch thick
2 leeks, white part only, cut in 1/4 inch slices
4-lb. chicken, cut into 8 serving pieces
1 cup coarsely chopped walnuts

Heat the oven to 400°F.

In a medium saucepan, Combine the orange juice and pomegranate juice in a saucepan, bring to a boil and reduce it to 1/4 cup (about 20 minutes). Add half of the thyme (eye balling is fine), all the cinnamon, and black pepper (about 1/4 tsp or according to your taste). Divide the mixture between two small bowls. To one bowl add 2 tsp. of the oil and 1/2 tsp. salt. To the other add the chicken broth, all but 1 tsp. of the orange zest, and 1/4 tsp. salt.

Scatter the sweet potatoes, parsnips, and leeks over the bottom of a dish that measures about 10 x 15 x 2 inches. Toss with the remaining 4 tsp. of oil and the rest of the thyme.  Arrange the chicken pieces, skin side up, on top of the vegetables and brush with all of the juice-oil mixture. Roast for 30 minutes.

Remove the pan from the oven and reduce the temperature to 375°F. Pour the reduced pomegranate-chicken broth mixture around the chicken pieces and scatter the walnuts around them.  Return the pan to the oven and roast until the vegetables are tender and an instant-read thermometer registers 165°F in several pieces of chicken, 20 to 30 minutes.

Transfer the chicken to a serving dish.  Remove the veggies and walnuts with a slotted spoon, season them lightly with salt, sprinkle the remaining orange zest all over the meat and veggies. Pour the liquid from the roasting pan in a pyrex type container, remove as much fat as possible.  Season the sauce to taste with salt and pepper and pour into a pitcher to serve with the food.

ENJOY!

to print the recipe, click here


Comments:  Make sure you use pure pomegranate juice (yes, it is expensive compared to blends, but  worth it in this case, because you will concentrate it quite a bit).  I’d love to give this recipe two thumbs all the way up, but it had some problems.  Many of the pieces of sweet potatoes and parsnips were not completely cooked: their centers were still hard.  I tested some with a fork before removing from the oven, but as Murphy’s Law would have it, those were perfect… (sigh).  Next time I’ll cover the dish with foil during the first 30 minutes, then pour the liquid all over it and roast it uncovered, perhaps adding a little more water if the veggies dry up during the final roasting.  I suspect that with this minor change it will be a winner.

One pot meals are such life-savers for a busy cook, and this recipe, apart from reducing the pomegranate/orange juice, doesn’t require much work. Even better, the reduction could be made a couple of days in advance.  With a nice loaf of bread or a green salad, dinner is ready!

ONE YEAR AGO: A Message from WordPress

TWO YEARS AGO: Turkish Chicken Kebabs

Add to FacebookAdd to DiggAdd to Del.icio.usAdd to StumbleuponAdd to RedditAdd to BlinklistAdd to TwitterAdd to TechnoratiAdd to Yahoo BuzzAdd to Newsvine