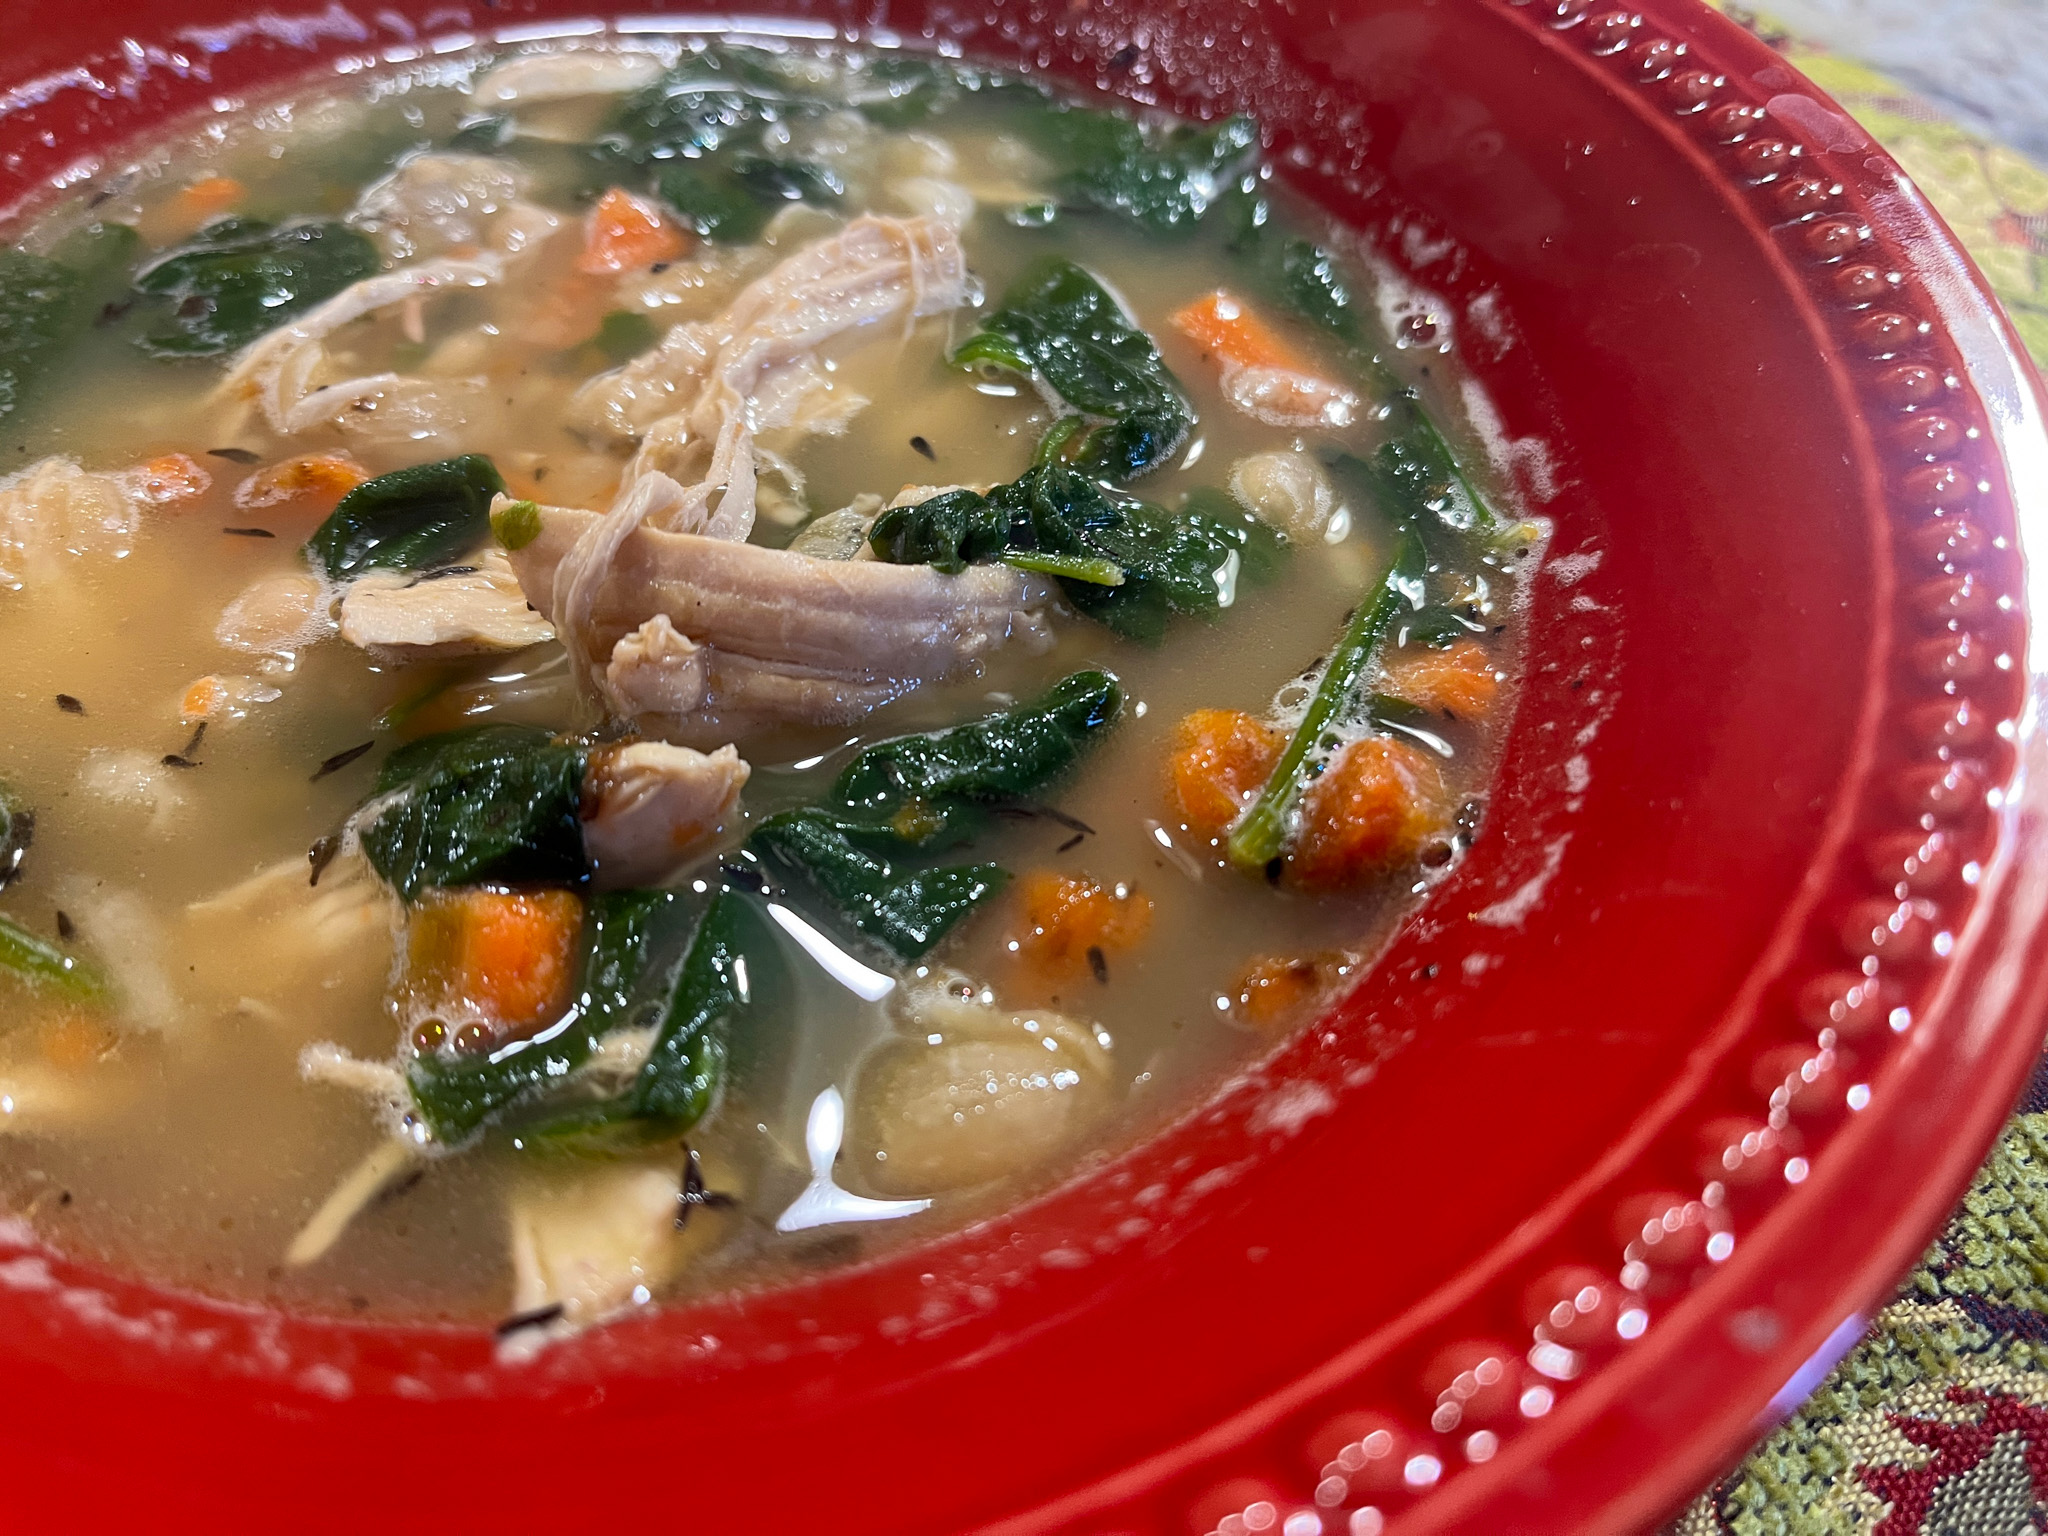
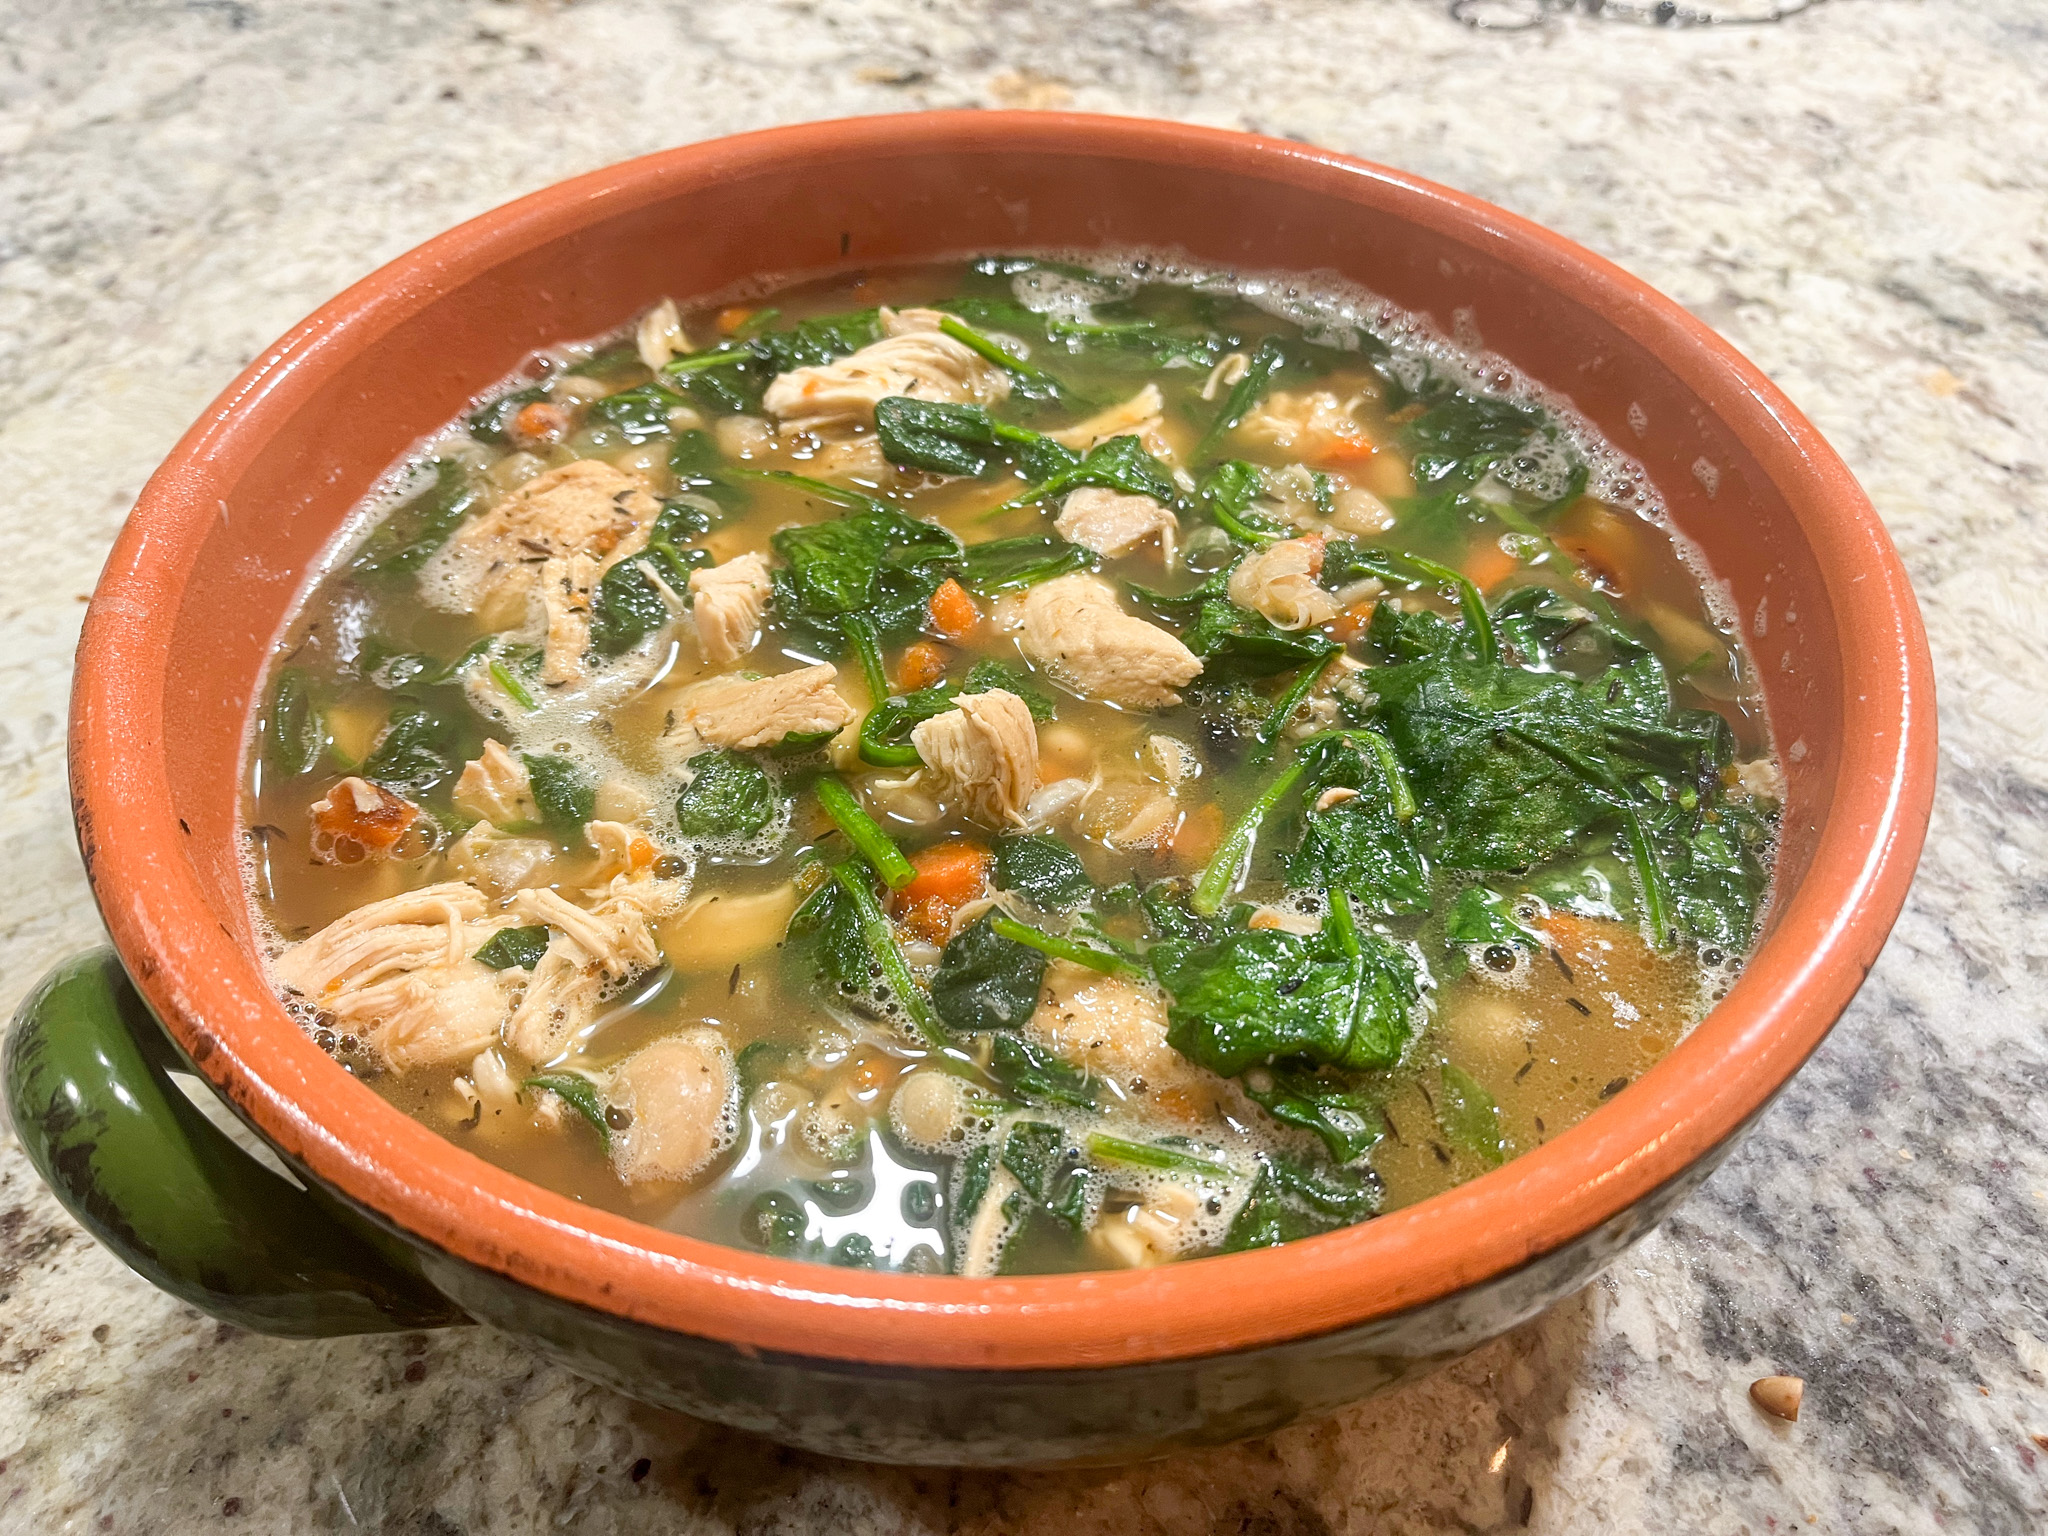
One more example of a recipe in which looks do not do it justice… This was so delicious, it goes into our regular rotation, although the weather for this type of meal is coming to an end. Comfort food without being overly heavy. Please give it a try, you won’t be disappointed.
1 tablespoons unsalted butter 2 tablespoons olive oil 1 shallot, finely chopped 2 sage sprigs Salt and black pepper 1 pound boneless, skinless chicken breasts 4 cups chicken broth 1 (15-ounce) can white beans, drained 1 bunch spinach leaves, coarsely chopped fresh lemon juice to taste, for serving
In a large pot or Dutch oven, melt the butter and olive oil medium. When foaming, add the shallot and sage, season with salt and pepper. Cook, stirring often, until softened and golden. Remove the sage sprigs.
Add the chicken, broth and white beans. Bring to a simmer over medium heat, then reduce heat to low, cover the pot and simmer until the chicken is cooked through, 15 to 20 minutes, depending on the thickness of the meat.
Transfer the chicken to a bowl and smash some of the beans on the side of the pot. Stir the greens into the soup. Increase heat to medium and simmer, uncovered, while you shred the chicken. Use two forks to shred the chicken. Stir the chicken back in the soup and season to taste with salt and pepper, squirt the lemon juice right before serving.
Comments: I love the way smashing the beans will give this stew a creamy, luscious texture, without any need to add heavy cream. I was pleasantly surprised by how much we enjoyed it, because it is such a simple preparation. You can use kale or other hearty greens instead of spinach, and add more beans, but I lightened it up a bit from the original. Leftovers are superb even after two days in the fridge. When I had the leftovers, I added a bit of harissa to my bowl, and that was a pretty nice touch, consider incorporating it into the recipe if you like some extra spice. Because, yes… some like it hot (wink, wink).
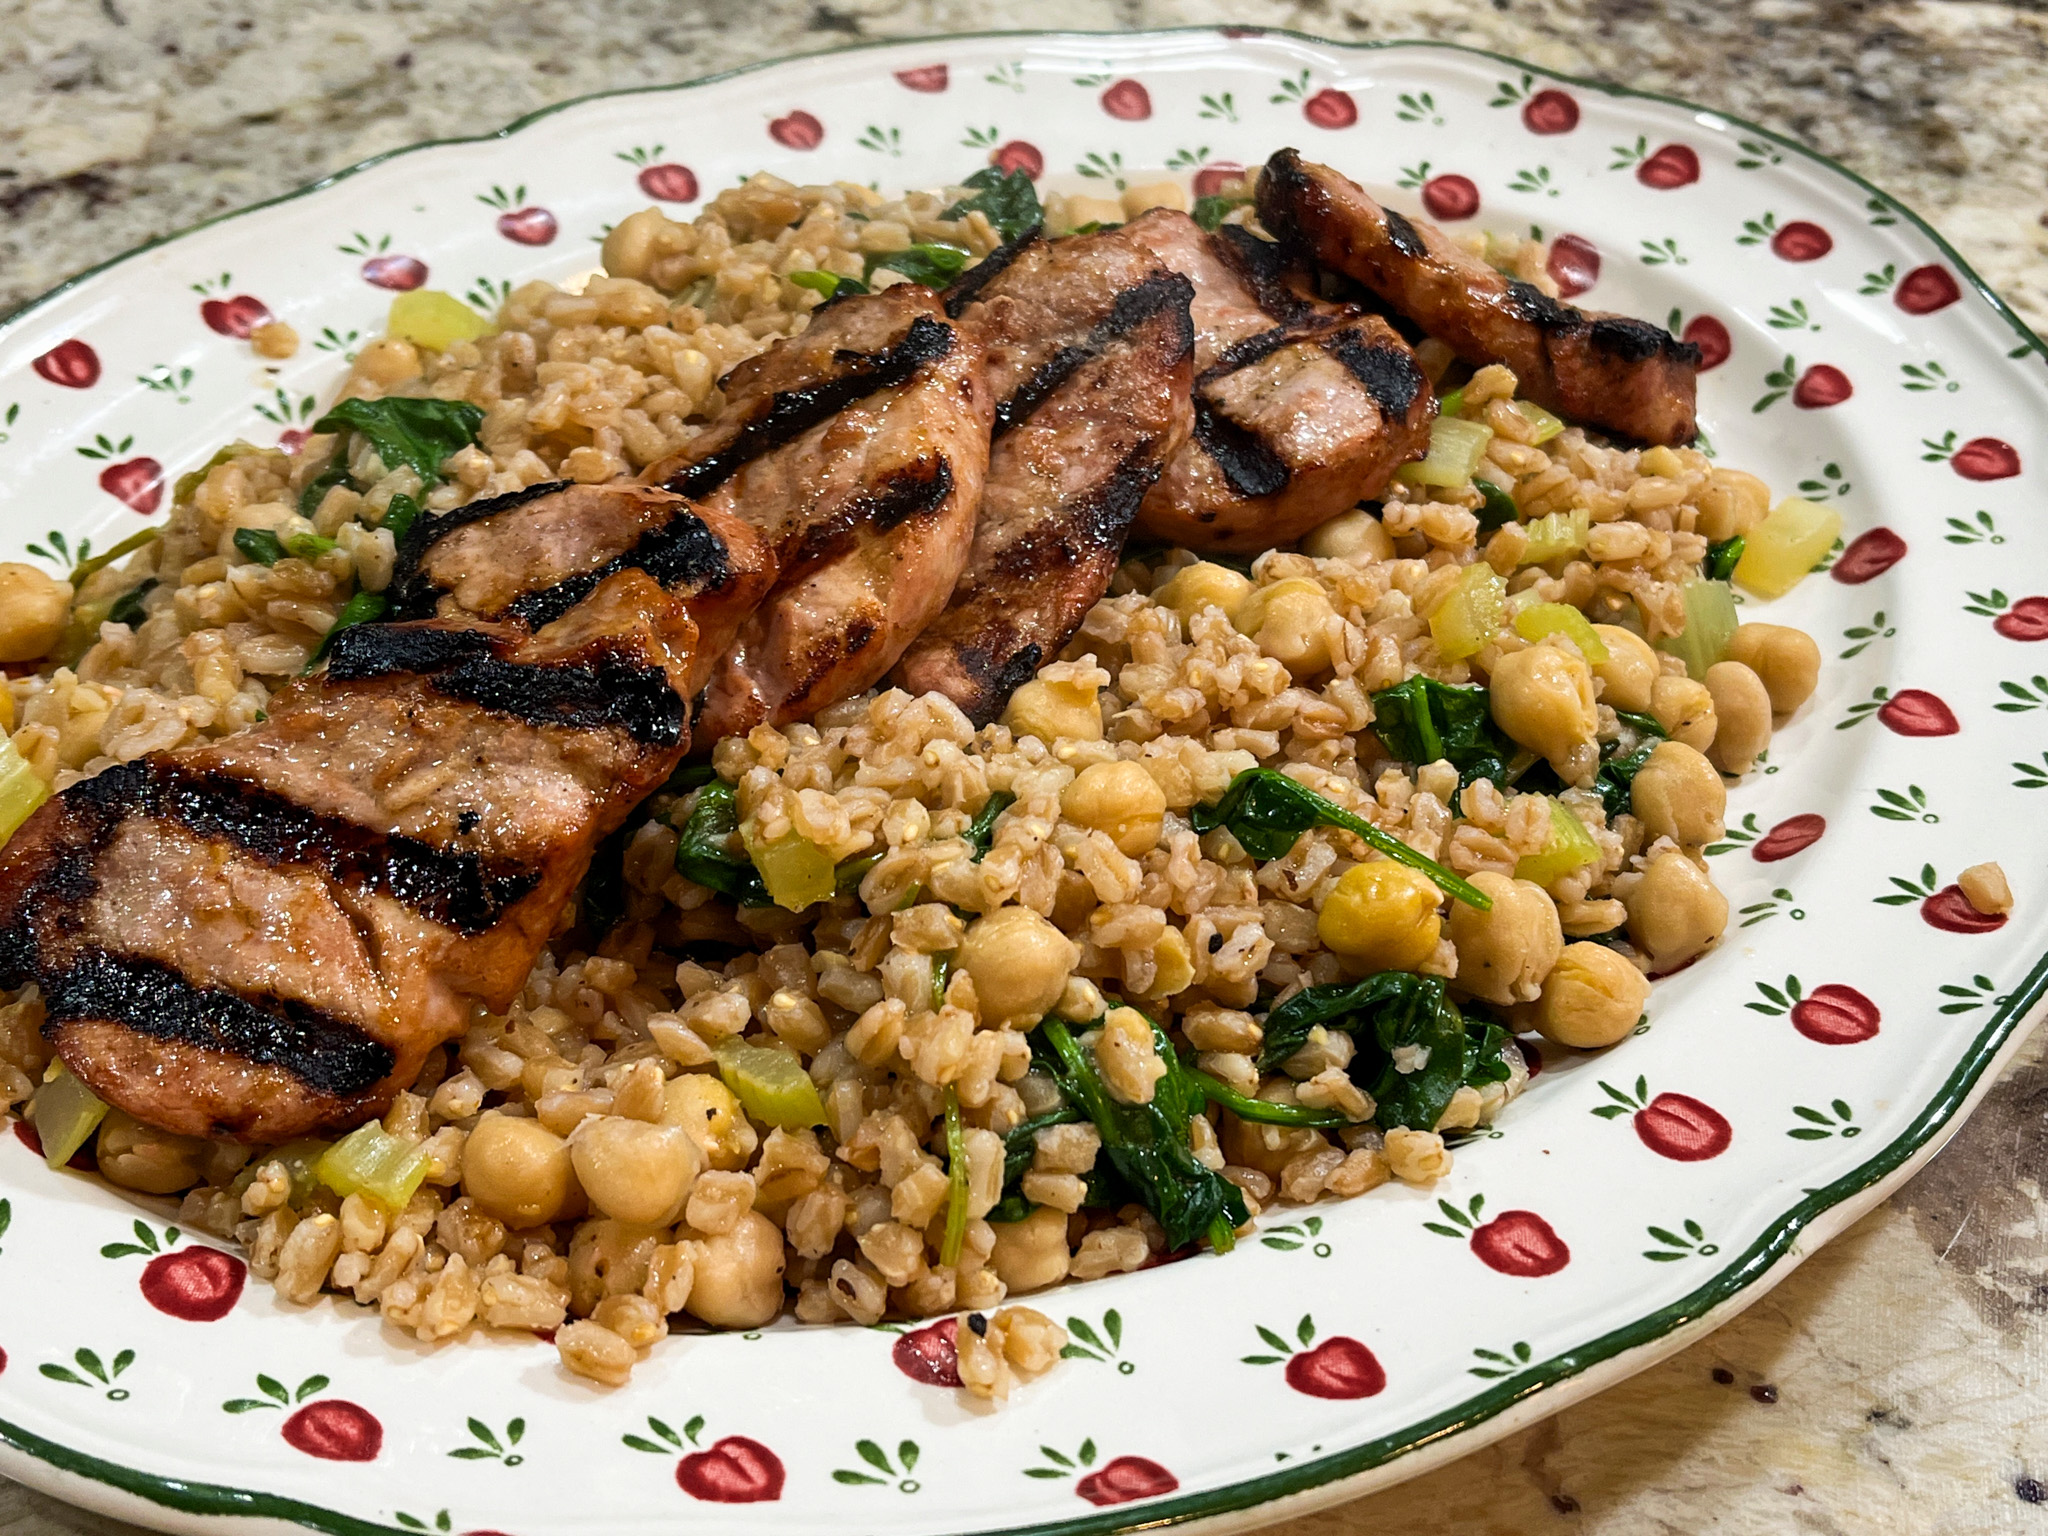
Lovers of farro, rejoice! This is a hearty side dish that might even be enough for a fully vegetarian meal and also perfect for entertaining. We enjoyed it with grilled pork tenderloin and it was a great midweek dinner.
FARRO WITH CHICKPEAS AND SPINACH (from The Bewitching Kitchen)
1.5 cups farro 2 celery sticks, sliced 1/4 inch thick 1 shallot, diced 2 tablespoons olive oil ½ teaspoon table salt 2 tsp za’atar 1 (15-ounce) can chickpeas, rinsed 1/2 cup vegetable broth 1/2 cup water 4 cups baby spinach, coarsely chopped lemon juice to taste
Cook the farro in a large volume of salted water until it starts to get soft, about 20 minutes. Drain, and reserve.
Heat the olive oil in a large saucepan, add celery and shallots, cook until fragrant. Add a little salt, za’atar, sauté everything together for a couple of minutes, stirring often. Add the reserved cooked farro, chickpeas, vegetable broth and water, season with salt, bring to a gentle boil. Reduce the heat and cook until farro is tender, about 15 minutes. If there is too much liquid left, allow it to simmer for a few more minutes. Add the spinach, adjust seasoning with more salt if needed, and right before serving, add the lemon juice. Fluff with a fork and serve.
Comments: Farro takes a bit of time to cook and also I find that each new bag might behave differently. Also make sure that for this preparation you don’t buy a quick cooking version, although if might work if you simply skip the pre-cooking step. Keep in mind I have not tried it with the quick cooking kind. I normally cook farro as I cook pasta, plenty of water, then test a few grains and stop cooking when ready. In this case, I make sure it is still al dente as it will cook with everything else for 15 more minutes. If you are interested in the pork tenderloin, it is almost a non-recipe. I eye-ball a marinade whisking olive oil, soy sauce (I actually used tamari in this one), lemon juice, honey, a touch of mustard. Cut the pieces, marinade whole day in the fridge. Grill the pieces about 12 minutes total, seasoning with a little salt right before grilling. I do it all the time, sometimes with butterflied tenderloin.
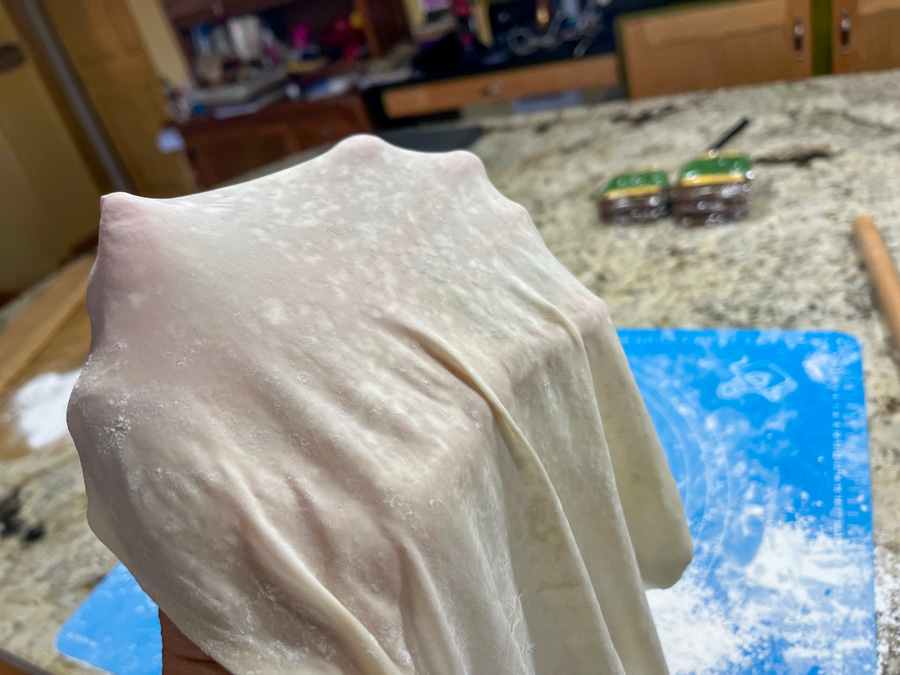
Have I totally lost my mind? No, not answering that. It turns out that I’ve always wanted to try making phyllo from scratch. When I was preparing for the Great American Baking Show, I had this annoying suspicion that it could be a technical challenge, but once you get accepted there is absolutely NO WAY to try to bake anything apart from the required, known bakes (signature and showstopper for every single episode). So I put it on the back burner ever since. But my friend Caro sent me the perfect rolling pin for the job, and it was the little nudge I needed. I tell you one thing, making phyllo is not for sissies. But I managed to have quite a bit of fun that weekend…
353 grams all purpose flour (3 cups) 1 teaspoon kosher salt 1 teaspoon baking powder 1 tablespoon olive oil 2 teaspoons white distilled vinegar 3/4 cup – 15 tablespoons warm water corn starch – to roll out and dust the dough
Make the dough by adding all ingredients and HALF the amount of water to a KitchenAid type mixer fitted with the dough hook.
Knead for a few minutes, then start adding the other half volume of the water, tablespoon by tablespoon until the dough starts to clean the sides of the bowl. Once a smooth dough forms, remove it from the machine, knead it by hand for a couple of minutes, form a smooth ball and place in a large oiled bowl for one hour.
Divide the dough into 20 equal pieces (mine were 28g each). Place each little ball over a parchment covered baking sheet. Leave for one hour at room temperature.
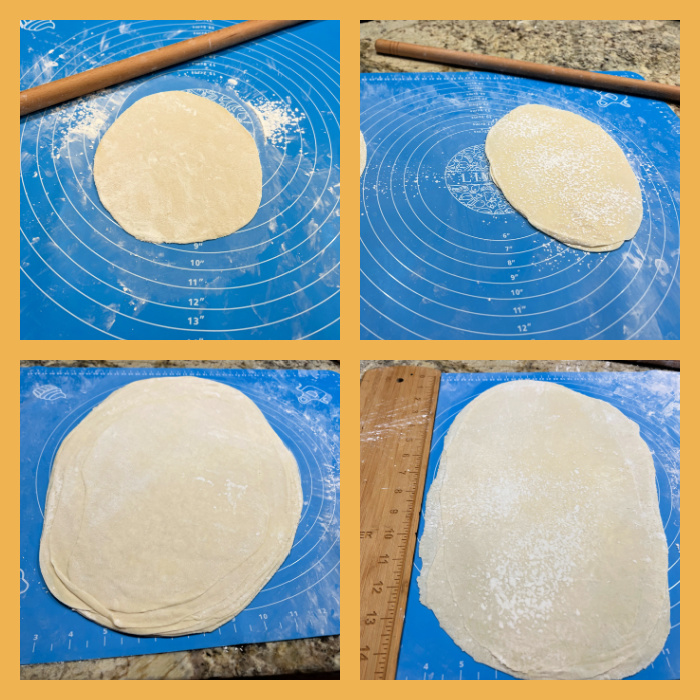
Start working the dough, first one little ball at a time, following her instructions on the video. My main change was to work with FOUR sheets at a time instead of TEN. I had too much trouble keeping them easier to separate, and decided ten was just too much for a first time. Four sheets at a time worked very nicely. That required 5 full cycles of rolling out to work on all 20 balls of dough. Another change I did was to separate each two sheets of phyllo fully rolled out with parchment paper, because I was afraid keeping them all together would result in severe sticking. I kept them in the fridge for a couple of hours before proceeding with the spanakopita and the crackers.
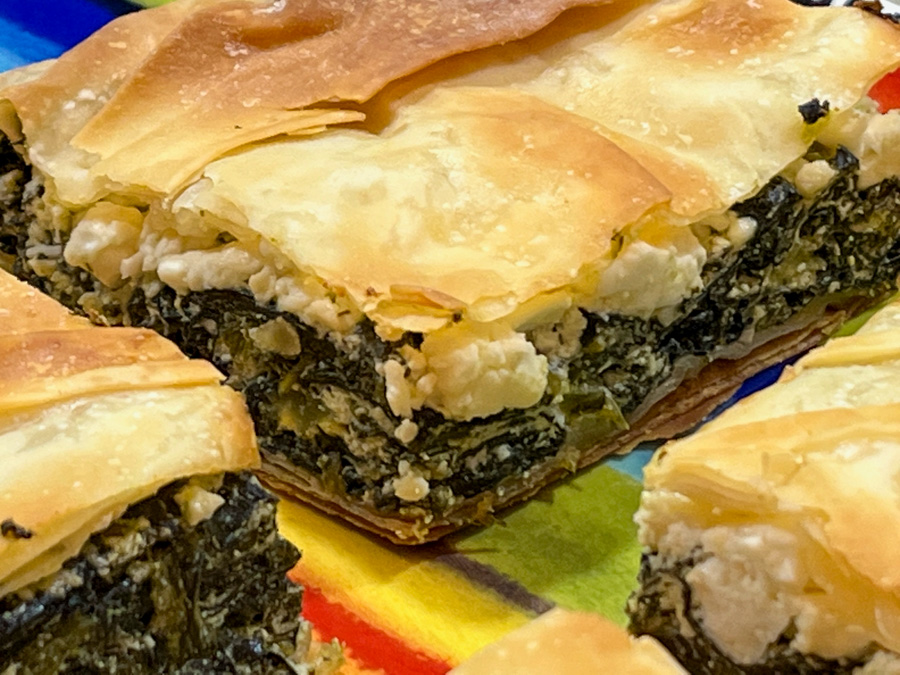
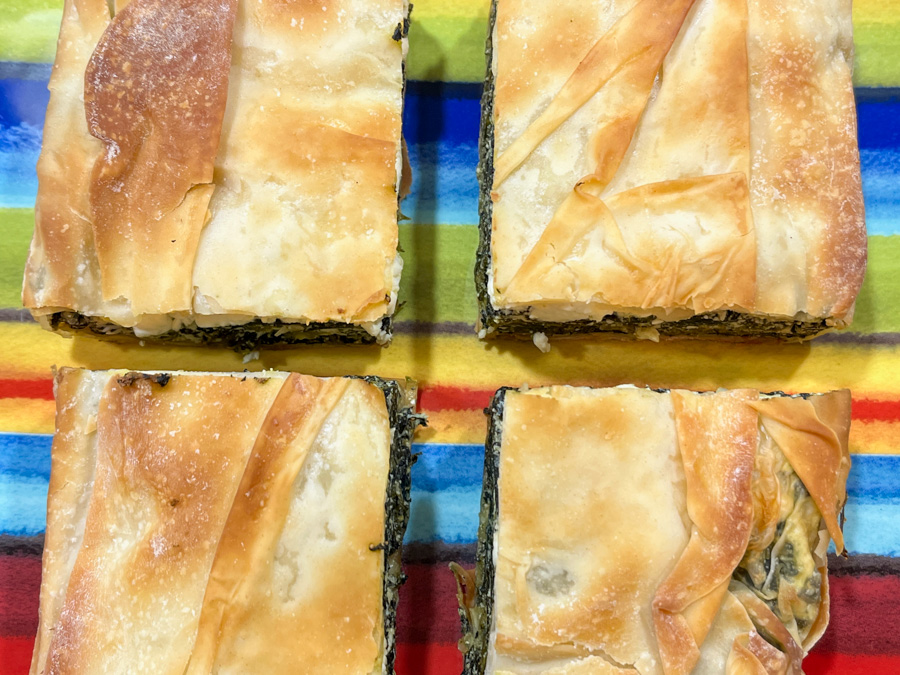
SPANAKOPITA (adapted from several sources)
8 sheets of phyllo dough (if using commercial you probably get by with 6) 500 g spinach (preferably not baby spinach) 1 tablespoon olive oil 2 ribs of celery, finely diced 1 shallot, finely diced salt and pepper to taste nutmeg to taste 200 g full-fat ricotta cheese 100 g feta cheese, crumbled in large pieces 1 egg, beaten olive oil spray
Boil water in a very large pan, add the spinach and press it down with a wooden spoon until the leaves wilt, 30 seconds or less. Drain into a large colander and place under running cold water to cool quickly. Drain well – squeeze out any excess water by pressing the spinach down with the wooden spoon, then squeezing with your hands. Using kitchen paper, pat the spinach dry into a compact shape, lay it on a board and roughly chop, then set aside.
Heat the olive oil in a large non-stick frying pan. Add the shallot, celery, and fry over a high-ish heat for 3-4 mins, stirring often, until softened and just starting to brown. Lower the heat, add the chopped spinach and stir for a few minutes to finish drying. Season with salt, pepper and nutmeg, and leave to cool.
Heat oven to 375F and put a baking sheet in to heat up. In a bowl, stir the ricotta into the beaten egg and season with pepper and a pinch of salt.
Lightly oil an 8 inch square baking pan. Lay one or two filo pastry sheets over the pan, spray with olive oil, and att two more, leaving a nice overhang on all sides. The pan should be completely covered, with a pastry overhang all round. Repeat the criss-cross layering with 2 more oiled filo sheets.
Stir the ricotta mixture into the spinach, then crumble in the feta. Lightly stir it in so you leave a few chunky pieces. Spoon this filling into the pan and level it. Bring the pastry sides up and over the filling, then brush a little oil over them. Add one or two more sheets sprayed with olive oil to top the spanakopita.
Bake for 30 to 35 mins until the pastry is crisp and golden. Leave to cool for 10-15 mins. Carefully remove from the pan, slice and serve.
Comments: The most “traditional” way to roll out phyllo is going for a very large and thin sheet, patiently rolling and stretching the dough over a lightly floured cloth. I watched videos, read articles, and decided to go for a ‘beginner’s friendly” method, in which you divide the dough in small pieces and roll them thin, but to a smaller final size. The other change is that the sheets are stacked as you roll. The video advised to stack 10 sheets but I could not make it work. I went for 4 sheets at a time, and rolled them to 9 x 13 inches. Don’t expect to get phyllo as thin as the one you can buy at the store, particularly not on your first time. But I was pretty happy with the overall outcome. Very rewarding!
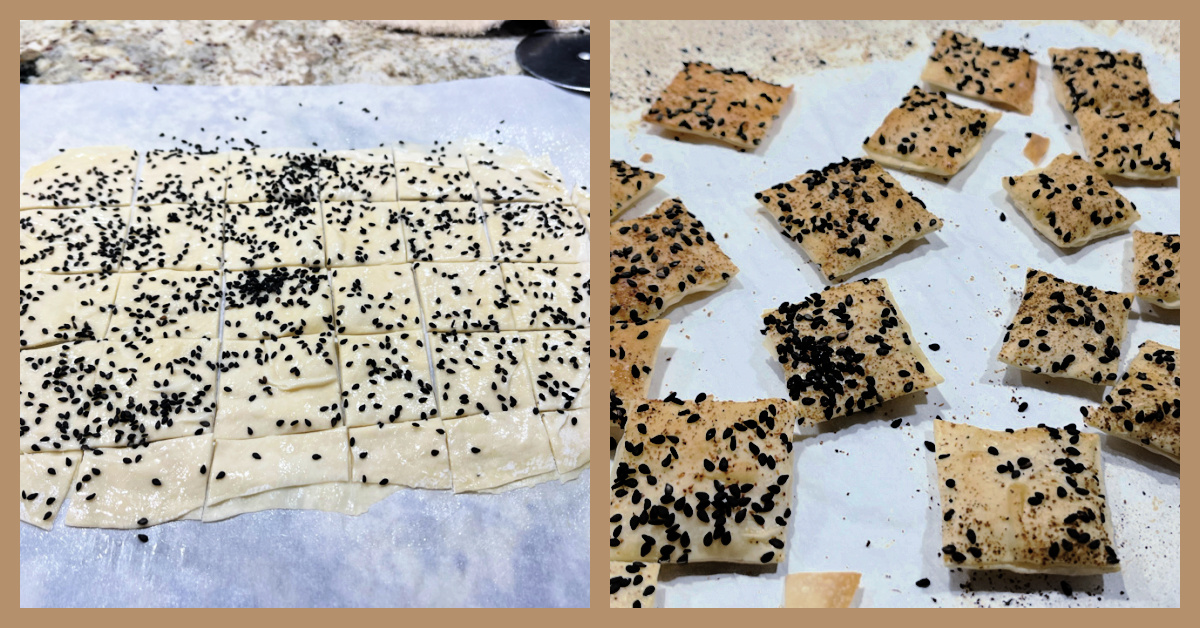
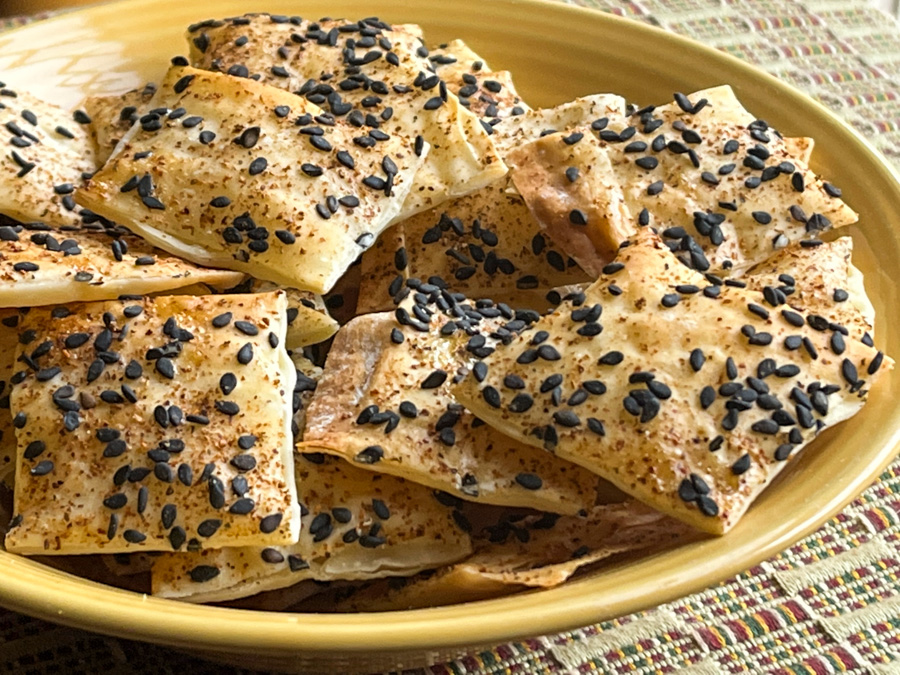
I also made crackers, using 4 of my precious sheets of home-made phyllo… Super simple. Stack the four sheets with a good spray of olive oil over each one. When you place the last sheet on top, brush some beaten egg white and add the toppings of your choice, so they will glue to the phyllo. I used black sesame seeds and Southwest spice from Penzey’s. Cut with a pizza roller and bake.
The crackers were absolutely delicious, and hubby thought I was a genius, crackers worth it of a Paul Hollywood handshake (allow me to dream, as I totally missed my chance, will you?)
I cannot lie to you, making phyllo from scratch is quite involved. I’ve found cornstarch in amazing places over the next couple of days. Things got wild, my friends… But how else can you have spanakopita made TOTALLY from scratch?
Caro, thanks so much for the thoughtful gift! I intend to make phyllo again, might even try the traditional approach and get a table cleared for the next adventure…
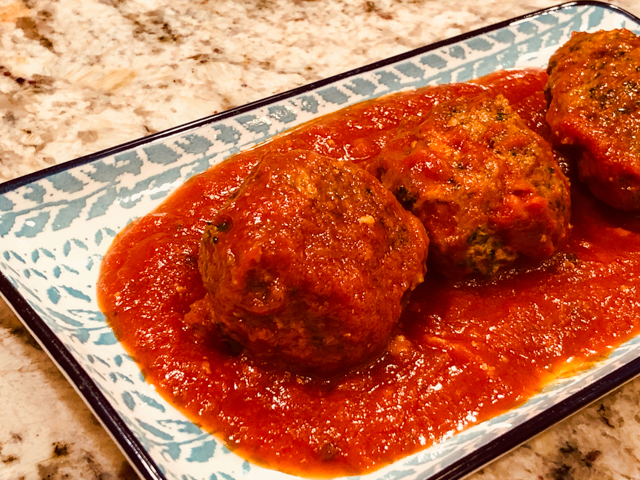
A considerably lighter version of the traditional Italian meatballs, this one takes ground turkey, almond flour and is baked instead of fried. The addition of dates in the meatballs and Middle Eastern spices in the sauce move it even farther away from Italy, but I promise you, it’s very good. You just need a light hand dealing with them, they are very delicate.
TURKEY-SPINACH MEATBALLS WITH CARDAMON TOMATO SAUCE (from the Bewitching Kitchen, inspired by many sources)
for the meatballs:
2 tbsp olive oil
1 bag (4oz) baby spinach
¼ cup dates, coarsely chopped
1 lb ground turkey (preferably dark meat)
1 egg
1/2 cup almond flour
ground nutmeg, salt and pepper to taste
for the tomato sauce:
2 tablespoons grape seed oil
6 cardamom pods
2 dried bay leaves
1 cinnamon stick
1/4 tsp ground coriander (I used whole the first time, but ground works better here)
1 bottle or can of tomato passata (about 15 ounces)
1 teaspoons ground Kashmiri chiles (or any pepper of your choice)
salt and pepper to taste
Make the meatballs. Heat the oven to 350°F. Line a baking sheet with parchment paper. In a large, 12-inch skillet, warm the olive oil over low heat. Add the spinach and dates, sprinkle a touch of salt, and cook until the leaves begin to wilt, about 1 minute. Transfer the mixture to the food processor and run it a few times to chop a little. Add the ground turkey to the processor, the egg, almond flour and the seasonings. Pulse until everything is starting to get combined, but do not let it turn into a homogeneous paste.
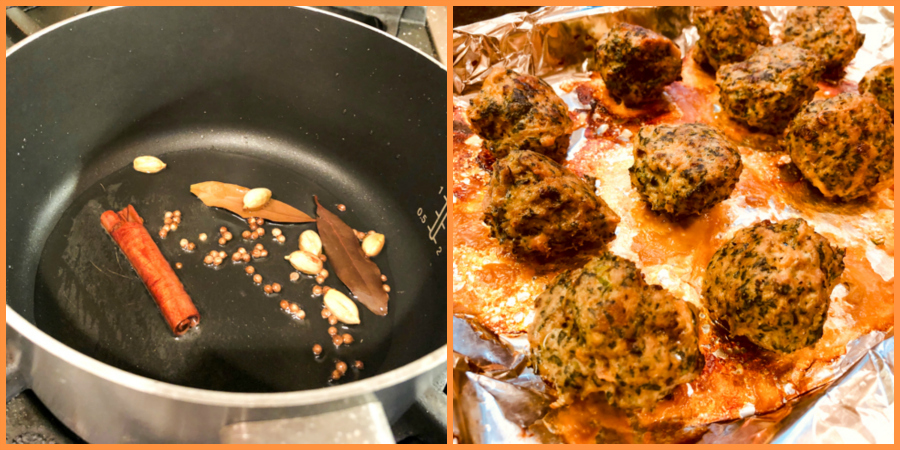
Form the mixture into little balls, keep them reasonably small (about 1.5 in) otherwise they might crumble too much. Place them in the prepared baking sheet and bake for 25 minutes, turning them over half-way into baking time.
Make the tomato sauce. Heat the oil in a small saucepan over medium heat. Sprinkle in the cardamom pods, bay leaves, and cinnamon sticks, and let them get very fragrant, about 1 minute. Carefully pour in the tomato passata. Add the Kashmiri chile, salt, pepper, and stir to blend. Simmer gently on low heat for 20 minutes. Discard the cardamon, bay, and cinnamon sticks.
When the meatballs are ready, place them in the warm sauce and gently simmer everything together for 10 minutes. Keep the heat very low. Serve with your favorite pasta or grain.
Comments: Kashmiri chile is a recent passion of mine. It has a special kind of heat that I like quite a bit, and it gives the food a beautiful red color, deeper than you would get from adding cayenne. I’ve been using it quite often and in this Middle Eastern-inspired sauce it does a beautiful job. I made this sauce twice since preparing this recipe, it is great as a milder substitute for the classic shakshuka, and if you add a bit of fresh orange zest right before serving you will be a happy camper. Passata is my favorite starting point, we have a very nice Italian brand available in town, but any type of crushed tomatoes will do. As to the turkey meatballs, feel free to start the recipe by sauteing onions and garlic before adding the spinach to the skillet. We omit those for food sensitivities but your kitchen, your rules!
The meatballs are super tender, moist, and with just a touch of sweetness from the dates.
Staying safe in Corona virus time: read the guest blog post by Phillip Klebba here. A video summarizing important tips can be found here.
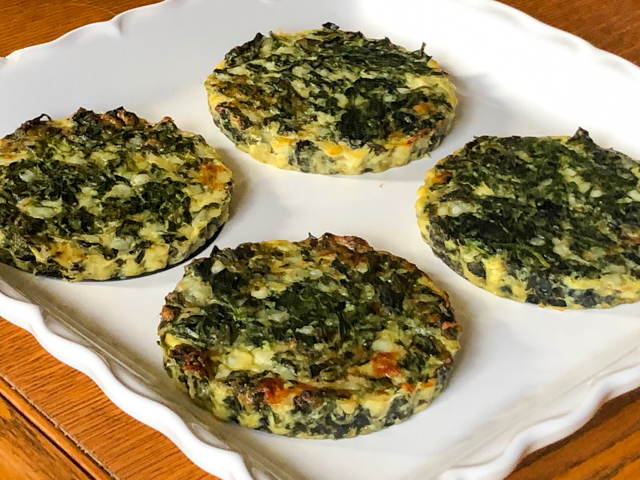
SPINACH PIES… Please, do not run away from me, I cannot take it. Times are stressful, I need your company. Hate spinach? Hate anything green? Fear not, this was quite likely THE tastiest savory recipe I tried this year. I know, it’s just April, but it’s a year that feels like a lifetime passing by. I will ask you to steam a ton of spinach and you might be a bit annoyed by that step. But once that’s done, you are basically there. Ready to enjoy one amazing side dish or fancy brunch item. Locked inside with no guests? Fancy Brunch for Two. Go with the flow…
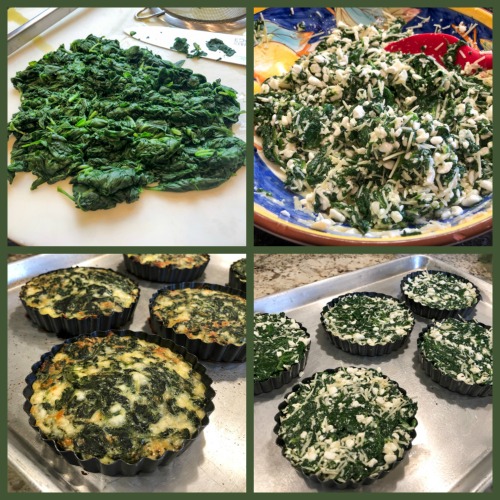
Set a steamer basket above simmering water. Place half of the spinach in the steamer. Cover and steam until just wilted, then drain and coarsely chop. Press with paper towels to remove as much moisture from the spinach as possible, then transfer to a large bowl. Repeat with the remaining spinach.
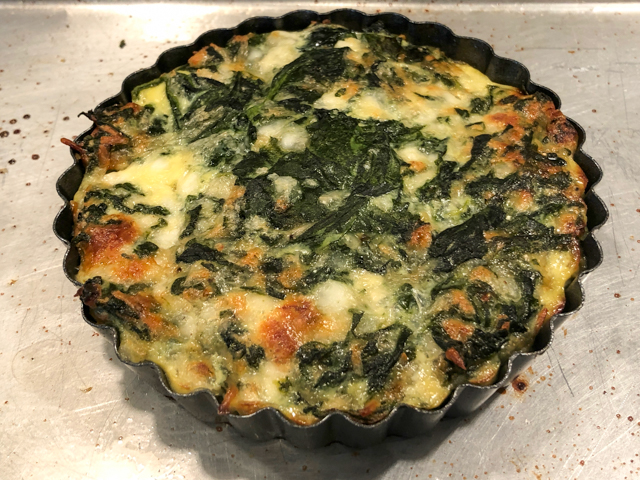
Heat oven to 350 degrees. Use cooking oil spray to grease the tartlet pans, then arrange them on a baking sheet. Add the diced shallot to the spinach, along with the eggs, cottage cheese, Parmigiano-Reggiano, pepper and nutmeg; stir to blend well. Divide evenly among the tartlet pans. Bake for 30 to 35 minutes, until browned on the edges and set in the center.
Wait 5 minutes before removing the little pies from the pans. Serve warm or at room temperature.
Comments: Credit should go for the husband who noticed the recipe in The Washington Post and sent me the link. It was part of an article on Irish cooking, published right around St Patrick’s Day. We were so impressed by these pies, not only tasty the day I made them, but two days later, very gently warmed in a low oven. I normally don’t care for low-fat cottage cheese, but it worked perfectly in this preparation. If using low-fat goes against your principles, by all means grab the regular kind.
I used tartlet pans from Wilton that have a loose bottom, so it’s easy to push them out to serve. The original recipe mentioned you could make 6 tartlets, but using these pans I made only 5. The same type of filling could work well as a real tart, over a crust (like the olive oil crust of my recent past), but this version is as light as it is flavorful.
I hope you make these pies. It is possible that it would work well with frozen spinach, but I much prefer the brighter taste that you get once you steam it yourself and use right away.