After so many years of blogging, I tend to quickly group food bloggers into two categories, those who have been doing it longer than me, and those who are “younger” (for lack of a better term). Clotilde is part of the first group, in fact Chocolate and Zucchini was one of the first food blogs I started to follow years and years ago. Not only she is still actively blogging, but she has written several cookbooks (I own them all, in case you are wondering), and – wait for it – writes the blog in two languages, English and French. I tried to do that when I started, writing each post in English and Portuguese, but after a few months, I gave up. It is a lot of extra work, so I truly admire her for doing it. This is a long overdue post. I had Clotilde’s newest book pre-ordered, the moment I got it in the mail I asked her permission to publish a recipe. She is the most gracious person ever, quickly answered with an enthusiastic “bien sûr”, but it took me a couple of months to finally share it with you. In part because I had a pretty tough time deciding which recipe to feature. But I am very happy with my choice, it is a real classic…
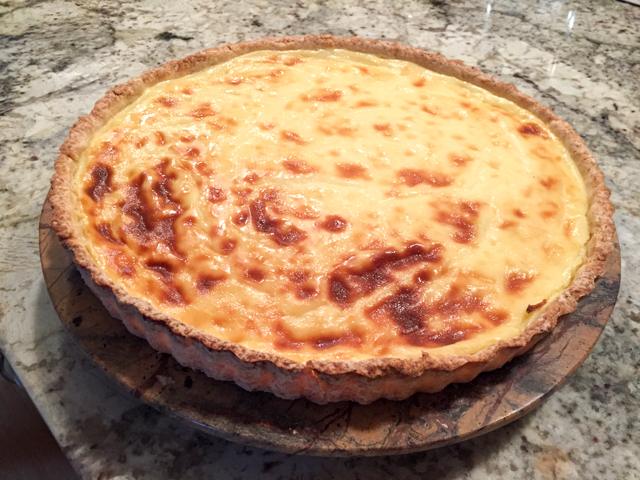
PARISIAN FLAN
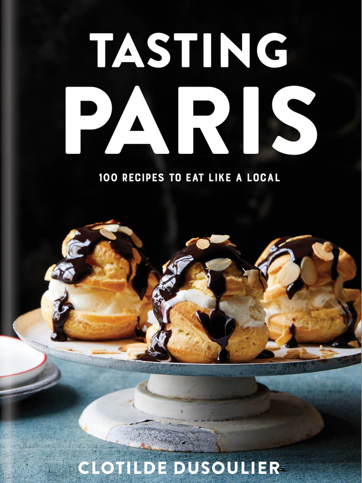
(published with permission from Clotilde’s Tasting Paris)
for pastry dough:
7 ounces (200 g) all-purpose flour (about 1½ cups)
3 tablespoons sugar
½ teaspoon fine sea salt
7 tablespoons (100 g) cold unsalted butter, diced
1 large egg
Ice-cold water, if needed
for filling:
2½ cups (600 ml) whole milk
¾ cup (150 g) sugar
⅔ cup (70 g) cornstarch
3 large eggs
2 teaspoons vanilla extract (I used vanilla paste)
⅔ cup (160 ml) heavy cream
1 tablespoon unsalted butter, for greasing tart pan
Make the crust, preferably the day before. Prepare the filling 5 to 8 hours before serving.
For the crust: In a food processor, combine the flour, salt, and butter. Process for 10 seconds, until you get a bread crumb–like consistency. Add the egg and process for a few more seconds, until the dough comes together into a ball. If the dough seems a little dry, mix in a little ice-cold water, 1 or 2 teaspoons at a time, until the dough does come together.
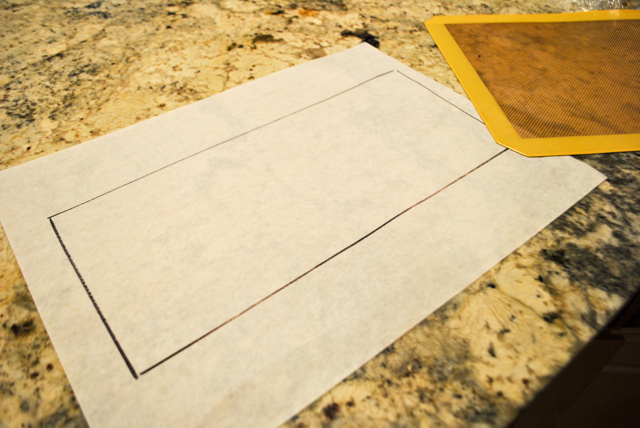
Tip the dough onto a clean work surface and knead lightly for a few seconds. Using a rolling-pin and working on a lightly floured surface, roll the dough out and transfer to a greased 10 inch round tart or quiche pan, pressing it up the sides to adhere. Prick the bottom with a fork. Freeze until needed.
Make the filling: In a medium saucepan, combine the milk and 6 tablespoons (75 g) of the sugar and bring to a simmer. In a large bowl, combine the cornstarch with the remaining 6 tablespoons (75 g) sugar. Add the eggs and vanilla and whisk until smooth. Whisk in the cream and the simmering milk, little by little. Pour the mixture back into the saucepan and return to medium heat. Bring to a simmer, whisking as the custard thickens, about 4 minutes. It is ready when the whisk leaves clear traces, and will continue to thicken as it cools.Pour the custard into a baking dish or other large vessel, cover, and cool to room temperature, about 2 hours.
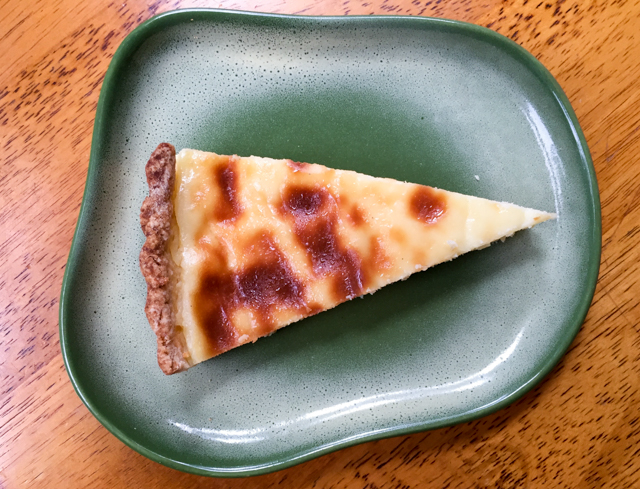
Heat the oven to 400°F (200°C). Whisk the custard to break it up, pour into the frozen tart shell, and smooth the surface with a spatula. Bake for 25 minutes, then increase the temperature to 450°F (230°C) and bake another 10 minutes, watching closely, until the top of the flan has dark brown spots. If you find the exposed sides of the crust are browning too quickly, drape loosely with strips of foil. Cool the flan for 1 hour, then refrigerate until cold, about 1½ hours.
ENJOY!
to print the recipe, click here

Comments: I really liked the way this tart is prepared, freezing the crust and adding the custard to it still frozen. It baked very nicely, absolutely no soggy bottom, perfect texture. I did not have to protect the edge with foil, but watched it closely as a hawk in the final minutes, those brown spot start to show up pretty quickly.
The flavor and texture improve a lot once you bring the tart to room temperature, but it is mandatory to cool it in the fridge for a few hours after baking. Just plan your schedule and you won’t have problems. I made the crust on a Saturday evening, made the filling next morning, and baked it mid-afternoon.
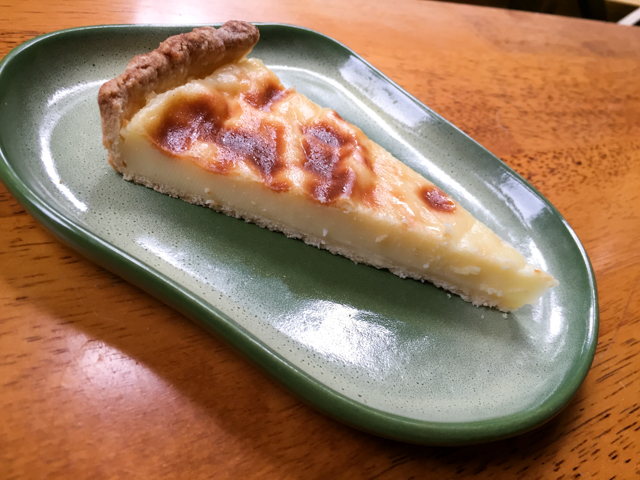
This flan really brought me memories of Paris. I cannot say it was something I enjoyed often while living there, but because every boulangerie proudly sells them, just the image was enough to transport me back. Creamy, sweet but not cloyingly so. A perfect dose of indulgence.
Now let me take you through Clotilde’s book for a virtual tour.
What I love the most about Clotilde’s book is how it covers not just your typical French cuisine, but the many flavors that surround people living in one of the most cosmopolitan cities in the world. During times in which prejudice, racism, general anti-foreign feelings are getting way too common – worse than that – way too accepted as the new normal, it is nice to see a book that embraces differences, that shows that if you live in Paris, one cool thing to do is to walk all the way to Faubourg-St Denis arrondisement, and dig into a juicy Lahmajoun. I had never heard of it, even though I did enjoy many of the “exotic” delicacies found in often small, almost hidden places in the city. Food joins cultures, and in her book Clotilde does exactly that. I cannot praise it enough.
The book is organized in a pretty cute way. Chapters are linked to times of the day: Morning, Noon, Afternoon, Early Evening, Evening, Late Night. How cool is that? Let me offer you my favorites of each chapter.
Morning (Le Matin)
Poached Eggs with Bread Crumbs and Pickled Onions... it makes the humble poached egg perfect. Bread crumbs for texture, the sharp bite of pickled onions (probably the only way I truly enjoy them, apart from slowly caramelized).
Chocolate Bread... I don’t think I need to say anything about this one.
Fruit Compote with Yogurt... I tell you, the French know how to pull this one like nobody’s business. I definitely intend to make it for a post-exercise treat, as I don’t eat breakfast.
Moroccan Crumpets... My heart missed a beat. That’s what I’m talking about when I tell you she embraces the many cultures around town. Crumpets, so British, and all of a sudden she introduces you a version that screams Middle East. They look gorgeous, and I cannot wait to make them.
Also in this chapter you’ll have recipes for Croissants, Deviled Avocados, and many more.
Noon (Le Midi)
That’s a chapter I would love to cook everything from, but one recipe that intrigued me is the very first one… Potato Chip and Chive Omelette… Clotilde got her inspiration from a Michelin-starred restaurant, if you can believe it, and I bet it is amazing, the texture of a potato chip adding a lot to the humble omelette. What a clever idea!
Frisée with Bacon and Egg… I’ve had this so many times in Paris, it’s filling and light at the same time. Love it.
Croque Madame, another super classic, you simply cannot go to Paris and not have one.
Turkish Lamb Flatbreads… These are the Lahmajoun I mentioned in the beginning. A flat bread made with yogurt in the dough, a bit like a naan, and topped with well-seasoned ground lamb. Seriously good, I am sure.
Buckwheat Crepes... These have been on my list to make for a long, long time. Not surprised she included them, they are sold everywhere in Paris, not only in bistrots, but also as street food.
Carrot Chickpea Crepes… a departure on the crepe subject, another Middle Eastern twist on a classic. I almost picked this one to feature in the blog, but the Parisian Flan won me over.
Chocolate Mousse, Raspberry Mille-Feuille, and Floating Islands with Caramel and Strawberries are three desserts from this chapter that made me dream.
Afternoon (L’Après Midi)
With this chapter, Clotilde explains the famous “Le Goûter“, that time in the end of the afternoon in which your light lunch has been used up, and dinner is still a bit far away. Keep in mind that in France no one has dinner before 8 or 9pm. Le Goûter is a small offering of goodies to keep you going, or to give the kids when they arrive from school. Fifteen recipes total in this chapter, including the Parisian Flan I featured.
Here is my shortlist of favorites:
Earl Grey Madeleines... Nantais Cake (a very moist almond cake)… Chocolate Ice Cream with Nuts and Raisins… Chestnut Cream Meringue (this looks absolutely spectacular)… Simple Chocolate Macarons (nothing like finding my obsession waiting for me)… But I guess my all time favorite would be Salted Caramel Flaky Pie. It is so tempting I must show you a picture from the book…
 Don’t you feel like going to the kitchen and making it right now?
Early Evening (L’Apéro)
Another French habit is to have a drink and light food before going out for dinner, a show, or a movie. In this chapter, Clotilde offers 11 recipes, including a few drinks. Some of my favorites:
Armenian Byoreks… Armenian food is found mostly in the 9th arrondisement of the city, the original neighborhood that received the first immigrants back in the 1915’s. Byoreks are delicious parcels of flaky dough, usually shaped as triangles, and filled with many different types of delicacies, from meat to veggies or cheese. Her version uses spinach, cheese, and pastrami.
Butternut Kibbeh with Spinach… I adore kibbeh, and normally have a meat-loaded version (I have one in the blog from years ago), but this one is definitely calling my name. So unusual!
Oven-Puffed Pancake... Baked Camembert with Honey and Apple Cider... Olive and Goat Cheese Quick Bread... The quick bread brought me memories of a couple of friends we visited often for dinner. She always prepared one of these quick breads as an appetizer if we were having dinner with them or perhaps going out for a meal somewhere. You know, just as a warm up to the evening. I actually blogged about one version with zucchini in the distant past.
Evening (Le Soir)
What could be more magical than spending a romantic evening in Paris? Tough question. In this chapter, Clotilde talks about special recipes that you can cook at home but will have the aura of a fancy restaurant. I could happily cook (and eat) every single one, but here is my selected list:
Roasted Squash Soup with Curried Cheese Quenelle… Quenelle makes any meal feel special. Just a simple technique to shape it is all you need, and Clotilde explains how to do it.
Rice and Ginger Soup... when simplicity meets elegance, I so want to make this one when the weather cools off (well, hopefully not anytime soon!)
Cauliflower Brioche. You have no idea how cool that looks. Get the book, then we can talk more about it (wink, wink)
Tfaya Chicken Couscous… have you heard of tfaya? It is a condiment made with caramelized onions and raisins, in this case used to perfume couscous. O.M.G.
Spice-Crusted Duck Maigret… how could she not include a duck dish, right? So Parisian…
Mushroom Bourguignon… a vegetarian take on one great classic French dish. Must make it!
Every single dish in this chapter seems fit for a special dinner, either for a romantic evening with just you and your favorite human, or a couple of very dear friends. Some sweets included are the classic Pears Poached in Spiced Red Wine, Caramelized Arlette Cookies (a version of them was a technical challenge in the Great British Bake Off years ago), and the recipe from the book’s cover: Ice Cream Puffs with Chocolate Sauce (no additional remarks needed).
Late Night (Tard dans la Nuit)
One recipe in the chapter. French Onion Soup. I don’t even know how many times I’ve enjoyed it with the most perfectly broiled Gruyere cheese on top of a perfect crusty slice of bread, cut in the exact thickness to make it stand against the hot soup without dissolving into nothingness. Au Pied du Cochon is a restaurant that still serves this soup pretty much the whole night. I’ve had the experience once. Yes, Tasting Paris brought me a ton of fond memories indeed!

Clotilde, thank you for allowing me to share the flan recipe in my blog…
For those interested in the book, it’s available in amazon.com. I am not affiliated, and won’t get a single penny from your purchase. I only recommend books I fall in love with, and this was definitely one…

ONE YEAR AGO: Beef Goulash, Slow-Cooker Version
TWO YEARS AGO: Post-workout Chia Yogurt Bliss
THREE YEARS AGO: Tomato Tatin
FOUR YEARS AGO: Best Thing I Ever Made: Chocolate Chip Cookies
FIVE YEARS AGO: Farofa Brasileira
SIX YEARS AGO: Thai-Inspired Pork Tenderloin
SEVEN YEARS AGO: A yummy Brazilian cake: Bolo de Fuba’
EIGHT YEARS AGO: Summer’s Tomatoes
NINE YEARS AGO: Leaving on a jet plane…