WALNUT SOURDOUGH

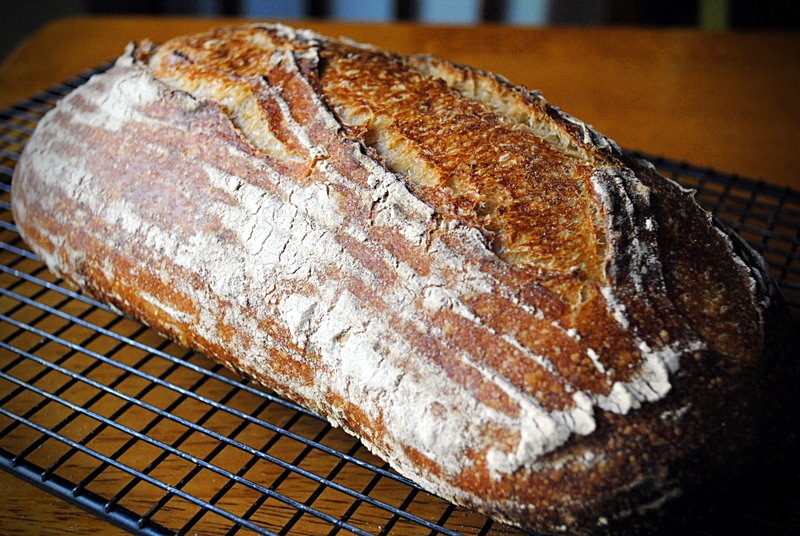
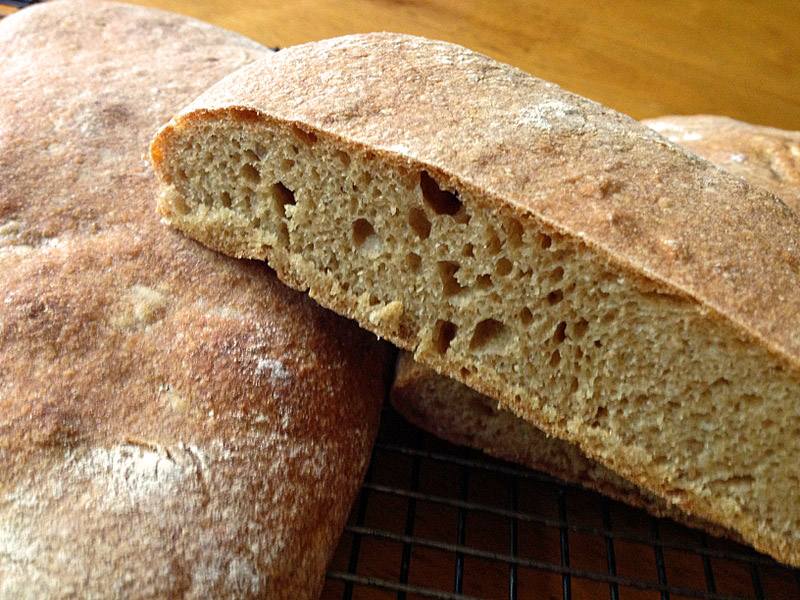
Recently, this post over at Fig Jam and Lime Cordial made all the 11 bread recipes on my “to make soon list” run away in a panic, as Celia’s sourdough demanded to be baked right away!   Walnuts, spelt flour, plus a very active sourdough starter.  I simply could not wait to try it. Celia is such an accomplished baker that she throws a recipe together as if it’s nothing, and her breads turn out spectacular every single time.  I am a lot more insecure, so I asked her to virtually hold my hand and guide me through my take on her method.  Success! We loved the bread, it is rich, dense but not to the point of feeling heavy.  Outstanding with Roquefort cheese,  confirming the magical combination of walnuts with blue type cheeses. Unbeatable! And, let’s not forget the many benefits of walnuts… read a nice article about it here.

WALNUT SOURDOUGH BREAD
(adapted from Fig Jam and Lime Cordial)

150 g sourdough starter (at 166% hydration)
300 g water
300 g bread flour
200 g whole wheat flour
100 g walnuts, lightly toasted
9 g sea salt

Toast the walnuts in a 400 F oven just until fragrant.  Cut in pieces, not too small. Reserve.

Place the water in a bowl, add the sourdough starter and mix to dissolve.  Add the flours, mix to form a shaggy mass, and let the dough rest for 20 minutes.  Add the salt and knead the dough in the bowl a few times to incorporate it.  Let the dough rest for 30 minutes, add the walnuts and incorporate them in the dough by gently kneading it.   Let the dough rise for 2 more hours, folding twice at 45 and 90 minutes.   Thirty minutes after the last folding cycle, form the bread in the shape of your choice, place in a floured banetton or other appropriate container, and let it rise for 3 to 4 hours at room temperature, depending on how active your sourdough starter is.  The dough is ready to bake when it is not quite doubled in size, but feels airy when you gently poke the surface.

Invert the dough on parchment paper, score the surface with a sharp blade, and place in a 450F oven to bake with initial steam.  Total baking time will be about 40 minutes, I baked my loaf under an inverted roasting pan previously filled with water and emptied, so that some water stays clinging to its sides.  I removed the roasting pan after 25 minutes, and bake the loaf uncovered until done.    Internal temperature should be higher than 200 F.

Allow the bread to completely cool before slicing through.

ENJOY!

to print the recipe, click here

Comments:  In typical Sally-fashion, what I thought was a bag of spelt flour in my freezer turned out to be teff flour.  After frantically inspecting every single spot of the two freezers we own, I gave up and modified the recipe to use regular whole-wheat flour instead (triple sigh).  If you have spelt, use it 50/50 with the regular flour (for the amount of this recipe, that would be 250 g of each flour).

The 166% hydration might sound strange, but  keep in mind that it’s the hydration you obtain when feeding your starter by volume instead of weight and using equal amounts of flour and water (for instance 1 cup of each).  Very convenient, many bakers adapt their recipes to this level of hydration because it makes it a lot easier to keep the starter, no  need to use a scale. I was more of a 100% hydration lady, but must say I loved the way the more liquid starter performed and was so easy to mix with the dough.

For this type of bread, I don’t like to cut the walnuts too small, but if you prefer them to be less obvious in the crumb, go ahead and finely dice them.   Toasting before incorporating in the dough is optional, but I usually go for it.

Celia, thanks for yet another inspiring recipe, and for your help with the method.   I am counting on you to hold my hand again as I take a walk on the dark side (aka cake baking ;-)). 

  I am submitting this post to Susan’s Yeastspotting.

ONE YEAR AGO: Thai Chicken Curry

TWO YEARS AGO: Zen and the Art of Risotto

Add to FacebookAdd to DiggAdd to Del.icio.usAdd to StumbleuponAdd to RedditAdd to BlinklistAdd to TwitterAdd to TechnoratiAdd to Yahoo BuzzAdd to Newsvine

THRILLING MOMENTS

June 2006: crossing the finish line in my first (and only) marathon…

March, 2009:  cutting a slice of my first (but not only) successful sourdough loaf,  and marveling at the open, airy crumb…

April 2012: making croissants that finally brought an important bit of Paris to our home!

I am not sure how many times I’ve tried to make croissants, perhaps five or six, but each and every occasion left me disappointed and  frustrated.  I didn’t  throw in the towel, though, and you may remember that I included croissants as one of my cooking projects for this year.   Since January,  I assembled all the recipes, tips (thanks once more, Gary!), and blog posts on the subject, finally settling on the recipe from Peter Reinhart‘s Artisan Breads Every Day. I couldn’t be happier, aren’t they cute?

Without further ado, here’s the full recipe, with photos that walk you through  the process.

CROISSANTS
(published with permission from Peter Reinhart,
recipe from  his book Artisan Bread Every Day)

for the “detrempe
4 + 2/3 cup all purpose flour (21 oz / 595 g)
1  + 3/4 tsp. salt (0.4 oz / 11 g)
1/4 cup sugar (2 oz / 56.5 g)
1 Tbs  instant yeast (0.33 oz / 9 g)
3/4 cup + 2 Tbs milk (7 oz / 198 g)
1 cup cool water (8 oz / 227 g)
2 Tbs melted butter (1 oz / 28.5 g)

for the butter block:
1 + 1/2 cups cold butter (12 oz / 340 g)
2 Tbs flour (0.57 oz / 16 g)

Make the dough (detempre) by whisking the flour, salt, sugar and yeast in a mixing bowl. Pour in the milk and water, then add the butter. Mix with the paddle attachment on the lowest speed for about 1 minute, stop, and check that the dough is shaggy.  It should not be too firm as you’d expect from a bread dough.  Adjust with a little water or a little flour if too wet.  Mix again for a couple of minutes, transfer to a board, form into a ball  and refrigerate overnight (or up to 2 days) inside an oiled bowl.

Make the butter block on baking day.  Cut the cold butter in 16 pieces, and place them in the bowl of an electric mixer together with the flour. Use the paddle attachment for 1 minute to incorporate the flour into the butter, without allowing it to melt.  Transfer the butter/flour to a piece of parchment paper (spray the surface of the paper with a little oil), and form into a 6 x 6 in square, about 1/2 inch thick.  Be as precise as you can with the measurement, and try to form it into a neat, straight-edged little package.  Cover the square with a plastic wrap and refrigerate for 10 minutes (or longer, if convenient).

Transfer the dough from the fridge to a floured work surface, sprinkle more flour on top, and roll the dough to a rectangle 12.5 inches wide and 6.5 inches long.  Square off the edges, try to keep it all straight.   The dough should be about 1/2 inch thick.  Place the butter block on the left side of the rolled out dough, check that only a border of 1/4 inch is left between the butter and the edge of the dough.  If necessary, roll the dough out a little more.  Lift the right side of the dough and cover the butter, stretch the dough to cover it all well, and pinch the edges to fully enclose the butter.

Lift each side of the package of dough/butter gently, toss more flour underneath, flour the top again, and gently tap the surface of the package with a rolling pin, to distribute the butter evenly into the four corners.  Roll the dough to a rectangle 16 inches wide and 9 inches long.  Again you should aim for a 1/2 inch thick dough.   Square off the edges as nicely as possible, and fold the dough as a letter in an envelope: fold the right one-third to the left, and the left one-third of the dough to the right.  Transfer the dough to a floured baking sheet, and place in the fridge for 20 minutes.

Place the dough again on a floured surface, with the open seam facing away from you and the closed side facing you.  Gently roll the dough again to the same dimensions (16 x 9 inches).  Fold again in thirds.  Let it rest in the fridge for another 20 minutes, and repeat this exact rolling and folding procedure one more time.  Let the dough rest 20 minutes more, and get ready for the final rolling and cutting of croissants.

If working the full dough at once, you will need to roll it as a rectangle 24 to 28 inches wide, and 9 inches long. If you prefer, cut the dough in half, and roll it to 12 to 14 inches wide, 9 inches long.  Once the dough is fully rolled (about 1/4 inch thick), make marks starting at the left side of the bottom part of the dough, placing a small notch at 4-inch intervals. Repeat the same on the top part of the dough, but start at the 2 inch mark from the left.  Use a pizza cutter to cut a line from the left bottom corner of the dough to first notch on the top part of the dough (at the 2 inch point).  Go on connecting the marks to cut triangles.  When all pieces are separated, cut a 1 inch notch into the bottom center of the triangle base of each piece (that helps the croissant get its curved shape).  Spread the bottom as wide as the notch will allow to create wing-like flaps. Start with the flaps and begin rolling up the dough as you would roll a rug.  Stretch the pointed end of the triangle as you roll, trying to elongate the dough.  Make sure the end of the croissant stretches all the way under it, so that it remains rolled as it rises and bakes.

Place the croissants on a baking sheet lined with parchment paper, and let them rise at room temperature for 2 and a half to 3 hours. Brush the surface with egg wash if desired.  Heat the oven to 450 F F (232 C), place the croissants inside, and reduce the temperature immediately to 375 F (190 C). Bake for 15 minutes, rotate the pans, and bake for an additional 15 to 20 minutes, until golden brown on all sides.

Allow the croissants to cool on a rack for 45 minutes to 1 hour.

ENJOY!

to print the recipe, click here

Now, allow me to show you a few photos of the process, which seems intimidating at first, but if you pay attention to a few details, it will be quite doable.
Use good quality butter, I recommend getting Plugra if you can find it, and measure the amount with a scale, no eye-balling here.  We are talking croissants, let’s make them pretty!   😉

After its rest in the fridge overnight, the dough will have risen quite a bit, and will be all puffy and nice to work with.  Working with it straight from the fridge will make it much easier to handle.

Be as precise as possible with the measurement,  each step matters, a little liberty here, a little liberty there, and your croissants will suffer.  Let’s make them pretty!   😉

The dough is rolled out  and the butter square is placed on one side, then all you have to do is fold the dough over it and pinch the edges, enclosing the butter completely inside the dough.

And the fun begins, rolling the dough to the right dimension (16 x 9 inch rectangle), then folding it in three, like a letter to be mailed to a dear  long-distance friend…  The package goes to rest in the fridge for 20 to 30 minutes, and the whole thing is repeated two more times (two additional series of rolling and folding in three).  Please notice my rolling pin, a gift Phil gave me for my Birthday. It is an antique piece that handles any dough extremely well.  Plus, I find it  very beautiful!

If you have a loooooong surface to roll the final dough out, go ahead and do the whole thing in one step.  I found it easier to cut the dough in half,  roll it, mark the spots to cut the triangles, and form the croissants from that half.  Place them on a baking sheet for the final rise, and move to the second portion of the dough.  Easy as pie!  One telling sign of the quality of your dough is how much can you stretch it without tearing it.  In my previous attempts, I could barely stretch it at all, but this recipe made the most elastic and forgiving dough ever!

Once they rise for a couple of hours, they will be noticeably bigger and plumper.

Brush them with egg wash (I think it makes for  beautiful croissants, with a nice shinny surface), and place in the oven, resisting the temptation to peek too often.  A little peek every once in a while is ok, particularly if you are a food blogger overly excited by your first good looking batch of croissants and anxious to get just one more photo…

And then, once they are all baked, allow them to cool for 45 minutes minimum. One full hour is even better, so that the butter sets in and gives you the best texture as you bite through the croissant.

In the end, all your hard work will be rewarded, I promise!

With all that in mind, is it feasible to have freshly baked croissants for breakfast?  Honestly, I find that a bit tricky.  Even if you retard the final proofing in the fridge, you will still have to let them come to room temperature to bake, and that will take about 1 hour, half an hour more to bake, and the gruesome wait of 45 minutes to attack them.  Maybe it would be possible to bake a batch for an 11am brunch,  but other than that, I think it’s much better to bake them, let them cool, and wrap each one individually to freeze.  You can see  here the results of my labor, ready to be enjoyed in the near future. Once you wake up with that unstoppable urge to have a warm-from-the-oven croissant,  simply unwrap them, leave at room temperature 10 minutes, and place in a 300 F oven for 5 minutes.  Voila’, mes amis:  great croissants whenever you feel like it!

I am grateful to Peter Reinhart for writing a great tutorial for croissants in his book, and of course for allowing me to publish his recipe on my blog. Thank you!

I am submitting this post to Susan’s Yeastpotting event…

ONE YEAR AGO: Maple-Oatmeal Sourdough Bread

TWO YEARS AGO: Pork Trinity: Coffee, Mushrooms, and Curry

Add to FacebookAdd to DiggAdd to Del.icio.usAdd to StumbleuponAdd to RedditAdd to BlinklistAdd to TwitterAdd to TechnoratiAdd to Yahoo BuzzAdd to Newsvine

CODRUTA’S ROLLED OAT SOURDOUGH BREAD

I can read Portuguese, English, and French.  Stretching my brains a little I can get by in blogs written in Italian or Spanish, as the grammar and many words are similar to those from my native language.  Reading Romanian is another story altogether, but Codruta’s blog is on my blogroll list and will not be leaving anytime soon! Through Google Translate and a few email exchanges with her, I can profit from the bread masterpieces she regularly posts on “Apa. Faina. Sare”.   Agua. Farinha. Sal.  Water. Flour. Salt.  The basic ingredients for great bread, once you add the magic of wild yeast.

When she posted her own formula for a sourdough bread with flaky oats in the dough, I wanted to make it right away, as it involved a technique new to me: cold fermentation of the starter and dough until final proofing of the shaped bread.  Plus, it combined two different starters, one made with rye flour.  Indeed, not a bread for beginners, but I decided to take a leap of faith and play with the grownups. 😉   What do you think?

CODRUTA’S ROLLED OAT SOURDOUGH
(reprinted with permission, from Apa. Faina. Sare)

Makes one very large loaf or two medium-sized loaves.

for pre-ferment:
50 g very active starter made with regular flour (100% hydration)
50 g very active starter made with rye flour (100% hydration)
100 g bread flour
50 g water

for final dough:
all pre-ferment (250g)
450 g white bread flour
150 g whole wheat flour
130 g rolled oats (rolled thick is better)
470 g cold water
17 g salt

Prepare the pre-ferment by dissolving both types of starters in water, then add the flour. Stir and cover the container, placing it immediately in the refrigerator.  It is better to use a tall and narrow pot, transparent, so you can mark the level of your starter mixture as you place it in the fridge. Let it sit there 18-24 hours, until the yeast bubble grows up. You have a margin of a few hours to use for the yeast bubble will remain within, then begins to collapse.  Ideally, you should catch it when it’s almost doubled in bulk, as you can see in this photo.

When the starter is ready to be used, mix in a bowl the flours, rolled oats and cold water, let it sit 40 to 60 min (the autolyse step). Sprinkle salt on top, add the fermented starter straight from the fridge. Blend all ingredients together. Knead by folding directly into the bowl, a few minutes, until the dough comes off the fingers and the vessel walls. The dough will be quite dense, but do not add more water. Cover the pot, wait 15 minutes, and repeat the kneading by folding (one complete rotation of the vessel is sufficient). Cover and wait 15 minutes.

Transfer the dough in a greased rectangular dish with oil, make a set of stretch and fold (SF), wait 45 minutes, repeat the set of SF and place dough in the refrigerator.  Let dough in refrigerator for 15 to 18 hours.

Remove dough from refrigerator and leave it at room temperature for 1 hour. Divide the dough in two, and shape each half as a round or oval loaf.  Place the shaped loaves in a banetton or another appropriate container, with the seam up. Cover the pot with a light fabric, and then with plastic wrap. Let the dough proof at room temperature for 2 hours and 30 minutes.

Heat your oven 45 minutes before baking time. Have a baking stone inside and your method to generate steam planned. Bake at 460 F  for 45 min, with steam for the initial 15 min. Reduce temp to 440 F  if the bread seems to be browning too much.

Cool it completely before slicing.

ENJOY!

to print the recipe, click here

With this bread, I tried to work on shaping a batard, but next time I will divide the dough in uneven portions, making a slightly smaller batard and bigger “boule”.  I need a bit more practice with this shape of bread, but I feel I’m slowly making progress…  I was hoping for a shorter bread, with more pointed ends.  It will happen.  I know it will…  😉

The bread was absolutely delicious! The oats, although not previously soaked, more or less disappear into the dough, contributing flavor and a very slight hint of texture. Perfect! More and more I lean towards bread with whole wheat flour and grains or seeds inside, I find that they are very satisfying and more flavorful than white bread.

Unfortunately, I had a small problem with my camera – pilot error – and lost all my photos of the crumb.   Mine was not as perfect as Codruta’s bread, but no one who tried the bread seemed to mind…  Make sure to stop by her blog and marvel at the structure of her bread,  with a beautiful pyramidal shape, which is a sign of perfect handling of the dough.

Codruta, thanks for a great recipe,  I now only have about 8 others from your blog waiting in line!   😉

I am submitting this post to Susan’s Yeastspotting event…

ONE YEAR AGO:  Roasted Corn and Tomato Risotto

TWO YEARS AGO: Light Rye Bread

Add to FacebookAdd to DiggAdd to Del.icio.usAdd to StumbleuponAdd to RedditAdd to BlinklistAdd to TwitterAdd to TechnoratiAdd to Yahoo BuzzAdd to Newsvine

AWARD-WINNING SOURDOUGH BAGUETTES

It was bound to happen.   Once I felt comfortable shaping baguettes, I went on the pursue of a recipe for a sourdough version. My number one source of inspiration for all things related to bread is Susan’s Wild Yeast, and this recipe charmed me right away.  Award-winning sourdough baguette version?  I am sold!   First thing I did was to drop an email to Samuel Fromartz, the writer-turned-baker behind the recipe,  asking for permission to publish his very detailed method.  To my delight, he replied within a few minutes, and we exchanged a few messages, in which I got great tips to improve steaming during baking  (I will test his method this weekend).   Sam Fromartz is currently working on a book about grains, bakers and bread for Viking/Penguin. So, if you are like me, and cannot have enough info on the subject, check his website for the development of his project.  I know I will…  😉

FROMARTZ BAGUETTE TRADITIONAL
(recipe published with permission from Samuel Fromartz)
(read original article at Chewswise blog)

Makes four baguettes

90 grams sourdough starter (at 100% hydration)
420 grams water
590 grams flour (I used King Arthur Organic All Purpose Flour)
10 grams whole wheat flour
13 grams sea salt
2 teaspoons instant dry yeast (I used  SAF Instant Yeast)
Olive oil to grease bowl
cornmeal to dust cutting board

FIRST DAY
Pour starter and yeast into bowl and add water, mixing until the starter breaks up a bit.  Add flours and salt and mix for a couple of minutes. The dough will be heavy and shaggy. Let it rest for 5 or 10 minutes, covered with plastic.

Rub the surface where you will knead the dough with a tiny amount of olive oil to prevent the dough from sticking (great tip originally from Dan Lepard).  Use a scraper to move dough onto the counter and begin to knead by stretching and folding dough, trying to use your finger tips.

After kneading for 5 minutes, scrape mass into a clean bowl or plastic bin. Cover and let rest for 20 minutes.

Oil the counter again if necessary and remove dough to counter. Stretch it until 1-inch thick then fold top and bottom in thirds like a letter. Do the same type of folding, coming from left to right. Put dough back in the bowl, cover, let it  rest for 20 minutes.

Remove from bin, fold again, and put back in a covered bowl for 20 minutes.

Remove from bin, fold again for the third and final time. Clean the bowl, oil lightly (with 2 tsp olive oil), and put dough back inside. Cover and place in refrigerator for 12 to 24 hours.

SECOND DAY
Place baking stone or quarry tiles in middle of oven. Place a thick rimmed cookie sheet or cast iron pan on oven floor or lower shelf. Heat oven to 470F (245 C).

Put a little olive oil in your palm and oil a 20-by-20 inch (50 x 50 cm) section of the counter. Remove dough from container. Cut dough in half. Put half back in container and into refrigerator. Cut dough into two rectangular pieces (about 250 grams each) and gently stretch into rectangles 5-by-7 inches (13-by-18 cm) with the long edge facing you.  Cover with light towel and let rest for 5 minutes.

While dough is resting, cut parchment paper large enough to fit your baking stone. Dust paper with flour. Dust  a couche (or kitchen towels) lightly with flour.

Shape dough into a log by folding top and bottom of rectangle toward middle and gently sealing the seam with thumb. Then fold top to meet the bottom and seal seam. You should have a log about 1.5 to 2 inches thick (4 to 5 cm). Gently roll and stretch into a 14-inch loaf (36 cm) or just under the size of your baking stone.

Place each loaf on parchment paper about six inches apart, seam side down. Place one rolled up towel underneath the paper between the loaves and one under each other edge, supporting their shape.  Cover with light kitchen towel and let rise for 45 minutes to 1 hour.

Put 2/3 cup water in measuring cup and bring to a boil in the microwave.

Carefully move the paper with the loaves onto a flour-dusted overturned cookie sheet or cutting board. Dust top of loaves very lightly with flour. Use a bench scraper to gently adjust the loaves and straighten them out.

Make four cuts on the top of the loaf with a razor blade, 1/4-inch deep, running lengthwise on the dough. A swift slash at a sharp 20-degree angle works best. Take cutting board and slide parchment paper with baguettes onto hot baking stone. Shut oven door. Open door, and carefully pour 2/3 cup water onto cookie sheet or cast iron pan. Be very careful if using boiling water. Shut door. Do not open the oven again while baking.

Check baguettes after 18 to 20 minutes. They should be dark brown and crusty. If pale, continue baking for 1 to 2 minutes. Let cool for 20 minutes on rack before eating. They are best eaten within 6 hours.

While baguettes are baking, form the remaining dough into loaves or leave for up to 24 hours and make fresh loaves the following day.

ENJOY!

to print the recipe, click here

for a streamlined version, click here

Comments:  To read the fascinating story behind perfecting  this recipe, check Sam’s write up about it here.

If you are a novice in baking bread, baguettes can be tricky, but you can find very detailed discussions about this particular recipe in his blog about it.  Don’t forget to read the comments, because they contain a lot of useful, additional information.  Sometimes little details we read  en passant  might mean the difference between failure and success.

I absolutely loved this recipe!   Handling a dough from the fridge is quite a bit easier than at room temperature (about 78 F), I had no problems shaping the loaves and going for their final stretch.   I will be playing with this recipe for a while,  using it to practice my slashing technique (just got a new blade, per my friend Gary’s recommendation), and baking with steam.  The baguettes had a complex “feel”,  with very delicate sourdough flavor, open crumb, and a hearty crust.  I know that when I overcome the steaming problem they will be even better… stay tuned, friends… stay tuned…

This slideshow requires JavaScript.

I am submitting this post to Susan’s Yeastspotting event….

ONE YEAR AGO: Meet our Lab (Lab = laboratory, not Labrador Dog… ;-))

TWO YEARS AGO: My New Favorite Tomato Sauce

Add to FacebookAdd to DiggAdd to Del.icio.usAdd to StumbleuponAdd to RedditAdd to BlinklistAdd to TwitterAdd to TechnoratiAdd to Yahoo BuzzAdd to Newsvine

VOILA’ LES BAGUETTES!

Second chapter on Cooking Projects 2012!

Five weekends. One hundred and twenty six ounces of flour. Blood. Sweat. A few tears. But, I am not afraid of shaping baguettes any longer. Is there room for improvement? No doubt, but the goal now shifts from shaping to baking: I must find a way to optimize the generation of steam.  Apart from that, I am pretty happy with my babies…
UN-KNEADED, SIX-FOLD FRENCH BREAD
(from Jeffrey Hamelman, Bread)

2 pounds + 4.5 oz  bread flour (8 + 1/4 cups)
1 pound + 10.6 oz water (3 + 3/8 cups)
3 + 1/2 tsp salt
1 + 1/4 tsp instant dry yeast

Place all the ingredients in a large bowl, and using your hands or a plastic scraper, bring them together forming a very shaggy mass.  The best way to do it is working the scraper down the sides of the bowl, and then rotating the bowl as you bring it up, and fold that part of the mixture on top. Do this movement about 20 times, which should mix everything together reasonably well at this stage.  Do not worry about how smooth the dough is, it will feel and look very “rough”.

Set a timer to go off every 30 minutes. You will fold the dough every thirty minutes, for a total of six times (at that point you will be 3 from the start).  At each cycle, fold the dough on itself using a scraper, for a total of 20 times,  either removing the dough to a surface, or folding it inside the bowl.  After the sixth folding cycle, leave the dough undisturbed for 30 minutes, then divide it in 12 ounce pieces (from the start,  you will be at the 3 hour and 30 minutes mark).  One full recipe makes 5 long baguettes.

Gently form each piece into a cylinder shape, and let it rest for 15 minutes (very important to relax the gluten, don’t skip this step).  Shape as a baguette, then roll the baguettes to stretch them to their final size (make sure they will fit over your baking stone or the surface you intend to bake them on).

Let the baguettes rise (preferably using a couche well coated with flour) for 1 to 1 and a half hours at room temperature (ideally at 76 F).  Score the baguettes and bake in a 460 F oven, with initial steam, for a total of 22 to 25 minutes. Cool completely before slicing.

ENJOY!

to print the recipe, click here


Comments:   I like to do the first four of the six kneading cycles using a different technique:  I coat the granite counter top with a very light amount of olive oil,  and slam the dough on it 15 to 20 times.  You can see the technique demonstrated in this video.  The last two cycles I omit the “slamming”,  and simply fold it, so that the airy structure is not disturbed.   Phil insists that I should let him make a video of my “slamming technique”, but so far I resisted the idea.  Maybe one day… 😉

As to the shaping, I will be forever grateful to Gary, my friend and baker extraordinaire, who went through the trouble of mailing me a DVD of Chef Jeffrey Gabriel CMC, from Schoolcraft College. Gary made the video during his class on French baguettes, and I watched it over and over… and over!   The main difference between Chef Gabriel’s technique and this one, is that he is not too concerned with where the seam of the baguette ends up.   On my initial attempts, I was so worried about keeping the seam up for the final rise, that I ended up manipulating the baguettes too much and messed up their final shape.   Gary’s method is much more user-friendly, and once you score the baguettes and bake them, the seam position seems to have no influence on the final look of the bread.

A few important pointers for success:

1.  Coat the surface where the baguettes will rise (after the final shaping) with flour.   They WILL stick if you forget this step, leading to intense grievance.

2. Allow the dough to rest for 15 minutes before shaping.  You need that or the gluten will keep fighting back like an elastic band.

3. The better you get at shaping the baguettes, the longer they will be.  If you want to bake them covered to create steam, this could be a problem.  Consider making shorter baguettes – not authentic, but easier to bake in a home oven.

4. Baguettes are scored  with an odd number of slashes. Usually 5 or 7.   Some advise you to wet the blade to do it, I prefer to use a dry blade, as I like the “spiky” look of the slashes.

5.  The baker’s blade is sharp.  Make sure you cover it with the protective plastic cap when you are done, or, if using a blade with no cap, put it away. Leaving it sitting on the counter top is a recipe for disaster.   (sigh)

After practicing several weekends in a row, I now settled on making half this recipe, and shaping either 3 long baguettes or 4 medium-sized.   The tricky part is baking them: I can bake two at a time, so the last one must go through a longer rise.  Sometimes it seems to be slightly over-proofed, and the resulting baguette is a bit flat.  However, the taste is spectacular, this recipe produces a very creamy crumb, with a flavor that transported us to the 7eme arrondissement in Paris.  Not a bad virtual trip to take!   😉

I am submitting this post to Susan’s Yeastspotting

ONE YEAR AGO: Cornmeal English Muffins

TWO YEARS AGO: Cornish Hens for a Sunday Dinner

Add to FacebookAdd to DiggAdd to Del.icio.usAdd to StumbleuponAdd to RedditAdd to BlinklistAdd to TwitterAdd to TechnoratiAdd to Yahoo BuzzAdd to Newsvine