LUCKY KAMUT BREAD

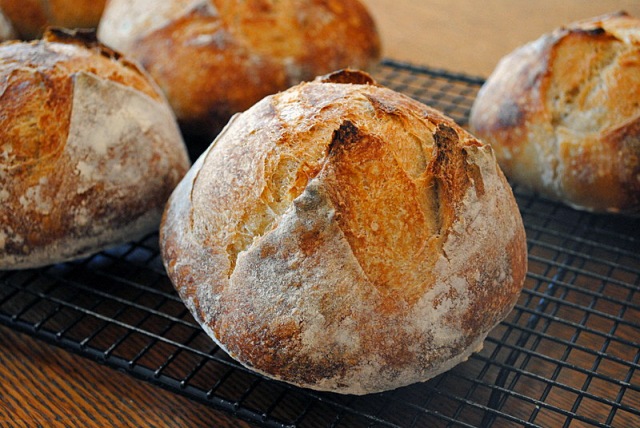
A few weeks ago I got smitten once more by a post on Farine’s blog  showcasing a bread made exclusively with whole wheat flour.  She used a mixture of spelt and kamut to bake a pavé style of bread that seemed perfect for a hearty sandwich.   I was quite curious about kamut flour, and thrilled to buy the last bag available in the only grocery store in town that carried it.  My adventure to procure kamut flour involved a phone call to the manager who personally held that bag for me until I could drive to the store later in the day.  That should clarify the title of this post. 😉

SPELT AND KAMUT BREAD
(from Farine’s blog, adapted from Thierry Delabre)
.
247 g whole kamut flour
247 g whole spelt flour
375 g water
148 g levain at 100% hydration
9 g salt
.
Mix both flours with all the water until no dry flour remains and let rest, covered, 20 to 40 minutes Add the sourdough starter and mix until incorporated Add the salt Cover the dough and let it rest, doing as many folds as necessary to obtain medium soft consistency.  I did five sets of folds, the first three 30 minutes apart, the last two 45 minutes apart.  At that point the dough was rising for 3 hours.  I let it rise undisturbed for 2 and a half hours more, by that time the dough was threatening to reach the top of the bowl.
.
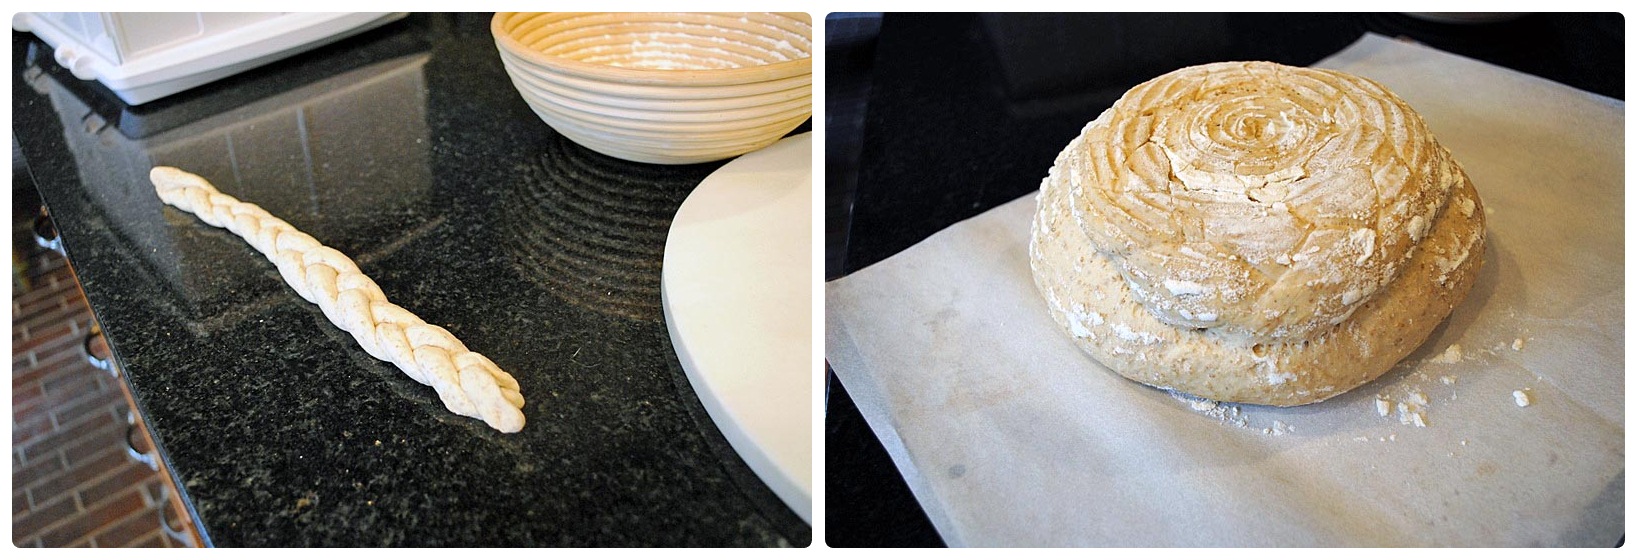
Remove the dough from the bowl onto a floured surface and fold it once over itself lengthwise, forming a long, non-overlapping rectangle.  Cut the dough into two pieces, and let them proof over heavily floured parchment paper for about 45 minutes, loosely covered.   Heat your oven to 450F and bake the loaves (with initial steam) for 30 to 35 minutes, until golden brown.    Cool on a rack.
.
ENJOY!
.
to print the recipe, click here
.
.
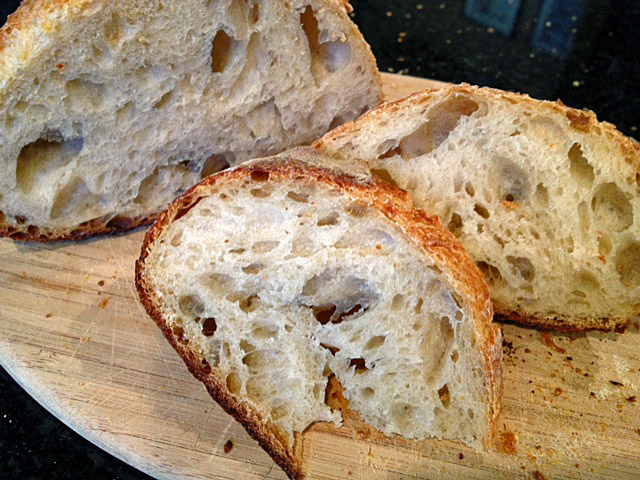
This is the kind of bread that makes you feel healthier with each bite.  It has that wholesome quality of a typical rustic loaf, but a texture with more moisture than you would expect from a bread made exclusively with whole wheat.  I  urge you to read Farine’s original post, as she describes her adaptations from the original recipe in great detail.  I always learn a lot reading her blog, she is an amazing bread baker!
.
The sourdough taste in this bread was stronger than usual, but the interesting thing is that next day the bread had mellowed down considerably.  Not sure why, but the world of bread leavened with wild yeast is mysterious. And fascinating!
.
.
Usually Phil is the master sandwich maker, but this time I hit a jackpot with my concoction:  chipotle-smoked turkey breast, provolone cheese, and a spread of tomatillo-avocado salsa.  A show-stopper!
.
Farine, thanks for the constant inspiration!  My list of breads to make from your blog only keeps growing and growing… 😉
.
I am submitting this post to Susan’s Yeastspotting event.
.

THERE WILL BE BREAD


Drum roll, please…  

This post officially inaugurates the new kitchen in The Little Apple!  What better than a loaf of bread to start things on a nice track?  So, let me share with you a golden bread perfumed with the special saffron I received as a gift from our friend Steve. The bread looked like a blast of sunshine sitting on the black granite, and it made nice cracking noises as it cooled, the promise of a nice crumb underneath a hearty crust.

GOLDEN SAFFRON & FENNEL LOAF
(from the Bewitching Kitchen, inspired by Flo Makanai)

125 g  sourdough starter (at 100% hydration)
250 g water (divided)
large pinch of saffron
375 g bread flour
7 g salt
1 tsp fennel seeds

Heat 50 ml (no need to be precise) of water in a microwave until almost boiling, add the saffron and let it sit until it cools to almost room temperature, stirring every now and then.  Strain the saffron water through a fine mesh colander, and add to the rest of the water for a final volume of 250ml. Reserve.

Add the active starter to a large bowl, mix it with the water until it dissolves more or less smoothly. Add the flour and the fennel seeds, and briefly do a few kneading moves to form a shaggy mess.  Cover loosely with plastic wrap for 20 minutes.

Sprinkle the salt over the dough and incorporate by kneading lightly and folding the dough on itself.  You can keep the dough in the bowl, or transfer to a surface.  After 20-30 seconds of kneading/folding, cover the dough again and let it sit for 40 minutes (total rising time up to this point: 1 hour).

Repeat cycles of quick kneading/folding two more times, spacing them 40 to 50 minutes.   After the third and final kneading cycle, let the dough sit for 20 to 30 minutes, shape it as a round or oval loaf, and leave it at room temperature  30 minutes longer.  Total rising time from beginning to end: about 3 and a half hours.  Place it in the fridge overnight.

Remove the dough from the fridge 2 hours before baking (see my comments). Heat the oven to 450F. If using a clay pot, place it in the cold oven as you turn it on. Bake the bread covered for 30 minutes, remove cover, and allow it to fully bake (reducing the temperature to 425F if the bread seems to be browning too fast) for 12 to 15 minutes longer.  Remove to a rack to cool completely before slicing.

ENJOY!

to print the recipe, click here
Comments:  It’s been a while since I baked a loaf of bread that made me as happy as this one! I’d been refreshing my starter for weeks in a row, but placing it back in the fridge, unable to squeeze bread baking in our crazy schedule.  My cookbooks are not unpacked yet, so I decided to go with the simple but very efficient method devised by Flo Makanai years ago: her famous 1, 2, 3 recipe.   One part starter, 2 parts water, 3 parts flour.  You can adapt and use any liquid or flour, but that’s the basic formula.   I wanted to incorporate saffron in the dough, and fennel seemed like a good match too.  Considering that it was not a tried and true recipe, and that it would be my first time using the oven in our new home, I admit I was  pushing the envelope. Interesting expression, by the way, I learned its origin not too long ago, and was a bit surprised. No Post Office material was used in its making.  Live, and learn.

Live, learn, and bake!  😉

To add a bit more emotion to the adventure, I could not find my banettons to proof the dough after shaping.  I actually have two, one round, and one oval, but they are both MIA, probably hidden inside one of the unpacked boxes.  I ended up using a copper colander, lined with a white cloth.

Necessity is the mother of invention.

I pushed the envelope once more by removing the dough from the fridge only 30 minutes before placing it in the 450F oven, trying to minimize the time our kitchen would be exposed to such insanely high temperature. Still, the bread had an impressive oven spring, and the beautiful, golden open crumb I hoped for.  It would be amazing with paella or a bowl of bouillabaisse, but until the weather cools enough for those dishes, we’ll enjoy it with fresh, juicy tomatoes and a sprinkle of Maldon salt.   Simple pleasures. Golden pleasures.

A final remark: I wish I could take credit for the title of this post, but my beloved husband was the genius behind it…  Sorry, ladies, he’s mine, all mine!

I am submitting this post to Susan’s Yeastspotting.

ONE YEAR AGO: In My Kitchen, July 2011

TWO YEARS AGO: Heavenly Homemade Fromage Blanc

THREE YEARS AGO: A Perfect Sunday Dinner

HOMEMADE CORN TORTILLAS

And the food snob strikes again!  😉

What can I say?  Once we tasted the tortillas made in the coziness of our (former) own home, we were shocked by how much better than the store-bought version they are!   Get yourself a good quality tortilla press, one that feels heavy and powerful like this one I found for a bargain at ebay.
All you’ll need is a bowl, the masa harina, some water and a little salt.  No need to knead, no need to wait. Amazing tortillas will be yours in less than 10 minutes!
HOMEMADE CORN TORTILLAS
(from the back of Masa Harina’s bag)

2 cups masa harina
1/2 tsp salt
1 to  1 + 1/4 cups hot water

Mix together the masa harina, salt, and water in a bowl.  Add the smaller amount of water, form a dough. If too rough, add the rest of the water, a little at a time.  The dough must stick together, but it should not be too wet, so that when you roll a portion on your hand it will turn out smooth.

Form golf ball-sized chunk of dough and  place into a tortilla press protected on both sides by plastic wrap (I cut open a large ziplock type bag).  Press, open, peel the tortilla off the plastic, reserve. When all tortillas are made, cook them for 45 seconds to 1 minute per side on a hot skillet, preferably cast iron. Set the cooked tortillas over a inside a folded towel to keep them warm and moist.

For added flavor, right before serving, set each over an open flame until you get small brown blisters on the surface, flip and do the same on the other side.

ENJOY!

to print the recipe, click here

Now, for the sad news…  I was holding this post for publication at a later time, when I could include a special recipe made with the tortillas.  But, the stove in our new home is electric and I’m having a bit of a hard time adjusting to it.  The lack of a flame prevents me from finishing the tortillas the way I like, so I am not sure when I’ll be able to make tortillas at home again.  It might take a while.. 😦

  To compensate, I share a link to the type of recipe I’d like to make using homemade corn tortillas.  It comes from a great blog I visit often, called Taste Food.  Ready?  Click here, and ENJOY!  

ONE YEAR AGO: Whole-Wheat Spaghetti with Vegetables and Peanut Sauce

TWO YEARS AGO: Brigadeiros: A Brazilian Party!

THREE YEARS AGO: Lemony Asparagus

BLACK OLIVE SOURDOUGH BREAD

Inspired by a bread from Hamelman (Olive Levain), which I’ve made a few times in the past, I improvised on the basic sourdough method from Emmanuel Hadjiandreou and his “How to Make Bread“, that I recently blogged about.  You want this bread to deliver real big olive flavor, so keep the olives in large pieces, you can even leave some whole (but pitted, of course! 😉

BLACK OLIVE SOURDOUGH
(adapted from Emmanuel Hadjiandreou)

400 g (3 + 1/2 cups) bread flour
10 g (2 tsp) salt
200 g (3/4 cup) warm water
300 g (1 + 1/2 cups) sourdough starter (100% hydration)
4-5 ounces black olives (preferably Kalamata, pitted and chopped in large pieces – roughly 1 cup, loosely packed)

Add into one bowl the flour and the salt.   This is your dry mixture.

In another, larger bowl, mix the  water and the sourdough starter. This is  your wet mixture.

Add the dry mixture to the wet mixture and mix until it all comes together. Cover with a plastic wrap and let it stand for 10 minutes.  After 10 minutes, add the pieces of olives and knead the dough in the bowl, by pulling one portion of the dough from the side and pressing it down in the middle.  Repeat it turning the bowl slightly at each kneading, doing this kneading motion about 8 times and covering the full circumference of the ball of dough. The whole process should take about 20 seconds.   Cover the dough again and leave it resting for 10 minutes.

Repeat this kneading cycle three more times, 10 minutes apart.  Cover the bowl and let it rest for one hour.

Turn the dough onto a floured surface, and shape it  as a round ball,  coat the surface lightly with cornmeal or rice flour, and place it in a suitable container for the final rise.  Let the dough rise until doubled in size, which should take from 3 to 6 hours, depending on how active your starter was.

Heat the oven to 475 F, and have your method to generate steam ready.   Slide the bread on a parchment paper or a wooden peel, slash it, and place it in the oven.  I like to bake it over tiles, and place an inverted roasting pan moist with hot water over it for about 30 minutes, then remove it.   Once the bread is in the oven, reduce the temperature to 425 F.  Bake for a total of 40 minutes, or until the internal temperature is over 200F.

Let the bread cool completely before slicing.

ENJOY!

to print the recipe, click here

Comments:  I confessed before that I am a kalamata-cheerleader,  so this bread is obviously a favorite of mine.  I already have a spicy kalamata sourdough in the blog,  but in this version I took a minimalist approach and used only olives, nothing else.

Don’t worry if when you start kneading the dough, the pieces of olive insist on poking out, just let them be.   In the end, they will find their perfect spot in the crumb.   Try not to squish the pieces too much as you fold or knead the dough.

I used cornmeal to coat the surface of the bread during proofing, because I ran out of rice flour, but in the end it turned out pretty good, the cornmeal gave the bread an interesting golden hue, and did a good job releasing the proofed bread from the banetton.

I am sending this post to Susan’s Yeastspotting, make sure you stop by to get inspired by all the baking going on this past week…   😉

ONE YEAR AGO: Buttermilk Cluster

TWO YEARS AGO: Farfalle, Farfalle

Add to FacebookAdd to DiggAdd to Del.icio.usAdd to StumbleuponAdd to RedditAdd to BlinklistAdd to TwitterAdd to TechnoratiAdd to Yahoo BuzzAdd to Newsvine

THE DEVIL MADE ME DO IT

Things were going well, perhaps too well.   My decision of not buying a single cookbook during the year of 2012 had me strong and confident until April 19th. The date is a personal record, as in the past 5 years I caved before sunset on the last day of February.   But, reading this passionate review by Farine set the stage for my demise.   How could I possibly resist a book called “How to Make Bread?”    I succumbed. I got it.  And, you know what?  I LOVE IT!

TOMATO SOURDOUGH
(from “How to Make Bread“, published with permission from Emmanuel Hadjiandreou)

400 g (3 + 1/2 cups) bread flour
10 g (2 tsp) salt
2 + 1/2 Tbsp chopped rosemary leaves
6 g (1 + 1/4 tsp) nigella seeds
40 g (2 Tbsp) tomato paste
200 g (3/4 cup) warm water
300 g (1 + 1/2 cups) sourdough starter (100% hydration)
2 tsp olive oil

Add into one bowl the flour, salt, seeds, and rosemary. This is your dry mixture.

In another, larger bowl, mix the tomato paste, water, sourdough starter, and olive oil. This is  your wet mixture.

Add the dry mixture to the wet mixture and mix until it all comes together. Cover with a plastic wrap and let it stand for 10 minutes.  After 10 minutes, knead the dough in the bowl, by pulling one portion of the dough from the side and pressing it down in the middle.  Repeat it turning the bowl slightly at each kneading, doing this kneading motion about 8 times and covering the full circumference of the ball of dough. The whole process should take about 20 seconds.   Cover the dough again and leave it resting for 10 minutes.

Repeat this kneading cycle three more times, 10 minutes apart.  Cover the bowl and let it rest for one hour.

Turn the dough onto a floured surface, and shape it either as a round ball, or an oblong format, place it in a suitable container for the final rise.  Let the dough rise until doubled in size, which should take from 3 to 6 hours, depending on how active your starter was.

Heat the oven to 475 F, and have your method to generate steam ready.   Slide the bread on a parchment paper or a wooden peel, slash it, and place it in the oven.  I like to bake it over tiles, and place an inverted roasting pan moist with hot water over it for about 30 minutes, then remove it.   Once the bread is in the oven, reduce the temperature to 425 F.  Bake for a total of 40 minutes, or until the internal temperature is over 200F.

Let the bread cool completely on a rack before slicing.

ENJOY!

to print the recipe, click here

About the book:  if you are into bread baking and think you’ve got enough books on the subject, think again.  You need this one.  Your library won’t be complete without it, no matter what is your skill level.  Emmanuel is a natural teacher, and the step by step photos arranged in a single page will give you a very clear idea of how to handle the dough at the different stages of fermentation and shaping.

One of the things I love the most about the book is how it makes me want to design my own recipes, using his basic method.  He simplifies the instructions by describing each recipe as “this is your dry mixture”“this is your wet mixture”“mix one with the other”.  Basically, that is what bread baking is all about, and you can customize and be creative  if you keep this basic formula in mind follow his minimalist approach to kneading.  Plus, he will expand your horizon on ingredients to add to a bread.  A few examples are his beetroot sourdough, fig, walnut and anise sourdough,  chocolate and currant sourdough…   Emmanuel’s book made me want to experiment, and that is the mark of a great cookbook.  It shows you a path without restricting you to it.

You can tell that a lot of dedication and attention to detail went into the making of this book.  From photos to text, a real masterpiece!

Emmanuel, thank you for giving me permission to feature your recipe in my blog…

I am submitting this post to Susan’s Yeastspotting

ONE YEAR AGO: A Focaccia Experiment

TWO YEARS AGO: Pierre Nury’s Bougnat

Add to FacebookAdd to DiggAdd to Del.icio.usAdd to StumbleuponAdd to RedditAdd to BlinklistAdd to TwitterAdd to TechnoratiAdd to Yahoo BuzzAdd to Newsvine