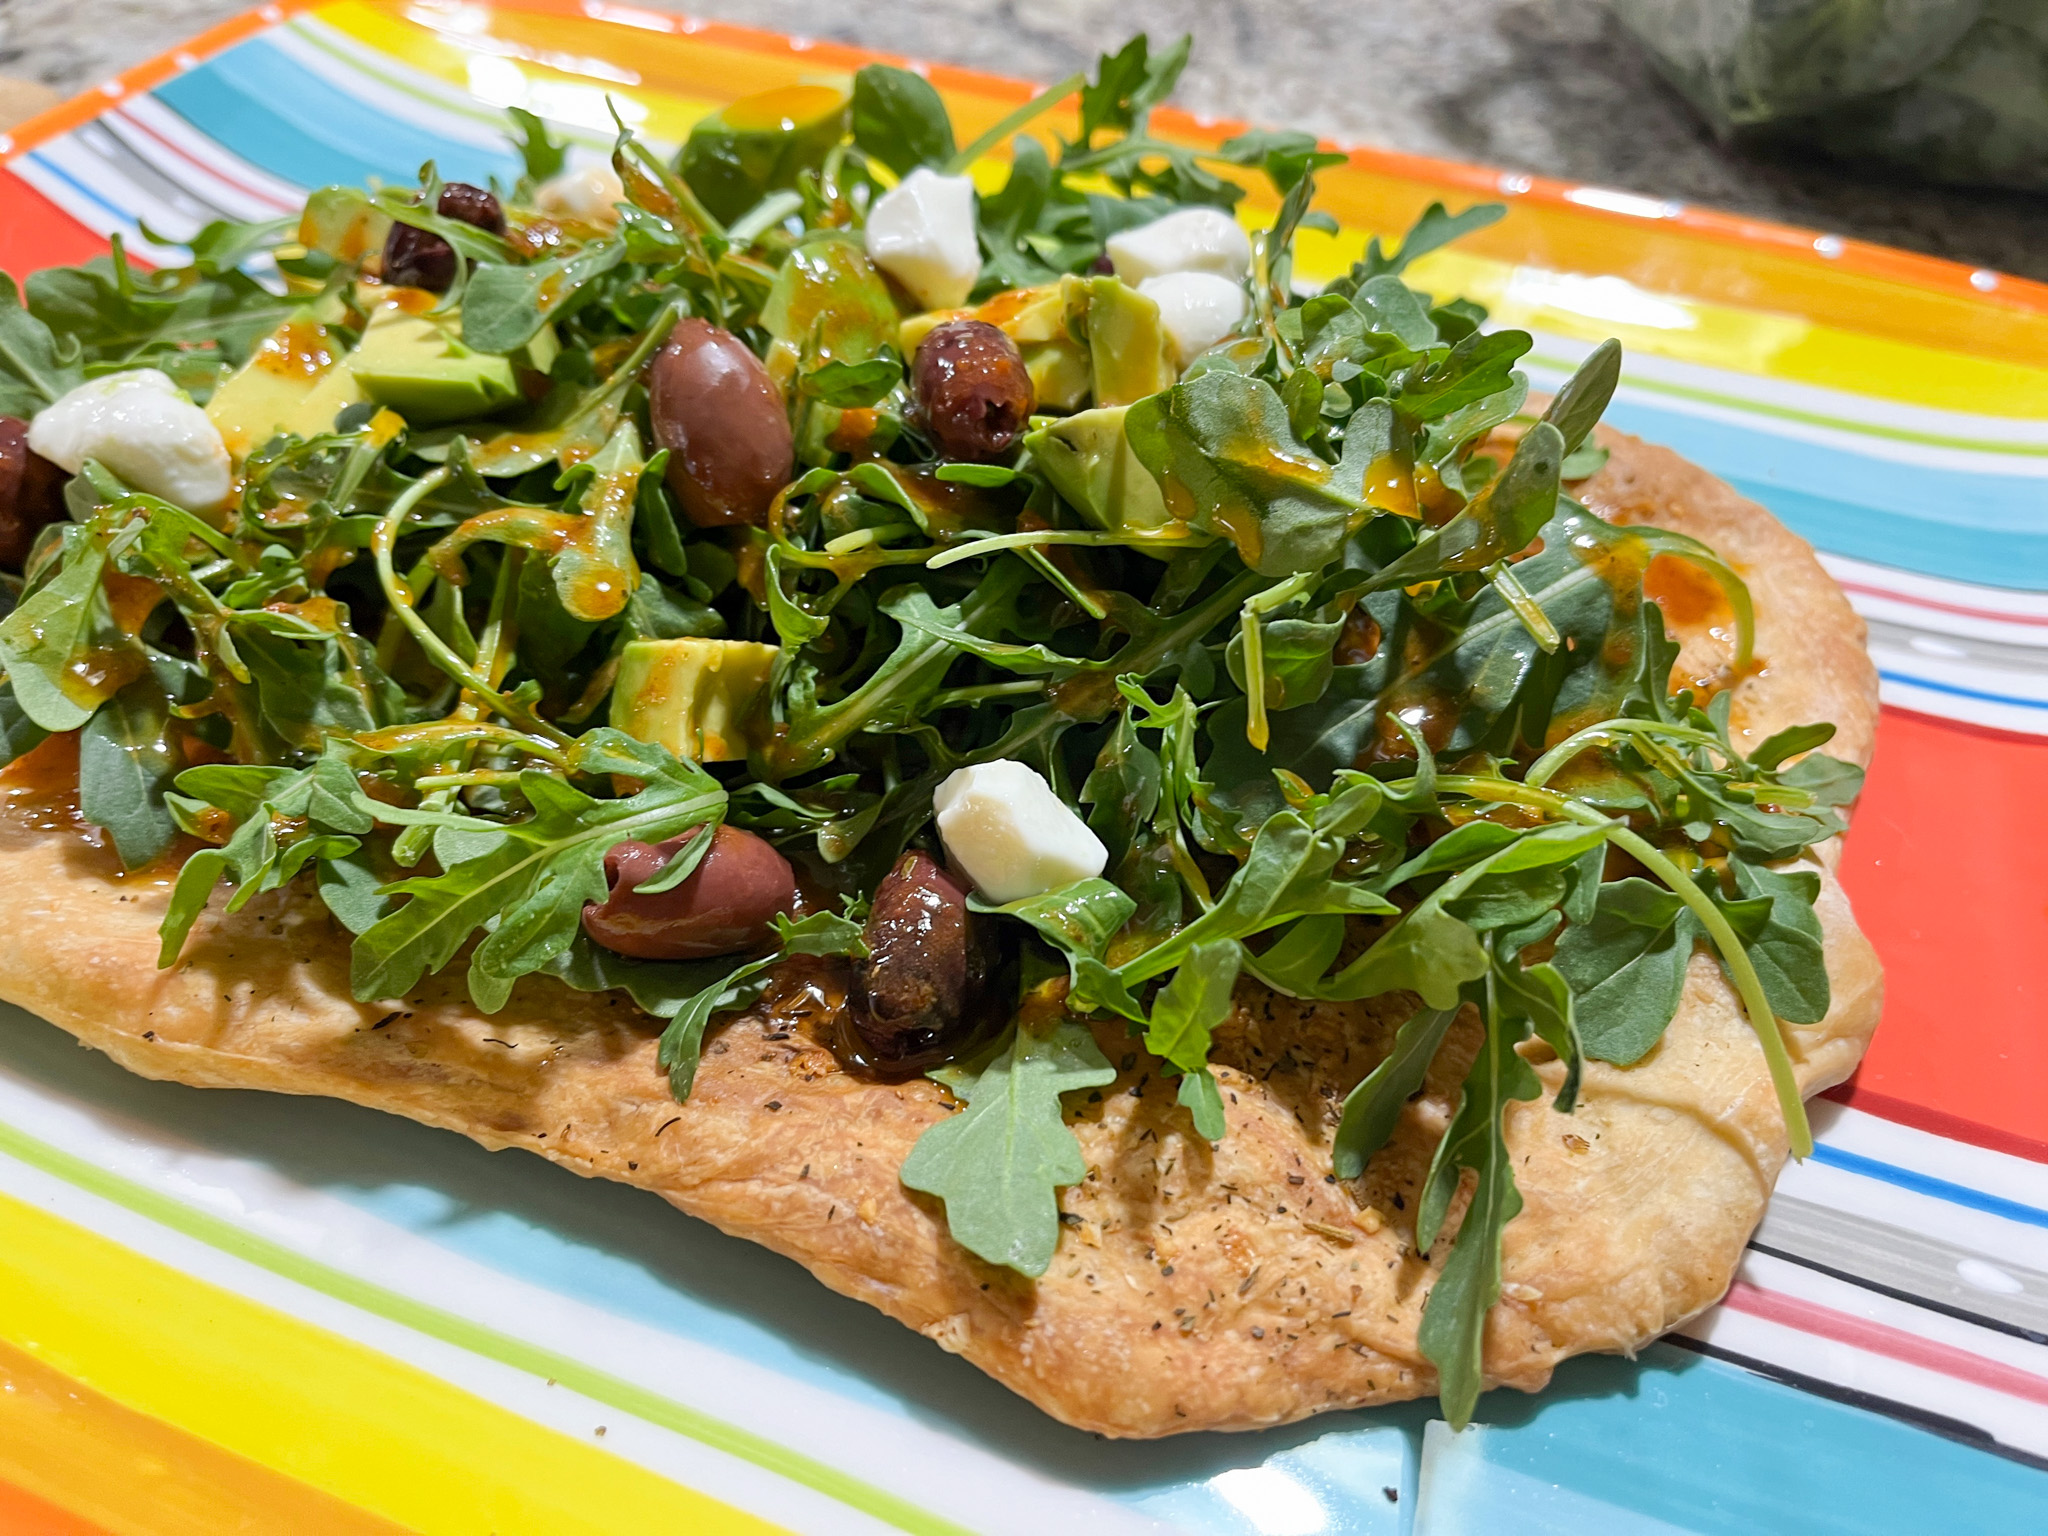
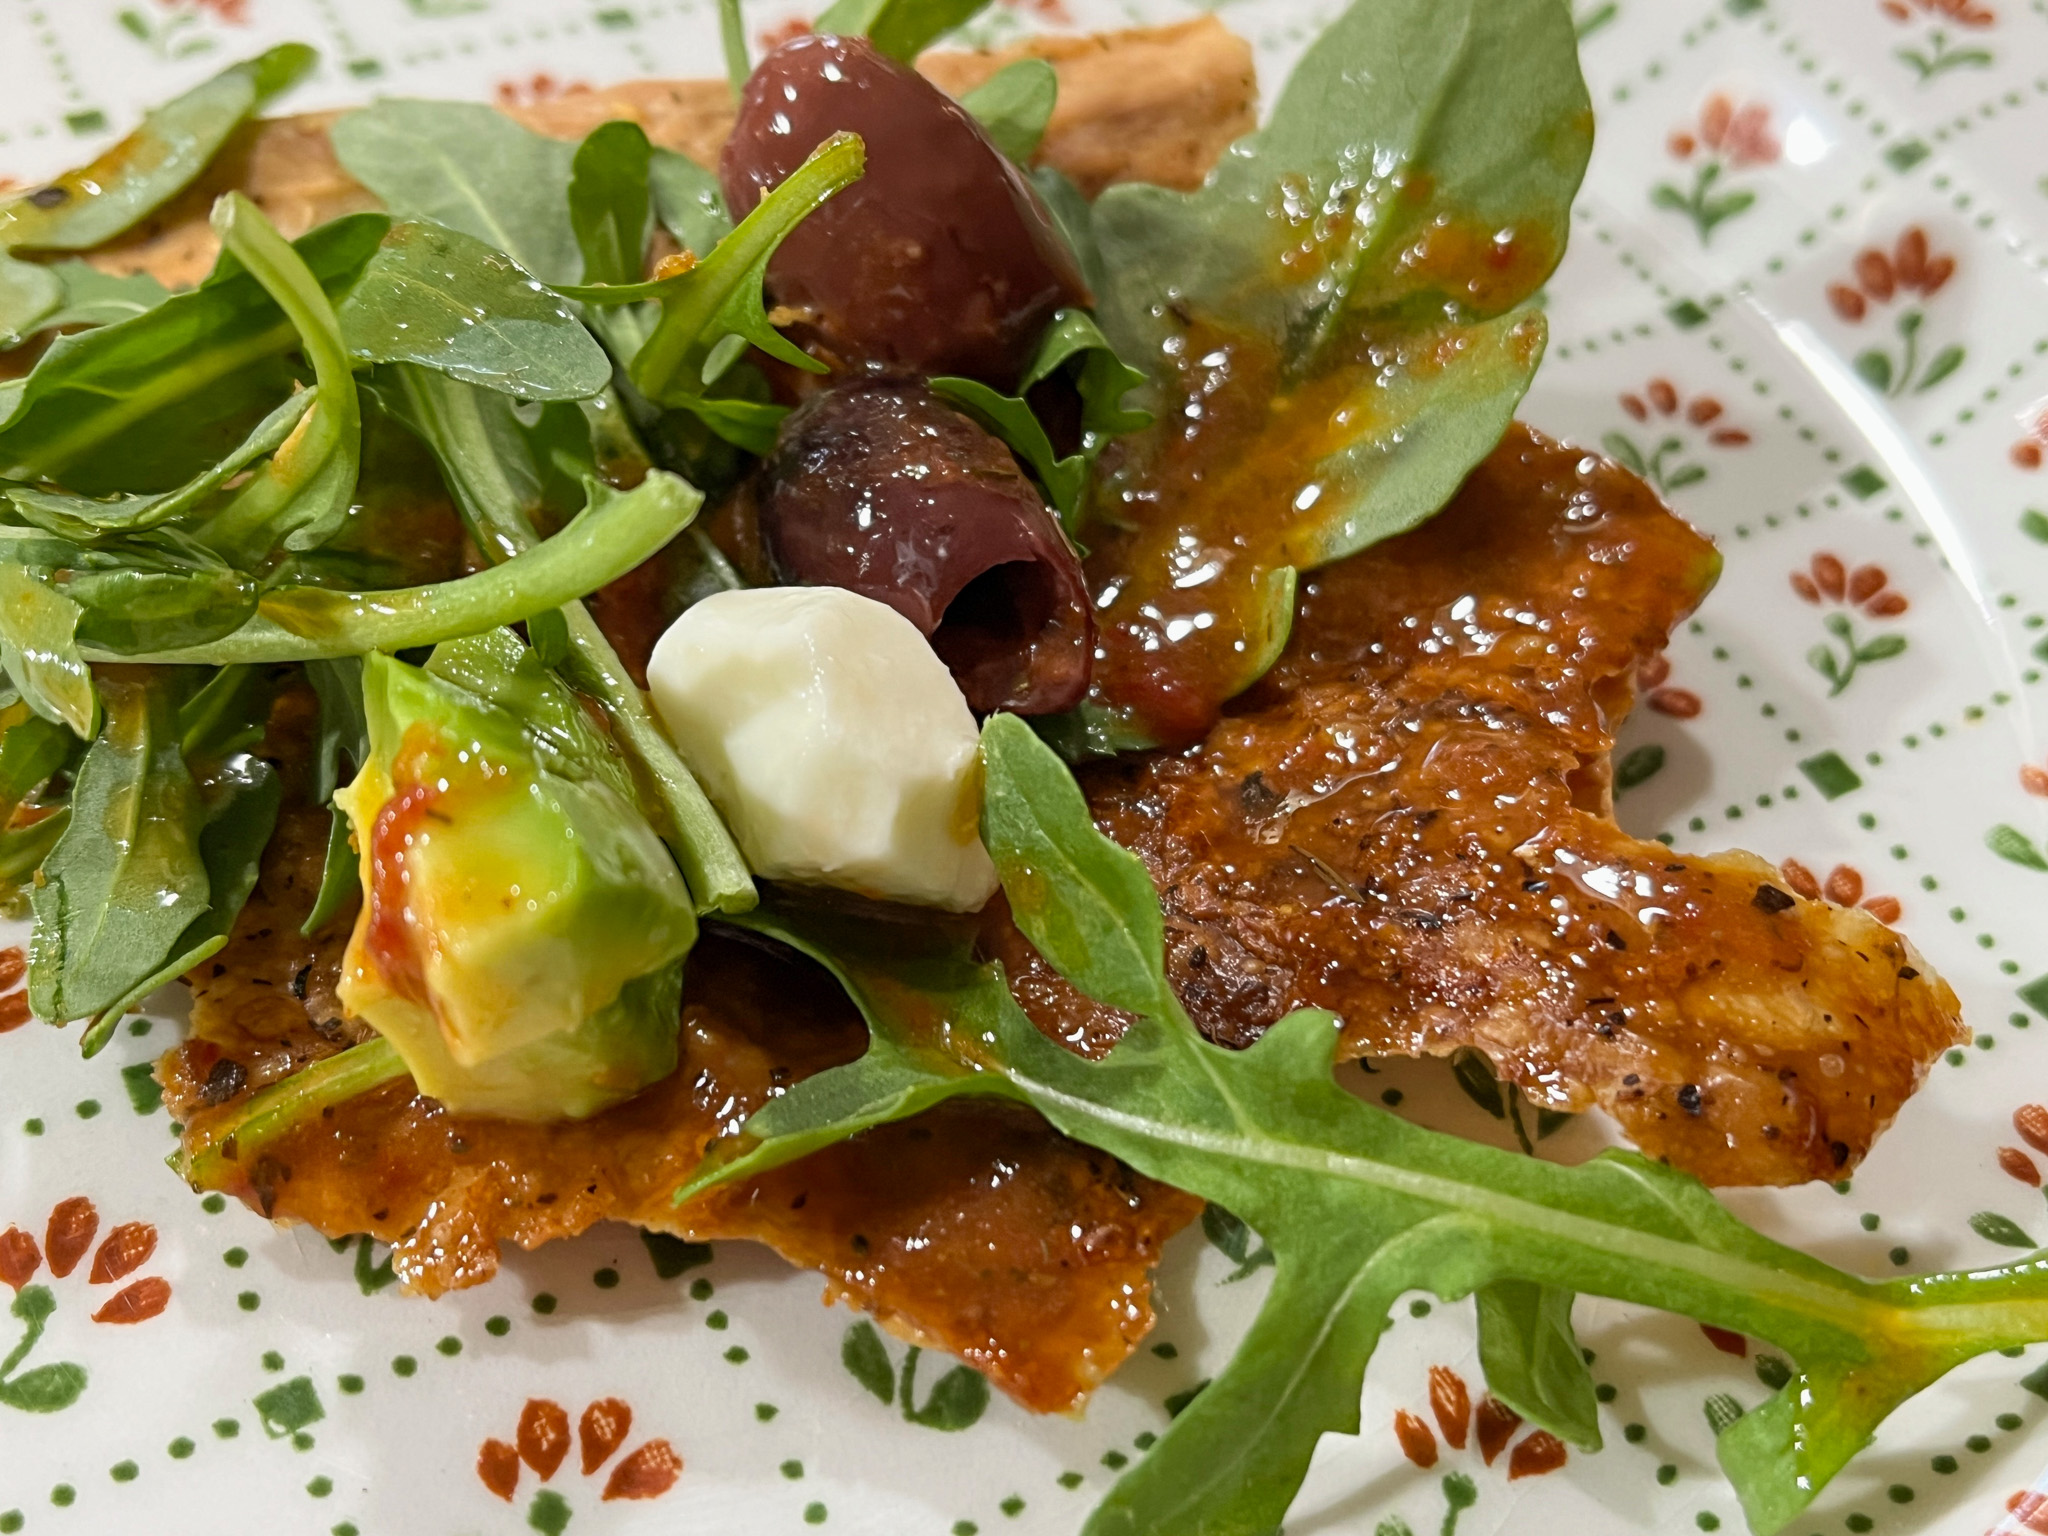
Apologies. I admit, that kind of hurt. This is salad on pizza crust. I saw this recipe on the FoodTV show The Kitchen, that I used to watch all the time but then lost interest. Lately I’ve been adamant about NOT tuning into the news 24/7 because… well, I just can’t take it anymore. Soooo, I got into browsing all the stuff taped on our TiVo, and that episode was waiting for me. Katie Lee loves salad, and she came up with a way to join her love for salad and pizza on a single serving. I was intrigued. She used store-bough thin crust pizza (those sold in a tube), but I went with my default pizza recipe from the good and old Fine Cooking (click here for all details).
PIZZA SALAD
(inspired by Katie Lee’s recipe)
pizza dough (I used 1/4 of my default recipe)
olive oil, grated Parmigiano, Herbes de provence for crust)
dressing:
1/4 cup sherry vinegar or red wine vinegar
2 tablespoons chopped sun-dried tomatoes
1/2 teaspoon dried oregano
1 tsp honey
1/4 cup olive oil
salt and pepper to taste
For the salad:
arugula
mozarella pearls
tomatoes
black olives
avocados
For the dressing: In a blender, combine the vinegar, sun-dried tomatoes, oregano, and sugar. Pulse to combine. With the motor running, drizzle in the olive oil. Season to taste with salt and pepper.
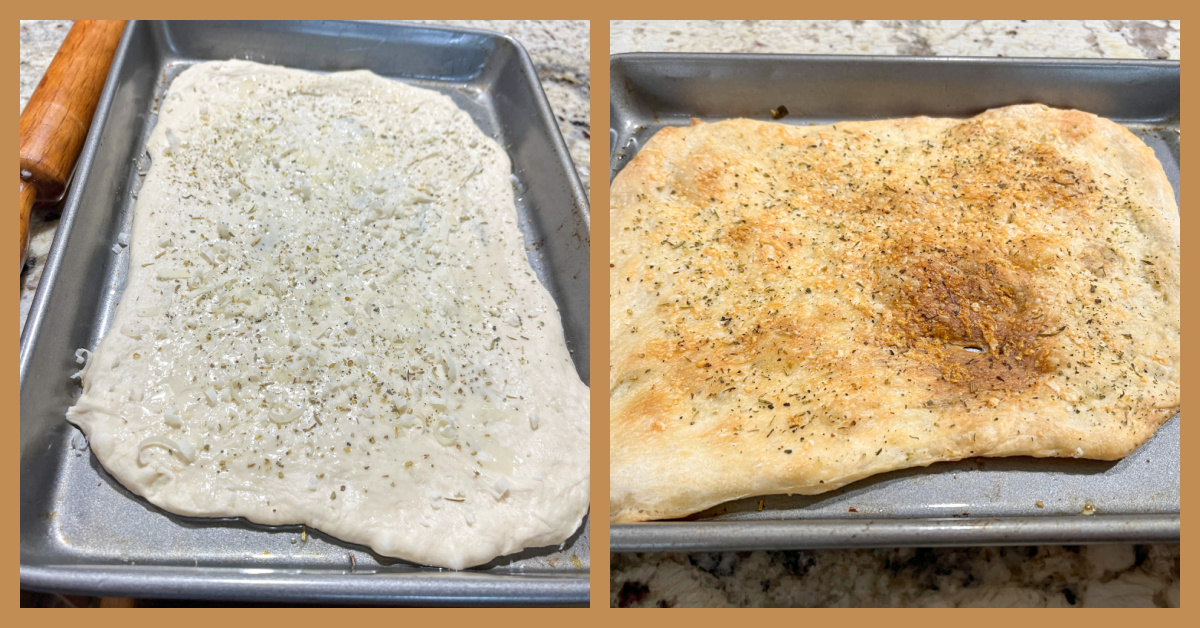
For the pizza-cracker base: Heat the oven to 425 degrees F. Drizzle 1 tablespoon olive oil on a rimmed baking sheet. Use a pastry brush to evenly coat the baking sheet with the oil. Stretch the pizza dough to cover the baking sheet (I used a 9 x 13 size). Drizzle more olive oil on top and use a pastry brush to spread the oil evenly on the dough. Sprinkle with the cheese and Herbes de Provence. Bake until golden brown, about 12 minutes. Remove from the oven and let cool until just warm or room temperature on the baking sheet.
Assemble the salad over the pizza and drizzle the dressing all over. Toss is gently and wait about 15 minutes to serve it.
ENJOY!
to print the recipe, click here
Comments: This is messy to eat, I won’t lie to you. I advise you to allow the dressing soak on the pizza component a bit, it won’t make it soggy at all, if you bake it until it is crispy. But it will be a delicate balance – do not bake it too dark or it will be super hard and difficult to cut. If you go into the FoodTV website, some of the comments about Katie are very hurtful, and I find it all so sad. She is a very sweet person and I’ve tried and enjoyed many of her recipes. This salad reminded me of fatoush, which is a classic I am quite fond of. I don’t think I would serve it for company because it is a little tricky to eat, but if it is perfect for an informal meal. The dressing is absolutely delicious, and I recommend you give it a try on a regular salad, independent of the pizza part.
ONE YEAR AGO: Prosciutto-Wrapped Chicken Breasts with Pickled Jalapeños
TWO YEARS AGO: Dressing Up the Roll Cakes
THREE YEARS AGO: Roasted Carrot and Barley Salad
FOUR YEARS AGO: Ode to Halva
FIVE YEARS AGO: Brazilian Pao de Queijo (re-blogged)
SIX YEARS AGO: Apricot Linzer Torte
SEVEN YEARS AGO: A Trio of Air-Fried Goodies
EIGHT YEARS AGO: Focaccia with Grapes, Roquefort and Truffled Honey
NINE YEARS AGO: Moroccan Carrot Dip Over Cucumber Slices
TEN YEARS AGO: White Chocolate Macadamia Nut Cookies
ELEVEN YEARS AGO: Cilantro-Jalapeno “Hummus”
TWELVE YEARS AGO:A Moving Odyssey
THIRTEEN YEARS AGO:Hoegaarden Beer Bread
FOURTEEN YEARS AGO: Ancho-Chile Marinade: Pleased to Meat you!
FIFTEEN YEARS AGO: Shrimp Moqueca