If you follow my baby blog, perhaps you’ve noticed I ran out of time to blog about St. Patrick’s cookies? It turns out I also got in trouble right here in the Bewitching Kitchen. Today I share a bread and a batch of cupcakes made in honor of that special holiday. Included in this post, a little cupcake decorating video, that you can find right after the recipe.
x
Better late than never, let’s start with the bread…
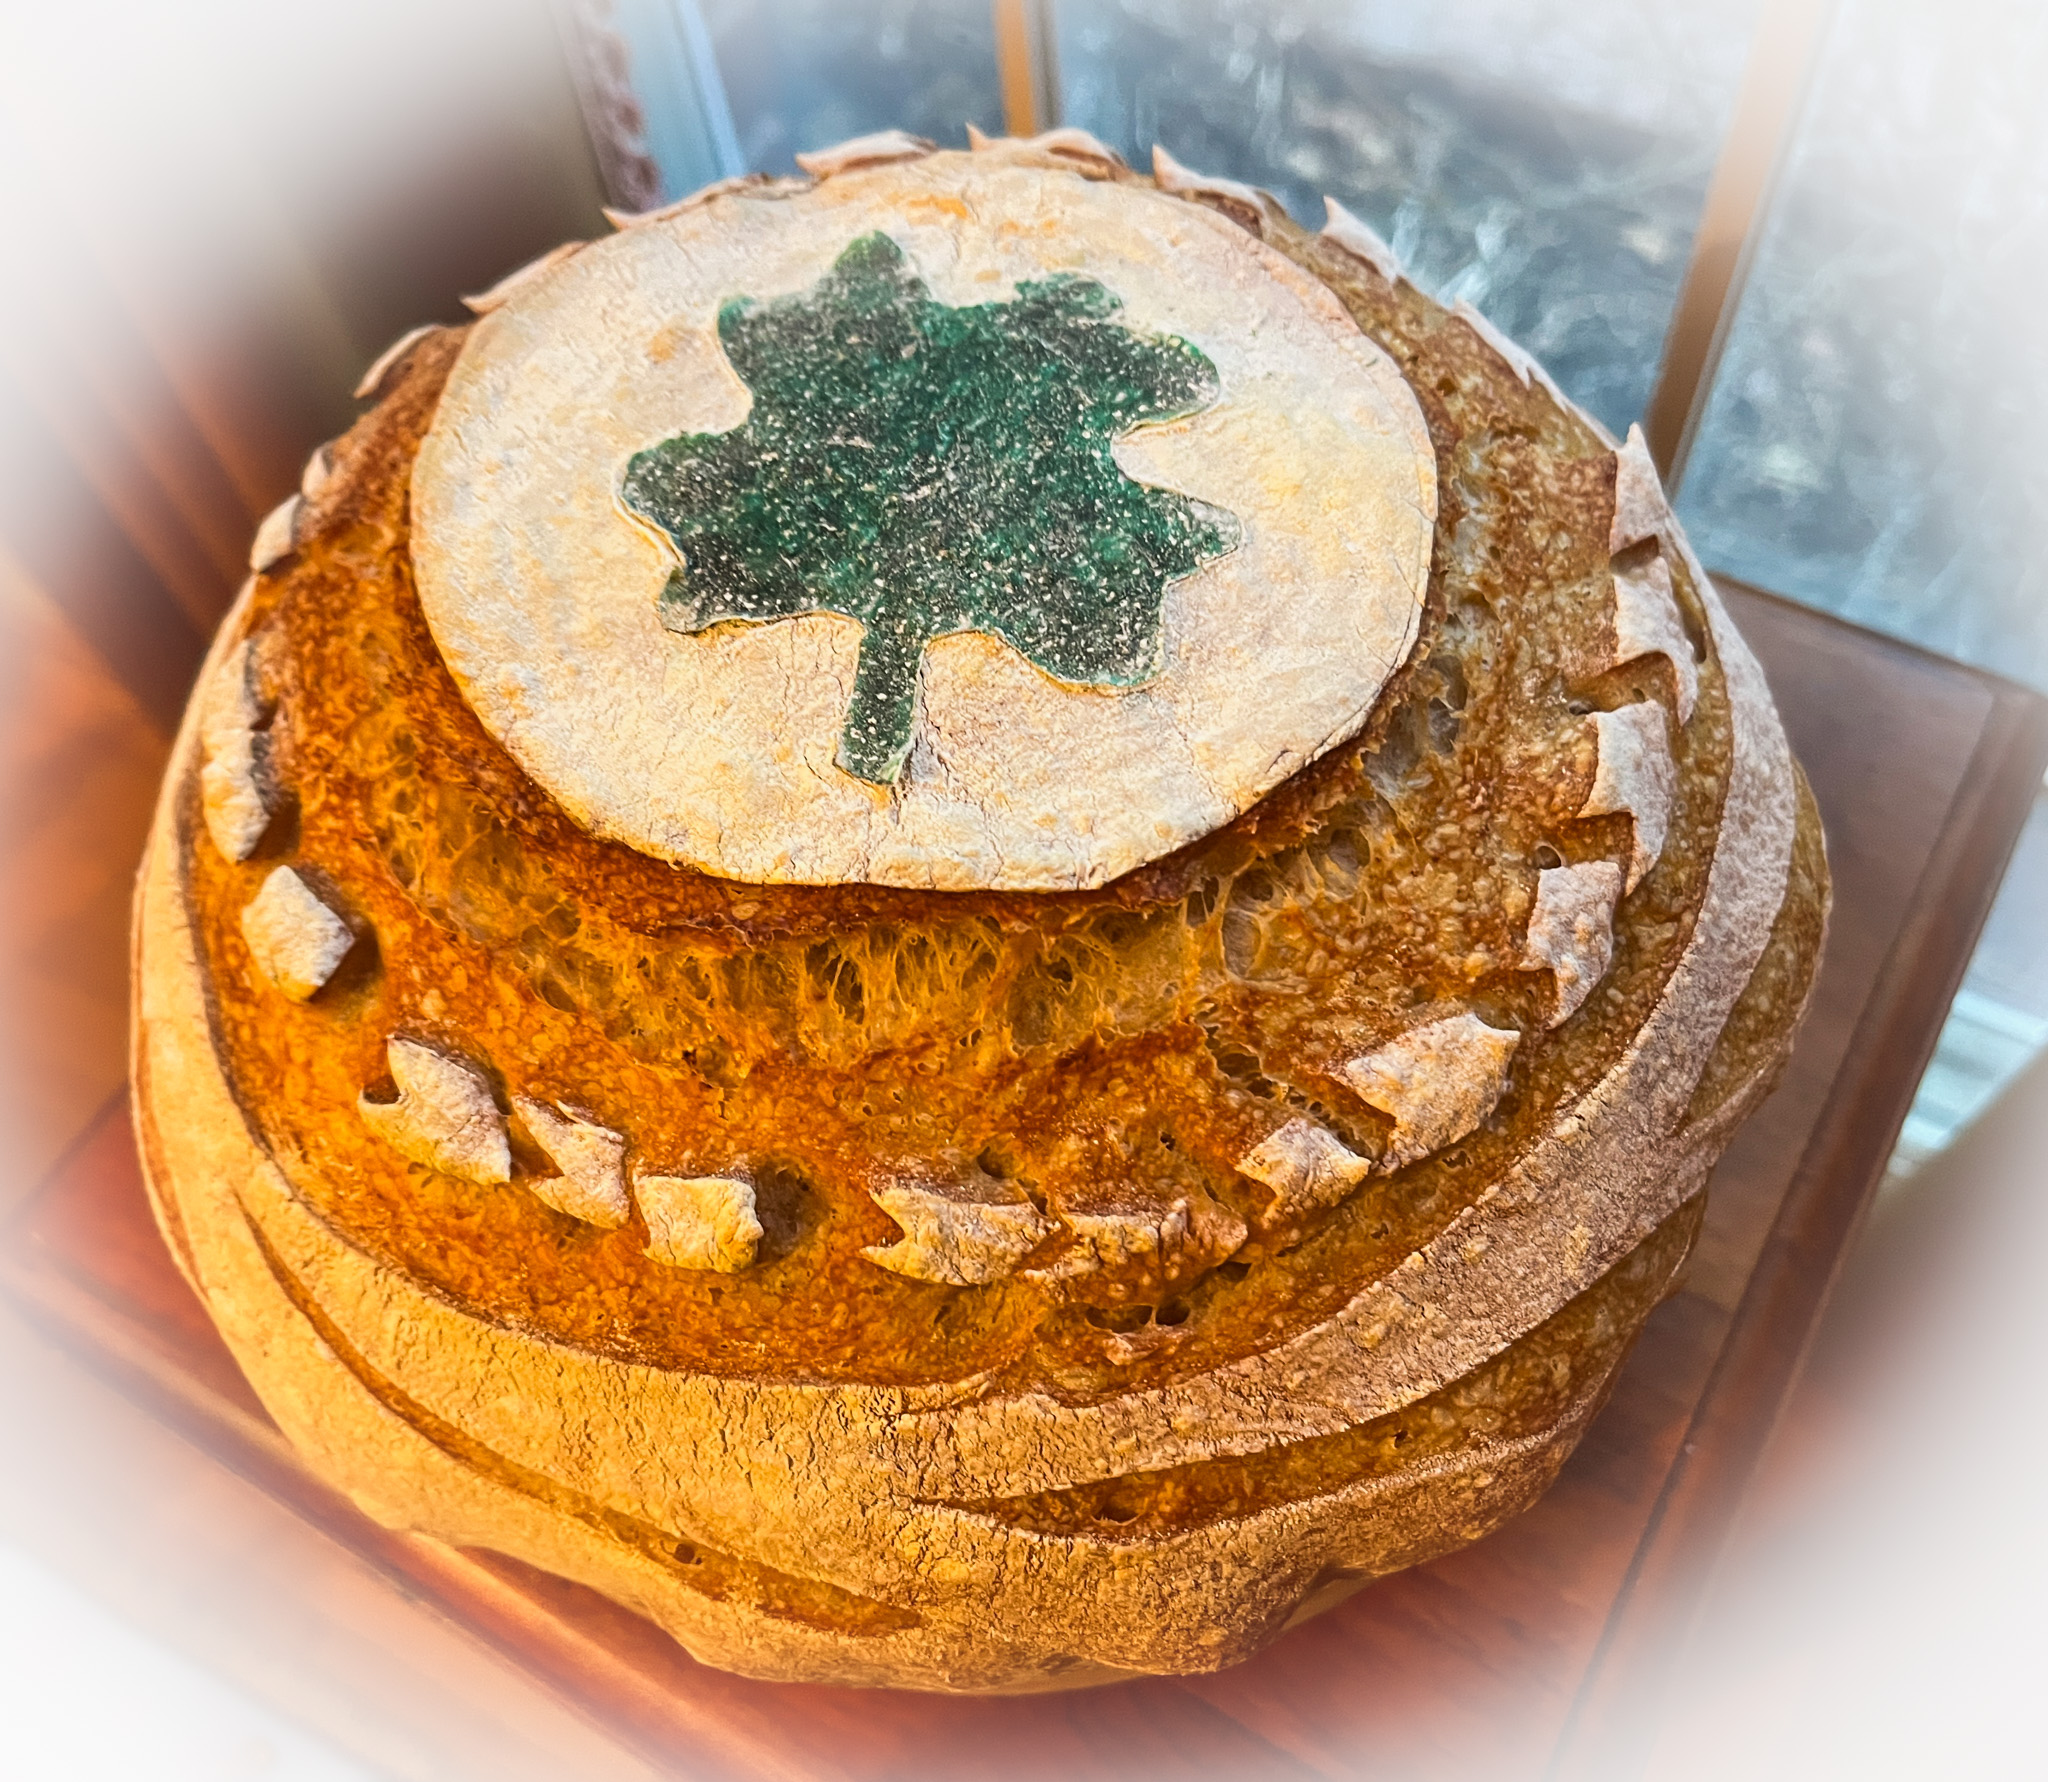
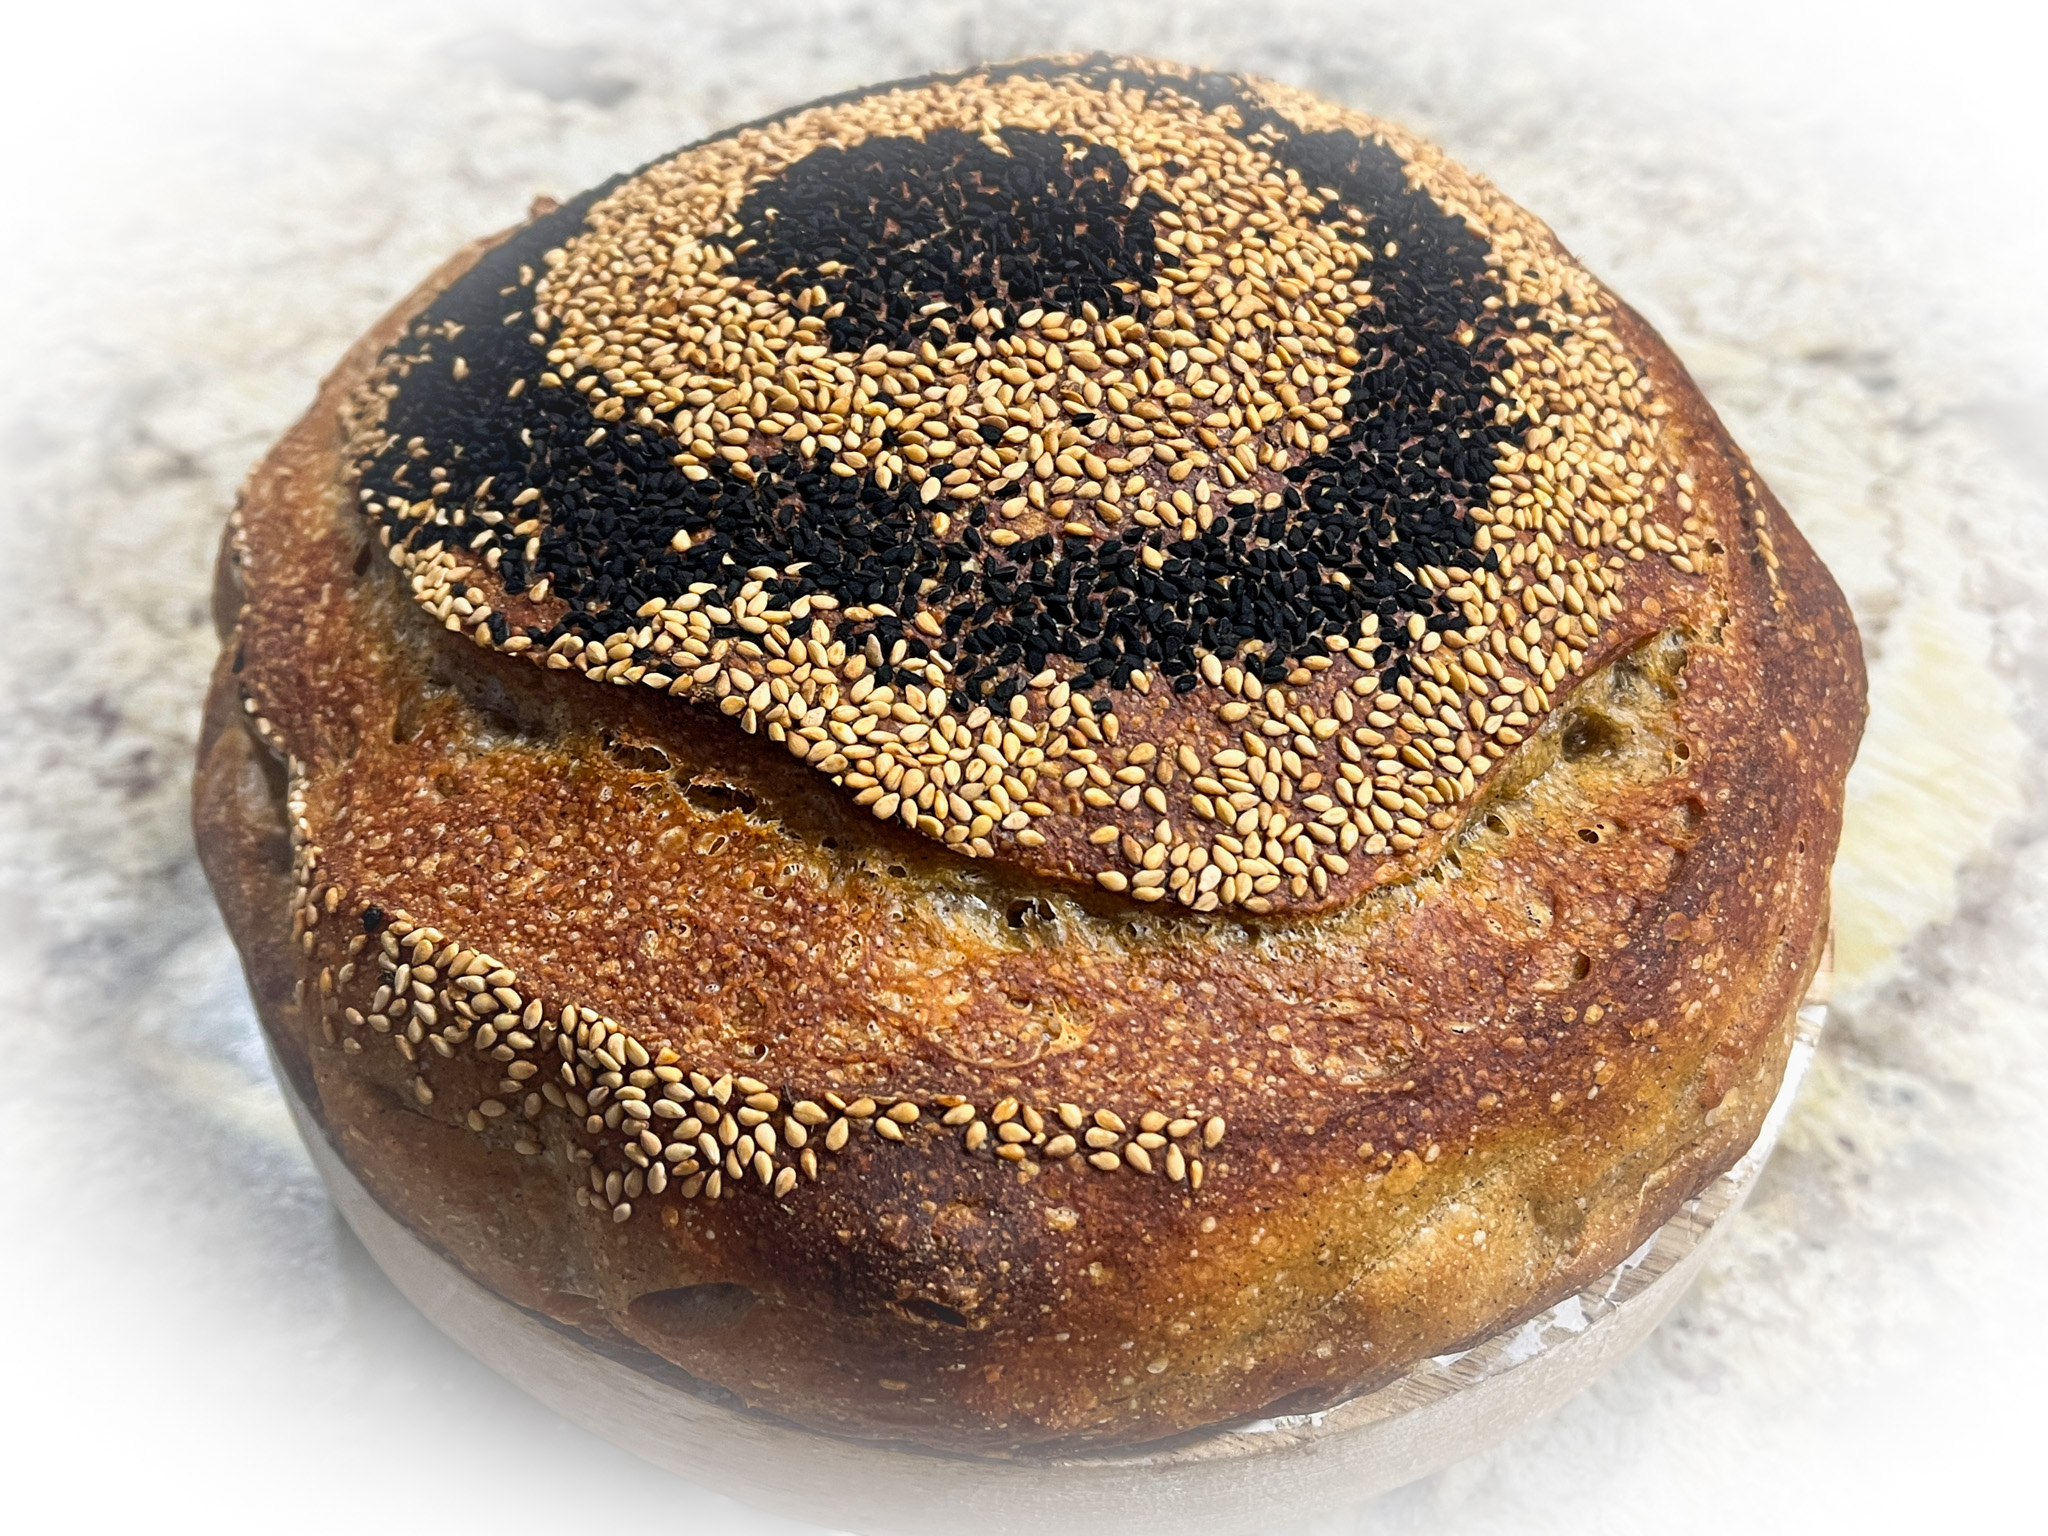
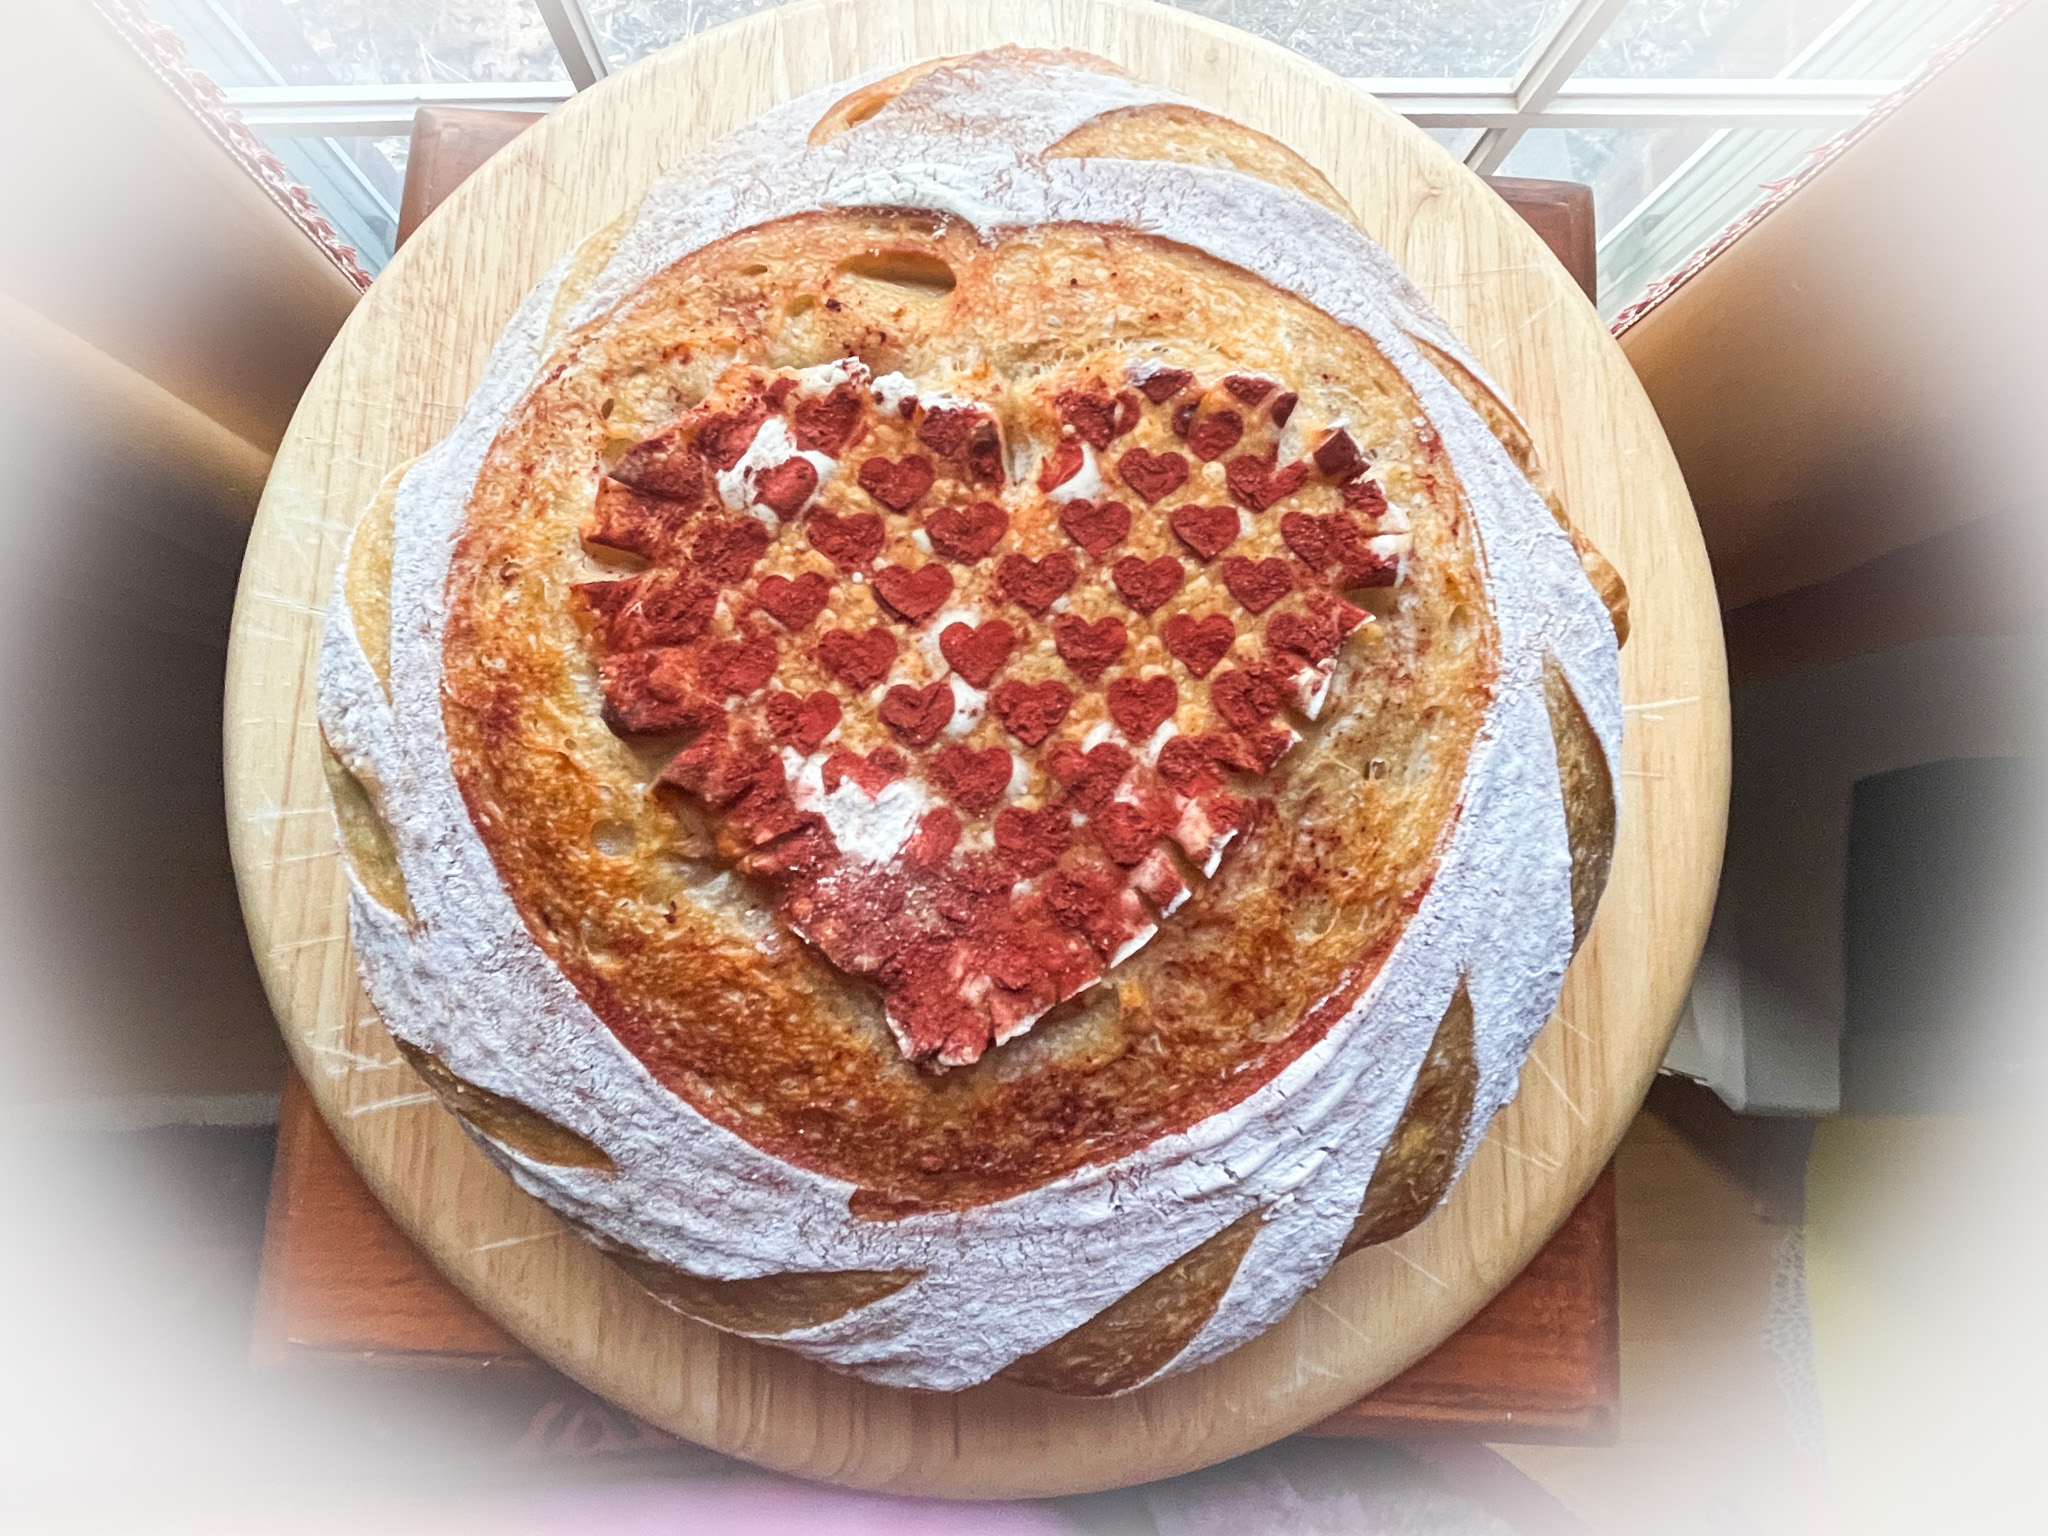
SHAMROCK SOURDOUGH
(from The Bewitching Kitchen)
450g bread flour
25g spelt flour
25g dark rye flour
75g sourdough starter (stiff or 100% hydration)
10g salt
360g water
Thai rice flour (or tapioca flour)
shamrock shape cut from edible paper
Mix all ingredients in the bowl of a KitchenAid type mixer fitted with the dough hook. Knead gently for about 4 minutes (first or second speed maximum).
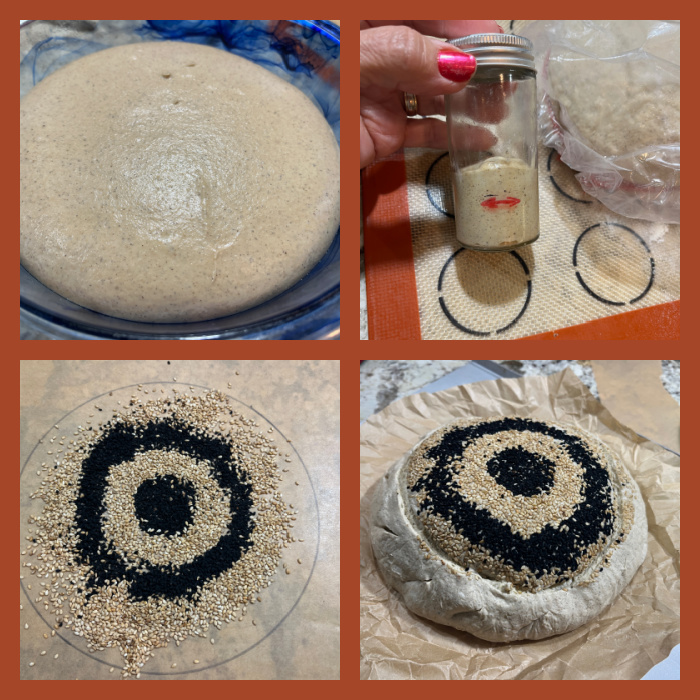
Transfer dough to a lightly oil bowl and do a bulk fermentation with 4 folds made 45 minutes apart. Before you start the fermentation , remove a very small amount of dough to a small glass container (like those that hold spices), and mark where the level of the dough is with a permanent marker. Keep that at room temperature to monitor fermentation.
After the last folding cycle, keep an eye on the fermentation using the small vial. Ideally you want to let the dough ferment until it is double in size. Depending on the day, temperature of your kitchen, it might take 8 hours or more.
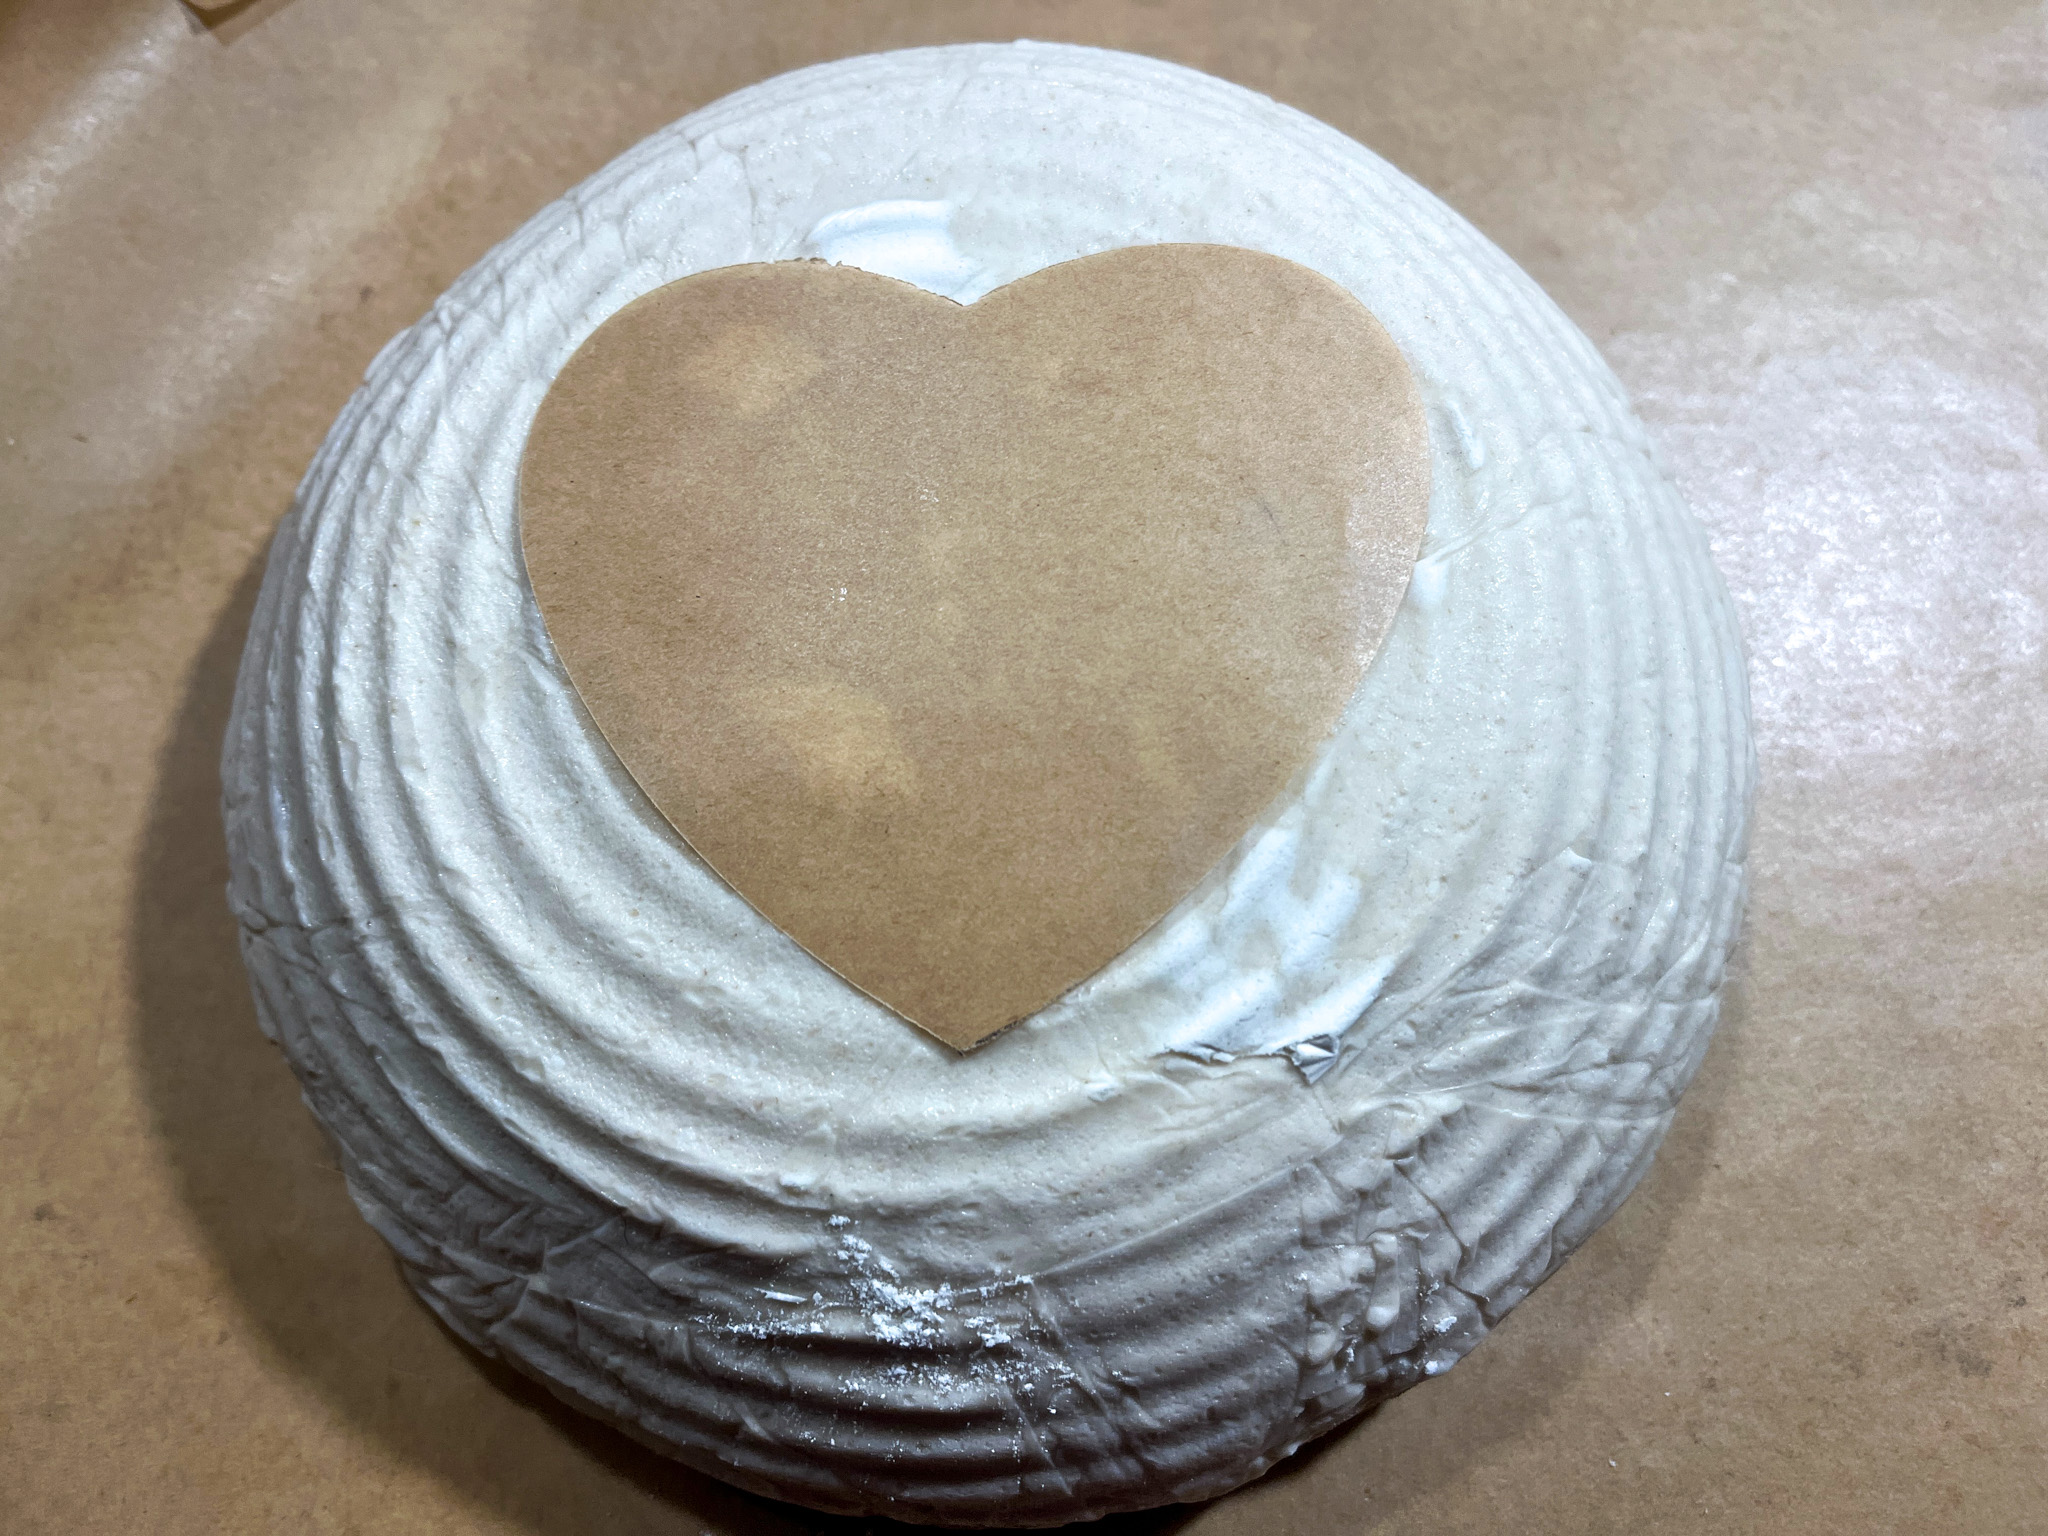
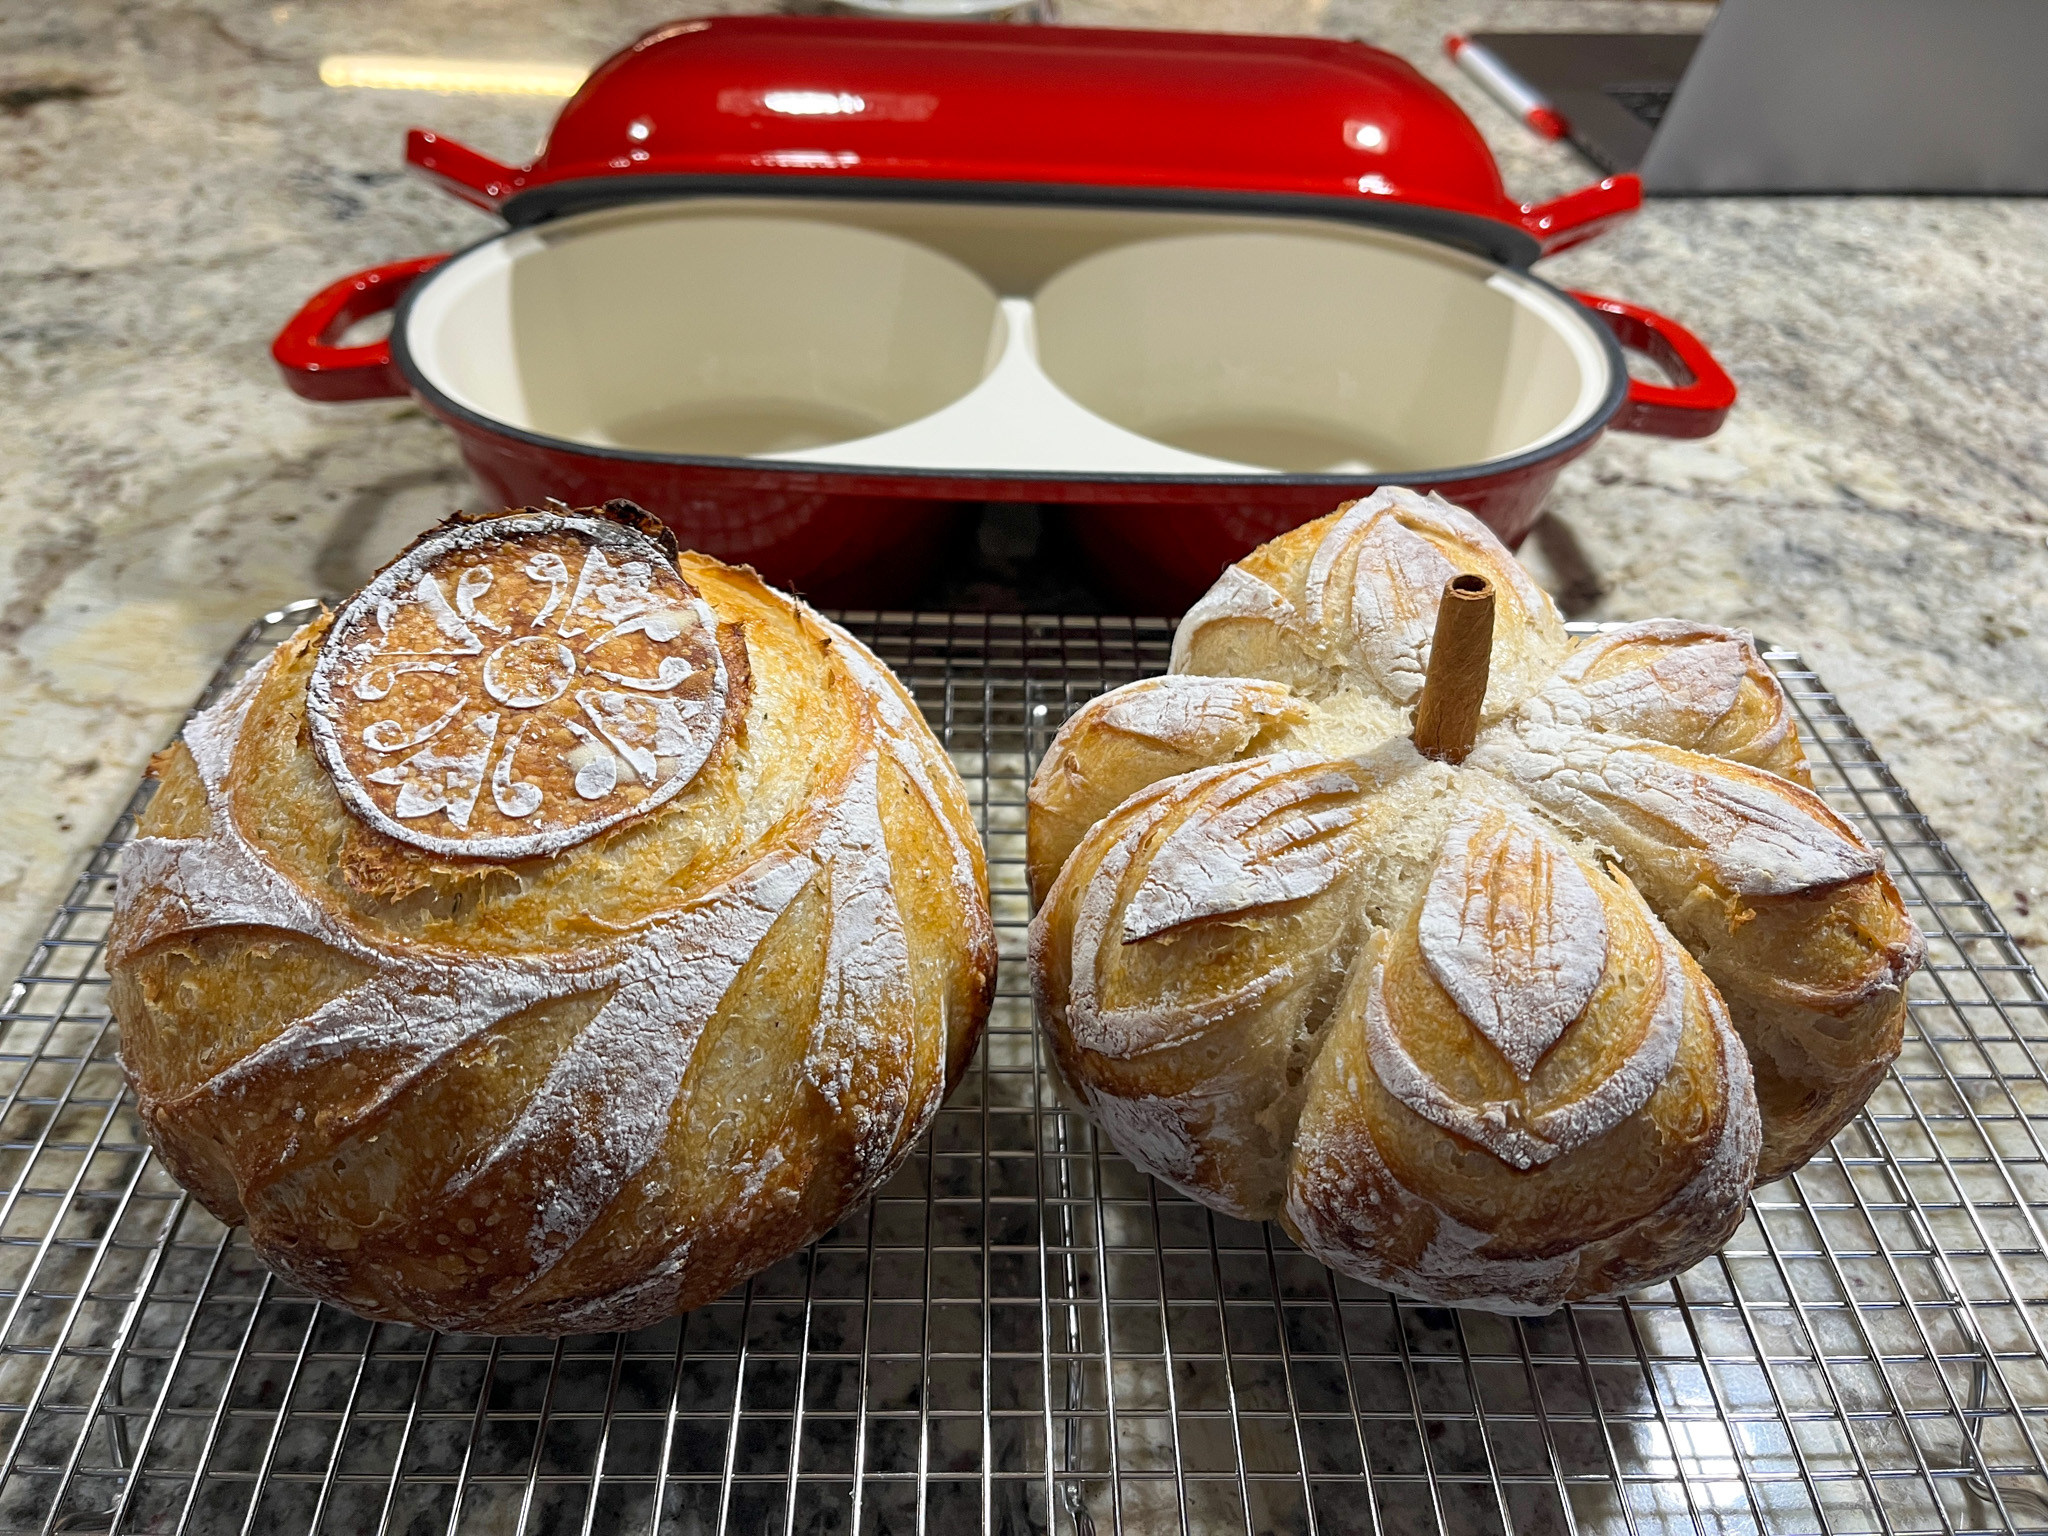
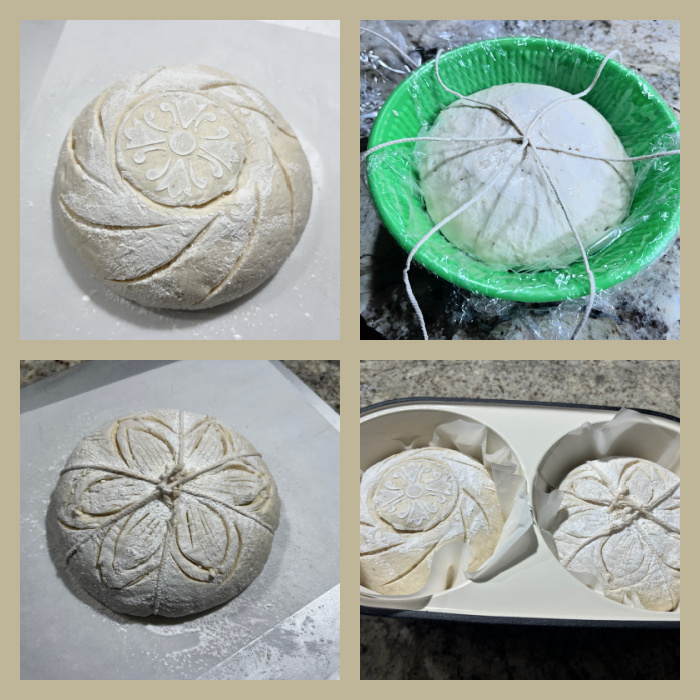
Once bulk fermentation is over, shape the dough as a round ball. Place in the fridge overnight.
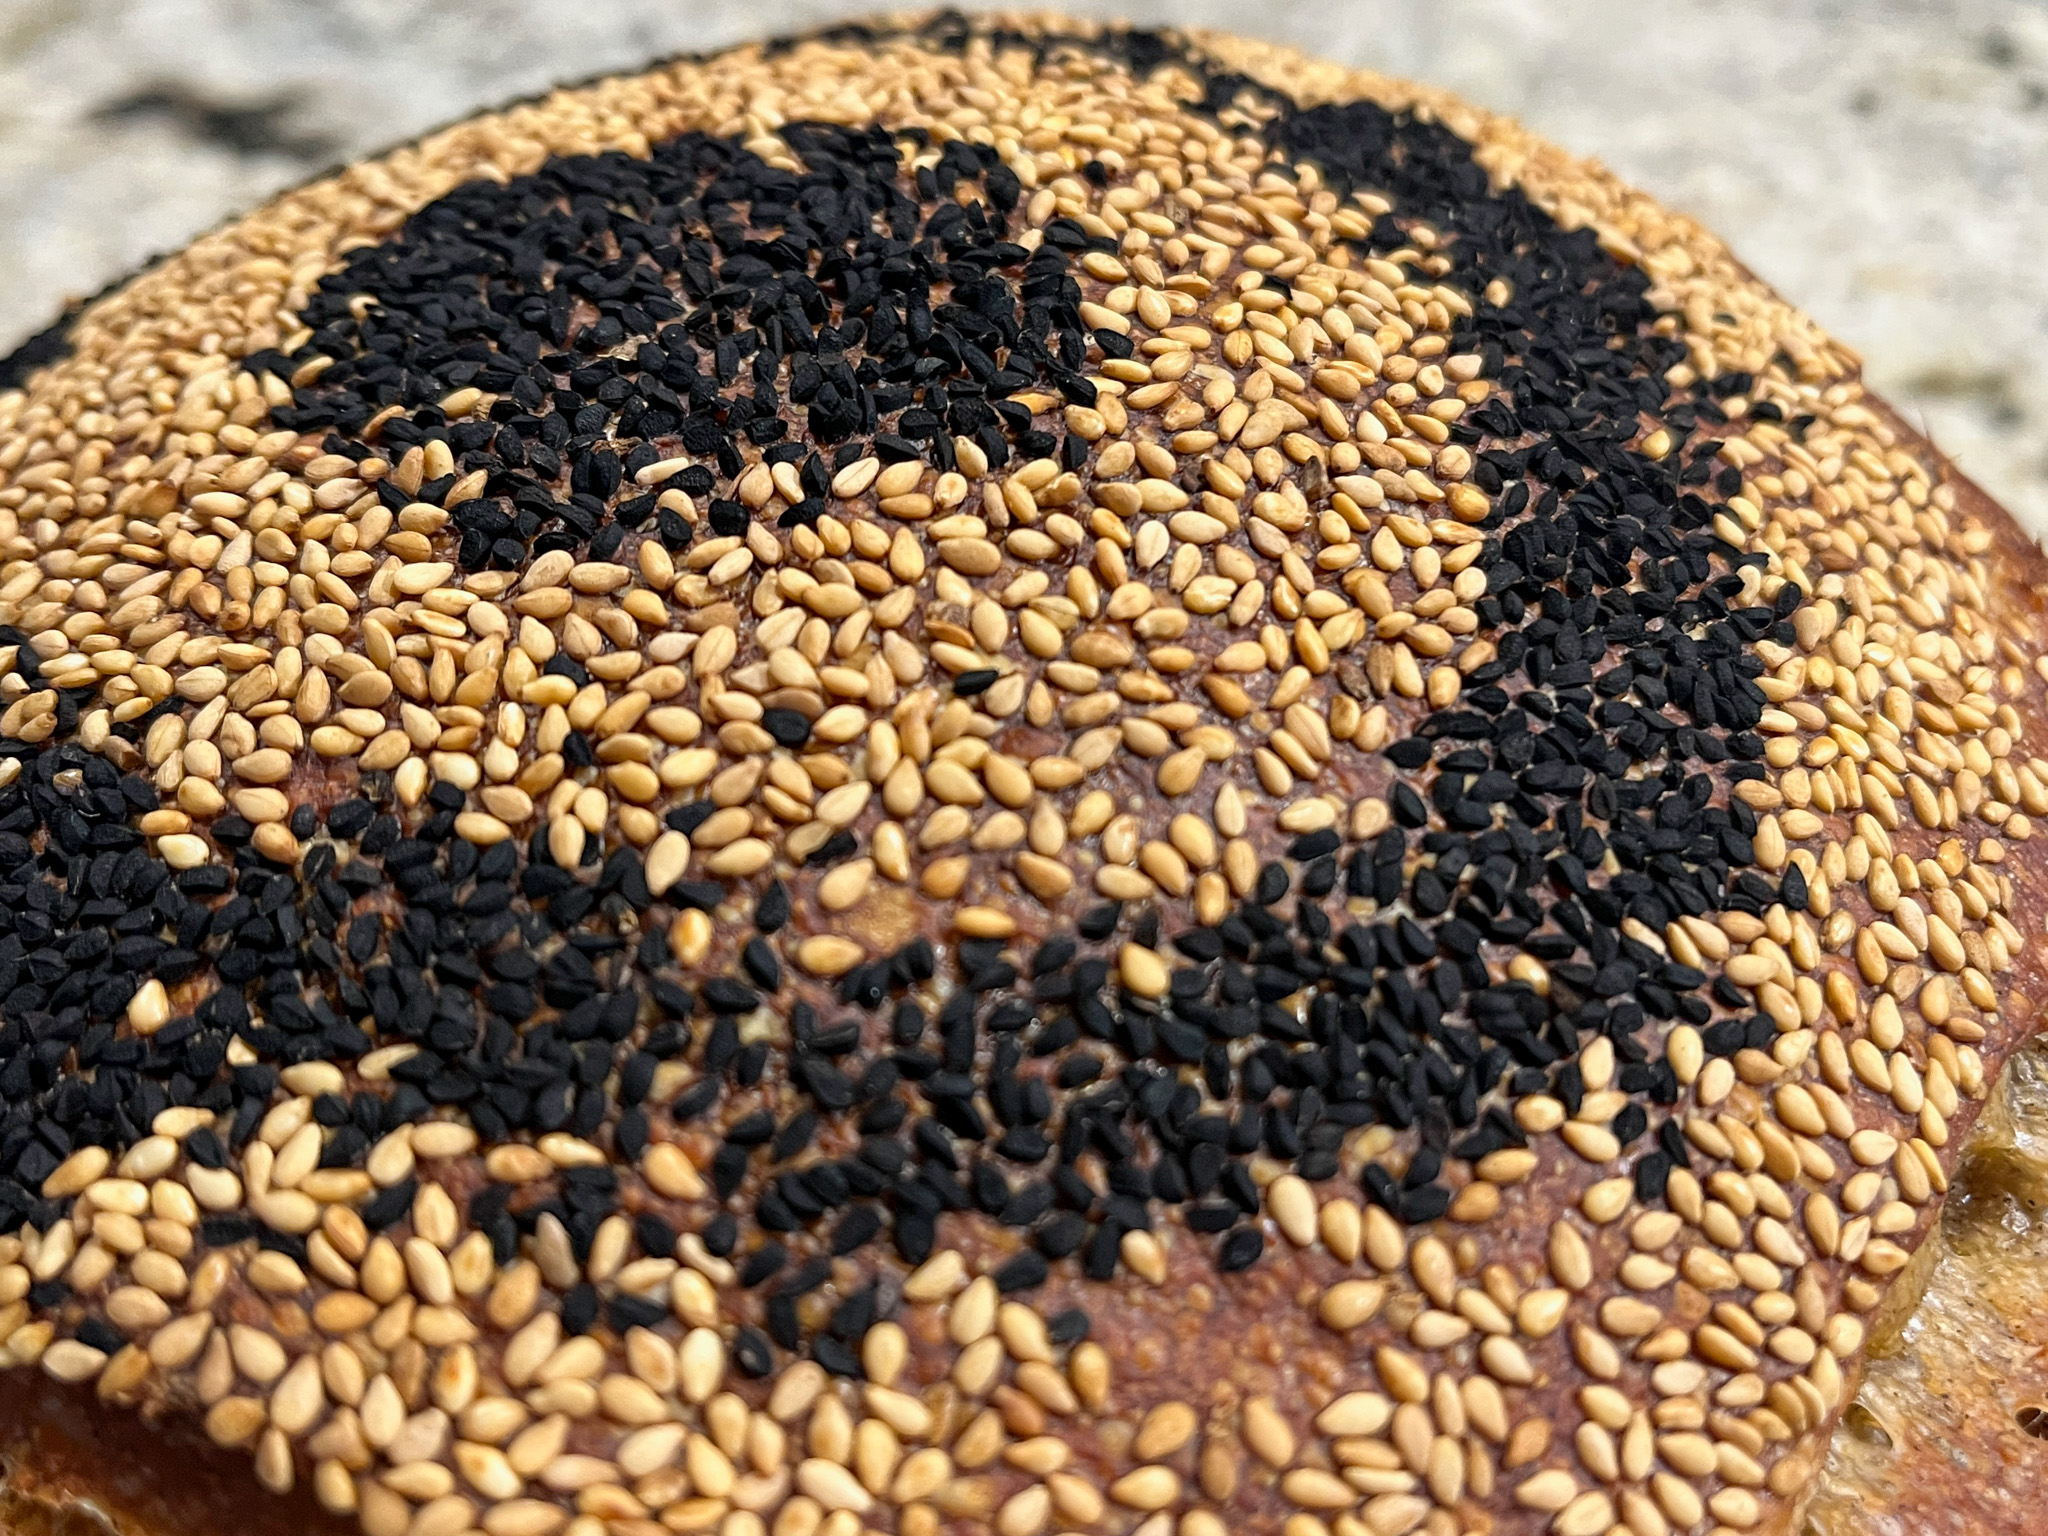
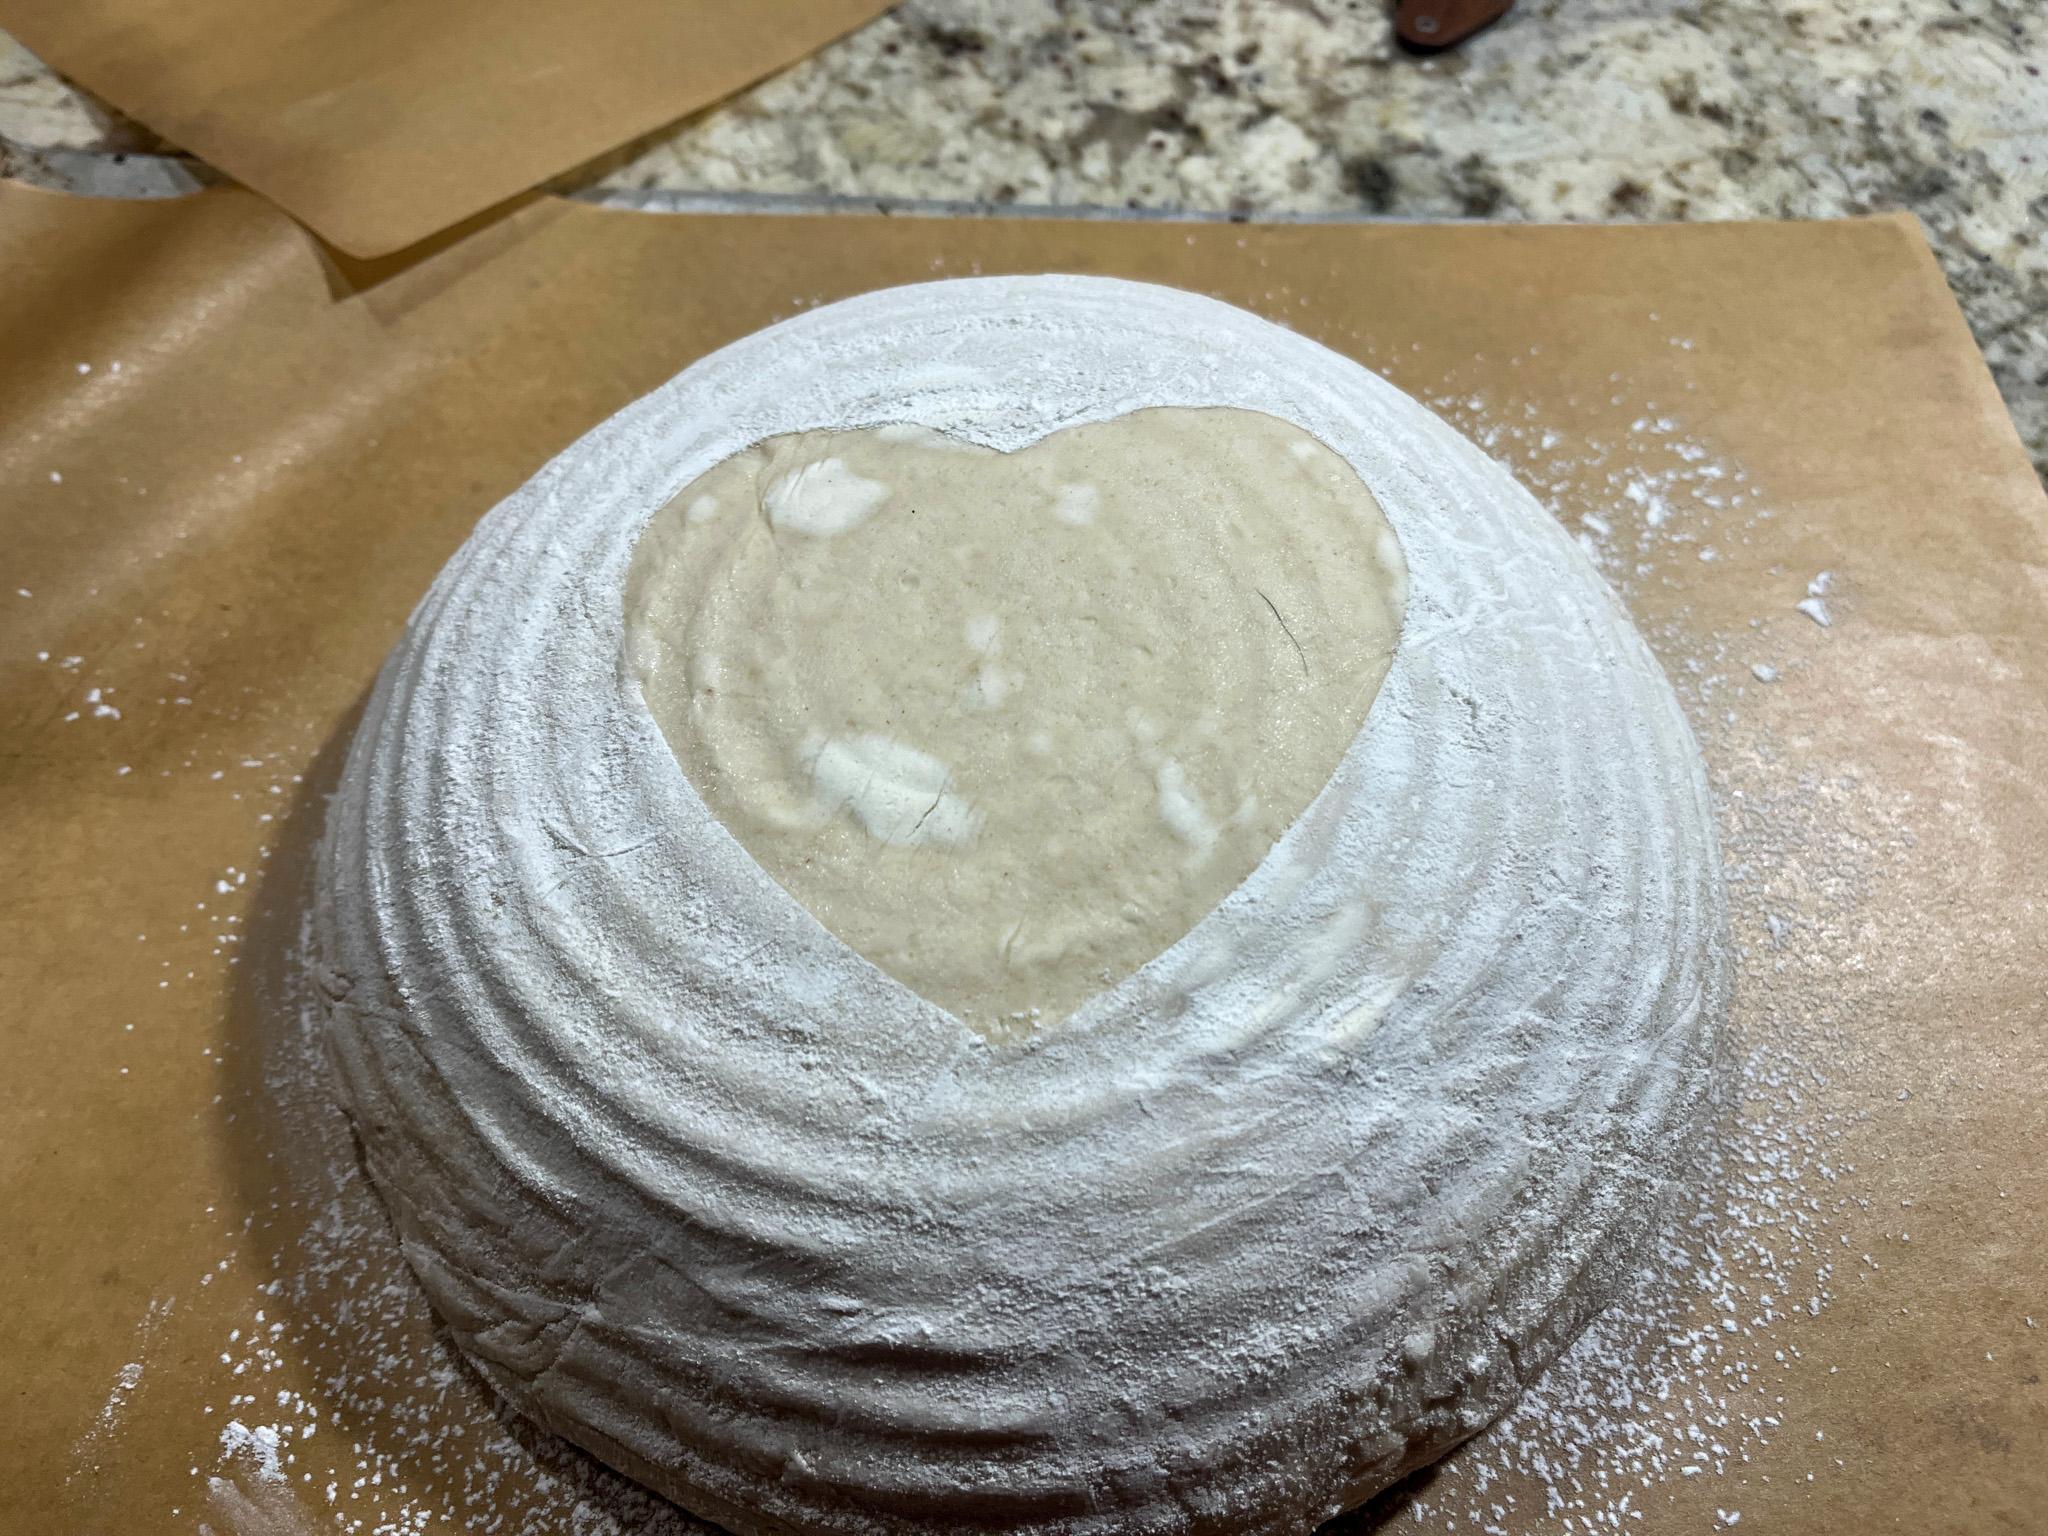
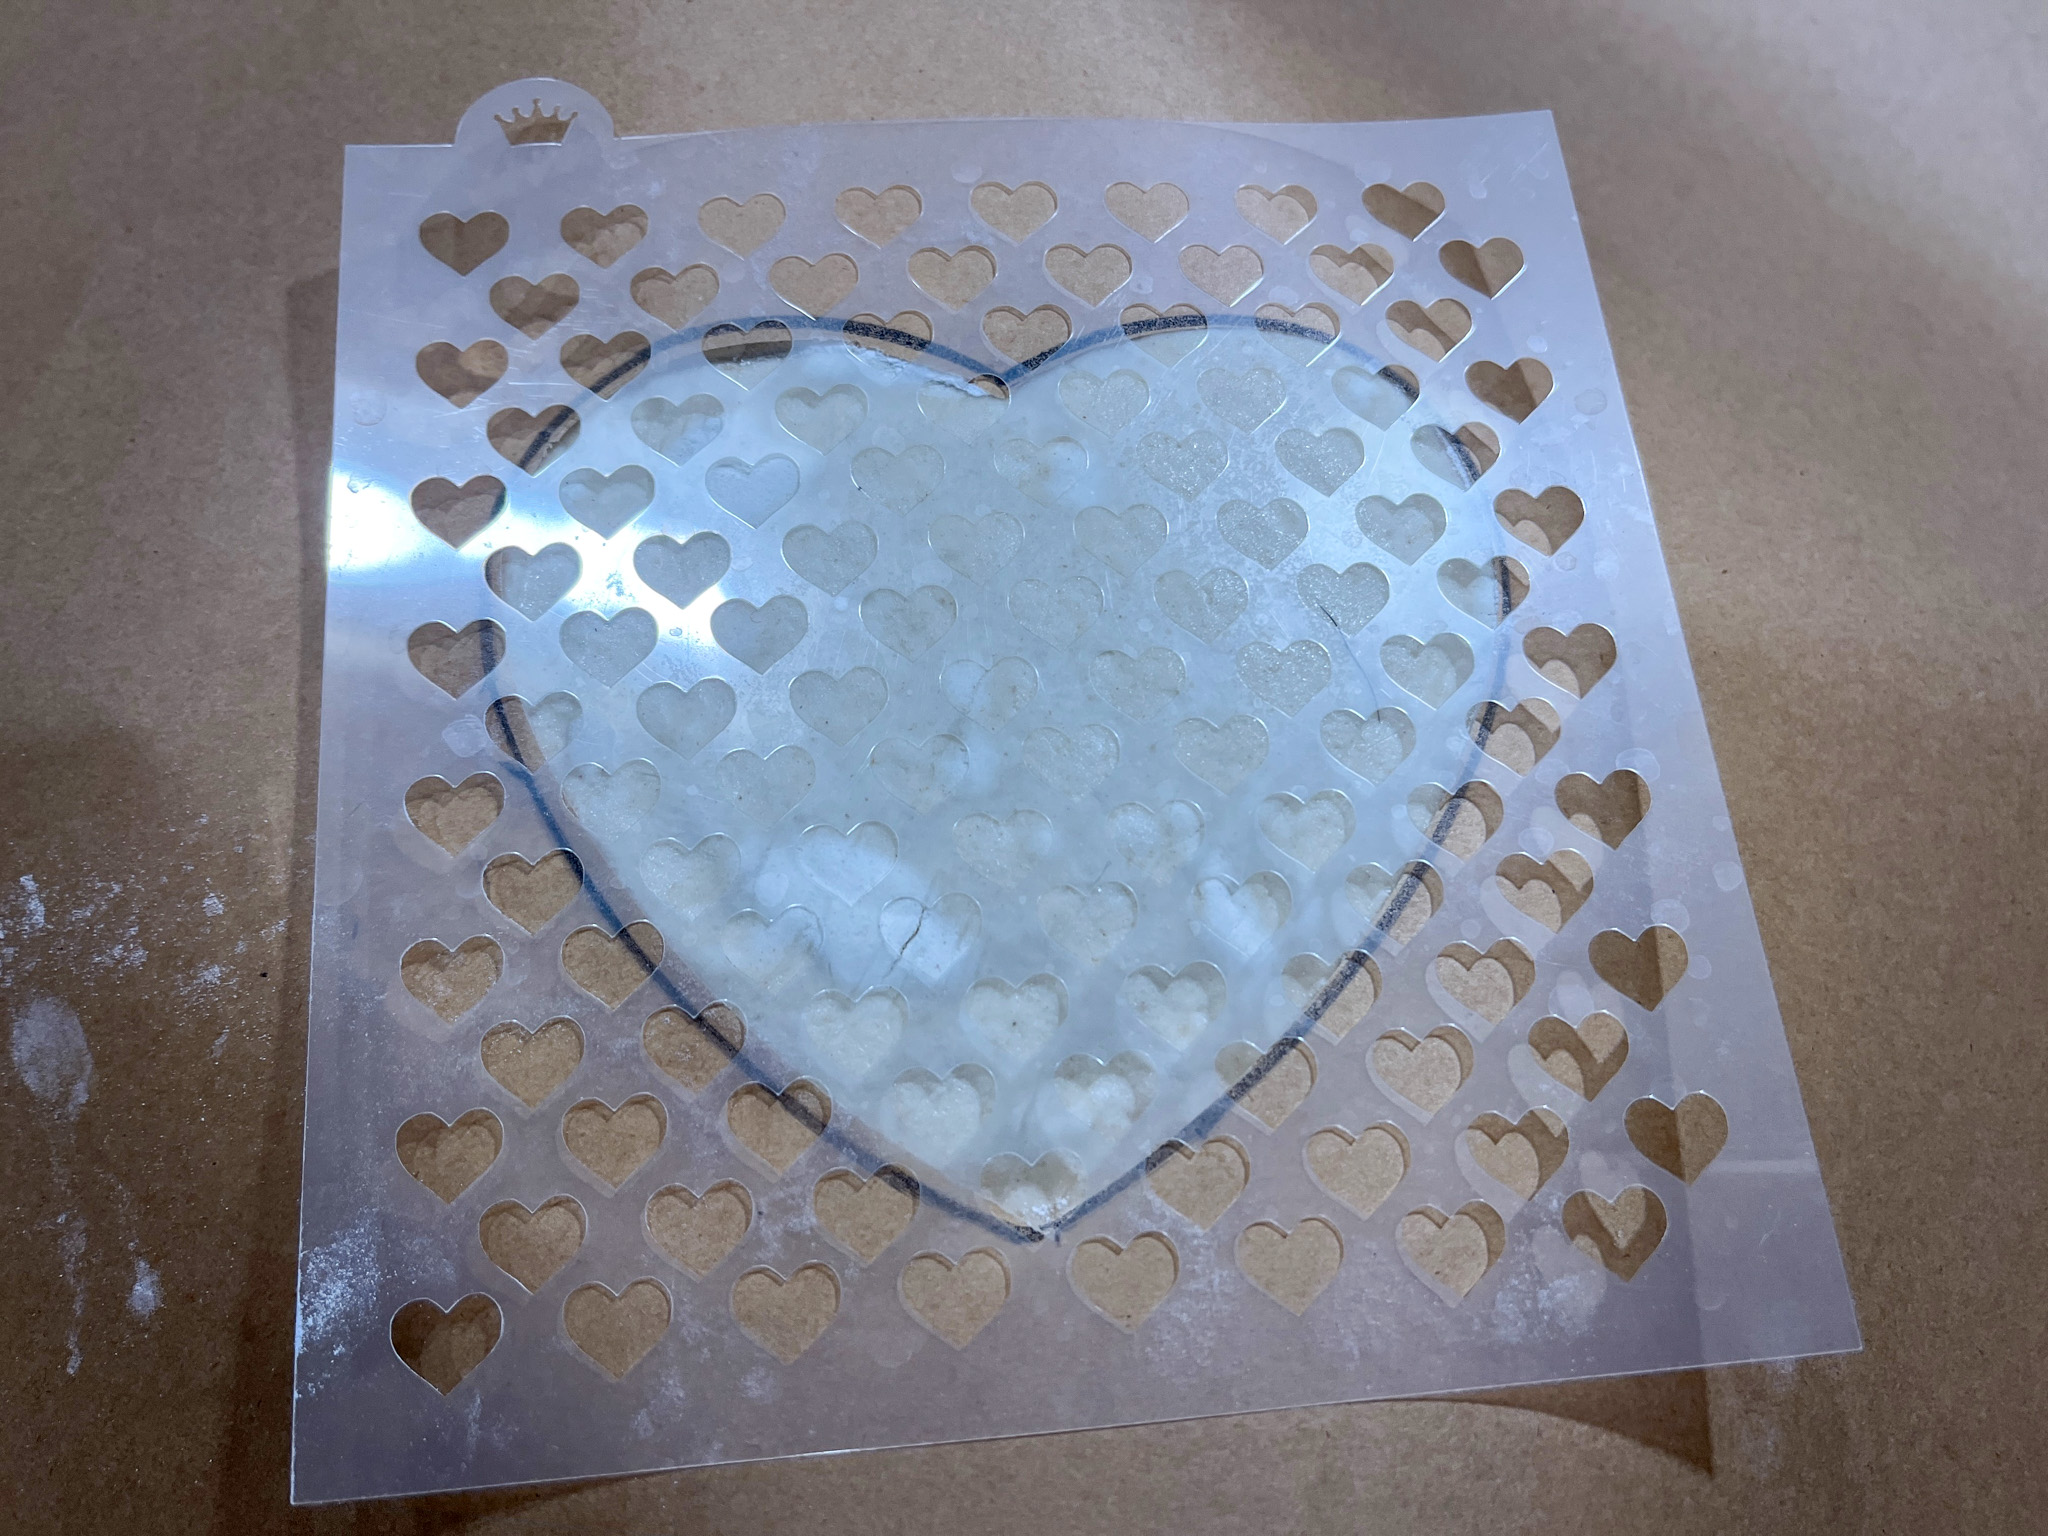
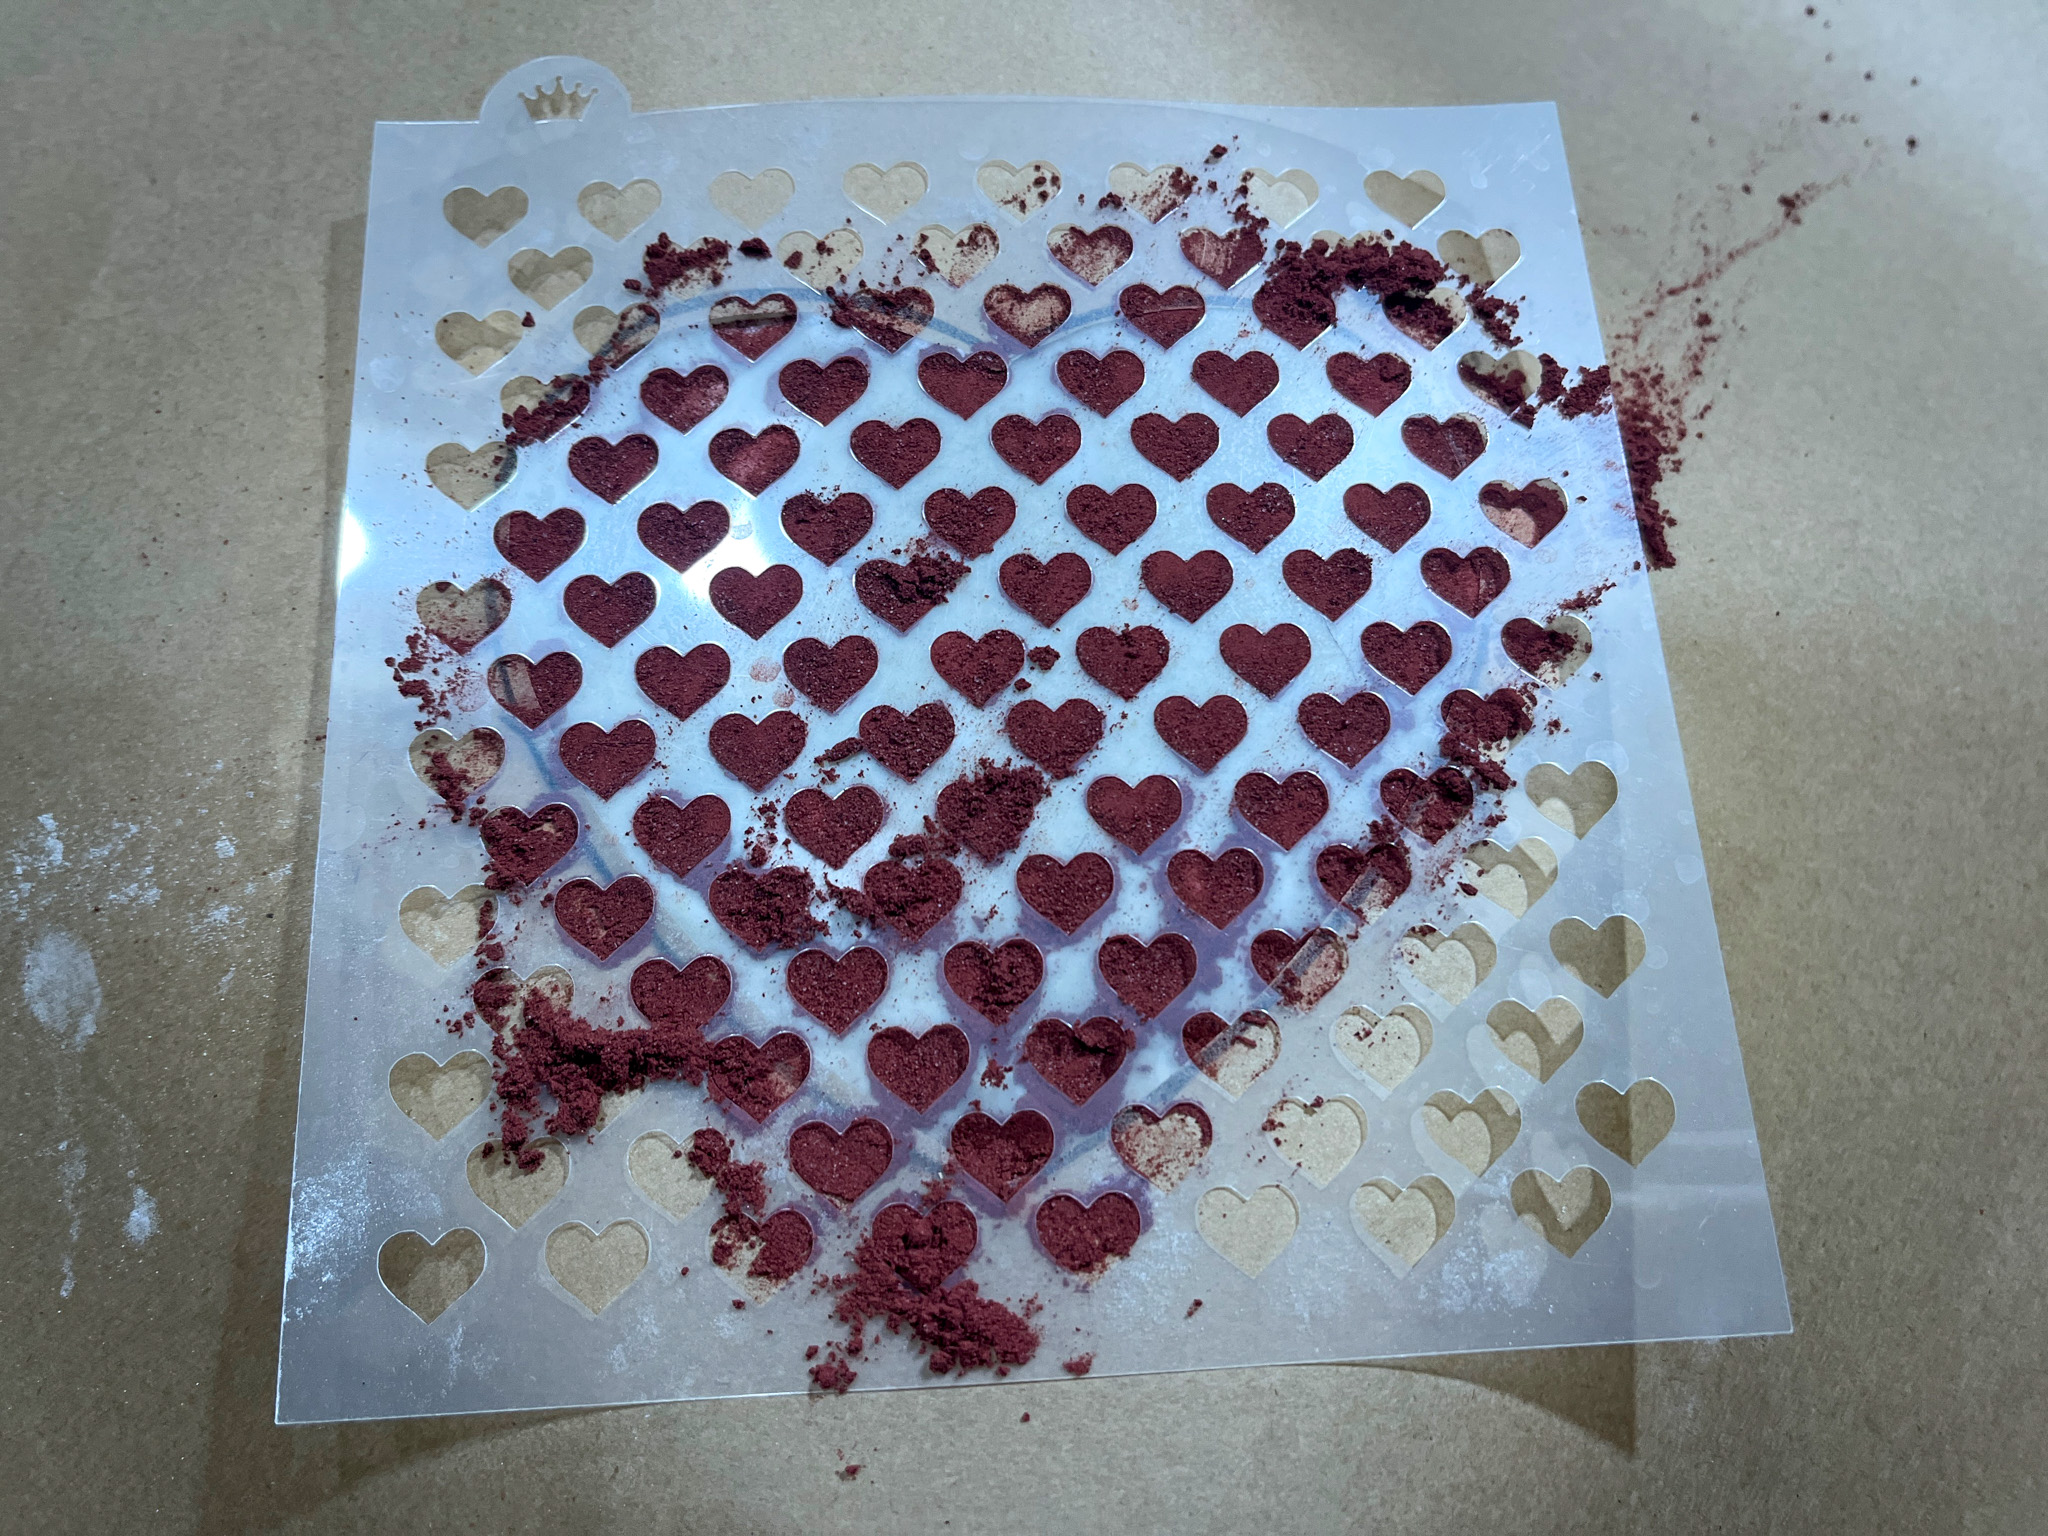
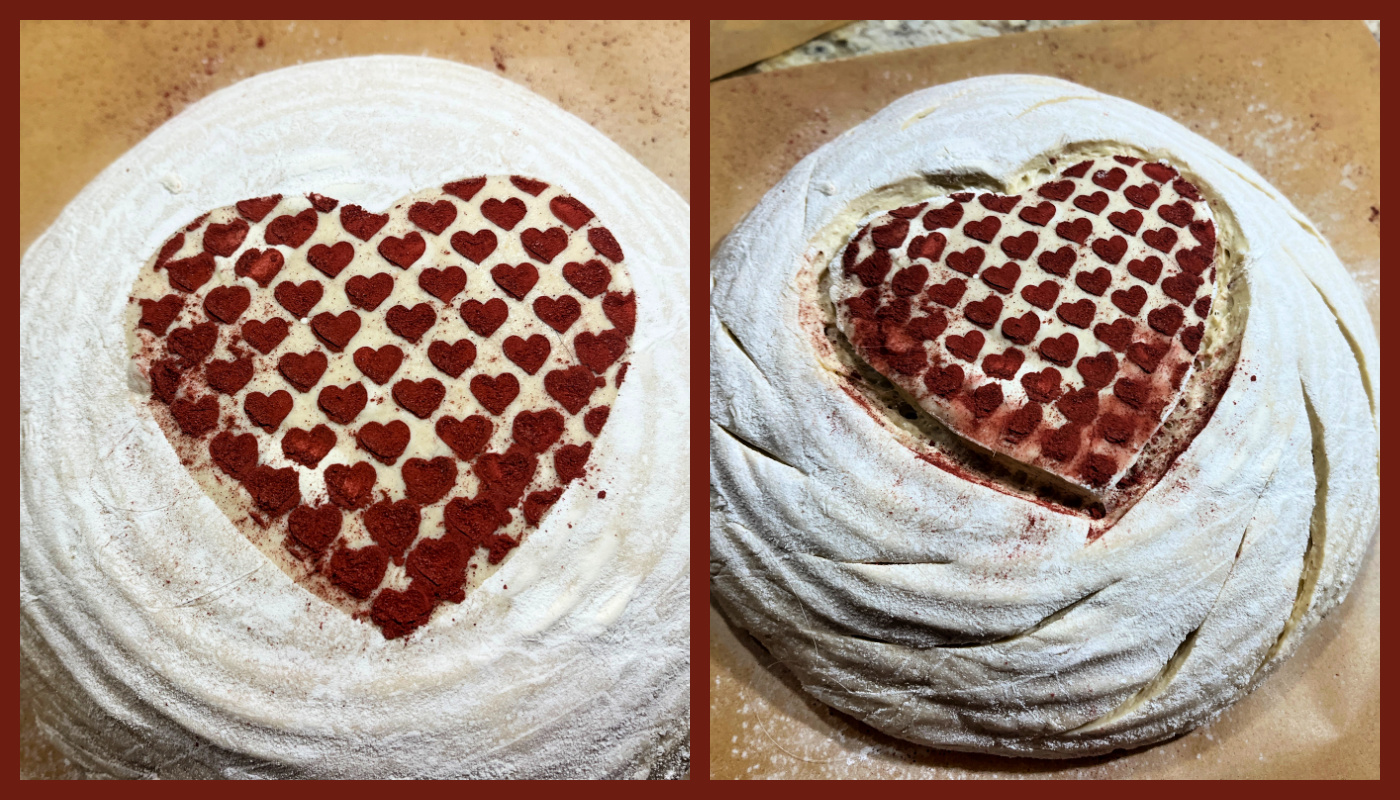
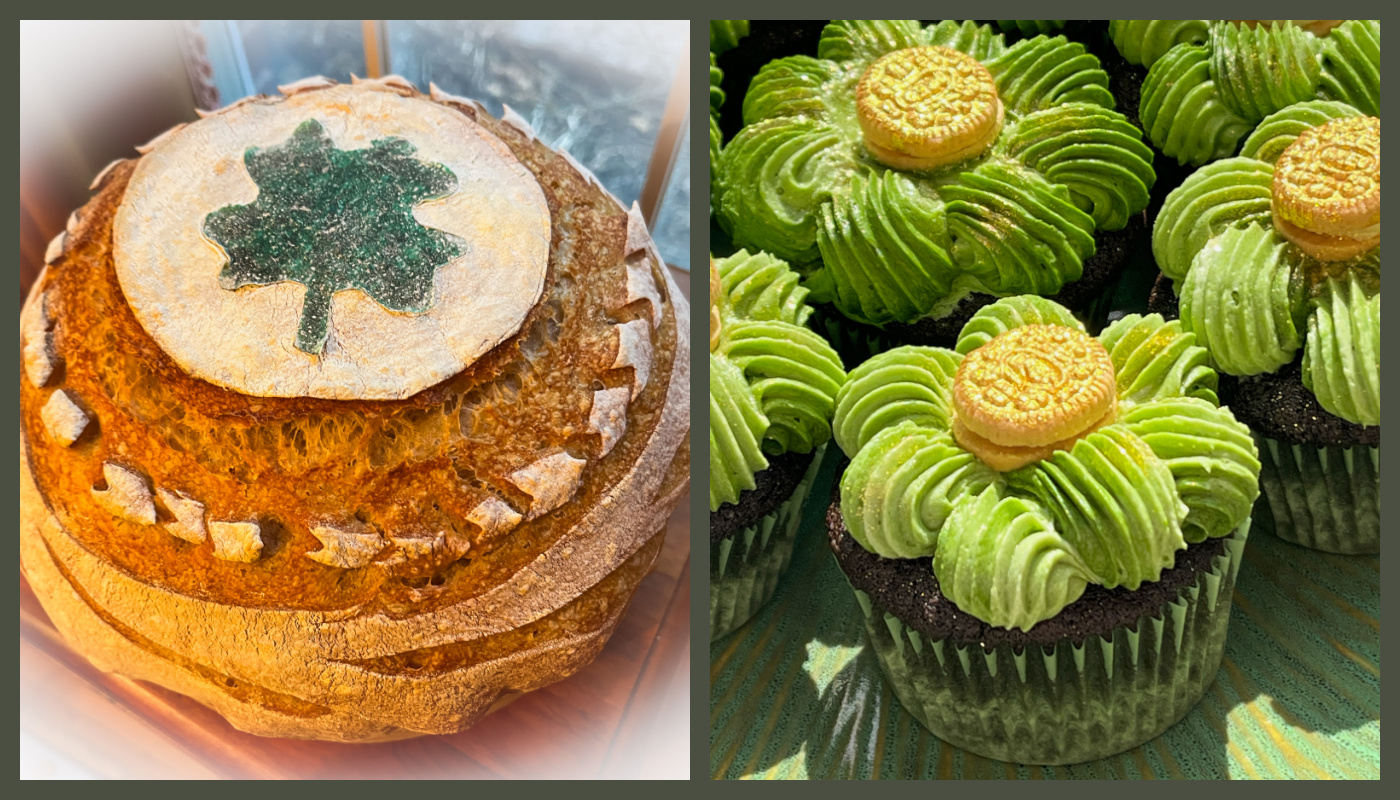
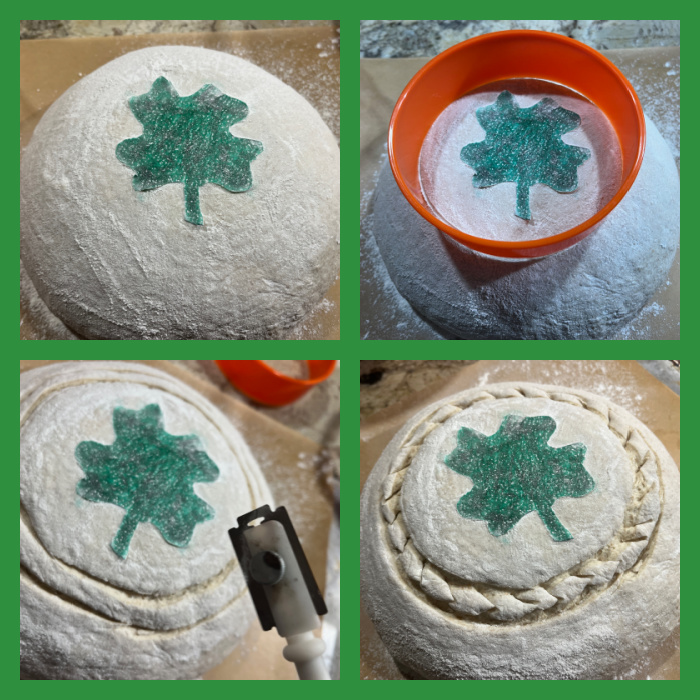
Next day, freeze the dough for 30 minutes in the banetton, to make it easier to score later. Invert the dough on a paper liner, add the shamrock shape in the center, and flour the region around it (I used Thai rice flour). To make the paper stick, you can spray the surface VERY LIGHTLY with water. Score the perimeter of the shamrock and the outer area of the dough, and place in a Dutch oven.
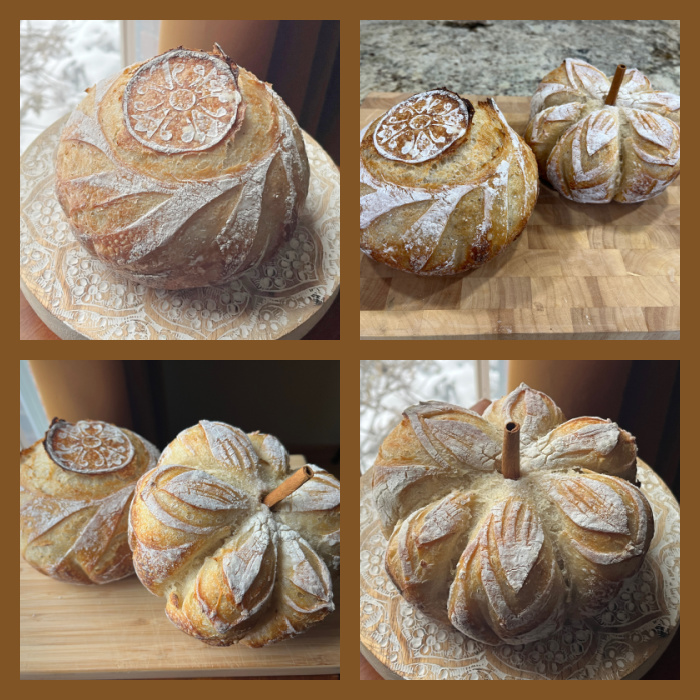
Close the pan and bake at 450F for 30 minutes, open and allow the bread to brown for a further 15 minutes.
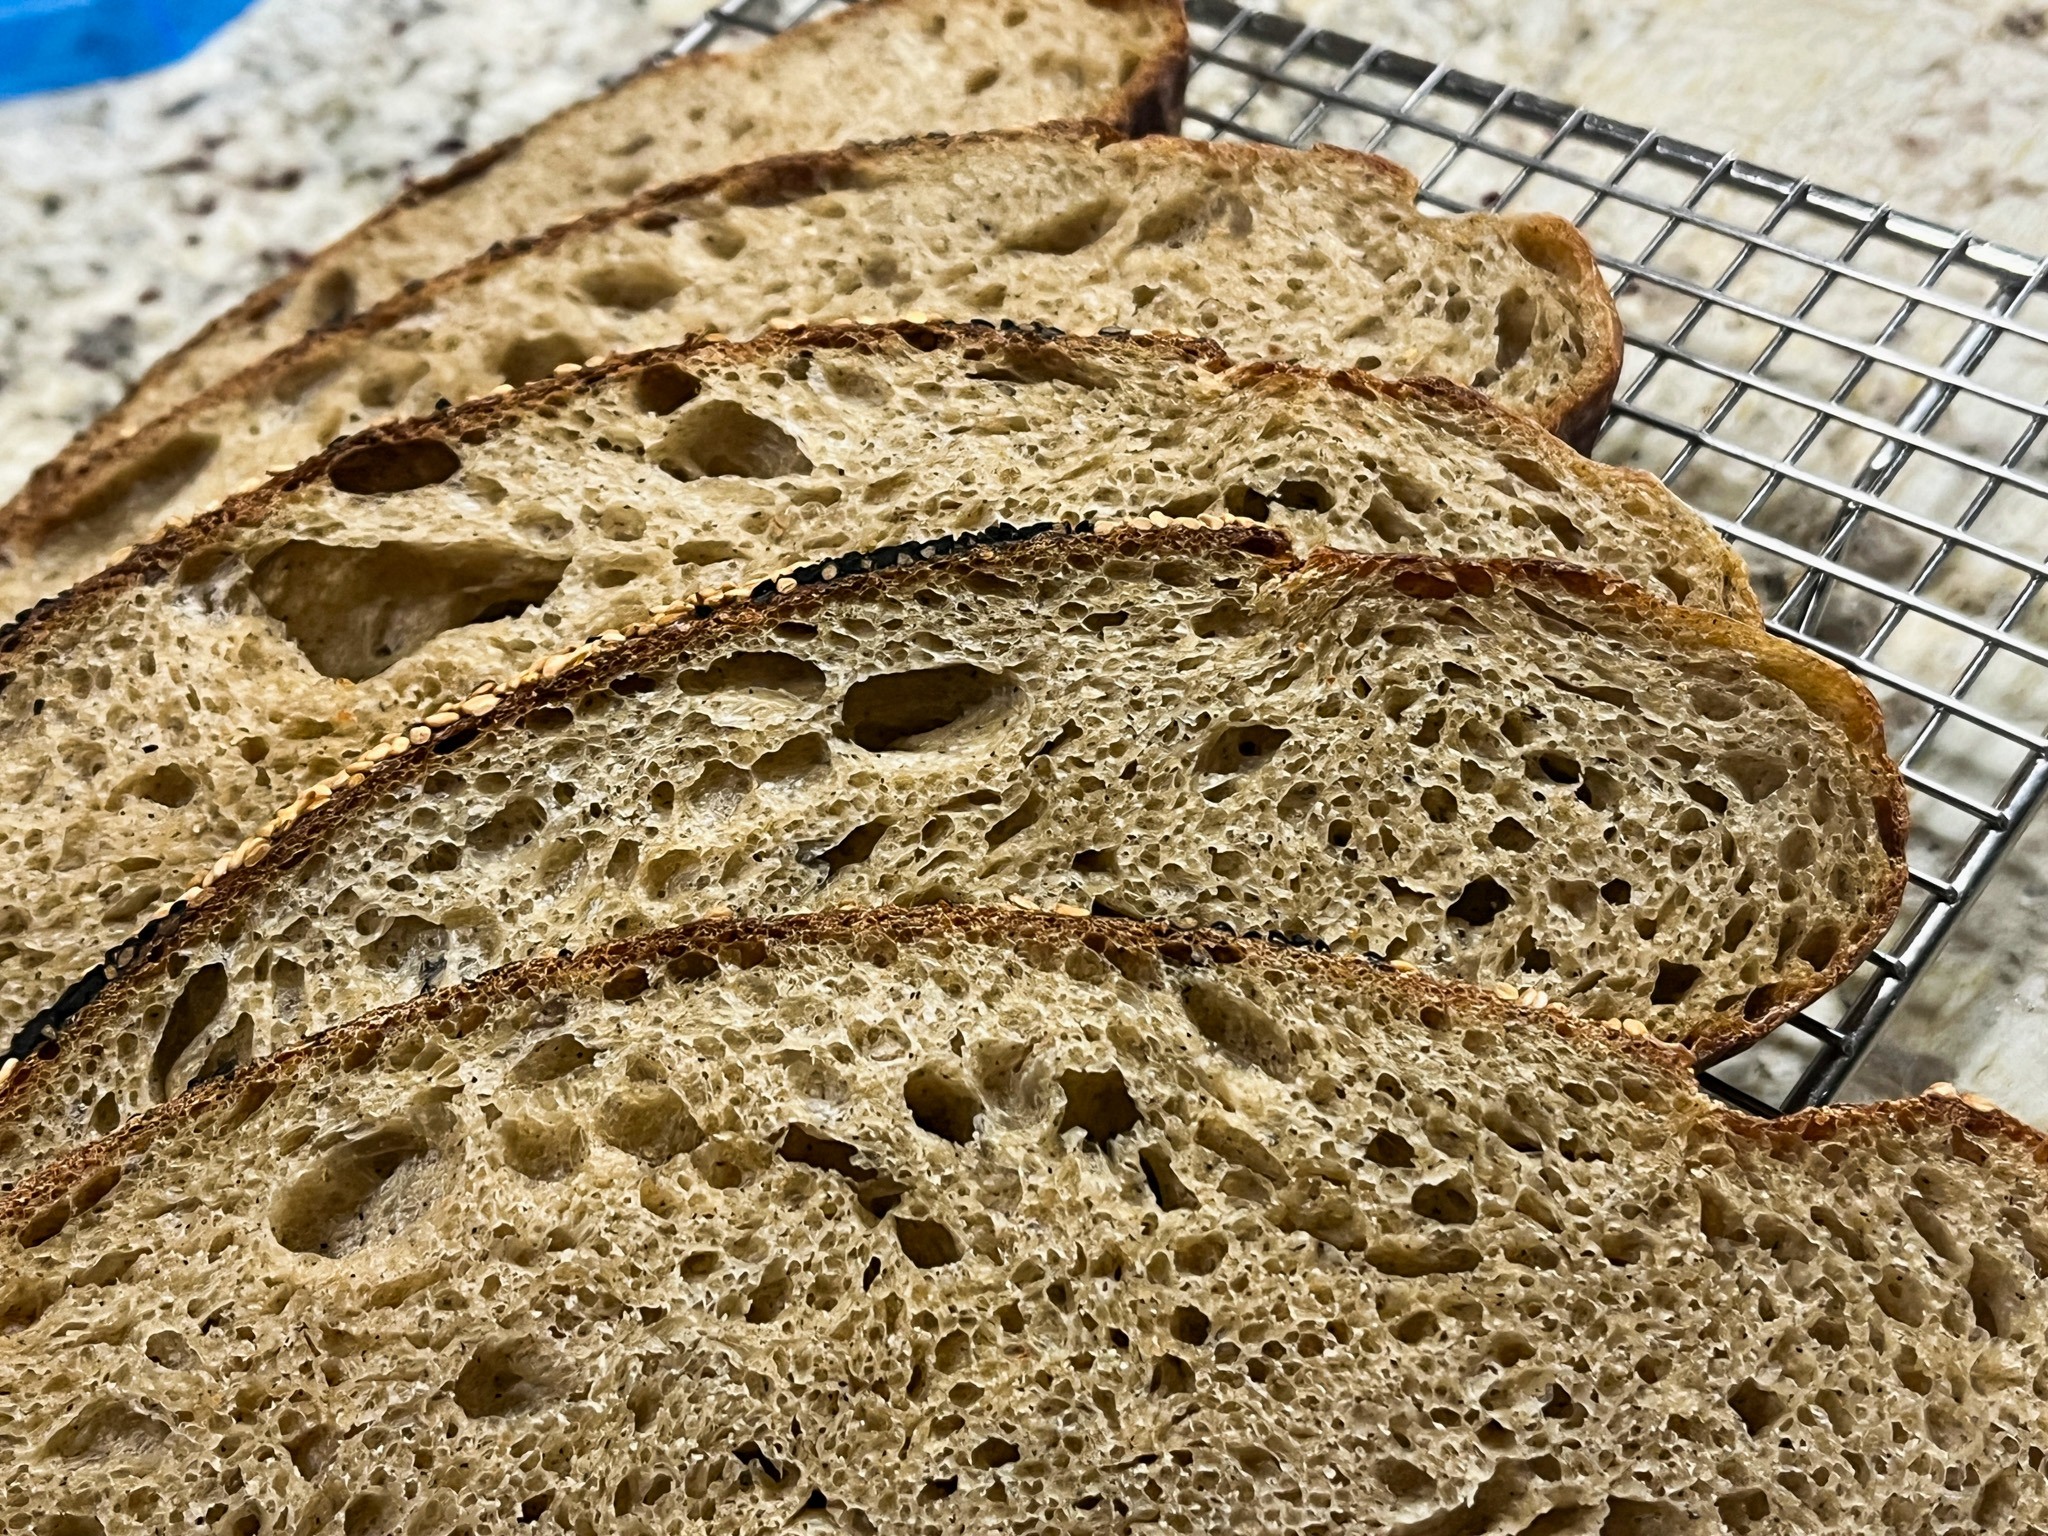
Cool completely over a rack before slicing.
ENJOY!
to print the recipe, click here
Comments: I used my Supersonic blade to score the dough, but a sharp razor blade will do, of course. This composition of sourdough, with mostly white flour, but a touch of spelt and rye might very well be my favorite these days.
x
Moving on, time for cupcakes!
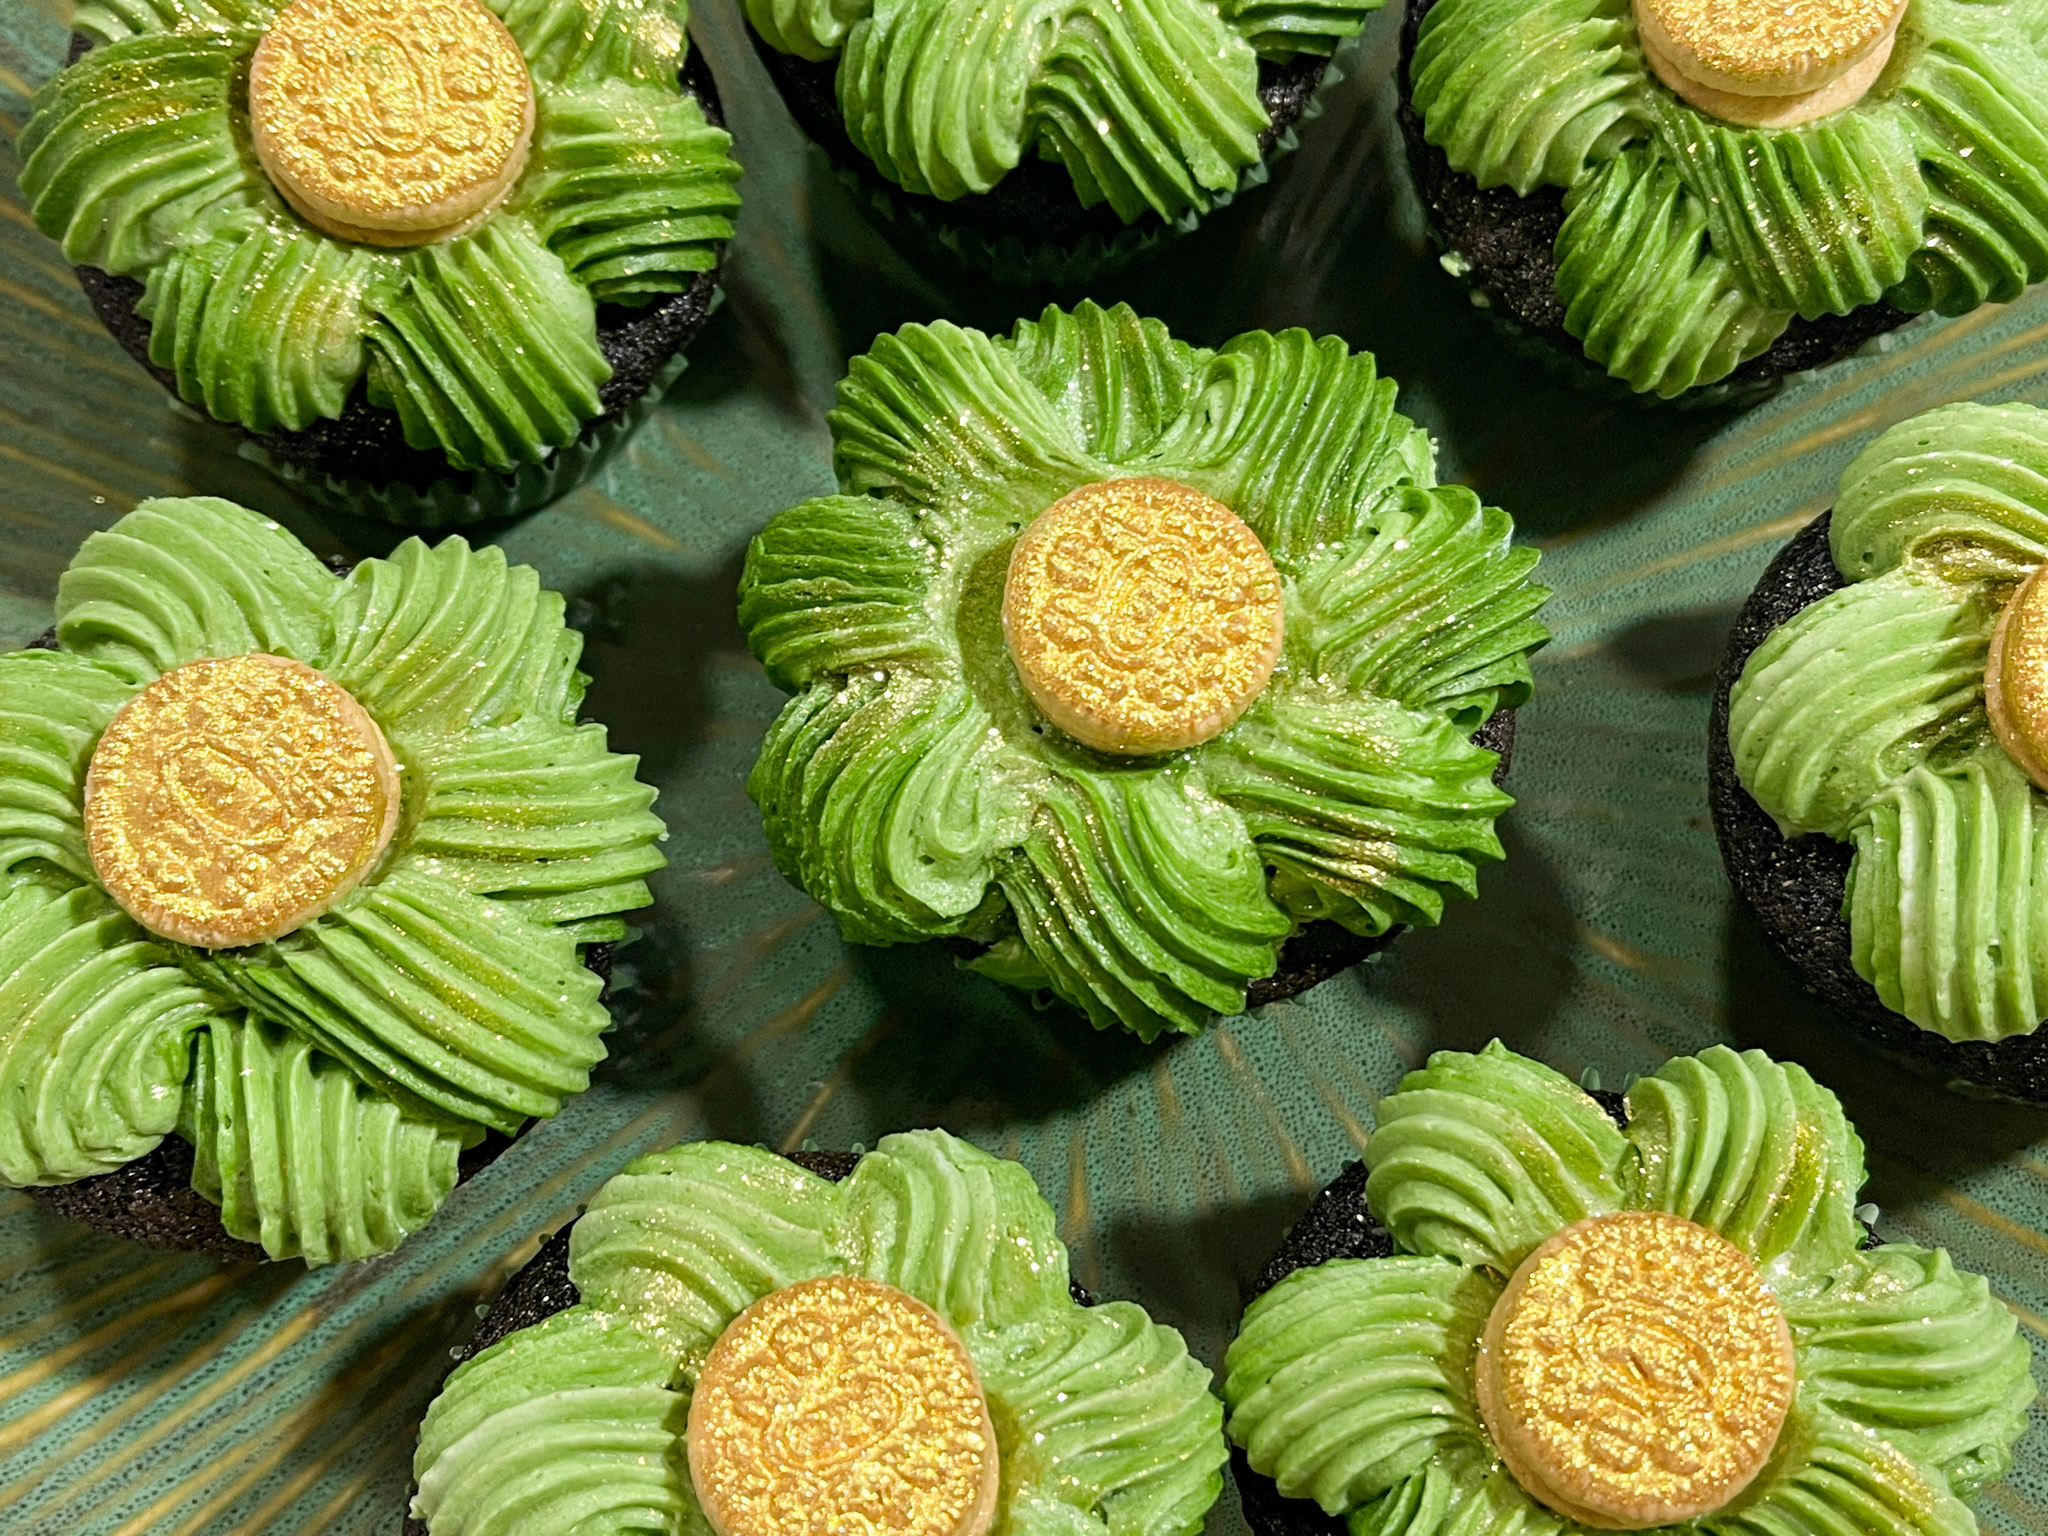
ST PATRICK CHOCOLATE CUPCAKES
(from The Bewitching Kitchen)
makes 10 cupcakes
100g all-purpose flour
20g cocoa powder
140g granulated sugar
1/8 tsp salt
40g unsalted butter
1 large egg
120ml milk
1 + ½ tsp baking powder
buttercream for topping
Mini-golden Oreos painted with gold luster powder + vodka
Heat your oven to 350F and line a muffin tray with cupcake liners.
In a small, bowl, whisk the milk and egg with a fork. Reserve.
Put the flour, baking powder, cocoa powder, butter, sugar and salt into the stand mixer
bowl with the paddle attachment. Mix on a medium speed until the butter turns into the consistency of sand.
Pour in half of the milk and egg mixture into the stand mixer bowl with your other
ingredients and mix on a slow speed until it all fully combines and becomes a thick
paste. Pour the remaining milk mixture and mix on low-speed until the batter is smooth.
Fill the lined pan with batter, a little more than halfway full. Bake for 16 minutes, testing with a toothpick. Leave to cool in the pan for 5 minutes, then remove the cupcakes to a rack to cool completely.
BASIC BUTTERCREAM FOR CUPCAKES
226g butter, unsalted, softened
452g powdered sugar
pinch of salt
Vanilla extract, about 1 tsp or more to taste
a couple or more tablespoons of milk (to adjust consistency)
Place the softened butter in the bowl of a KitchenAid type mixer with the paddle attachment, add the pinch of salt, and whip at high speed for about 7 minutes. It needs to be really soft and lighter. Stop the mixer. Eyeball the amount of powdered sugar, add 1/3 and mix at low speed at first, once the sugar is starting to get incorporated, increase the speed to medium-high.
Add the second portion of the sugar, and incorporate the same way. Add the final portion, start at low speed, clean the sides of the bowl well with a spatula, add the vanilla and increase the speed slowly all the way to high. Whip it until very smooth. Add milk to desired consistency. Divide the buttercream in two portions, dye one with light green, one with darker green. Place both portions over a plastic wrap, enclose them as a sausage, drop inside a large piping bag fitted with an open star tip. Decorate the tops of the cupcakes as shown in the video. Add the gold Oreos.
EENJOY!
to print the recipe, click here

Comments: I was pretty happy with the way these cupcakes turned out. It was fun to decorate, and to show the process in more detail, here is a little video for you.
x
That’s all for now, friends! If you like a little St. Patrick’s trivia, here is a very interesting article for you…
x
ONE YEAR AGO: Happy Birthday to me!
TWO YEARS AGO: Incredibly Simple: Air-Fried Salmon Bites
THREE YEARS AGO: Chocolate-Covered Oreos
FOUR YEARS AGO: Pan-Steamed Broccoli with Miso Vinaigrette
FIVE YEARS AGO: Cookies and Rubber Stamps
SIX YEARS AGO: Macarons for all Seasons and Reasons
SEVEN YEARS AGO: Lentils and Radicchio? Yes, please!
EIGHT YEAR AGO: Tres Leches Cake
NINE YEARS AGO: The Joys of Grating Squash
TEN YEARS AGO: Auberge-Pecan Walnut Bread
ELEVEN YEARS AGO: Gluten-free and Vegan Raspberry Bars
TWELVE YEARS AGO: Lasserre, a French Classic
THIRTEEN YEARS AGO: Sourdough Bread with Walnuts and Dates
FOURTEEN YEARS AGO: Braised Brisket with Bourbon-Apricot Glaze
FIFTEEN YEARS AGO: The Real Vodka Sauce
SIXTEEN YEARS AGO: Pork Tenderloin and Blue Cheese