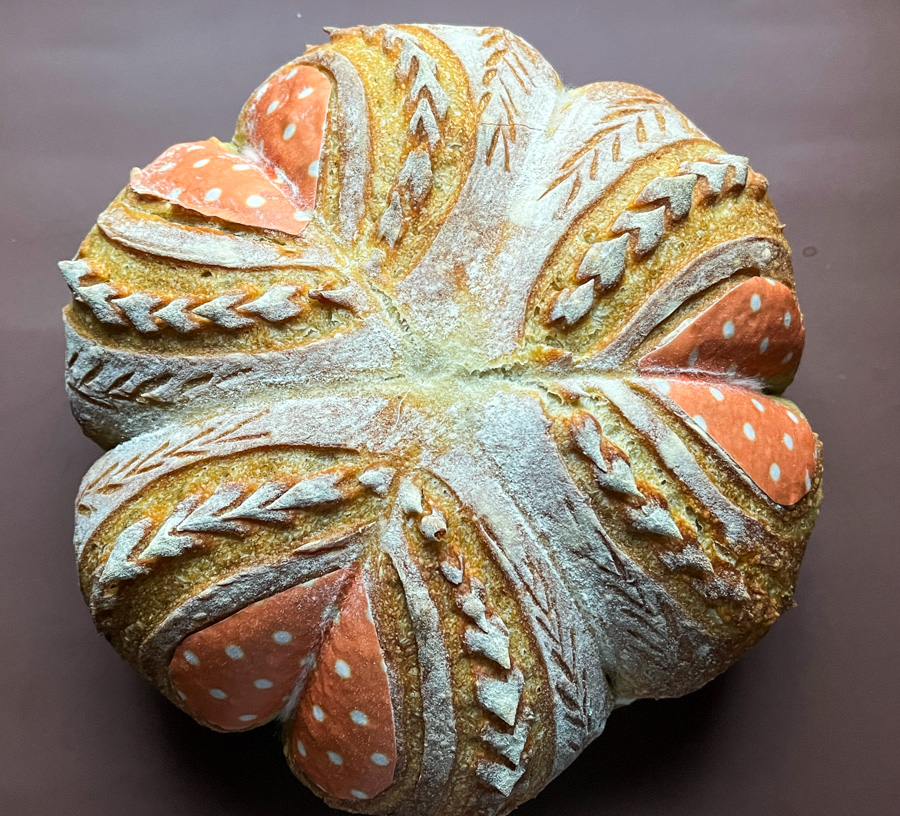
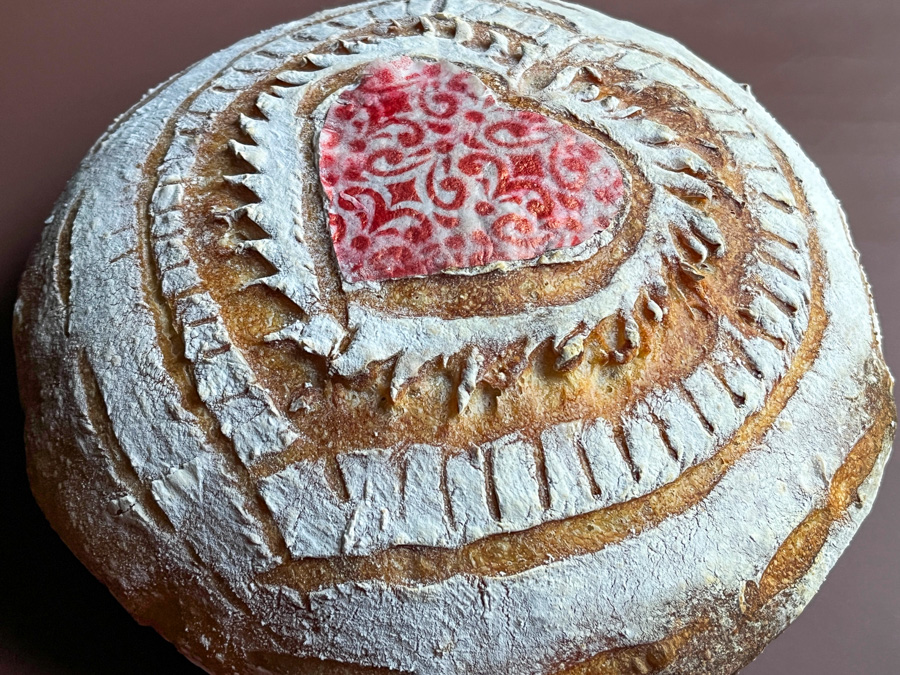
Once again I played with wafer paper to decorate sourdough bread, but this time I coupled it with a few strings to generate a cute shape, often used to turn the bread into pumpkin shape, but I opted for a more romantic outcome… Nothing personal against pumpkins, I do love them and honored them in the past (click here).
Start by cutting wafer paper in small heart shapes…. You will need three, and three long strings that you should rub very lightly with oil to facilitate removing later.
Place the strings equally spaced over the proofed dough, flip the dough over parchment paper, and tie the strings on the top, trying to hit the center as closely as possible. Gently insert the paper, coat the surface with flour and score the bread in any design you like. I used the Sonic blade and small scissors, as I often do.
Bake as you normally do, I keep the lid for 30 minutes and remove it for a final 15 minutes, all at 450F. Remove the strings, and allow the bread to cool completely before slicing.
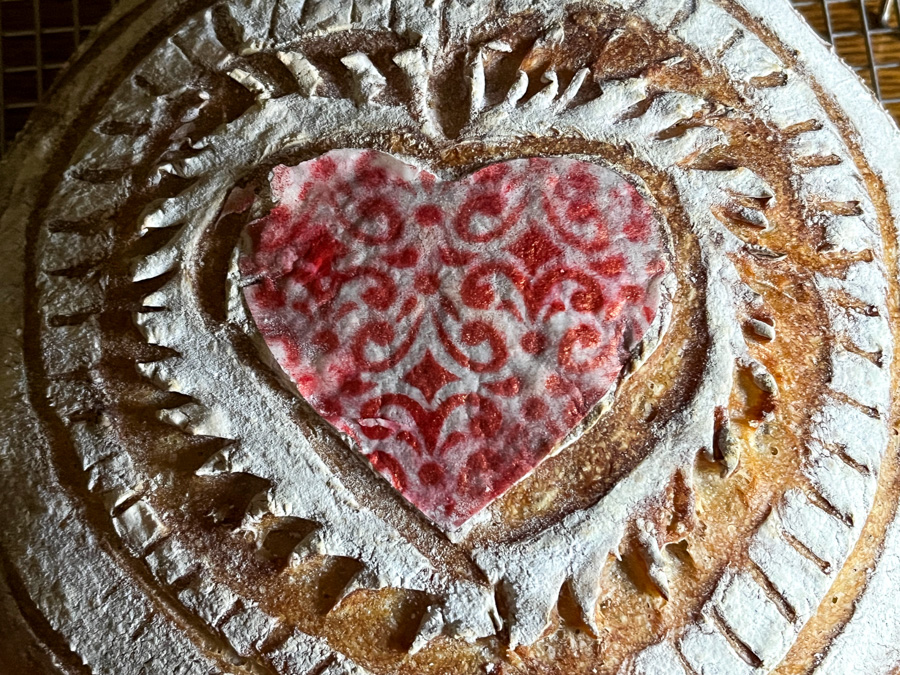
You can use different patterns for the small hearts, or cut plain wafer paper and paint it yourself.
It is really amazing how well the colors in the wafer paper stay pretty much unchanged with baking, much better than air-brushed or gel colors. I hope you give this technique a try and have as much fun with it as I am having…
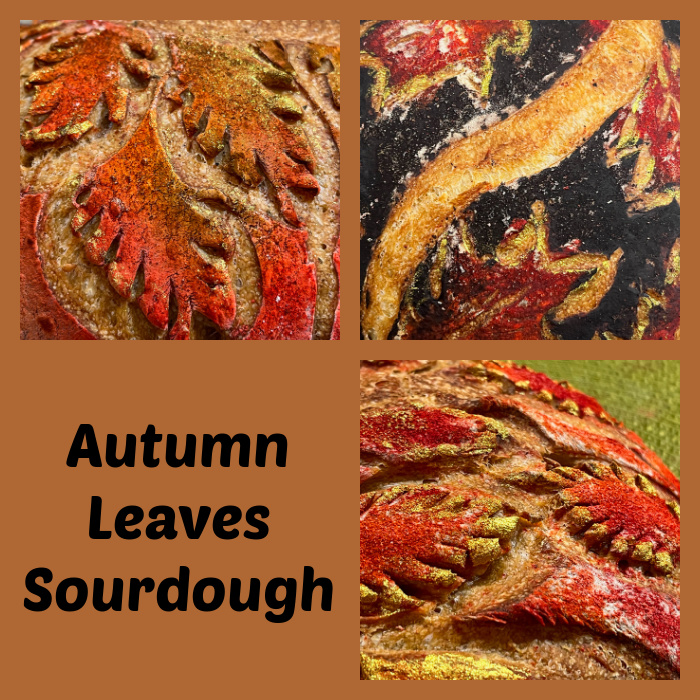
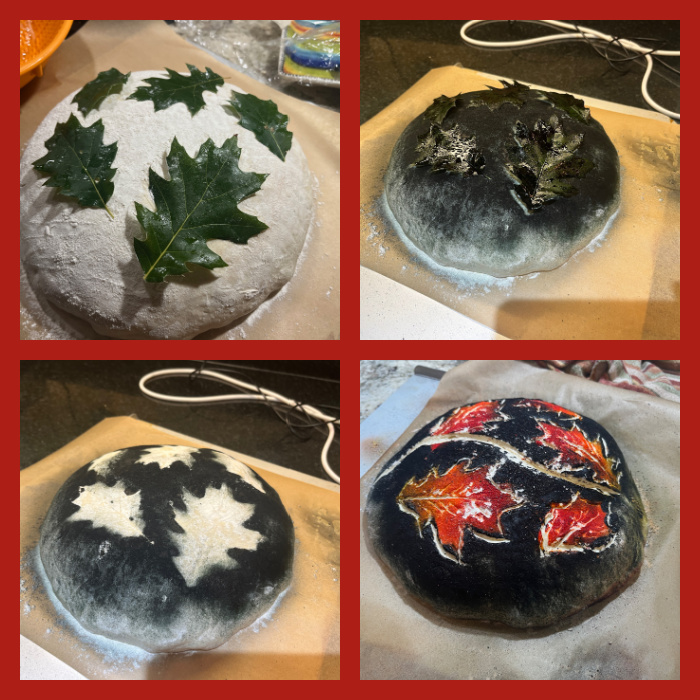
Fall is here, and to celebrate one beautiful season with sourdough bread, I tried a new technique, coupling air-brushing with leaf shapes. You can use any recipe you like, these were flavored with either Za’atar, Smoked Paprika, or Herbes de Provence.
AUTUMN LEAVES SOURDOUGH VERSION #1
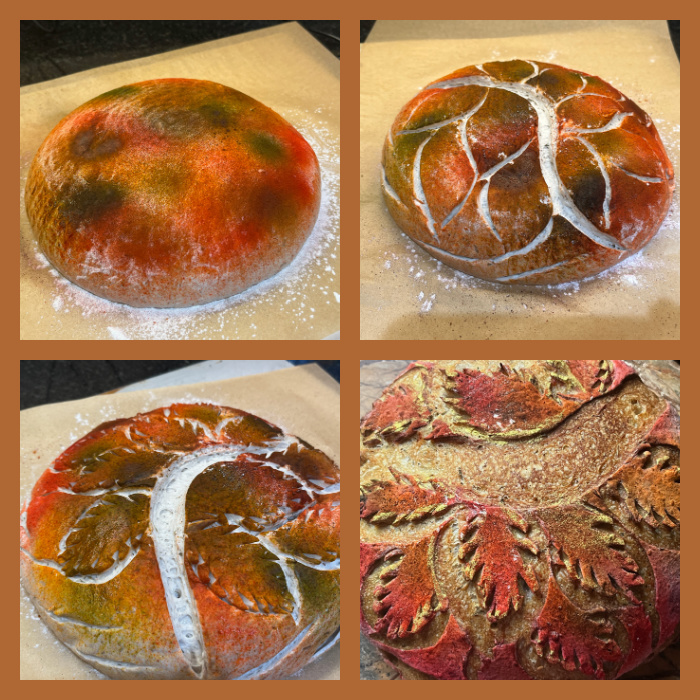
I started air-brushing a mixture of three colors, red, orange and green…
However, the green was totally lost during baking, so in my second attempt I skipped that color and went with red, orange and yellow instead….
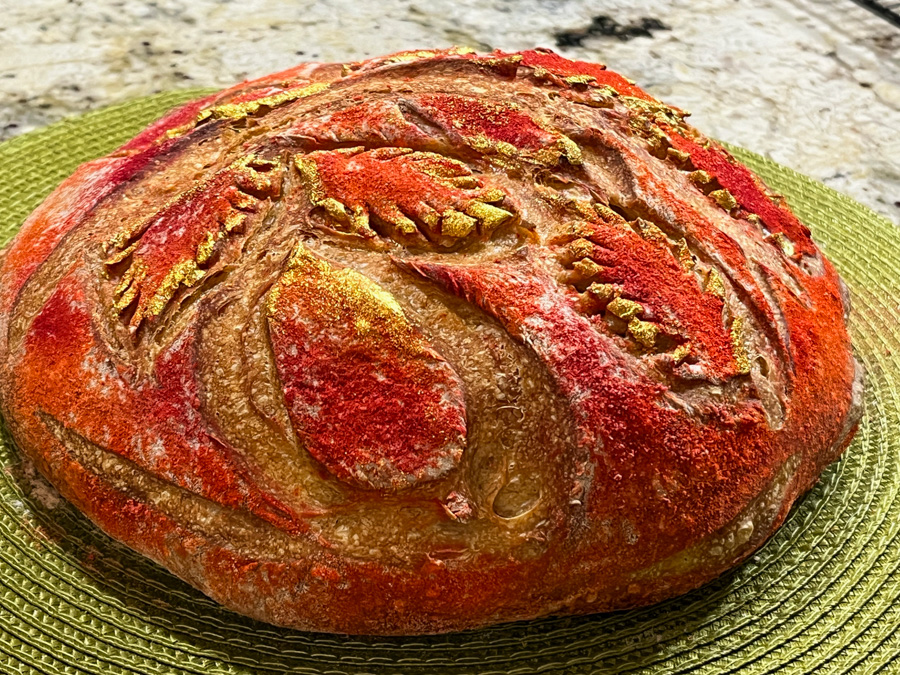
AUTUMN LEAVES SOURDOUGH VERSION #2
I also got a little more assertive with the gold painting of the edges, which happens after baking.
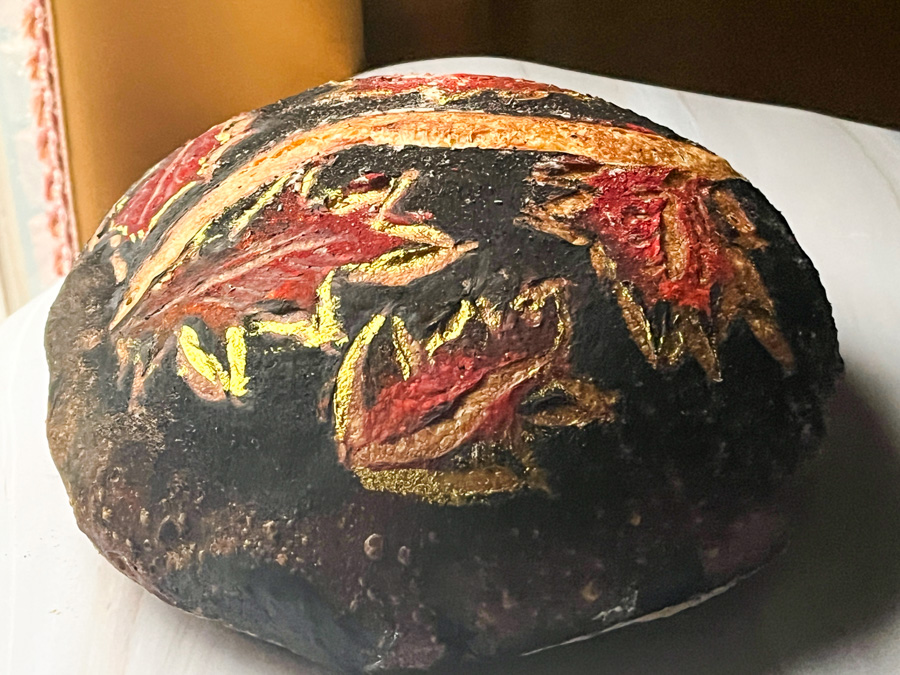
For my last version, I changed things around and used real leaves to mask parts of the dough. Spray-painted black all over, then came back with the air-brush to highlight the leaves with red and yellow.
AUTUMN LEAVES SOURDOUGH VERSION #3
It is by far the most dramatic, and what I like about air-brushing is that contrary to charcoal or cocoa powder, the black color won’t run on your fingers as you touch the bread to slice it.
Stay tuned for more adventures with air-brushing and bread, so many possibilities! A lot of inspiration available on Instagram and Pinterest, it is hard to decide what to try next…
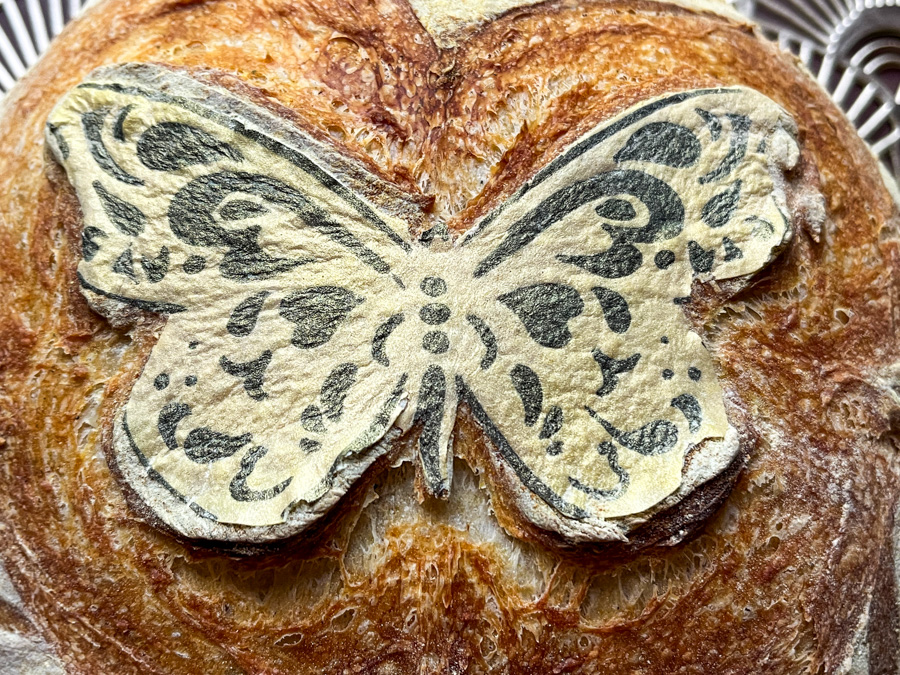
This post is dedicated to Eha, a lover of butterflies…
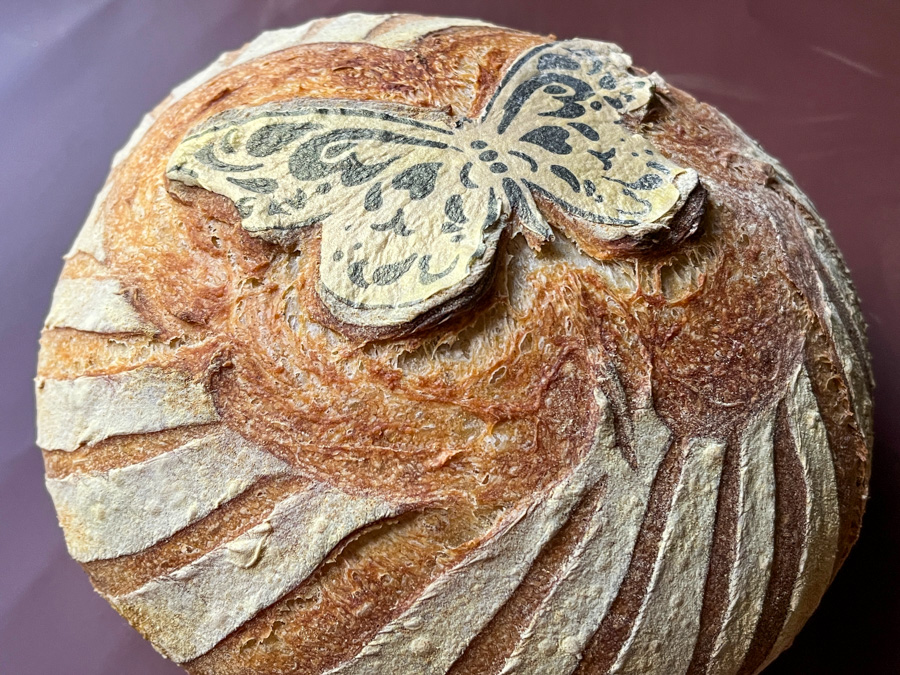
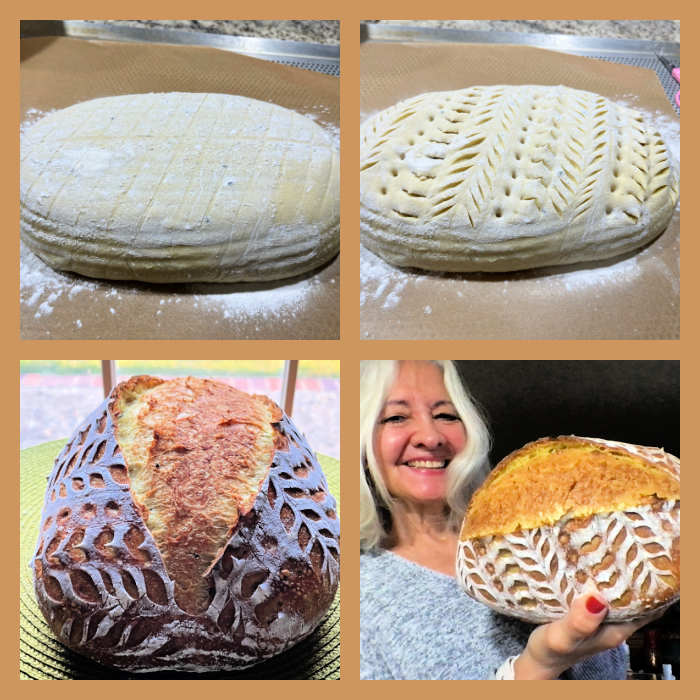
I am so excited to share this new technique with you today! I first saw it on Instagram (check this page) and decided to give it a try. The possibilities are simply endless, of course. Basically, you make a design using wafer paper painted by hand or with a stencil, add that to the shaped, fully proofed dough right before baking, score around it with a razor blade. Isn’t that the coolest thing since….. sliced bread?
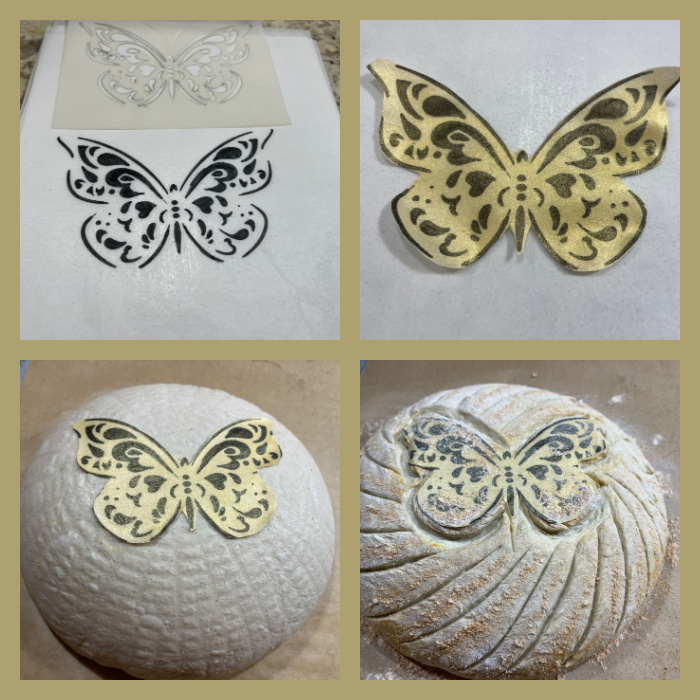
You can use any sourdough formula you want, in this particular loaf I re-visited the Ras-El-Hanout of my past, because I love that combination of flavors. Below you see the preparation of the wafer paper and the way I scored it (using my Sonic blade).
I used a stencil and painted the black portion with a food safe pen. Then I sprayed the whole surface with air-brush gold. That has to dry completely, so I advise you to make the wafer paper decoration the day before you intend to bake the bread. Or even several days in advance, it stays perfect, no issues.
My dough had enough moisture for the paper to stick to the surface without problem, if your dough is too dry, spray it lightly with water. VERY lightly. After the paper is on the surface, dust the surface of the loaf lightly with tapioca or all-purpose flour. In my case, I mixed tapioca flour with a little turmeric to re-inforce the golden color and the taste of the bread. Slash around the paper and all over the bread with the pattern of your choice.
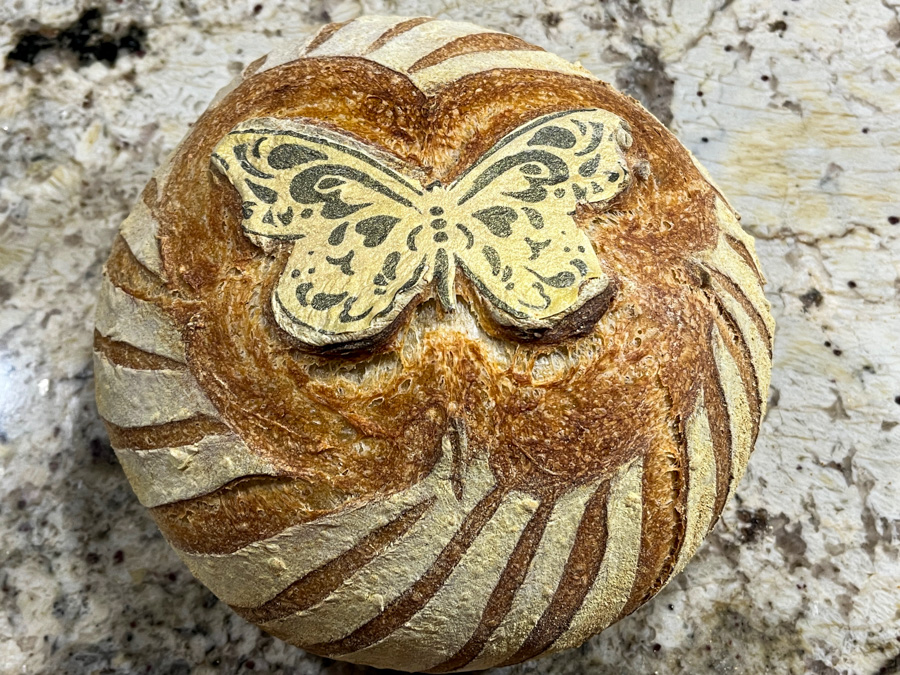
Another important point – do not forget this – after the bread has been in the oven for 5 to 7 minutes, go back and slash AGAIN only around the design. That will make it lift and look much better. Try not to forget this step.
My first attempt making this type of decoration did not work as well for two reasons: I was too focused on the paper and did not plan carefully the scoring, so it did not turn out very good. Second, I forgot to go back and slash the design again after 5 minutes into the bake. That made the paper stay glued to the bread and the design did not have the right impact. Anyway, it is the type of thing that you learn the more you do it.
I know I will be playing with this quite often in the future, and I hope you consider this fun technique also. The paper does not darken in the oven, which surprised me a bit, and the air-brush colors also seem to hold up well. If you are the artistic type, you can paint flowers, landscapes, whatever your imagination desires!
A match made in heaven and materialized in the Bewitching Kitchen! We were lucky to get a huge bag of fresh dill from a departmental colleague and I had some feta cheese hanging in the fridge. One thing led to another and here we are!
FRESH DILL AND FETA SOURDOUGH (from the Bewitching Kitchen)
475g white bread flour 25g whole-wheat flour 9g salt 350g water 65g sourdough starter at 100% hydration 2 tablespoons fresh dill, minced (or amount to taste) 50-100g feta cheese, crumbled
Make the levain mixture about 6 hours before you plan to mix the dough. It should be very bubbly and active.
When you are ready to make the final dough, place the water in the bowl of a KitchenAid type mixer and dissolve the starter in it, mixing with a spatula briefly, then add the two types of flour, and the salt. Turn the mixer on with the hook attachment and knead the dough for 3 minutes at low-speed all the time. Add the dill, knead for another minute to incorporate. If the dough is too sticky, add 1/4 cup flour, you want the dough to start clearing the sides of the bowl, but still be sticky at the bottom.
Remove from the machine, and transfer to a container lightly coated with oil, add the feta and gently mix it in. Don’t worry about incorporating it, it will all go into the dough as you fold it. Cover lightly with plastic wrap and allow it to ferment for 4 hours, folding every 45 minutes or so. After four hours bulk fermentation, shape the dough as a ball, and place, seam side up, in a lightly floured banetton. Leave at room temperature one hour, and then place in the fridge overnight, from 8 to 12 hours.
Next morning, heat the oven to 450F. Invert the dough over parchment paper, rub gently tapioca flour on the surface. Score with the pattern of your choice and bake at 450F for 45 minutes, preferably covered for the first 30 minutes to retain steam. Cool completely over a rack before slicing.
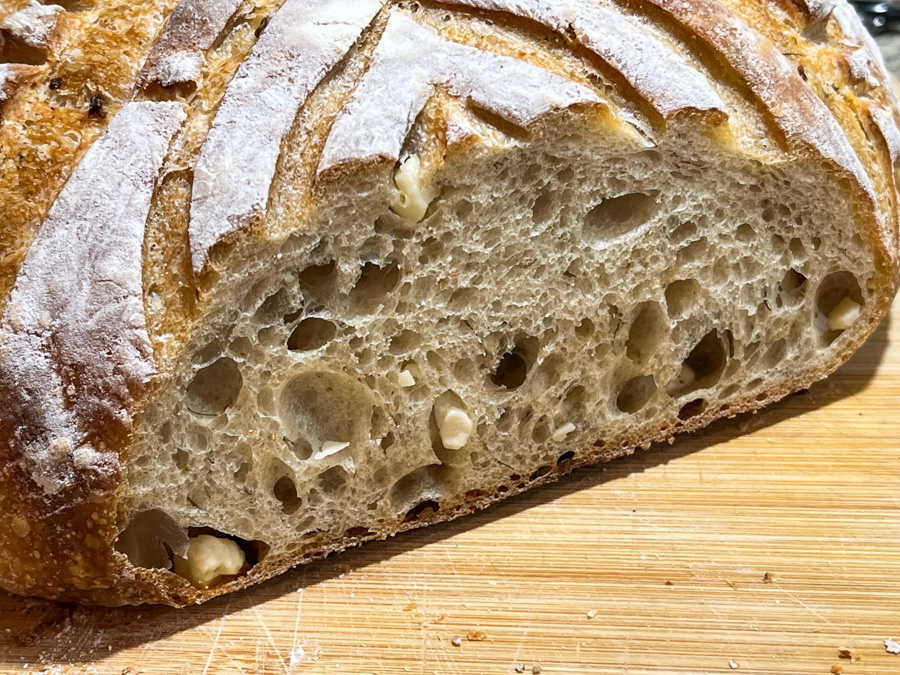
Comments: For the scoring of the surface I used a combination of razor blade and scissors. The bread had impressive oven spring, but I liked the way the design ended up. As to the flavor, I noticed that the dill came through stronger on the second day of the loaf sitting at room temperature. Usually in the evening of day #2 we slice what is left and freeze for later, so that’s what we did.
Really nice to bite into a little piece of feta cheese…..
Hawaij (or Hawaj) is a spice mixture from Yemen that came to my attention very recently. I ordered a bottle, as you can see in my previous In My Kitchen post, and put it to use. Here you have three ideas, a sourdough, a tahdig type rice, and a delicious carrot cake with cream cheese topping, super easy to make. I have a soft spot for spice mixtures. I know that I could make my own version but I love the convenience of opening the bottle and having it ready to go. This mix of flavors is right up my alley! Read more about it here.
. HAWAIJ SOURDOUGH (from the Bewitching Kitchen)
365g water 75g sourdough starter at 100% hydration 470g white bread flour 30g spelt flour 1 tsp Hawaij spice mix 10g salt
Make the levain mixture about 6 hours before you plan to mix the dough. It should be very bubbly and active.
When you are ready to make the final dough, place the water in the bowl of a KitchenAid type mixer and dissolve the starter in it, mixing with a spatula briefly, then add the two types of flour, Hawaij mix, and salt. Turn the mixer on with the hook attachment and knead the dough for 4 minutes at low-speed all the time. You will notice the dough will gain quite a bit of structure even with just 4 minutes in the mixer. Remove from the machine, and transfer to a container lightly coated with oil, cover lightly with plastic wrap and allow it to ferment for 4 hours, folding every 45 minutes or so. Because the dough is already a bit developed from the initial time in the mixer, you should get very good structure after 3 and a half hours, or even sooner than that.
After four hours bulk fermentation, shape the dough as a ball, and place, seam side up, in a lightly floured banetton. Leave at room temperature one hour, and then place in the fridge overnight, from 8 to 12 hours.
Next morning, heat the oven to 450F.
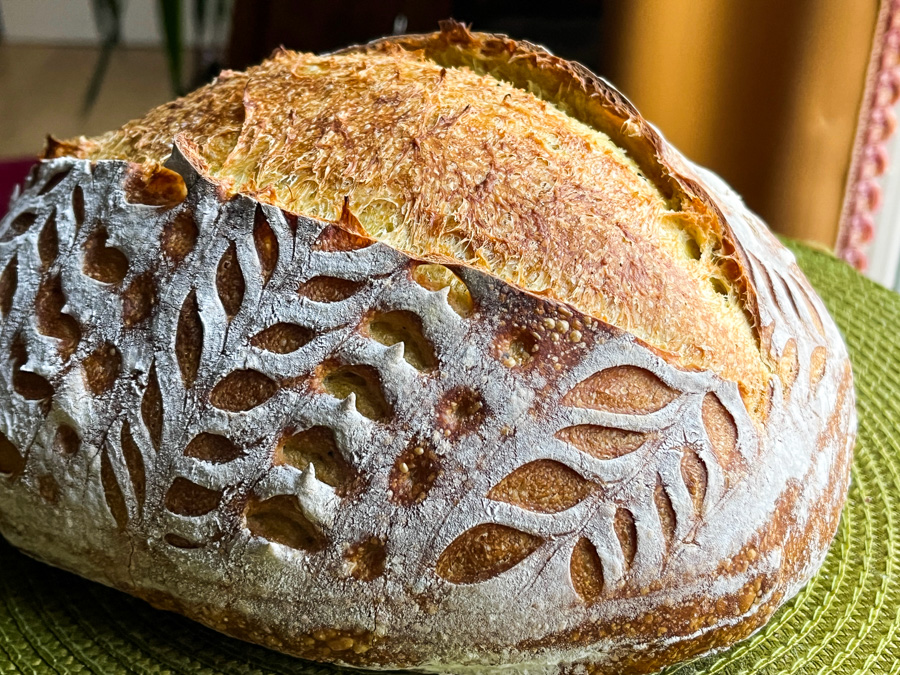
Invert the dough on a piece of parchment paper and score with a pattern with a new razor blade.
Bake at 450F for 5 minutes, quickly remove the bread from the oven, and slash it with the blade just where you want the bread to open. Cover the bread with the lid, place back in the oven for 30 minutes, uncover and bake for 15 more minutes. Cool completely over a rack before slicing.
Comments: I really love the way the bread opens up with the second slashing once the dough has been in the oven for 5 to 7 minutes, not longer. It is a bit tricky to open the pan and do the second scoring, but totally worth it. Just be careful not to burn yourself. I’ve seen this tip on several IG posts and I am quite fond of it now. Whenever you want to coach your bread to open in a specific spot to preserve your design, think about incorporating this step in your baking.
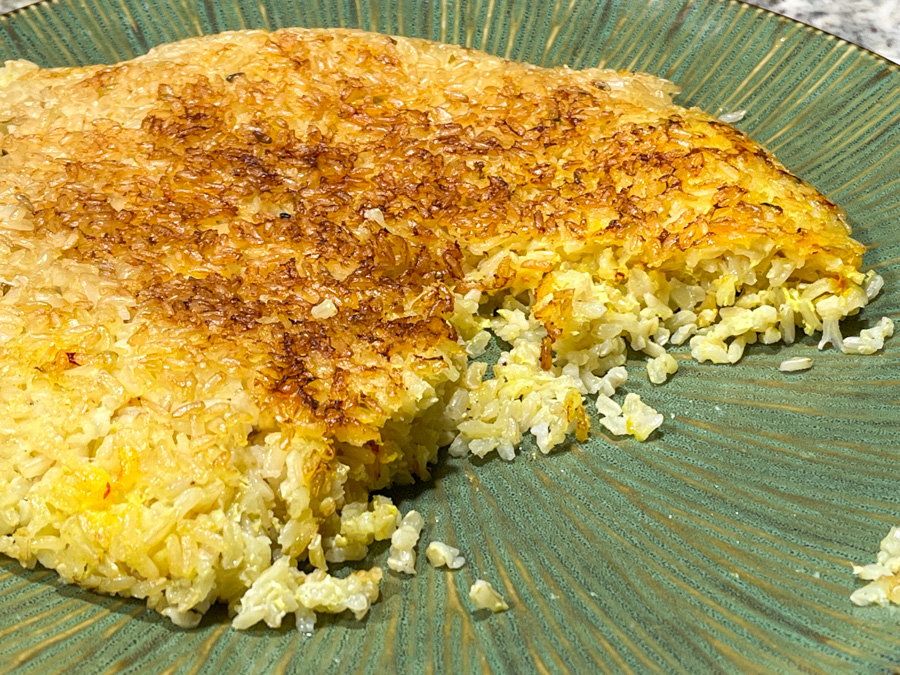
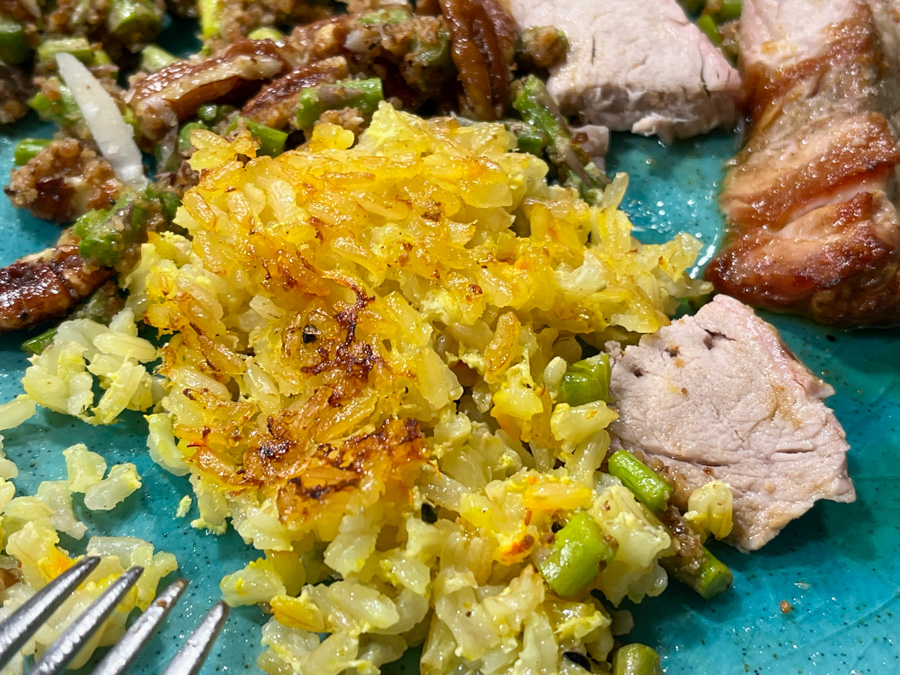
. QUICK BROWN RICE TAHDIG WITH HAWAIJ SPICE (from the Bewitching Kitchen)
1 cup brown rice 3 cups lightly salted water 1/3 cup full-fat yogurt 1/4 tsp salt 1/2 tsp Hawaij mix drizzle of olive oil
Mix the yogurt with the salt and Hawaij mix. Reserve.
Cook the rice for 20 minutes in salted boiling water and immediately drain and rinse with cold water to stop cooking. Rice and yogurt mixture can sit separately for a couple of hours before continuing.
Mix the rice with the yogurt. Heat a 10-inch non-stick skillet and add olive oil, swirling around the whole surface. When the oil starts to get hot, add the rice-yogurt mixture and spread it all over the pan, smoothing the surface with a silicon spoon. Cover the rice with a paper towel moistened with water, then place a lid. Don’t worry if the lid is not totally tight.
Place on a low-burner for exactly 30 minutes. At the end of 30 minutes check to see if the bottom is golden, if not, increase the heat lightly and remove the lid. Leave it for a minute or two, should be enough to make a nice crust at the bottom. Carefully place a platter on top and invert the rice on it. Cut in wedges to serve.
Comments: We love this quick version of tahdig made with brown rice instead of white. You will probably have to tweak the time to first parboil the rice a bit depending on the brand you use, but it is truly delicious. Again, not the most authentic version of tahdig out there, but we are hooked. I probably make it once a week ever since I first blogged about it (click here for flashback).
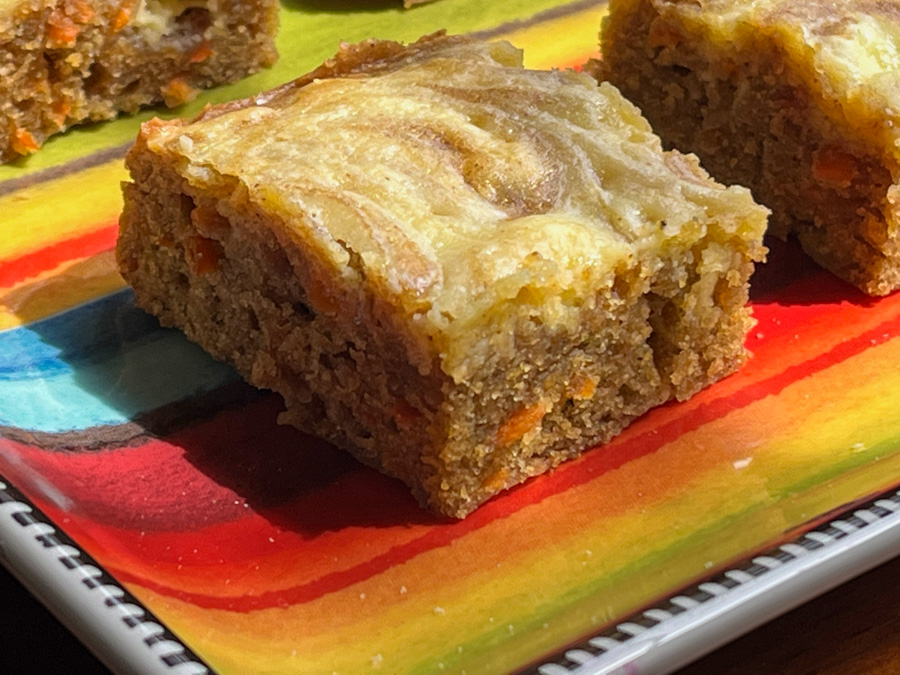
CARROT CAKE BARS WITH HAWAIJ MIX (adapted from Averie Cooks)
1/2 cup unsalted butter, melted 1 large egg 1 cup brown sugar, packed 1 teaspoon cinnamon 1 teaspoon Hawaij spice mix 1 teaspoon vanilla extract 1 cup all-purpose flour 1/2 teaspoon salt 1 cup grated carrots, loosely packed 4 ounces brick-style cream cheese, softened to room temp 1 egg yolk 1/4 cup granulated sugar
Heat oven to 350F, line an 8×8-inch pan with parchment paper, and spray with cooking spray.
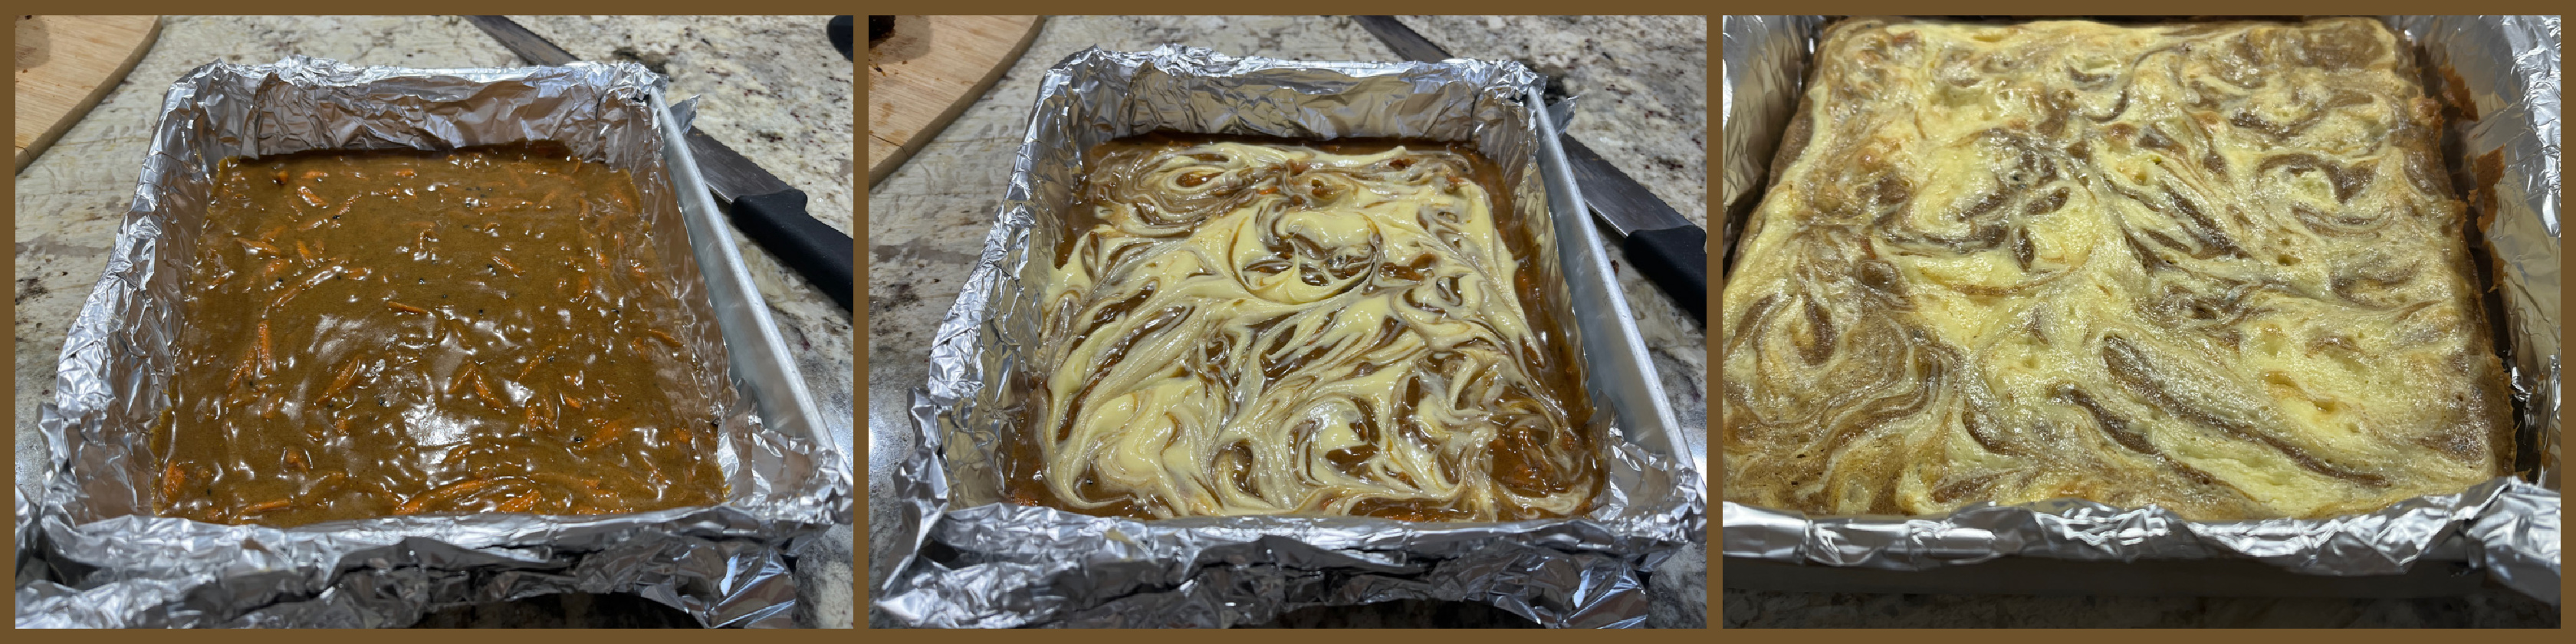
To a large microwave-safe bowl, add the butter and heat on high power to melt, about 1 minute. Allow the melted butter to cool slightly, then whisk in the egg, brown sugar, spices, and vanilla. Once it is all smooth, add the flour and salt, mixing gently. Add the carrots, fold them in, then pour the batter into the prepared pan. Smooth the top with a spatula.
Prepare the topping: into a medium bowl, add the cream cheese, egg, sugar, and beat on high with a handheld electric mixer until smooth and fluffy, about 4 minutes. Turn the cream cheese out over the carrot batter using the blade of a butter knife or the tip of a spatula, and lightly swirl the cream cheese into the carrot batter. Bake for about 25 to 30 minutes, or until a toothpick inserted in the center comes out clean.
Allow to cool, uncovered in the pan, at room temp, for at least 2 hours (overnight is preferred) before slicing and serving.
Comments: These bars/blondies were a huge hit with our colleagues from the department, and I got a few emails of praise for them. They are not too sweet and the spice mixture goes perfectly with the carrot and cream cheese topping. I highly recommend you give them a try!
So that closes my first series of recipes using Hawaij. I do hope you’ve found something to inspire you!