KEN FORKISH’S PAIN AU BACON

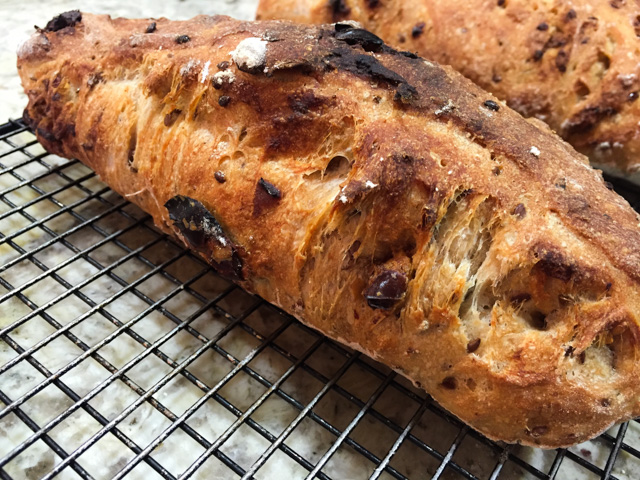
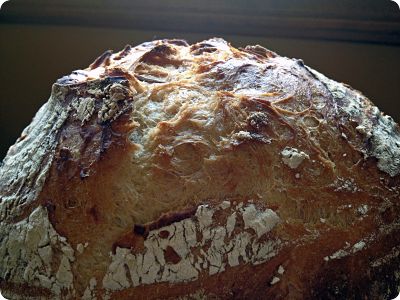
PainAuBacon2It’s been a while since I baked a loaf of sourdough bread. A quick browse through my archives proves this sad turn of events: October 13th was my last adventure in the Land of the Wild Yeast. But, with so much going on, trips, busy schedule, I was forced to let my starter sleeping in the freezer a lot longer than I expected.  Finally, the second weekend of December shaped up as a perfect opportunity to resume bread baking. The weekend schedule seemed flexible enough – just a cocktail party Saturday night – and the perfect weather to crank the oven up all the way to 450 F.  Sometimes a tropical being is forced to find positive aspects in outside temperatures falling below 60 F.  I sat down next to our fireplace with quite a few of my bread cookbooks, and went through the very elaborate process of choosing which recipe to work on.  Keep in mind that if I have to dress up for a party, my outfit is decided in 5 minutes, accessories included. But choosing a sourdough bread takes me hours. And I mean  hours  in the strict sense of the term, in which 1 hour equals 360 seconds.  After intense mental struggle, I picked a winner from Ken Forkish’s book “Flour Water Salt Yeast“.   It was worth all the pacing back and forth, the many stick-it notes, and the snide remarks of the husband asking if I needed another couch to spread some more cookbooks. Very uncalled for. Obviously, I can only endure this type of treatment because I am an easy-going, serene, and forgiving human being. PainAuBacon1PAIN AU BACON
(recipe reprinted with permission from Ken Forkish)

Makes one loaf.

for the levain:
50 g mature active sourdough starter
200 g unbleached all-purpose flour
50 g whole wheat flour
200 g lukewarm water

for the final dough:
432 g unbleached all-purpose flour
8 g whole wheat flour
343 g water (warmed to about 90 degrees F)
10 g fine sea salt
250 g (about 1/2 pound) bacon, fried to crispy, and then crumbled
1 T reserved bacon fat
108 g of the levain
.
Mix the levain ingredients in a medium bowl, cover with plastic wrap, and let sit for about 10 hours, until bubbly. In a large bowl mix the flours and water by hand until just incorporated. Cover and let it rest for 20 to 30 minutes (that is the autolyse step).
.
Sprinkle the salt all over the flour mixture, then add the levain.  Using wet hands to prevent the dough from sticking, mix the dough by pinching it to distribute the salt. Cover and rest for 10 minutes.
.
Spread the bacon fat over the dough and add the crumbled bacon. Using the pincer method alternating with folding, mix all of the ingredients in the bucket. Cover the dough with plastic wrap, and let it sit for 30 minutes. In the next 2 hours, stretch and fold the dough 4 times, every 30 minutes. Cover and let rest at room temperature for 12 hours, until about tripled in volume.

Gently shape the dough into a loose boule. Flour a banneton,  shape the dough into a medium tight ball and place it seam side down into the proofing banneton. Cover with oiled plastic wrap. Let the loaves proof for about 4 hours, depending on the room temperature.

About 45 minutes before baking, heat the oven to 475 degrees F with an empty covered Dutch oven placed on the middle rack.

Remove the Dutch oven from the oven and remove the lid. Place a piece of parchment over the banneton with the proofed bread inside, and a flat baking sheet over it. Flip the dough over, remove the basket, and place the shaped boule in the Dutch oven using the parchment to help move it. The paper can stay in during baking.  Cover the Dutch oven and place it in the hot oven.  Wet the lid of the Dutch oven, and quickly use it to cover it. Alternatively, you can use your own favorite method to generate steam during baking.

Bake covered for 30 minutes, and then uncover it and bake it for 15 to 20 minutes more, until the interior of the bread reaches 205 to 210 degrees F and the bread is a deep brown.

Cool on a rack completely before devouring it…

ENJOY!

to print the recipe, click here

composite1

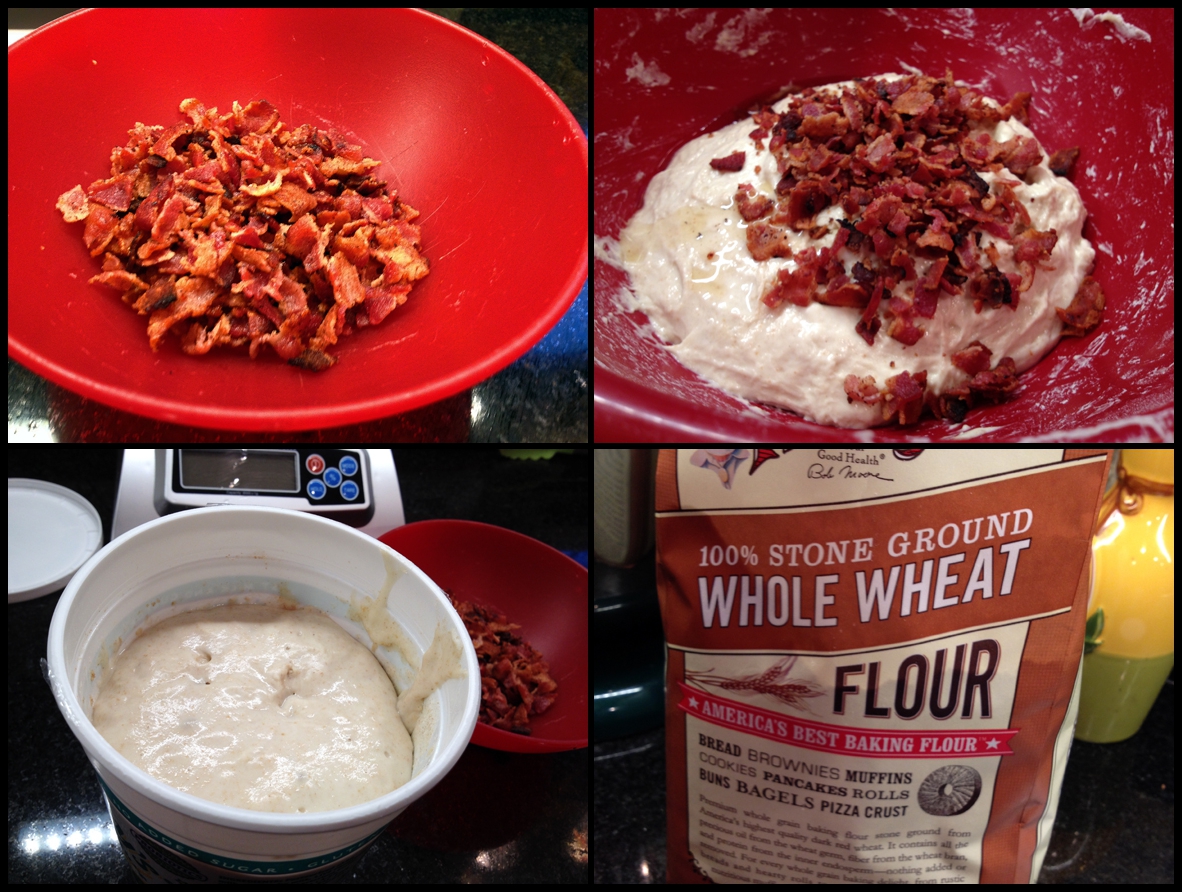
Comments:  After such a long time away from my starter, I get a little anxious when baking a loaf like this.  I was particularly worried about leaving the dough to ferment at room temperature for 12 hours, something I had never done before.  But, the dough behaved exactly as Ken mentioned in the book.  Take a look at these couple of shots:

Before…
Before

After…
After

A very nice, soft, bubbly dough, quite easy to work with and shape as a boule.
Proofing

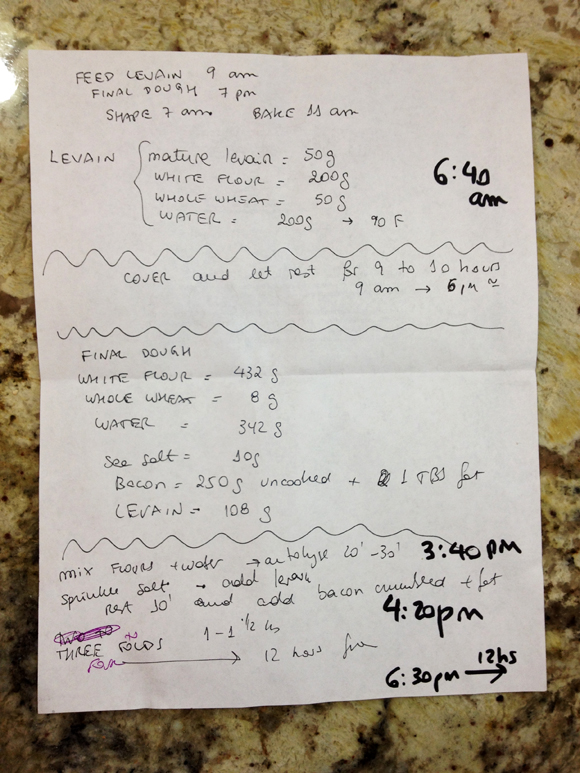
One of the things I love about Ken’s book, is that he offers a sample timeframe for all recipes. Just for fun, I include my notes, prepared the night before. On top you see his suggestion of timing, and as I move along, I jot down my actual timing, adapted to fit my schedule. If you have the book, you may notice I actually halved the recipe to make a single loaf instead of two.

Notes(click to enlarge, if so desired)

The subtle smell of bacon while the bread baked was wonderful!  I made this bread especially to share with my youngest stepson and our great friends from Oklahoma who were coming to visit us the following weekend. So, the bread cooled completely over a rack, rested for a day, and the following morning I sliced it and froze the slices, in small packages.  It is a perfect way to have bread as good as freshly baked at a moment’s notice.

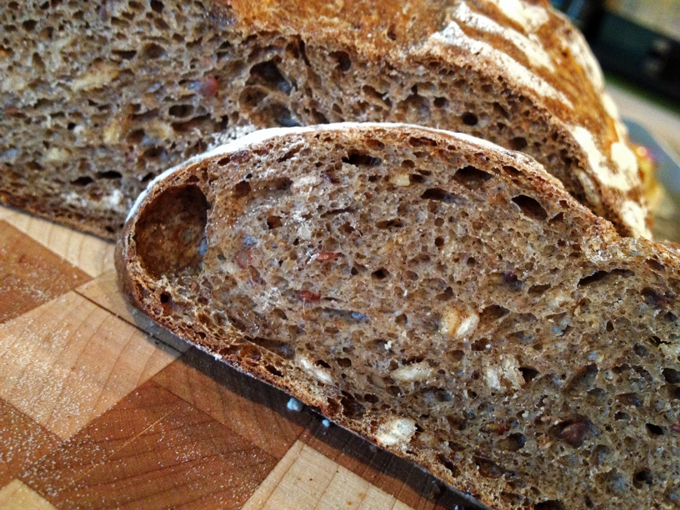
Here is the mandatory crumb shot…
CrumbShot

And the slices on their way to the freezer…

Bagged

This was a superb loaf of bread!  In fact, when we served it – alongside a hearty pasta with Bolognese sauce – it was hard to believe that bacon was the only ingredient added. It tasted very complex, almost as if a mixture of nuts were also incorporated into the dough. Salty, spicy, and smoky at the same time.

Ken, thank you for allowing me to publish the recipe for one of the most flavorful loaves of bread I ever made!I am submitting this post to Susan’s Yeastspotting event…

HAPPY HOLIDAYS, EVERYONE!

maracujaDad and son enjoying a nice passion fruit “caipirinha”…

ONE YEAR AGO: Carrot and Cumin Hamburger Buns

TWO YEARS AGO: Potato Galettes a l’Alsacienne & Book Review

THREE YEARS AGO: Caramelized Carrot Soup

FOUR YEARS AGO: Miso-Grilled Shrimp

FIVE YEARS AGO: Pain Poilane


SOURDOUGH RYE BREAD WITH FLAXSEEDS AND OATS

This is that type of bread that begs for mindful eating. No sitting down in front of the TV grabbing one piece here, another there, or sharing it with friends in the middle of a loud party.  No, this is a bread that deserves attention. It is dense without being overly heavy, and its flavor is quite complex due to the use of assertive flours and flax seeds. The recipe was created by Rosa, from Rosa’s Yummy Yums, a food blog that not too long ago celebrated its 9th anniversary!  Nine years.  No small feat, folks, considering that each of Rosa’s post is a masterpiece: carefully composed text (with recipes in two languages, English and French), matched with her incredibly beautiful photography. Hers is the type of blog that just like this bread, deserves full attention.

Rosa Yum Yum BreadMade July 26th; Blogged October 13th

WHOLE-WHEAT AND RYE SOURDOUGH WITH FLAX SEEDS AND OATS
(from Rosa Mayland’s blog)

(for one round loaf; check her site for full version that makes 2 loaves)

1 heaping tablespoon of flax seeds 1/2 Tbs Flax seeds
150g whole-wheat flour
100g white flour
35g rye flour
35g buckwheat flour
100g active sourdough starter

188-200 g/ml lukewarm water
A pinch of dry yeast
1 heaping tablespoon of olive oil

20g Rolled oats
7g fine sea salt

Put the flax seeds in a small bowl and add 63g/ml of boiling water (this will make them slimy). Stir and leave to cool.

In the bowl of your stand mixer put the flours, sourdough, water, yeast, olive oil, flax seeds (+soaking water).  Mix until all the ingredients are just combined. Let the dough rest (autolyse) for 2 hours.

Add the salt as well as the oats and continue mixing for about 5-8 minutes (add a little flour if the dough is too wet), until the dough reaches medium gluten development.  Transfer the dough to a slightly oiled container and cover with plastic wrap. Let the dough ferment/rise, at room temperature, for about 2h30 (or until doubled in size), folding at 50 and 100 minutes.

Shape it as desired (sandwich loaves, boule, bâtard, banneton, etc…). Sprinkle your loaves with flour and cover them with plastic wrap let proof for about 90 minutes or until doubled in size.

Bake at 230° C (450° F) using your favorite method to generate steam during the initial 20 minutes of baking. Total baking time will be approximately 40 minutes.  Leave the bread in the oven for 5 minutes with the door ajar once you turn the oven off.  Cool it completely on a rack before slicing it.

ENJOY!

to print the recipe, click here

crumb
Now, if that crumb doesn’t make you sigh, there is something wrong with you… This was a very nice baking project, perfect for a weekend in which we had nothing planned, no social commitments, no need to go to the lab, just taking each hour as the hour shaped up.   If you stop by Rosa’s original post, you’ll see that she coupled this recipe with a text about the importance of slowing down, a praise for idleness. Food for thought, as usual for her posts. It is nice to be able to take a step back and do nothing. Or, if doing nothing seems like too much of a shock for  you 😉  grab your flours and make this bread. Then, slowly slice it, and close your eyes when you taste it.   Yes, it is that wonderful!

Rosa, thank you for a great recipe, and above all, for the effort you put into your blog, a pleasure to visit every single time!  See you around the blogosphere 😉

I am submitting this post to Susan’s Yeastspotting event…

ONE YEAR AGO: Apricot-Raspberry Sorbet: A farewell to Summer

TWO YEARS AGO: Marcela’s Salpicon

THREE YEARS AGO: Pork Kebabs

FOUR YEARS AGO: Fondant au Chocolat

FIVE YEARS AGOGot Spinach? Have a salad!

TAKING A BREAK FROM THE WILD

I’ve always been fascinated by bread baking. For years I would read books and blogs, but get discouraged because the breads I fell in love with were all made with a sourdough starter. You know, that wild yeast thing.  I would close the book, click away from the site, telling myself “why can’t they bake bread with regular yeast, like normal people?”  It was so frustrating!  Of course, if you follow my blog, you’ll know that now I love to walk on the wild side…  😉   Like many bread bakers, using commercial yeast almost feels like cheating. But, a bread leavened just with instant yeast can be amazing too. In this recipe, 80% of the formula comprises flour fermented overnight with a small amount of yeast.  It comes from Flour Water Salt Yeast, by Ken Forkish.
ready

WHAAAT? NO RECIPE?

Here’s the deal: I sent a couple of messages to Mr. Forkish asking his permission to publish the recipe, but got no answer. Of course, it’s quite possible he never checks his Facebook account.  I know many people who don’t even remember having one!  😉   Without his permission, I don’t feel it is right to include the recipe. You can read more about this subject at the end of my post.

If you want to try his method, you can click here for a great variation on his recipe that includes barley flour in the formula. The technique is exactly the same, though. I intend to make it myself soon, as I am quite fond of barley flour.

photo(1)

Comments: Of all breads I’ve made, this one was by far the loudest singer.  The noises it made while it sat on the counter, cooling, were unreal!  Interestingly, Jane, the blogger behind The Wayward Oven, had this to say about her version of Forkish’s White Bread with 80% BIGA:

“It had a wonderful aroma and the crackling as it cooled was so loud I could – no exaggeration! –  hear it across the room.”

Yeah, that was exactly the case!   I also loved Forkish’s approach of letting the bread rise with the seam side down, and then invert it for baking, without scoring the crust. The bread opens in a natural,  more rustic-looking way.  This bread has a double personality:  the taste and crust of a regular sourdough, and a crumb with the softer texture usually found in breads made with commercial yeast.  Quite an interesting combination!

shot2_opt

I am submitting this post to Susan’s Yeastspotting

And now, for something completely different…

When I started blogging, I did not give too much thought about publishing recipes from cookbooks. I changed the wording around, gave credit, and felt it was good enough.  As time passed, my views on the issue started to change, in part because I learned that some cookbook authors are completely against having their recipes out in the blogosphere, even if proper credit is given.  Then, my virtual friend Joanna published a thoughtful article on her blog, and that pretty much did it for me.  Ever since I read her post, I decided not to transcribe a recipe from any cookbook here, unless I get permission from the author, which unfortunately is not always that easy.  

If I adapt a recipe, I will publish it and link to the “inspirational source”. In fact, that is a practice considered ok by copyright laws. A very good article on the whole subject was written by David Lebowitz and is available here.  As to recipes published in food magazines,  Fine Cooking editors told me they do not mind their recipes being published as long as a link is provided to the source.  And other magazines –  such as Food and Wine, Bon Appetit, Saveur, Cooking Light – have their content online for public access, so it is not a problem to blog on them.

ONE YEAR AGO: Zucchini-Spinach Soup

TWO YEARS AGO: Pollo en Mole en Cacahuate

THREE YEARS AGO: Thom Leonard’s Country French Bread

SOURDOUGH BREAD WITH WALNUTS AND DATES

Another example of inspiration coming from The Fresh Loaf.  David is a regular contributor to the forum, and every bread he makes is a work of art. He is the type of baker comfortable enough around sourdough starter to  devise his own recipes, having recently come up with a fig and walnut concoction.   David had access to fantastic figs, but when I went to the store I was not particularly impressed with what was available.  Since I am no longer afraid to improvise ;-), I used dates instead.   This bread is perfect to practice mindful eating. Don’t devour it. Instead, savor each bite as slowly as you can. Awesome bread, very complex taste.

crumbSAN FRANCISCO-STYLE SOURDOUGH WITH WALNUTS AND DATES
(adapted from David, at The Fresh Loaf forum)

for the stiff levain
41 g water
66 g sourdough starter
78 g all-purpose flour
4 g rye flour

for the final dough
337 g water
416 g all-purpose flour
46 g whole wheat flour
11 g salt
189 g levain
98 g dates, diced fine
98 g walnuts, diced and lightly toasted

Dissolve the starter in the water. Add the flour and mix thoroughly until the flour has been completely incorporated and moistened. Ferment at room temperature for 16 hours.

In a stand mixer, mix the flour and water at low-speed until it forms a shaggy mass. Cover and autolyse for 30 minutes. Coarsely chop or break apart the walnut pieces and toast them for 8 minutes in a 300ºF oven. Allow to cool. Coarsely chop the dates, rinse in cool water, drain and set aside.

Add the salt and levain to the autolyse, and mix at low-speed for 1-2 minutes, then increase the speed to medium (Speed 2 on a KitchenAid) and mix for 5 minutes. Add flour and water as needed. The dough should clean the sides of the bowl but not the bottom. Add the walnuts and the figs to the dough and mix at low-speed until well-distributed in the dough. (About 2 minutes).

Transfer to a lightly floured board, do a stretch and fold, and form a ball. Place the dough in a lightly oiled bowl and cover tightly. Ferment at 76º F for 2 1/2 to 3 hours with a stretch and fold at 50 and 100 minutes.  Shape as a large ball (or divide the dough in two and shape as two smaller loaves)  and place in banneton. Proof at room temperature (68-70º F) for 1-2 hours. Cold retard the shaped dough overnight.

The next morning, proof the dough at 85º F for 2-3 hours. Heat the oven to 480º F. Score the bread as desired, and bake with initial steam, reducing the oven to 460 F when the bread goes in. Bake for 40 to 45 minutes, and cool completely on a rack before slicing.

ENJOY!

to print the recipe, click here

boule1

I am still having issues with our oven, the temperature shoots up and down, making it hard to control proper baking.  At some point in the future we’ll change our kitchen appliances, but for the time being we dance according to the music. That’s the proper Zen attitude. Or so I am told…  😉

I am submitting this post to Susan’s Yeastspotting.

ONE YEAR AGO: Braised Brisket with Bourbon-Apricot Glaze

TWO YEARS AGO: The Real Vodka Sauce

THREE YEARS AGO: Pork Tenderloin and Blue Cheese

RED WINE SOURDOUGH BREAD WITH CRANBERRIES

The Fresh Loaf Forum is a virtual paradise for bread bakers, as not only very experienced folks share their best recipes, but you can also get feedback in case problems arise with a recipe.  Last week I stopped by the site and the thread right at the top had the following title: Sourdough Wine Bread. That got my full attention.  I clicked on it, and was blown away by the gorgeous photos, and the unusual color of the bread’s crumb, given by the wine and the dried cranberries.  I revived my starter that same day, and started this bread on a Friday night.  Sometimes you  should not wait to chase a dream.loaf1RED WINE SOURDOUGH BREAD WITH DRIED CRANBERRIES
(adapted from The Fresh Loaf Forum, bread by Yuko)

102 g sourdough starter (at 100% hydration)
288 g  all-purpose flour
80 g water
123 g red wine
6.7 g Salt
80 g dried cranberries

In a bowl, mix flour, wine, and water roughly, cover it with plastic and keep for 12 hours in the fridge (autolyse).

Add sourdough starter and mix by folding dough in the bowl. Add  cranberries and mix by folding dough in the bowl. Add salt and slap & fold for 3 – 4 minutes or until the dough becomes a ball.  Bulk fermentation at room temperature, folding the dough every half and hour until it develops enough strength (I did 4 sets of folds).

Let it rise until the dough starts showing the yeast activity. It takes about 6 hours total depending on the temperature of your kitchen (I used my bread proofing box set at 78 F).  Shape the bread as a boule (or 2 baguettes), place in a banetton or other appropriate container, and let it proof in the fridge for 16 to 18 hours.

Pull it out of the fridge and leave it out for one to three hours (see comments).  Slash the bread and bake in a 450F oven with initial steam for a total of 40 minutes (for a boule), or 20 to 25 minutes for baguettes.

Cool on a rack before slicing.

ENJOY!

to print the recipe, click here

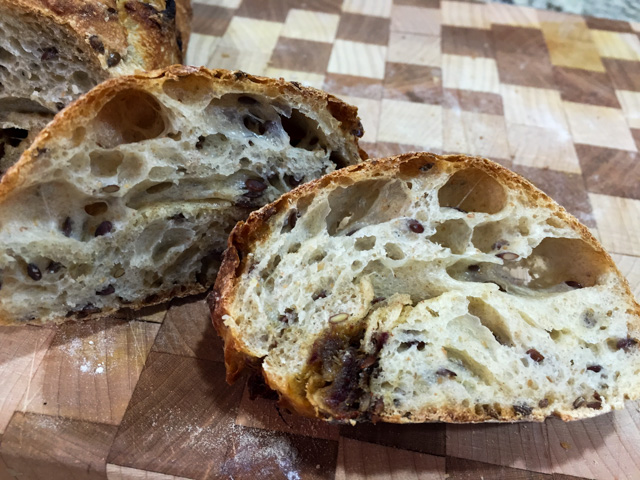
crumb

Comments:  Preparing this bread had me worried up until the point I finally sliced it. Something seemed terribly wrong, as I detected very little fermentation, even though I kept the dough for almost 7 hours at 78 F. The original recipe called for retarding the dough in the fridge and shaping it next day, but my dough seemed so…. slow!  I decided to shape it on the same day, and retard the dough in its final form, ready for the oven.  Ideally, you should remove the bread from the fridge and allow it to almost double in size.  That was not happening, so after a couple of hours I simply had to bake it.

Now, a little tangent.  I usually wake up several times during the night, and tend to think about our experiments while trying to go back to sleep.  Sometimes (unfortunately not that often),  when I wake up again an hour or so later, I have a new idea to solve a problem or at least approach it.  Almost as if during my sleep something goes to work “behind my back”…   😉  That Saturday night, I went to bed thinking about the red wine sourdough and why it seemed so weak.  Exactly at 2am I woke up with one word blinking in my mind: SULFITES!  All wine these days is preserved with sulfites! Maybe some batches have a higher concentration, maybe some of the bacteria or yeast in my starter was particularly sensitive to it.  At any rate, one thing is certain: when you add red wine to make the dough the pH will be lower (higher acidity) so that will affect the efficiency of fermentation.  Add to that the sulfites, and things can get trickier.   Discussing these points in The Fresh Loaf forum, one of the bakers mentioned that when he adds wine to the dough the crumb of his bread gets tighter (indicating lower production of gas). For that reason,  he normally tweaks his recipes to lower the alcohol and increase the water.  Since in this case we are hoping for a nice red tint in the crumb, compromise is in order.  I’d say keep the recipe as it is, and see how your starter behaves with it.  Just for fun, I’ll try to find an organic red wine for my next “experiment”. Organic wines cannot have extra sulfites added,  so the levels of the chemical will be low, ranging from 10 to 20 ppm (parts per million).  Non-organic red wines often reach 125 ppm of sulfites or higher.

Even if the fermentation was not at its peak, this bread was delicious!  I love the slightly sweetness given by the cranberries.  My favorite match for the bread was a Maytag blue cheese, sharp and salty.   Next day, slightly toasted, it seemed even better!

plattercheese

I am submitting this post to Susan’s Yeastspotting

ONE YEAR AGO: Award-Winning Sourdough Baguettes

TWO YEARS AGO: Country Rye (Tartine)

THREE YEARS AGO: Penne a la Vechia Bettola