LET’S BRAID IT ON!

Joanna from Zeb Bakes is a constant source of inspiration. She always comes up with the most amazing breads, just because she got up one day in the mood to play with an idea, or try to mimic something from a fancy bakery.  Not too long ago she shared with her readers a gorgeous bread with a crown, looking like a Roman Emperor, perhaps Julius Caesar on his golden days.  According to Joanna, the Emperor had indulged a tad too much on vino the evening before, so his crown was tilted to one side.  Granted, we’ve all had our days of overindulging, so let’s not be too critical.  Here is my attempt at crowning a sourdough:
boule1
HAIL CAESAR SOURDOUGH
(adapted from Joanna, at Zeb Bakes)

Mix together:
25 g of active sourdough starter
100 g  bread flour
125 g water

Leave for 12-16 hours in a cold kitchen;  6-10 hours in a warm one.

The following day, make the dough:
225 g of the above mixture
200 g water
175 g bread flour
150 g regular bread flour
75 g dark rye flour
1/2 tablespoon of dark malt dissolved in water
3 g dry yeast
10 g sea salt

Mix all ingredients together, except the salt.  Leave the mass of dough to rest for 20 minutes, sprinkle salt on top and knead it in for a couple of minutes until smooth. You can use a KitchenAid in low-speed if you like.

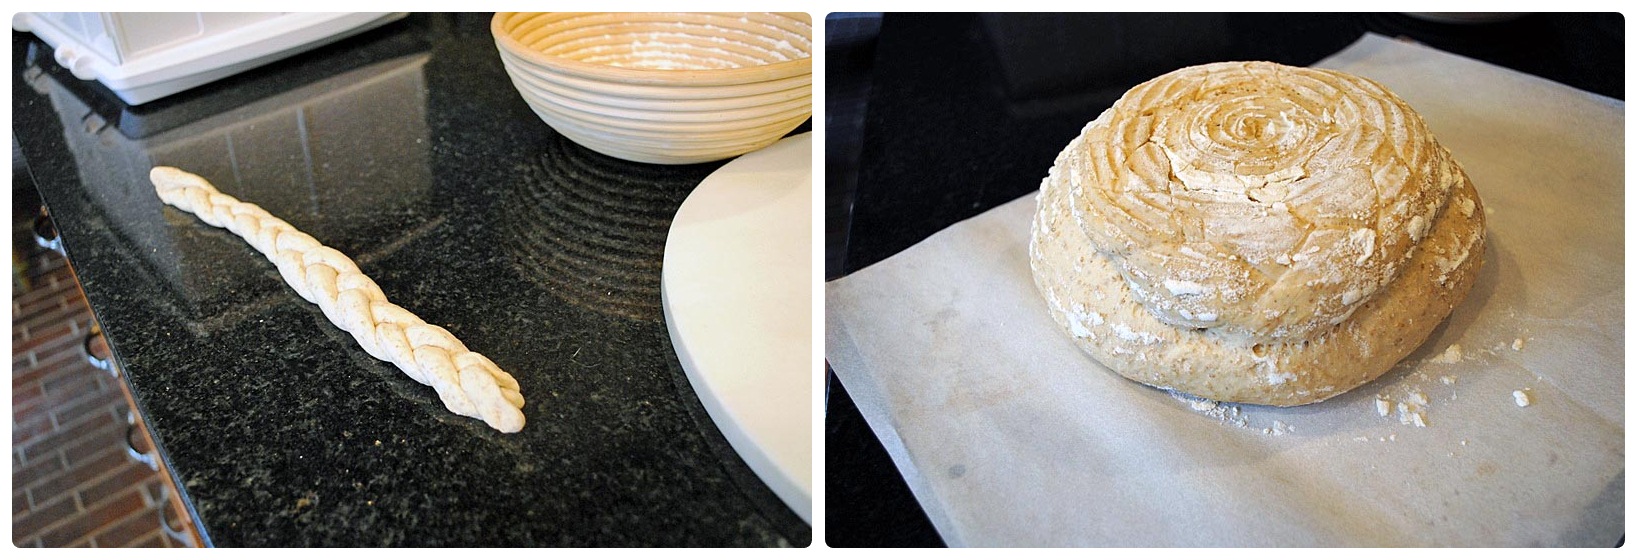
Ferment the dough for 3 hours, with two folds (at 60 and 120 minutes). Leave the dough rise undisturbed for the last hour.   Weigh the dough and separate a small amount roughly 10% of its weight for the braid.  Divide that portion in three, make long strands with it, and form a braid.   Place the braid at the bottom of a well floured banetton, form the remaining of the dough as a ball, and place it, seam side down over the braid.

Ferment the shaped dough for 2 hours, invert it on a piece of parchment paper, and bake in a 450 F oven with initial steam for 20 minutes, reduce the oven to 420 F and bake for 20 to 25 minutes more.  Cool completely on a rack.

ENJOY!

to print the recipe, click  here

composite

I loved making this bread!  When Joanna posted her article, she got a comment from the baker who originally designed this recipe, and he advised her to use less dough (5 to 8% from the total weight) to make the braids.  I used 10% because it already seemed like a very small amount, but I ran into some difficulties. I should have rolled my strands a little longer, and glued them better to the rest of the dough.  Still, it is a nice touch to embellish a sourdough boule. I will not lie to you, though.  My  Emperor was also vino-happy the previous night, as these (more revealing) shots will demonstrate. 😉

oops2oops

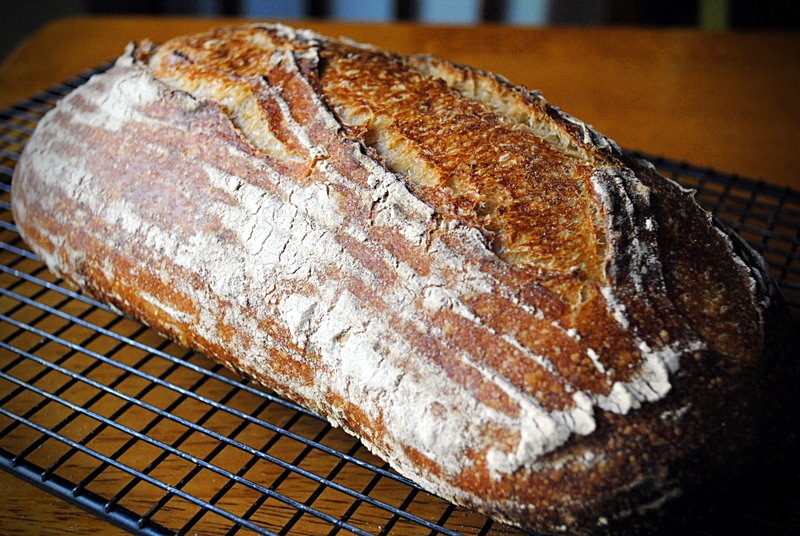
This was a nice loaf of bread, with the delicious flavor of rye, and a golden brown crust, boosted by the inclusion of malt. I baked it inside a large roasting pan with a lid, after a nice comment left by Donna on my sourdough mini-rolls post. It worked extremely well, thanks for the great tip, Donna!  I did not add any extra water inside the pan. I just poured some inside the lid, emptied it leaving a little water clinging to the surface, and inverted it quickly to close the roaster.  At the end of 20 minutes I opened the roasting pan and continued baking uncovered.

closeup

Joanna, thanks for another great recipe!  This one goes straight to Susan’s Yeastspotting

ONE YEAR AGO: In My Kitchen, December 2011

TWO YEARS AGO: Festivus Dinner Rolls

THREE YEARS AGO: 100% Sourdough Rye

OCTOBER 16: WORLD BREAD DAY!

Six years ago, Zorra started an event called “World Bread Day“. Bakers from all over the world would bake a loaf of bread and blog about it.  This year I am thrilled to participate and chose my favorite type of bread to join the party.  The recipe comes from a very nice book, Artisan Baking, written by Maggie Glezer.  A country French-style loaf called Essential’s Columbia.   The formula comes from George DePasquale, from Seattle’s Essential Baking Company.

The perfect Sunday starts with a batch of sourdough starter all puffed up from getting fed 12 hours earlier.  Before I even have my morning capuccino, the kitchen still dark, I look at my ingredients waiting, and get all excited anticipating the thrill of getting a nice loaf of bread from our oven.   It does help a lot to weigh it all the night before, all you have to do is heat the water in the microwave for 30 seconds or so,  and you are ready to go…

In Glezer’s book, this bread is listed as “advanced”, but it’s actually quite simple to prepare.  It calls for all purpose flour, bread flour, whole wheat, and a little rye.  Also in the formula a small amount of toasted wheat germ, and barley malt syrup.   It uses a very firm starter, probably the firmest I’ve ever seen in a recipe, it is actually more like a dough that ferments for 12 hours and then is incorporated in the mixture of flours, salt, and water.    A very slow and long fermentation, with the help of my bread proofing box.  Amazing how the two banettons fit just right inside!

After shaping, the oblong loaf proofed for 3 hours, and the round one for almost 4 hours, as I could not bake them at the same time.  Not much difference in the crumb, which was a bit surprising to me. I expected the round loaf to have a slightly more airy inner structure.  But bread is bread,  its temperamental nature one of the things I love the most about it.

I could not find a way to contact Maggie Glezer to get her official ok to publish the full recipe, but it is available online in a couple of blogs, so you can find it.  But the book is a must-have for anyone with a passion for wild yeast, so consider providing that little boost on the economy.

My batard shaping was a little better than usual, but still needs improvement… gotta keep going at it!

The perfect Sunday ends with a couple of loaves resting on the counter….

and the perfect Monday starts with a small gift to the Department!   😉

I am submitting this post to Susan’s Yeastspotting…    and I invite you to visit the roudup of breads at Zorra’s site!

ONE YEAR AGO: The US Listeria Outbreak 2011

TWO YEARS AGO: 36 Hour Sourdough Baguettes

THREE YEARS AGO: October 16 is World Bread Day

THERE WILL BE BREAD


Drum roll, please…  

This post officially inaugurates the new kitchen in The Little Apple!  What better than a loaf of bread to start things on a nice track?  So, let me share with you a golden bread perfumed with the special saffron I received as a gift from our friend Steve. The bread looked like a blast of sunshine sitting on the black granite, and it made nice cracking noises as it cooled, the promise of a nice crumb underneath a hearty crust.

GOLDEN SAFFRON & FENNEL LOAF
(from the Bewitching Kitchen, inspired by Flo Makanai)

125 g  sourdough starter (at 100% hydration)
250 g water (divided)
large pinch of saffron
375 g bread flour
7 g salt
1 tsp fennel seeds

Heat 50 ml (no need to be precise) of water in a microwave until almost boiling, add the saffron and let it sit until it cools to almost room temperature, stirring every now and then.  Strain the saffron water through a fine mesh colander, and add to the rest of the water for a final volume of 250ml. Reserve.

Add the active starter to a large bowl, mix it with the water until it dissolves more or less smoothly. Add the flour and the fennel seeds, and briefly do a few kneading moves to form a shaggy mess.  Cover loosely with plastic wrap for 20 minutes.

Sprinkle the salt over the dough and incorporate by kneading lightly and folding the dough on itself.  You can keep the dough in the bowl, or transfer to a surface.  After 20-30 seconds of kneading/folding, cover the dough again and let it sit for 40 minutes (total rising time up to this point: 1 hour).

Repeat cycles of quick kneading/folding two more times, spacing them 40 to 50 minutes.   After the third and final kneading cycle, let the dough sit for 20 to 30 minutes, shape it as a round or oval loaf, and leave it at room temperature  30 minutes longer.  Total rising time from beginning to end: about 3 and a half hours.  Place it in the fridge overnight.

Remove the dough from the fridge 2 hours before baking (see my comments). Heat the oven to 450F. If using a clay pot, place it in the cold oven as you turn it on. Bake the bread covered for 30 minutes, remove cover, and allow it to fully bake (reducing the temperature to 425F if the bread seems to be browning too fast) for 12 to 15 minutes longer.  Remove to a rack to cool completely before slicing.

ENJOY!

to print the recipe, click here

Comments:  It’s been a while since I baked a loaf of bread that made me as happy as this one! I’d been refreshing my starter for weeks in a row, but placing it back in the fridge, unable to squeeze bread baking in our crazy schedule.  My cookbooks are not unpacked yet, so I decided to go with the simple but very efficient method devised by Flo Makanai years ago: her famous 1, 2, 3 recipe.   One part starter, 2 parts water, 3 parts flour.  You can adapt and use any liquid or flour, but that’s the basic formula.   I wanted to incorporate saffron in the dough, and fennel seemed like a good match too.  Considering that it was not a tried and true recipe, and that it would be my first time using the oven in our new home, I admit I was  pushing the envelope. Interesting expression, by the way, I learned its origin not too long ago, and was a bit surprised. No Post Office material was used in its making.  Live, and learn.

Live, learn, and bake!  😉

To add a bit more emotion to the adventure, I could not find my banettons to proof the dough after shaping.  I actually have two, one round, and one oval, but they are both MIA, probably hidden inside one of the unpacked boxes.  I ended up using a copper colander, lined with a white cloth.

Necessity is the mother of invention.

I pushed the envelope once more by removing the dough from the fridge only 30 minutes before placing it in the 450F oven, trying to minimize the time our kitchen would be exposed to such insanely high temperature. Still, the bread had an impressive oven spring, and the beautiful, golden open crumb I hoped for.  It would be amazing with paella or a bowl of bouillabaisse, but until the weather cools enough for those dishes, we’ll enjoy it with fresh, juicy tomatoes and a sprinkle of Maldon salt.   Simple pleasures. Golden pleasures.

A final remark: I wish I could take credit for the title of this post, but my beloved husband was the genius behind it…  Sorry, ladies, he’s mine, all mine!

I am submitting this post to Susan’s Yeastspotting.

ONE YEAR AGO: In My Kitchen, July 2011

TWO YEARS AGO: Heavenly Homemade Fromage Blanc

THREE YEARS AGO: A Perfect Sunday Dinner

BLACK OLIVE SOURDOUGH BREAD

Inspired by a bread from Hamelman (Olive Levain), which I’ve made a few times in the past, I improvised on the basic sourdough method from Emmanuel Hadjiandreou and his “How to Make Bread“, that I recently blogged about.  You want this bread to deliver real big olive flavor, so keep the olives in large pieces, you can even leave some whole (but pitted, of course! 😉

BLACK OLIVE SOURDOUGH
(adapted from Emmanuel Hadjiandreou)

400 g (3 + 1/2 cups) bread flour
10 g (2 tsp) salt
200 g (3/4 cup) warm water
300 g (1 + 1/2 cups) sourdough starter (100% hydration)
4-5 ounces black olives (preferably Kalamata, pitted and chopped in large pieces – roughly 1 cup, loosely packed)

Add into one bowl the flour and the salt.   This is your dry mixture.

In another, larger bowl, mix the  water and the sourdough starter. This is  your wet mixture.

Add the dry mixture to the wet mixture and mix until it all comes together. Cover with a plastic wrap and let it stand for 10 minutes.  After 10 minutes, add the pieces of olives and knead the dough in the bowl, by pulling one portion of the dough from the side and pressing it down in the middle.  Repeat it turning the bowl slightly at each kneading, doing this kneading motion about 8 times and covering the full circumference of the ball of dough. The whole process should take about 20 seconds.   Cover the dough again and leave it resting for 10 minutes.

Repeat this kneading cycle three more times, 10 minutes apart.  Cover the bowl and let it rest for one hour.

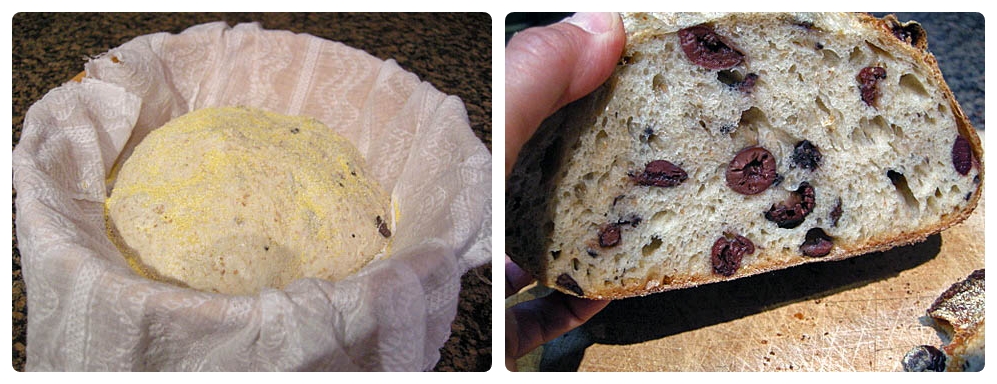
Turn the dough onto a floured surface, and shape it  as a round ball,  coat the surface lightly with cornmeal or rice flour, and place it in a suitable container for the final rise.  Let the dough rise until doubled in size, which should take from 3 to 6 hours, depending on how active your starter was.

Heat the oven to 475 F, and have your method to generate steam ready.   Slide the bread on a parchment paper or a wooden peel, slash it, and place it in the oven.  I like to bake it over tiles, and place an inverted roasting pan moist with hot water over it for about 30 minutes, then remove it.   Once the bread is in the oven, reduce the temperature to 425 F.  Bake for a total of 40 minutes, or until the internal temperature is over 200F.

Let the bread cool completely before slicing.

ENJOY!

to print the recipe, click here

Comments:  I confessed before that I am a kalamata-cheerleader,  so this bread is obviously a favorite of mine.  I already have a spicy kalamata sourdough in the blog,  but in this version I took a minimalist approach and used only olives, nothing else.

Don’t worry if when you start kneading the dough, the pieces of olive insist on poking out, just let them be.   In the end, they will find their perfect spot in the crumb.   Try not to squish the pieces too much as you fold or knead the dough.

I used cornmeal to coat the surface of the bread during proofing, because I ran out of rice flour, but in the end it turned out pretty good, the cornmeal gave the bread an interesting golden hue, and did a good job releasing the proofed bread from the banetton.

I am sending this post to Susan’s Yeastspotting, make sure you stop by to get inspired by all the baking going on this past week…   😉

ONE YEAR AGO: Buttermilk Cluster

TWO YEARS AGO: Farfalle, Farfalle

Add to FacebookAdd to DiggAdd to Del.icio.usAdd to StumbleuponAdd to RedditAdd to BlinklistAdd to TwitterAdd to TechnoratiAdd to Yahoo BuzzAdd to Newsvine

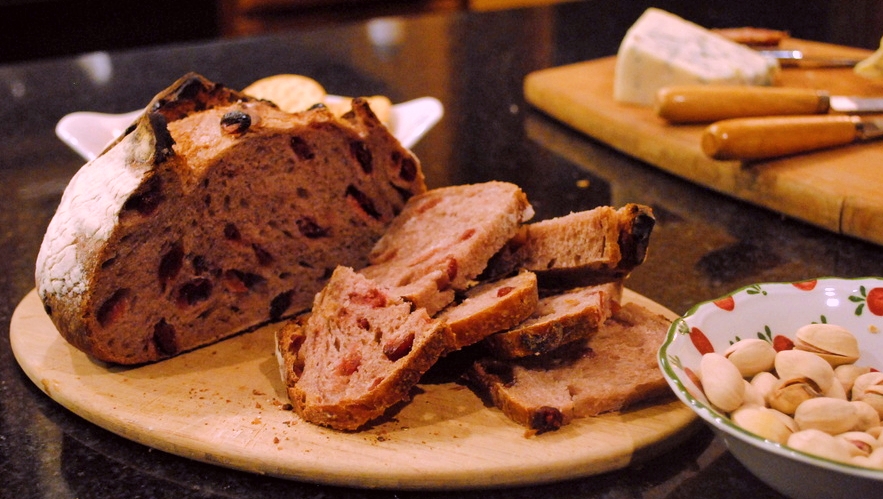
THE DEVIL MADE ME DO IT

Things were going well, perhaps too well.   My decision of not buying a single cookbook during the year of 2012 had me strong and confident until April 19th. The date is a personal record, as in the past 5 years I caved before sunset on the last day of February.   But, reading this passionate review by Farine set the stage for my demise.   How could I possibly resist a book called “How to Make Bread?”    I succumbed. I got it.  And, you know what?  I LOVE IT!

TOMATO SOURDOUGH
(from “How to Make Bread“, published with permission from Emmanuel Hadjiandreou)

400 g (3 + 1/2 cups) bread flour
10 g (2 tsp) salt
2 + 1/2 Tbsp chopped rosemary leaves
6 g (1 + 1/4 tsp) nigella seeds
40 g (2 Tbsp) tomato paste
200 g (3/4 cup) warm water
300 g (1 + 1/2 cups) sourdough starter (100% hydration)
2 tsp olive oil

Add into one bowl the flour, salt, seeds, and rosemary. This is your dry mixture.

In another, larger bowl, mix the tomato paste, water, sourdough starter, and olive oil. This is  your wet mixture.

Add the dry mixture to the wet mixture and mix until it all comes together. Cover with a plastic wrap and let it stand for 10 minutes.  After 10 minutes, knead the dough in the bowl, by pulling one portion of the dough from the side and pressing it down in the middle.  Repeat it turning the bowl slightly at each kneading, doing this kneading motion about 8 times and covering the full circumference of the ball of dough. The whole process should take about 20 seconds.   Cover the dough again and leave it resting for 10 minutes.

Repeat this kneading cycle three more times, 10 minutes apart.  Cover the bowl and let it rest for one hour.

Turn the dough onto a floured surface, and shape it either as a round ball, or an oblong format, place it in a suitable container for the final rise.  Let the dough rise until doubled in size, which should take from 3 to 6 hours, depending on how active your starter was.

Heat the oven to 475 F, and have your method to generate steam ready.   Slide the bread on a parchment paper or a wooden peel, slash it, and place it in the oven.  I like to bake it over tiles, and place an inverted roasting pan moist with hot water over it for about 30 minutes, then remove it.   Once the bread is in the oven, reduce the temperature to 425 F.  Bake for a total of 40 minutes, or until the internal temperature is over 200F.

Let the bread cool completely on a rack before slicing.

ENJOY!

to print the recipe, click here

About the book:  if you are into bread baking and think you’ve got enough books on the subject, think again.  You need this one.  Your library won’t be complete without it, no matter what is your skill level.  Emmanuel is a natural teacher, and the step by step photos arranged in a single page will give you a very clear idea of how to handle the dough at the different stages of fermentation and shaping.

One of the things I love the most about the book is how it makes me want to design my own recipes, using his basic method.  He simplifies the instructions by describing each recipe as “this is your dry mixture”“this is your wet mixture”“mix one with the other”.  Basically, that is what bread baking is all about, and you can customize and be creative  if you keep this basic formula in mind follow his minimalist approach to kneading.  Plus, he will expand your horizon on ingredients to add to a bread.  A few examples are his beetroot sourdough, fig, walnut and anise sourdough,  chocolate and currant sourdough…   Emmanuel’s book made me want to experiment, and that is the mark of a great cookbook.  It shows you a path without restricting you to it.

You can tell that a lot of dedication and attention to detail went into the making of this book.  From photos to text, a real masterpiece!

Emmanuel, thank you for giving me permission to feature your recipe in my blog…

I am submitting this post to Susan’s Yeastspotting

ONE YEAR AGO: A Focaccia Experiment

TWO YEARS AGO: Pierre Nury’s Bougnat

Add to FacebookAdd to DiggAdd to Del.icio.usAdd to StumbleuponAdd to RedditAdd to BlinklistAdd to TwitterAdd to TechnoratiAdd to Yahoo BuzzAdd to Newsvine