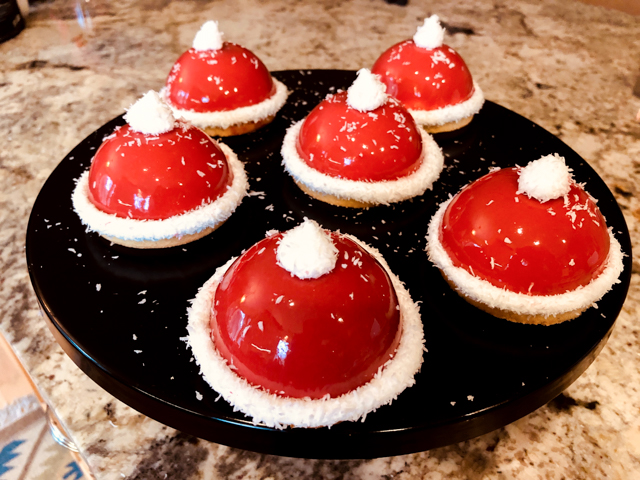
New Year’s Eve, we cooked our meal together, and decided not to have dessert, since a mighty Mont Blanc had been at our table just a few days earlier (read about it here). But I developed this intense desire to surprise my beloved husband, so one day in which he had to work in a very long experiment I went to work and made all I needed to assemble a mini-cake. Small in size, great in impact. Coffee and chocolate. And a ton of love.
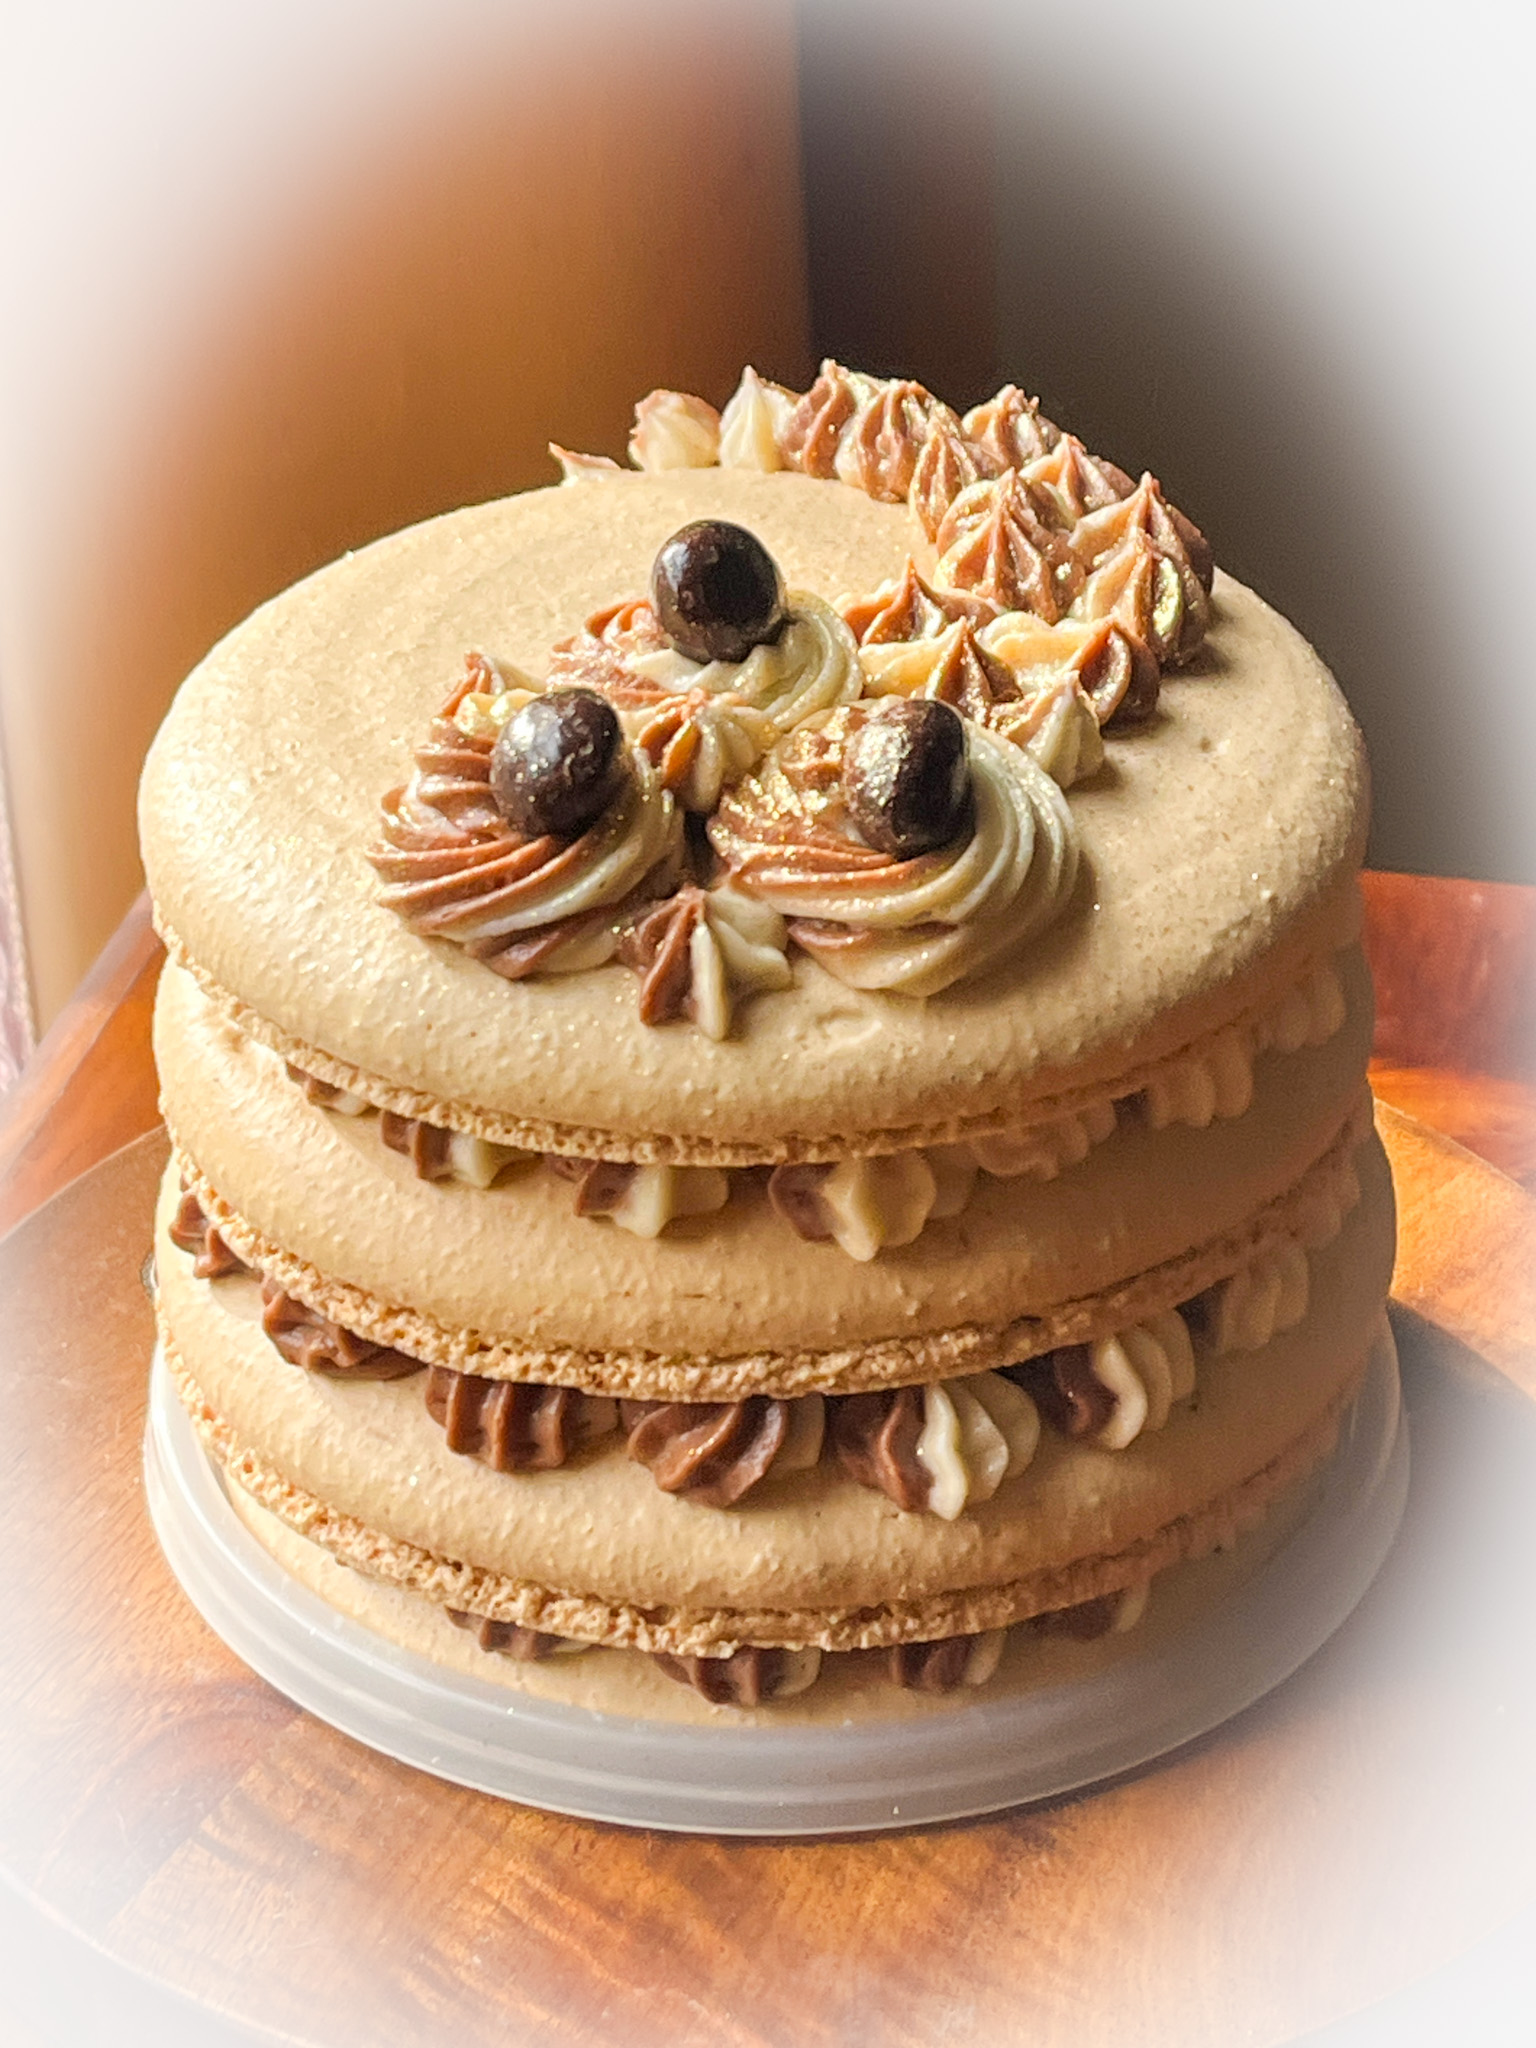
COFEE AND CHOCOLATE MINI-MACARON CAKE
(slightly modified from Pies and Tacos website)
for the shells:
100 grams egg whites
100 grams granulated sugar
4 grams egg white powder
105 grams almond flour
105 grams powdered sugar
1 teaspoon espresso powder
for the espresso and mocha filling:
1/4 cup cream cheese, softened (56 grams)
2 tbsp butter, softened (28 grams)
1 + 1/2 cup powdered sugar (187 grams)
1/2 tsp vanilla extract
1/2 tsp espresso powder
2 tbsp cocoa powder
1 tsp milk to adjust consistency (if needed)
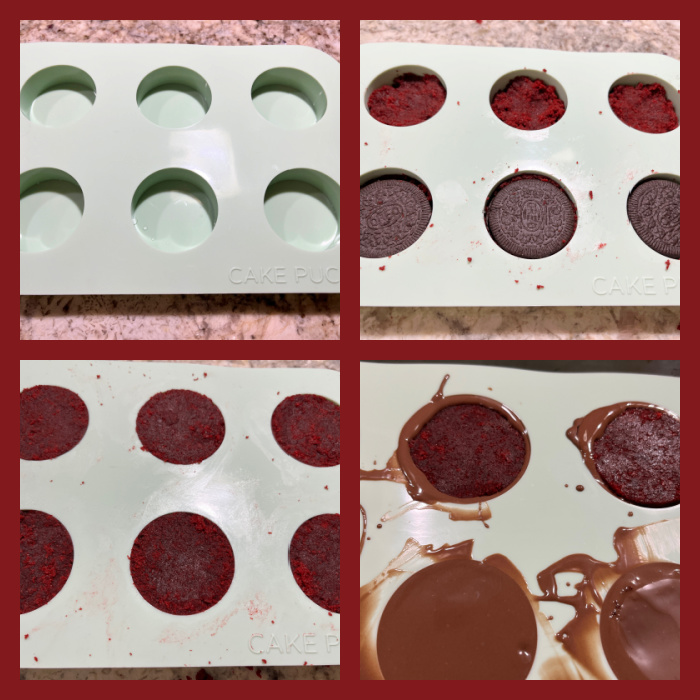
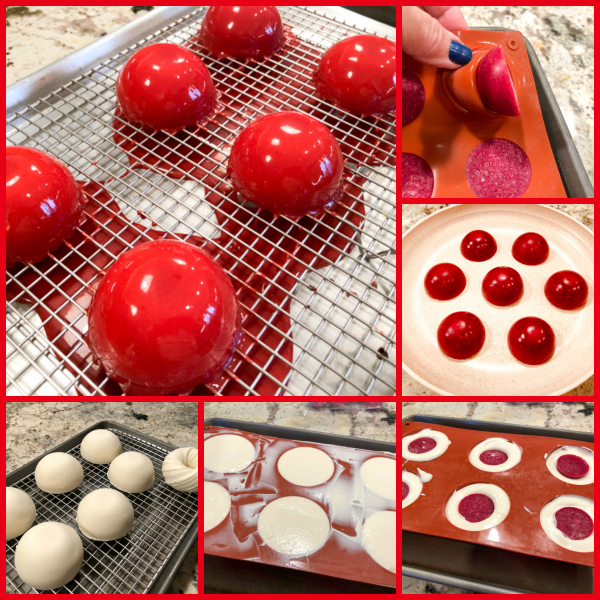
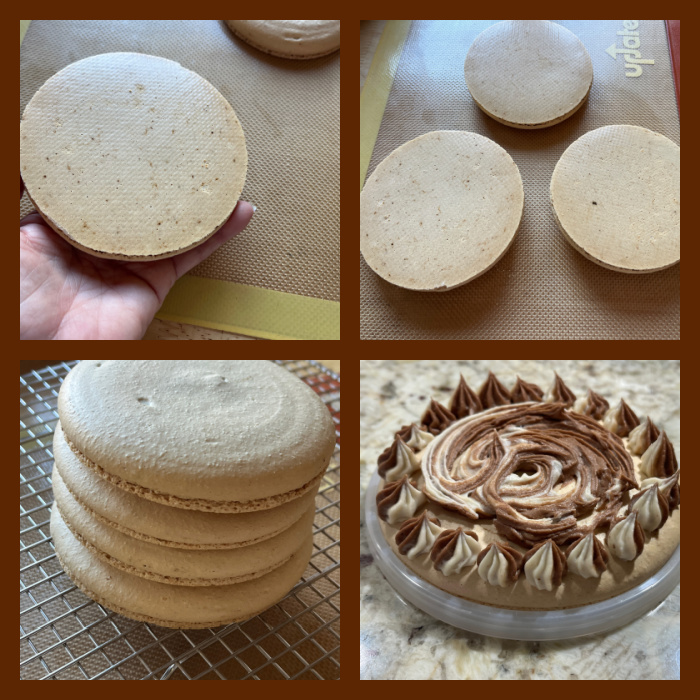
Prepare a large piping bag, fitted with a large round tip, I use a 1/2” diameter tip. Set aside. Line two baking sheets with parchment paper or silicone mat. Place a template with large circles – 4 inches in diameter – underneath it. You will need 4 circles.
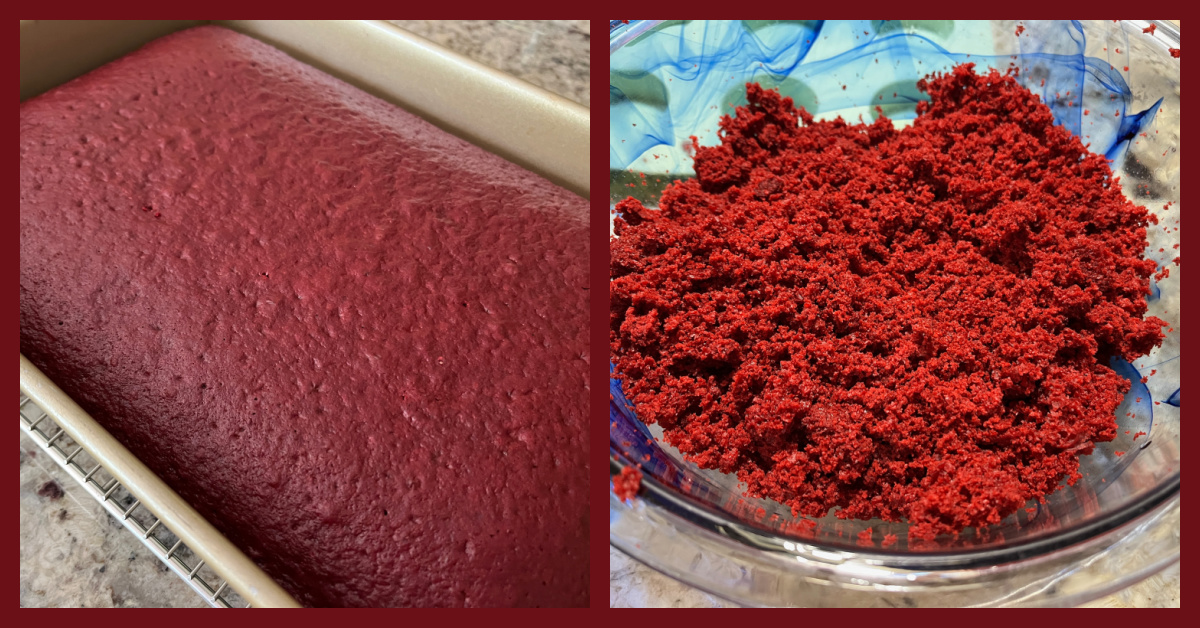
Process the powdered sugar and almond flour for 20 seconds, pass through a sieve. Set it aside. Whisk the sugar and the egg white powder (if using) in a bowl, and place it over a pan with barely simmering water. Add the egg whites to the sugar and whisk the mixture until frothy and the sugar is completely melted. Transfer the syrup to the bowl of a stand mixer.
With the whisk attachment, start whisking mixture on low for about 30 seconds, then gradually start increasing speed to medium. Whisk on medium for one to two minutes, until the mixture is white and starting to become fluffy. Raise the speed to high, or medium-high and whisk for a few minutes until stiff peaks are formed. Pour the powdered sugar and almond flour into the stiff meringue. Perform the macaronage until it is glossy and has a thick flowing consistency. Add the espresso powder when the batter is almost ready to pipe.
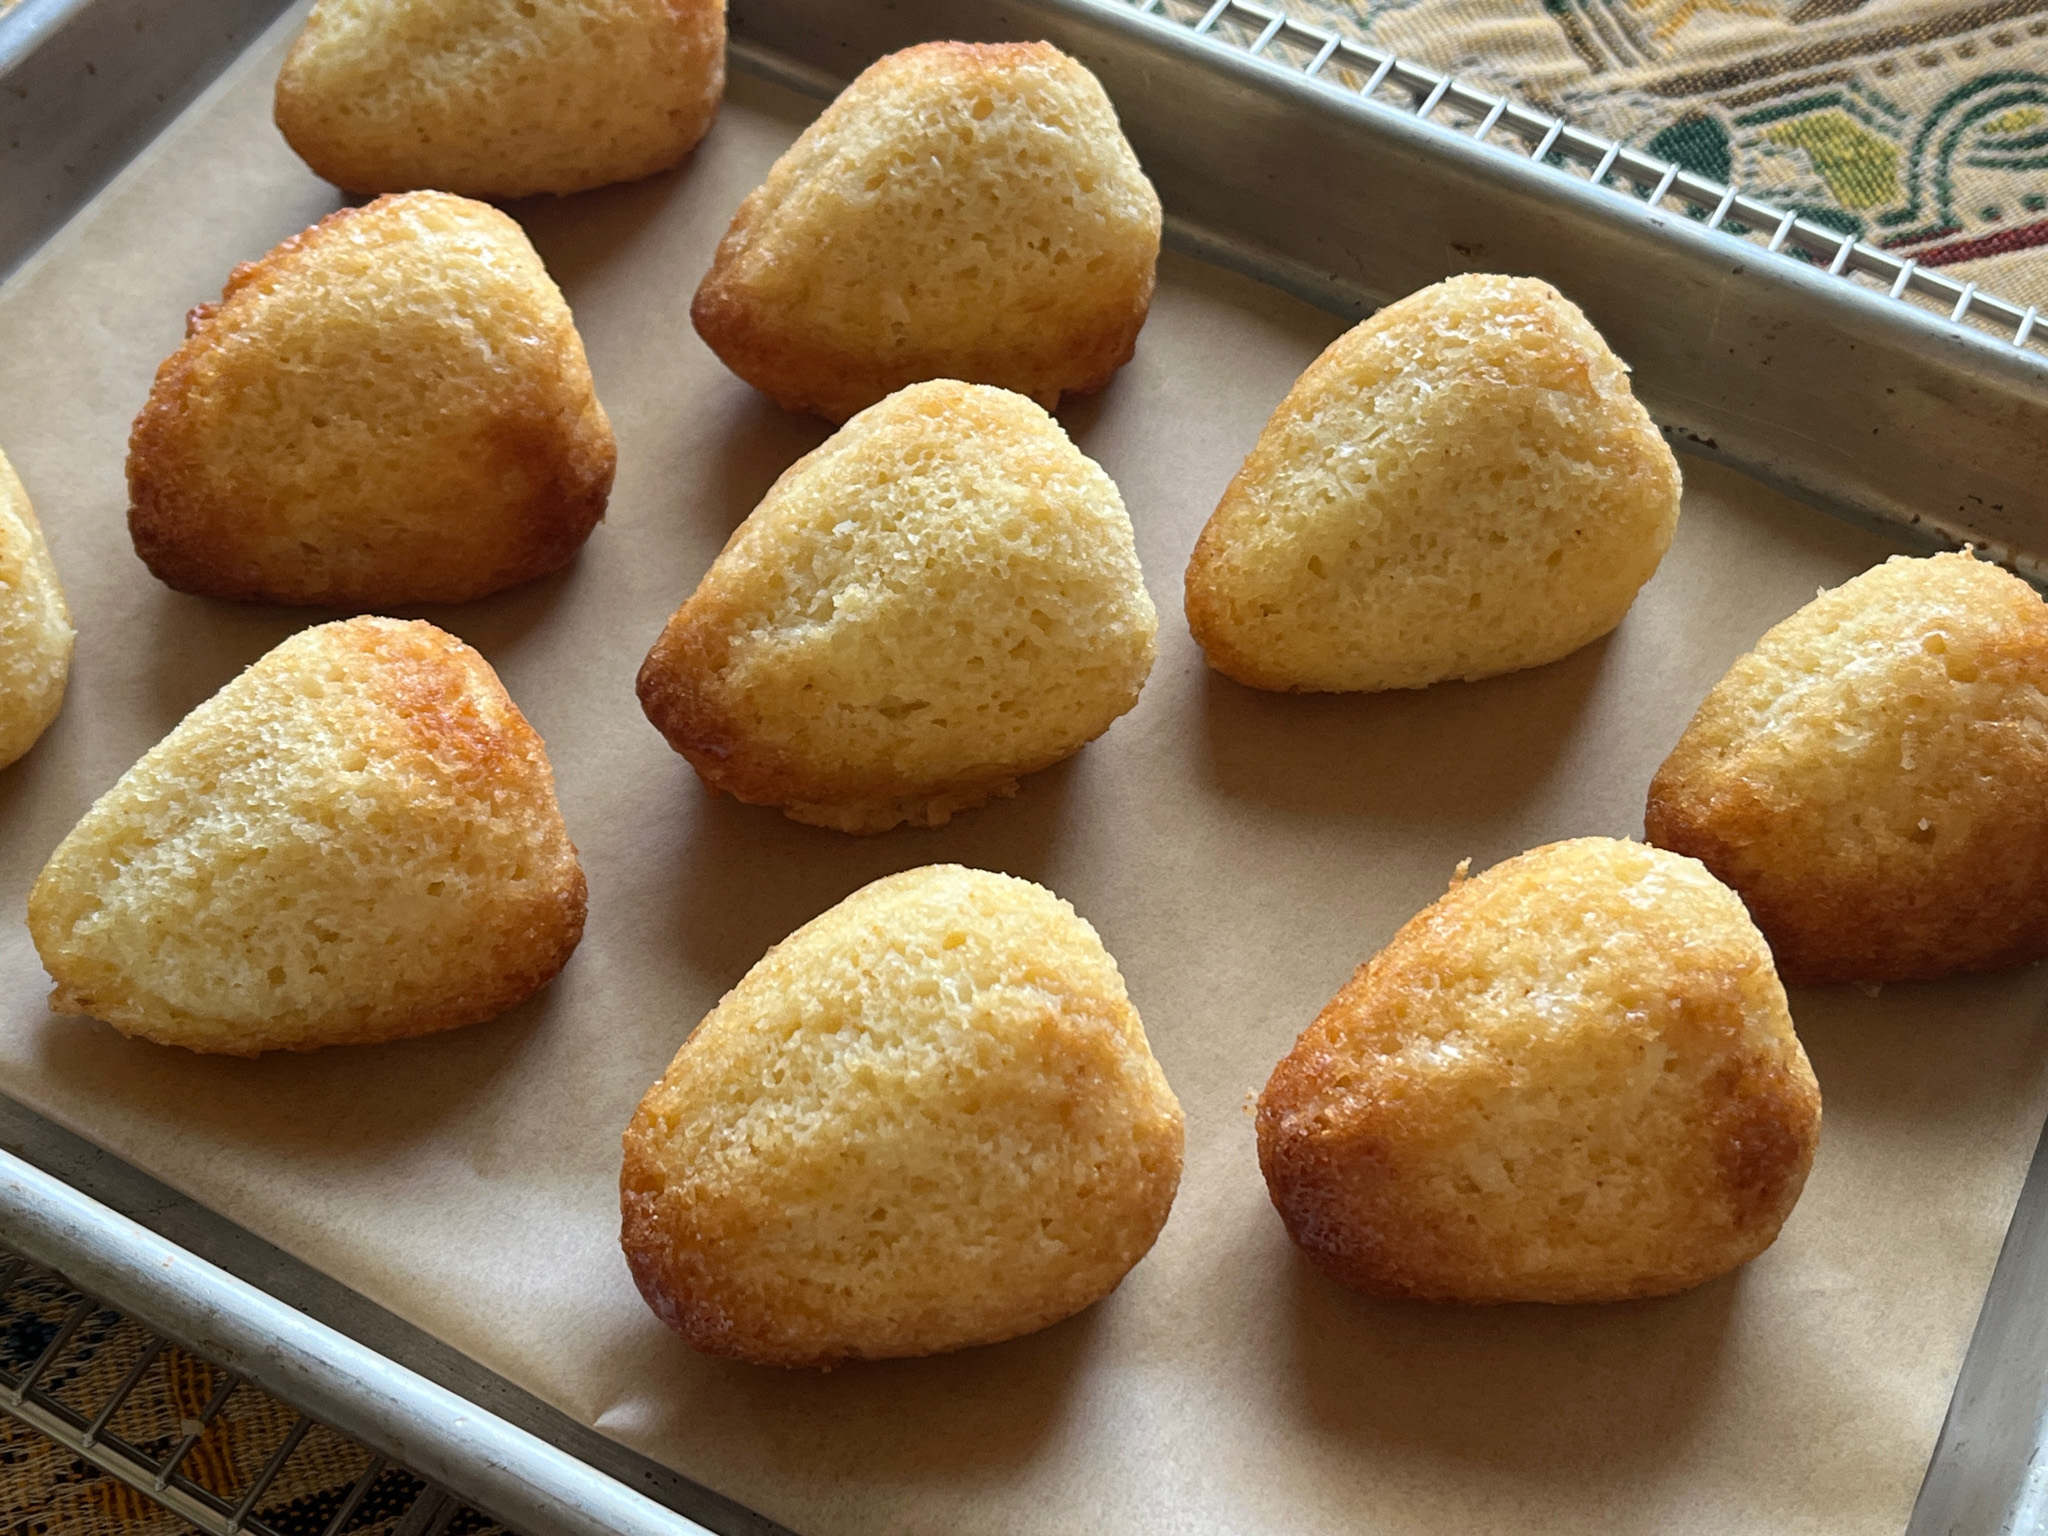
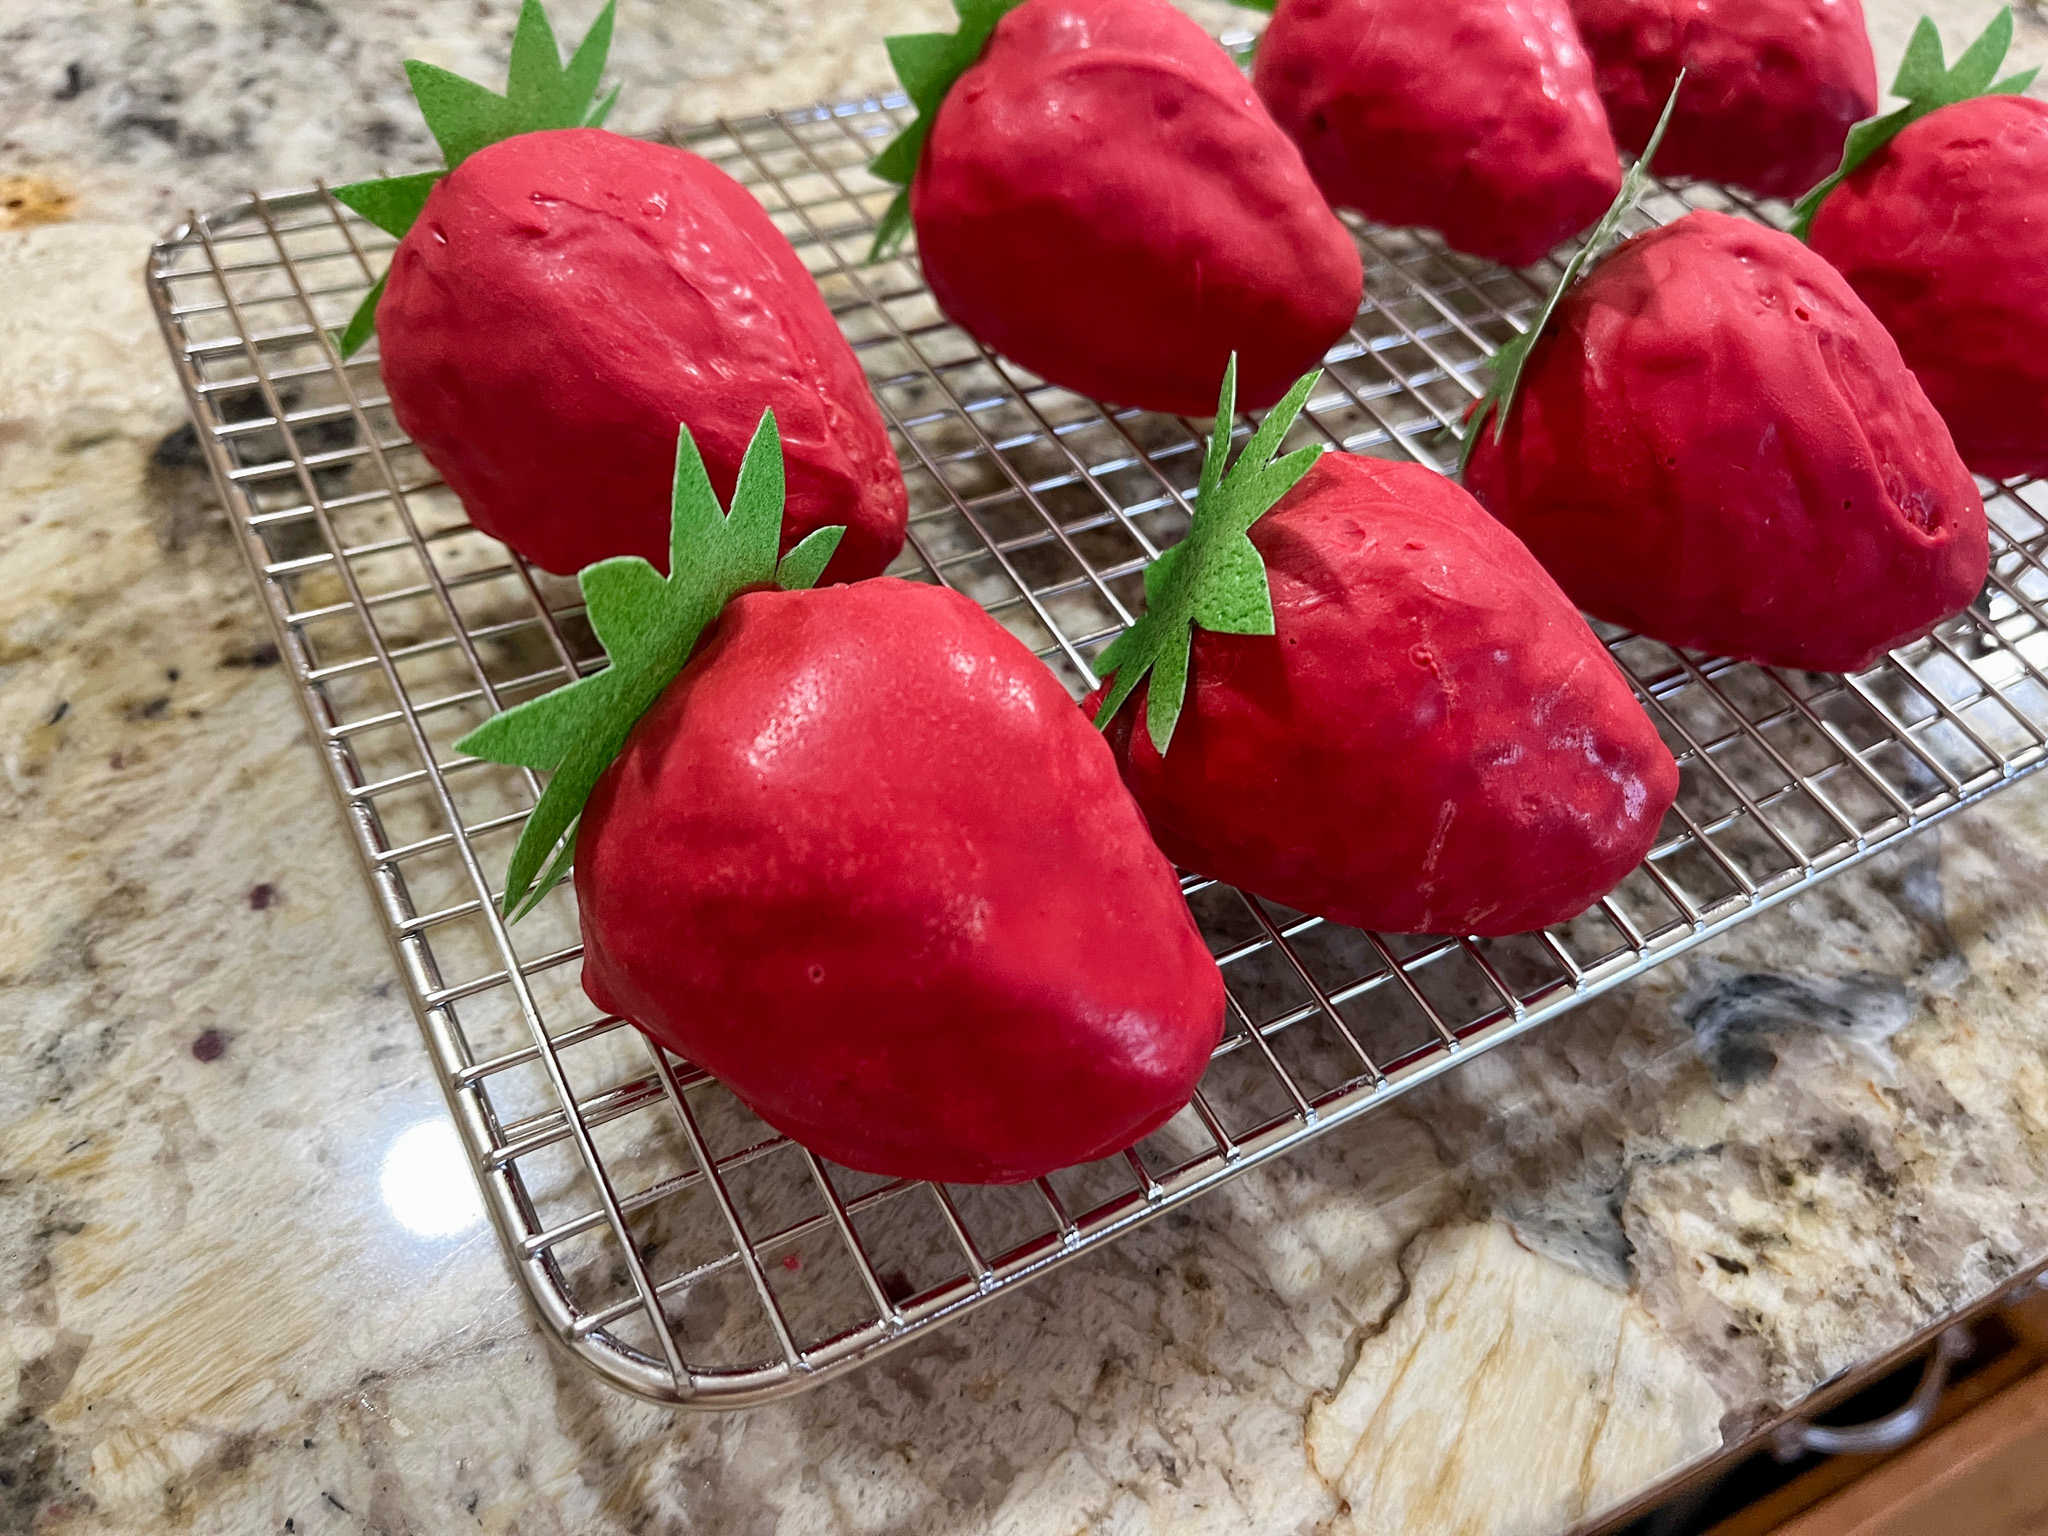
Transfer the batter to the prepared piping bag. Place the piping bag directly 90 degrees over the center of a circle template. Apply gentle pressure and carefully pipe while keeping the bag in that vertical position. I piped each macaron about 3.5”, because they spread out considerably after piping, and then they reached a 4.” diameter after I banged the tray against the counter.
Once you’ve piped the circles, bang the tray against the counter a few times. This will release air bubbles that are in the batter and prevent your macaron shells from cracking.
Let the trays sit for a while so the shells will dry out. Bake at 315F for about 20 minutes, until they don’t move around as you try to rotate the shells.
Make the filling:
Cream the softened cream cheese and butter together in the bowl of an electric mixer, for about 2 minutes, until light and fluffy. With the mixer off, add the powdered sugar to the bowl. Turn mixer on low to incorporate the powdered sugar with the cream cheese and butter. Cream the mixture on medium high for one minute. Add vanilla extract and the espresso powder and mix to combine.
If the frosting is too runny, add more powdered sugar. And if the frosting is too stiff, add a teaspoon of water or milk to thin it out. Divide the frosting between two different bowls. Cover one bowl so that the frosting doesn’t dry out, that will be the Espresso Frosting.
To make the Mocha Frosting, add cocoa powder to the other half of the frosting you divided between the bowls. Cream until combined.
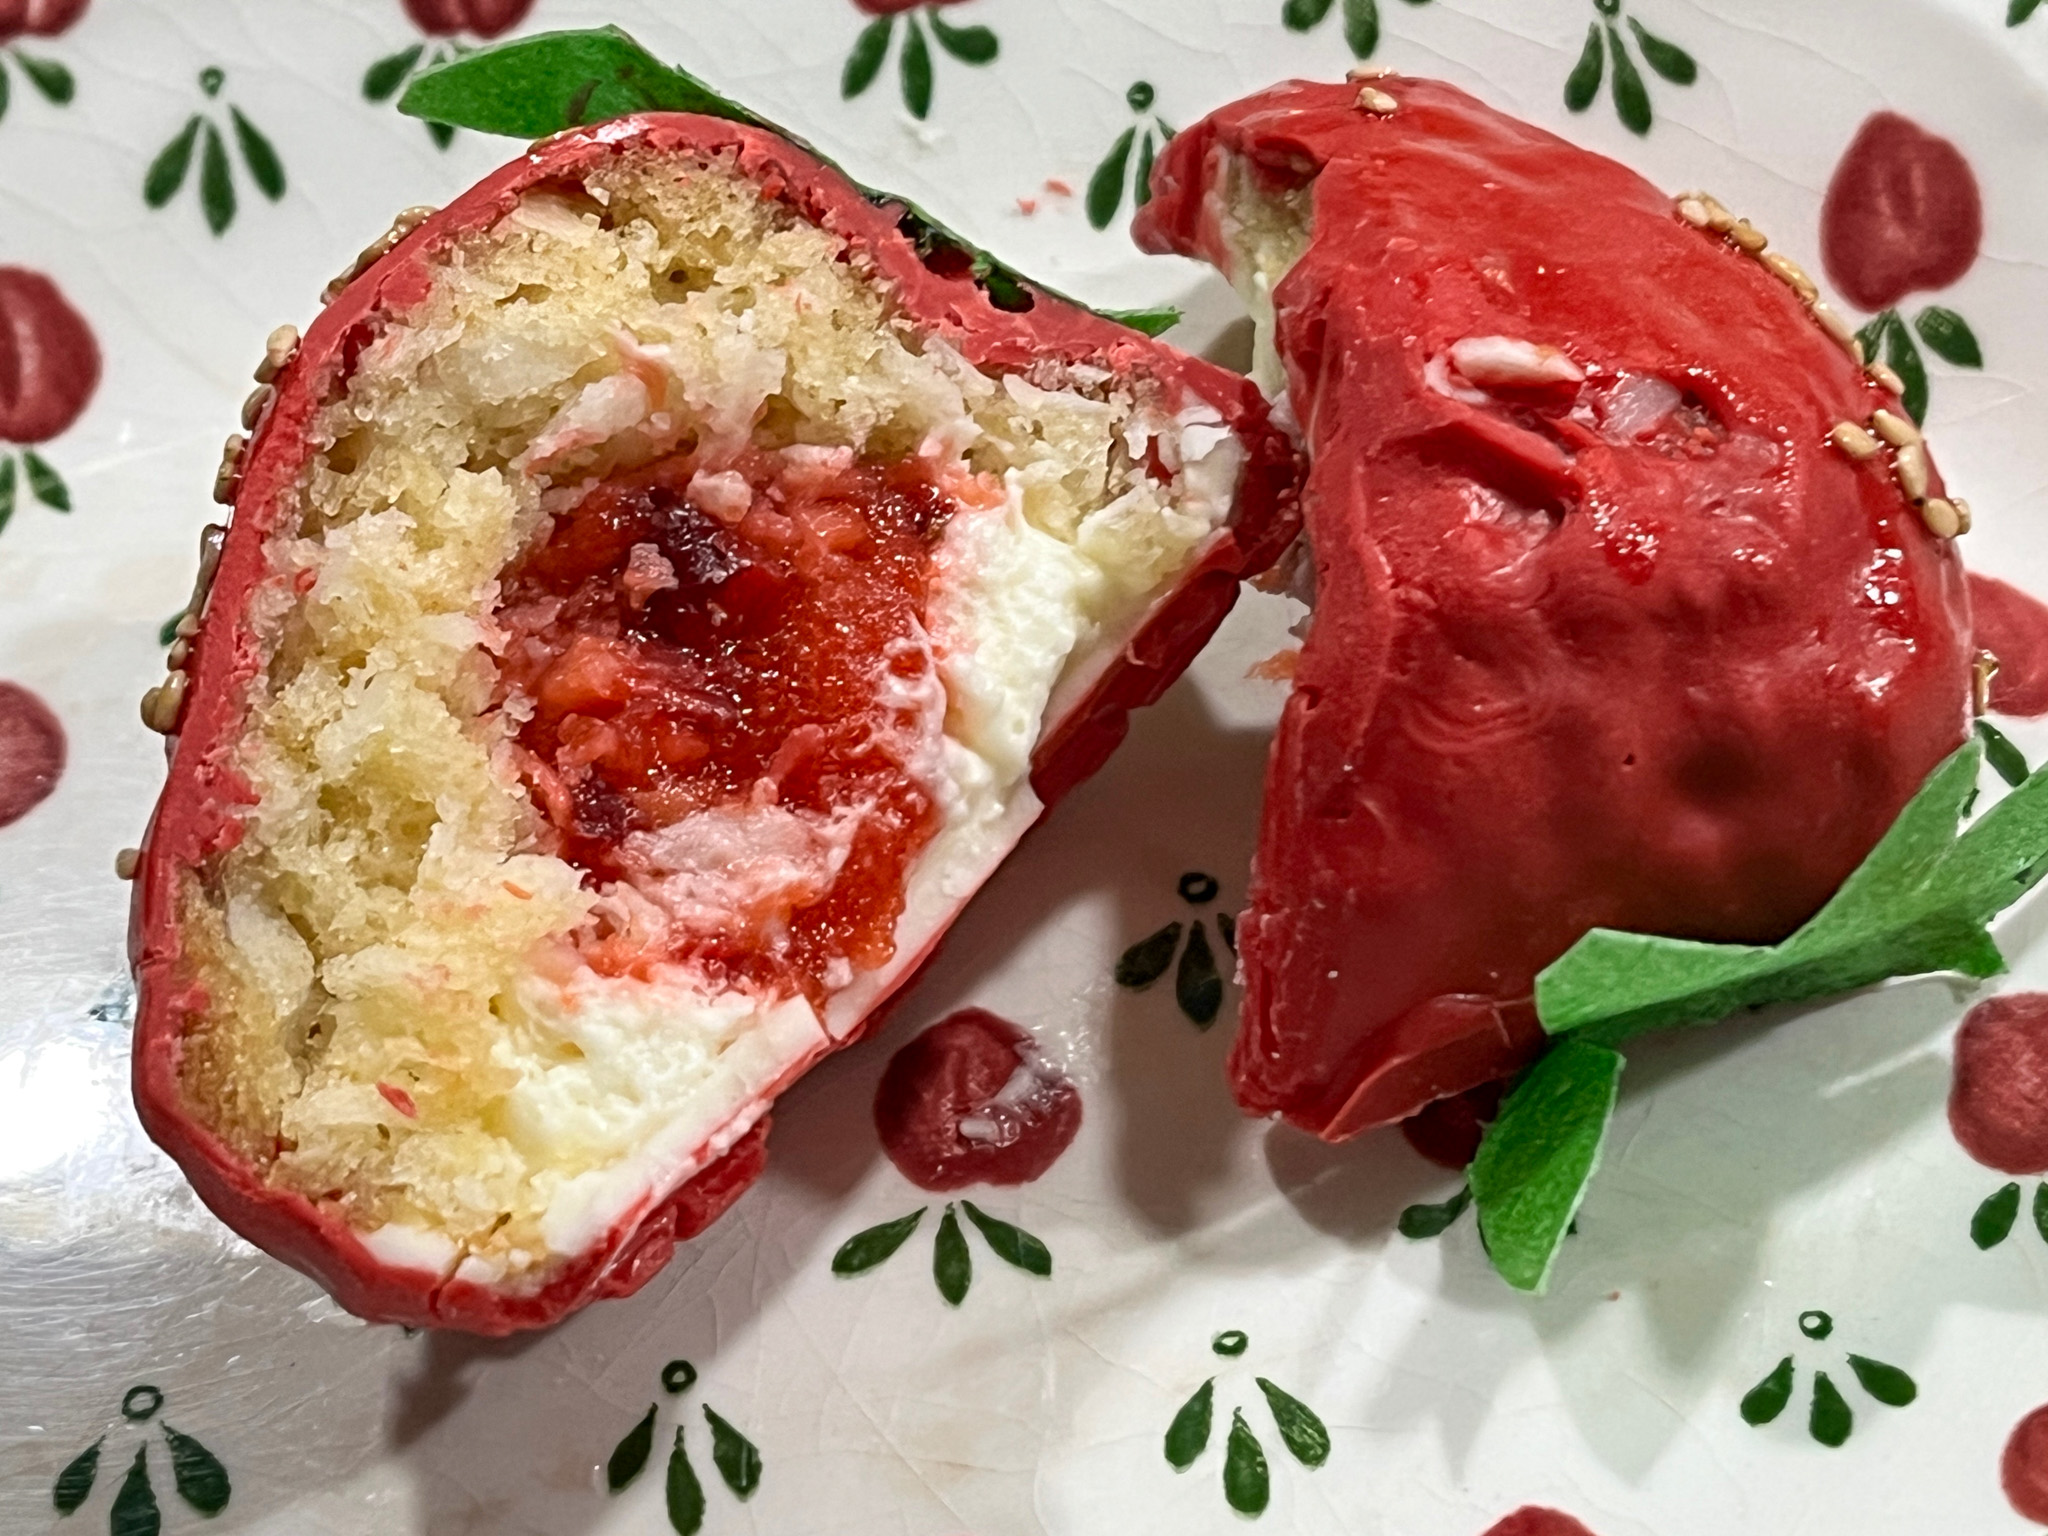
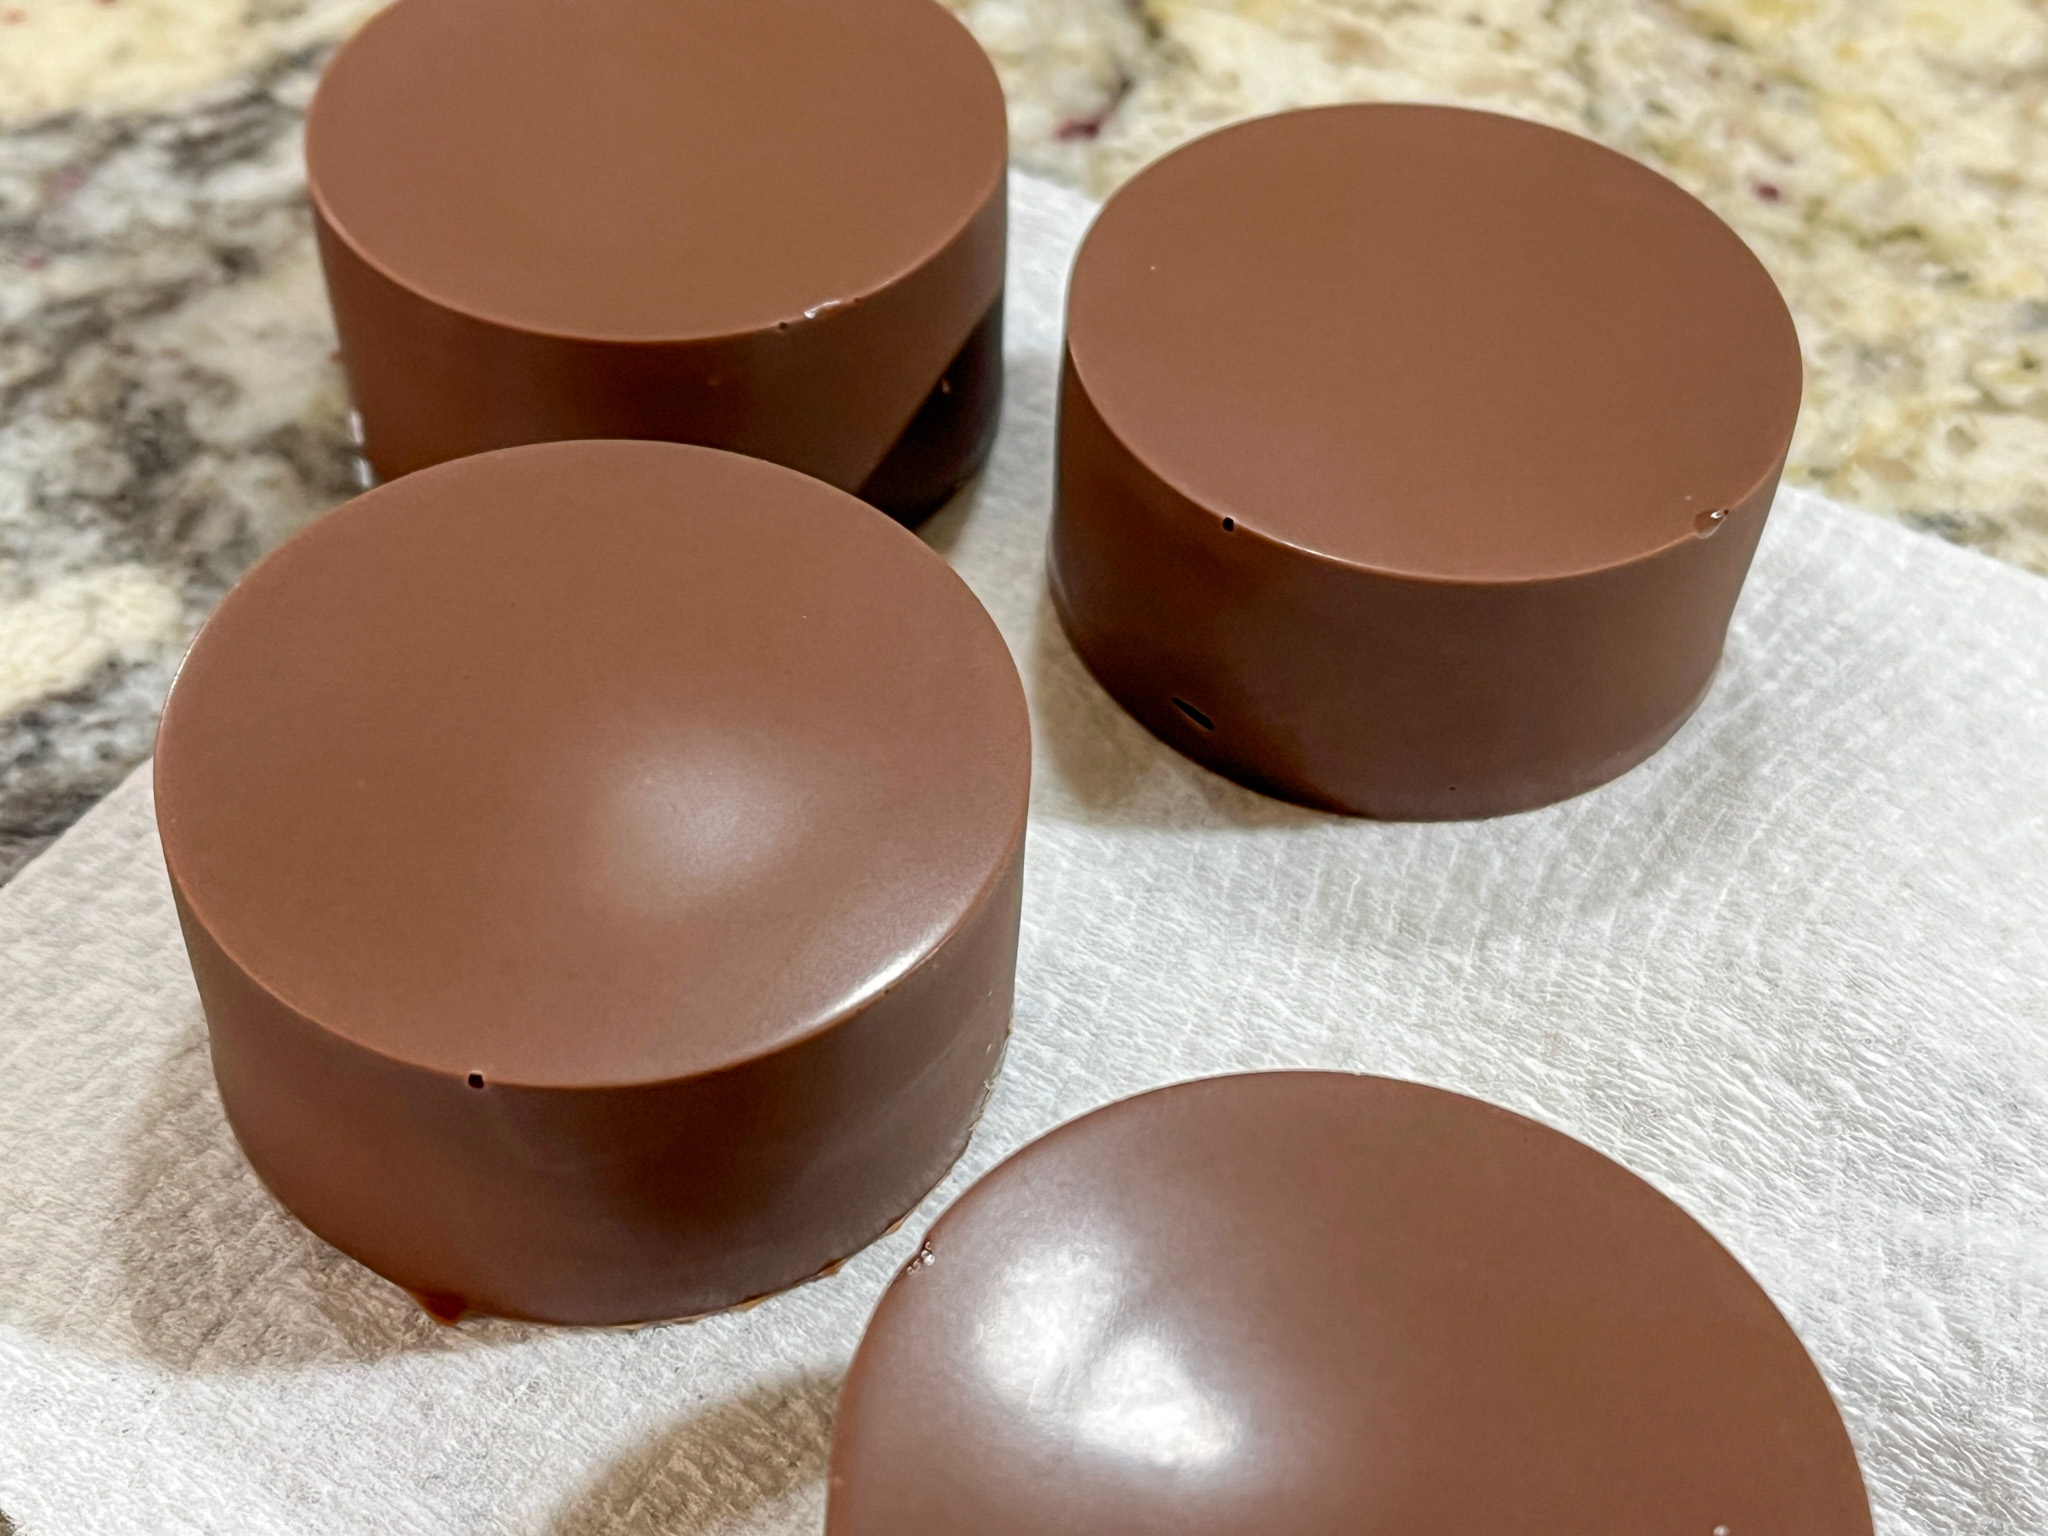
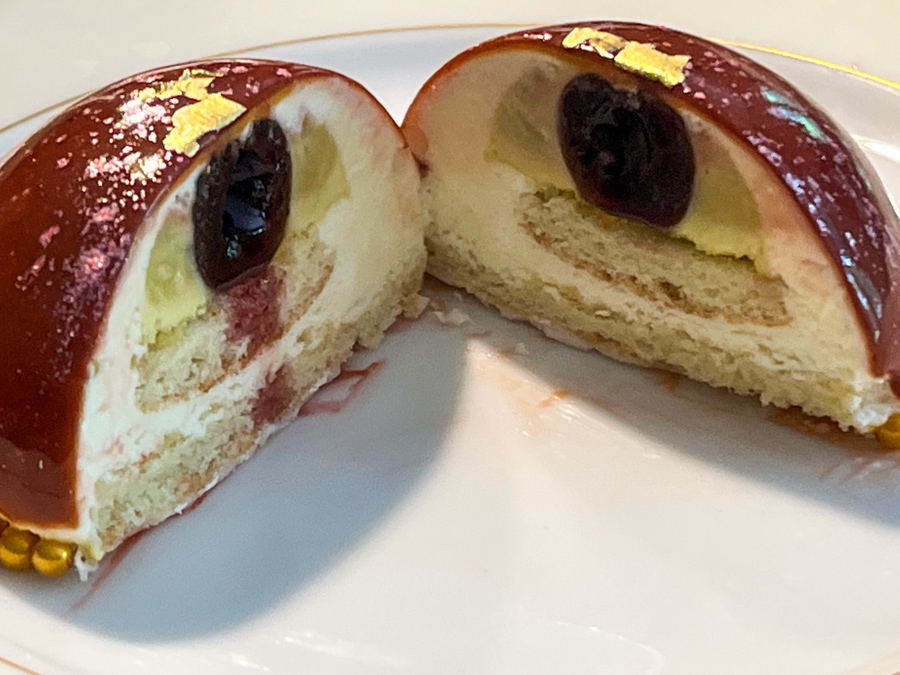
Lay out a piece of plastic wrap. Spread a stripe of the Mocha Frosting in the middle of the plastic wrap, across the narrow side. On top of the Mocha (brown) Frosting, spread some Espresso (white) Frosting. Roll the plastic wrap over itself to form a log. Line a piping bag with the piping tip of your preference. Insert the frosting log in the piping bag (watch the video on this page). Press evenly on all sides so both color frostings come out with the same intensity.
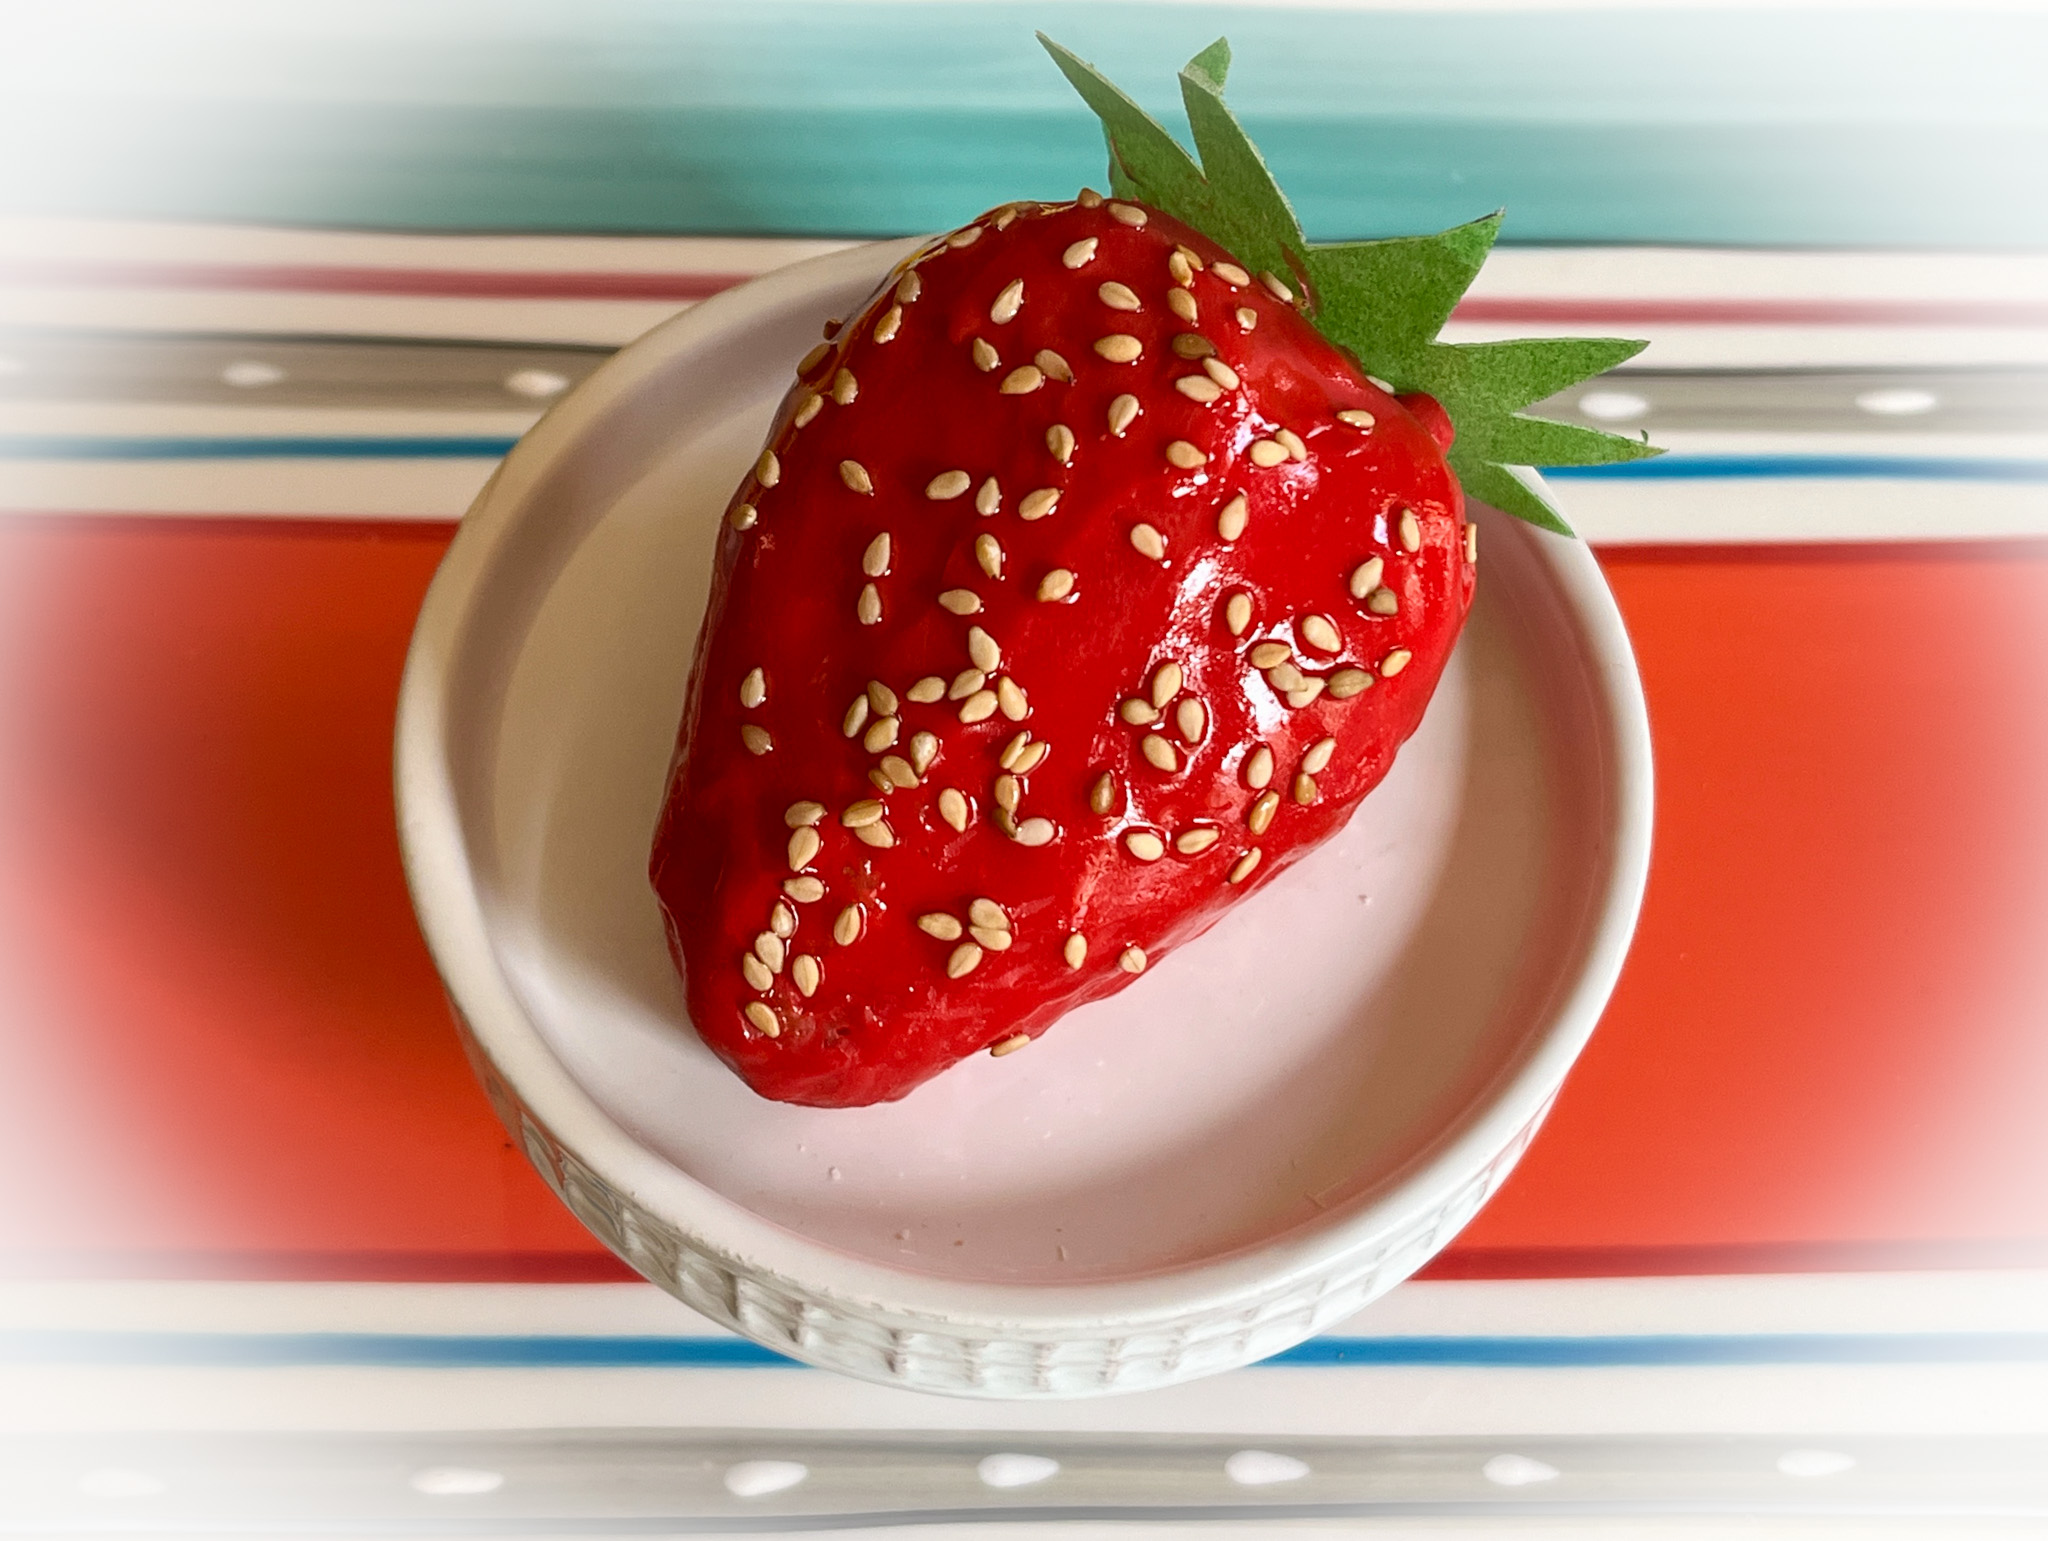
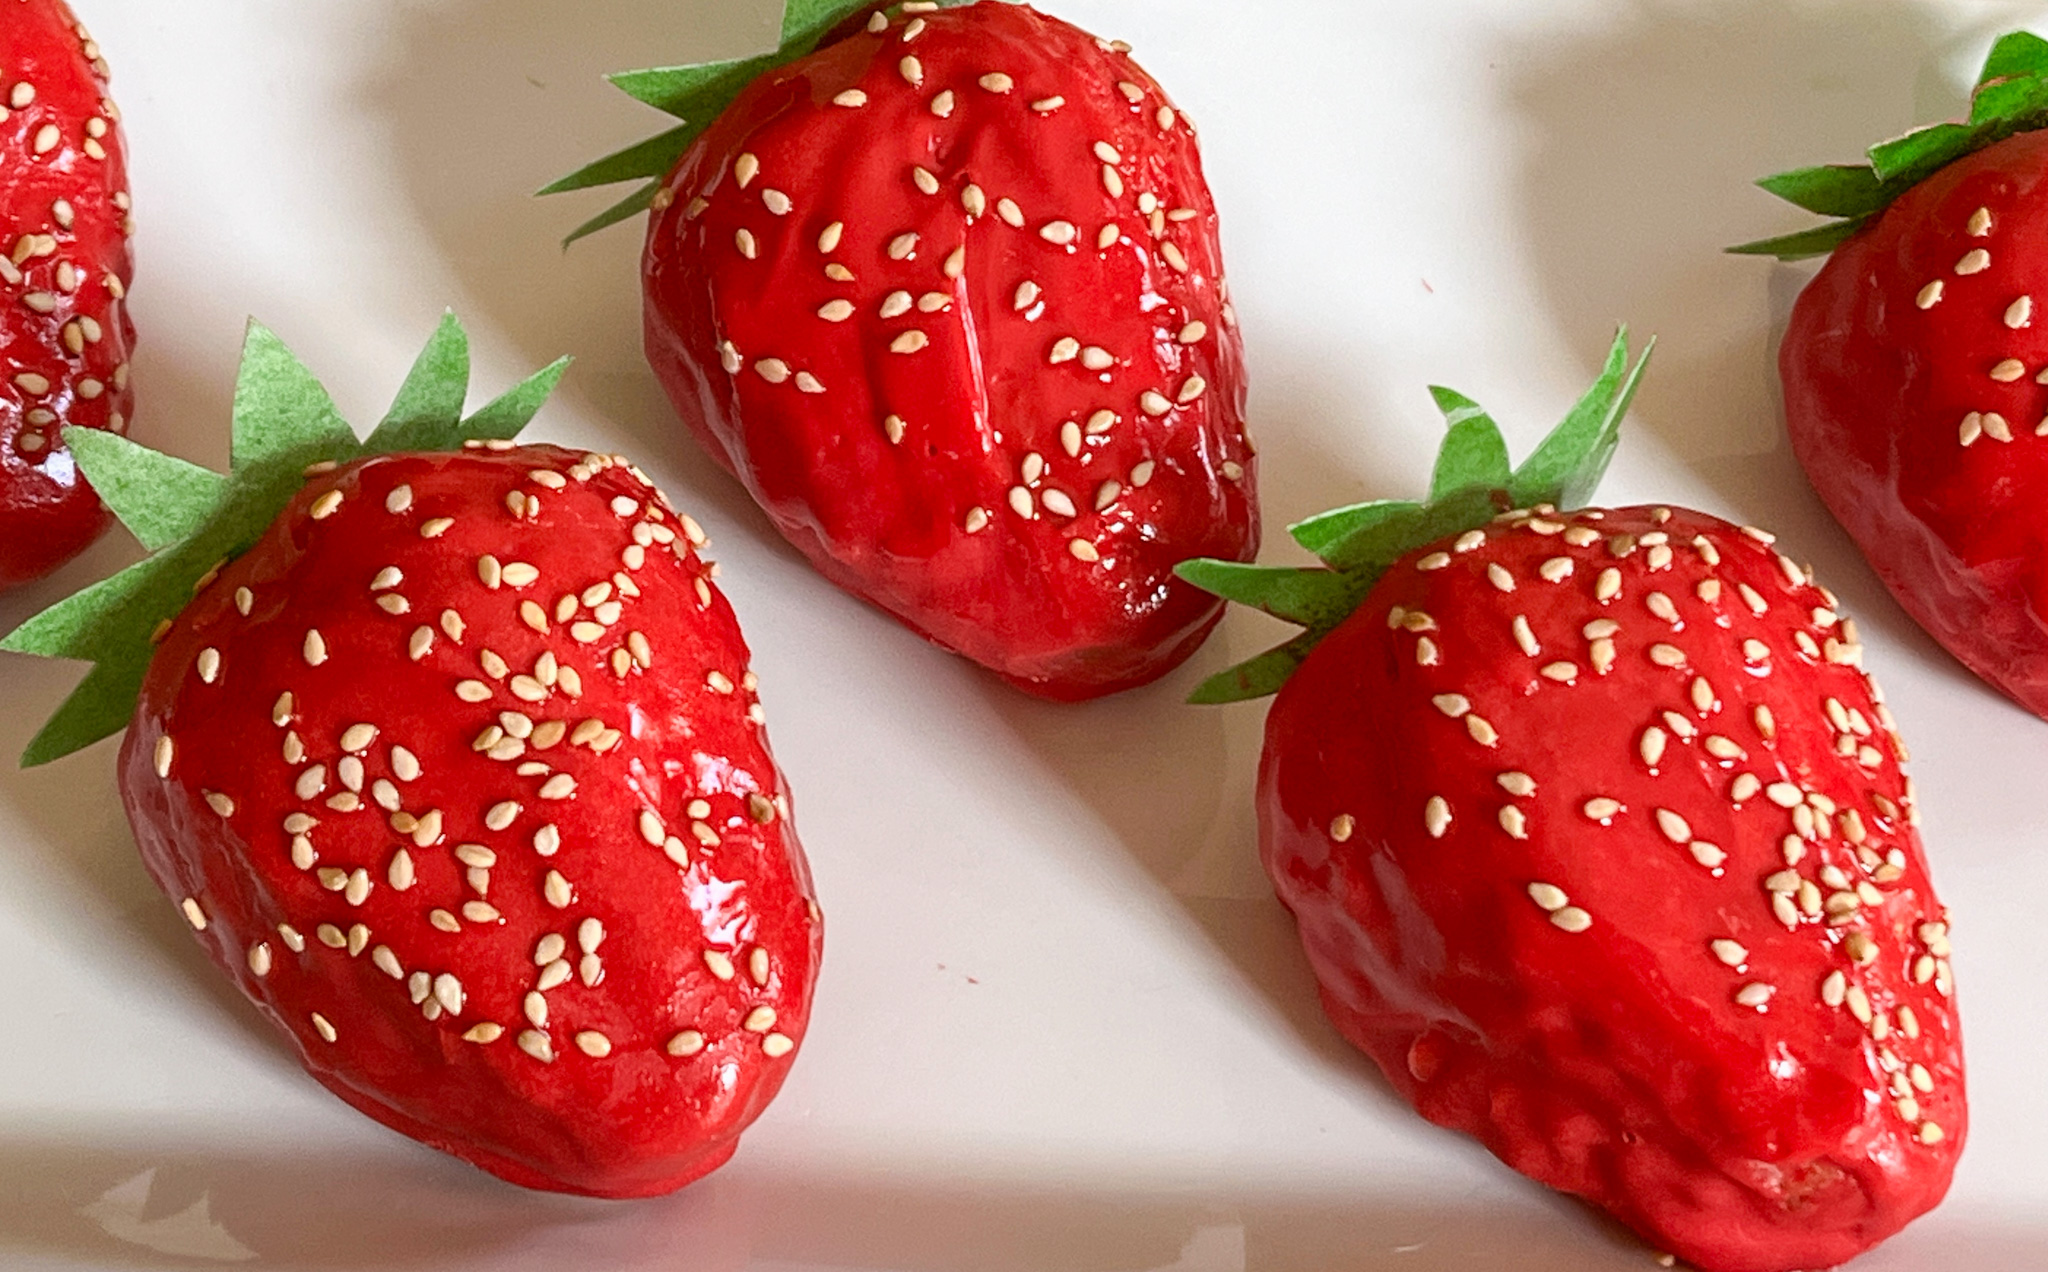
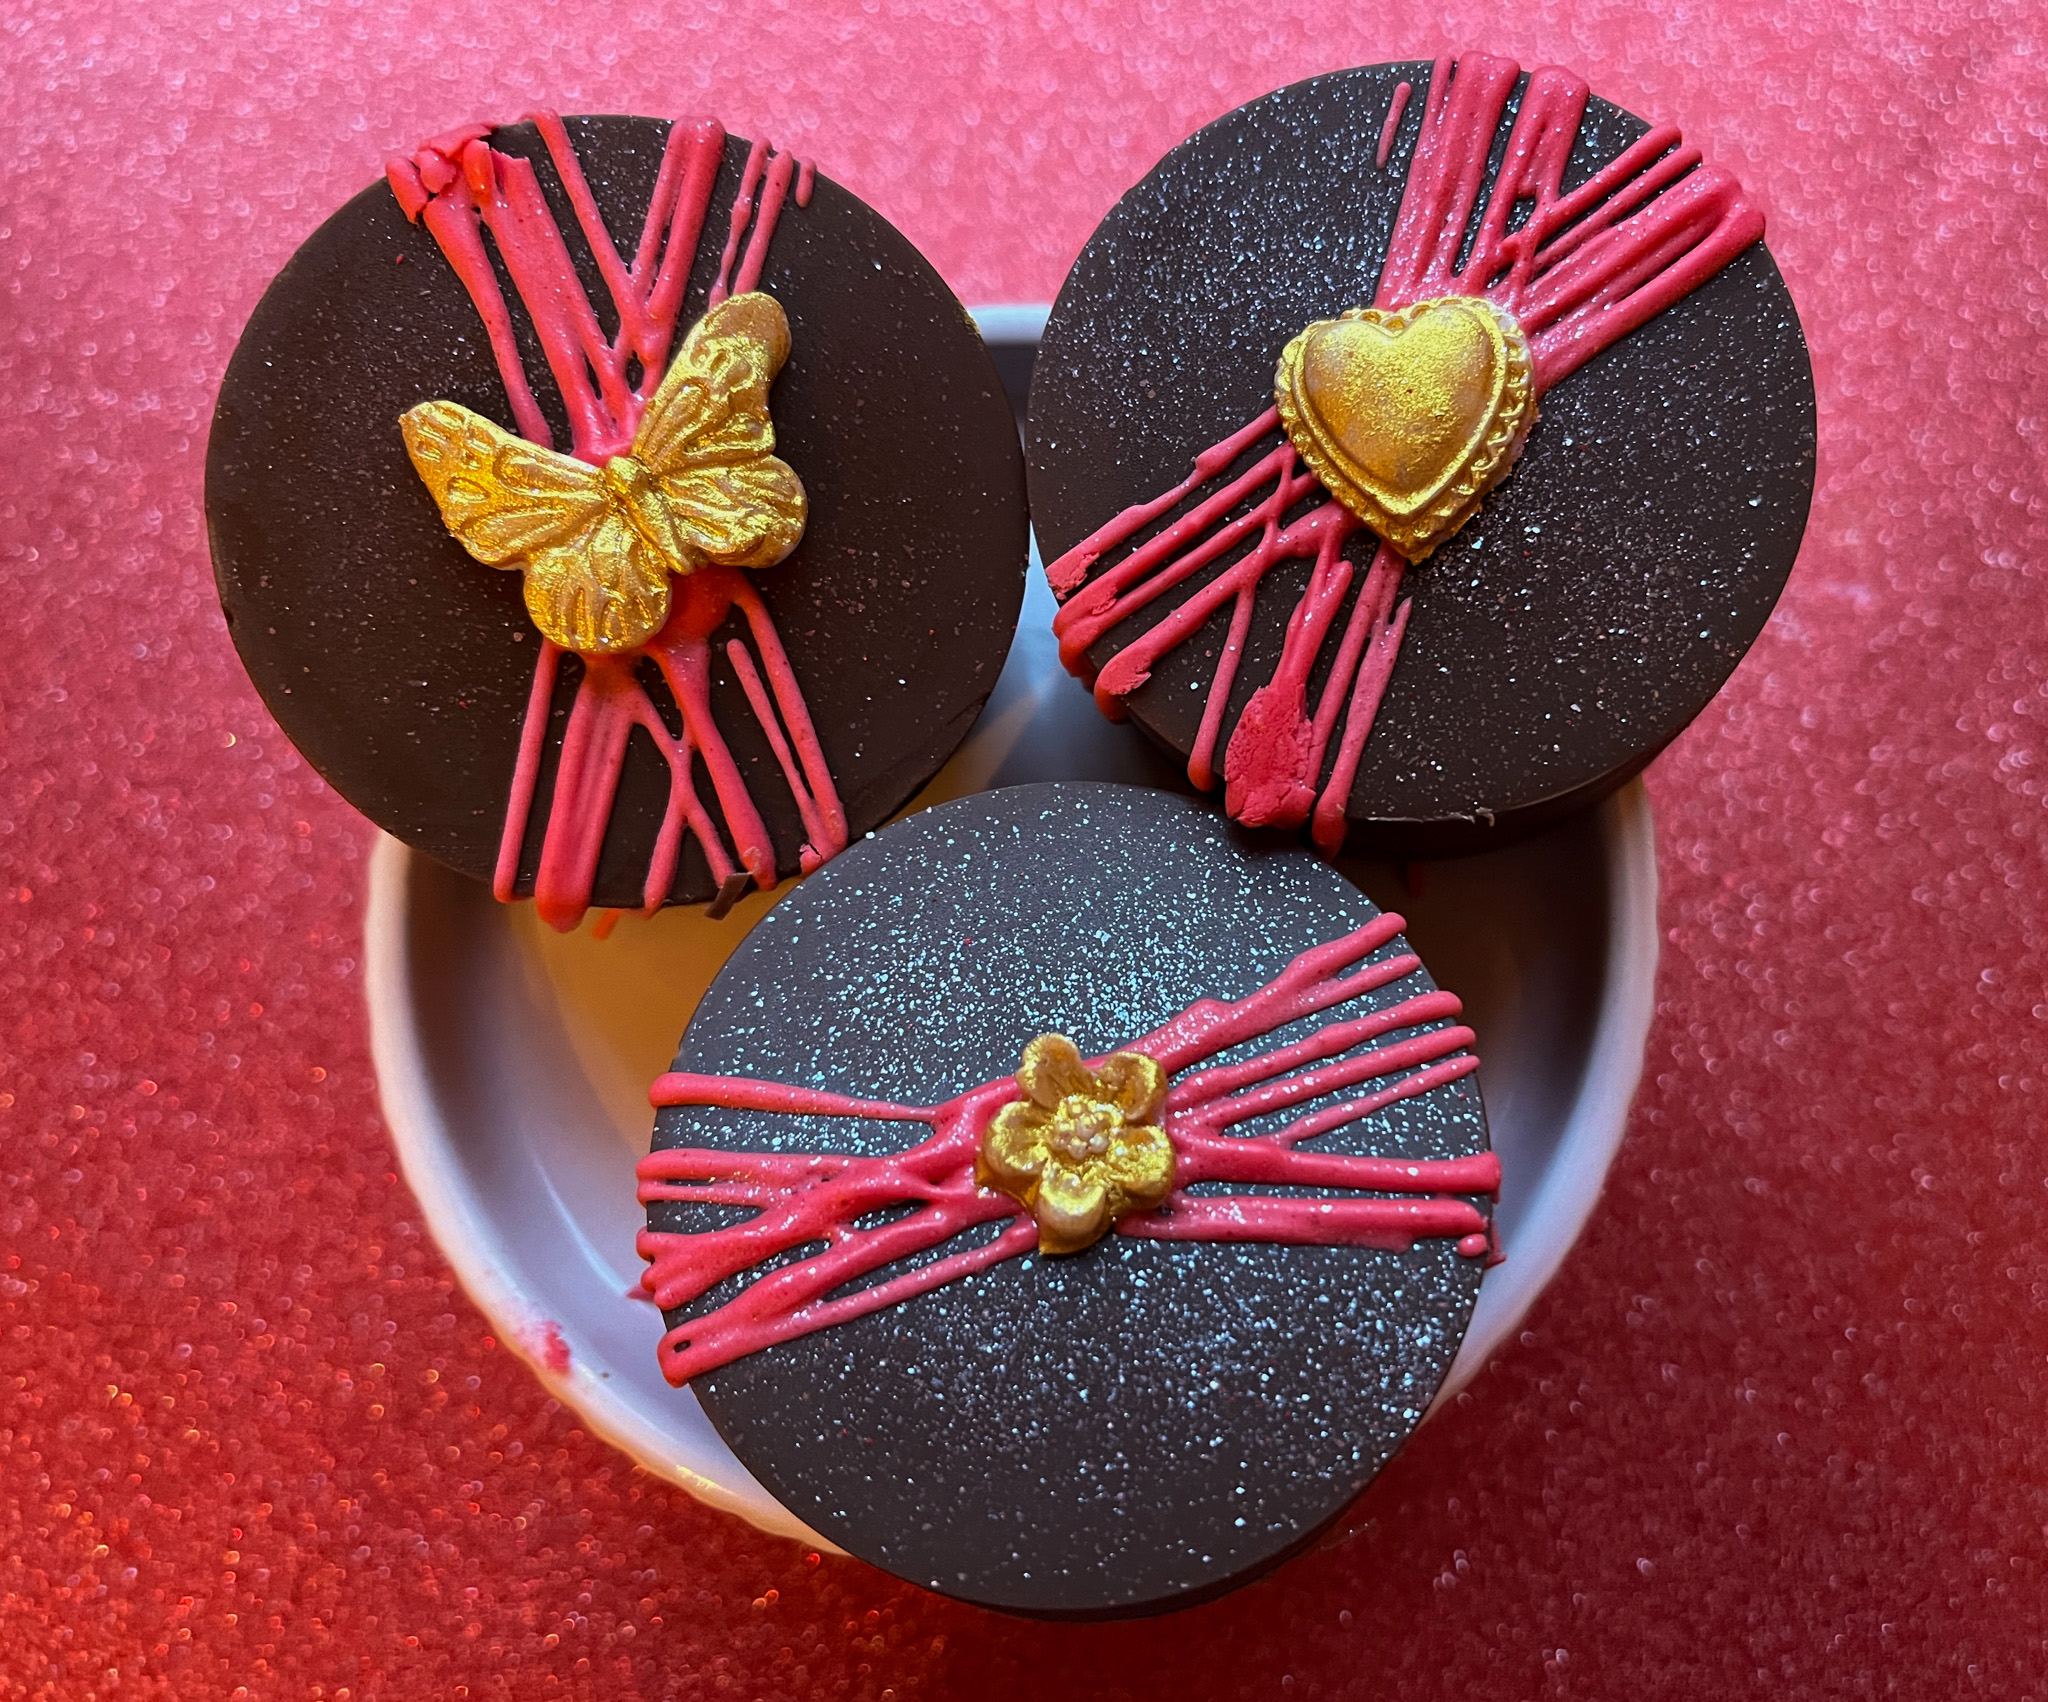
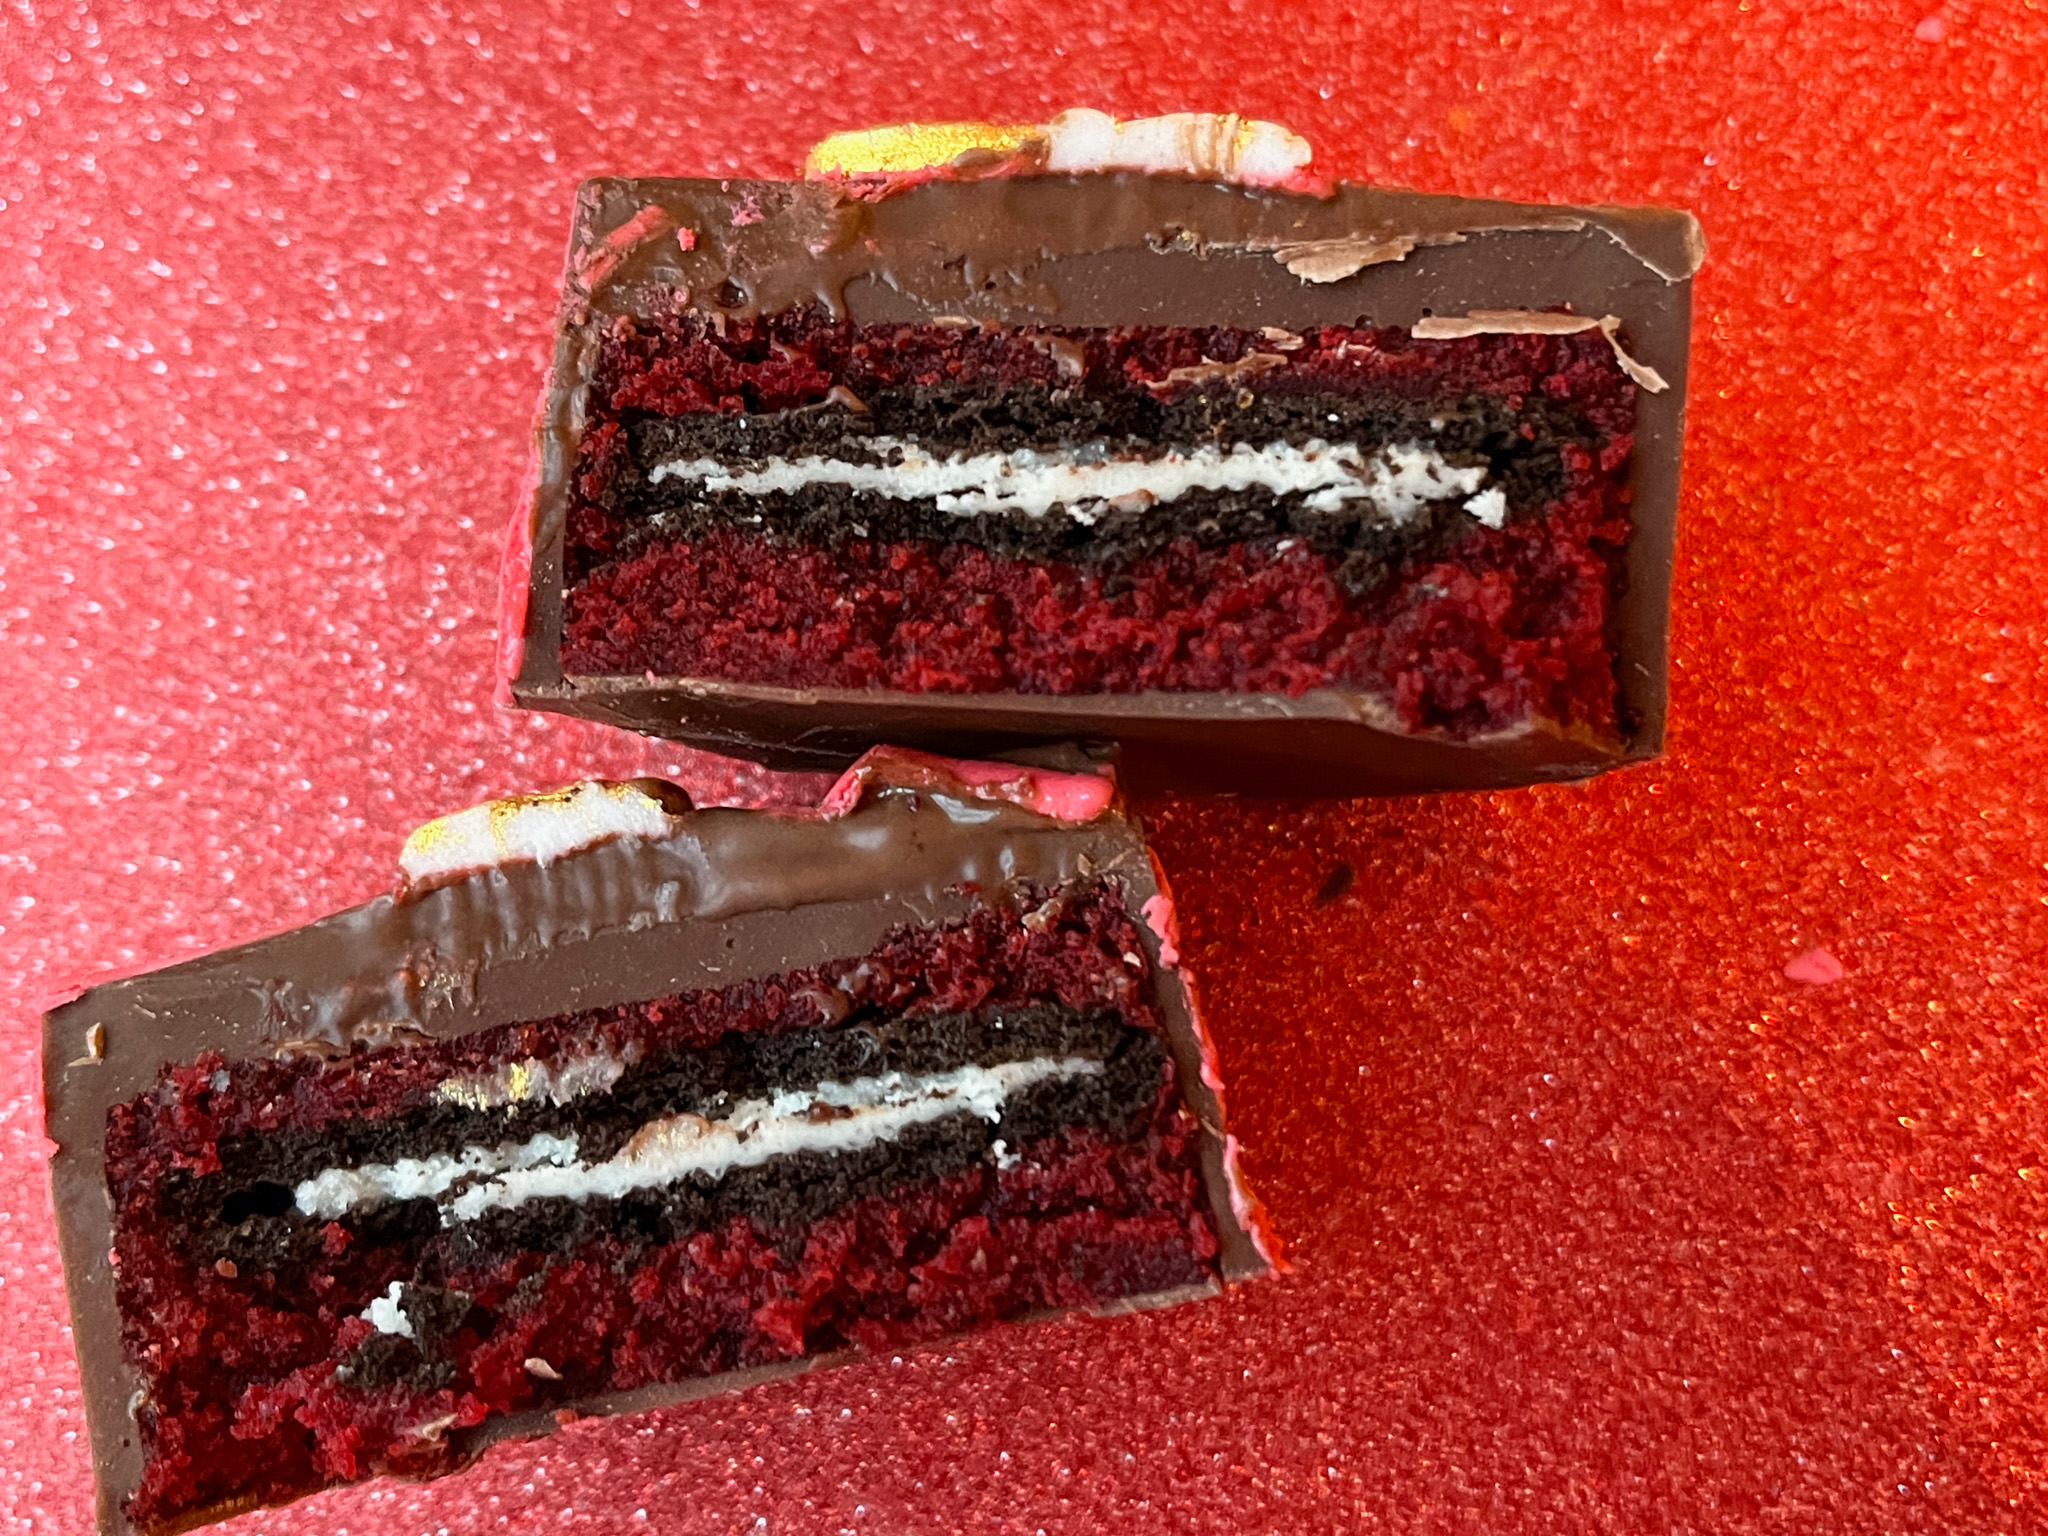
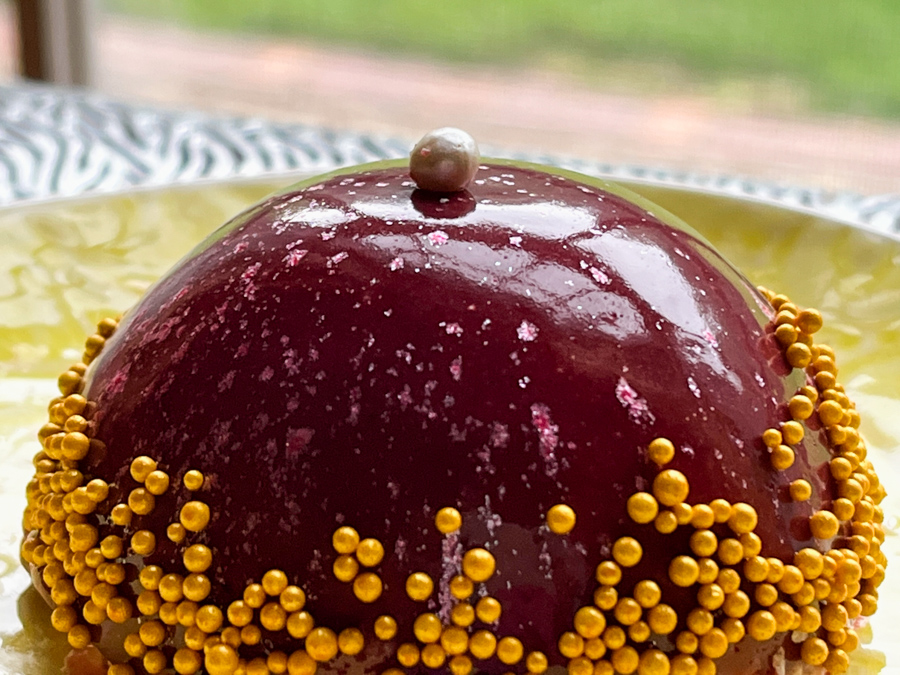
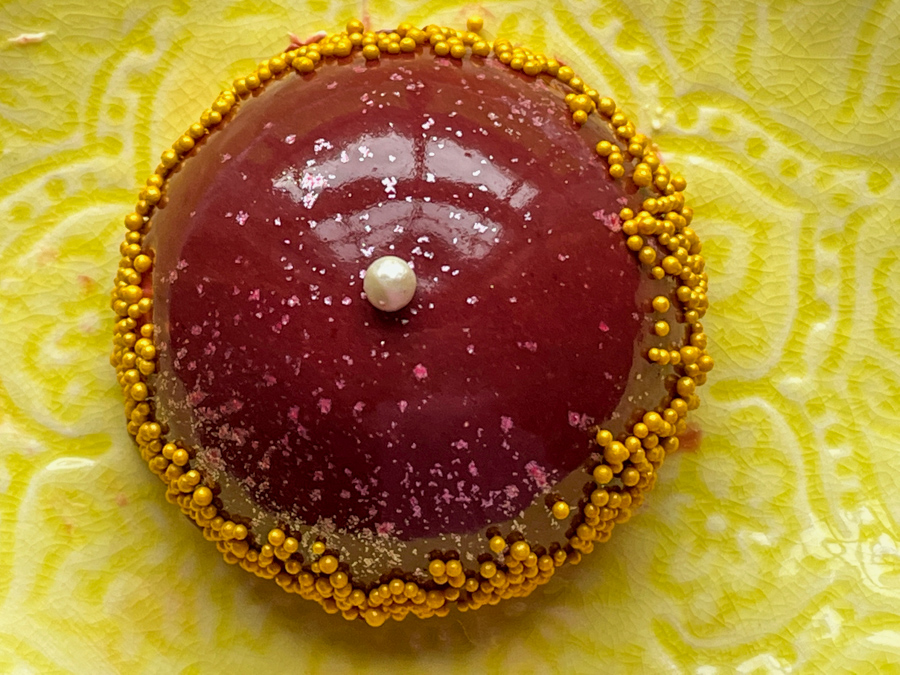
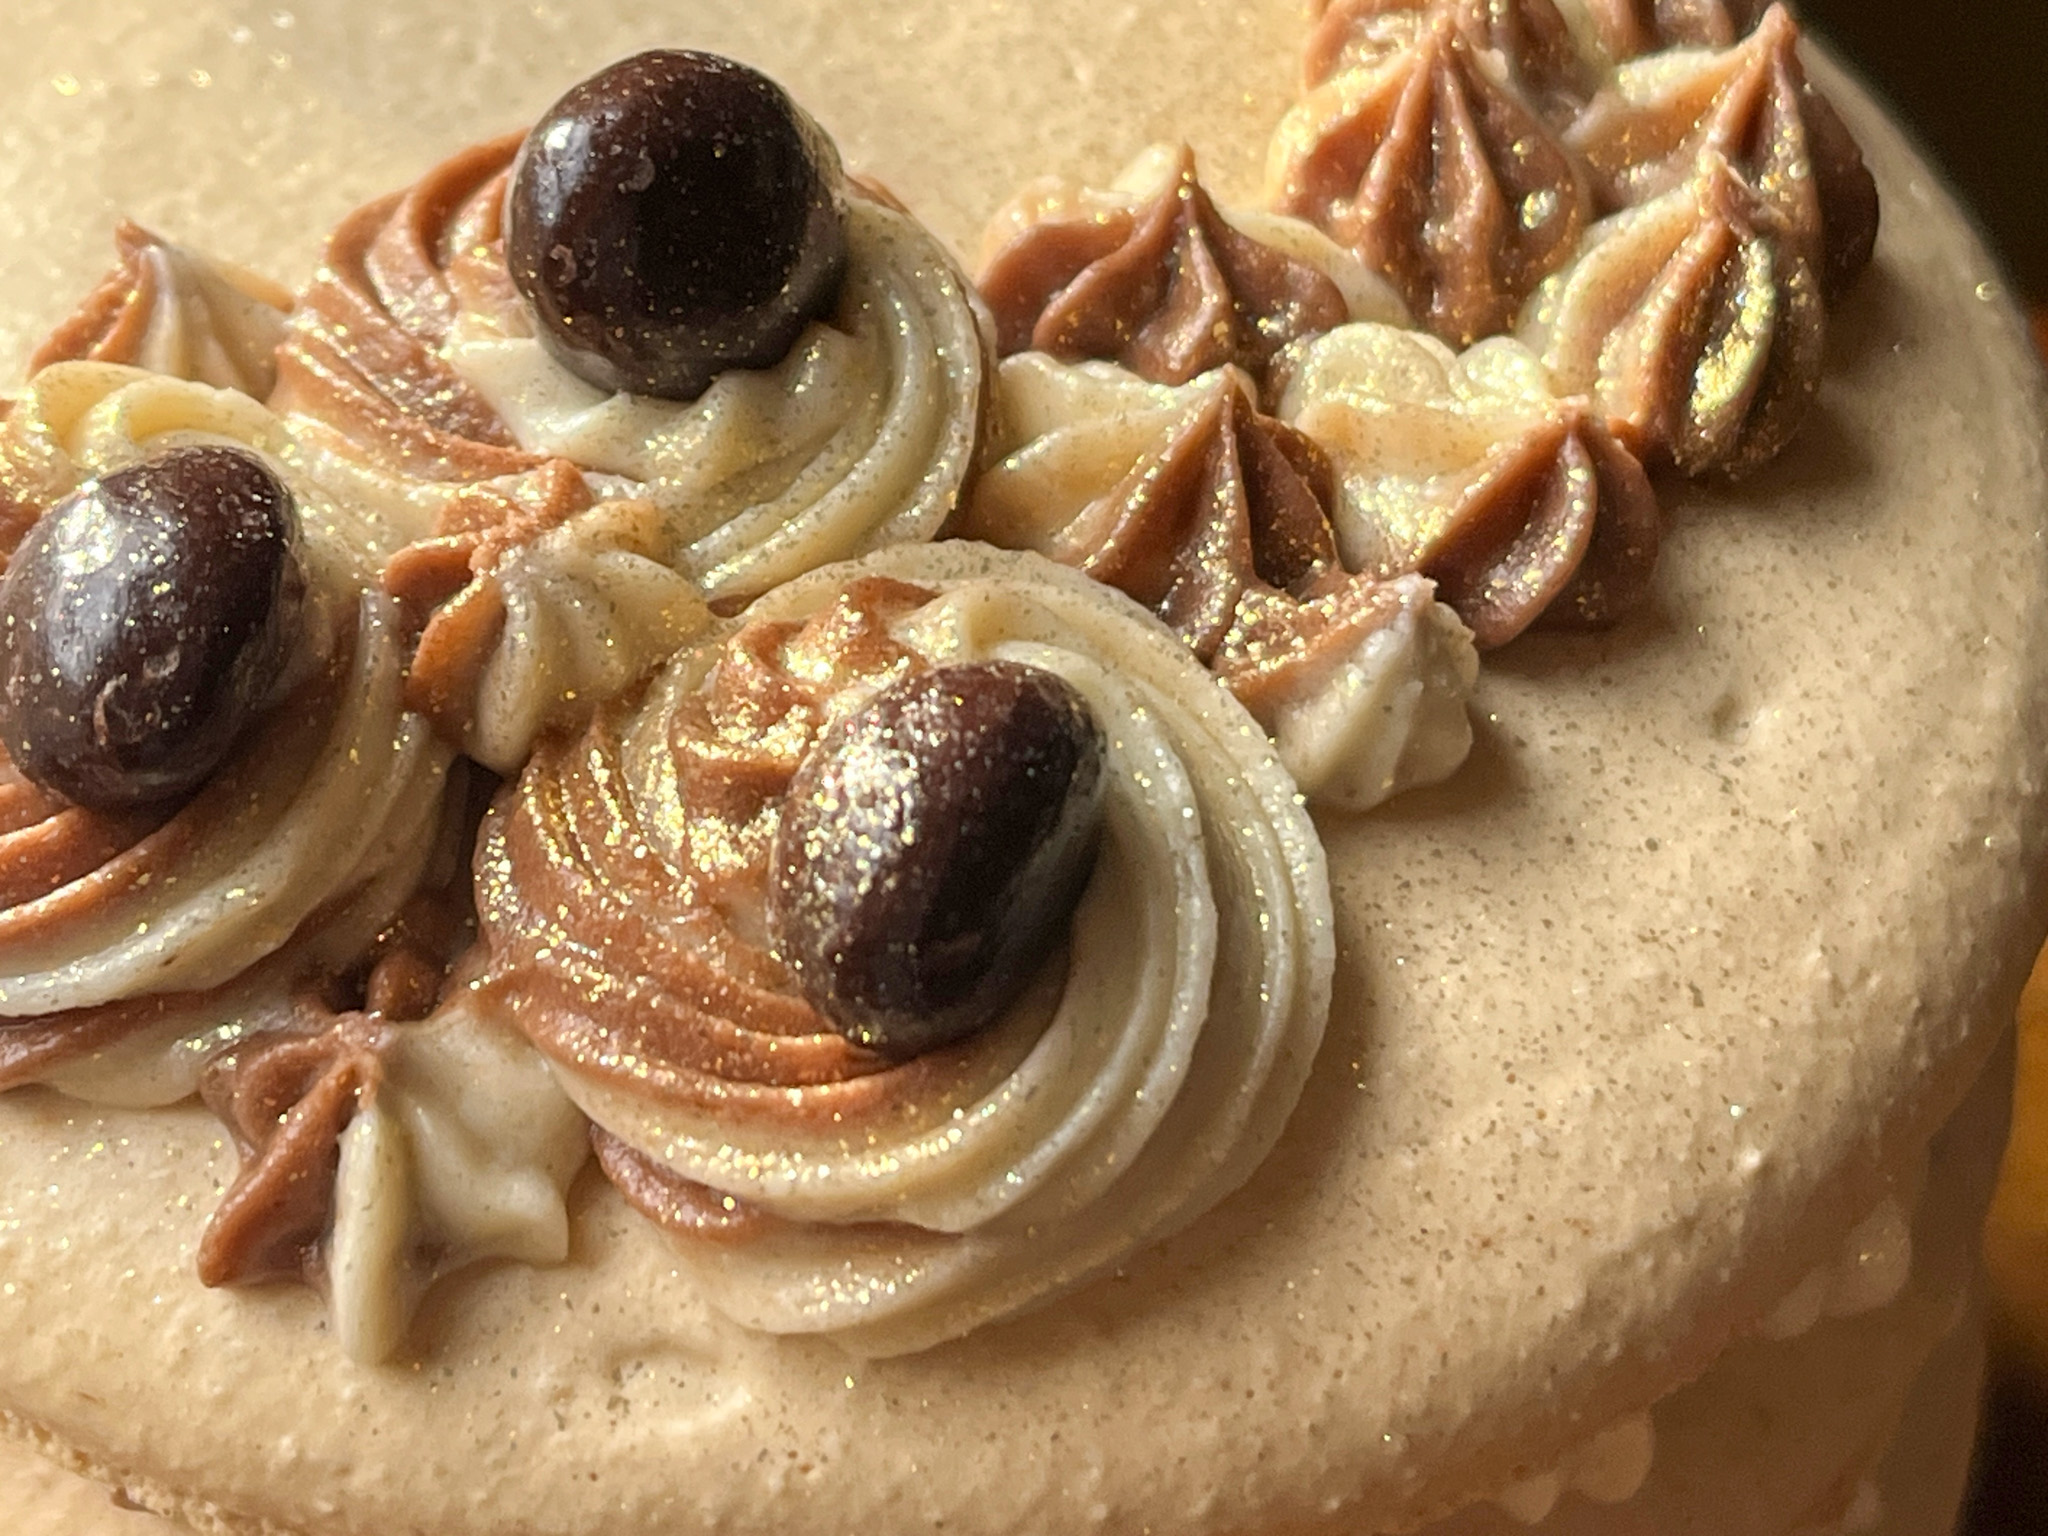
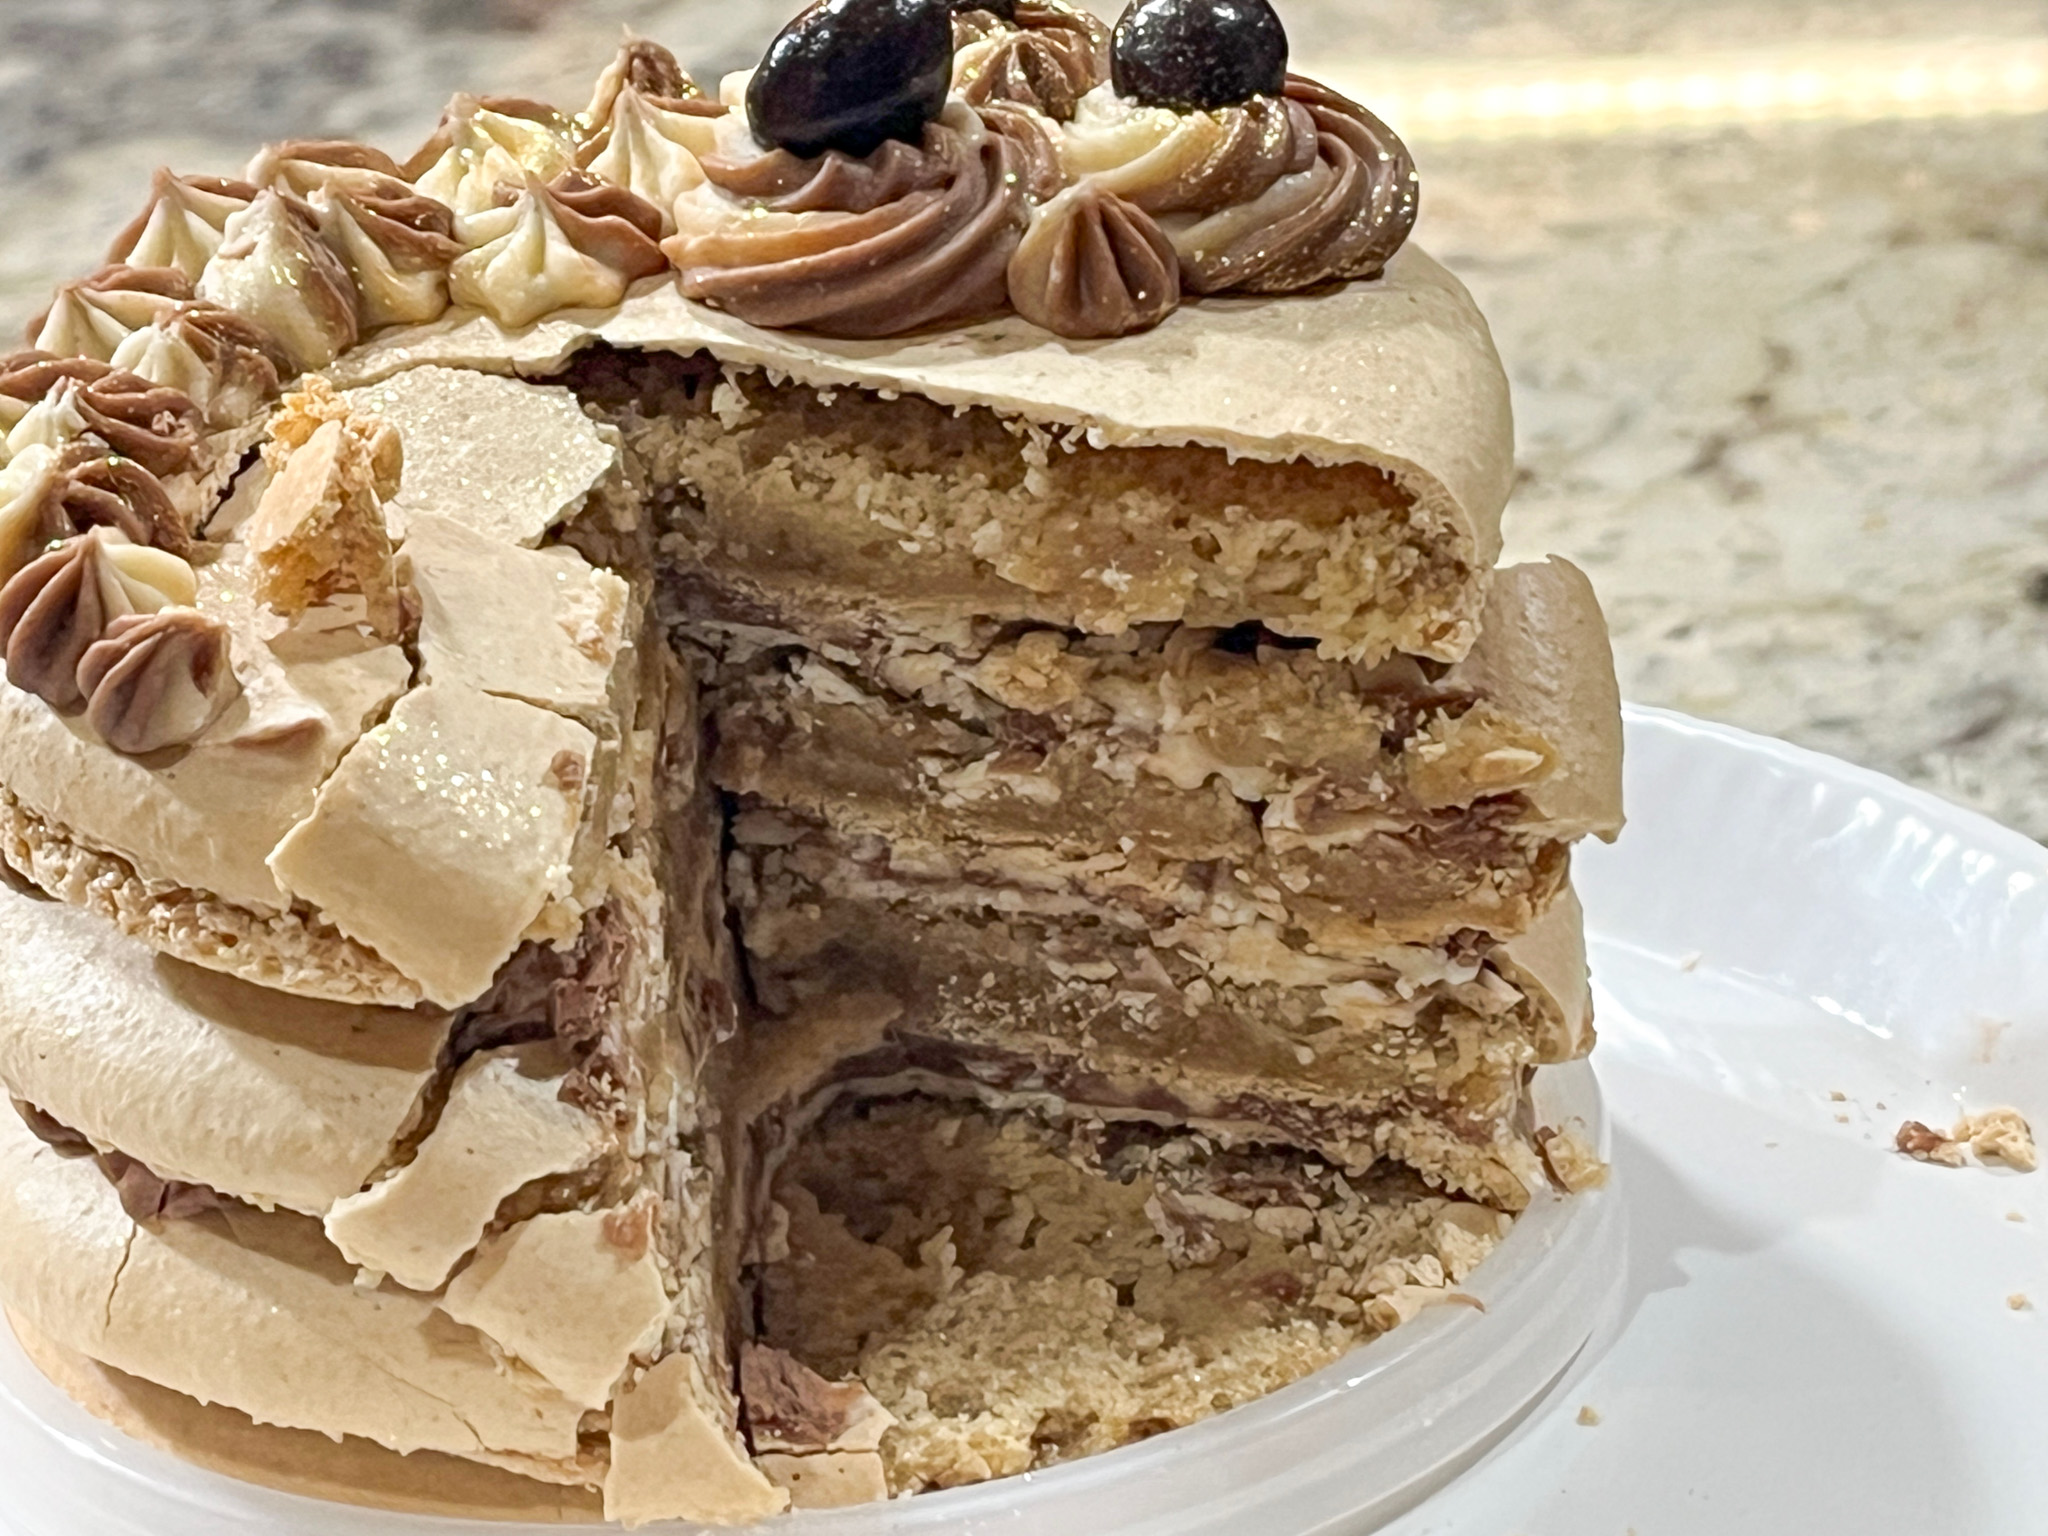
Place one macaron shell on top of a cake stand or plate. Pipe some frosting on top. Top with another shell. Pipe more frosting on top. Repeat until you reach the last shell. If desired, pipe some frosting on top of the macaron cake, and then decorate with chocolate covered espresso beans.
Let the macarons mature for 24 hour in the fridge before serving.
ENJOY!
to print the recipe, click here
Comments: Did you know that Camila, the baker behind Pies and Tacos is originally from Brazil? She is an expert macaron baker, I’ve been following her site for years, and also have her cookbooks. I normally use the French meringue method, but this was my first time piping large shells and I decided to follow her exact method. Worked like a dream!
This was so incredibly delicious, but the best part was Phil’s face when I brought the dessert from the basement (we have a fridge in the basement which is perfect for hiding sweet surprises).
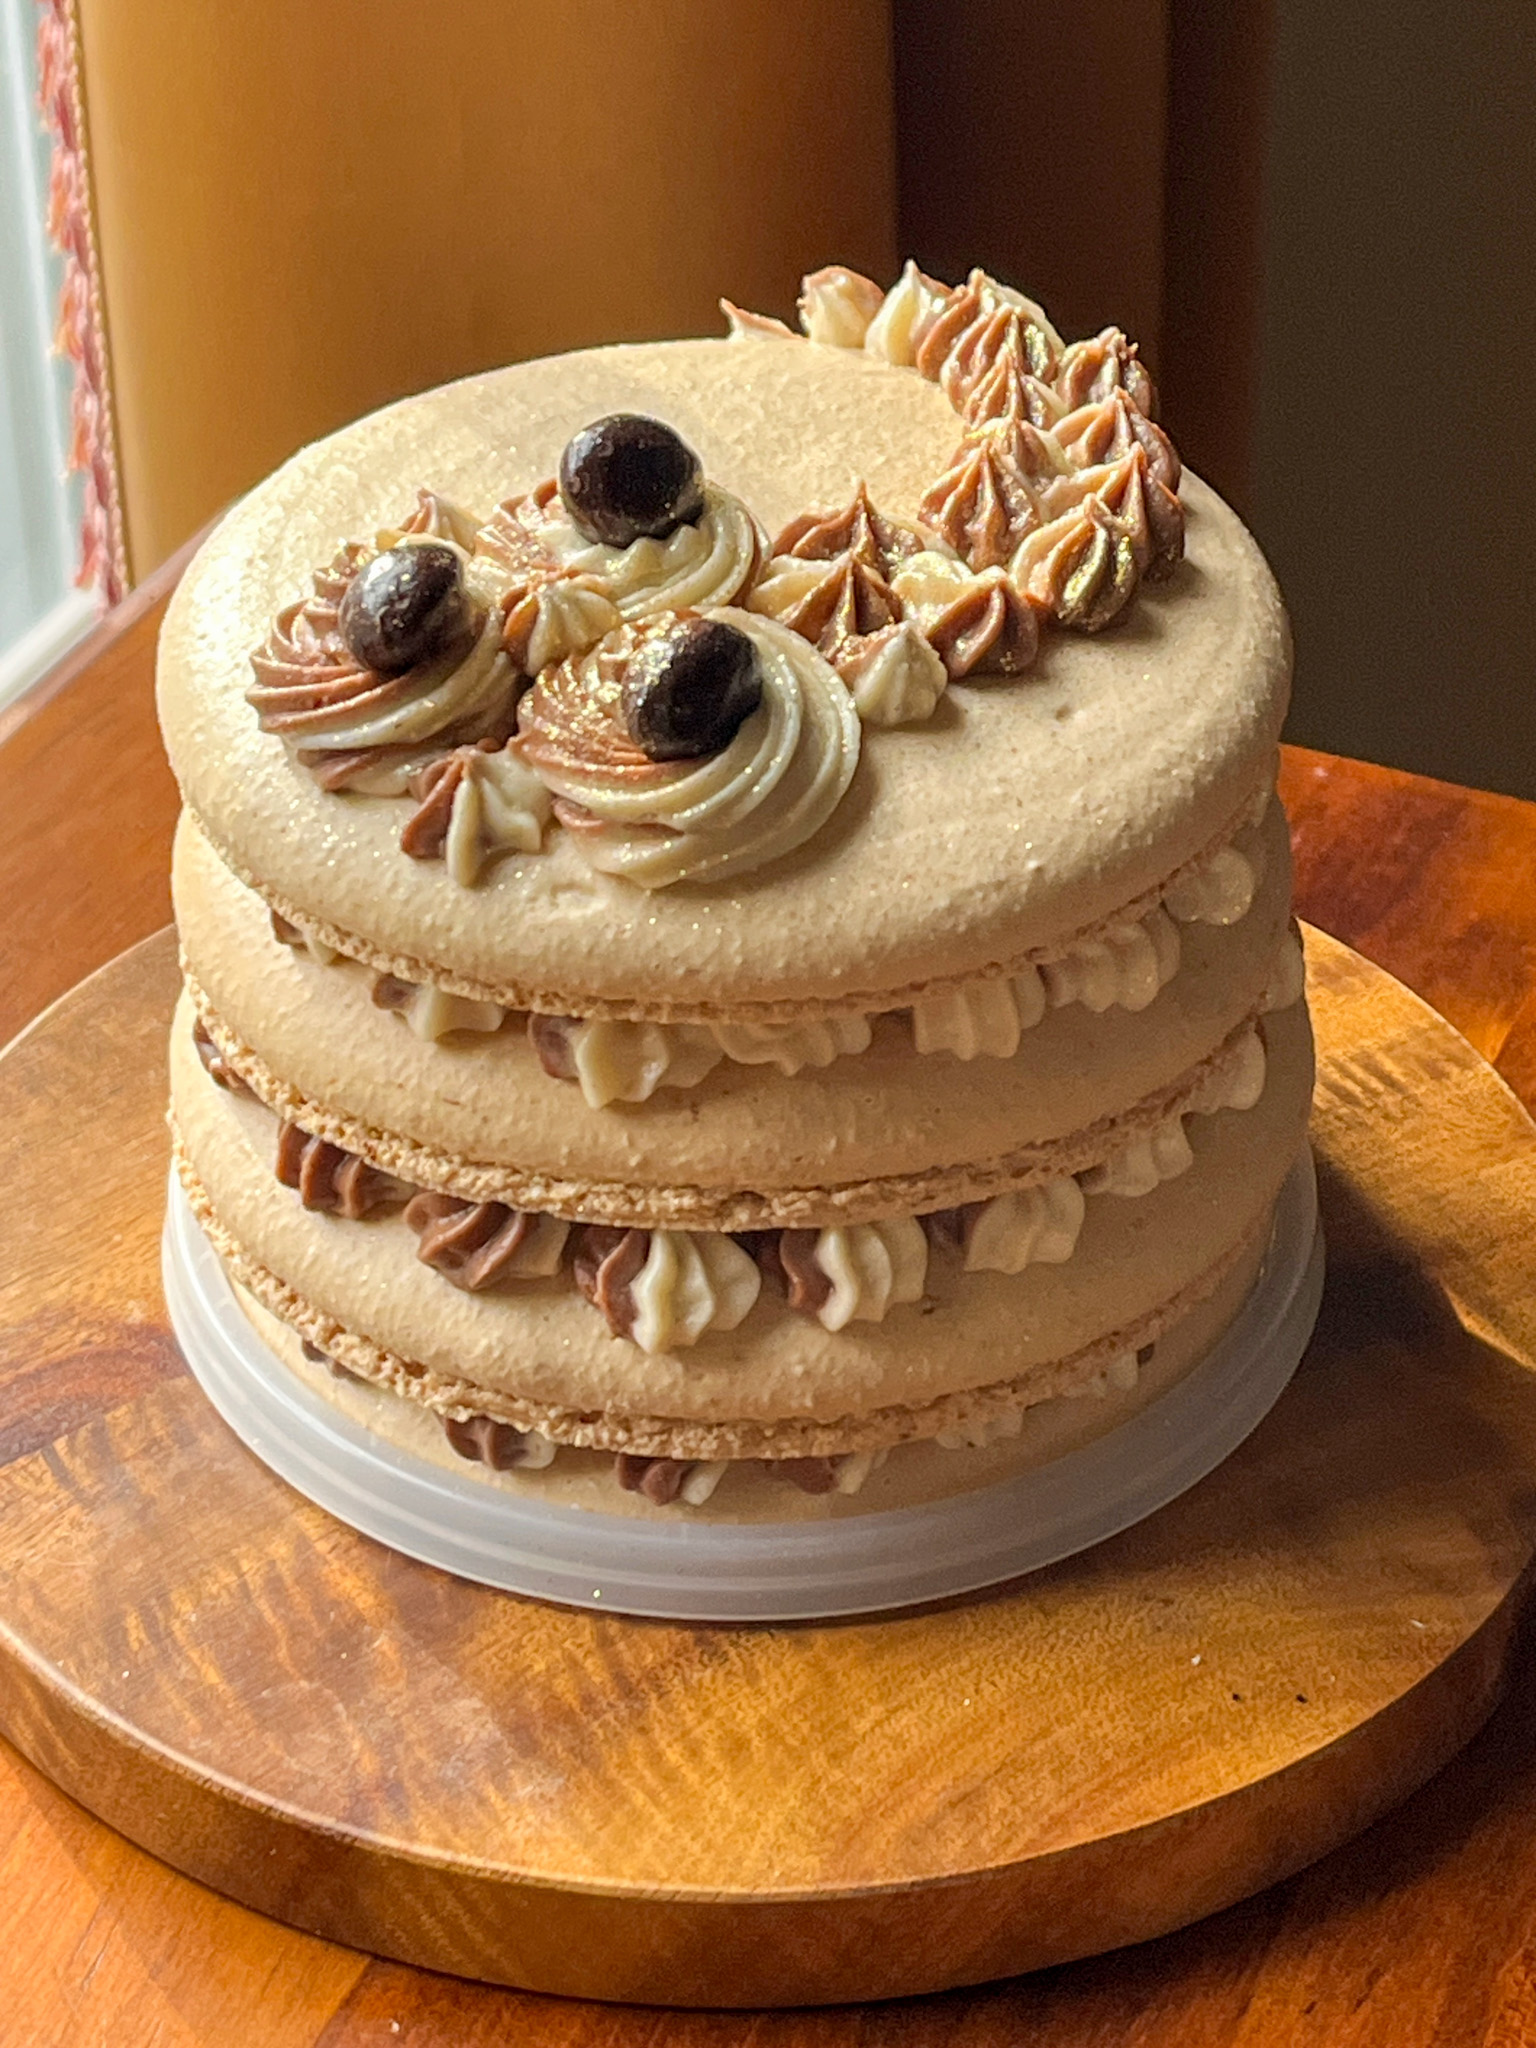
If you have a special celebration coming up, consider making a mini-macaron cake, you will thank me later. It is messy to eat, but totally worth it. Very important to let that rest for one or two days in the fridge, the layers meld together nicely. A dreamy dessert, no doubt!
ONE YEAR AGO: Chocolate Cupcakes with Peanut Butter Frosting
TWO YEARS AGO: Incredibly Simple, Times Four
THREE YEARS AGO: Zucchini-Prosciuto Parcels
FOUR YEARS AGO: Double Peanut Sourdough Loaf
FIVE YEARS AGO: Fennel-Rubbed Shrimp in Light Coconut Sauce
SIX YEARS AGO: Puff Bread Balls, Two Salads and a Cookbook Review
SEVEN YEARS AGO: Pistachio-Caramel and Apple Mousse Cakes
EIGHT YEARS AGO: La Couronne Bordelaise
NINE YEARS AGO: A Special Birthday Dinner
TEN YEARS AGO: Duck Confit for a Special Occasion
ELEVEN YEARS AGO: Tuscan Grilled Chicken and Sausage Skewers
TWELVE YEARS AGO: Celebrate Wednesday with Pork Tenderloin & Apples
THIRTEEN YEARS AGO: Salmon Wellington
FOURTEEN YEARS AGO: The Green Chip Alternative
FIFTEEN YEARS AGO: Weekend Pita Project
SIXTEEN YEARS AGO: Let it snow, let it snow, eggs in snow