THE BEWITCHING KITCHEN TURNS 13!

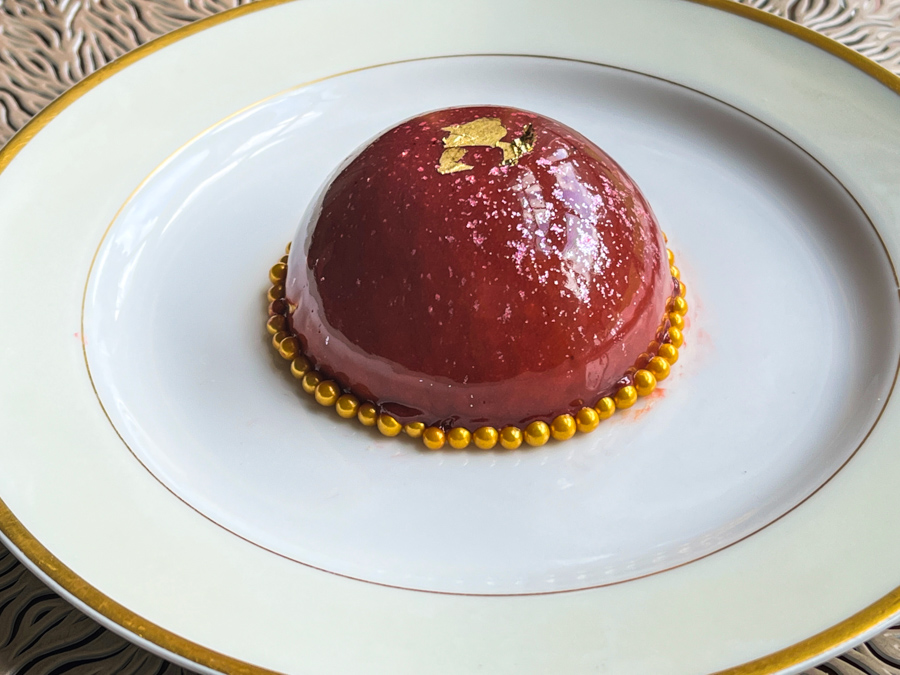
And this virtual spot is now officially a teenager! Thirteen years. One thousand, five hundred and forty-six posts published. Over twenty-nine thousand comments. But how do we measure all the joy I get from keeping this site alive? Impossible. For thirteen years I’ve been doing it with the exact same enthusiasm of the first week. I don’t think I could keep at it, if I was not fully in love with the whole process. To celebrate, I share a little entremet with mirror glaze, the kind of bake I adore, but with the limitations of the pandemics I’ve been unable to do. Since it was just the two of us, I went with individual portions, very small cakes with a combination of cherry, pistachio, and mascarpone. Plus the mandatory bling!

CHERRY AND PISTACHIO MINI-ENTREMET CAKE
(from the Bewitching Kitchen)

for the cherry-pistachio centers:
20 g egg yolk
8 g caster sugar
3 g cornstarch
20 g milk
60 g whipping cream
10 g pistachio paste
4 Amarena cherries in syrup

Heat the oven to 200F (yes, very low temperature). In a small bowl, whisk the egg yolk with the sugar and cornstarch. Put the milk, cream and pistachio paste in a saucepan and heat while whisking. As soon as it boils, pour it over the egg yolk mixture and whisk. Put one cherry in each of 4 holes of a small half-sphere mould (about 1 inch in diameter). Pour over the pistachio mixture. Bake for 30 minutes, or until the center is almost fully set. Cool to room temperature, then freeze for several hours to overnight, to be able to un-mold them.

for the sponge:
70 g icing sugar
70 g almond meal
100 g egg
10 g all-purpose flour
10 g pistachio paste
70g egg white
10g granulated sugar
melted white chocolate for brushing cake circles

Heat the oven to 375F. Using a KitchenAid mixer, whip together the icing sugar, almond meal and the eggs. The mixture should double in volume, so whip it for at least 8 minutes. Reserve.

Make a meringue, gently beating the egg white until soft peaks form. Increase the speed of the mixer and add the sugar, a little bit at a time. Beat until firm peaks form. Fold one-third of the meringue into the whipped egg mixture, followed by the flour. When the mixture is smooth, gently fold in the remaining meringue. Spread the mixture on a half-sheet pan covered with parchment paper, and smooth the surface with an off-set spatula. Bake for about 10 minutes, until dry to the touch. Dust a sheet of baking paper with a little powdered sugar and invert the baked sponge over it. Peel off the parchment paper that it baked on. Using two cookie cutters, cut out 4 discs that will fit inside the mold that will hold the dessert, and 4 discs that will fit inside the little mold used for the cherry inserts. Melt the white chocolate and apply a very thin coat over one side of the larger piece of sponge. Reserve.

for the mascarpone mousse:
6 g Platinum gelatin (3 sheets)
80 ml whipping cream
55 g egg yolks
80 g granulated sugar
160 g mascarpone cheese
1/4 tsp vanilla paste
320 g heavy cream

Bloom the gelatin in cold water for 10 minutes. Combine egg yolks with sugar, whisking well and set aside. In a saucepan, heat 80 ml of cream until it boils. Remove from heat, and slowly pour a bit of the hot liquid into the egg yolk mixture, to temper it gently. Add the rest of the cream and transfer all the mixture to a saucepan.

Over low heat, cook until 180 F stirring constantly. Remove from heat, drain the gelatin, and add to the mixture, stirring until completely dissolved. Let the mixture cool down to around 140 F. Add the mascarpone cheese, mix until the cheese is incorporated. Process with a hand mixer, to emulsify. Add the vanilla paste, and let it cool to around 95 F. Meanwhile, whip the 320 ml of cream to soft peaks. Incorporate the  cream gradually to the mascarpone mixture.

ASSEMBLE THE DESSERTS. Place a small amount of mascarpone mousse inside each of 4 cavities of a semi-sphere silicone mold (3 to 3.2 inches in diameter). Drop the cherry insert inside. Place the small circle of sponge on top. Cover the cavity with mousse, leaving a little space on the top, so you can place the larger circle of sponge on top, with the chocolate painted side facing up. Smooth the surface, adding a little more mousse if needed. Freeze overnight, or for a minimum of 6 hours.

for mirror glaze:
3 sheets Platinum grade sheet gelatin
120ml water
150 g liquid glucose
150 g granulated or caster sugar
1 tsp agar-agar
100 g condensed milk
150 g white chocolate, chopped fairly small
½ tsp titanium oxide (optional, but advisable)
red and purple gel food coloring
Prism powder to sprinkle in the end (optional,I used Tourmaline Pink)

Put the water, sugar, liquid glucose and agar-agar in a small pan and bring to simmering point, stirring occasionally to dissolve the sugar. Remove from the heat and let it stand for about 5 minutes. This is the base syrup for the glaze. Meanwhile, soak the gelatin in some cold water for about 5 minutes. Squeeze out the excess water and stir into the hot water, sugar and liquid glucose mixture to dissolve. Stir in the condensed milk and the titanium oxide.

Put the chocolate in a medium bowl and pour this hot mixture slowly over the chocolate, stirring gently to melt it, avoid making bubbles. Add the red food gel dye. A stick immersion blender works great, but you must keep the blades fully submerged at all times. If bubbles are present, pass the mixture through a fine sieve.

The ideal temperature to glaze is 92 to 94 F. Un-mold the cakes, immediately pour the mirror glaze over the frozen surface. Sprinkle with Prism powder or golden luster powder. Cake should sit in the fridge for a couple of hours before serving.

ENJOY!

to print the recipe, click here

Comments: I love making entremet cakes. They seem complicated but the nature of these cakes pretty much forces you to do everything in steps, over a period of a couple of days. No rushing is advisable, not even feasible. Just take your time and enjoy the ride. This version calls for a baked center. That part of the recipe came from a great cookbook, Patisserie at Home, from Melanie Dupuis. Once that is made (and it can sit in the freezer until you are ready to proceed with the recipe), it is all very straightforward. A sponge bake, some assembling, freezing everything and then my favorite step, mirror glazing!

I used two different ways to present the mini-cakes. In the first version the cake was placed on a small plate and little chocolate covered candy added around the base. A little gold leaf for a final touch on top.

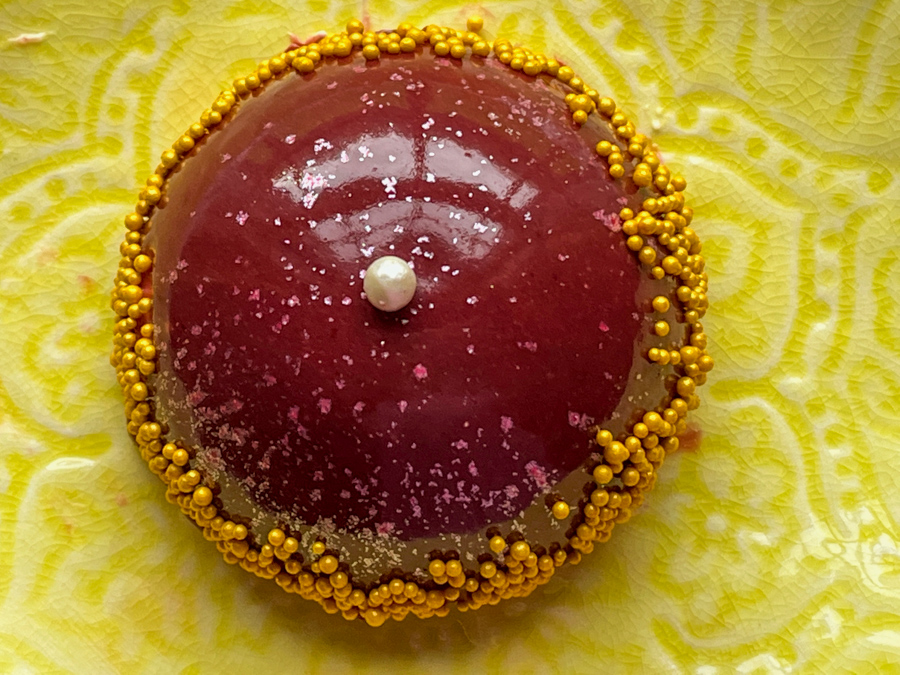
The second version was a little less time-consuming, I just carefully added golden non-pareils around the edge, in a random pattern, and a little white pearl on top.

I imagine you are curious to see the cake cut… So here it is, the different components of this very tasty dessert…

I must say that of all the entremets I’ve made, this ranks very high in the deliciousness level. The cherry, when cooked to make the center, gets a very nice texture and the taste seems concentrated. Lovely. If you make mirror glazes, I want to point out that I add a touch of agar-agar to my recipe. That makes the layer cut more nicely, without slipping, as it is common with gelatin-only formulas. There is no change in taste.

Without further ado, I invite you to step with me
into the 14th year of my blogging adventure!

ONE YEAR AGO: The Bewitching Kitchen Turns 12!

TWO YEARS AGO: The Bewitching Kitchen turns 11!

THREE YEARS AGO: The Bewitching Kitchen Turns 10, and a Giveaway…

FOUR YEAR AGO: The Bewitching Kitchen turns 9!

FIVE YEAR AGO: The Bewitching Kitchen turns eight!

SIX YEARS AGO: The Bewitching Kitchen Turns Seven!

SEVEN YEARS AGO: Bewitching Kitchen Turns Six!

EIGHT YEARS AGO: The Bewitching Kitchen turns Five!

NINE YEARS AGO: The Bewitching Kitchen turns Four!

TEN YEARS AGO: The Bewitching Kitchen Turns Three! 

ELEVEN YEARS AGO:  The Bewitching Kitchen turns Two!

TWELVE YEARS AGO:  Bewitching Birthday!

THIRTEEN YEARS AGO: Welcome to my blog!

THE BEWITCHING KITCHEN TURNS SEVEN!

13450033_10208522449031784_8373900714076798199_n

(picture courtesy of our dear friend Karl)

Seven years blogging! Cliché or not, time goes by fast when you’re having so much fun…  The other day I was reading a very insightful blog post in which the blogger asked the question “why do we blog?”  In her case, the question arose mainly because after several years publishing posts, she realized a pattern. She would get excited about writing posts and go on periods of a lot of activity, then abandon her site for months in a row. Feeling guilty about it the whole time. Basically the blog becomes more a source of pressure/pain rather than pleasure, meriting the question “why do it?”.  For me, the question is easy to answer: blogging is fun, it makes me a better cook (or at least more adventurous), and it leads to many wonderful connections with other food bloggers (and readers), forming a sort of virtual family. So, there you have it, seven years and I have not tire of it yet. I don’t have a cake to celebrate the occasion because it was humanly impossible to bake one before our trip considering how busy we were then. Landing back on the very day of my blog-anniversary, I am forced to postpone the virtual party for a few days. Stay tuned. I do have a specific cake recipe in mind, and if all goes well… it will be legendary!

(I probably jinxed myself once more)

CAKES

Six cakes from previous Bewitching anniversaries…


ONE YEAR AGO: Bewitching Kitchen Turns Six!

TWO YEARS AGO: The Bewitching Kitchen turns Five!

THREE YEARS AGO: The Bewitching Kitchen turns Four!

FOUR YEARS AGO: The Bewitching Kitchen Turns Three! 

FIVE YEARS AGO:  The Bewitching Kitchen turns Two!

SIX YEARS AGO:  Bewitching Birthday!

SEVEN YEARS AGO: Welcome to my blog!


THE BEWITCHING KITCHEN TURNS SIX!

IT’S GIVEAWAY TIME!
(comments are now shutdown for this post)

Six years ago I composed a post and hit “PUBLISH” for the first time, with trembling fingers and the excitement of starting a new path. For six years I’ve shared recipes, photos, stories, reviewed cookbooks, fitness videos, baked a lot of bread, quite a few desserts, and invited you over many virtual tours of our kitchen. It’s been absolutely great!  During this time I’ve made connections with a number of food bloggers and readers that now feel like real life friends. That side-benefit of blogging I could not foresee on day one, and I love it!

As I prepared this post, I noticed about 25 wordpress drafts waiting to go live, and probably nearly as many folders in my computer of recipes and photos “to be blogged soon”. Come to think of it, I could quit cooking anything new for about 6 months and still keep the site going. I have no intentions of slowing down my cooking, but such a backup of posts definitely makes life easier. Who needs a hobby that is a source of stress? No, not me, not into it. However, in such a special day we must have cake, which all of a sudden places the stress threat on RED ALERT. Plus. I’m not talking a simple cake, but one defined by Dorie Greenspan as a “show-stopper”.  I tried my hands at her “Carrèment Chocolat”.  Here is the result of my labor of love, which ended up as Phil’s labor of love too.

Carrement Chocolat Cake2

HAPPY 6th BIRTHDAY, BEWITCHING KITCHEN!

I will dedicate a special post for the making of this cake, let me just say that it was worth the stress and the many boo-boos made by yours truly, and fixed by her awesome husband.  Stay tuned.

A blog anniversary would not be complete without a giveaway to show appreciation for my readers.  You make blogging fun and rewarding. I am giving away a signed copy of David Leite’s The New Portuguese Table.  I take this opportunity to thank David for sending me a signed copy super fast… much appreciated!

composite
Portuguese cuisine doesn’t get the recognition it deserves. Being Brazilian, I grew up under the influence of many such dishes, not only because of Brazil’s colonization, but because my Mom’s parents were both born and raised in Portugal. I have memories of my childhood and teenage years back home, when grandma (Vovo’ Florinda, who lived with us), would make “bolinhos de bacalhau” (salt cod fritters) and the smell made me want to turn around and go back to school.  I was a silly young girl, who twisted her nose at many classic Portuguese dishes. I feel bad because I never even tried one of her fritters. Shame on me! Maybe now that I am older and so much wiser (or as I like to put it… much older and a little wiser), I can do justice to Vovo’ Florinda‘s cooking by offering this book to one of my readers.  To enter the giveaway, simply leave a comment in this post. Comments will be open until July 1st, and the winner will be announced the following day. If you’ve never commented before but have been following my blog, I would love to “meet” you, so don’t be shy anymore, and say hello! Contrary to my usual approach, I won’t reply to every comment in this post, so let me say upfront:  Thank you for taking part of my virtual celebration!

I invite you to follow me on the road to my seventh year of food blogging. I promise there will be cakes, breads, and dog tales. I’ve shown you this photo before, but I love it so much, I want to share it again… Plus, who knows how long Chief will be with us? Hard to tell… at almost 16 and a half years old, he still loves going for walks and staring at the road ahead. Like all of us do… The unknown, the possibilities. All there, waiting for us.

sunsetwalk1

A walk at sunset with the pups…


ONE YEAR AGO:
The Bewitching Kitchen turns Five!

TWO YEARS AGO: The Bewitching Kitchen turns Four!

THREE YEARS AGO: The Bewitching Kitchen Turns Three! 

FOUR YEARS AGO:  The Bewitching Kitchen turns Two!

FIVE YEARS AGO:  Bewitching Birthday!

SIX YEARS AGO: Welcome to my blog!

BEWITCHING BIRTHDAY!

One year of blogging! It passed with astonishing speed, proving that time flies when you’re having fun!   It’s surely been fun, sharing what happens in our kitchen with friends, family and lots of other folks, and getting acquainted (at least virtually) with new people and bloggers through comments and emails.

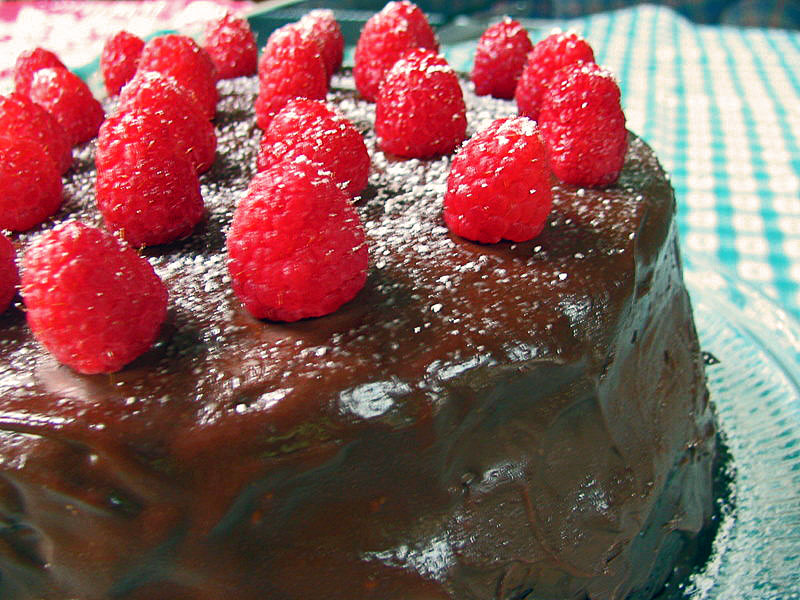
A cake is a mandatory birthday celebration!  Unfortunately,  cake and Sally don’t make a good match.   But in the name of this special occasion I faced my demons and baked a cake. Choosing the recipe wasn’t easy, but I decided by elimination: genoise was out of the question, I’d rather be tortured.   Any recipes involving the instructions “cream the butter with the sugar” were also excluded.  Then, browsing the latest issue of Bon Appetit, I spotted a layered chocolate raspberry cake and I was smitten: that was it! Luscious, beautiful, perfect… would you believe  that the recipe didn’t need an electric mixer?  Instead, two bowls and a whisk…. my kind of recipe!  Even the layering didn’t bother me (although it should have, … but  ignorance is bliss).

So, here it is, my first layered cake, in honor of my baby blog…

CHOCOLATE-RASPBERRY LAYERED CAKE
(from Bon Appetit, June 2010)

2 cups unbleached all purpose flour
1 + 3/4 cups sugar
3/4 cup unsweetened cocoa powder
2 teaspoons baking soda
1/4 teaspoon salt
1 cup water
3/4 cup buttermilk
3/4 cup vegetable oil
3 large eggs

18 ounces bittersweet chocolate (maximum 61% cocoa), chopped
2 + 1/4 cups whipping cream
6 tablespoons seedless raspberry jam, divided
resh raspberries
powdered sugar

Heat the oven to 350°F. Coat two 9-inch-diameter cake pans with nonstick spray. Line their bottoms with parchment paper rounds and spray the rounds. Sift the flour, sugar, cocoa powder, baking soda, and salt into a large bowl; whisk to blend and form a well in the center. Whisk 1 cup of water, buttermilk, oil, and eggs in a medium bowl to blend. Pour the wet ingredients into well in dry ingredients; whisk just to blend. Divide the cake batter between the prepared pans.

Bake the cakes for 30 minutes or until a toothpick inserted into center comes out clean.  Cool completely in pans on cooling racks.

for the ganache and raspberry topping;
Place the chopped chocolate in a medium bowl. Bring the cream to a boil in a heavy medium saucepan. Pour it over the chocolate.  Let stand for 1 minute, then stir until the ganache is melted and smooth. Transfer 1 + 1/4 cups of the ganache to a small bowl. Cover and refrigerate until the ganache is thick enough to spread, stirring occasionally, about 1 hour. Let the remaining ganache stand at room temperature to cool until  lukewarm.

Invert one cake onto a cardboard round or the bottom of 9-inch-diameter tart pan. Peel off the parchment paper and spread 3 tablespoons of raspberry jam over the top, then spoon dollops of chilled ganache over the surface, spreading it around.   Invert the second cake onto another cardboard round or tart pan bottom.  Peel off  its parchment paper. Carefully slide the cake off its round and onto the frosted cake layer.  Spread the remaining 3 tablespoons of raspberry jam over top of the second cake layer, and pour half of the lukewarm ganache over the cake, spreading it over the sides to cover.  Place the cake in the freezer until the ganache sets, about 30 minutes. Pour the remaining ganache over the cake, allowing it to drip down sides and spreading over the sides if needed for even coverage and smooth edges. Freeze again to set the ganache, about 30 minutes.

Arrange the raspberries in concentric circles atop the cake, then sift powdered sugar lightly over raspberries and serve.

ENJOY!

to print the recipe, click here

Comments: I wish that my cake-phobia was cured, but now I have a few more reasons to stick with breads and pizzas.   At first  my confidence grew as the batter behaved exactly as anticipated, filling two 9-inch cake pans and baking into beautiful brown cakes with only a slight dome in the center.  But the Cake Gods  weren’t quite finished with their conspiracy against me.   Spreading the ganache was nightmarish, to put it mildly. Thinking back, I realize that it wasn’t quite  hard enough to spread, so instead of forming a nice thick layer, it ran down the sides, but my cake-naivete made me go on, thinking  that eventually everything would be OK.

When I placed the second cake on top of the first, once all the slippage-fiesta stopped, the ganache layer had a big gap all around the edges, that stubbornly resisted my attempts to fill it.  In despair, I checked my cake pans, and was shocked and appalled to realize that they were not identical in size – a small difference from one brand of pan to another, which made my layers unequal. My last hope was that the “lukewarm icing” would solve all the problems and make a beautiful, smooth covering of all the boo-boos. But, this was not the case.  Not a chance.  To make a  long story short, my cake ended a bit like the Leaning Tower of Pisa in Italy.  Its sides had nothing to do with the “picture perfect” look in the magazine.    I had hoped to post a picture of my cake on a gorgeous stand with a nice candle in the center, but I settled instead for the only photo that showed more cake than boo-boos.

Cake, my friends, is not for sissies…But, even if its looks were not picture-perfect, it disappeared in an afternoon, devoured with gusto by hungry grad students!  The flavor was amazing: deep chocolaty, with a tangy background of raspberries, not overly sweet, but decadent.  I guess there might be hope for next year… 😉

Add to FacebookAdd to DiggAdd to Del.icio.usAdd to StumbleuponAdd to RedditAdd to BlinklistAdd to TwitterAdd to TechnoratiAdd to Yahoo BuzzAdd to Newsvine

One year ago…. Welcome to my blog!