DAN LEPARD TIMES THREE

Dan Lepard is the person who many years ago started my bread baking adventures through his fascinating book The Handmade Loaf. I even named my sourdough starter “Dan” and he is now a healthy and bubbly 8-year-old boy. Dan is better known as a bread baker, but his talent goes way beyond that, as you can see in his book Short and Sweet, which I reviewed five years ago. He often writes articles in The Guardian and in Goodfood (an Australian online publication) and I try not to miss anything new coming from him.  Today I share three wonderful recipes, one published in Short and Sweet (but shared by Dan in The Guardian) and two from Goodfood. Dan prefers not to have his recipes published in food blogs, so respecting his wishes, I will only share the links. You can fetch them easily and make them in the comfort of your kitchen…

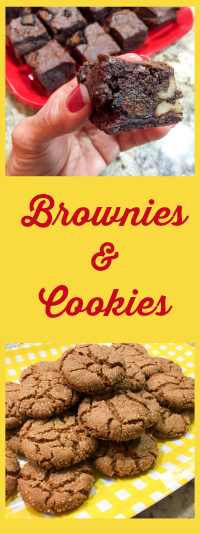
First, a batch of brownies that could very well be my favorite brownie recipe ever.  Very sophisticated and complex, even those with issues against brownies will be awed by Dan’s take on it.  Figs and chocolate are a great match, but add a little red wine and you’ll hit a jackpot.  Make them. You must.
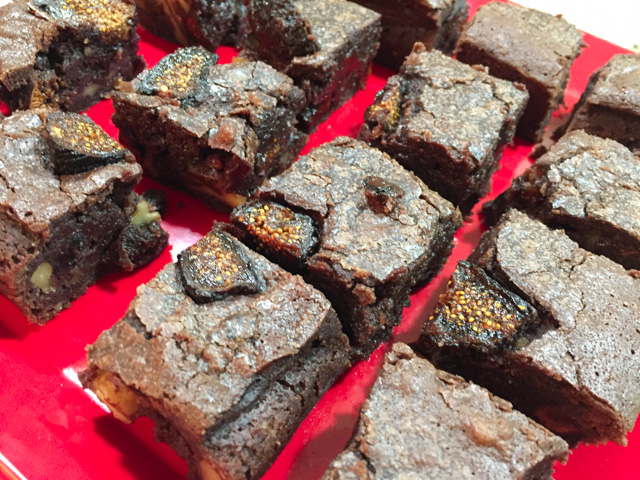
SHIRAZ FIG BROWNIES

First you reduce Shiraz on the stove top until it is a concentrated purple-reddish beauty that smells wonderful… then you add to it chocolate, butter, walnut halves and dried figs. By the way,  get the best quality figs you can find for these brownies. Also, make sure to keep the walnuts in large pieces, don’t go dicing them.  The texture of the figs, the gooey chocolate and a slight touch of fennel seeds make this recipe shine! A real masterpiece in brownie format.

for the full recipe, click here


Tell me, don’t you wish you could have a piece like RIGHT NOW?


Next, let’s talk Chestnut Ginger Biscuits. I adore ginger and anything sweet with spices, but normally have a bit of a problem with crispy cookies. I am definitely a soft-baked kind of girl. Sorry, odd phrase. Anyway, these cookies are basically dressed-up gingersnaps. They are crispy, they are hard, but once you bite into them, they melt in your mouth, and your senses are invaded with the warmth of ginger and cloves. Spectacular. Make them. You must. 

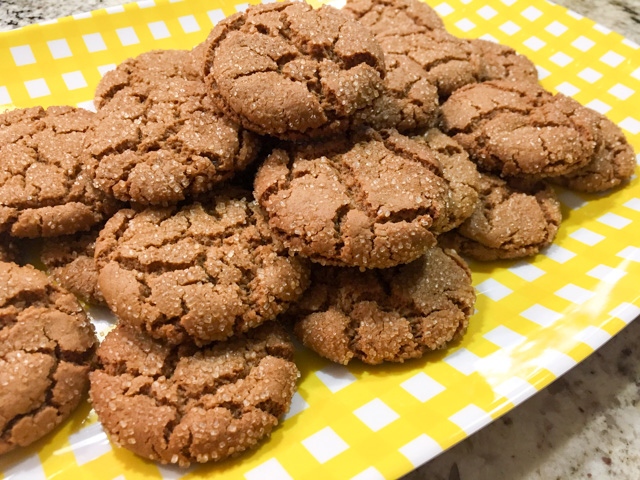
CHESTNUT GINGER BISCUITS

The recipe uses chestnut flour, an ingredient that might be a little tricky to find, but you can order it online. Smells amazing, actually. As usual for nut flours, keep it in the freezer. The preparation is actually quite simple, a one-bowl type of thing. Melt the butter, add the spices, get all happy with the intense smell as you mix the dough, that must sit in the fridge for a little while before scooping little balls and rolling in coarse sugar.  They are fun to make, fun to watch as they bake and get all cracked, and fun to share with co-workers. On a side note, I baked mine for only 18 minutes instead of 25 as called for in the recipe, and they turned out perfect.  As soon as they started to collapse a little, I removed them from the oven.

for the full recipe, click here

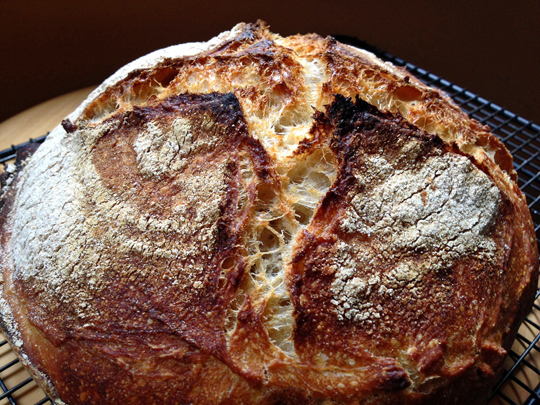
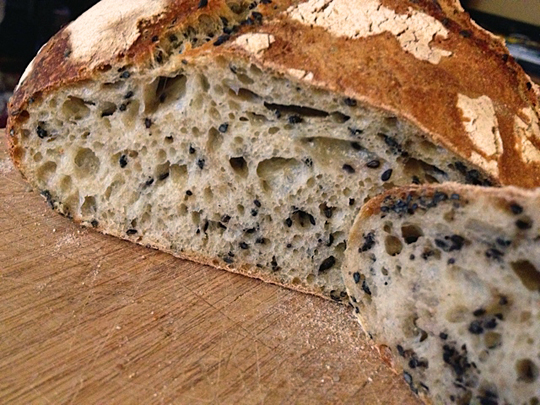
Finally, let me share a special bread. It is not a Johnny Depp-like loaf. No, definitely not eye-candy. It is black, with a tight crumb, quite humble looking. But when you taste it, you realize you are in front of bread royalty. Believe it or not, I made it in December 2014 and never blogged about it, hoping to make it again and perhaps get better pictures. I have good intentions, but they don’t always materialize. Oh, well. Make this bread. You must.


RUSSIAN BLACK BREAD

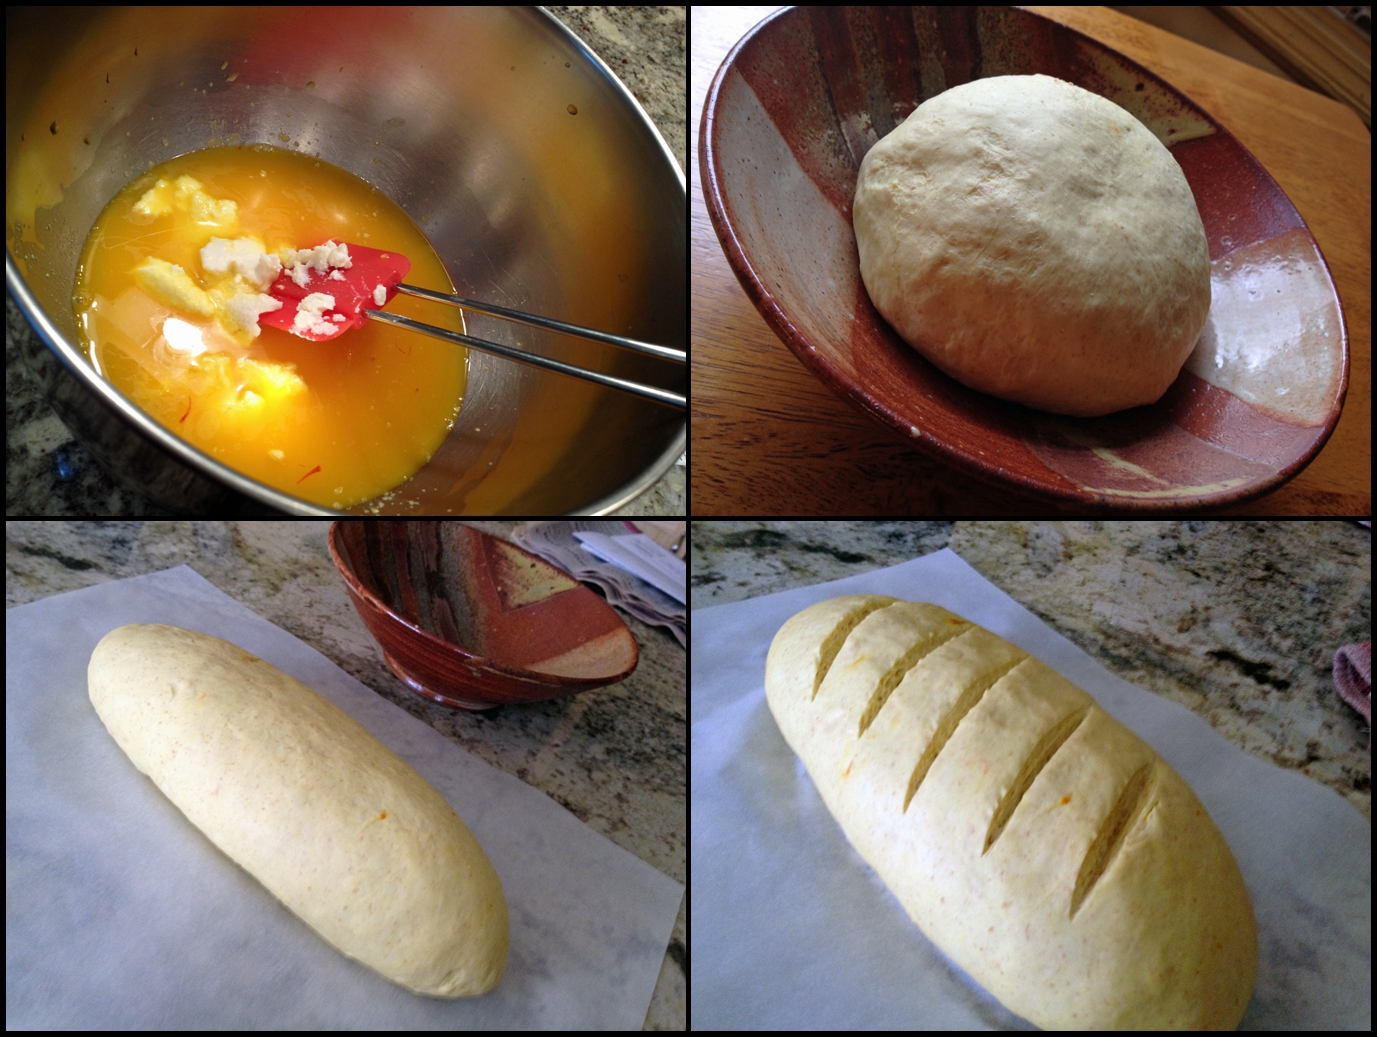
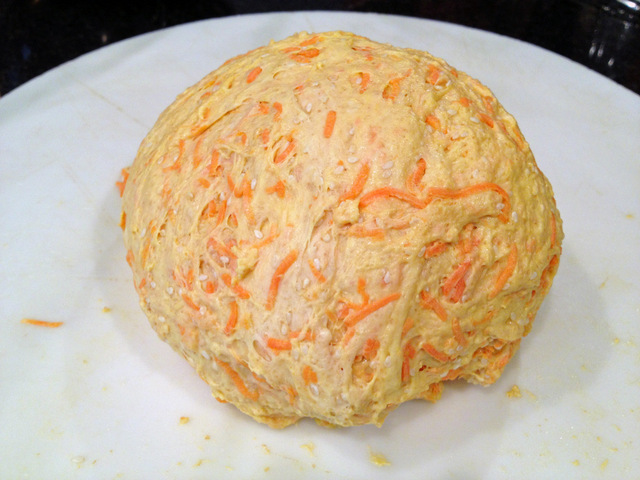
Very interesting preparation, rye flour is added to boiling water, then allowed to cool to lukewarm.  Yeast and sugar are added.  At that point, I realized I was out of an important ingredient to continue with the recipe (caraway seeds!) so I dashed to the grocery store, and returned to find quite a bit of a mess over my counter.  On the positive side,  at least I could be sure the yeast was alive and kicking.  Or, should I say, bubbling?  Another interesting twist in the recipe is the addition of grated carrots to the dough. All in all, a very straightforward bake, the bread will be ready in less than 3 hours start to finish.


for the full recipe, click here

As I mentioned, I baked this bread back in December 2014, when two very special friends (Marijo and Vlad) visited us. I knew that Vlad grew up in Russia enjoying dark rye breads, and decided to try and bake one for him.  Of course, I trust any recipe designed by Dan, and this one hit the spot. Vlad said that my bread took him straight to his childhood and teenage days. I cannot think of a better compliment…

Bumper sticker from Penzey’s, a company I’ve been a customer for 15 years. They are taking a firm stance on a message of inclusion, of embracing diversity and refusing hate and division.  On top of it, their spices rock!  Visit and support their online store with a click here.


Add to FacebookAdd to DiggAdd to Del.icio.usAdd to StumbleuponAdd to RedditAdd to BlinklistAdd to TwitterAdd to TechnoratiAdd to Yahoo BuzzAdd to Newsvine

ONE YEAR AGO: Turkey Portobello Burger

TWO YEARS AGO: Raspberry Ricotta Cake

THREE YEARS AGO: In My Kitchen, April 2014

FOUR YEARS AGO: Whole-Wheat Pasta with Lemony Tomatoes and Spinach

FIVE YEARS AGO: Blood Orange Duck: A work in progress

SIX YEARS AGO: Grilled Mahi-mahi with citrus marinade

SEVEN YEARS AGO: Memories of Pastéis (and my Dad)

DAN LEPARD SIMPLE WHITE LOAF

I suppose most of my readers know that I am crazy for sourdough bread. But there’s something to be said for a simple, straightforward loaf that is a breeze to make and will be so much better than anything store-bought. Granted, it won’t stay good for as long because you won’t be adding preservatives to it, but isn’t that a bonus?  This recipe from Dan Lepard is simplicity in itself. Think of the usual suspects, flour, water, salt, and yeast, with a smidgen of butter that will contribute with flavor and improve texture. Anyone can make this bread, beginners, experienced bakers, children, yeast-o-phobes. All you need is a loaf pan, although you could conceivably shape it free form and bake it on a stone or baking sheet.

Simple White Loaf


SIMPLE WHITE LOAF – RECIPE OVERVIEW

The recipe calls for a sponge, which is simply a very liquid mixture of water, flour, and commercial yeast,  allowed to ferment for a couple of hours or overnight. The longer you allow the sponge to ferment, the better. I’ve made this bread after overnight “spongification” or after 2 hours, both worked quite well.

Once your sponge is ready, you will add the rest of the flour to the dough, a little softened butter,  and do the minimal kneading technique 10 minutes after mixing the dough, again at 25 minutes, and one final time at 40 minutes (timing is quite flexible).  A final 30 minute-proofing and you’ll be ready to shape the loaf.

The shaped loaf sits for 90 minutes, gets slashed and baked for about 45 minutes.

The full recipe can be found in Short and Sweet. You might be able to find it also through a google search.

For my review of his book, click here.

lepardcollage

This simple recipe can be adapted in many ways. Dan himself used whey liquid from fresh mozzarella as part of the water in the recipe and loved the slight “tang” in the bread. One person who discussed this recipe in a Facebook page mentioned that a little soy sauce together with the water does wonders. Quite intriguing, I should try that at some point, probably reducing a little the amount of salt as soy contributes with some.

ceumb

Slightly toasted, it is perfect to go with pretty much anything you’d like… from sliced ham to jams, or a smear of butter with Maldon sea salt flakes… heaven! I made this recipe three times so far, and after we enjoy it on the day of baking, I wrap 4 slices together and freeze them. Within 10 minutes at room temperature and a brief encounter with our small Breville oven, they are as good as freshly baked.

Before I leave, allow me to share a link to  the best 10 breads to have in your repertoire according to Dan Lepard. I was happy to see several that I made (and blogged about) included in his list.  

ONE YEAR AGO: Maureen’s Fabulously Fudgy Brownies

TWO YEARS AGO: Wheat Berry Caraway Bread

THREE YEARS AGO: Mexican Focaccia 

FOUR YEARS AGOSunny Kamut Salad with Roasted Lemon Vinaigrette

FIVE YEARS AGO: Pane de Casa & Crostini

SIX YEARS AGO: Down-home Dig-in Chili

SEVEN YEARS AGO:  Cinnamon Rolls

DAN LEPARD’S SAFFRON BLOOMER

Dan Lepard is by far my favorite bread baker instructor, for many reasons, but perhaps the most important is that he doesn’t try to portray bread baking as a complicated and convoluted issue.  It is flour, water, salt, and yeast, folks.  Some bakers make you believe that you must go out of your way to get flour made from wheat harvested under a full moon when the temperature was 68.5 F. Or else… your bread will suffer horrible consequences.    Others will have you frantically measuring the temperature of the air, the water, the bowl, your hands, the nose of your dog, then manipulate all those variables to find out for how long you must knead your dough to hit the jackpot of 78 F. Or else… your bread will suffer horrible consequences.   Dan has a totally different approach, and you know what? None of his recipes has ever failed me.  Because he turns bread baking into a light, fun experience, you’ll relax, bake more often, and get the real important achievement in the process: familiarity with the dough, a “feel” for when it’s been kneaded enough, proofed enough, baked enough. This is a wonderful example of Dan’s talent, a bread made with saffron and ricotta that smells amazing, and tastes even better!

SaffronLoaf

SAFFRON BLOOMER OVERVIEW\
(recipe from Short and Sweet, available at The Guardian)

This is a very simple recipe, that doesn’t require a sourdough starter, a pre-ferment, or hours of commitment.  All you’ll need is good quality saffron, some ricotta cheese, and flour, mostly all-purpose with a touch of spelt (or whole wheat).

The saffron steeps in a bit of warm water, and that yellow, fragrant liquid is mixed with rapid rise yeast plus all other ingredients.

Minimal kneading involved: three sessions of kneading lasting less than a minute each will produce a super smooth dough with tiny flecks of saffron poking through here and there.

Using rapid rise yeast makes this bread show up at your table in less than 3 hours from the  moment you start gathering your ingredients.

I used an empty Le Creuset to bake this loaf: simply placed the slashed dough still over parchment paper inside the pre-heated Le Creuset (oven at 425F), closed the lid, and baked for 30 minutes.  After 30 minutes I removed the lid and allowed the loaf to bake for 10 to 15 more minutes, until dark golden.


If you want to see the complete recipe and print it, please click here


composite,jpg

Comments:  I’ve made this loaf twice in a month, which tells you how much we enjoyed it. One of the reasons I repeated this loaf so quickly was that we had a special visitor in our home, that dear friend who gave me a huge amount of saffron a couple of years ago.  He came over to give a seminar in our department, and I decided that baking a loaf of saffron bread would be a nice way to thank him for the gift. Side benefit: right after visiting us, he jumped on a plane to Saudi Arabia, and a little bird told me that more saffron will be arriving by mail, just when my reserves are reaching a dangerously low-level. Yes, you do have the right to feel jealous.  😉

CrumbSaffron

The bread has a beautiful yellow crumb, and if you freeze it and enjoy it later, slightly toasted, the taste of saffron gets much more pronounced. It also makes superb croutons for a Caesar salad.  Baking in the Le Creuset produced a crust that was not too different from that of a rustic sourdough.  I am definitely going to use this method often for non-sourdough breads, it traps the steam in a very efficient way, and the resulting crust is considerably better (for our taste, at least).


I am submitting this post to Susan’s Yeastspotting


ONE YEAR AGO: Fesenjan & The New Persian Kitchen

TWO YEARS AGO: Quinoa Salad with Roasted Beets

THREE YEARS AGO: Pasta Puttanesca

FOUR YEARS AGO: Miche Point-a-Calliere

SOURDOUGH BLUES

For the past few months the Bewitching Kitchen witnessed my silent struggles with bread baking.  Re-phrasing that, for the past few months the Bewitching Kitchen witnessed a full-fledged bread baking debacle!   Yes,  a few floured banettons flew across the Bewitching Kitchen.   Yes, the lives of several loaves quickly came to a violent end as crouton-material on the chopping board.  Yes, Phil received text messages stating that I would never ever EVER bake sourdough again, and I needed him back home so I could cry on his shoulder.  I was miserable, confused and frustrated, feelings  I normally associate with golf, not bread baking.  Life can be cruel.

The deterioration in my baking happened slowly.  A slightly less plump loaf here, a tighter-than-expected crumb there.   Then, suddenly, no matter what I did my boules became pancakes.   Flat, … they were flat!.  No oven spring to speak of, and scoring the surface was like make-up at the undertaker’s,  … it made no difference in the loaf.  The crumb below was actually one of my better “pancake-loaves.”  Most had a much tighter crumb, leaving me too upset and disgusted to even bother taking a picture.

here

At a  loss,  I posted a message to Dan Lepard’s Appreciation Facebook page, and David W. came to the rescue.  Much like a therapist holding the hand of a patient, he listened to my saga and concluded that the problem related to storing my starter in the fridge.  Slowly, the complex microbial population in the starter had changed, leaving me with a less than ideal mixture to start bread with.  Several people advised me to discard the sourdough and start all over again, but I didn’t want to consider that route.  I’m too attached to Dan, the starter I captured and kept for four  and a half beautiful years.  That explains why I threw a massive fit at Phil when he insisted that a starter “is just flour and water“.  Can you imagine hearing THAT?  I know, it goes beyond insensitive.   But David provided the light at the end of the tunnel, with a  “revival protocol” for my starter.  Guess what happened on my first loaf?

boule1White Levain Sourdough Bread, a classic recipe from Dan Lepard’s Handmade Loaf


SOURDOUGH STARTER RECOVERY

(from David, at Dan Lepard’s Appreciation Facebook page)

For 7-10 days, discard all but a small spoonful of the starter, and feed the starter by adding 70g organic rye flour + 100 g water.  Keep it out in the kitchen, not in the fridge.

After the 7-10 days, reverse the refreshment proportions to form a dough:  175g organic rye flour + 125 g water.   After 12 hours, bake with as much as you need, by either adjusting your bread recipe to compensate for the thicker starter, or refreshing it again at the hydration level called for in the recipe.  Freeze small portions of the thick starter for future use.

You can keep your dough-consistency starter at room temperature, refreshing it weekly, or thaw one of those small portions a couple of days before baking, refreshing it daily (always at room temperature).

_________________________________________________________________________________________________________________________________________________

I was so excited about getting back my “sourdough mojo”, that the following day I baked another loaf, a recipe adapted from Tartine.

_________________________________________________________________________________________________________________________________________________

blacksesamecrumbCan you look at this crumb and not shed a tear or two of pure joy?


BLACK SESAME SOURDOUGH

(adapted from Chad Robertson Tartine)

For the starter:
50g  spelt flour
50g white flour
100g/ml water at 78-80F
1 Tbs active sourdough starter

For the dough:
375g/ml water at approximately 80F (divided in 350g + 25g)
100 g starter (you won’t use the full amount made)
440g white flour (good quality all-purpose is fine)
60g spelt flour
10g salt
1/3 cup black sesame seeds

In a large bowl, mix 350g of warm water with the starter (100g of it), and mix to dissolve. Add both types of flour, mix until all flour is mixed with water, without large dry bits present.  Let the dough rest for 25 to 40 minutes.

Add the salt and the rest of the water (25g), and incorporate by pressing the dough with your fingers. Fold the dough a few times, until if forms a homogeneous mass, but don’t try to knead it.  Leave it in the bowl, folding it again a few times – no need to remove it from the bowl – every 30 minutes, for the first two hours (you will be making 4 series of folds during this period).  Add the sesame seeds to the dough on your first folding, after all the water and salt has been incorporated.  After the last folding cycle, let the dough rest undisturbed for another full hour, for a total of 3 hours of “bulk fermentation.”

Remove the dough from the bowl and shape it gently as a ball, trying to create some surface tension (for a tutorial, click here).  Let it rest for 20 minutes, then do a final shaping, by folding the dough on itself and rotating it.  If you have a banneton, rub it with rice flour, line it with a soft cloth sprinkled with rice flour, and place the dough inside it with the seam-side up. If you don’t have a banneton, any round container – like a colander – will do. Let it rise for 3 to 4 hours at room temperature.  Twenty minutes before baking time, heat the oven to 450F.

Cut a piece of parchment paper that will completely cover a pie baking dish and place it on top of the banneton containing the bread dough.   Carefully invert the banneton  over the parchment paper, using the pie plate to support the dough.  The cloth will probably be sticking to the dough, so carefully peel it off.  Score the bread, and place the pie pan over baking tiles in the pre-heated oven.

Bake for about 45 minutes, covered during the first 20 minutes, remove the cover for the final 25 minutes.

Let the loaf cool completely on a rack before slicing.

ENJOY!

to print the recipe, click here

Comments: I’ve been working with bacteria for 30 years, and one of the things we know too well is not to store it in the fridge.  Some strains of E.coli develop a capsule, a heavy coating of polysaccharides once exposed to cold temperatures, and they become pretty tricky to work with, particularly if you study what we do: their outer membrane proteins.  We tell the students all the time to avoid keeping their plates in the fridge, if a strain is worth preserving it should be immediately frozen at – 70 C.  So, it was ironic that I never thought twice about keeping my sourdough starter in the fridge for years and years, without making a “backup” stock in the freezer.  Never again.

I hope that if you bake with sourdough, this post will help you out in case of problems.  Make a few balls of very thick sourdough starter and store it in the freezer. Label that bag, by the way… you don’t want to look at it months from now and decide it’s some unknown creature that got into your freezer when no one was paying attention.  And then proceed to toss it in the garbage!   😉

I am submitting this post to Susan’s Yeastspotting

ONE  YEAR AGO: Headed to Hawaii

TWO YEARS AGO: A yummy Brazilian cake: Bolo de Fuba’

THREE YEARS AGO:  Hidden Treasure

FOUR YEARS AGO: Avocado Three Ways

CARROT AND SESAME SANDWICH LOAF

From the one and only Dan Lepard, a loaf to satisfy your cravings for a hearty sandwich bread, with the slightly nutty flavor of sesame seeds and a very subtle sweetness from grated carrots in the crumb.  Very easy to make, very easy to love…    You can find the full recipe on The Guardian site, by clicking here.

loaf
Here’s a little virtual tour of the process, starting with a quick preparation of your loaf pan.  You might be surprised to learn that I am a complete disaster when it comes to using scissors. I cannot make a straight cut to save my life.  So I was proud of my job here, although truth be told, it took me almost 15 minutes to do this.

prepbowl

You weigh your ingredients, and make a nice, smooth round of dough…
weighingdough
Thanks to the use of Rapid Rise Yeast (which is unusual for me, I normally go for the regular kind), you will end up with a shaped loaf that will threaten to escape its container, so make sure not to leave the house to run a few errands as the dough rises…  😉
risingslashed

The carrots are very evident in the dough, but they get baked into the crumb in a wonderful way. They won’t disappear, but you won’t feel any harsh bits of carrots as you bite into the bread.  A very soft crumb, with a nice crunchy top given by the sesame seeds.  Make sure to follow Dan’s tip on adding them: wet the surface of the slashed dough with a little water so that the seeds can stick better.  He used black sesame seeds, for quite a dramatic look.  I could swear I had black sesame seeds somewhere, but I could not find them, so I used regular, white seeds.
crumb

And I share with you a favorite lunch option: an open-faced sandwich made with  this bread, slightly toasted, some smoked ham, and cottage cheese with enough salt and black pepper to make it all shine…  Perfection, if you ask me!

sandwich

I am submitting this post to Susan’s Yeastspotting

ONE YEAR AGO: Border Grill Margaritas

TWO YEARS AGO: Goodbye L.A.

THREE YEARS AGO: Vermont Sourdough