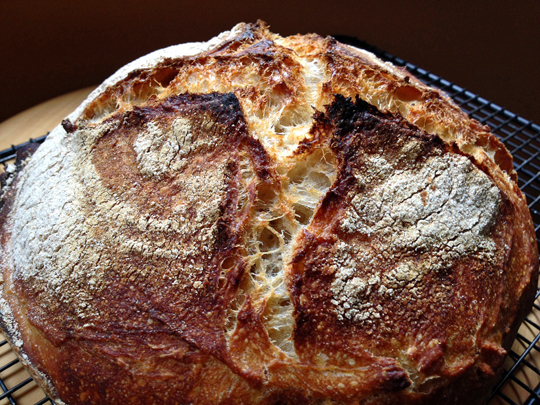
For the past few months the Bewitching Kitchen witnessed my silent struggles with bread baking. Re-phrasing that, for the past few months the Bewitching Kitchen witnessed a full-fledged bread baking debacle! Yes, a few floured banettons flew across the Bewitching Kitchen. Yes, the lives of several loaves quickly came to a violent end as crouton-material on the chopping board. Yes, Phil received text messages stating that I would never ever EVER bake sourdough again, and I needed him back home so I could cry on his shoulder. I was miserable, confused and frustrated, feelings I normally associate with golf, not bread baking. Life can be cruel.
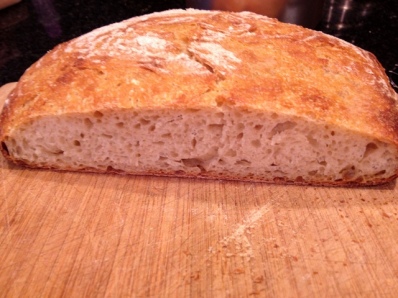
The deterioration in my baking happened slowly. A slightly less plump loaf here, a tighter-than-expected crumb there. Then, suddenly, no matter what I did my boules became pancakes. Flat, … they were flat!. No oven spring to speak of, and scoring the surface was like make-up at the undertaker’s, … it made no difference in the loaf. The crumb below was actually one of my better “pancake-loaves.” Most had a much tighter crumb, leaving me too upset and disgusted to even bother taking a picture.
At a loss, I posted a message to Dan Lepard’s Appreciation Facebook page, and David W. came to the rescue. Much like a therapist holding the hand of a patient, he listened to my saga and concluded that the problem related to storing my starter in the fridge. Slowly, the complex microbial population in the starter had changed, leaving me with a less than ideal mixture to start bread with. Several people advised me to discard the sourdough and start all over again, but I didn’t want to consider that route. I’m too attached to Dan, the starter I captured and kept for four and a half beautiful years. That explains why I threw a massive fit at Phil when he insisted that a starter “is just flour and water“. Can you imagine hearing THAT? I know, it goes beyond insensitive. But David provided the light at the end of the tunnel, with a “revival protocol” for my starter. Guess what happened on my first loaf?
 White Levain Sourdough Bread, a classic recipe from Dan Lepard’s Handmade Loaf
SOURDOUGH STARTER RECOVERY
(from David, at Dan Lepard’s Appreciation Facebook page)
For 7-10 days, discard all but a small spoonful of the starter, and feed the starter by adding 70g organic rye flour + 100 g water. Keep it out in the kitchen, not in the fridge.
After the 7-10 days, reverse the refreshment proportions to form a dough: 175g organic rye flour + 125 g water. After 12 hours, bake with as much as you need, by either adjusting your bread recipe to compensate for the thicker starter, or refreshing it again at the hydration level called for in the recipe. Freeze small portions of the thick starter for future use.
You can keep your dough-consistency starter at room temperature, refreshing it weekly, or thaw one of those small portions a couple of days before baking, refreshing it daily (always at room temperature).
_________________________________________________________________________________________________________________________________________________
I was so excited about getting back my “sourdough mojo”, that the following day I baked another loaf, a recipe adapted from Tartine.
_________________________________________________________________________________________________________________________________________________
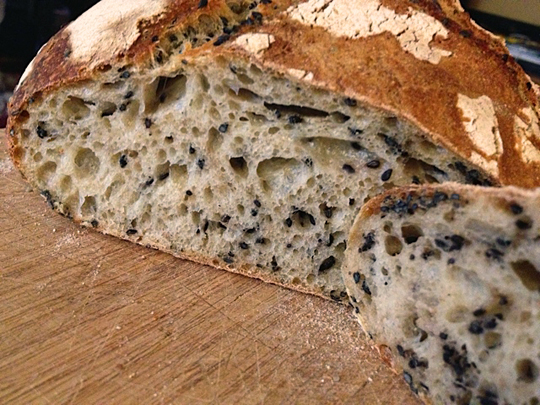
 Can you look at this crumb and not shed a tear or two of pure joy?
BLACK SESAME SOURDOUGH
(adapted from Chad Robertson Tartine)
For the starter:
50g spelt flour
50g white flour
100g/ml water at 78-80F
1 Tbs active sourdough starter
For the dough:
375g/ml water at approximately 80F (divided in 350g + 25g)
100 g starter (you won’t use the full amount made)
440g white flour (good quality all-purpose is fine)
60g spelt flour
10g salt
1/3 cup black sesame seeds
In a large bowl, mix 350g of warm water with the starter (100g of it), and mix to dissolve. Add both types of flour, mix until all flour is mixed with water, without large dry bits present. Let the dough rest for 25 to 40 minutes.
Add the salt and the rest of the water (25g), and incorporate by pressing the dough with your fingers. Fold the dough a few times, until if forms a homogeneous mass, but don’t try to knead it. Leave it in the bowl, folding it again a few times – no need to remove it from the bowl – every 30 minutes, for the first two hours (you will be making 4 series of folds during this period). Add the sesame seeds to the dough on your first folding, after all the water and salt has been incorporated. After the last folding cycle, let the dough rest undisturbed for another full hour, for a total of 3 hours of “bulk fermentation.”
Remove the dough from the bowl and shape it gently as a ball, trying to create some surface tension (for a tutorial, click here). Let it rest for 20 minutes, then do a final shaping, by folding the dough on itself and rotating it. If you have a banneton, rub it with rice flour, line it with a soft cloth sprinkled with rice flour, and place the dough inside it with the seam-side up. If you don’t have a banneton, any round container – like a colander – will do. Let it rise for 3 to 4 hours at room temperature. Twenty minutes before baking time, heat the oven to 450F.
Cut a piece of parchment paper that will completely cover a pie baking dish and place it on top of the banneton containing the bread dough. Carefully invert the banneton over the parchment paper, using the pie plate to support the dough. The cloth will probably be sticking to the dough, so carefully peel it off. Score the bread, and place the pie pan over baking tiles in the pre-heated oven.
Bake for about 45 minutes, covered during the first 20 minutes, remove the cover for the final 25 minutes.
Let the loaf cool completely on a rack before slicing.
ENJOY!
to print the recipe, click here
Comments: I’ve been working with bacteria for 30 years, and one of the things we know too well is not to store it in the fridge. Some strains of E.coli develop a capsule, a heavy coating of polysaccharides once exposed to cold temperatures, and they become pretty tricky to work with, particularly if you study what we do: their outer membrane proteins. We tell the students all the time to avoid keeping their plates in the fridge, if a strain is worth preserving it should be immediately frozen at – 70 C. So, it was ironic that I never thought twice about keeping my sourdough starter in the fridge for years and years, without making a “backup” stock in the freezer. Never again.
I hope that if you bake with sourdough, this post will help you out in case of problems. Make a few balls of very thick sourdough starter and store it in the freezer. Label that bag, by the way… you don’t want to look at it months from now and decide it’s some unknown creature that got into your freezer when no one was paying attention. And then proceed to toss it in the garbage! 😉
I am submitting this post to Susan’s Yeastspotting
ONE YEAR AGO: Headed to Hawaii
TWO YEARS AGO: A yummy Brazilian cake: Bolo de Fuba’
THREE YEARS AGO: Hidden Treasure
FOUR YEARS AGO: Avocado Three Ways

