IN MY KITCHEN, SPRING 2023

In My Kitchen posts are hosted by Sherry, from  Sherry’s Pickings. Please visit her site to see whateverybody else is sharing this month. I join four times each year, on the first day of January, April, July and October. If you are a food blogger, considering taking part of this fun event. It is chance to share those little things you bought or received as gifts and that make your life in the kitchen easier. 

Starting with gifts…. quite a few to share!
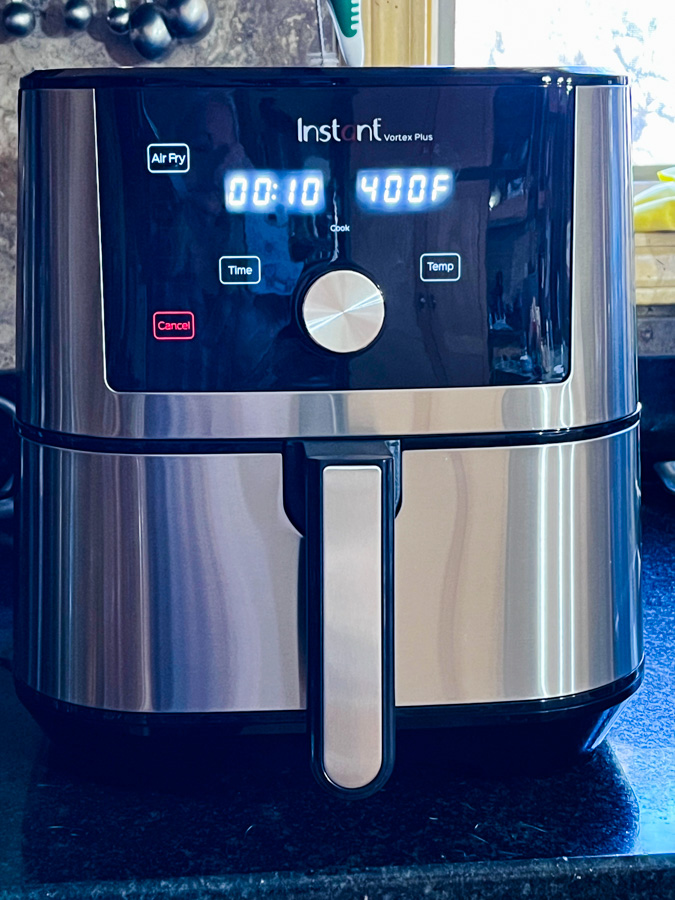
From the husband, a brand new, bigger and better air-fryer! I am totally in love with this one, the #1 recommended by America’s Test Kitchen. Instant Vortex Plus Air-Fryer. A total game-changer when it comes to air-frying, compared to our old Lolita, which we bought in 2017 (check it out here).
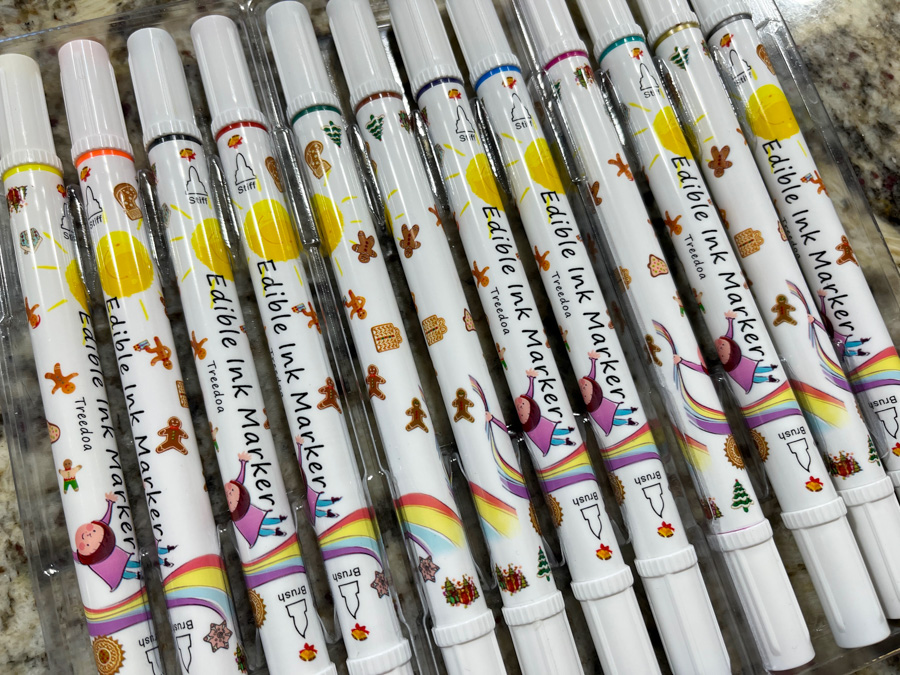
From our friends Lorne and Wasu, several gifts for cookie making, but I am highlighting this one because this is one amazing set of food safe pens. They are all double-sided with a thin and a brush type point, and the set comes with a gold and a silver pen, absolutely fantastic quality. I’ve been using them A LOT.
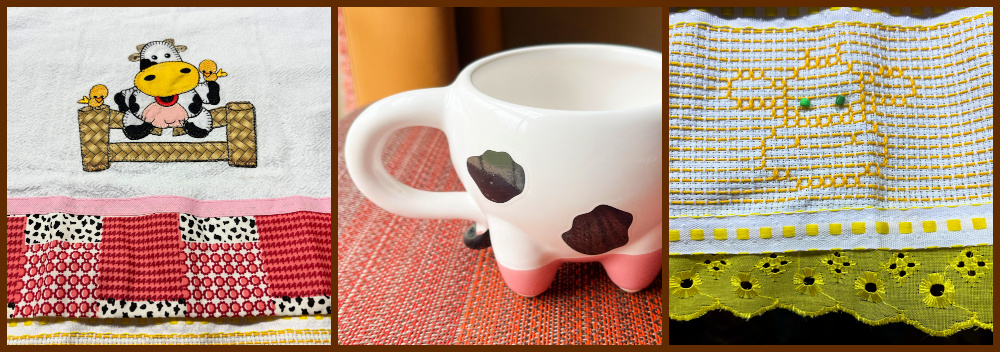
From my folks in Brazil, a series of cow-thingies. It is part of a family joke. Two kitchen drying cloths and a tea cup. The yellow embroidery was made by my sister Norma, too cute for words!
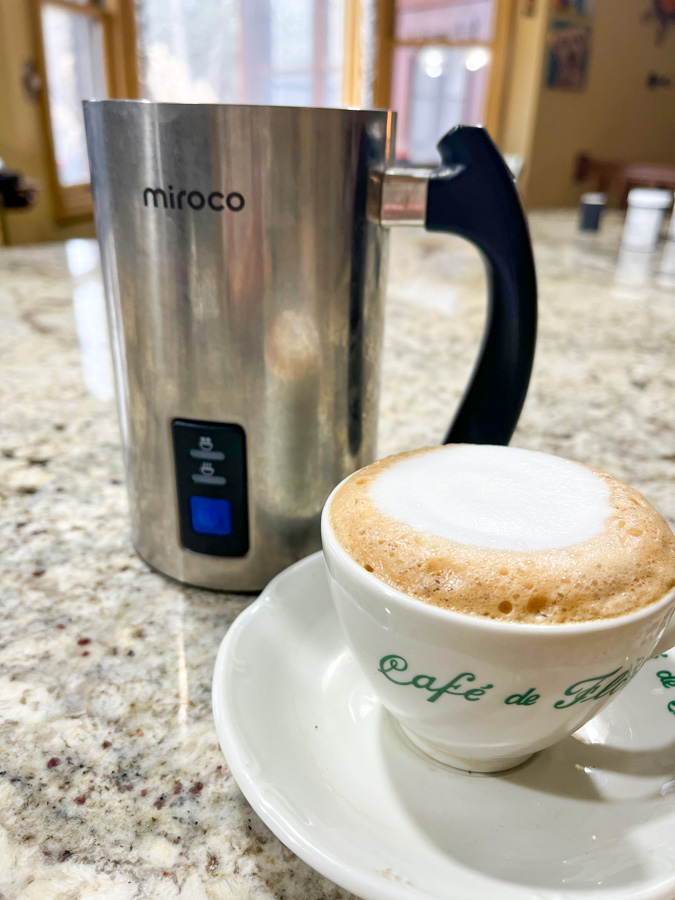
This is a gift that the husband gave to himself, as he is the barista in our place. When we were at my niece Raquel’s home in Brazil, she and her husband Celso would use this special steamer that Phil totally fell in love with. So he got one and I tell you, it makes the most amazing foam. Ordering info here.
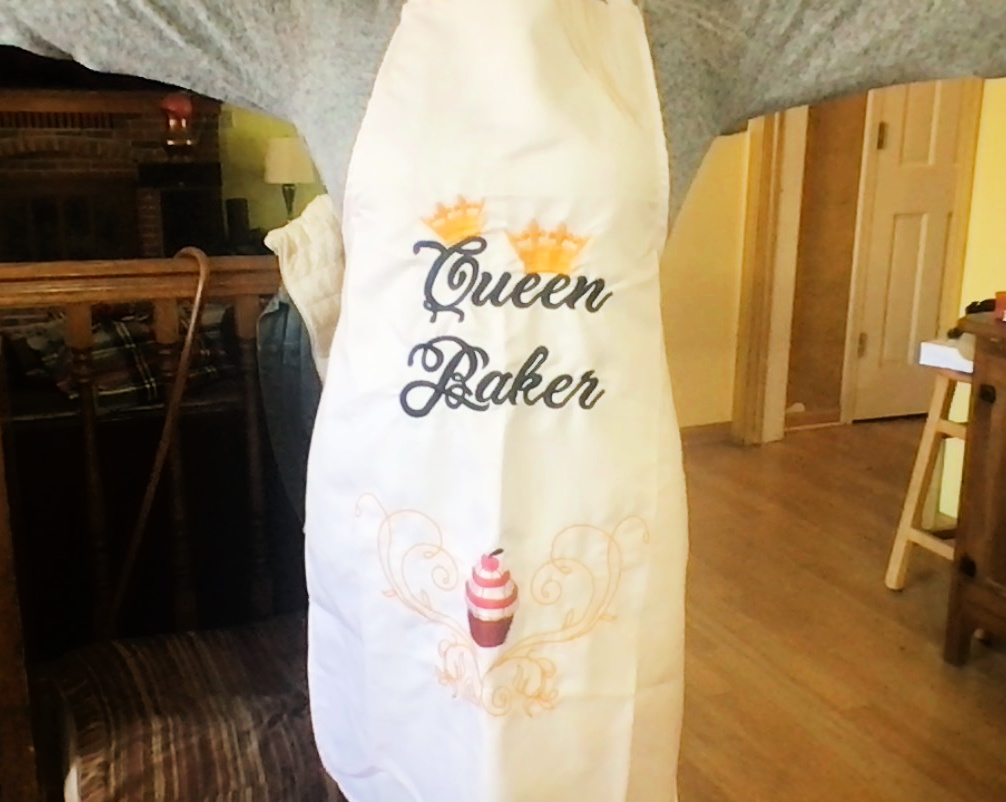
From a colleague from our department, a fantastic apron he bought in India during a recent visit… isn’t that the coolest apron?

In our kitchen…
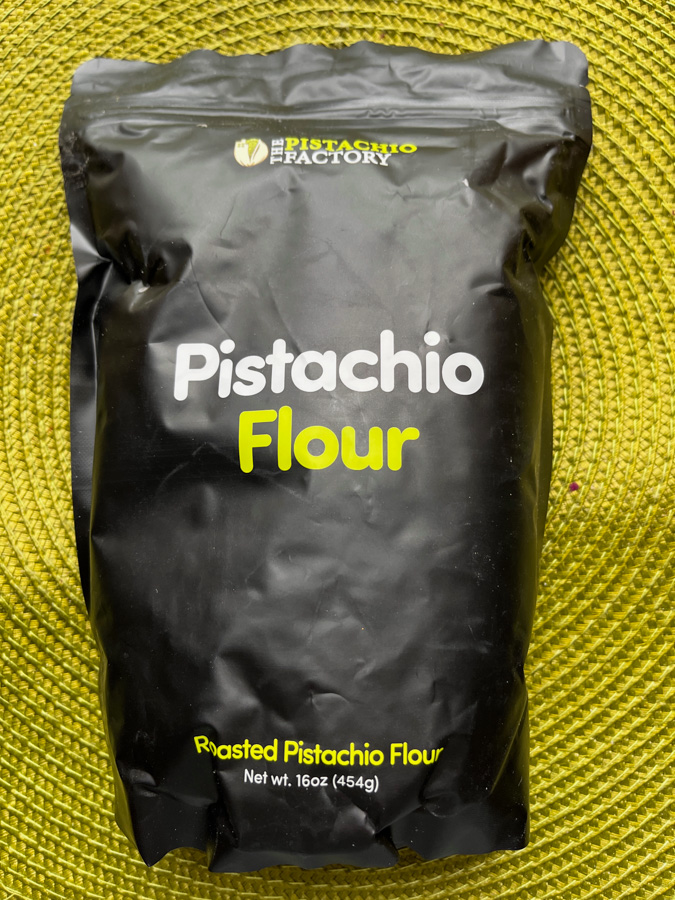
Pistachio Flour, great for many concoctions, from shortbread cookies to macarons, and cakes. Smells amazing!

In our kitchen…
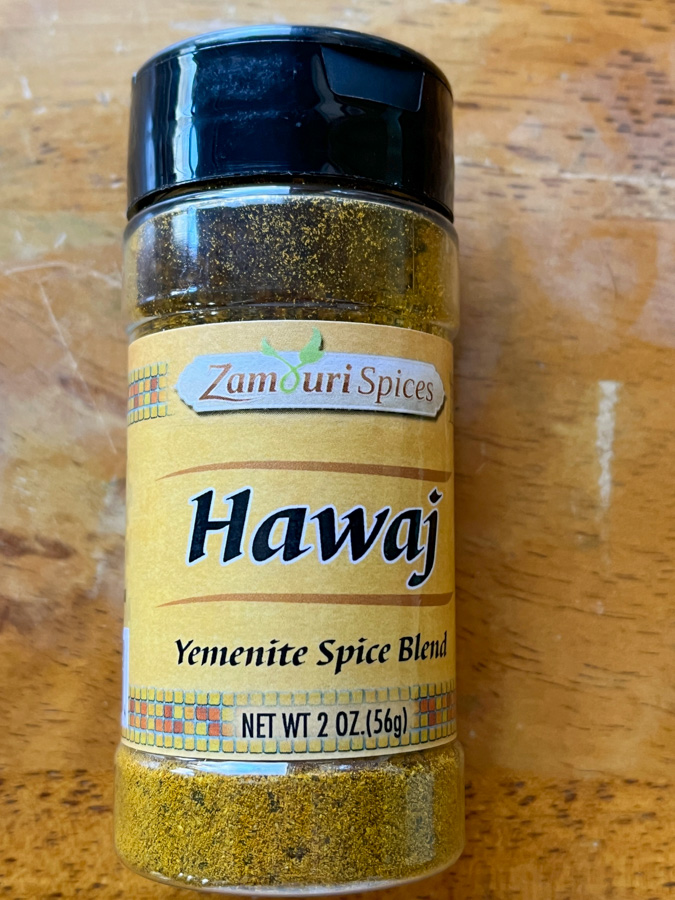
I have a weak spot for spice mixes, and this one was brough to my attention in a recent episode of Girl Meets Farm. She used it in a carrot cake and I was sold. Check her recipe here, and stay tuned because I shall make it soon! It is also wonderful in sourdough bread, as you will learn in the very near future.

In our kitchen…
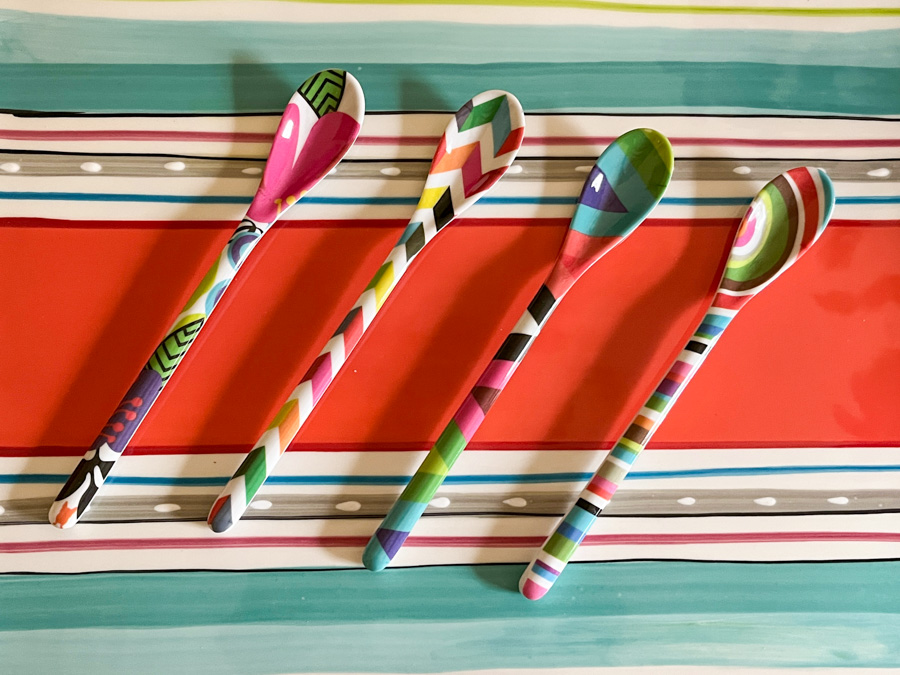
I can never resist color. Yet another gentle suggestion from my friend Gary, who told me I needed to have them (ordering info here). I don’t discuss with friends. I follow their advice. His fault. Obviously.

In our kitchen…
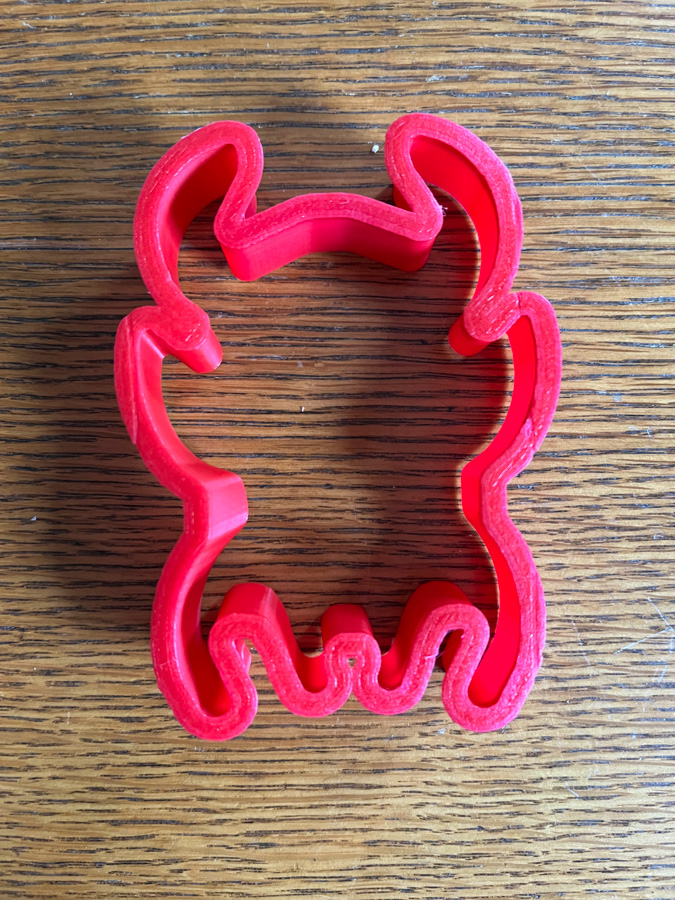
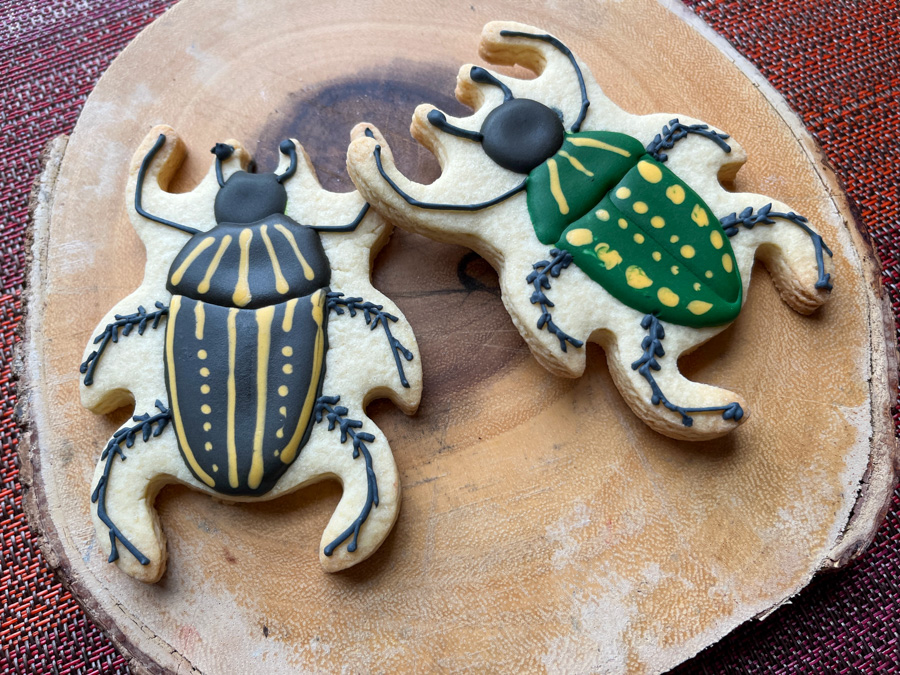
As far as unusual cookie cutters, this might take first prize. It is a beetle! It so happened because a friend of mine dared me cookie some beetles. And that’s what I did! I REALLY do not discuss with friends. Cookie cutter available here.
In our kitchen…
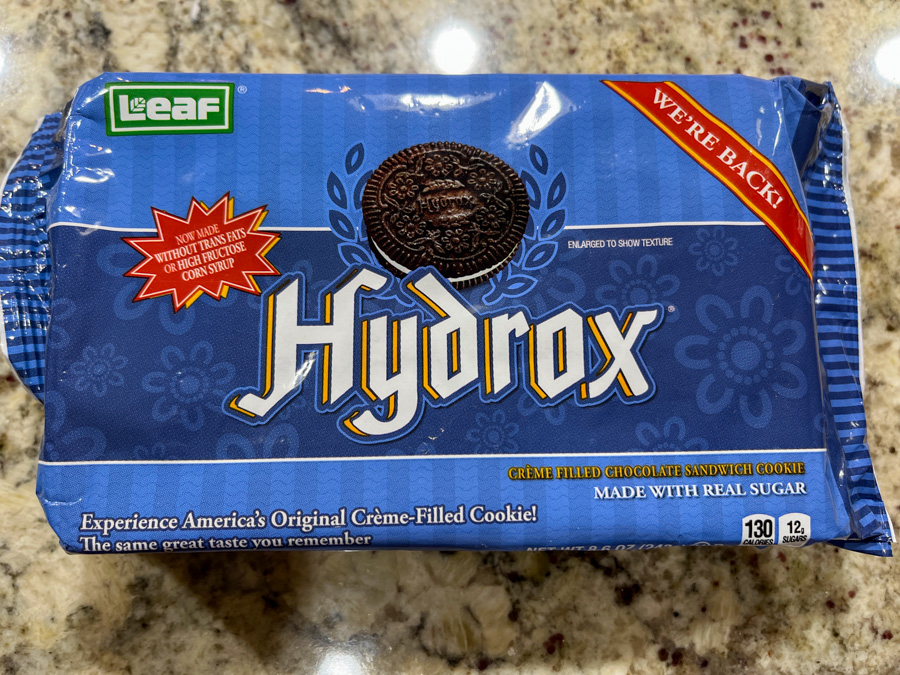
These are the original Oreo type cookies. Phil is the one who brought them to my attention, as he remembers them vividly from his childhood days. They are less sweet, more intense in the chocolate flavor, and are also firmer in texture. I have been using them to make chocolate-covered concoctions such as those blogged about recently (see post here).

In our kitchen….
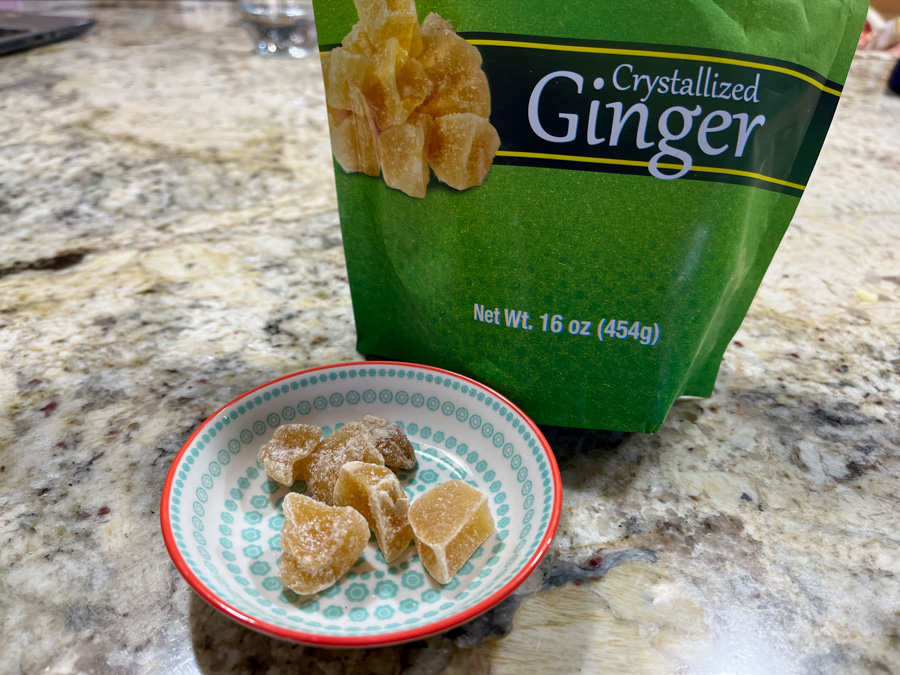
Crystallized Ginger pieces. These are luscious. Of al the brands I’ve tried, these are by far the best. If you are going to use them in cookies, you’ll need to cut in smaller pieces but the flavor you get from them is superior to anything else out there. Click here to order some.

In our kitchen…
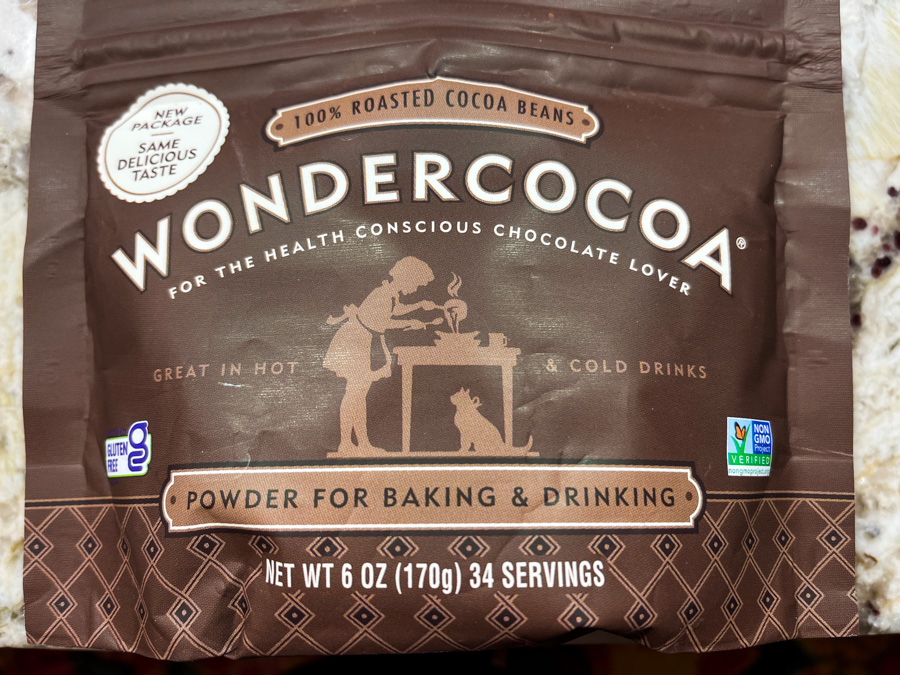
Fat-free cocoa powder (ordering info here), my absolute favorite to bake macarons and to make chocolate Royal icing, as you can see here and here.


.

AND NOW, A VERY IMPORTANT ANNOUNCEMENT

.

We don’t really know what happened to him. In his place, a fierce, huge, powerful pup showed up, out of nowhere!

With so much energy and curiosity, we followed the advice of some friends and got a little puzzle for Prince to play with. He was quite intrigued to say the least…
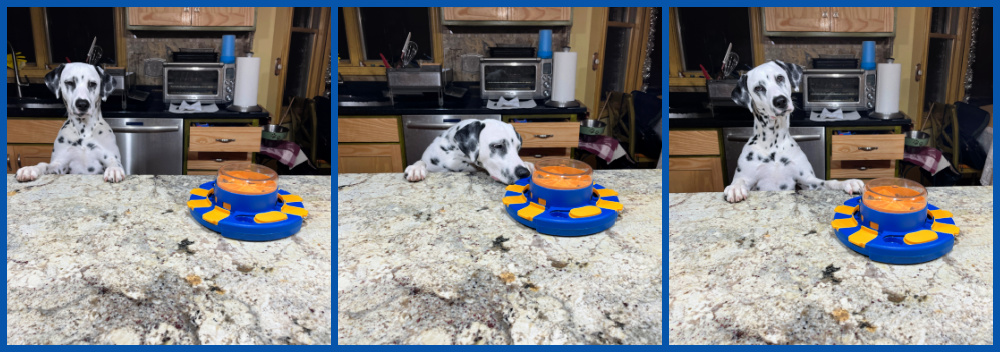
The puzzle has two levels. The dog can get the goodies from the outside doors, and once that is empty, he can bang on the top to release some more. Prince got the first level figured out quite quickly, but when Oscar had his chance to play, he surprised us by getting to the second level right away, as you can see in this short video:

.
We don’t know if Prince would get to that in a few more rounds of play because thanks to Oscar’s excessive enthusiasm, the toy did not last long enough. A moment of silence. Please and thank you.

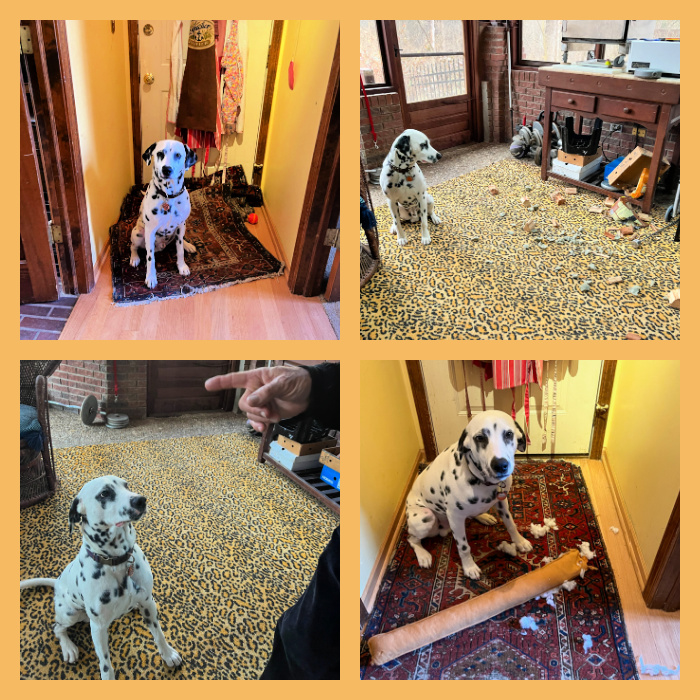
The fierce pup has a strange adoration for shoes….

Incredible resilience in tug-of-war games….

And the uncanny ability to generate chaos in all areas of our home, aka His Kingdom…
.

Well, Osky… The Annoying One has quite a few things going for him…

He is very liberal with his hugs and kisses…

He enjoys watching the shows we love….

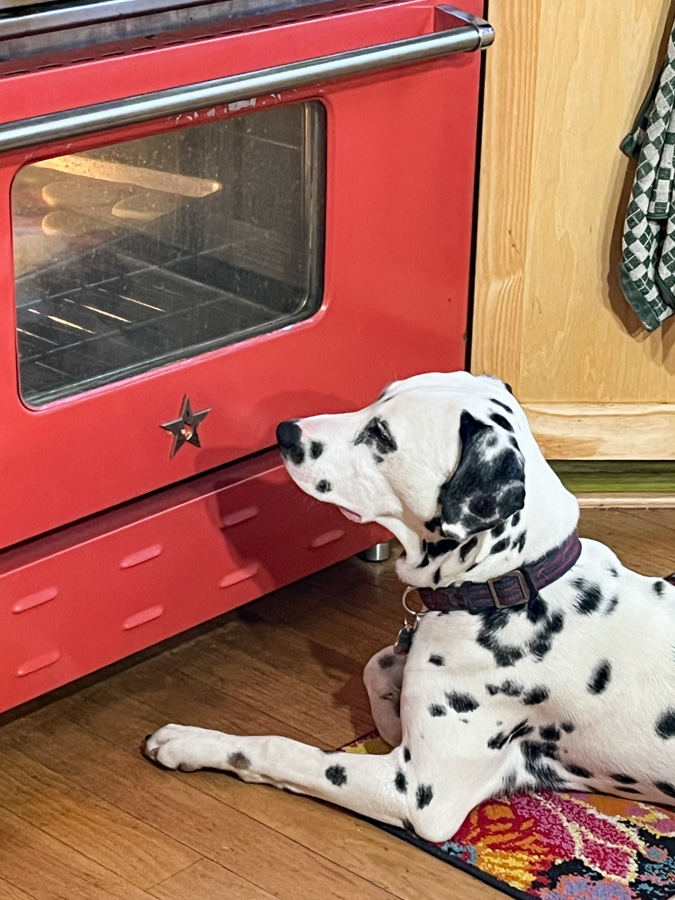
He is a great help with my baking…
.

Tries hard to keep up with his parent’s day job!

.

And look how amazing he is at the golf course!

Finally, who could possibly resist those head tilts?

All things considered, we think you can learn to live with His Royal Annoyance…
There is room and love for everybody in this kingdom…

.

I close this post with a little call from the past. We miss them. We are glad they were part of our pack, but we do miss them still. They were special in so many ways. I could never quite put into words my bond with Buck. I guess it will stay like that. Something only me and that little being were fully aware of. And BogeyQT. How could we ever forget him?

.

That’s all for now, folks! We’ll be back for the Summer chapter of In Prince’s Kingdom!

.

ONE YEAR AGO: In My Kitchen, April 2022

TWO YEARS AGO: In My Kitchen, April 2021

THREE YEARS AGO: In My Kitchen, April 2020

FOUR YEARS AGO:  In My Kitchen, April 2019

FIVE YEARS AGO: In My Kitchen, April 2018

SIX YEARS AGO: First Monday Favorite

SEVEN YEARS AGO: In My Kitchen, April 2016

EIGHT YEARS AGO: Spring has Sprung with Suzanne Goin

NINE YEARS AGO: Chai Brownies

TEN YEARS AGO: Pomegranate-Molasses Glazed Carrots

ELEVEN YEARS AGO: Braised Brisket with Bourbon-Peach Glaze

TWELVE YEARS AGO: The Real Vodka Sauce

THIRTEEN YEARS AGO: Spring Rolls on a Spring Day

BLOOD ORANGE & CRANBERRY MINI-CAKES

Some say these would be more appropriate for winter, but I will respectfully disagree… too adorable to restrict to a single season… Very easy to make, the mini format is impossible to resist.

BLOOD ORANGE AND CRANBERRY MINI-CAKES
(adpated from several sources)

for the mini-cakes:
130g all-purpose flour
1 tsp baking powder
1/4 tsp salt
57g butter, softened (4 tablespoons)  tablespoons
100g granulated sugar
1 egg
1 Tablespoon blood orange zest
1/2 cup milk
1/3 cup dried cranberries, cut in pieces 

for the icing:
1 cup powdered sugar
2 Tablespoons blood orange juice
sprinkles

Heat oven to 325F.

Mix flour, baking powder and salt in a medium bowl. Reserve. 

Cream the butter with sugar in a KitchenAid type mixer. Add egg and zest. Add 1/3 flour mixture, half of the milk, 1/3 flour, the rest of the milk, and end with the final third of the flour. Mix well to incorporate. Fold the cranberries, add batter to mini-cake pan, bake for about 13 minutes, until toothpick comes out clean.

Cool for  minutes in pan,  and invert on a rack. Make the icing by whisking all ingredients, if you want stronger color, add  a tiny drop of pink food gel. Cover cooled cakes with icing, add sprinkles while still wet. 

ENJOY!

to print the recipe, click here

Comments: These are soft, sweet and tangy at the same time. Two little bites of heaven, covered with the blood orange icing that, together with sprinkles make them all so festive. I suppose you could use raisins instead, but cranberries are perfect in this setting.

ONE YEAR AGO: Simnel Cupcakes

TWO YEARS AGO: Oat and Sesame Seed Sourdough

THREE YEARS AGO: Moroccan Turkey Pie with Olive Oil Crust

FOUR YEARS AGO: Another Twisted Sister of the Shepherd’s Pie 

FIVE YEARS AGO: Cashew Chicken, My Way

SIX YEARS AGO: Two Deliciously Simple Salads

SEVEN YEARS AGO: In My Kitchen, April 2016

EIGHT YEARS AGO: Spring has Sprung with Suzanne Goin

NINE YEARS AGO: Chai Brownies

TEN YEARS AGO: Pomegranate-Molasses Glazed Carrots

ELEVEN YEARS AGO: Braised Brisket with Bourbon-Peach Glaze

TWELVE YEARS AGO: The Real Vodka Sauce

THIRTEEN YEARS AGO: Spring Rolls on a Spring Day

ALMOND FLOUR SOURDOUGH

No, this is not a gluten-free bread, it is a regular sourdough with a small amount of almond flour (natural kind, with skin on during processing). You won’t be able to tell exactly what is in it, but the almond gives it a nice flavor component.

ALMOND FLOUR SOURDOUGH
(from The Bewitching Kitchen)

470g bread flour
30g almond flour
20g spelt flour
10g salt
365g water
80g sourdough starter at 100% hydration
tapioca flour for dusting dough

Make the levain mixture about 6 hours before you plan to mix the dough. It should be very bubbly and active.

When you are ready to make the final dough, place the water in the bowl of a KitchenAid type mixer and dissolve the starter in it, mixing with a spatula briefly, then add the three types of flour, and the salt. Turn the mixer on with the hook attachment and knead the dough for 4 minutes at low-speed all the time. If the dough is too sticky, add 1/4 cup bread flour, you want the dough to start clearing the sides of the bowl, but still be sticky at the bottom.

Remove from the machine, and transfer to a container lightly coated with oil, cover lightly with plastic wrap and allow it to ferment for 4 hours, folding every 45 minutes or so. After four hours bulk fermentation, shape the dough as a ball, and place, seam side up, in a lightly floured banetton. Leave at room temperature one hour, and then place in the fridge overnight, from 8 to 12 hours.

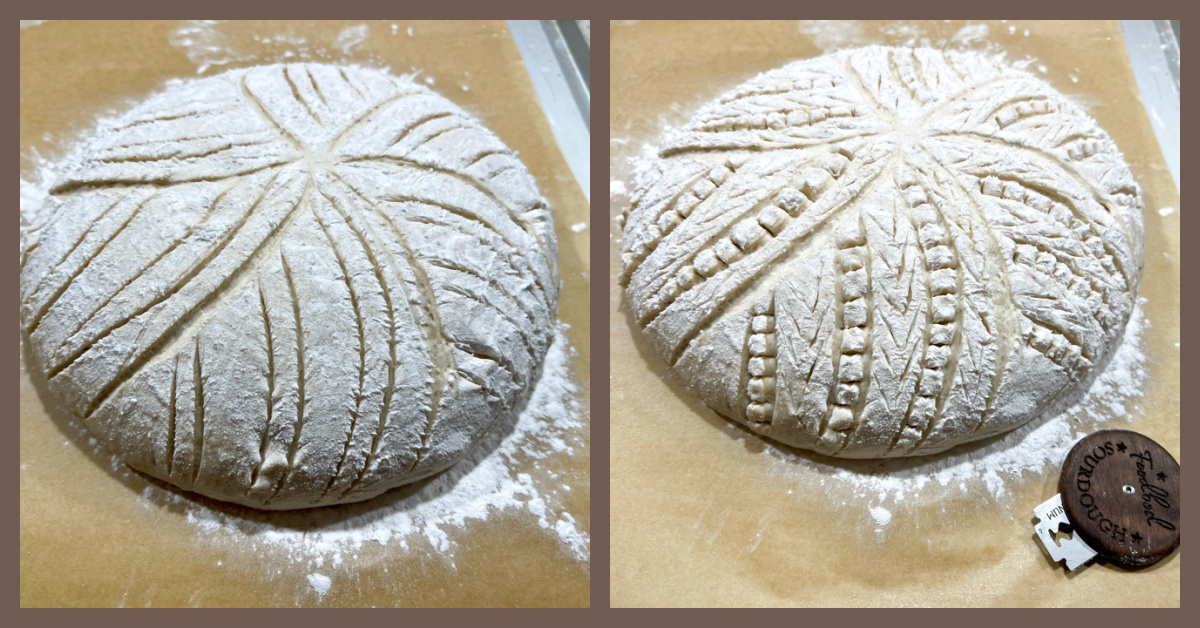
Next morning, heat the oven to 450F. Invert the dough over parchment paper, dust with tapioca flour and slash with a new razor blade, in any pattern you like.

Bake at 450F for 45 minutes, preferably covered for the first 30 minutes to retain steam. Cool completely over a rack before slicing.

ENJOY!

to print the recipe, click here

Comments: I went a little blade-crazy with the scoring, using my new blade, this beauty with the logo of my dear friend Elaine, Foodbod Sourdough. Click here to get yours. The square cuts I made with small scissors, the same I use for cutting piping tips, very small blade.

A delicious bread, with a slightly softer crumb, as the almond flour contributes some fat and helps retain moisture.

ONE YEAR AGO: Grilled Romaine Lettuce with Tahini Dressing and Chickpeas

TWO YEARS AGO: Asparagus and Snow Peas with Walnut Crumbs

THREE YEARS AGO: Yin and Yang Viennoise Bread

FOUR YEARS AGO: Extreme Chocolate Cupcakes

FIVE YEARS AGO: Sunflower Seed Kamut Sourdough

SIX YEARS AGO: The Joys of Grating Squash

SEVEN YEARS AGO: Auberge Pecan-Walnut Bread

EIGHT YEARS AGO:Gluten-free and Vegan Raspberry Bars
.

NINE YEARS AGO:Lasserre, a French Classic
.
TEN YEARS AGO:Sourdough Bread with Walnuts and Dates
.
ELEVEN YEARS AGO:Braised Brisket with Bourbon-Apricot Glaze
.
TWELVE YEARS AGO: The Real Vodka Sauce
.
THIRTEEN YEARS AGO:Pork Tenderloin and Blue Cheese

CHOCOLATE-COVERED OREOS

I am slightly obsessed with these. So. Many. Possibilities. I will have to disappoint the purists, though. I do not use high-quality chocolate to make them, I go with compound chocolate. Go ahead, twist your nose, but I have to be mindful of my baking budget. Feel free to splurge and temper chocolate if you prefer.


To make them you will need the appropriate molds. Go to online sources such as amazon or etsy and search for molds for chocolate covered Oreos. I will share links to the specific ones I used, but there are countless possibilities out there. Then, you need your choice of dark or white compound chocolate (about 250g for a mold of 6 cookies). A touch of coconut oil, maybe 1 teaspoon. And the items to decorate: oil-soluble food dye, luster powder, or chocolate transfer sheets.

.

VERSION #1

CHERRY BLOSSOMS ON WHITE CHOCOLATE

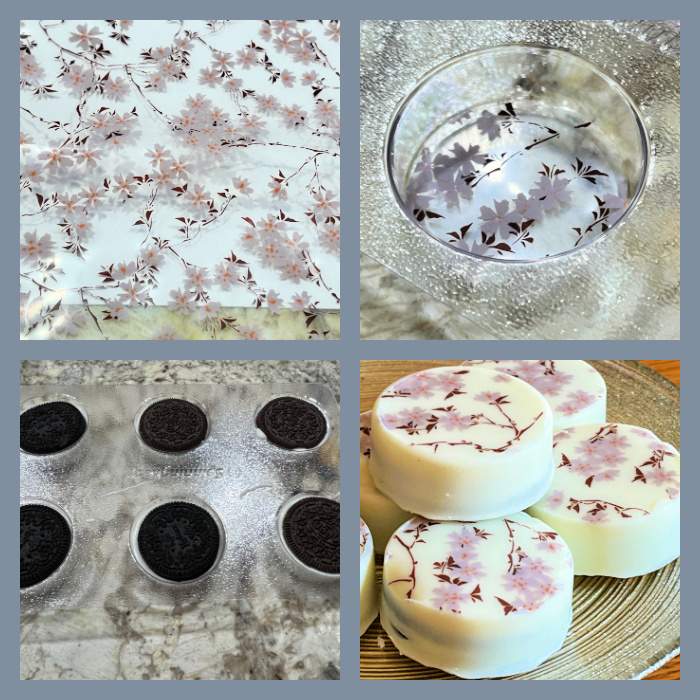
Mold used can be found here. To decorate this set, I used chocolate transfer sheets that I bought a couple of years ago (!!!!). Simply cut them to fit the bottom of the mold, making sure the transfer motif is up, so it will be in contact with the warm chocolate. Pour the melted white chocolate and pour about halfway up. Place an Oreo cookie inside, and add chocolate to cover. Tap a little bit to force air bubbles up, smooth the top (which will be the bottom of the enrobed cookie), and refrigerate for 30 minutes. You can also freeze for about 10 minutes. They should come out very easily.

.

.

VERSION #2

DARK CHOCOLATE ON FLOWER MOLD

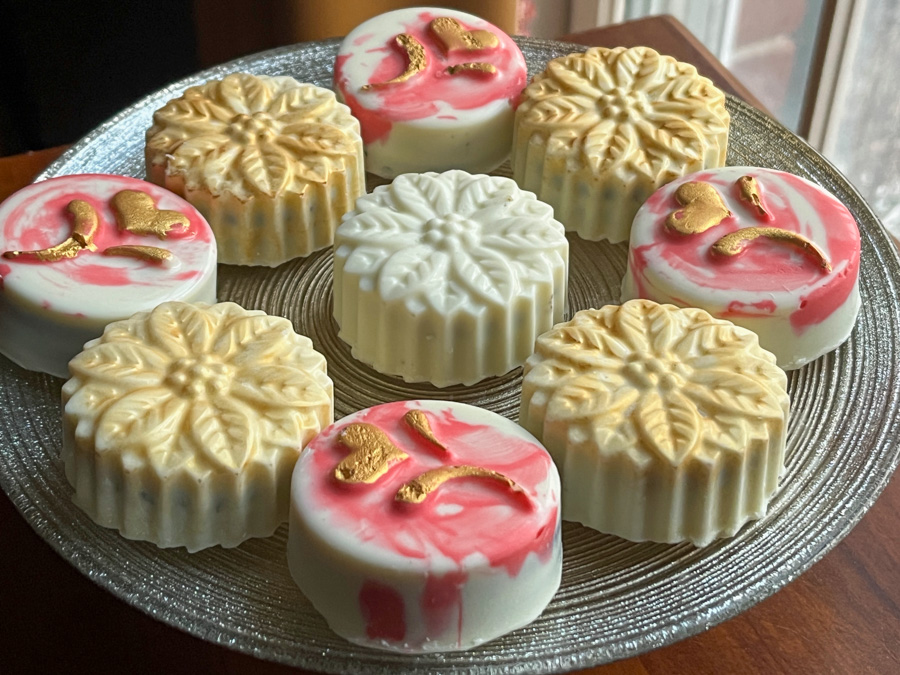
Mold used for this set can be found here. Same method as the previous one, except that the gold decoration was achieved by painting the bottom of the mold with luster powder (as a powder, no vodka needed). A little bit goes a long way, next time I will use less. They also look nice left plain.

.

VERSION #3

WHITE CHOCOLATE WITH PINK AND GOLD

For the molds, follow this and this link. A small portion of melted chocolate-coconut oil was dyed with fat-soluble red dye (a very small amount, to get a pink tone), and used to paint the bottom of the mold. Then the rest of the melted chocolate was poured normally on top, cookie added, and topped to close with more chocolate. Details with gold were painted after unfolding. The White poinsettias were dusted with dry gold powder, the heart was painted with gold + vodka.

Since there is not need to temper chocolate, these are incredibly easy and quick to make. You can make a batch of 6 or 12 in 45 minutes, including cooling time. They would be a ton of fun to make with kids too, so consider that option for a fun weekend…

.

ONE YEAR AGO: Pan-Steamed Broccoli with Miso Vinaigrette

TWO YEARS AGO: Cookies and Rubber Stamps

THREE YEARS AGO: Macarons for all Seasons and Reasons

FOUR YEARS AGO: Lentils and Radicchio? Yes, please!

FIVE YEAR AGO: Tres Leches Cake

SIX YEARS AGO: The Joys of Grating Squash

SEVEN YEARS AGO: Auberge-Pecan Walnut Bread

EIGHT YEARS AGO: Gluten-free and Vegan Raspberry Bars

NINE YEARS AGO: Lasserre, a French Classic

TEN YEARS AGO: Sourdough Bread with Walnuts and Dates

ELEVEN YEARS AGO: Braised Brisket with Bourbon-Apricot Glaze

TWELVE YEARS AGO: The Real Vodka Sauce

THIRTEEN YEARS AGO: Pork Tenderloin and Blue Cheese

AIR-FRYER CORN RIBS

Note added after publication: I now tried the air-frying with whole corn cobs, and it worked great also! So if you are afraid to cut the cobs (I don’t blame you), go ahead and try it this way. I rubbed the cobs with the seasoned oil, placed at 390F for 16 minutes, turning them around every once in a while. Perfect! Not as cute as the ribs, but definitely safer.


Apparently this recipe went viral on TikTok. I can understand why – it is unusual, cute, and dangerously addictive. However, in my humble opinion, the videos showing how they prep the corn are misleading. It is a dangerous maneuver, and not at all easy to do. I modified the technique by microwaving the corn before cutting it into “ribs”. It did not harm the final product and made a very tricky step a little more user-friendly.

AIR-FRYER CORN RIBS
(adapted from several online sources)

3 ears of corn
1/4 cup olive oil
1 tsp Southwest spices
1/4 tsp smoked paprika
salt to taste
squirt of lemon juice
grated Parmigiano to serve

Wrap the corn cobs in plastic wrap and microwave for 5 minutes. Allow it to cool until you can handle.

Cut the corn cob lengthwise in ribs – you will still need a large knife and maybe use something to bang on the top of it to make it slice through. I have a lower-quality knife with a large blade that can take that abuse.

Whisk the oil, spices and lemon juice in a small bowl, then drizzle all over the ribs of corn in a large bowl. Make sure to rub the mixture well. Place in the air-fryer and set at 400F (or as high as your machine will go) for 10 minutes, moving them around half-way through frying time. Season with more salt if you like, and sprinkle cheese on top.

ENJOY!

to print the recipe, click here

Comments: This is a real keeper of a recipe! The corn gets a perfect texture, and you can vary the spice mix to take it in any direction you like. Many versions will serve it with a sauce, often mayo-based, but we liked it plain. I don’t think you can pull the exact same quality without the air-fryer, but maybe if you roast it at 450F it might get close. Super delicious. Trust me. Prepping the corn is not fun but once you bite into these little morsels you will feel it was all worth it.

I cannot express how much I love them! I ate four, and went back for two more, which was pretty much half the amount prepared. We had no leftovers. I don’t think I ever consumed as much corn in a single sitting. Plus, I smiled and oohed and aaahed all the way through it.

ONE YEAR AGO: Lemony Chicken Thighs with Artichokes and Olives

TWO YEARS AGO: Farari Bateta

THREE YEARS AGO: Covid-19, Keeping yourself safe

FOUR YEARS AGO: Carrot Cake Macarons

FIVE YEARS AGO: Soup Saturday: Say Goodbye to Winter

SIX YEARS AGO: Manchego and Poblano Soup

SEVEN YEARS AGO: A Smashing Pair

EIGHT YEARS AGO: Spinach and Mushroom Stuffed Pork Tenderloin

NINE YEARS AGO: Crispy Chickpea and Caper Spaghetti

TEN YEARS AGO: Spring has Sprung!

ELEVEN YEARS AGO: Chickpea and Fire Roasted Tomato Soup

TWELVE YEARS AGO: Double Asparagus Delight

THIRTEEN YEARS AGO:  Sun-dried Tomato and Feta Cheese Torte