HAZELNUT BLUE CHEESE SOURDOUGH

I am very excited about this bread, because I came up with the formula myself. Well, that is not completely true, as we all follow the footsteps of more experienced folks. Sometimes a dear Grandma, a favorite cookbook author or celebrity chef (excuse me while I try to control my eye roll, the word celebrity does that to me. Every. Single. Time). Back to the bread in question. I had hazelnuts in my mind and thought they would be wonderful added to a rustic sourdough bread. I also had a small amount of blue cheese in the fridge (Bleu d’Auvergne, to be precise), and decided that they could interact nicely with the hazelnuts in the bread environment.  I used a very basic recipe that did not need any special type of starter.  A little spelt flour for added pizzazz. And there you have it, a sourdough bread to call my own. But I would be thrilled if you make it in your kitchen too…

Hazelnut Blue Cheese Sourdough
HAZELNUT BLUE CHEESE SOURDOUGH
(from the Bewitching Kitchen)

125 g  sourdough starter (at 100% hydration)
250 g water, warm to the touch
300 g bread flour
75 g spelt flour
7 g salt
60 g roasted hazelnuts, chopped in large pieces
50 g blue cheese (I used Bleu d’Auvergne)

Add the active starter to a large bowl, mix it with the water until it dissolves more or less smoothly. Add the flours and briefly do a few kneading moves to form a shaggy mess.  Cover loosely with plastic wrap for 30 minutes.

Sprinkle the salt over the dough and incorporate by kneading lightly and folding the dough on itself.  You can keep the dough in the bowl, or transfer to a surface.  After 20-30 seconds of kneading/folding, cover the dough again and let it sit for 40 minutes.

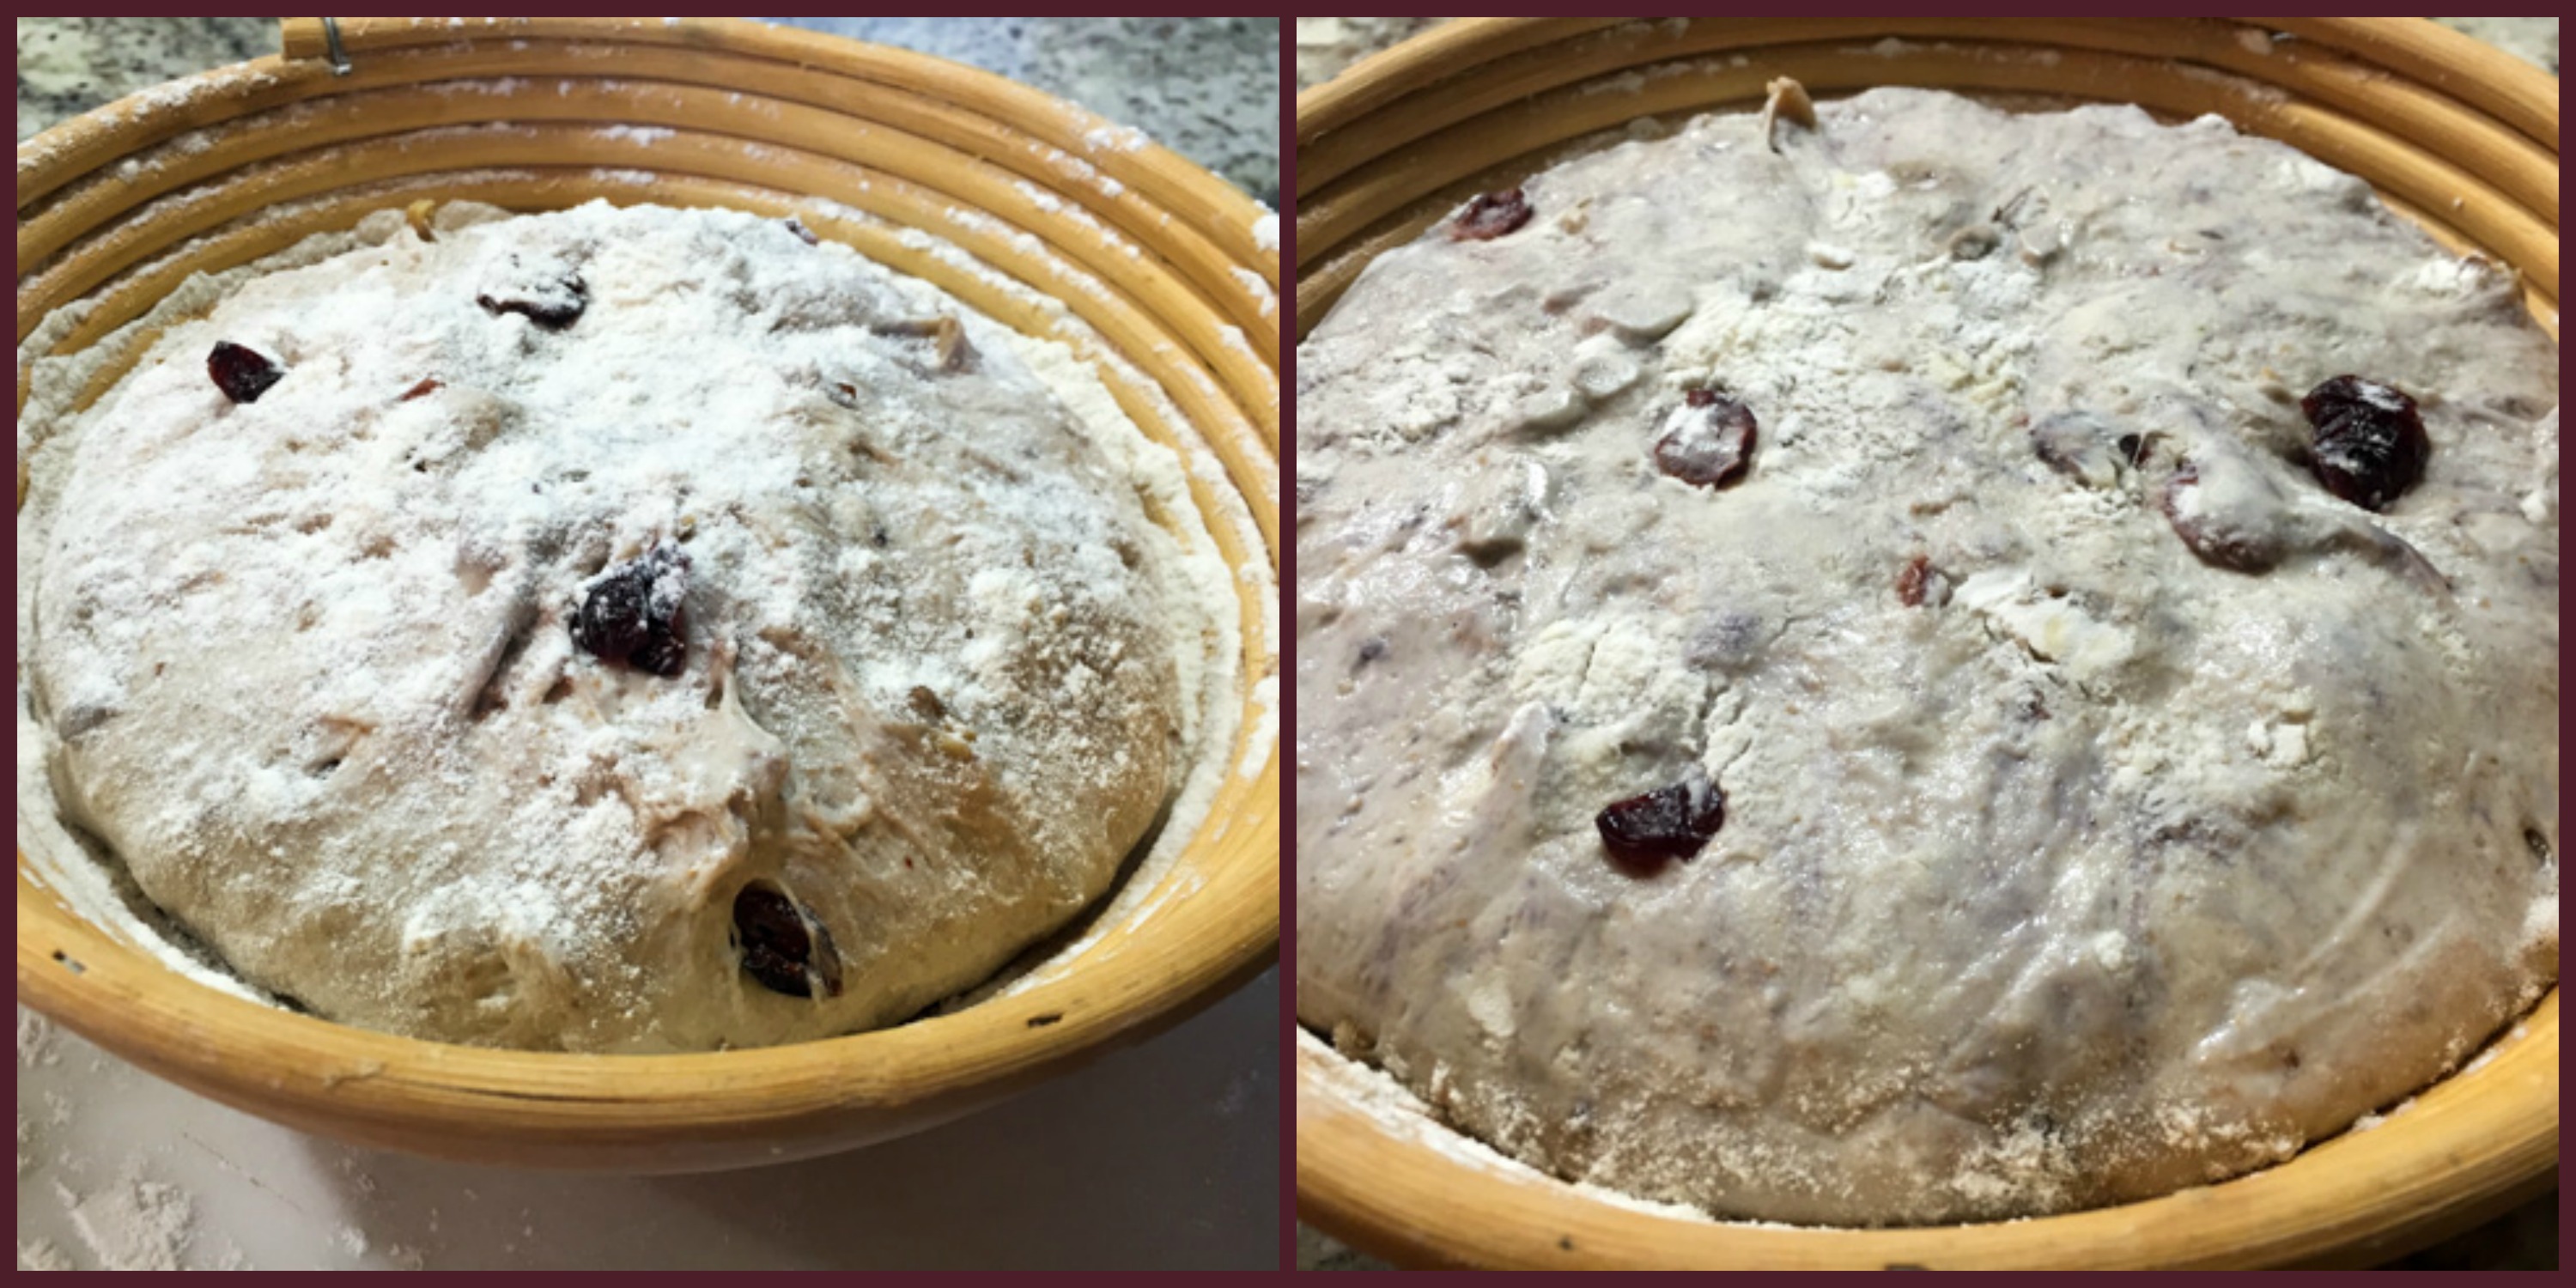
Add the hazelnuts and blue cheese to the dough and repeat cycles of quick kneading/folding two more times, spacing them by 45 minutes.   If the dough doesn’t seem to have enough strength, incorporate one more cycle of folding. After the final kneading cycle, let the dough sit for 20 to 30 minutes, shape it as a round or oval loaf, place it in a banneton with the seam side up and leave it at room temperature  30 minutes longer. Place it in the fridge overnight, lightly covered with a plastic wrap (oil the surface that will be in contact with the dough).

Remove the dough from the fridge 1 hour before baking, while the oven heats to 450 F. If using a Dutch oven, place it in the cold oven as you turn it on. Invert the bread out of the banneton (the easiest way to do it is over a parchment paper on a flat baking sheet), quickly slash it and place it in the Dutch oven. To generate steam, cover the pan with the lid that you rinsed under the sink, allowing some water to be retained on the surface. Bake the bread covered for 30 minutes, remove cover, and allow it to fully bake (reducing the temperature to 425F if the bread seems to be browning too fast) for about 15 minutes longer.  Remove to a rack to cool completely before slicing.

ENJOY!

to print the recipe, click here

compositehazelnut
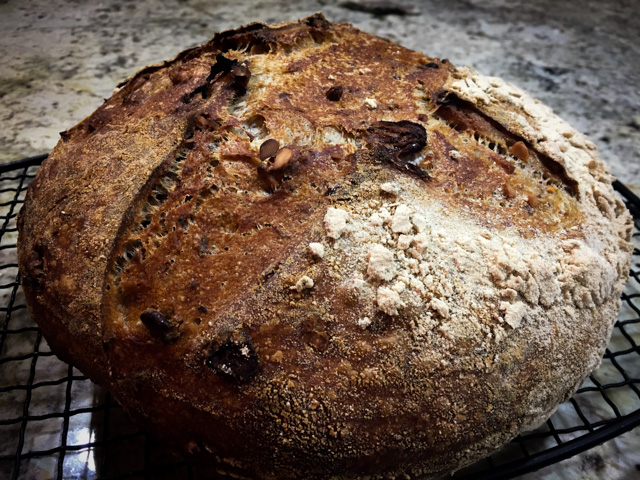
Comments:  The blue cheese I used was quite strong, and until I tasted a slice of this bread I was quite worried. The smell as it baked was so intense, I thought that adding the cheese was overkill. Well, I was wrong. No need to worry at all. The cheese pretty much melted throughout the crumb, and gave it sort of background of flavor, almost smoky, although it could be the roasted hazelnuts speaking. Hard to tell. I love the way the crumb delicately involved each piece of nut, like little eggs in a nest.  And the taste? Incredible. I had to pat myself in the back for this bread, even if my parents insisted that modesty is one of the most important qualities of a human being. A pat in the back is not that bad, right? It’s  not as if I’m bragging to the world about it… what? Is that what blogging is about?  But, but, but… will you look at this crumb?

CrumbShot2

If that’s not a pat-in-the-back crumb, I don’t know what is… 

ONE YEAR AGO: My First Truffle Adventure: Poulet Demi-Deuil

TWO YEARS AGO: My Rio de Janeiro: A Cookbook Review

THREE YEARS AGO: Hearts of Palm Salad with Cilantro Vinaigrette

FOUR YEARS AGO: Watercress Salad

FIVE YEARS AGO: Curried Zucchini Soup

SIX YEARS AGO: Chocolate Bread

INDIAN SPICED CHICKEN WITH CHICKPEAS AND SPINACH

Another great recipe using my beloved pressure cooker, but no need to run away if you don’t own one, the original method (found here)  uses a regular pan.  We’ve been so busy lately (by lately I guess I mean a few years in a row…)  that shortcuts to get dinner at the table faster are more than welcome. As long as they don’t compromise flavor. No need to worry about it in this recipe, flavorful is one adjective that comes to mind to describe it.

Chicken Curry Spinach


INDIAN SPICED CHICKEN WITH CHICKPEAS AND SPINACH
(adapted from Bon Appetit)

1 tablespoon vegetable oil (I used grape seed oil)
6 boneless, skinless chicken thighs
Kosher salt
1 tablespoon unsalted butter
1 large shallot, thinly sliced
1 + 1/2 tablespoons grated ginger
2 teaspoons ground coriander
1 teaspoon ground cumin
1 teaspoon ground turmeric
1/4 teaspoon cayenne pepper
1 15-ounce can chickpeas, rinsed
1 cups chicken broth
5 ounces baby spinach
1/4 cup Greek yogurt
1/4 cup cilantro leaves, coarsely chopped (optional)

Heat oil in a large heavy pot over medium-high heat or in your pressure cooker. Season chicken with salt. Working in batches, cook chicken, reducing heat as needed to prevent over-browning, until golden brown on all side.Transfer to a plate.

Add butter and shallot to drippings in pot; season with salt. Cook, stirring often, until soft and fragrant. Stir in ginger, coriander, cumin, turmeric, and cayenne. Cook, stirring constantly, until spices are fragrant, about 1 minute. Stir in chickpeas and chicken broth. Return chicken and any accumulated juices to pot. Bring to a simmer. Cover pot and either braise it in a 325 F oven for about 50 minutes, or cook under pressure for 15 minutes.

Quickly release the steam (or place the closed pan under running cold water in the sink), and when the pressure equalizes open the pan. Return the pan to the stove, add the spinach and simmer for a couple of minutes until wilted. Stir yogurt into cooking liquid, mix gently and serve right away, sprinkled with fresh cilantro, if you like.

ENJOY!

to print the recipe, click here

served

Comments:  I absolutely love the way pressure cooking intensifies the flavors of a sauce, and this one with all the warm spices and the chickpeas turned out quite spectacular indeed. The recipe made so much sauce that even after leftovers were enjoyed at lunch, a little sauce remained. I went at it with a spoon on day 3. Yeah, that good.  And, of course the time-saving aspect is hard to be neglected…

Screen Shot 2016-02-28 at 1.02.19 PM

This recipe could be served quite simply with a slice of naan bread, but I opted for cauli-rice and some snow peas sautéed in olive oil and a little mint. We ate like the King and the Queen… except for the fact that we did the dishes afterwards. I doubt royalty deals with such mundane issues. Their loss. Doing dishes can be a lot of fun. All you need is the right music in the background…

😉


ONE YEAR AGO: Curry Cardamon Cookies

TWO YEARS AGO: In My Kitchen, March 2014

THREE YEARS AGO: Boeuf Bourguignon for a Snowy Evening

FOUR YEARS AGO: Chickpea Salad

FIVE YEARS AGO: Soft Spot for Chevre

SIX YEARS AGO: Roasted Onion and Asiago Cheese Miche

CREAMY BROCCOLI AND MUSHROOM CASSEROLE

One more time I am sharing a recipe from the super athlete Mike, who runs the blog The Iron You. For those who like to experiment with a lower carb or Paleo nutrition, eggs are a fundamental ingredient. Great source of protein and fat, they are so versatile: you can make a nice omelette, frittatas, egg muffins, egg bakes, adding all sorts of ingredients from meats to veggies. I eat a lot of eggs each week for lunch, usually sunny side up or scrambled, sometimes hard-boiled, but at dinner time I opt for more elaborate uses, souffle’ being a favorite when I don’t mind splurging a little.  This casserole is quite low in carbs, but feels like splurging. Satisfying without making you feel uncomfortably stuffed. Perfect side dish, if you ask me…

Broccoli Casserole1

CREAMY BROCCOLI AND MUSHROOM CASSEROLE
(slightly modified from The Iron You)

1 ½ pounds broccoli florets
2 tablespoons coconut oil
1 medium shallot, thinly sliced
1 celery stalk, finely diced
1 pound white button mushrooms, sliced
1 teaspoon dried thyme
1 teaspoon fine grain salt
½ teaspoon sweet paprika
¼ teaspoon ground black pepper
⅛ teaspoon red pepper flakes
4 eggs, at room temperature
1 cup full fat coconut milk

Heat oven to 350°F  and place a rack in the middle. Grease a 9×13 baking dish with olive oil.
Place an inch of water in a saucepan with a steamer and bring to a boil. Steam the broccoli for 5 minutes, until tender but still firm. Remove from the heat and let cool.

While the broccoli cools, melt coconut oil in a large skillet over medium-high heat, add the shallot and celery and sauté until translucent and fragrant, about 5 minutes.   Add mushrooms, thyme, salt, paprika, black pepper, and red pepper flakes. Sauté until mushrooms have browned a bit, about 8 minutes.

When broccoli florets have cooled down a little bit, chop the larger ones into bite-sized pieces. Add broccoli to the skillet and gently stir until combined. Pour the broccoli-mushroom mixture into the prepared baking dish. In a bowl whisk eggs with coconut milk and pour over broccoli mixture. Bake for 45 to 50 minutes until golden-brown.

ENJOY!

to print the recipe, click here

Comments: If you google recipes for low-carb egg bakes or egg muffins, you’ll end up with thousands of hits to choose from. For the most part, they can be divided in two categories: those that use just eggs to bind the ingredients, and those that rely on dairy (quite often heavy cream).  I am not too fond of recipes that use only eggs because they end up with a rubbery texture I don’t care for. As to the ones loaded with heavy cream, they feel overly rich for my taste. This recipe solves both problems, the texture is perfect, and it has just the right amount of naughty…   We enjoyed it back in December, actually.  Obviously, it’s taking me a while to share,  but the weather is still appropriate for casseroles. Make it and you will fall in love with it too. You can add different veggies, in fact soon I intend to try a version using carrots and zucchini. I might even get my spiralizer out just for fun, and a bit of added naughty.

Mike, thanks for all the great dishes you blog about, two thumbs up for this one!

ONE YEAR AGO: Maple Walnut Biscotti

TWO YEARS AGO: Barley Risotto with Peas

THREE YEARS AGO: Oatmeal Fudge Bars

FOUR YEARS AGO: Cauliflower Steaks

FIVE YEARS AGO: Soft Spot for Chevre

SIX YEARS AGO: Quick sun-dried Tomato Crostini

ASIAN STYLE SHORT RIBS

Vegetarians & vegans, avert your eyes!

This is a post for those who appreciate indulging in beef in all its glory, and we are part of this team. We need to have our beef-fix at least once a week, and do so with gusto… I was a bit surprised when I realized that this recipe from Fine Cooking was not in the blog, because I’ve been making it for years, ever since it was published in the magazine back in 2003.  It is so simple to make, the only work involved is browning the ribs, but once you are done with that, it is cake. Actually it is braise. Three hours of the oven working for you, as the house smells better and better.  Star anise is probably the only ingredient you might not have in your pantry.  However, you should really get it because it turns this dish (and many others) into a complete winner. We enjoyed it on Valentine’s Day, which this year fell conveniently on a Sunday. Perfect day for this kind of cooking. I got started early in the morning, put the pan in the fridge so that the fat congealed to the surface, and skimmed most of it off before serving.  Comfort food by definition. If you are a beef lover, you must make this before winter is over (and typing these words made me get up and do a happy dance).

Asian Style Short Ribs2Steaming beauty…

ASIAN STYLE SHORT RIBS
(adapted from Fine Cooking magazine)

1 + 1/3 cups drained canned whole tomatoes, coarsely chopped
1/2 cup soy sauce
2/3 cup water
1/2 cup dry vermouth
2 tablespoons light brown sugar
4 whole star anise
6 to 6-1/2 pounds beef short ribs on the bone
Freshly ground black pepper
1-1/2 tablespoons vegetable oil; more as needed
1-inch piece fresh ginger, peeled and cut into 8 slices
6 large scallions (white and green parts), cut into 2-inch lengths

Position a rack in the center of the oven and heat the oven to 325°F. Put the tomatoes, 2/3 cup water, the soy sauce, vermouth, and brown sugar in a bowl and stir. Add the star anise.

Pat the short ribs dry with paper towels and season them with pepper. In a pot that’s large enough to hold all the ribs in no more than two layers, heat the oil over medium-high heat. Put as many ribs in the pot as will fit without crowding and brown them on all sides. Transfer to a platter. Brown the rest of the ribs, adding more oil if needed, and transfer to the platter.

Pour off the fat from the pan, reduce the heat to low, and add the ginger and scallions, stirring and pressing them against the pot, for 1 to 2 minutes to bring out their flavor. Return the ribs to the pot and pour the tomato and soy sauce mixture over them. Bring to a simmer and cover. Transfer the pot to the oven and braise the ribs, lifting and turning them about every half hour, until the meat is very tender and starts to fall off the bone when pulled with a fork, about 3 hours.

Transfer the ribs to a serving platter (or if you’re working ahead, transfer them to a baking dish; refrigerate, covered, when cool). Pick out and discard the ginger and star anise from the pot and pour the remaining sauce into a large, clear measuring cup. When the fat rises to the surface, after about 5 minutes, spoon it off and discard. If you’re working ahead, cool the sauce in the pot, refrigerate it, and skim the solid fat off the top. When it’s time to reheat the ribs, return them to the pot and heat gently in the oven.

Adjust seasoning, and serve.

ENJOY!

to print the recipe, click here

Asian Style Short Ribs

Comments: The picture above shows you what to look for at the end of braising. Bones almost completely exposed, and the meat begging to be pulled off, literally melting away from it. Fine Cooking says from 2.5 to 3 hours, I went for 3 full hours, then turned off the oven and left the pot inside for a little while, maybe 15 minutes more.  I did have to add a bit more water 2 hours into the braise, make sure you pay attention to that.

served2

The star anise gives this sauce a very unique and wonderful flavor. We thought this dish would feel comfy in a restaurant run by Thomas Keller. It was that great! Meat super tender, luscious sauce, perfect match for mashed potatoes (or any other root veggie puree). Of course, cauliflower mash or polenta would be amazing too.  A great option for entertaining, as you can make the whole thing a couple of days in advance, it will only get better as it sits in the fridge.  A rustic loaf of bread to soak up the fantastic sauce is recommended.

tenderHappiness on a fork!


ONE YEAR AGO:
Herbed Goat Cheese Souffles

TWO YEARS AGO: Barley Risotto with Peas

THREE YEARS AGO: Jammin’ Blueberry Sour Milk Pancakes

FOUR YEARS AGO: Scallops with Black Pasta in Orange Cream Sauce

FIVE YEARS AGO: Stir-fried Chicken with Creamed Corn

SIX YEARS AGO: Potato, Cheddar, and Chive Torpedo


WALNUT CRANBERRY SOURDOUGH BREAD

Not too long ago I shared with you The Best Sourdough Recipe, and in that post mentioned that a second bread from Maurizio’s site was undergoing fermentation. So, here I am to talk about that bread, probably one of the top ten best we’ve enjoyed in the Bewitching Kitchen. Considering how many loaves of bread I’ve baked through several years of blogging (almost seven, my friends), I wouldn’t take such a remark lightly…  Something about mixing a sweet and tart fruit with toasted walnuts, plus the complex flavor of the sourdough makes this loaf pretty spectacular.  It was superb with a nice Roquefort cheese, but toasted and enjoyed even without adornments it was a feast for the taste buds.

Cranberry Walnut Sourdough2

WALNUT CRANBERRY SOURDOUGH
(adapted from The Perfect Loaf blog)

for the liquid levain starter:
(make 12 hours before making the dough)
35 g liquid starter (at 100% hydration)
35 g whole wheat flour
35 g bread flour
70 g water

for the final dough:
400 g white bread flour
88 g whole wheat flour
12 g rye flour
440 g water at about 90 degrees F (divided, 400 g + 40 g)
10 g sea salt
100 g toasted walnuts, in pieces
70 g dried cranberries
125 g levain (made as above)

Build the liquid levain 10 to 12 hours before you want to make your final dough. Leave it at room temperature (around 72 F).

Next morning, mix flours and  400 g of water very well in a bowl and cover. Ensure all dry flour is hydrated. Leave it to autolyse for 1 hour.  Add the levain with the reserved water and hand-mix it into the dough until it is very well incorporated.  Leave it 30 minutes at room temperature, or if you have a proofer, set it to 78 F and keep the dough at this temperature all the way through. After 30 minutes, add the salt, and mix well.

After the salt is incorporated perform folds for about 2-3 minutes in the bowl. Grab under one side, pull up and over to the other side, then rotate the bowl a bit and repeat. Do this about 30 times or so (it goes fast and easy). At the end the dough should still be shaggy, but it will be a little more smooth and will slightly start to hold itself together more in the bowl. Now you are ready to start bulk fermentation.  If your home is at 78 to 82 F, bulk fermentation should last 4 hours.

During fermentation, do 4 to 5  sets of stretch and folds (I did five), adding the walnuts and cranberries on the second cycle of folding. Perform the first three foldings at 15 minute intervals, the remaining ones at 45 minute intervals then leave the dough to ferment for a full hour undisturbed.  If your dough is too “weak”, seeming to lack structure, add one extra cycle of folding, then leave the dough undisturbed for another hour.

Lightly shape the dough into a round, cover with inverted bowl or moist towel, and let rest for 20 minutes.  After 20 minutes remove the towel or bowl and let the dough rest 5 more minutes exposed to air. This step helps dry out the dough just a bit so it’s not too sticky during shaping.  Lightly flour the top of your dough rounds and flour the work surface. Shape into a batard or boule. Place in a banneton very well floured, leave it at room temperature for about 20 minutes, then retard in the refrigerator  for 15-16 hours.

Heat oven at 500ºF. Bake 20 minutes at 500ºF with steam, and an additional 25-35 minutes at 450ºF, until done to your liking. Cool completely on a rack before slicing.

ENJOY!

to print the recipe, click here

doughcollage

Comments: For a bread so heavy with goodies, the crumb turned out a lot more open than I expected. I decided to add one extra cycle of folding (for a total of five) because I felt the dough was asking for it. When the dough speaks to me, I listen.  This method of retarding the dough in the fridge overnight and baking early next morning is perfect. You can use this basic recipe and add other nuts, seeds, dried fruits, olives, just use it as a basic formula.  If your additions are heavy, wait for the second cycle of folding to incorporate them, because it will be easier.  The proportion of white, whole wheat and a touch of rye was perfect to our taste, I would not change it a bit.

Maurizio, thanks again for a great recipe!

crumb shot
ONE YEAR AGO: Ottolenghi in Brazil?

TWO YEARS AGO: Roasted Winter Vegetables with Miso-Lime Dressing

THREE YEARS AGO: 2012 Fitness Report: P90X2

FOUR YEARS AGO: Caramelized Bananas

FIVE YEARS AGO: Roasted Lemon Vinaigrette

SIX YEARS AGO: Whole Wheat Bread