HAPPY NEW YEAR IN MY KITCHEN!


I cannot think of a better way to start 2021 than inviting my readers for a virtual tour of our kitchen. In My Kitchen posts are hosted by Sherry, from  Sherry’s Pickings. At the end of this post you will find a link to jump to her site and see what everybody else is sharing this month. I join four times each year, with a new post on the first day of January, April, July and October.

Starting with gifts…

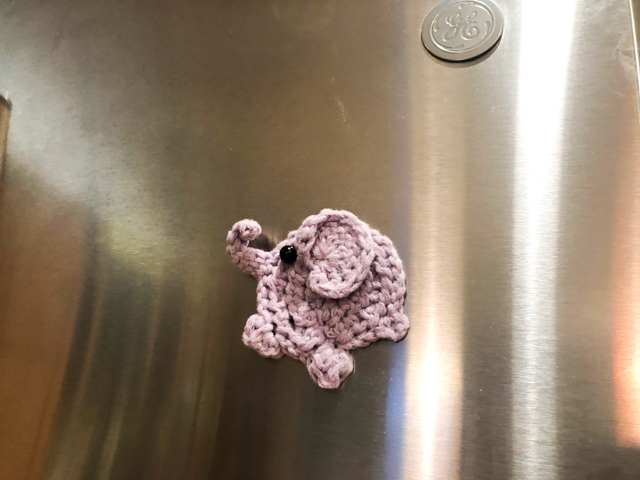
A little crocheted elephant with a magnet, super cute gift made and sent by my friend Jennifer, from California. Elephant is my favorite animal, and purple one of my favorite colors. She hit that one out of the park! Thank you!

From our graduate student, Taihao, a savory snack from China. Addictive to say the least. Dried green peas with a delicious mixture of spices.  It comes in a large bag with small portions that ensure the product stays fresh for a long time. I confess to finding unusual ways to enjoy it… like sprinkled over white rice with my dinner… 

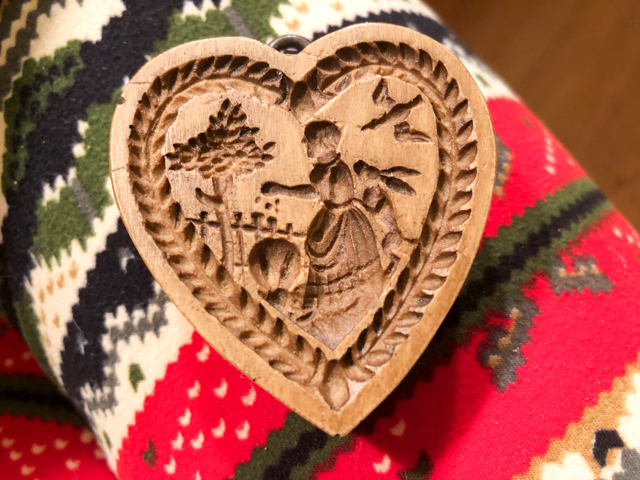
From Phil, a new Springerle mold! It is amazing how he was able to find a style I don’t have, when I’ve been accumulating quite a few over the past couple of years. Made by hand in Switzerland! I love it and cannot wait to mold some cookie dough into it. For the photo it is laying on my leggings, I thought that they happened to match the mold quite well… Serendipity at work…

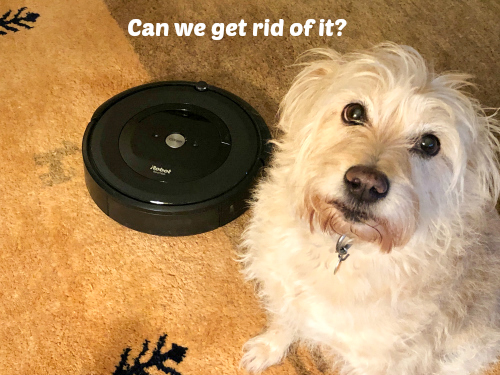
A new acquisition for our family, which is not exactly a kitchen gadget, but it does wonders on the kitchen floor…

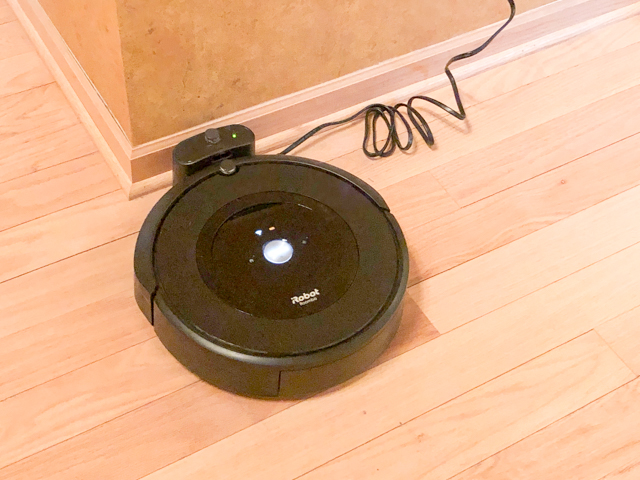
A Roomba vacuum! We used to have one of the first models many years ago in Oklahoma but ended up leaving it behind. It had too many little issues with steps and corners, and we did not feel it was worth the trouble. Well, the technology behind these newer models is nothing short of amazing… we are totally in love with it. It avoids steps, it goes back to charge when cleaning is done, and goes underneath all the furniture, which in itself is pretty awesome. We are still learning all the features, but I highly recommend it. Every single room of our house is spotless clean, including the basement. We release the roomba at night, one area at a time. HEAVEN! 

In our kitchen….

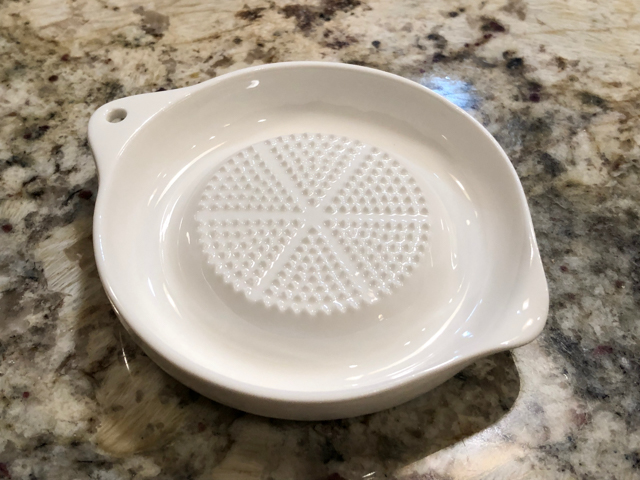
I am normally not too fond of a single-use gadget, but this is so great that I don’t want to be without it anymore. A ginger grater. It pretty much juices the ginger root into a nice pulp with zero effort. I love this baby!

In our kitchen….

A set of citric oils: lemon, orange and lime. These pack a ton of flavor, and are particularly nice to add to ganaches in bonbons and macaron fillings because all you need is a tiny amount. I learned about the oils in a cookbook dedicated to chocolate confections, but find myself using them quite often, even in salad dressings, or whisked into olive oil to dip a slice of sourdough bread.

In our kitchen….

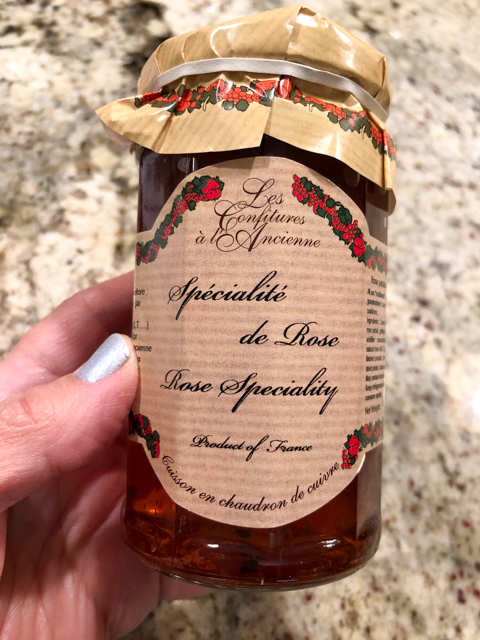
Rose Petal Jam… Stay tuned for this one, which will show up in a certain cookie of French origin. Rose, violet and lavender are strong flavors that need to be used with caution, but when you hit that right amount, they are heavenly, in my opinion.  I found it at Marshalls for a very nice price, but it is available on amazon.

In our kitchen….

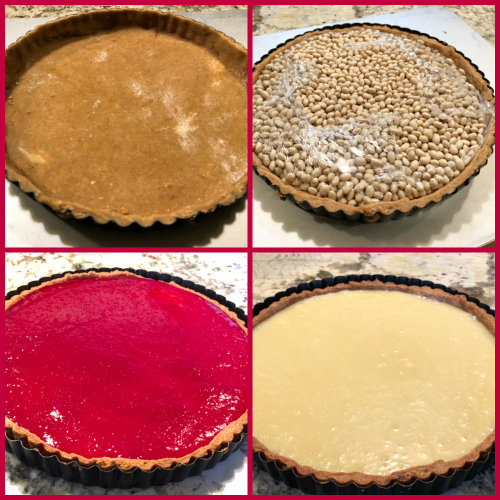
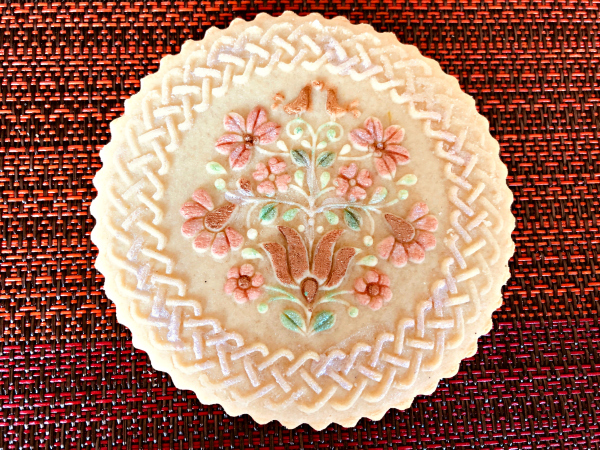
New wooden molds. The left one is traditional Springerle type, the right set (a double duty mold) is more appropriate for filled cookies, as they are very deep. Instead of rolling the dough and pressing the mold on it, you fill the mold with dough, press it in, fill, and add more dough to close the top (which will be then the bottom of the baked cookie). I have used the first mold to make White Chocolate Lime Molded Cookies…. The other mold is waiting patiently to play.


In our kitchen….

A very nice balsamic vinegar infused with blood orange. It is thick, and very delicious. Not only for savory uses like marinades, but also excellent in chocolate ganache.

In our kitchen….

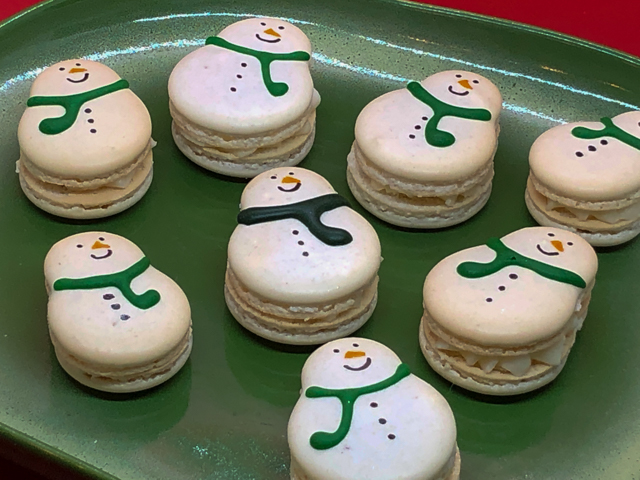
A tip for dealing with macarons that end up with a little bump in the center. If that happens to you, a Microplane can fix it, as you can see in the composite below.

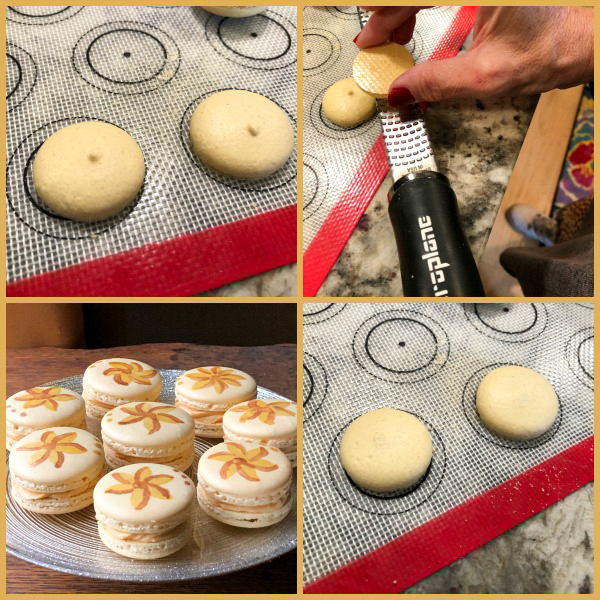
Just be gentle and work the blade until the bump is fully smooth. Although it will be good even if you serve the shells plain, a little decoration will hide all signs of your sneaky maneuver. 

In our kitchen….

As you may have noticed, I baked a lot of sugar cookies in December. They were sent to family members, friends, neighbors, and also shared in homeless meals. Three products related to cookie decoration are worth sharing. 

The black pearls by PME are excellent to use as eyes or buttons for decoration, as they do not “melt”  like other black products will do. By melting I mean release the color into the surrounding icing over time. Tulip Red is a red dye that does not have a sour taste. I had no idea but most red gel dyes have a taste that just like cilantro, some people are very sensitive to. If you are using red as a small detail on the cookie, no big deal, but if you are flooding a large extension of the cookie with red, consider getting this product.  Finally, my favorite of this trio: Diamond Dust from SugarArt. I love it so much!  You can buy already in a pump, it does wonders to cookies, like I showed you in my previous macaron post

You cannot select a portion of the cookie to be covered, it will stick even on dry icing, but it looks quite amazing with just a tiny spray. 

In our kitchen….

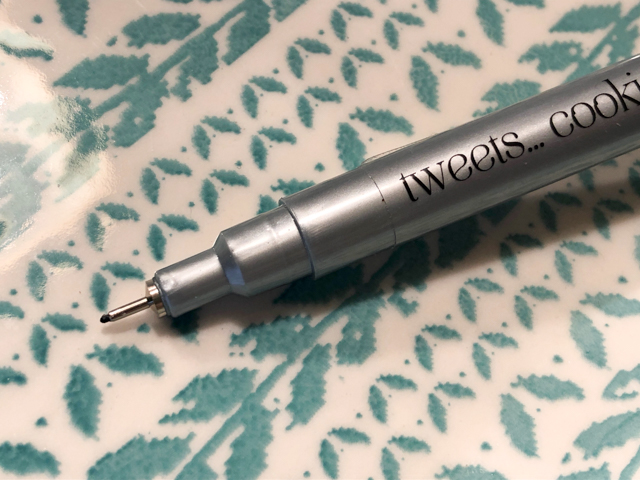
A super fine tip edible marker.  Another product I fell in love with, because for very delicate details, I am not skilled enough to work with royal icing.  One example is this little Santa I made last month.

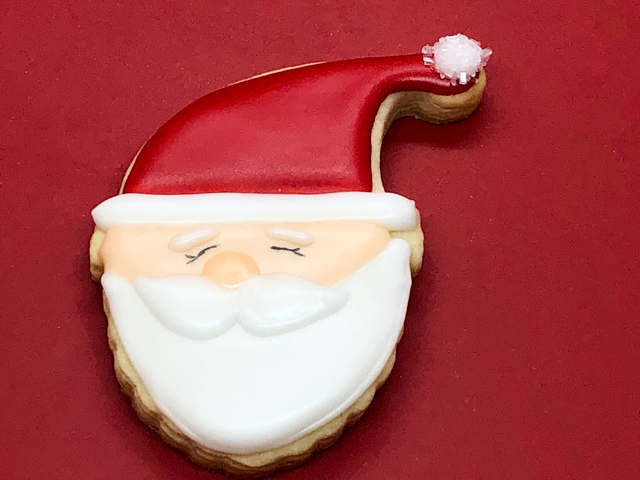
The eyes needed to be as thin and delicate as possible. Only that type of marker will do. 

In our kitchen….

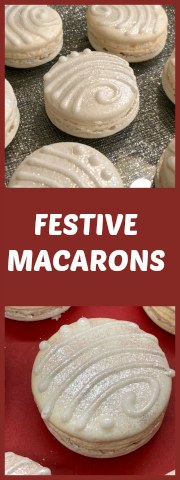
I use luster dust quite often, but this is different because it is water-soluble. From SweetSticks. You get a small bowl with water, wet the brush and swirl it around the surface. There is essentially no waste of product. And it does work quite well, as you can see in this little Christmas tree. 


In our kitchen….

This really is a life-changer gadget if you are into air-brushing: a Stencil Genie. Placing the stencil over a cookie and trying to steady it with one hand, spraying with the other, is simply a disaster waiting to happen. Plus, the edges of the design get all blurry. This simple plastic set shuts the stencil in place with magnets on the corners. You place it flat over the cookie and spray on. So clever and easy to use!  You can also see how I cover the surface of the countertop with plastic wrap, so that mess is kept at a minimum. Yes, there will be some waste of plastic, but the neat-freak in me prefers to live with that type of guilt. 

In our kitchen….

A feeble attempt at organizing my Sprinkle Entropy Corner. I label the tops so there is some hope of finding what I need. SS stands for Sanding Sugar. NP for Non-pareils. This is one box. It is not the only one. Enough said. Freud would have a blast with me.


So, that’s all for now, my friends.
New Year, New Rules.
The pups have had their share of fame in MY BLOG over the years,
and they’ve been putting on airs.
Enough is enough…..

Can they shame me in to it? How could they? Am I really that weak? 

Truth is, I have the unsettling feeling that if I remove them from these posts, my readership will drop to near zero. And they seem to know that too well (sigh). 

So what are these derelicts up to? 

Buck might be tremendously cute indeed, but he’s learned some nasty tricks from his bigger brother, the Black-Spotted-Capeless-Hero who attends by the name of BogeyQT. 

For many years he had never considered eating paper, but now we have to be very vigilant. Any piece of paper (or a big roll that finds itself on the floor) is immediately claimed and consumed. He did learn that from Bogey, but as a good student, he has definitely surpassed the teacher. 

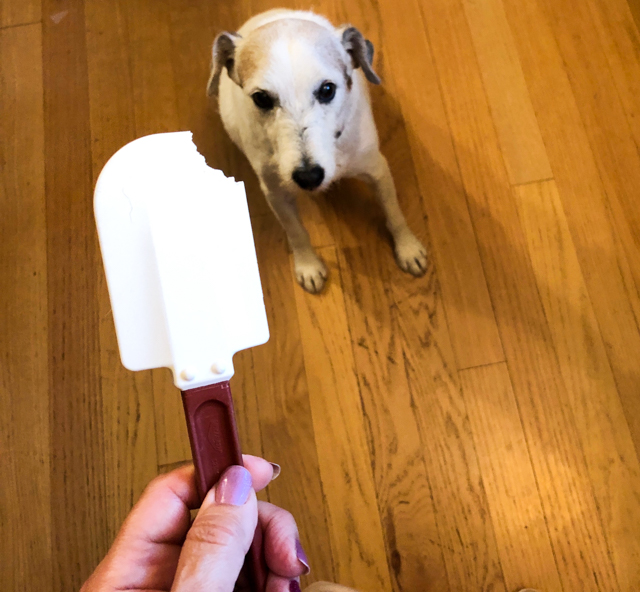
In fact, he now seems to think that ANYTHING found on the floor is a chewing toy. He’s ruined my wooden scoop a couple of months ago, and for this installment of IMK, he made sure to destroy my favorite silicone spatula, the one that was perfect for macaronage (sigh). 

I guess my point is proven. 

I suppose this picture captures the very essence of our Black-Spotted-Capeless-Hero. I should thank my friends Jill and Astrid for jointly coining the term, which I suppose fits him well. But the mere sound of a knife leaving the drawer, a plastic wrap being ripped open, a wooden board laying on the countertop will wake up the beast from the arms of Morpheus to assume his very important function in our home. 

He’s had his share of Karma last month.  Somehow he cut his back leg and needed to go see a vet, which in pandemic times is even worse than normal. Phil could not go into the building with him, the vet came to the car and took a very scared BogeyQT away. 

He got a lot of attention and loving care, and was nursed back to health.  

His brothers were a bit concerned that socks-on-paws would become a thing. 

From Oscar: Since we are on the subject of “no way”,  let me remind you of my stance on tortillas. I don’t care how carefully you pass them over a fire, it might be appealing to you, but it disgusts me. I hope it is the last time I need to endure this type of offering. 

And to prove that 2020 was a very odd year, events with close to zero probability materialized as reality. 


The bottomline is that the only one who has absolutely no issues with any type of food is Bucky Boy. We constantly fight to keep his weight down, as it will definitely help him live longer. Plus, he seems a bit self-conscious at times…

No, Buck. You are just stocky and strong and powerful and I love you to pieces!

That’s all for now, my friends!  We start the year with high hopes that things will improve all over our planet. We know that the first semester will be still pretty dark, but as people get vaccinated in larger and larger numbers, we should be able to turn this page and recover as a society. Let’s do our part, get the vaccine when is our turn, and help end lingering doubts about it.  For my views on vaccination, you can read (and share) an article I wrote a few years ago. 

Oh, wait…. Oscar seems to have some wishes for 2021….


If you’d like to see what other food bloggers shared to start 2021 on a good note, read this post by Sherry and check out the link party at the end.   

HAPPY NEW YEAR,
from our home to yours!


ONE YEAR AGO: Happy 2020 In My Kitchen!

TWO YEARS AGO: Happy 2019 In My Kitchen!

THREE YEARS AGO: Happy New Year In My Kitchen!

FOUR YEARS AGO: Happy New Year In My Kitchen!

FIVE YEARS AGO: In My Kitchen: Happy New Year!

SIX YEARS AGO: And another year starts…

SEVEN YEARS AGO: In My Kitchen: January 2014

EIGHT YEARS AGO: Tacos with Pork in Green Sauce

NINE YEARS AGO:  Maui New Year!

TEN YEARS AGO: Natural Beauty

ELEVEN YEARS AGO: Sunflower Seed Rye

FESTIVE MACARONS TO WELCOME 2021

That Sally? She’s all about cauliflower and macarons. Hopeless. Since my reputation is already in shambles, I will share yet another recipe for macarons designed to kick a Poltergeist-ish year into the past and embrace 2021 as a light in the end of a very dark tunnel. Vaccines in sight, we just need to hang in there and keep doing all we can to avoid the virus while it still lingers unchecked out there. A single recipe, a single filling, and two designs. A dressed-up version to enjoy at at New Year’s Eve, and a playful take perfect pretty much anytime in January.

REVEILLON MACARONS
(from the Bewitching Kitchen)

For the shells:
200g Icing/powdered sugar
115 g almond flour
115 g egg whites at room temperature (approx. 4 eggs)
1/8 tsp of cream of tartar (optional)
100 g granulated sugar
¼ tsp vanilla paste or extract
white food gel color
toothpick drop of purple gel color

For filling:
160g powdered sugar  
57g unsalted butter, softened (4 tablespoons)  
1/2 to 1 teaspoon peppermint extract  (depends on your taste and the extract you are using)
pinch of salt 
heavy cream or milk to adjust consistency, if needed

Line 3 heavy baking sheets with parchment/baking paper or Silpat mats. Layer the powdered/icing sugar and ground almonds/almond meal in a food processor. Pulse until the mixture looks like fine meal, about 12 pulses. Pass through a sieve and transfer to a small bowl or to a sheet of parchment/baking paper. Set aside.

Place the egg whites and cream of tartar in the bowl of a stand mixer fitted with the whisk attachment. Make sure that the bowl and the whisk are impeccably clean. Starting on medium speed, whip the whites with the cream of tartar until they look like light foam. The whites should not appear liquid. The foam will be light and should not have any structure.

Slowly rain in the granulated sugar in five additions, trying to aim the stream between the whisk and the side of the bowl. Turn the speed up to high. Continue to whip the meringue until it is soft and shiny. It should look like marshmallow creme (marshmallow fluff). Add the vanilla and food colors. Whip the egg whites until the mixture begins to dull and the lines of the whisk are visible on the surface of the meringue. Check the peak. It should be firm. Transfer the whites to a medium bowl.

Fold in the ground almond/almond meal mixture in two increments. Paint the mixture halfway up the side of the bowl, using the flat side of a spatula. Scrape the mixture down to the center of the bowl. Repeat two or three times, then check to see if the mixture slides slowly down the side of the bowl. Put the mixture in a piping bag fitted with your choice of piping tip (round, ¼ or ½ inch in diameter or 6 – 12 mm). If you don’t have a macaron mat, draw circles on baking/parchment paper about 2inches/5cm in diameter & turn the paper over before placing on the baking sheets. Pipe shells, I like to count numbers in my head and use the same count for each shell so they end up similar in size. If making snowmen, make a template with two circles joined together to form head and body, and pipe each section.

Slam each sheet hard four to six times on the counter/worktop. Let the unbaked macarons dry until they look dull but not overly dry. Drying time depends on humidity. In a dry climate, the macarons can dry in 15 to 20 minutes; in a humid climate, it can take 35 to 40 minutes.

While the macarons are drying, heat the oven to 300 F (150 C/130C Fan oven/Gas Mark 2). Bake one sheet at a time on the middle rack. Check in 11 minutes. If the tops slide or move (independently of the ‘feet’ when you gently twist the top), then bake for 2 to 3 more minutes. Check one or two. If they move when gently touched, put them back in the oven for 1 to 2 more minutes until they don’t move when touched. Let the macaroons cool for 10 minutes before removing from the pan. The macarons should release without sticking.

For the filling, use a hand-held electric mixer and whisk the butter until creamy. Add the powdered sugar, peppermint extract and salt. Whisk in low-speed at first, the increase speed and whisk until creamy and smooth. If needed, add a very small amount of milk or heavy cream. Pipe the filling in shells, close them, and leave in fridge overnight to mature. 

Assemble the macarons: find two macarons similar in size and add a good amount of filling to the bottom of one of them. Place the other on top and squeeze gently to take the filling all the way to the edge. Store in the fridge for 24 hours for perfect texture.

Decorate with Royal icing and sprinkles, if so desired.

ENJOY!

to print the recipe, click here

Comments: For the dressed-up version, I added white Royal icing to make abstract swirls, and immediately sprayed the shells with Diamond Dust, a product I will feature very soon in my next In My Kitchen post. Love it.

For the playful version, I piped the shells as two circles, baked them, and decorated the shells with Royal icing dyed orange and green, leftover from sugar cookies projects. The details of eyes, mouth, and buttons were made with a very fine tip edible marker. I am still not confident enough to pipe extremely fine lines with Royal icing, need more practice to get to that point.

Making white shells is a bit of a challenge, they tend to get some color in the oven in the final stages of baking. To help things a bit, you can add a tiny amount of purple food gel, that counteracts the yellow tone as it bakes. But you might get a little bit of browning anyway. That’s where the Diamond dust comes nicely into play. That stuff is amazing.

ONE YEAR AGO: Episode 6, Cookies in The Great American Baking Show

TWO YEARS AGO: Brazilian Chicken and Heart of Palm Pie

THREE YEARS AGO: Roasted Butternut Squash with Walnuts and Tahini Sauce

FOUR YEARS AGO: The Complicit Conspiracy of Alcohol

FIVE YEARS AGO: Candy Cane Cookies

SIX YEARS AGO: Macarons: Much better with a friend

SEVEN YEARS AGO: Our Mexican Holiday Dinner 

EIGHT YEARS AGO: The Ultimate Cranberry Sauce

NINE YEARS AGO: Edamame Dip

TEN YEARS AGO: Gougeres

ELEVEN YEARS AGO: Beef Wellington on a Special Night

THOMPSON’S TURKEY AFTER 20 YEARS OF WAITING

This will certainly break all the records as far as taking my sweet time goes. I first heard of this amazing recipe in the show Taste hosted by David Rosengarten from 1994 to 2001. Those were truly the golden years of FoodTV, before it became centered on cooking competitions. I was fascinated by the recipe and always considered trying it. However, we never wanted to take a risk making this quite unusual recipe for guests, not knowing if it would work as expected. But, if there is one year that calls for all craziness to come out and play, 2020 is it. Big time. Plus, being just the two of us, we could always laugh at the disaster and chalk it to experience. Without further ado, I share the strangest, and most convoluted recipe I’ve ever made.

To see the big reveal, click here

THOMPSON’S TURKEY
(adapted from David Rosengarten)

1 turkey, 16-22 pounds, with giblets
For basting:
5 ½ cups water
Salt, freshly ground pepper, vegetable oil
1 large bay leaf
1 teaspoon each: paprika, salt
½ teaspoon ground coriander
1 qt apple cider (hard cider if you prefer)

for stuffing:
1 Granny Smith apple, cored, unpeeled, diced
1 medium orange, diced
1 can (20 ounces) crushed pineapple, undrained
zest of 1 lemon
1 can (8 ounces) water chestnuts, sliced, drained
6 ribs celery, minced
2 Vidalia onions, minced
1 red bell pepper, seeded, chopped
¼ cup minced fresh parsley
1 tablespoon celery seed
2 tsp dried sage
2 tsp dried thyme
2 tsp dried oregano
2 tsp each dry mustard (Coleman’s)
2 tsp caraway seeds
2 tsp poppy seeds
1 tsp sesame seeds
1 tsp freshly ground black pepper
½ tsp turmeric
½ tsp dry summer savory
2 dashes hot red pepper sauce (I used Sriracha)
2 + 1/2 cups bread crumbs
1 pound ground pork
1 stick (½ cup) butter, softened

for paste:
8 egg yolks
1 tablespoon dry mustard
1 tablespoon onion juice
1 tablespoon lemon juice, or more as needed
1 teaspoon salt
¼ teaspoon ground red pepper
1/3 to ½ cup flour

Rub turkey inside and out with salt and pepper. Spray turkey skin thoroughly with vegetable oil. Set liver aside. Chop gizzard, neck and heart; put in saucepan with 5 cups of the water, bay leaf, garlic, paprika, salt and coriander. Simmer, uncovered, about 1 hour, while proceeding with rest of recipe.

For stuffing, combine apple, orange, pineapple, lemon zest, and water chestnuts in medium bowl; set aside. Mix celery, onions, cloves, bell pepper, parsley, celery seed, oregano, dry mustard, caraway seeds, poppy seeds, sesame seeds, black pepper, turmeric, summer savory, and hot red pepper sauce in another bowl; set aside. In a third (very large) bowl, mix bread crumbs, pork, and butter; incorporate them well. Add contents of the other two bowls; mix by kneading well.

(Thompson advised: “Mix it with your hands. Mix it until your forearms and wrists ache. Then mix it some more. Now toss it enough so that it isn’t any longer a doughy mess.”)

Remove battery from smoke detector. Heat oven to 500 degrees. Lightly fill turkey body and neck cavities with stuffing. Skewer closed. (Place remaining stuffing in a 3-quart greased casserole; cover. Refrigerate; bake later at 325 degrees until it registers 165 degrees on a thermometer, about 1 hour.) Place turkey, breast down, on rack in large roasting pan. Cook about 15 minutes. Remove; turn breast-side up. Cook 15 minutes. Meanwhile for paste, combine egg yolks, mustard, onion juice, 1 tablespoon of the lemon juice, salt and red pepper. Add enough of the flour to make a paste.

Turn oven down to 325 F. Paint turkey all over with the paste, using a kitchen brush. Return turkey to oven 3-5 minutes, until paste sets. Paint again; return to oven. Repeat this painting every 3-5 minutes, adding lemon juice to the paste as necessary to keep from drying out, until paste is used up. Meanwhile, add the reserved turkey liver and 1 cup of the cider to the simmering basting liquid. Cook until liver is no longer pink, about 30 minutes; remove liver. Pass liquid through a sieve, discard giblets. Keep liquid on simmer.

Roast turkey, basting every 15 minutes and adding more cider to basting liquid as needed, until a meat thermometer reads 180 degrees in the thigh, 170 degrees in the breast, about 4 hours. Let turkey stand at room temperature 30 minutes before carving. Remove blackened paste coating from turkey using a spatula or tweezers. Remove stuffing to serving bowl. Carve turkey; serve.

ENJOY!

to print the recipe, click here

Comments: If you want to know more about Thompson’s Turkey, I suggest this article. Essentially, you make a stuffing that requires using every single spice available in a well-stocked pantry, and proceed to paint the bird with a paste that will turn absolutely black and hard once roasting is over. By the time you remove it from the oven, you will be sure it’s not fit for consumption. But then, you break that crust and reveal the most beautiful roasted bird, with a dark copper tone in the skin, and a stuffing that is out of this world delicious. To see the big reveal, click here

The best part of the turkey for me was the stuffing. The pineapple comes through as the most prominent taste, but then it gets all complex on you, and different from any stuffed turkey I’ve ever enjoyed for Thanksgiving. It made our Christmas Day meal quite special and festive.

Breaking the crust is quite exciting! I read a few articles written by those who attempted this culinary marathon, and some said that the crust can glue to the skin and get it removed with it, which is a shame. The way to avoid that is to oil the skin before applying the paste, and I incorporated that in the recipe. Also some methods tell you to keep turning the bird breast-up then down as you paint it and place it in the oven to set for a few minutes. Don’t do it, it is not necessary and it is a messy job. The only thing I missed about the turkey was gravy. Husband is the gravy maker and he did not think the juices accumulated in the bottom of the roasting pan were particularly fit for it. I might have allowed it to get a bit too burned, so maybe next time I can plan accordingly.

So, if you want to have a very unusual and exciting meal for your next big celebration, consider making this one. It is very labor-intensive, but also a lot of fun to bring to the table. I would definitely serve it for guests, knowing now that there is a nice bird underneath that darkness…

ONE YEAR AGO: Episode 5 of GABS, Citrus Tart, Napoleons and a Personal Nightmare

TWO YEARS AGO: Brazilian Chicken and Heart of Palm Pie

THREE YEARS AGO: Roasted Butternut Squash with Walnuts and Tahini Sauce

FOUR YEARS AGO: The Complicit Conspiracy of Alcohol

FIVE YEARS AGO: Candy Cane Cookies

SIX YEARS AGO: Macarons: Much better with a friend

SEVEN YEARS AGO: Our Mexican Holiday Dinner 

EIGHT YEARS AGO: The Ultimate Cranberry Sauce

NINE YEARS AGO: Edamame Dip

TEN YEARS AGO: Gougeres

ELEVEN YEARS AGO: Beef Wellington on a Special Night

CRANBERRY WHITE CHOCOLATE TART

I cannot think of a better dessert for Christmas or New Year’s Eve. Cranberries and white chocolate go very well together, as the former is so tart and the latter is often accused of excessive sweetness. Join to this pair a crust made from what is essentially a gingerbread cookie, and as you savor it, all thoughts of pandemics and politics and whatever else troubled 2020 will vanish in thin air. I promise you.

CRANBERRY AND WHITE CHOCOLATE TART
(recipe published with permission from Chef Eve)

for gingerbread crust:
178g all-purpose flour
2 Tablespoons brown sugar
113g cold, cubed, unsalted butter (1 stick)
1 tsp. ground cinnamon
1/2 tsp. ground ginger
1⁄4 tsp. ground allspice
A pinch ground cloves
1⁄2 tsp. salt
1 tbsp. molasses
1⁄2 tsp. vanilla extract
2 Tbsp cold water

for white chocolate ganache:
340g white chocolate
170g (3/4 cup) heavy cream
2 tbsp. room-temperature unsalted butter, cubed
pinch of salt

for cranberry jelly:
3 cups (340g) whole cranberries, washed and picked through
1 medium-sized apple, peeled and grated
200g granulated sugar
1/2 cup water
pinch of salt
1 tsp. vanilla extract
shaved white chocolate and sprinkles for decoration (optional)

for a 9-inch tart pan

Mix dry ingredients together in the bowl of a stand mixer fitted with the paddle. Add in cold, cubed butter and ginger, and mix until crumbly, and butter is no larger than pea-sized. Mix together cold water, molasses, and vanilla, then stream into pie dough and mix just until dough starts to come together and no dry flour remains in the bottom of the bowl. Do not overmix. Chill the dough for 30 minutes, then roll into a 1⁄8-inch thick round. Use the tart pan to make sure the dough is big enough to come up the sides of the pan with a little overhand. Chill 30 minutes more (the dough is very soft, it needs the extra time in the fridge), then line the tart mold. Chill in the freezer for 10 minutes, then trim the edges of the pie dough using a paring knife. Reserve dough scraps in case you need to patch any cracks that form as the tart bakes.

Line the tart crust with a sheet of parchment paper (or plastic wrap, which is what I do) and fill with baking weights that come up to the edge of the tart. If using a plastic wrap, make sure to fold it over the top of the beans, so that the plastic won’t touch the metal pan. Bake at 350°F for 15 minutes, then carefully remove the pie weights and bake another 10-15 minutes, until the crust is golden brown at the edges, and the center of the tart dough is completely baked. Cool to room temperature.

Make the chocolate ganache. Bring cream to a simmer. Put chocolate and salt in a food processor and pulse to break up into small pieces. When cream simmers, pour over chocolate and let sit one minute to start melting the chocolate. Pulse until smooth. When the chocolate is fully melted, add in butter cubes, and blend to incorporate. Pour into the cooled pie crust. Chill in the freezer to set for about 1 hour as you make the jelly. Make sure the tart is sitting nicely leveled.

Make the cranberry jelly. Put all ingredients except vanilla in a saucepan. Bring to a boil, then lower to a simmer. Cook until all of the cranberries explode, stirring occasionally, about 10 minutes. Remove from heat, add vanilla, and press through a mesh strainer. Cool for 30 minutes at room temperature, then carefully pour over the very cold from the freezer white chocolate layer. Chill at least 30 minutes in the fridge for the layer to set.

Optional decoration: shave some white chocolate on half of the surface, add sprinkles and sugared cranberries on top.

ENJOY!

to print the recipe, click here

Comments: As some of you may have already noticed, this year there won’t be a Great American Baking Show. They could not make it happen with all the restrictions due to the pandemics. It was tough enough to produce the British show, but the American production had to be canceled. The producers decided that this month they would feature on their Instagram page holiday-inspired bakes from contestants of previous seasons. This was my contribution. You can browse through all the entries from other tent-bakers clicking here. Be ready to be amazed…

Back to the tart .The combination of cranberry jelly and chocolate ganache is superb but not the only thing I loved about this dessert. The crust is just perfect and quite different from any other tart I’ve ever made. Lastly, for my taste the proportion of crust and topping also hit the jackpot. When I make it again, I might use some gelatin to get the top layer a little more set, so that the sliced piece would have more defined layers, but it’s more a cosmetic point, not really that big a deal.

Chef Eve, thank you so much for allowing me to share your delicious recipe!

ONE YEAR AGO: I dream of Madeleines and a Tower of Cheesecakes

TWO YEARS AGO: Dominique Ansel’s Chocolate Mousse Cake

THREE YEARS AGO: Slow-Roasted Eye of the Round Beef

FOUR YEARS AGO: Steam-Roasted Indian-Spiced Cauliflower

FIVE YEARS AGO: Creamy Zucchini-Mushroom Soup

SIX YEARS AGO: Ken Forkish’s Pain au Bacon

SEVEN YEARS AGO: Carrot and Cumin Hamburger Buns

EIGHT YEARS AGO: Potato Galettes a l’Alsacienne & Book Review

NINE YEARS AGO: Caramelized Carrot Soup

TEN YEARS AGO: Miso-Grilled Shrimp

ELEVEN YEARS AGO: Pain Poilane

ROASTED CAULIFLOWER & CHICKPEAS WITH MUSTARD VINAIGRETTE

A long time ago I decided that a blog cannot have too many cauliflower recipes. Once I made peace with that decision, bringing yet another version to this virtual spot became easier and easier. So here I am. Playing with one of my favorite veggies once again.

ROASTED CAULIFLOWER AND CHICKPEAS WITH MUSTARD VINAIGRETTE
(from thebrookcook)

14 oz can garbanzo beans, drained, rinsed, and dried
1 large head of cauliflower, cut into bite-sized florets
7 tablespoons extra-virgin olive oil, divided
coarse salt or sea salt and freshly ground black pepper
1 tablespoon Dijon mustard
1 tablespoon whole grain seeded mustard
1 tablespoon white wine vinegar
4 tablespoons fresh flat leaf parsley, chopped

Set a rack in the center of the oven and heat to 400ºF, preferably on convection roast.

Toss the chickpeas and cauliflower florets together on a parchment paper lined rimmed baking sheet or in a large roasting pan with 3 tablespoons of olive oil and a big pinch of salt. Roast, stirring now and then, until everything is dark brown and the cauliflower is quite soft, about 30 to 35 minutes.

Meanwhile, whisk together the mustards, vinegar, and 4 tablespoons of olive oil. Season with a big pinch of salt and a few grinds of black pepper, or to taste. While the chickpeas and cauliflower are still warm, toss them with the mustard dressing and the parsley. Serve warm or at room temperature.

ENJOY!

to print the recipe, click here

Comments: I bet you are wondering why two kinds of mustard, and what if you only have one kind? Use what you have. I happen to have both because we love mustard. I imagine that if you use full whole-grain it could be a bit too harsh. But whatever you choose to do, this is a real keeper of a side dish. Both chickpeas and cauliflower have that earthy, almost funky nature, and the acidity of the vinaigrette does a beautiful job tying them together. Leftovers were great two days later, barely warmed in the microwave.

Josette always shares amazing recipes in her blog, so I invite you to visit her site and browse around. I made this one just a few days after she published it, and repeated it the following week because we loved it so much.

ONE YEAR AGO: Great American Baking Show, Spice Episode (insert bucket of tears here)

TWO YEARS AGO: Pork Tenderloin Roulade with Pumpkin and Pecans

THREE YEARS AGO: White-Chocolate Peppermint Macarons

FOUR YEARS AGO: Shrubs, a fun alternative to alcoholic drinks

FIVE YEARS AGO: Date Truffles 

SIX YEARS AGO: Mascarpone Mousse from Baking Chez Moi

SEVEN YEARS AGO: Pumpkin Brigadeiros

EIGHT YEARS AGO: Pumpkin Espresso Loaf

NINE YEARS AGO: Caramelized Carrot Soup

TEN YEARS AGO: Miso-Grilled Shrimp

ELEVEN YEARS AGO: A Special Holiday Fruitcake