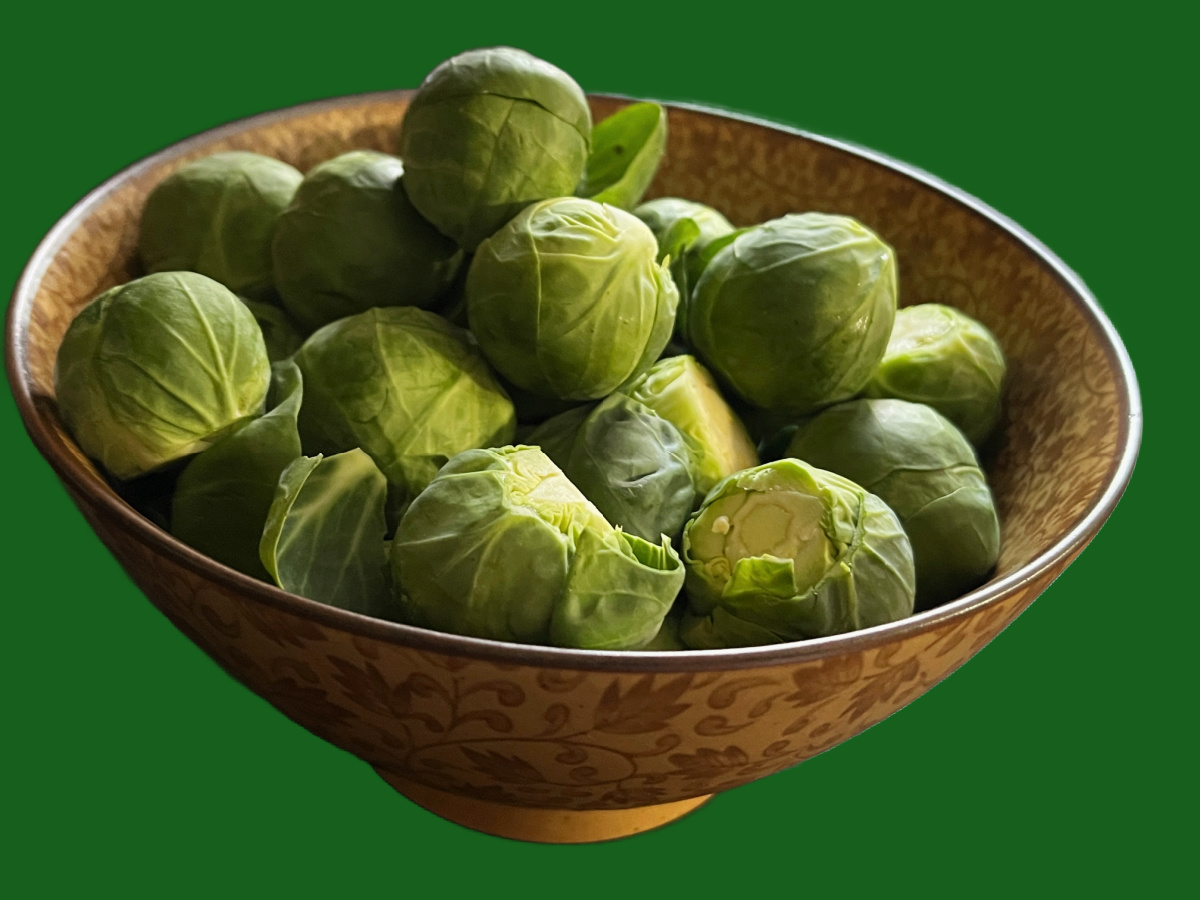
CAULIFLOWER WITH SUN-DRIED TOMATOES AND OLIVES

This is cauliflower that deserves a spot at your table when you have special guests for dinner. Amazing that we can now write such a phrase after a couple of years of social isolation. I go as far as saying that even cauliflower haters will be pleasantly surprised. The sun-dried tomatoes add richness and the olives and balsamic vinegar that acidity that lightens things up. Absolutely delicious. And, by the way, it is vegan-friendly.

CAULIFLOWER WITH SUN-DRIED TOMATOES AND OLIVES
(inspired by Crossroads)

1 head cauliflower, florets only, chopped in pieces
2 tablespoons olive oil (for oven roasting) or olive oil spray for air-frying
Kosher salt and freshly ground black pepper to taste
2 celery stalks, thinly sliced
1 shallot, minced
1/2 cup Castelvetrano olives, pitted and coarsely chopped
8 sun-dried tomatoes in oil, drained and coarsely chopped
2 tablespoons capers
1 tablespoon balsamic vinegar
zest and juice of 1/2 lemon
slivered almonds, slightly toasted, to taste

If roasting the cauliflower in an oven, drizzle the florets with olive oil, season with salt and pepper and roast in 425F oven for about 30 minutes. If using the air-fryer, spray the florets with olive oil, season with salt and pepper and air-fry for 15 to 20 minutes, until golden. Reserve. The cauliflower can be roasted hours in advance or even the day before.

Put a large saute pan over medium-heat and add 1 tablespoon olive oil. Add the celery and shallots, season lightly with salt and pepper. Cook for a couple of minutes, add the olives, sun-dried tomatoes, and capers and cook for a few minutes longer, stirring often. Add the reserved cauliflower, the balsamic vinegar, adjust seasoning. Right before serving, add lemon zest and juice, and top with the toasted slivered almonds.

ENJOY!

to print the recipe, click here

Comments: I don’t know which ingredient elevates this recipe, it is a tight match between the sun-dried tomatoes and the green olives. At any rate, it was an outstanding side dish. I highly recommend it. We enjoyed it with grilled chicken breasts, super simple. Just a marinade with olive oil, Garam masala and salt.

ONE YEAR AGO: Curry Sourdough with Sesame Seeds

TWO YEARS AGO: Chocolate-Crusted Passion Fruit Tart

THREE YEARS AGO: Lemony Shredded Brussels Sprouts with Almonds

FOUR YEAR AGO: Savory Oatmeal with Bacon and Cheddar

FIVE YEARS AGO: Air-Fried Carrots, Two Ways (most popular post on my blog!)

SIX YEARS AGO: Five Minutes in L.I.T (a tour of our laboratory!)

SEVEN YEARS AGO: Chicken Thighs with Artichokes and Capers

EIGHT YEARS AGO: Pea Pancakes with Herbed Yogurt

NINE YEARS AGO: Mushroom Stroganoff

TEN YEARS AGO: Tomato Sourdough

ELEVEN YEARS AGO: Gamberetti con rucola e pomodori

TWELVE YEARS AGO: Flirting with Orzo

CARROTS AND ZUCCHINI STIR-FRY WITH PEANUT SAUCE

Five days without our faithful goofy companion. I want to thank for all the comments in my previous post. I read each one, but cannot bring myself to answer them. Please consider yourself hugged.

This key to this recipe is slicing the carrots in ribbons, which is a bit of a labor of love, but worth it. Couple that with spiralized zucchini, and you’ll hit a jackpot. If you do not have a spiralizer, slice the zucchini very thinly and that will do. It is surprisingly hearty, and would be a great vegetarian meal if you add perhaps some farro and a slice of bread.

CARROT AND ZUCCHINI STIR-FRY WITH PEANUT SAUCE
(inspired by many sources)

3 carrots, sliced in ribbons (with a large veggie peeler)
2 large zucchini, spiralized fine
1 tablespoon grapeseed oil
grated ginger to taste
1 shallot, minced
salt and pepper

for the sauce:
2 tablespoons smooth peanut butter
2 tablespoons soy sauce
2 tsp sesame oil
1 tsp or more Sriracha sauce
drizzle of agave nectar
juice of 1/2 lemon
water to adjust consistency

Heat the oil in a non-stick large wok. Sautee the ginger and the shallot until fragrant. Add the veggies, stir-fry for a couple of minutes in high heat. Drizzle the sauce, you might not need the full amount, so that the veggies are not drenched. Cook for a couple of minutes more, stirring constantly to distribute the thick sauce well into the veggies.

Add the peanuts, and serve.

ENJOY!

to print the recipe, click here

Comments: If you want to make a bigger amount, you might have to stir-fry the veggies in two batches, then join them and finish with the sauce. As I mentioned, slicing the carrots is not the most enjoyable activity in the world, but it is a game changer. Just incorporate the Zen and go for it. The sauce is pretty delicious and would be awesome added on top of grilled pork tenderloin, which I intend to do soon.

ONE YEAR AGO: Cookie Therapy, Anyone?

TWO YEARS AGO: The Quasi-Vegan Quiche

THREE YEARS AGO: Not Quite Moqueca

FOUR YEARS AGO: Roasted Butternut Squash with Cashew Nuts

FIVE YEARS AGO: Mississippi Roast and the Open Mind

SIX YEARS AGO: Walnut-Raisin Bran Muffins

SEVEN YEARS AGO: A Star is Born!

EIGHT YEARS AGO: Chestnut Flour Sourdough Bread

NINE YEARS AGO: Kinpira Gobo and Japanese Home Cooking

TEN YEARS AGO: Walnut Sourdough

ELEVEN YEARS AGO: Thai Chicken Curry

TWELVE YEARS AGO: Zen and the art of risotto

RED QUINOA “TABBOULEH”

Another great recipe that the editors of the New York Times raved about. I ate leftovers for two days, with a slightly bigger smile on the last time. It gets better and better. I adore colorful food. And clothes. And earrings.

RED QUINOA “TABBOULEH”
(slightly modified from The New York Times)

1 cup red quinoa (or a mixture of colors)
3 cups wate
Salt to taste
½ cup fresh lemon juice½ teaspoon ground cumin
¼ cup extra virgin olive oil
1 cup finely chopped flat-leaf parsley
¼ cup finely chopped fresh mint
1 red bell pepper, chopped
1 cup finely diced cucumber
1 pound ripe tomatoes, cut in small dice

Rinse the quinoa thoroughly, and combine with the water and salt to taste in a large saucepan. Bring to a boil, cover and reduce the heat to low. Simmer 15 to 20 minutes until the quinoa displays a little white spiral. Drain through a strainer, tap to remove excess water, then return the quinoa to the pot. Place a dish towel over the top of the pot, and return the lid. Let sit for 15 minutes. This gives the quinoa a perfect texture.

Transfer the quinoa to a large bowl. Mix together the lemon juice, salt to taste and cumin, and toss half of it with the quinoa. Allow the quinoa to cool. Combine the remaining lemon juice and olive oil, and toss with the cooled quinoa. Add the remaining ingredients, and toss together. Taste and adjust seasoning.

ENJOY!

to print the recipe, click here

Comments: We enjoyed it with grilled chicken breasts, for a very simple but delicious dinner. It became my lunch for the following two days, on the second time I added a sunny-side egg on top. Heaven. I hope purists will forgive the tabbouleh label in the recipe, but I was not the one who started. The New York Times was the first sinner. I just went along with it, but added the quotation marks to protect my reputation as a food blogger. At any rate, tabbouleh or not, make this recipe. It is super refreshing and satisfying.

ONE YEAR AGO: Cucumber Salad with Yogurt-Harissa Dressing

TWO YEARS AGO: Sundried Tomato and Feta Cheese Torte 

THREE YEARS AGO: Hickory-Smoked Beef Tenderloin

FOUR YEAR AGO: Spaghetti Squash, Revisited

FIVE YEARS AGO: Stir-fried Chicken and Cabbage in Spicy Almond Sauce

SIX YEARS AGO: Fifteen Years!

SEVEN YEARS AGO: Light Brioche Burger Buns

EIGHT YEARS AGO: Sourdough Blues

NINE  YEARS AGO: Headed to Hawaii

TEN YEARS AGO: A yummy Brazilian cake: Bolo de Fuba’

ELEVEN YEARS AGO:  Hidden Treasure

TWELVE YEARS AGO: Avocado Three Ways

INCREDIBLY SIMPLE POBLANO TAHDIG

With this post I will upset a lot of people. First, by mixing a classic Middle Eastern recipe with a Mexican component. And second, by making it a much quicker version than the authentic. However, since I first made this version back in 2019, I never stopped. It is by far the most requested side dish by the resident food critic, and I adore it too. My only problem lies with that portion control thing. I tend to over-eat because it’s just too good. The basic method is the same, and to be honest I don’t even measure anything now, because it always works. This version rocked our little world.

POBLANO TAHDIG
(from The Bewitching Kitchen)

1 cup rice
3 cups lightly salted water
1 Poblano pepper, roasted with a touch of olive oil until soft
1/3 cup full-fat yogurt
1/4 tsp salt
1/4 tsp chipotle pepper (or other pepper of your choice)
drizzle of olive oil

Mix the yogurt with the poblano pepper, salt and chipotle pepper. Process with a mini-food processor until smooth. Reserve.

Cook the rice for 12 minutes in salted boiling water and immediately drain and rinse with cold water to stop cooking. Rice and yogurt mixture can sit separately for a couple of hours before continuing.

Mix the rice with the yogurt. Heat a 10-inch non-stick skillet and add olive oil, swirling around the whole surface. When the oil starts to get hot, add the rice-yogurt mixture and spread it all over the pan, smoothing the surface with a silicon spoon. Cover the rice with a paper towel moistened with water, then place a lid. Don’t worry if the lid is not totally tight.

Place on a low-burner for exactly 30 minutes. At the end of 30 minutes check to see if the bottom is golden, if not, increase the heat lightly and remove the lid. Leave it for a minute or two, should be enough to make a nice crust at the bottom. Carefully place a platter on top and invert the rice on it. Cut in wedges to serve.

ENJOY!

to print the recipe, click here

Comments: The above picture shows what was left once we finished our dinner. We could have inhaled it all, but I decided to consider my lunch next day. If you are a rice lover, please try this method. And now that we loved the poblano version so much, I have plenty of other variations to try. The only thing to keep in mind is under-cooking the rice in the beginning, and choosing a skillet that is right for the amount of rice you have. For 1 cup dry rice, the 10-inch skillet is perfect. Thirty minutes on low-heat. DONE.

ONE YEAR AGO: Roasted Green Beans and Tomatoes with Tahini Sauce

TWO YEARS AGO: Brazilian Pao de Queijo 

THREE YEARS AGO: The Chignon

FOUR YEARS AGO: Rack of Lamb Sous-Vide with Couscous Salad

FIVE YEARS AGO: Focaccia with Grapes, Roquefort and Truffled Honey

SIX YEARS AGO: Moroccan Carrot Dip over Cucumber Slices

SEVEN YEARS AGO: White Chocolate Macadamia Nut Cookies

EIGHT YEARS AGO: Cilantro-Jalapeno “Hummus”

NINE YEARS AGO:A Moving Odyssey

TEN YEARS AGO:Hoegaarden Beer Bread

ELEVEN YEARS AGO:
 
Ancho-Chile Marinade: Pleased to Meat you!

TWELVE YEARS AGO: Shrimp Moqueca

ASPARAGUS WITH GUNPOWDER MASALA

Impossible to ignore the Indian vibes in our kitchen lately. Of all cuisines, I believe that is the one bringing the most out of veggies. This recipe will blow your mind, and I am certain of it. The gunpowder masala is nutty, with the perfect level of heat and complex mixture of flavors. As my friend Joanne said in her blog post, it will be good on pretty much anything. I urge you to make it, even if finding curry leaves could be a bit tricky.

BLISTERED ASPARAGUS WITH GUNPOWDER MASALA
(from Joanne’s blog Eats well with Others)

for the Masala:
100 g raw cashews
35 g raw pepitas
30 g dried red chilies de arbol (or to taste)
20-25 fresh curry leaves (I used 10 dried leaves)
2 tbsp white or black sesame seeds (I used a mixture)
½ tsp asafetida

for the asparagus:
4 tbsp olive oil
1 lb asparagus, woody ends trimmed
1 tbsp fresh lime juice
sea salt flakes
1-2 tbsp gunpowder masala (or to taste)

Make the masala: Heat a small skillet over medium heat. Once it is hot, add the cashews, pepitas, dried chilies, curry leaves, and sesame seeds. Toast them, stirring occasionally, until the seeds are starting to brown. Transfer to a bowl and cool to room temperature. Once cool, grind in a food processor or blender along with the asafetida to a coarse powder. Pour into an airtight container and store in the refrigerator.

Make the asparagus: Heat a cast iron skillet or grill pan over medium-high heat. In a large bowl or on a sheet pan, toss the asparagus with 1 tbsp of the olive oil. Add the asparagus to the pan and cook for 5-6 minutes, turning occasionally, until blistered on at least 2 sides. Transfer the cooked asparagus to a serving platter. Drizzle with the remaining olive oil and lime juice. Sprinkle with the salt flakes and gunpowder masala. Serve immediately, and swoon!

ENJOY!

to print the recipe, click here

Comments: The other day I was part of a conversation about food blogging and how tiring it is the over-use of certain adjectives to describe a dish. Life-changing, fantastic, mind-blowing (guilty as charged)… So let’s stop going there. This is a great masala that I can see being paired with many veggies and even animal protein. I envision a beautiful piece of salmon, grilled to perfection and topped with this crunchy concoction, with a nice squeeze of lemon juice. It does need a bit of moisture to shine, so that final drizzle of oil and citric juice is a must.

If you cannot find curry leaves, I’d say make it without. It does have enough going on, and it will still be mighty tasty. The recipe makes more than you’ll need, so keep it in the fridge and find new uses for it. Just yesterday I paired it with sweet potatoes and garbanzo beans, drizzled with a tahini-yogurt sauce.

Joanne, thank you for yet another perfect recipe that will go into our regular rotation for sure!

ONE YEAR AGO: The Home Bakers Collective, April Project

TWO YEARS AGO: Asian-Style Eggplant Meatballs

THREE YEAR AGO: Uzbek Flatbread

FOUR YEARS AGO: First Monday Favorite – Black Sesame FOUR

FIVE YEARS AGO: Chocolate Orange Mini-Cakes

SIX YEARS AGO: In My Kitchen, May 2015

SEVEN YEARS AGO: P90X3, a Review of Tony Horton’s Latest Fitness Program 

EIGHT YEARS AGO: Pasta and Mussels in Saffron Broth

NINE YEARS AGO: Triple Chocolate Brownies

TEN YEARS AGO: Shanghai Soup Dumplings

ELEVEN YEARS AGO: Bite-sized Chocolate Pleasure