BAKING THROUGH THE BLOGOSPHERE

And now for something completely different. I will share a few recipes straight from blogs I follow. You can click on the link to the original blog posts to get the recipes that perk your interest…

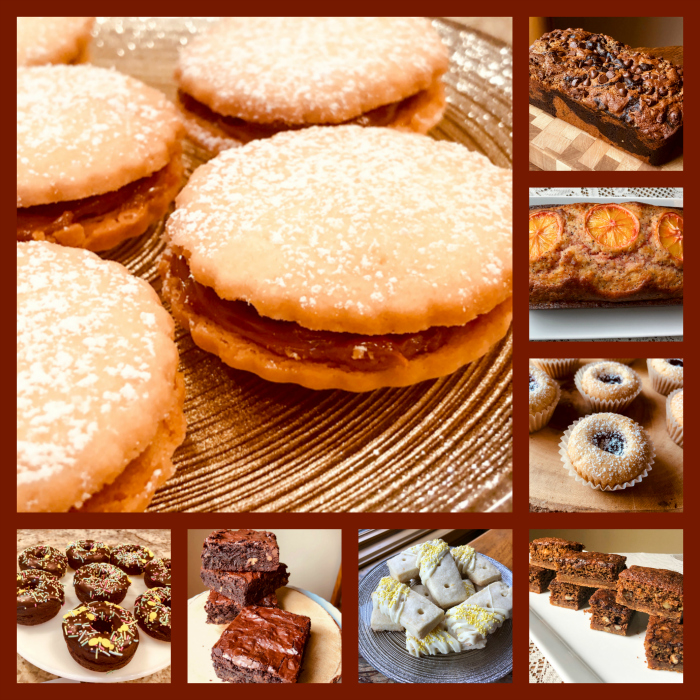
PERUVIAN ALFAJORES
(from Carlos’ blog)

Delicious cookies, filled with dulce de leche, which reminds me so much of my childhood!  My Mom used to pressure cook cans of condensed milk, open them to reveal the luscious caramel inside, and I would enjoy it by spoonfuls. I was such a picky eater, I suppose having that around would make sure I got enough calories to survive.  Carlos offers THE authentic version for these famous cookies. They are delicate, elegant, and incredibly tasty.

HELEN’S BROWNIES
(from Bakers Anonymous)

These are just amazing brownies. A huge hit of chocolate, perfect texture, got rave reviews from the resident brownie critic, who has been very VERY hard to please in the brownie department. His favorite version takes toasted pecans in the mix (follow Helen’s recipe and add 3/4 cup toasted pecans in the final mixing).

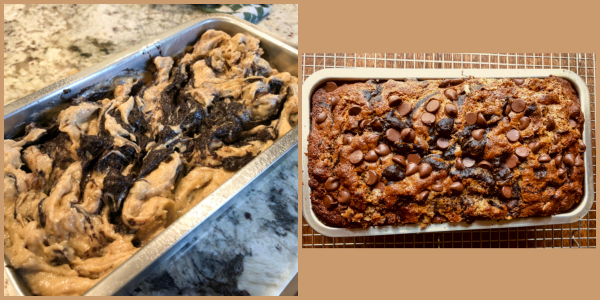
CHOCOLATE-SWIRLED BANANA BREAD
(from Jamlab)

This takes your regular banana bread and dresses it up for party… I find that people are usually divided into two groups when it comes to banana bread. Those purists who want a plain, banana-only taste in their loaf, and those who don’t mind bells and whistles. Obviously, this version is dedicated for those in the latter group. Don’t be stingy with the chocolate chips on top. They add a lot, and look super cute.

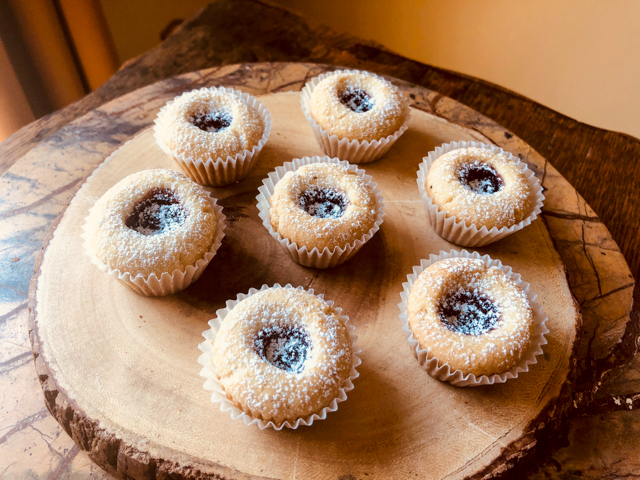
ALMOND TEA CAKES
(from Saving Room for Dessert)

A lot of fun to make, these are egg-free little cakes in bite-size format, deliciously addictive. You can add any kind of jam to their centers. I used boysenberry jam. Other than that, I followed the recipe from Tricia’s blog to a T. They turn out quite elegant also, I visualize them in a tea party next to Peruvian Alfajores. What a nice couple!

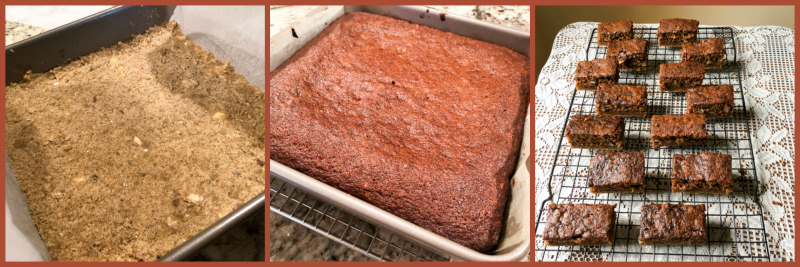
LOVE BARS
(from Helen’s Pastries like a Pro)

These are quite unusual, and the looks do not do justice to their taste. Helen described them so well in her blog, that I could not wait to bake a batch. The base bakes at the same time as the topping, simplifying the preparation quite a bit.  If you are into gingerbread type dessert, you will go nuts for this one. Trust me.

DOUBLE CITRUS POPPY-SEED BREAKFAST CAKE
(from Joanne’s Eats Well with Others)


This was an OMG type of cake. I slightly modified her recipe by using a mixture of Meyer Lemon and Blood Oranges, juice and zest. The slices on top were Meyer Lemons, but the drizzle was a mixture of lemons and blood oranges, so in the end the red color spoke louder. It is a very moist and tender cake, intensely fragrant. A crowd-pleaser.

CHOCOLATE DONUTS
(from Dana’s Wake and Bake Mama)

Baked donuts made as festive as possible through the power of sprinkles. Dana’s recipe is quick to assemble, one-bowl-type-thing. Less things to wash, no need to get the KitchenAid out to play. Granted, maybe I used a bit of a heavy hand with the sprinkles, but they make me happy.


TRADITIONAL SCOTTISH SHORTBREAD
(from Tanya’s Global Bakes)

Last December I went on a compulsive shortbread cookie adventure, and tried several recipes, including one super convoluted from America’s Test Kitchen, in which every single utensil of my kitchen was involved. Tanya’s version won my heart, apart from going a bit over the top with the decoration, I stayed true to her recipe. Two thumbs all the way up for it.

That’s the end of my walk through the blogosphere… all these bakes ended up as part of the Common Table meals, something that has kept me busy and “sane” through these odd times we are going through. Baking is a huge therapy for me, and I know I’m not alone, many of my baking friends feel the same way.

ONE YEAR AGO: Chickpea Burgers, Vegan and Delicious

TWO YEARS AGO: Macarons with Ganache Noisette

THREE YEARS AGO: Quiche with Asparagus and Fennel

FOUR YEARS AGO: Fakebouleh

FIVE YEARS AGO: Yellow Squash Soup

SIX YEARS AGO: Grilled Chicken with Tamarind and Coconut Glaze

SEVEN YEARS AGO: Chicken-Apricot Skewers

EIGHT YEARS AGO:  Asparagus Quiche

NINE YEARS AGO: Two-stage Pea and Prosciutto Risotto

TEN YEARS AGO: Mellow Bakers: Corn Bread


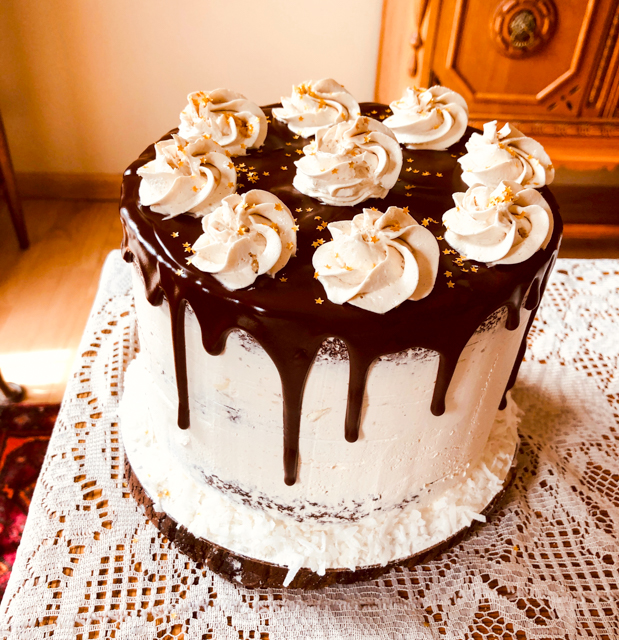
CHOCOLATE CAKE WITH COCONUT BUTTERCREAM

Every Monday I like to take a bake to our department, and try to keep it varied, never the same type of sweet two weeks in a row. I always have too many options in my mind and go into a state of paralysis when the weekend arrives and I need to decide what to make. Last weekend was particularly tough, so I asked the husband to help me out. He did not even blink. Why not a chocolate cake with coconut frosting? And that’s how this cake was born.

CHOCOLATE CAKE WITH COCONUT BUTTERCREAM
(adapted from  Ina Garten and Stella Parks)

for the chocolate cake (make one day in advance):
(after Ina Garten)
228g all-purpose flour
400g sugar
75g unsweetened cocoa powder
2 teaspoons baking soda
1 teaspoon baking powder
1 teaspoon salt
1 cup buttermilk
1/2 cup vegetable oil
2 large eggs
1 teaspoon pure vanilla extract
1 cup freshly brewed hot coffee

for coconut creme patissiere:
1 cup coconut milk
4 large egg yolks
65g granulated sugar
2 + 1/2 tablespoons cornstarch
1/2 teaspoon coconut extract
2 tablespoons unsalted butter
1/2 cup shredded sweetened coconut

for coconut frosting:
(after Stella Parks)
170g egg whites
340g turbinado sugar
1/2 teaspoon kosher salt
1/4 teaspoon cream of tartar
1/2 tsp vanilla paste
450 g butter (4 sticks)  softened to about 65 F
115g virgin coconut oil

for the drip glaze:
113 g semisweet chocolate, coarsely chopped
4 tablespoons unsalted butter, cut into pieces
2 tablespoons light corn syrup

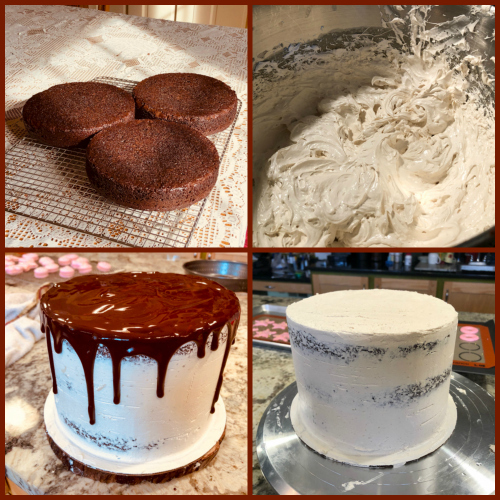
Make the cakes. Heat the oven to 350°. Butter three 7-by-2-inch round cake pans and line them with parchment; butter the paper. Dust the pans with flour, tapping out any excess.

I In a bowl, whisk the buttermilk with the oil, eggs and vanilla. Place the flour, sugar, cocoa powder, both leavening agents and salt in the bowl of a KitchenAid type mixer.  Turn the mixer on, and after a few seconds slowly beat the buttermilk mixture into the dry ingredients until just incorporated.  Slowly pour the warm coffee. Batter will be pretty thin.

Pour the batter into the prepared pans. Bake for 35 minutes, or until a toothpick inserted in the center of each cake comes out clean. Let the cakes cool in the pans for 20 minutes, then invert the cakes onto a rack to cool. Peel off the parchment. When completely cold, refrigerate to finish next day.

Make the creme patissiere (can be made the day before). Bring the coconut milk up to a simmer in a medium saucepan. In a small bowl, whisk the egg yolks, sugar, cornstarch, and extract until pale in color. Slowly pour in the hot coconut milk while whisking continuously. Return the mixture back to the saucepan and whisk over medium-high heat until it boils. Boil for two minutes (important step, to destroy amylases in the egg yolks, that would prevent the cream from setting properly).  Pour the pastry cream through a fine-mesh sieve then stir in the butter. Place a piece of plastic wrap directly on top of the pastry cream, making sure it is touching the surface, and refrigerate until cooled completely. Stir in the shredded coconut when ready to use in the cake.

Make the coconut frosting. Make a Swiss meringue by mixing egg whites, turbinado sugar, cream of tartar, salt and vanilla paste in a large bowl and bringing it to 185F over simmering water, whisking constantly.  Transfer to Kitchen Aid type mixer and whisk at high-speed for about 12 minutes until temperature is around 90F.

Add butter, one tablespoon at a time, then add the coconut oil. Whisk a couple more minutes until fully smooth, and use right away. You can also store it in the fridge, bring it to 70F and whisk again before using.

Make the drip glaze. Warm all ingredients in a bowl over simmering water. Once chocolate is fully melted and incorporated with other ingredients, remove from heat. Cool to around 98F to use.

Assemble the cake. Place one layer over a cake board. Add a layer of coconut frosting, top with a small amount of coconut creme patissier. Add second layer of the cake, repeat filling. Add final third layer, frost top and sides with a crumb coat of frosting. Put in the fridge for 20 minutes.

Add a final coating of the coconut frosting, work with a scraper to the remove a bit from the sides, exposing some of the layers. Place back in the fridge, so that it is very cold before you add the drip glaze.

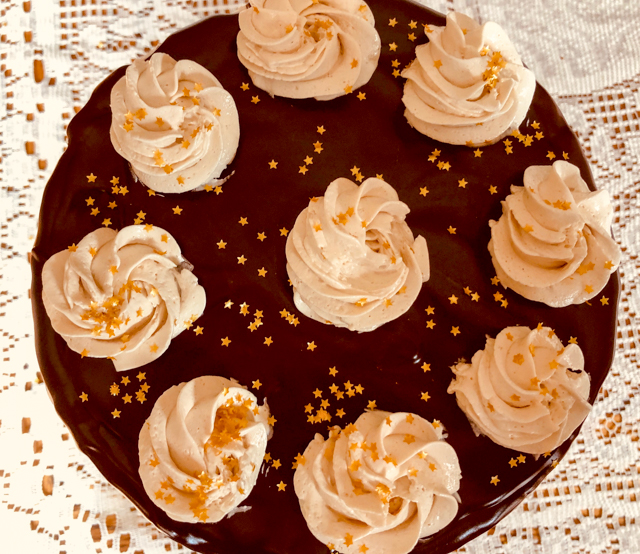
Add the drip glaze with a spoon, dripping around the sides, then fill the top of the cake with a thin layer. Refrigerate again for 15 minutes or until the drip glaze is set. Add swirls of coconut buttercream, decorate the base with shredded coconut, if so desired.  Sprinkles are optional.

ENJOY!

to print the recipe, click here

Comments: The chocolate cake is a favorite of mine. I’ve used it in the past, and was my cake of choice for a very special celebration back in December.  It is moist, it is intense, it holds well in layers. I was a bit worried that so much chocolate would obliterate the coconut component, but we are talking a duel between Ina and Stella, two Baking Titans. Stella Parks’ coconut frosting rose to the challenge.  I do think my little contribution of the creme pat was also pretty nice, so I discreetly offered myself a pat in the back.

Usually, when we think about chocolate cake with coconut frosting, the first idea that comes to mind is a mountain of white frosting with shredded coconut all over it. I don’t particularly care for the texture of shredded coconut when it is prominent like that. So for my personal taste this version is more appealing. And it does have a touch of elegance, I think.

I loved doing the drip glaze thing. It is not as dramatic as mirror-glazing, in fact it is much more Zen, because you can plan your drips and watch them form. Plan your drips. Yeah, that is one odd statement, but it’s the best I could do. It’s early and coffee has not kicked in yet.

I think this cake goes easily into my top five list. 

ONE YEAR AGO: Berry Rebellion Tarts 

TWO YEARS AGO: Bergamot-Cherry Macarons

THREE YEAR AGO: Roasted Veggies with Queso Cotija Dressing

FOUR YEARS AGO: Creamy Broccoli and Mushroom Casserole

FIVE YEARS AGO: Maple Walnut Biscotti

SIX YEARS AGO: Barley Risotto with Peas

SEVEN YEARS AGO: Oatmeal Fudge Bars

EIGHT YEARS AGO: Cauliflower Steaks

NINE YEARS AGO: Soft Spot for Chevre

TEN YEARS AGO: Quick sun-dried Tomato Crostini


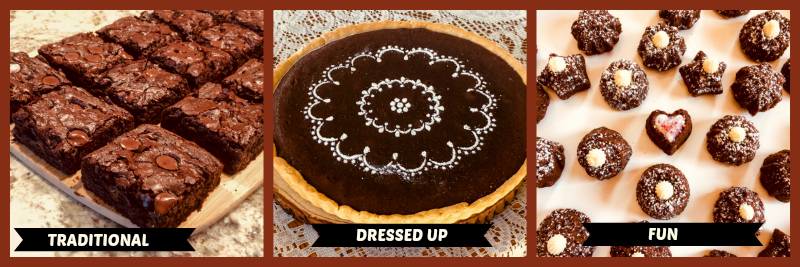
BROWNIES, THREE WAYS

I share with you three takes on a very simple bake, the deliciously humble brownie. What makes a brownie a  brownie? Tough to define precisely because lots of different recipes will take you to that territory. In general, it is a simple cake with just a few ingredients: butter, flour, chocolate, sugar and eggs. But a leavening agent might finds its way there also, in case the baker prefers a more cake-like version. Marriages have been damaged due to brownie divergencies. I advise you to date people who share your passion for fudgy or cakey. Back to what matters. My three versions are right here for you.

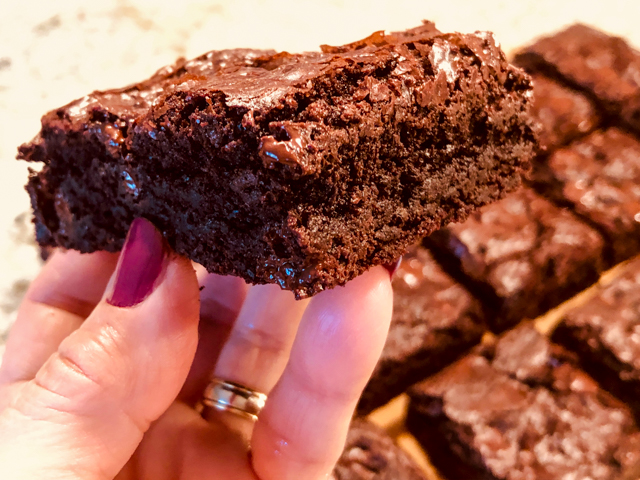
BROWNIE, TRADITIONAL

I like it to be dense, creamy, not cakey. I like a brownie with substance, but that melts in the mouth and brings with each bite a moment of introspection because words seem like such a waste.

This recipe, straight from the blog of Helen, my tent-baker friend, checks all the boxes.For the recipe, visit Bakers Anonymous with a click here.

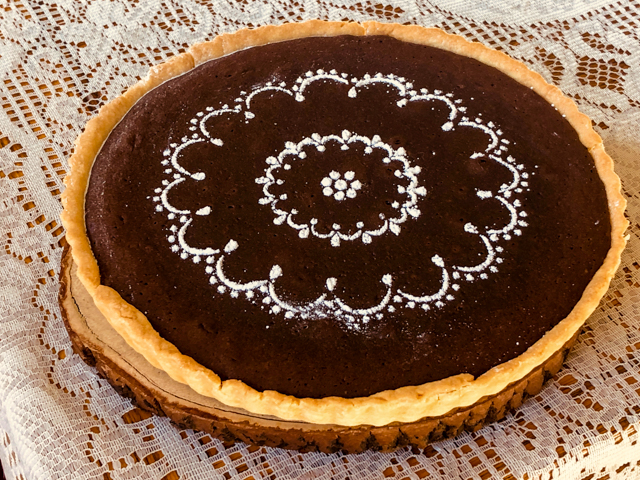
BROWNIE, DRESSED UP

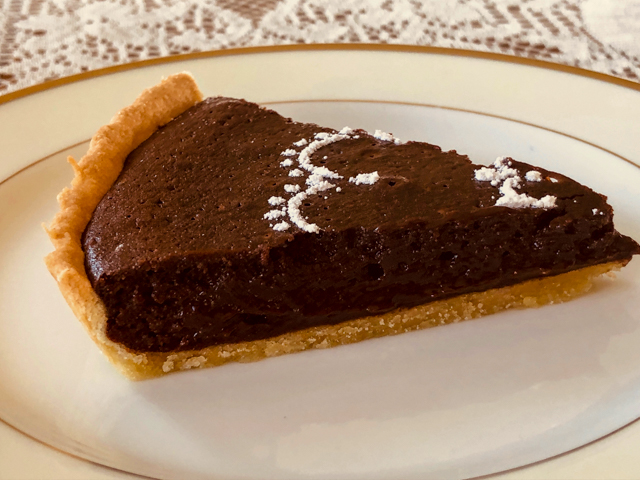
BROWNIE PIE
(from the Bewitching Kitchen)

for the pastry shell:
(makes more than you need, save the rest in the freezer)
310g  all purpose flour
30g powdered sugar
pinch of salt
170g butter (chilled and cut in small cubes)
3 egg yolks mixed with very cold water to make a volume of 6 tablespoons

for the chocolate brownie filling:
100 g coarsely chopped 70% chocolate
10 g  Dutch-process cocoa powder
120 g unsalted butter
180 g whole eggs
130 g granulated sugar
50 g all-purpose flour, sifted
powdered sugar for decoration (optional)

Heat the oven to 375F.

Put the flour, sugar and salt in food processor then add the butter and process until the butter is in small pieces. With the motor running add the mixture of egg yolks and cold water. Stop the mixer before the pastry forms a ball, remove it from the processor and gently bring it all together with your hands over plastic wrap. Shape into a flat disc and leave it in the fridge for 30 minutes.

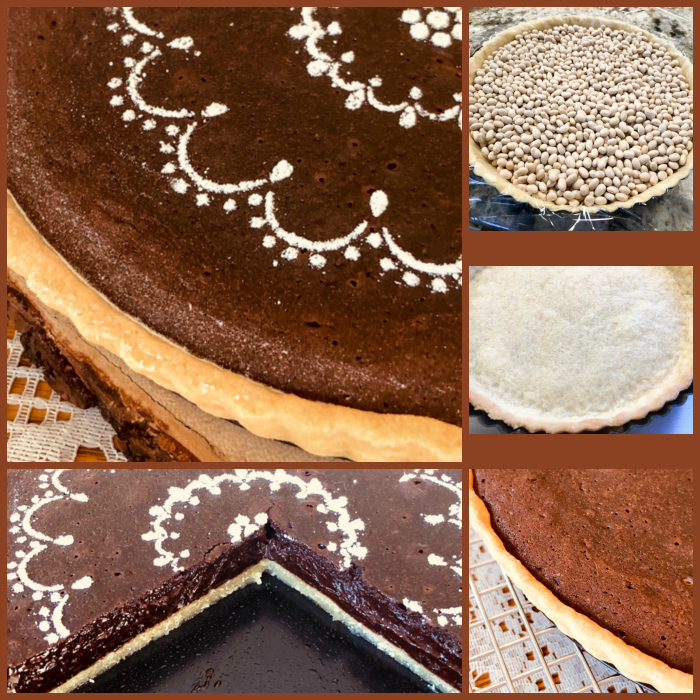
Roll out the pastry to a thickness of about 3mm. I like to do it in between two plastic sheets (I cut the four sides of a  large ziplock bag leaving just the bottom part attached, open it and roll the pastry inside it). Roll the dough as a circle large enough to cover the pan and leave a little extra around the sides. Place it in an 8-inch tart pan with removable bottom.

Line the surface with plastic wrap and fill with beans. Wrap the plastic over the beans so that it does not touch the metal sides of the pan.  Blind bake for 15 minutes with the beans on, then carefully remove them and place the shell back in the oven for 20 more minutes. Remove and allow it to cool slightly.

Lower the temperature of the oven to 350 F.

Make the brownie filling. Gently melt the chocolate, cocoa powder and butter together in the microwave. In a bowl, lightly whisk the eggs and sugar by hand. Fold in the dark chocolate mixture, followed by the sifted flour. Continue gently folding using a spatula until well combined. Place the finished mixture into the blind-baked tart shell and bake for 15 to 20 minutes, until it is set in the center.

Allow it to cool and decorate with powdered sugar using a stencil, if you like. Refrigerate until serving time.

ENJOY!

to print the recipe, click here

This was decadent. We offered pieces to some bricklayers working in a little project in our home and they were very VERY happy.  This recipe has just enough flour to hold it together, so it is almost like enjoying a piece of ready to  melt chocolate on top of a sweet tart shell. Bliss. 

Am I the only one who sees a cute alien?

Now finally, my third version for you…

BROWNIE BITES, FOR FUN

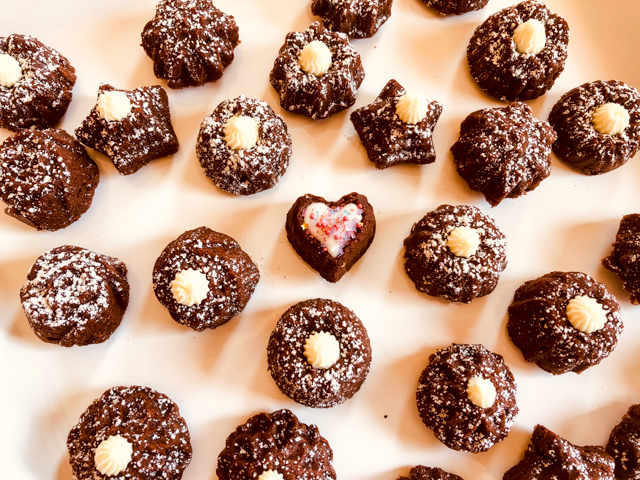
BROWNIE BITES
(adapted from The Cookery Wife)

95 g all-purpose flour
200 g granulated sugar
75 g cocoa powder (I used natural)
1/4 teaspoon salt
1/2 cup butter, (1 stick, 113 g), room temperature
2 eggs
1 teaspoons vanilla paste
2 Tablespoons full-fat milk (optional)

Heat oven to 350F.

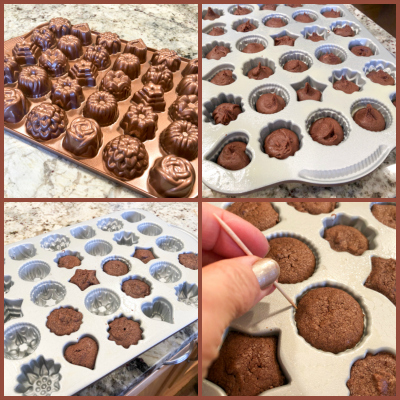
Spray your mini-cake pan with baking spray containing flour.

In the bowl of a stand mixer add dry ingredients: flour, sugar, cocoa, salt. Stir to combine. Next, add eggs, vanilla, butter. Mix on low for 30 seconds, add the milk and mix on medium-high for 2 full minutes. Batter will be very thick. Place it in a piping bag (no need for piping tip). Cut an opening and fill the mini-cakes between 1/2 and 3/4 full.

Using the tip of your finger coated with a bit of butter, press the batter to smooth it out. Bake for 15 minutes until a tooth pick inserted comes out clean. Let cool 10 minutes before removing from pan.

A toothpick can help loosen the sides, but be gentle.  Cool completely over a rack before decorating with powdered sugar.

ENJOY!

to print the recipe, click here

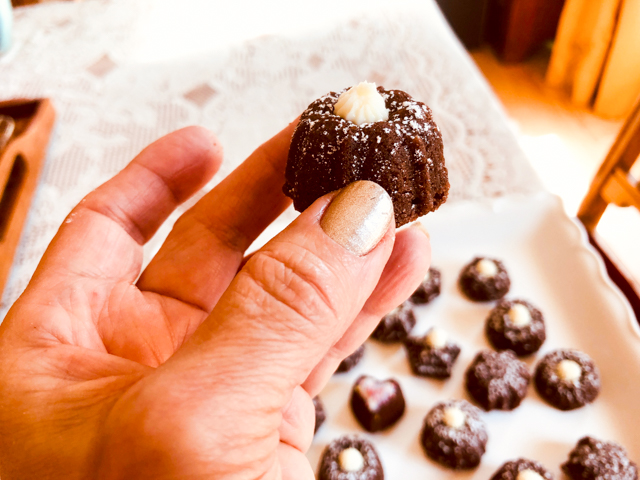
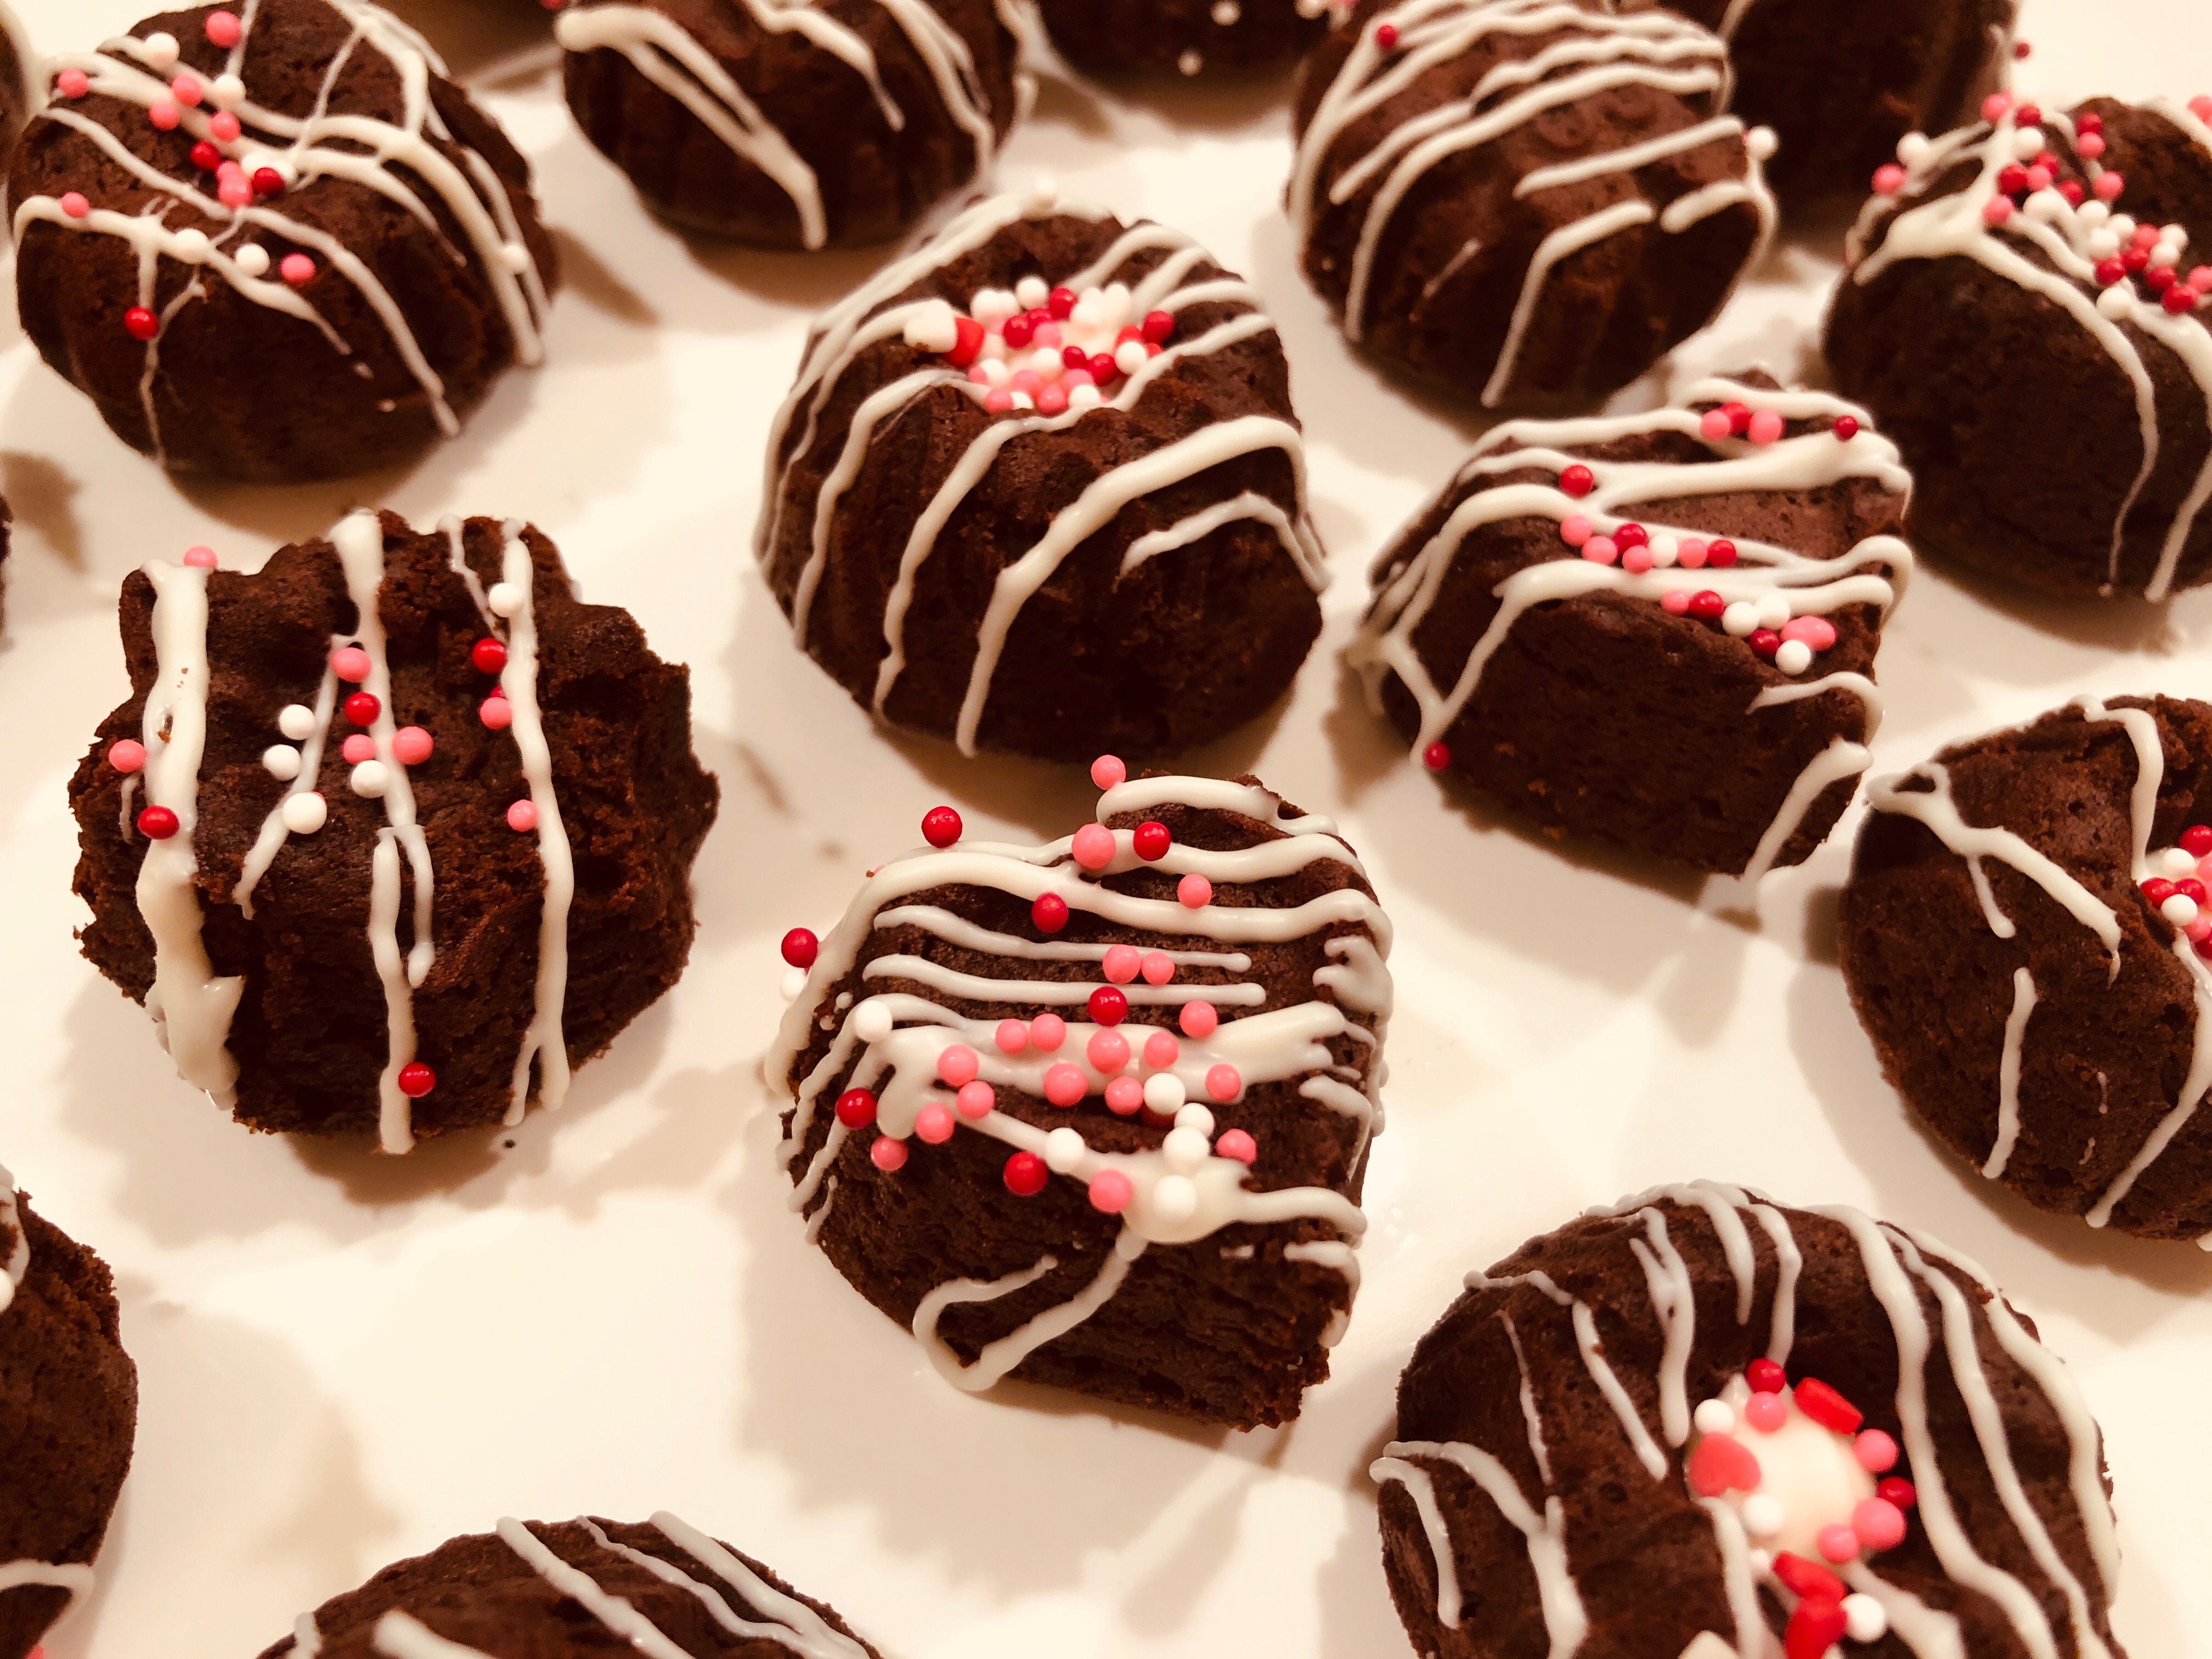
First of all, don’t let the lack of a mini-cute-Bundt pan stop you from making these bites. A mini-muffin alternative will work just as well. But, you know I cannot resist a baking gadget. I was a bit afraid of them sticking to the pan, but most came out just with a gentle flip of the pan (see photo, bottom left). Just a few stayed in, but were also released with a gentle tap, no harm done. I think filling them just a little over half capacity is the ticket. If some of them dome a bit, you can gently shave the bump with a small serrated knife, so they will sit leveled.

They have great flavor and the texture is not dense, even though the batter started so thick. You can decorate them with powdered sugar, a drizzle of caramel, melted chocolate. I happened to have some leftover white chocolate ganache from a macaron adventure, so I added a touch of that to most of them. They are perfect to bring to parties or share with co-workers. I will bake them regularly, my next project will involve a lemon cake. The idea is to avoid cake batters that are too light, you need more substance to get them to unmold nicely and keep the overall design.

ONE YEAR AGO: Berry Rebellion Tarts  (one of my favorite blog posts)

TWO YEAR AGO: Emilie Raffa’s High Hydration Sourdough

THREE YEARS AGO: Short-Ribs with Chickpeas and Chard

FOUR YEARS AGO: Asian-Style Short Ribs 

FIVE YEARS AGO: Herbed Goat Cheese Souffles

SIX YEARS AGO: Barley Risotto with Peas

SEVEN YEARS AGO: Jammin’ Blueberry Sour Milk Pancakes

EIGHT YEARS AGO: Scallops with Black Pasta in Orange Cream Sauce

NINE YEARS AGO: Stir-fried Chicken with Creamed Corn

TEN YEARS AGO: Potato, Cheddar, and Chive Torpedo

ORANGE STREUSEL CAKE & THE JOYS OF BAKING BOOK REVIEW

I will never write a cookbook. Having said that, IF I ever wrote one, I would like it to be along the lines of The Joys of Baking, by Samantha Seneviratne. As Dorie Greenspan writes in her endorsement: A sweet meditation on why we bake… the book is a delight.

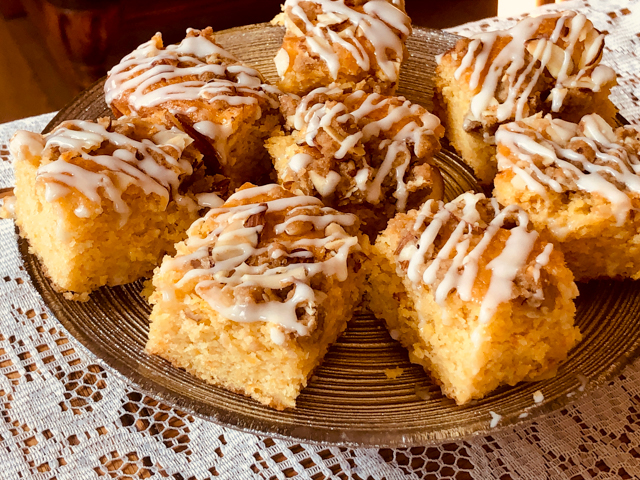
I couldn’t have said it better, Dorie summarized it all. I contacted Samantha and she gave me permission to publish one recipe on the blog. I had quite a hard time choosing which one to share, but decided to go with her Orange Streusel Cake, because its preparation is quite unusual and the cake turned out absolutely perfect for my taste.  But I will also show you pictures of another recipe from the book, Samantha’s  Mascarpone Gingerbread Bars. Because… ginger…
ORANGE STREUSEL CAKE
(from The Joys of Baking, published with permission from Samantha Seneviratne)

For the streusel:
½ cup (65g) all-purpose flour
½ cup (110g) packed light brown sugar
¼ teaspoon kosher salt
4 tablespoons (57g) unsalted butter, melted (I used half the butter)
1/2 cup (15g) sliced almonds

for the cake:
6 tablespoons (85 g) unsalted butter, at room temperature
1 entire navel orange (about 280 g), seeded, cut into large chunks
¼ cup (60g) sour cream, at room temperature
1 +1/2 cups (195g) all-purpose flour
1 teaspoon baking powder
½ teaspoon kosher salt
¼ teaspoon baking soda
¾ cup (200g) granulated sugar
2 large eggs, at room temperature

for the glaze:
3 to 4 teaspoons freshly squeezed orange juice
¾ cup (90g) powdered sugar

Heat the oven to 350°F.

Prepare the streusel: In a medium bowl, combine the flour, brown sugar, and salt. Drizzle the melted butter over the mixture and stir to incorporate. The mixture should clump together when squeezed. Toss in the almonds. Prepare the cake: Butter an 8-inch square baking pan. Line the pan with parchment paper, leaving a 2-inch overhang on 2 opposite sides. Butter the parchment.

Place the orange in a blender and process until it is the texture of applesauce. It’s okay if you have a few larger pieces. You should have about 1 cup of orange purée. Add the sour cream and stir to combine.

In a medium bowl, whisk together the flour, baking powder, salt, and baking soda. In a large bowl, with an electric mixer on medium speed, beat the butter and granulated sugar until light and fluffy, about 3 minutes. Add the eggs, 1 at a time, scraping down the bowl as necessary. Add half of the flour mixture and beat on low speed until just combined. Beat in the orange mixture, then beat in the remaining half of the flour mixture.

Transfer the batter to the prepared pan and smooth the top. Top with the streusel mixture. Squeeze the streusel to form a range of differently sized clumps. Bake until a toothpick inserted into the center of the cake comes out with moist crumbs attached, 40 to 45 minutes. Transfer the pan to a wire rack to cool for 20 minutes. Then, using the parchment overhang as handles, transfer the cake to a wire rack to cool completely.

Prepare the glaze (if using): In a small bowl, whisk the orange juice into the confectioners’ sugar, adding a little less juice for a thicker glaze that will look lovely on top of the cake, or a little more for a thinner glaze that will soak in. Drizzle the glaze over the cooled cake.

ENJOY!

to print the recipe, click here
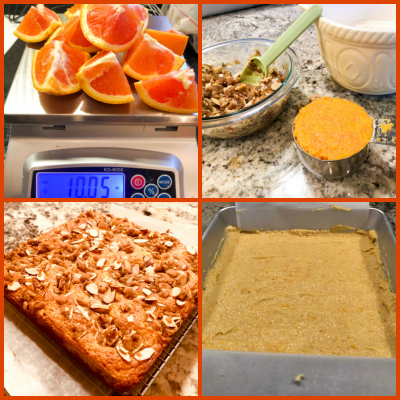
Comments: I am very fond of marinades that use a whole lemon instead of its juice or zest, so the moment I saw that the cake called for a full orange turned into a pulp in the food processor, I knew I had to give it a try. You cannot get much more orange-y than that. And the drizzle of icing sugar/orange juice beautifully seals the deal. The cake is moist, feels rich but light at the same time, if at all possible.

Do you notice the little bits of orange throughout the crumb?
Absolute yumminess.

Now let me share with you a little teaser of a recipe. Originally I was going to focus the blog post on this one, because it was a huge hit when I took it to the Common Table meal (meals for homeless in our town). Mascarpone Gingerbread Bars…

It starts as a very smooth batter, pretty much like a brownie, a one-bowl deal.

Then you swirl a mascarpone cream into it, and marvel at the way it looks.
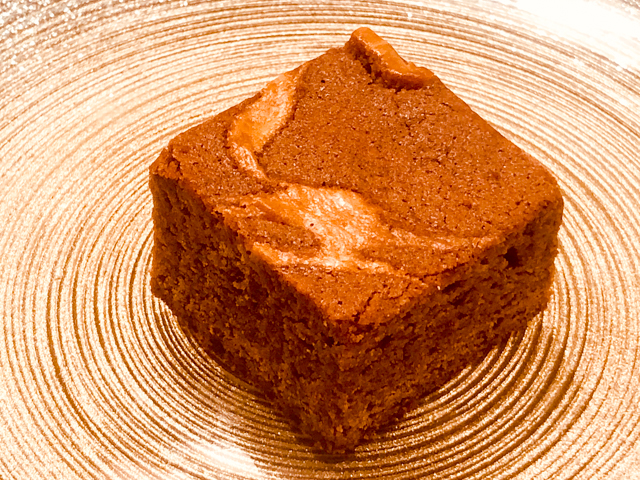
The crumb is tight, full of gingerbread flavor, and you get that delicious sharp contrast of the mascarpone every now and then. This will please anyone.

Now, a virtual tour of Samantha’s book.
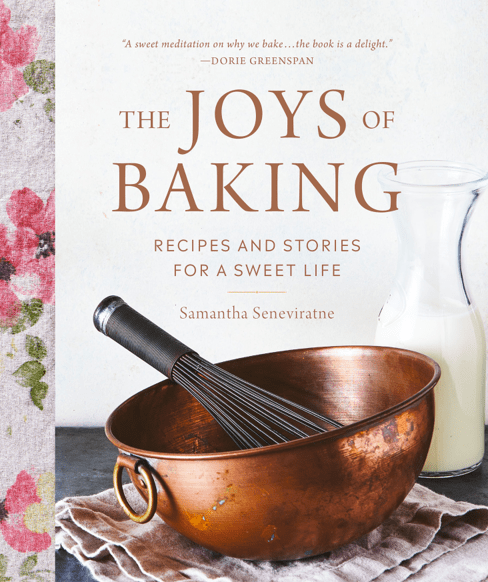
From her introductory chapter, I cut and paste her words…

Cooking is a necessity. Everyone needs to eat. Preparing a special meal can be a joy, of course, but often it feels like a chore, just another item on an endless list of things that must get done. Baking is different. Baking is a choice. Baking is never a necessity. No one needs a chocolate cake to survive. Except, sometimes, a chocolate cake is exactly what you need to survive. Sometimes, a chocolate cake is the only thing you need in the world. This is a book about and for those times.

I was touched by this paragraph, it really echoes with the way I view baking. She then moved to talk about the tragic life story of Irma Rombauer,  the woman behind the most classic American cookbook of all times, The Joy of Cooking. I was unaware of it, and once again Samantha’s words touched me.

The Joys of Baking is inspired by the book that Irma Rombauer could have written. It’s the story of baking my way through my own heartbreak—of what happened when the parts of my life I thought would be the best turned out to be the worst, and when the things I thought would make me happy almost wrecked me, and why they didn’t.

The book is divided in chapters that have nothing to do with baking categories. They are: Courage, Grace, Bliss, Love, and Wisdom.  Each chapter and each recipe starts with a small paragraph that is like a tiny little window into Samantha’s soul. The window might be tiny, but the image it shows is very bright. 

From this chapter, many recipes tempted me to get into the kitchen and start baking. Coconut and Passion Fruit Pound Cake, a breathtakingly gorgeous Chocolate Cardamon Babka, Earl Grey Pain au Chocolat, the Mascarpone Gingerbread Bars (photo included in this post), and a Sweet Potato Cinnamon Bun with Browned Butter Cream Cheese Glaze (wow!).

The chapter opens with Salted Chocolate-Covered Chocolate Caramels. Of course, when a person wears braces, she will be fiercely drawn towards caramels, brittles, and nougats, even if before having braces those items were rarely part of her life. Anyway, I will make these babies the moment I get rid of my torture devices. Coffee Creme Bundt Cake, is beautiful and preceded by a heart-warming bit about her Dad. As always, just a little paragraph, just enough to make you smile and wonder if you haven’t been too narrow-minded about your thoughts about food.  Next comes a recipe I really wanted to feature in the blog, but did not have a chance to make yet. Ready to dream? Creme Brulle Tart with Pears and Chocolate. Yes, this will be in our kitchen at some point in the near future.  Danish Sugar Cookies with Currants and Lemon… Pistachio and Praline Puffs… Sunshine Wreath (a thing of beauty!).

From this chapter the first thing that caught my eye was a shortbread, a recent weakness of mine. Her version is a Chocolate Almond Spelt Shortbread. Looks really tasty. Brownie Cake with Candied Hazelnuts and Whipped Cream...  Coconut Buns… Gingered Cashew Nut Brittle (blame it on the braces)…  Graham Cupcakes with Milk Chocolate Frosting (just adorable)…  Another heavy contender to be featured is We are Nuts About Nuts Cookies. Little sugar cookie rectangles dipped in chocolate and sprinkled with ground pistachio nuts. Just lovely. Orange Streusel Cake, featured today, is also in this chapter.


The chapter opens with my favorite little story of her book. Just a few thoughts about JFK Airport in New York City. More specifically about the arrivals gate.  “Where shopping and dining isn’t the point. It’s all about the crowd along the barriers.”  Just perfect.

From this final chapter, I would gladly try her Apple Snack Cake...  Barley Oat Biscuits… Cinnamon Raisin Soft Pretzels (the picture is enough to make your heart missed a few beats)… Lemon Lime Earl Grey Sables...  Maple Cream Pie…  Orange Pistachio Buns… Saffron and Chocolate Tea Cake…  and the very last recipe of the book, Unorthodox Challah with Dates and Cocoa.

I hope you enjoyed my little review and consider inviting this gem of a cookbook into your home. Samantha, thank you for allowing me to share a recipe with my readers. I look forward to baking more goodies from your book, and reading again and again your stories behind each one.
ONE YEAR AGO: Pink Praline Brioche

TWO YEARS AGO: A Spinach Salad to Write Home About

THREE YEARS AGO: Karen’s Four Hour French Country Bread

FOUR YEARS AGO: The Siren’s Song of the Royal Icing

FIVE YEARS AGO: Blog-worthy Roasted Butternut Squash

SIX YEARS AGO: Chocolate Currant Sourdough Loaf & Roasted Beet Hummus

SEVEN YEARS AGO: Sesame and Flax Seed Sourdough

EIGHT YEARS AGO: Spanakopita Meatballs

NINE YEARS AGO: Saturday Morning Scones

TEN YEARS AGO: Pain de Mie au Levain

 

THE HOME BAKERS COLLECTIVE: JANUARY PROJECT

I am thrilled to share this post today, because it gives me the chance to invite all my readers to visit a new blog, a blog that started from the experience of 9 lucky campers baking together in a certain tent in London. Our cozy virtual spot is The Home Bakers Collective, and we want it to be a place to share culinary experiences, stories,  recipes, and also get feedback from readers. Every month one of us will design a group project and we will work independently on it and show our concoctions on the last day of the month. Sounds like fun?  I definitely think so.

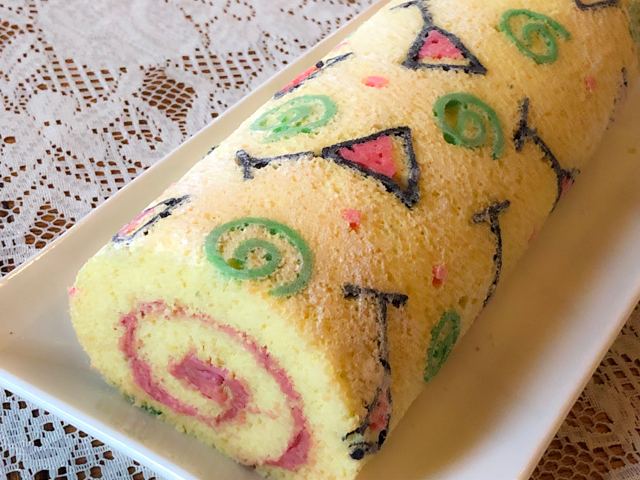
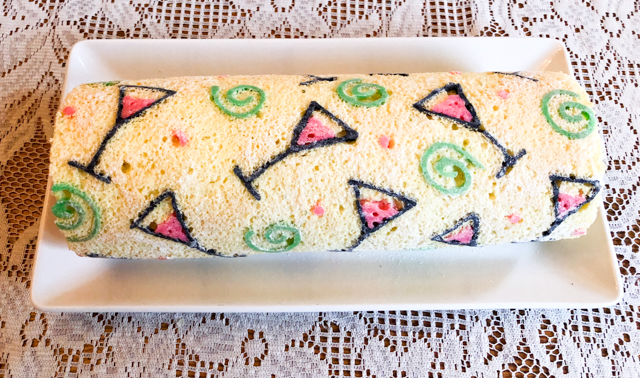
Helen was the first to come up with something for January. Her brief: make a roll cake inspired by your favorite cocktail or drink. It did not take me very long to settle on my choice: a Cosmopolitan-inspired cake!

VIRGIN COSMOPOLITAN ROLL CAKE
(from the Bewitching Kitchen, filling adapted from this site)

for the decoration:
50g  butter, softened
50g powdered sugar
50g  egg whites
50g  all-purpose flour
black, pink and green gel food dye

for the cake:
130g cake flour
1 teaspoon baking powder
5 large eggs, at room temperature, separated
200 g granulated sugar, divided (100g + 100g)
Zest of 2 limes
1/2 teaspoon lemon extract
¼ teaspoon cream of tartar
¼ teaspoon kosher salt
powdered sugar for rolling

for the filling:
3 cups fresh cranberries
1/3 cup granulated sugar
2 Tablespoons pomegranate molasses
227 g unsalted butter, softened (1 cup)
360 g cups powdered sugar, sifted (about 3 cups)

Make the piping decoration by beating the butter with powdered sugar in a small bowl until fully combined. I used a hand-held electric mixer. Add the egg whites and beat for a couple of minutes. Add the flour and mix by hand with a spoon, divide in three portions.  Color them black, pink and green.

Draw the design you want to have on the surface of the cake with a pencil on parchment paper that fits a half-sheet baking pan. Invert the paper so that the pencil mark is at the bottom. Pipe the icing using a very thin piping tip. Freeze the whole tray with the decoration for at least one hour. When the time is almost up, prepare the cake batter.

Heat oven to 400°F.  Sift the flour and baking powder into a small bowl. Reserve. Place the egg yolks in the bowl of a standing mixer fitted with the paddle attachment. Sprinkle 100 g of granulated sugar over the yolks, and beat on high speed until the mixture ribbons and is very pale and thick, about 8 minutes. Add the lime zest and lemon extract. Beat until just combined.

Place the egg whites in a clean bowl and fit the standing mixer with the whisk attachment; beat on medium-high speed for 1 minute. Sprinkle the cream of tartar and salt over the egg whites and continue beating on medium-high until soft peaks begin to form. Reduce the speed to medium, then slowly stream in the remaining 100 g granulated sugar and continue beating until the whites are glossy and stiff but not dry. Fold one-third of the beaten egg whites into the yolk mixture. Gently fold half of the sifted flour mixture into the yolk mixture, then half of the remaining egg whites. Gently fold in the remaining flour mixture, followed by the remaining egg whites. Transfer the batter into the pan with the frozen pattern on it, and very gently smooth the top into an even layer with an offset spatula. Bake the cake until it begins to pull away from the sides, about 8 minutes.

Transfer the pan to a cooling rack, cover the cake with a towel and let it cool fr 10 minutes. Remove the towel, sift a little powdered sugar over the surface and flip it over parchment paper. Gently peel off the paper with the design, flip the cake again over a towel with a little dusting of powdered sugar on the surface. Starting with a short side of the cake, roll the cake gently, using the towel to support the cake as you go. Let the cake cool all rolled up in the towel, seam side down.

Prepare the filling. Cook cranberries, sugar, pomegranate molasses and a splash of water in a saucepan on medium heat until the cranberries break down and into a thick, juicy mixture. Puree the cranberries in a high-speed blender until perfectly smooth. Chill. You will need ½ cup of this mixture to make the buttercream.

Put the soft butter, sifted sugar, cream of tartar, and 1/2 cup of the cranberry-pomegranate puree into the bowl of a stand mixer fitted with the whisk attachment. Beat, scraping down the sides often, for about 4 minutes, until light and fluffy.  Unroll the cake, fill and roll back, keeping the seam down.  Slice and serve.

ENJOY!

to print the recipe, click here

Comments: If you are intimidated by baking a cake with a “printed” pattern, please don’t be. Even if you are artistically challenged like me, simple drawings are easy (although I must say my hand was shaking a bit when I started piping). Just remember that different colors piped side by side will mix. Pipe the outline first, put the baking sheet in the freezer for 10 minutes, and add the second color to fill the design, if that’s the case.  For my Virgin Cosmopolitan glasses, I did all the black outlines first, froze it, and finished with pink and green after.  It is a lot of fun, particularly that moment in which you peel off the parchment paper.

Also keep in mind that you don’t need to have the design on the whole area, as some of it will be rolled and hidden.  I just made sure I covered enough not to go into “pattern-anxiety.”

I tried two different recipes for the cake itself, and settled on the one I am sharing. You need to get good volume as you beat the yolks and later the whites, and use a gentle hand to mix them together. The baking powder made the cake rise quite a bit more than a version I made without it. I think you might get by with 3/4 tsp of baking powder for the same amount of batter.

The filling. I wanted to add fresh pomegranate seeds after spreading the buttercream, but that day I could not find them in the two main grocery stores in town. I got some frozen but they are just to watery and I skipped them. Be warned: do not taste the cranberry/pomegranate buttercream before spreading on the cake, or you might not have enough. So, so delicious! I actually had leftovers that went into some macarons the following week. At the present time, I have 6 macaron recipes patiently waiting to be shared with you. I know. Some obsessions do not seem to end.

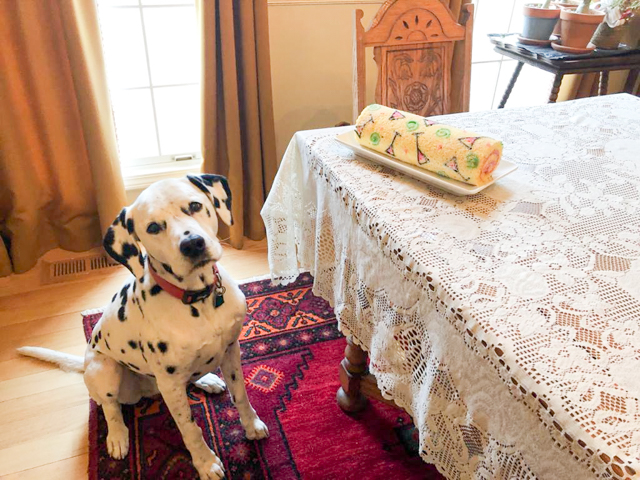
BogeyQT™ understands obsession…

I hope you enjoyed my little roll cake, but please make sure to stop by “the collective” to see what my friends came up with (post might take a couple of hours to be published, just try a little later if it’s not there  yet). I heard that next month’s challenge will be pretty cool, but until then we’ll have some cool stuff to share with you. Stop by to say hello, we would love to have you there.

ONE YEAR AGO: Bouillabaise for a Chilly Evening

TWO YEARS AGO: Bergamot-Cherry Macarons

THREE YEARS AGO: Roasted Veggies with Queso Cotija Dressing

FOUR YEARS AGO: Creamy Broccoli and Mushroom Casserole

FIVE YEARS AGO: Maple Walnut Biscotti

SIX YEARS AGO: Barley Risotto with Peas

SEVEN YEARS AGO: Oatmeal Fudge Bars

EIGHT YEARS AGO: Cauliflower Steaks

NINE YEARS AGO: Soft Spot for Chevre

TEN YEARS AGO: Quick sun-dried Tomato Crostini