LOW-CARB SUPER FAST CHICKEN PARMIGIANA

Air-fryer to the rescue again… I will give you pretty loose instructions, because how you make it will depend on your carb goals. If you want to do close to zero carbs, omit the bread crumbs. The texture will suffer a bit, but it will still work. If you want to do moderate carbs, use the mixture I did. I am quite surprised by how much I liked the texture of the meat, and the fact that frying the chicken breast on the stove top before baking was not needed at all. A leap of faith was needed for me to try it the first time. I’ve made it three times ever since.

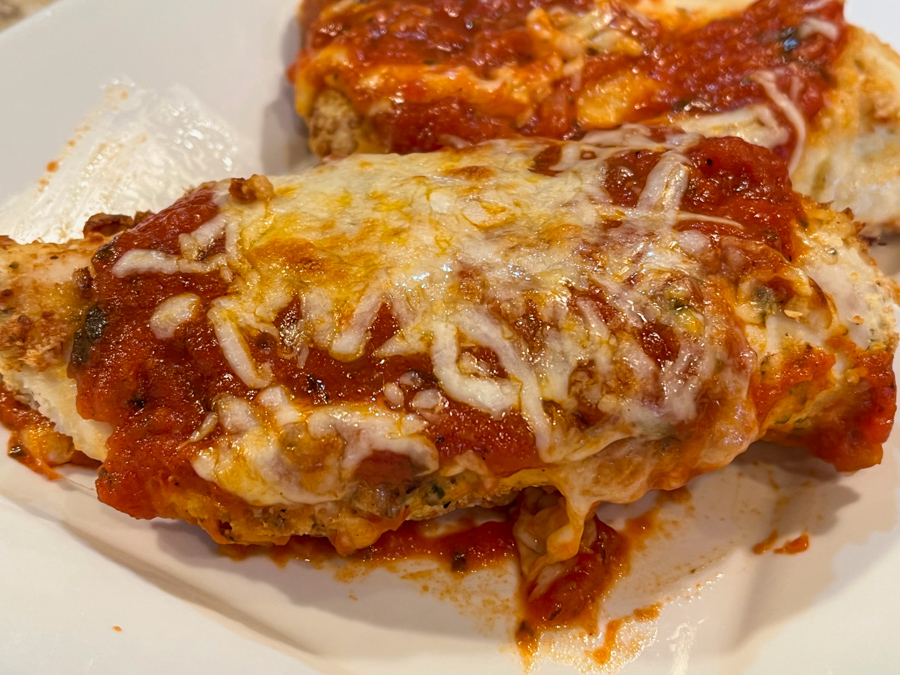
LOW-CARB AIR-FRYED CHICKEN PARMIGIANA
(from The Bewitching Kitchen)

2 chicken breasts, boneless, skinless, lightly seasoned with salt
2 eggs, whisked with a teaspoon of water, salt and Herbes de Provence to taste
50:50 mixture of bread crumbs and almond flour
(lower carb alternative 50:50 mixture of almond flour + finely grated Parmigiano cheese)
tomato sauce
mozzarella cheese

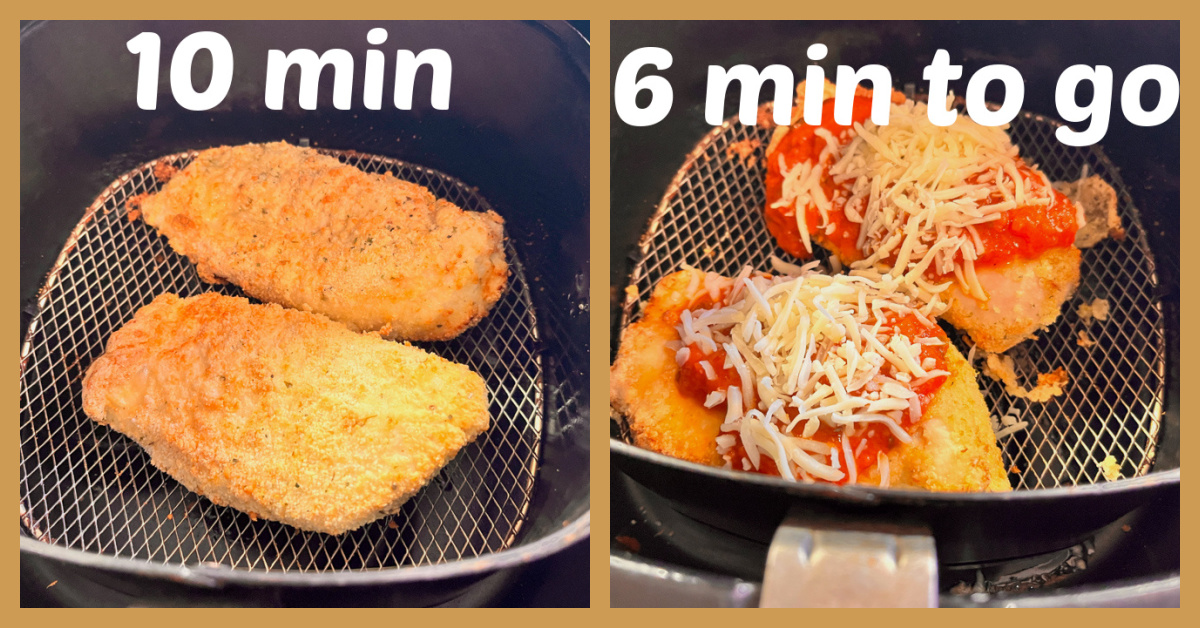
Dip the chicken breasts in the seasoned whisked egg mixture, coat both sides with your choice of “breading.” Spray the basket of the air-fryer with a little olive oil. Carefully place the pieces of meat side by side in the basket. Turn the air-fryer to 390F and cook for 10 minutes. If you are using very large breasts, cook for 12 minutes, but the recipe works best with smallish pieces of meat.

Gently flip the meat over, add tomato sauce and cheese. Air-fry for 6 additional minutes. Remove the meat and let it rest for a few minutes before slicing.

ENJOY!

to print the recipe, click here

Comments: There are three little issues that might annoy you with this method. You know I never lie…

First: if you go real low in carbs, the coating is on the soft side. It will be very hard to flip the chicken piece without losing part of it to the basket. Even with the bread crumbs a little bit is lost. I am not sure if the flipping of the piece is necessary, and intend to try without doing it next time.

Second: it makes a bit of a mess in the basket once the cheese melts. I am a neat-freak and that means I spend quite a bit of time cleaning it up and inspecting every little corner. It still does not prevent me from making it, but keep that in mind and don’t get mad at me…

Third: if you have a smallish air-fryer like I do, you can only do two pieces of chicken at a time. It turns out that when I make this, I do the regular kind (stove-top, fried then baked) for the husband, and this lower-carb version for me. But if you are feeding a family of four, this is not a good option.

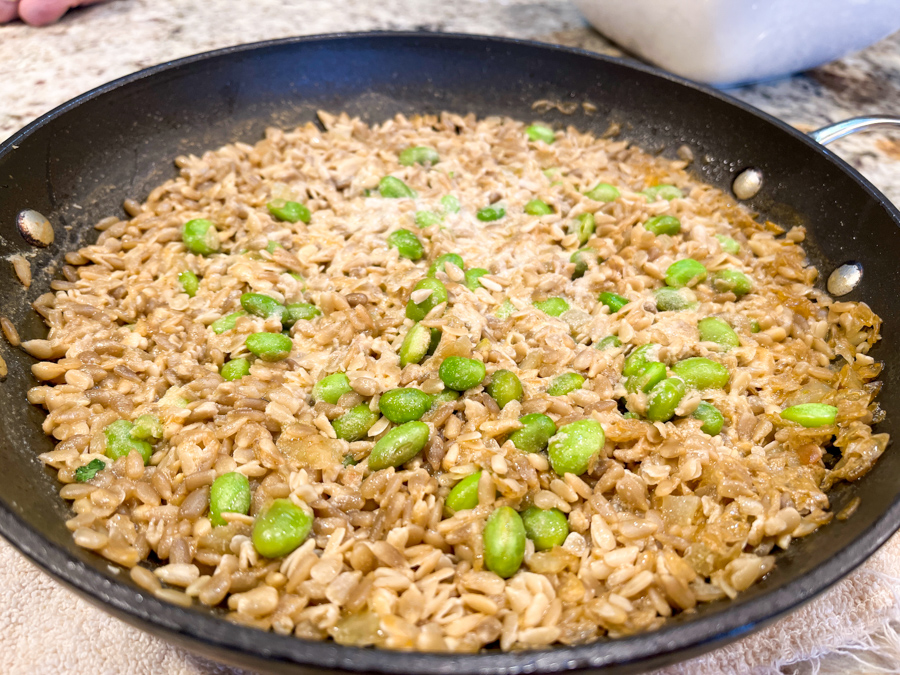
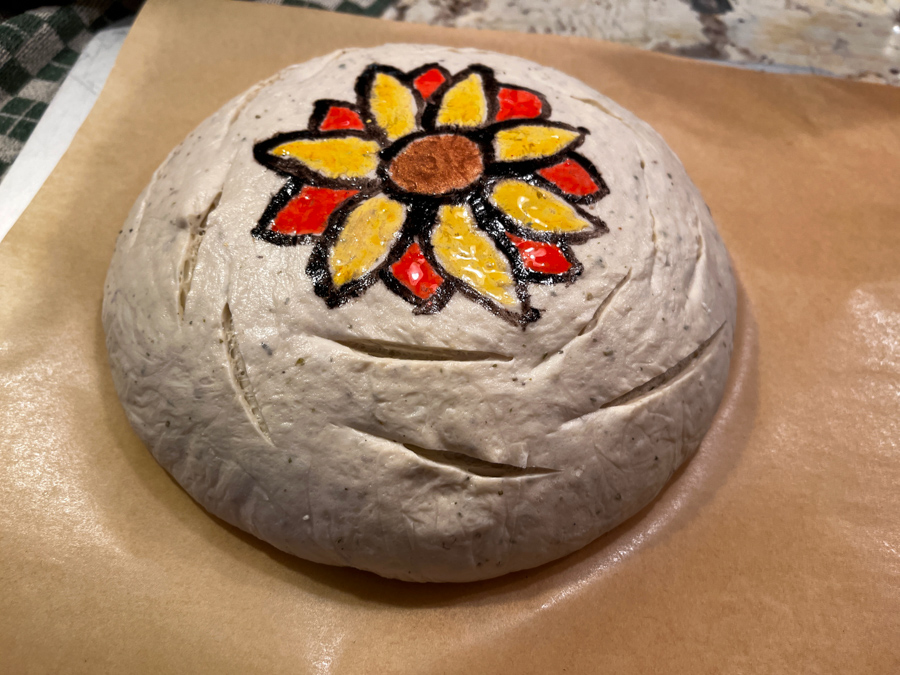
ONE YEAR AGO: Sundried Tomato Spelt Sourdough

TWO YEARS AGO: A Duet of Chocolate Bonbons

THREE YEARS AGO: Chocolate Tartlets with Honey-Caramel Filling

FOUR YEAR AGO: Zucchini Soup with Tahini

FIVE YEARS AGO: Black Sesame Macarons

SIX YEARS AGO: Fine Tuning Thomas Keller

SEVEN YEARS AGO: Cauliflower Tortillas

EIGHT YEARS AGO: Majestic Sedona, Take Two

NINE YEARS AGO: Secret Ingredient Turkey Meatballs

TEN YEARS AGO: Swedish Meatballs and Egg Noodles

ELEVEN YEARS AGO: Italian Easter Pie

TWELVE YEARS AGO: Black Olive Bialy

HAPPY EASTER!

I invite you to stop by my cookie blog to see several designs of cookies for the occasion…

CLICK HERE TO VISIT

SUNFLOWER SEED “RISOTTO” WITH EDAMAME

It is not often that a recipe blows my mind and I get so excited about it I can hardly wait to share here… This is not rice-based. There is no rice at all. The whole concoction is made with sunflower seeds, soaked for several hours. It is absolutely delicious, hearty but considerably lower in carbs. The starting point for my version was a recipe from Naturally Nourished, by Sarah Britton. I was not sure the husband was going to like it that much, but he thought it was one of the tastiest side dishes I’ve made in the recent past. So there you go!

SUNFLOWER SEED “RISOTTO” WITH EDAMAME
(inspired by Naturally Nourished)

2 cups raw, unsalted, shelled sunflower seeds
1 tsp salt, plus more as needed
1 tablespoon grapeseed oil
1 fennel bulb, diced small
2 cups vegetable stock (you won’t need the full amount)
frozen edamame, about 1/2 cup or amount to taste

Soak the sunflower seeds overnight or all day with the sea salt in a large bowl of water. Drain and rinse the sunflower seeds.

In a high-power blender (I used a Vitamix), add 1/2 cup of soaked seeds and half a cup of water. Blend util fully smooth, remove and set aside.

In a non-stick skillet or small stockpot, heat the oil, add the fennel, season with salt and pepper. After about 2 minutes, add the soaked and drained whole sunflower seeds, stir to coat with the oil, then add vegetable stock to completely cover the seeds. It will depend on the size of your pan, but you will probably need less than 2 cups. Add a little salt and pepper if so desired.

Reduce the heat and simmer, covered, for 20 minutes. Add 2 tablespoons of the reserved sunflower seed cream, stir, then add frozen edamame, spread all over the surface, and cover the pan again. Cook gently for 5 minutes, then check that the seeds are tender and the edamame warm. If needed, add more vegetable stock, or alternatively remove the lid and let the excess liquid evaporate.

Serve the “risotto” right away.

ENJOY!

to print the recipe, click here

Comments: I fell in love with this dish at first bite… The cream of seeds made in the Vitamix has a strong taste, and gives the grain a luscious texture without the need for butter. You won’t use all, but it is hard to make less in the Vitamix. I am saving the leftover for next time, because it will happen again very soon… You can add different veggies, mushrooms, sun-dried tomatoes, whatever you feel like, adjusting the timing or cooking the veggies before incorporating in the “risotto.” Sometimes it is hard to find raw sunflower seeds, but when we have them available in our grocery store, we buy several packages. Now that this dish will be part of our regular rotation, I cannot afford to run out of them!

ONE YEAR AGO: Russian Icing Tips, a Shortcut to Insanity

TWO YEARS AGO: Smoked Pork Tenderloin with Roasted Parsnips

THREE YEARS AGO: Fresh Take on Farro with Roasted Veggies

FOUR YEARS AGO: Secret Recipe Club Reunion 2018

FIVE YEARS AGO: Parsnip and Tomato Soup

SIX YEARS AGO: A Retro Dessert

SEVEN YEARS AGO: Cauliflower Tortillas: Going low-carb and loving it!

EIGHT YEARS AGO: Clementines in Cinnamon Syrup

NINE YEARS AGO: In My Kitchen, April 2013 

TEN YEARS AGO: Thrilling Moments

ELEVEN YEARS AGO: Maple-Oatmeal Sourdough Bread

TWELVE YEARS AGO: Pork Trinity: coffee, mushrooms, and curry

PAINTED SOURDOUGH

I consider this bread a work in progress, as the color is fading a bit during baking. Sugarprism stays very well on cookies (as I showed in the first cookie from this post), but I suppose 450F is a different story. However, this was only my second time doing it, and I already saw some improvement from the first attempt. Any sourdough recipe you are fond of will work. I opted for Elaine’s Herb and Olive Oil Sourdough, which I used as a teaser recipe in my recent review of her wonderful book (click here to read it, in case you’ve missed it). I like the way the olive oil in the dough seemed to tame a bit the crust explosion, and that worked well to keep the design untouched.

Basic things to consider when painting… minimize the amount of flour on the surface. When we do stenciling or even artistic slashing, a coating with flour is super important. In painting the dough, it makes things difficult and interferes negatively with the color. In today’s bread, for the outline I used black cocoa diluted with water. For the petals, Sugarprism in yellow and red. For the center of the sunflower, bronze luster powder diluted with vodka. As you can see, from the before pictures the bronze luster powder was the champion as far as keeping the color during baking. Black cocoa will always stay well, but if your goal is color, that cannot really help you much…

Just in case you are curious, below you see my first attempt painting sourdough. Two small issues happened: the dough had so much oven-spring that it lifted the design in ways that were not ideal. And I coated the surface with flour, which made the Sugarprism color interact with it and fade even more. The flour also gave a rough texture that made it impossible to spread the color nicely with a brush. In this case, I re-painted the bread the moment it came out of the oven to bring the color back. But my goal is to not have to do that, and get some method that retains the color during baking. Stay tuned then for my next adventure, in which I will use exclusively luster powder + vodka, hoping for a happy, very colorful ending…

ONE YEAR AGO: Over-the-Moon Blueberry Lemon Macarons

TWO YEARS AGO: Springtime Macarons Bake-Along

THREE YEARS AGO: Macarons for a Little Princess

FOUR YEARS AGO: Gilding the Sourdough Loaf

FIVE YEARS AGO: Lolita Joins the Bewitching Kitchen

SIX YEARS AGO: Cashew Cream Sauce

SEVEN YEARS AGO: Blood Orange Margaritas

EIGHT YEARS AGO: Smoked Salmon Appetizer

NINE YEARS AGO: Clementine Cake

TEN YEARS AGO: Springtime Spinach Risotto

ELEVEN YEARS AGO: The end of green bean cruelty

TWELVE YEARS AGO: Torta di Limone e Mandorle

MINI BLUEBERRY CAKES

I love all bakes by Sonali, a Bengali food blogger (site: Sugaretal) based in Australia. Her style is flawless, and her choice of flavors always pleases me. Not too long ago she shared these mini-cakes, loaded with blueberries, made even more special by the final touch of a shell of chocolate. To bake them, I used the Silikomart mold Parfum.

MINI BLUEBERRY CAKES
(very slightly modified from Sugaretal)

170g all-purpose flour
130g granulated sugar
1 + 1/2 tsp baking powder
1 egg, lightly whisked
1/2 cup milk
1/4 cup vegetable oil
1 tsp vanilla extract
1/3 cup fresh blueberries
1 cup white chocolate melts
pink oil-soluble food color
fondant decoration (optional)

Heat oven to 375 F. Lightly grease/spray 8 silicone molds.

Place flour, sugar and baking powder in a medium bowl. Add the egg, milk, vegetable oil and vanilla extract. Whisk to combine. Fold in the blueberries.

Pour batter into mold. Bake for 20 to 25 mins or until fully cooked through. A toothpick must come out clean when inserted in the center of the cakes. Remove from the oven, let the cakes cool almost completely before attempting to remove them from the silicone molds. Wash the silicone pan and reserve, while the cakes sit on a rack to get completely cold.

To the melted chocolate, add pink color, and brush the inside of the silicone pan. Carefully place a cold mini cake inside the cavity, so that the chocolate coats the surface. Place in the fridge for 45 minutes or the freezer for 15 minutes, then carefully remove the cakes. Decorate if so desired, with fondant or a Royal icing flower.

ENJOY!

to print the recipe, click here

Comments: So many possibilities with this technique! If you follow Sonali on Istagram (check her page here), you’ll see she has other variations using chocolate in the same basic approach. I can hardly wait to bake another batch. I will probably use my default recipe for brownie cupcakes, as it behaves well in different types of baking pans. The main thing to pay attention to is making sure the coating is fully set before the final un-molding. When in doubt, wait a little longer. It should come out very easily.

ONE YEAR AGO: Wood Plank Cookies, Learning from the Best

TWO YEARS AGO: OMG Spinach Pies

THREE YEARS AGO: Avgolemono Soup, My Way

FOUR YEARS AGO: Sourdough Chocolate Twist Bread

FIVE YEARS AGO: Dan Lepard Times Three

SIX YEARS AGO: Turkey Portobello Burger

SEVEN YEARS AGO: Raspberry Ricotta Cake

EIGHT YEARS AGO: In My Kitchen, April 2014

NINE YEARS AGO: Whole-Wheat Pasta with Lemony Tomatoes and Spinach

TEN YEARS AGO: Blood Orange Duck: A work in progress

ELEVEN YEARS AGO: Grilled Mahi-mahi with citrus marinade

TWELVE YEARS AGO: Memories of Pastéis\