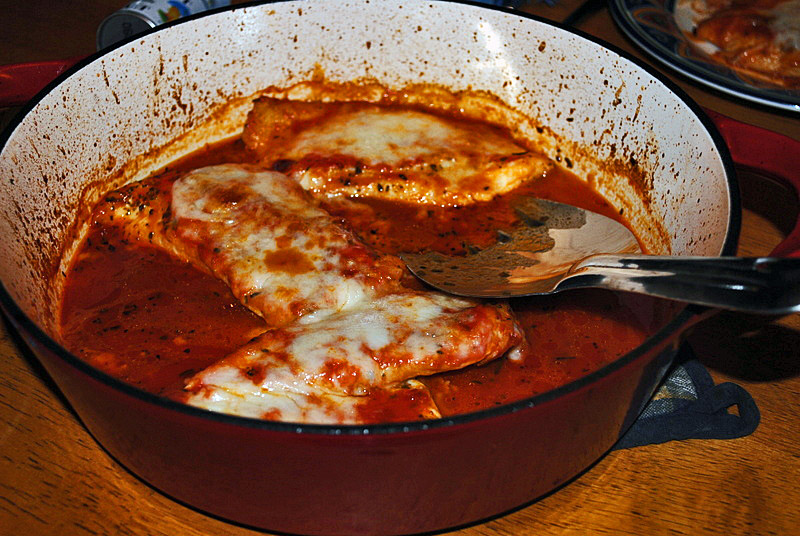
LOW-CARB SUPER FAST CHICKEN PARMIGIANA

Air-fryer to the rescue again… I will give you pretty loose instructions, because how you make it will depend on your carb goals. If you want to do close to zero carbs, omit the bread crumbs. The texture will suffer a bit, but it will still work. If you want to do moderate carbs, use the mixture I did. I am quite surprised by how much I liked the texture of the meat, and the fact that frying the chicken breast on the stove top before baking was not needed at all. A leap of faith was needed for me to try it the first time. I’ve made it three times ever since.

LOW-CARB AIR-FRYED CHICKEN PARMIGIANA
(from The Bewitching Kitchen)

2 chicken breasts, boneless, skinless, lightly seasoned with salt
2 eggs, whisked with a teaspoon of water, salt and Herbes de Provence to taste
50:50 mixture of bread crumbs and almond flour
(lower carb alternative 50:50 mixture of almond flour + finely grated Parmigiano cheese)
tomato sauce
mozzarella cheese

Dip the chicken breasts in the seasoned whisked egg mixture, coat both sides with your choice of “breading.” Spray the basket of the air-fryer with a little olive oil. Carefully place the pieces of meat side by side in the basket. Turn the air-fryer to 390F and cook for 10 minutes. If you are using very large breasts, cook for 12 minutes, but the recipe works best with smallish pieces of meat.

Gently flip the meat over, add tomato sauce and cheese. Air-fry for 6 additional minutes. Remove the meat and let it rest for a few minutes before slicing.

ENJOY!

to print the recipe, click here

Comments: There are three little issues that might annoy you with this method. You know I never lie…

First: if you go real low in carbs, the coating is on the soft side. It will be very hard to flip the chicken piece without losing part of it to the basket. Even with the bread crumbs a little bit is lost. I am not sure if the flipping of the piece is necessary, and intend to try without doing it next time.

Second: it makes a bit of a mess in the basket once the cheese melts. I am a neat-freak and that means I spend quite a bit of time cleaning it up and inspecting every little corner. It still does not prevent me from making it, but keep that in mind and don’t get mad at me…

Third: if you have a smallish air-fryer like I do, you can only do two pieces of chicken at a time. It turns out that when I make this, I do the regular kind (stove-top, fried then baked) for the husband, and this lower-carb version for me. But if you are feeding a family of four, this is not a good option.

ONE YEAR AGO: Sundried Tomato Spelt Sourdough

TWO YEARS AGO: A Duet of Chocolate Bonbons

THREE YEARS AGO: Chocolate Tartlets with Honey-Caramel Filling

FOUR YEAR AGO: Zucchini Soup with Tahini

FIVE YEARS AGO: Black Sesame Macarons

SIX YEARS AGO: Fine Tuning Thomas Keller

SEVEN YEARS AGO: Cauliflower Tortillas

EIGHT YEARS AGO: Majestic Sedona, Take Two

NINE YEARS AGO: Secret Ingredient Turkey Meatballs

TEN YEARS AGO: Swedish Meatballs and Egg Noodles

ELEVEN YEARS AGO: Italian Easter Pie

TWELVE YEARS AGO: Black Olive Bialy

CHICKEN PARMIGIANA, THE THRILLER

Phil doesn’t like to mess with a classic.  He’s got his favorite pancake recipe,  the oven-fried chicken with buttermilk biscuits and gravy, the Thanksgiving turkey, and the potato dumplings that his Grandma used to make.  And, he is also adamant about my chicken parmigiana, which he professes to be “the best he’s ever had”. That’s why it took me so long to try Giada’s version, a streamlined, lightened up approach to this American-Italian goodie.  I tried to hide my game, but he saw some of the regular actors in the plot: chicken breast filets, mozzarella cheese, and my tomato sauce simmering on top of the stove.  He opened his brightest smile: “We are having chicken Parmigiana! YEAAAAH!”    I  replied with a sheepish smile:  “Well, sort of, it’s a kind of Parmigiana, yes, but not really, maybe almost Parmigiana, but not quite.  We’ll see if we like it.”   Silence.  A slight shudder of the shoulder, which I could not help but notice.  His body language went more or less like “Why would she do this to me?”  Why? For the simple thrill of it, of course! 😉

First, you must make your own tomato sauce, using good quality canned tomatoes.  I saute’ a little shallot in olive oil until fragrant, season with salt and red pepper flakes, add the tomatoes and some dried thyme, and simmer for about 20 minutes. Then I use an immersion blender to turn it into a smooth sauce.

Next, you need to make a little seasoned oil.  I used thyme from my friend Cindy’s garden (yet another gift from my very thoughtful friend), and rosemary from our own plant here in Manhattan. Chop them finely, and add to the oil with a little salt. And freshly ground black pepper.

Brush the chicken cutlets on both sides with the oil, keep in the fridge for half an hour or so, if you have the time. If not, move on to the next step.

Sautee the cutlets in a very hot skillet with just a tiny coating of olive oil.  Once both sides are nicely golden, pour some  tomato sauce around and over the chicken.  Cover the pan and simmer gently for a few minutes.  Uncover, add grated mozzarella cheese on top of the meat, cover the pan again and bake on a 400F oven for 10 minutes.
Open the lid, turn the broiler on for a little while if you like your cheese to get a nice tan. It’s not mandatory, though… at this point, you have already reached the desired level of yumminess.

Serve with some spaghetti with your home-made tomato sauce, sprinkle Parmigiano cheese on top, and   ENJOY!

For Giada’s recipe, follow this link…

Comments:  When I make my own version of this dish,  I often omit the cheese in some pieces.  I tried it with this recipe (you might be able to notice one small piece of cheese-less chicken on the first photo), but I advise against it. In this particular preparation, the cheese will act as an important blanket for the cutlets that otherwise will be a bit dry.  What I love the most about this recipe is how easy it was to make it.  No need to have those three trays with breadcrumbs, flour, eggwash, and the result is quite a bit lighter but still delicious.  The herb oil adds a lot of flavor, don’t omit this step, and feel free to experiment with other spices and flavorings. Will it be the default Parmigiana in our home?  I doubt it, but it’s definitely a great option for those evenings that pop up right at the end of a hectic day at work.  😉

One more thing before I forget:  the pan I use is a Giada cast iron dish sold by Target.  I cannot believe I’m saying this, but I like it better than Le Creuset.  It is a lot cheaper, it works just as well, and the cleanup is a breeze!  My Le Creusets got stained from the first use, and never cleaned well, even using diluted bleach.  Giada’s pan still looks brand new, after many  encounters with tomatoes, red wine, and soy based sauces.  No, I don’t work for Target, and have no personal links to Giada.  In fact, I have never accepted  freebies from companies to write a review.  I only endorse stuff I love.  And I love, love, love this pan!  😉

ONE YEAR AGO: Wild Mushroom Risotto

TWO YEARS AGO: Tartine Bread:  Basic Country Loaf
(one of my most popular posts!)

THREE YEARS AGO:  Pugliese Bread