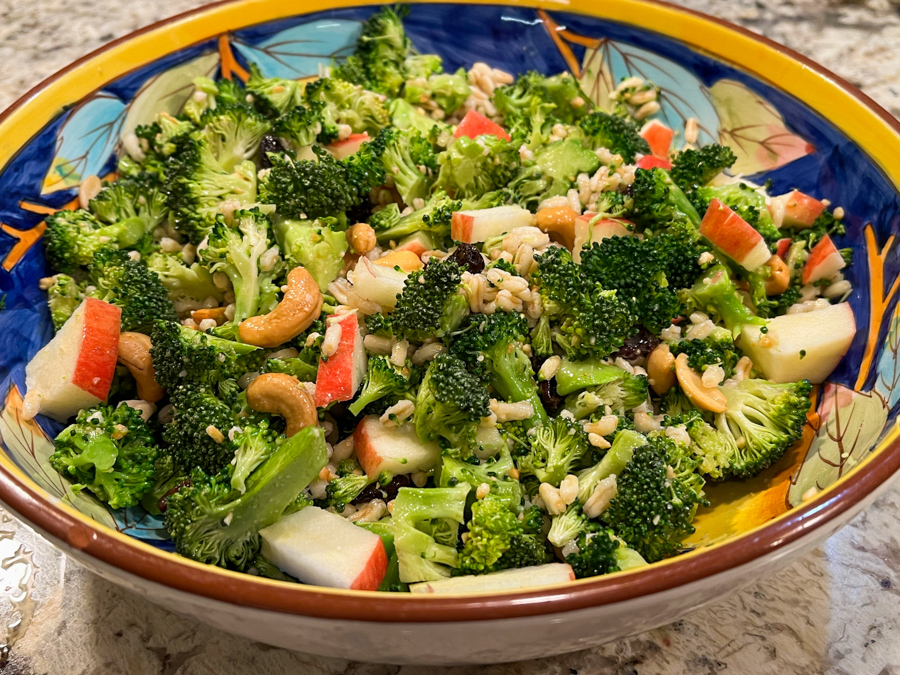
If I am going to have a salad, my preference is a salad with substance, and a variety of textures and colors. No need to go all the way into a Chicken Caesar or a Steak Salad, but the addition of grains is more than welcome. I used quick-cooking kamut, but any type will work, just pay attention to the timing. Also, any other will be fine: barley, cracked wheat, or the beautiful farro.
KAMUT & BROCCOLI SALAD (adapted from many sources)
1 cup cooked kamut, or amount to taste 2 broccoli heads, or amount to taste 1/2 cup roasted, salted cashews 1/4 cup raisins 1/2 apple, cut in pieces (I used Pink Lady) 1/4 cup olive oil juice and zest of 1 lemon grated ginger to taste salt and pepper to taste
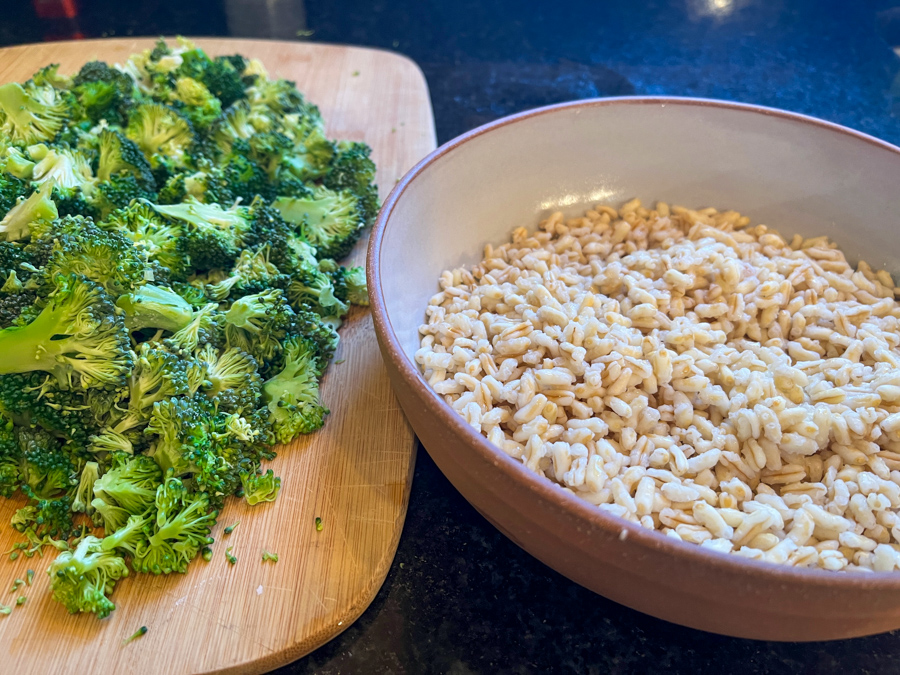
The kamut can be prepared a day in advance if you like. Make sure it is cold when you make the salad. If you make it in advance, drizzle just a touch of olive oil to prevent the grains from sticking together. Separate the broccoli into florets and steam them for 3 minutes. Immediately run very cold water to stop the cooking. Cut the steamed broccoli into pieces. Reserve.
Make the dressing by whisking the olive oil with lemon juice, add ginger, salt and pepper.
In a large serving bowl, add all the ingredients for the salad, pour the dressing and mix gently. Adjust seasoning with salt and pepper if needed. Allow the salad to sit for 30 minutes before serving, if possible.
Comments: The main inspiration for this recipe came from a cookbook I own, but that version served the broccoli raw and passed by the food processor. The pieces of raw broccoli were very small and lost in the middle of the grain, all acquiring the same green color. The way I chose to make it, was barely steaming the broccoli. This simple step tames its raw sharpness. Next, I cut the pieces with a knife, in small chunks. In my opinion, this makes the final product much more appealing not only visually, but as far as texture goes.
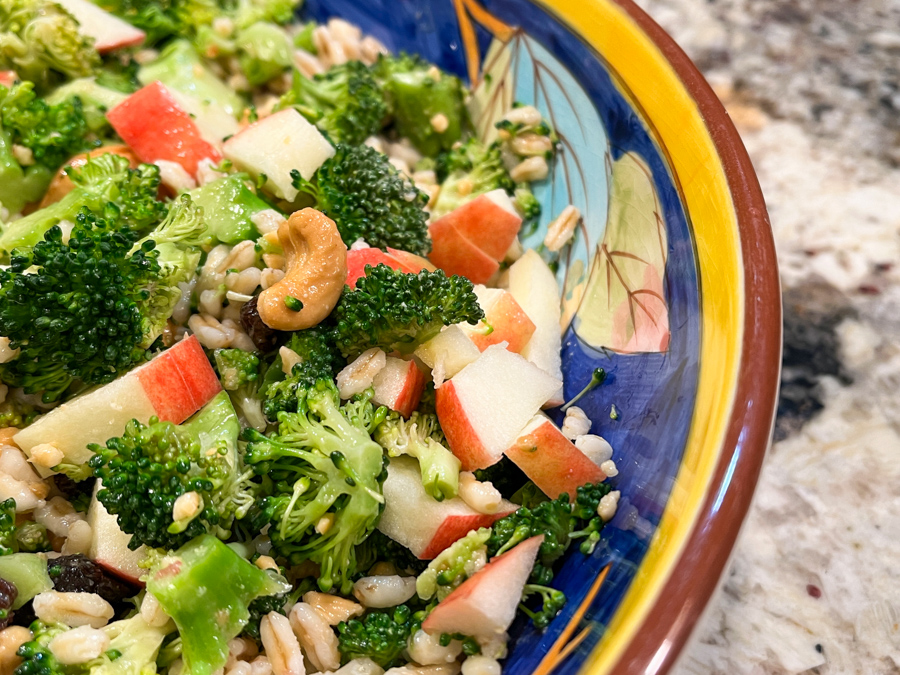
The apples and raisins are a must, and the cashews give that extra crunchiness that will leave you smiling… peanuts, walnuts, or pecans, can be used instead.
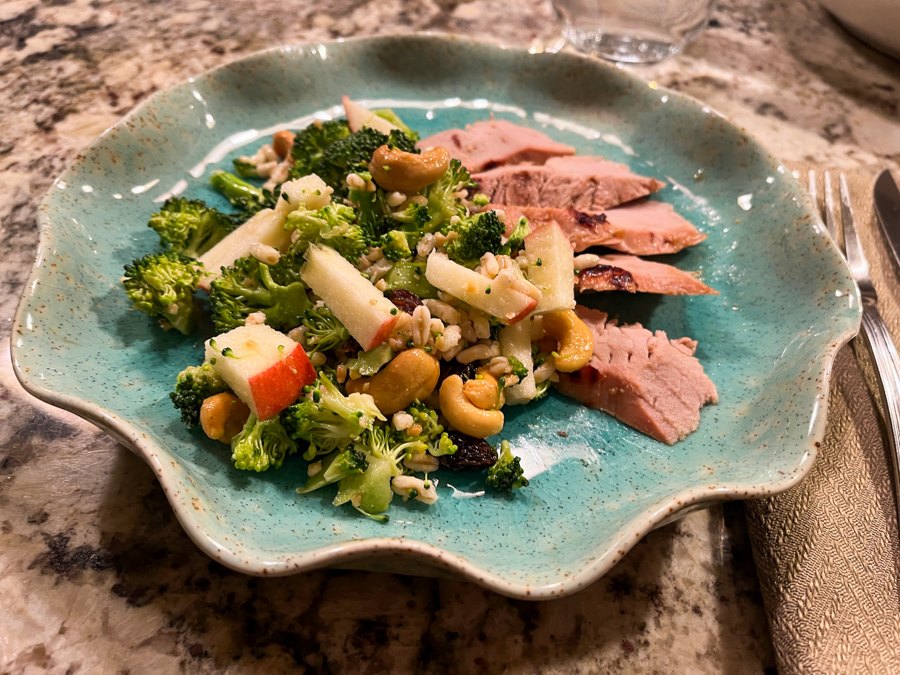
The added bonus of this salad: it holds quite well in the fridge. I made such a big portion that in fact it lasted two days, and on the second day I decided to warm it in the microwave for a minute. Perfect! A light lunch that needed absolutely nothing else to go with it.
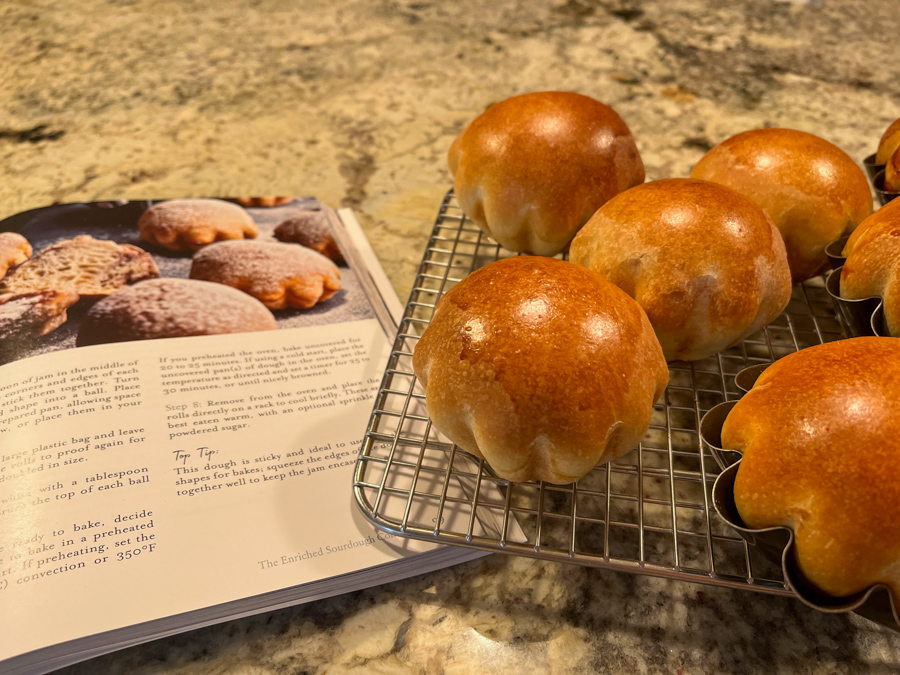
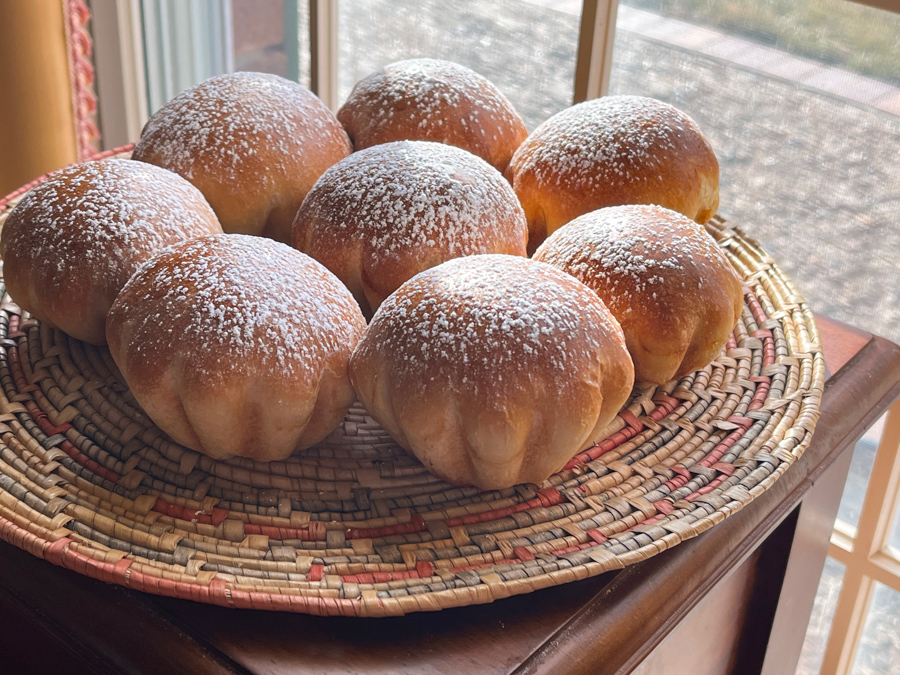
I am absolutely thrilled to share this recipe, fresh from the press, part of the second cookbook of my dear friend Elaine (click here for her sourdough site and here for her new book ordering info). Sourdough taken straight into brioche territory, with just the right level of sweetness, filled with your favorite jam. The recipe makes 16 rolls, I actually halved it and divided the dough in 8 pieces for shaping as rolls. To divide the egg, I just mixed one egg with the yolk, weighed that, and used half. It ended up being 30g egg mixture for half the recipe, in case you’d like to go that route.
Either line a large baking or cookie sheet with parchment paper and sprinkle with rice flour, or prepare fluted baby brioche pans (3 1/8 inches [8 cm] in diameter and 11/4 inches [3 cm] deep), lined up ready to fill on a baking sheet.
Makes 16 snack-sized buns 50 g active starter at 100% hydration 270 g milk, cold or room temperature 1 large egg 1 large egg yolk (reserve egg white for brushing) 75 g butter, at room temperature 50 g runny honey 500 g strong white bread flour, plus more for dusting 7 g (1 tsp) salt, or to taste 200 g jam of your choice (about 2 tsp per roll) Powdered sugar, for sprinkling (optional)
In the early evening, in a large mixing bowl, roughly mix together all the ingredients, except the reserved egg white and jam. It will be a very sticky dough, and it may be easier to use a bowl scraper or spatula to mix it at this stage. Leave it roughly mixed, cover the bowl with a clean shower cap or your choice of cover and leave the bowl on the counter.
After an hour, perform the first set of pulls and folds on the dough. Lifting and pulling the dough across the bowl until it starts to come into a soft ball, then stop. The butter will not be fully mixed in yet; it will become more so as you work with the dough. Cover the bowl again and leave it to sit on the counter. During this first set of pulls and folds, the dough will still be sticky, but keep working with it.
Over the next few hours, perform three more sets of pulls and folds on the dough, covering the bowl after each set. The dough will remain sticky but nicely stretchy and will come together into a nice soft ball each time. Do the final set before going to bed. Leave the covered bowl on the counter overnight, typically 8 to 12 hours, at 64 to 68°F (18 to 20°C).
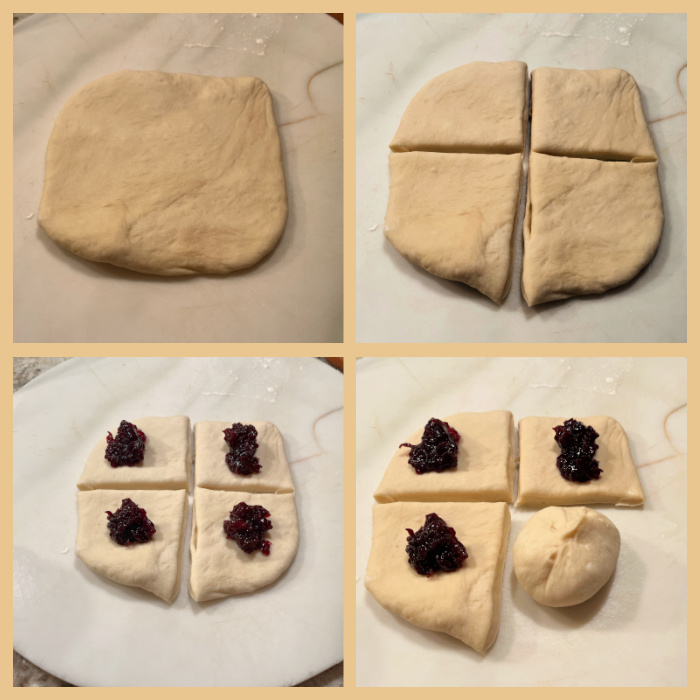
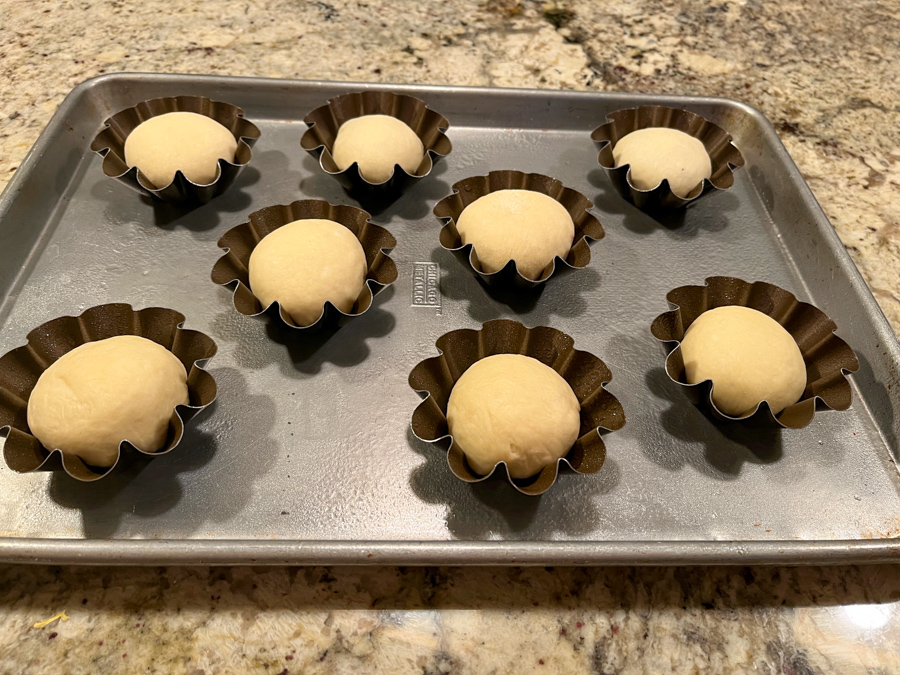
In the morning, turn the dough out onto a lightly floured surface and pull the dough into a 14-inch (35-cm) square that is an even thickness all over. Using a dough knife or pizza cutter, cut the dough into sixteen equal squares. Place a heaping teaspoon of jam in the middle of each square, pull the corners and edges of each square together and stick them together. Turn each parcel over and shape into a ball. Place each ball onto your prepared pan, allowing space between them to grow, or place them in your baby brioche pans. Cover the balls with a large plastic bag and leave on the counter for the rolls to proof again for 2 to 3 hours, or until doubled in size.
Heat the oven to 325F. Mix the egg white with a tablespoon of water and brush the top of each ball gently with it. Bake uncovered for 20 to 25 minutes. Remove from the oven and place the rolls directly on a rack to cool briefly. These are best eaten warm, with an optional sprinkle of powdered sugar.
Comments: This dough is wonderful to work with… smooth, elastic, easy to shape. Do not be afraid of letting it sit overnight at room temperature, unless you live in a super warm climate without air-conditioning. This rich type of dough tends to proof a lot slower than regular sourdough. For the final proofing, I used these brioche pans. They are a bit pricey but excellent quality. Love the way they look… But as Elaine mentions in the recipe, you can simply shape them as round little balls instead.
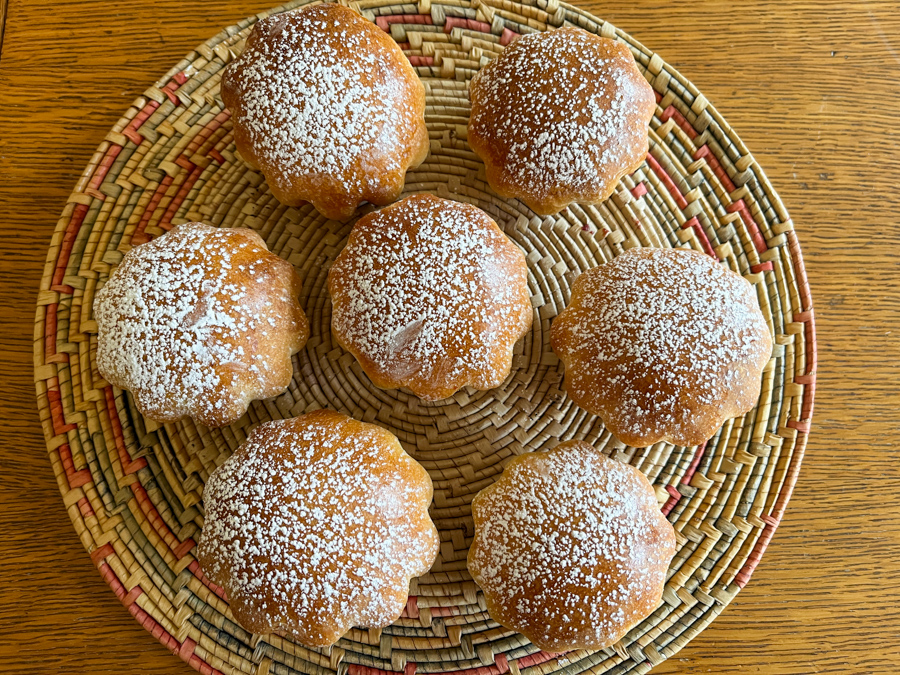
You can fill them with any jam you like. I used Morello Cherry preserves and it was absolutely delicious… A little bit leaked from the bottom of some of the rolls, but no harm done.
I don’t think I need to say much more, right? The picture is worth 1,000 words… They actually freeze well too. Just wrap them, and when you are ready to enjoy them, bring to room temperature for 20 minutes or so, then place in a warm oven to heat through. They will be as good as freshly baked!
Now let me walk you through Elaine’s new book, “The Sourdough Whisperer.” And in the end of this blog post you will see another bread I baked from her book, as a teaser recipe..
The book is organized in two parts, the first deals with everything you need to know about making sourdough: making a starter from scratch, maintaining it, ingredients, tools, her master recipe and timing your bread baking to suit your schedule. The essence of it all is exactly what we’ve seen in her first book: simplicity. I tell you one thing, in this first part she covers EVERY single question a baker might have as far as tweaking recipes, or changing proofing time and/or temperature. A must-read even if you are a seasoned sourdough baker.
Part Two is devoted to recipes, and you’ll find eight sub-chapters in it.
#1 – The Master Recipe Sourdough Collection. In this chapter she shows how versatile her Baby Master Recipe can be, adapting it to make different shapes, Wedge Rolls, Sandwich Loaf, a beautiful concoction using a Bundt Pan (yes, that is right, and the photo of that one is worth a prize), a Pullman Loaf, and she closes it with a cute little method to use up “ends of bags” of flour. Every single bread in the whole book has a picture, so keep that in mind. I love that.
#2 – The Enriched Sourdough Collection. I love this section! Normally I do a straight sourdough bread, so to me playing with enriched dough is not very common, which is one of the reasons why I chose the featured recipe. Elaine uses her default Enriched Sourdough in some formulas, and also offers a lighter alternative. The chapter opens with a total beauty, Enriched Sourdough Pesto Babka. Stunning! The Jam-Filled Rolls are part of that chapter, and I almost chose the Cinnamon and Raisin Enriched Bundt Pan Bake to showcase here.
#3 – The Spiced Sourdough Collection. I love bread with spices, if you follow my blog you’ve probably noticed. I definitely will be trying some of her versions like Smoked Paprika, Rosemary and Sun-Dried Tomato Master Loaf, and her Turmeric and Onion Seed Sandwich Loaf.
#4 – The Softer Sourdough Collection. Super interesting chapter. It centers on methods that will produce a sourdough with a much softer crust, something she achieves by adding milk into the formulas. She starts with a “Half-Milk, Half-Water Baby Master Loaf”, and moves to variations using different proportions and different liquids such as buttermilk (Buttermilk and Spelt Loaf with Pine Nuts and Oats, another thing of beauty). I made the teaser recipe from this chapter, “Olive Oil and Herb Master Loaf”, so check it out in the end of this post.
#5 – The Filled Collection. Maybe my favorite chapter, I just don’t know. In this section, she really shows her creativity, joining interesting ingredients together. First comes a Cheese, Fig and Walnut Sandwich Loaf, absolutely gorgeous and mouth-watering photo… Apricot and Almond Babka Loaf with very detailed pictures of the shaping. I absolutely MUST make the “Chickpea, Barberry and Lemon Pantry Loaf”.
#6 – The Flat Sourdough Collection. Elaine uses her master recipe to make focaccia, pizza, ciabatta, and fougasse. In other words, she covers all the classics. Pictures are wonderful, including once again quite detailed shots of shaping ciabatta, which can be tricky.
#7 – The Shaped Collection. Another super fun and creative chapter, she shares techniques for special shaping. Braided Loaf is the first example, but don’t think about challah, this braid decorates the top of the bread, super cool. Looks intimidating but the pictures show you exactly how to do it. A Chocolate and Nut Sourdough Crown follows, would be just amazing at a party. The one I intend to try soon is… Pull-Apart Sharing Sesame Sourdough. The chapter closes with baguettes, in my opinion the trickiest bread to shape correctly.
#8 – The Same Day Collection. Sometimes we want to speed things up, right? This series gives recipes to have sourdough prepared and baked the same day. It is all a play with amount of starter and proofing temperature. Sourdough Pizza and Pita are two examples, but my favorite might be Same Day Poppy Seed Sourdough Rolls. They are adorable.
If you bake sourdough bread, or if you flirt with the idea of venturing into it, you need this book. The tone is always friendly, supportive, positive, and again, reading the book and browsing through the wonderful pictures, I just wanted to stop and start baking right away. The mark of a captivating cookbook!…
And now, as I always like to do when reviewing cookbooks, I share…
A TEASER RECIPE
OLIVE OIL AND HERB SOURDOUGH
Isn’t that amazing? The crust is a lot softer than a regular sourdough, and the bread stays fresh longer. A pleasure to work with, great flavor with the herbs spread inside the crumb.
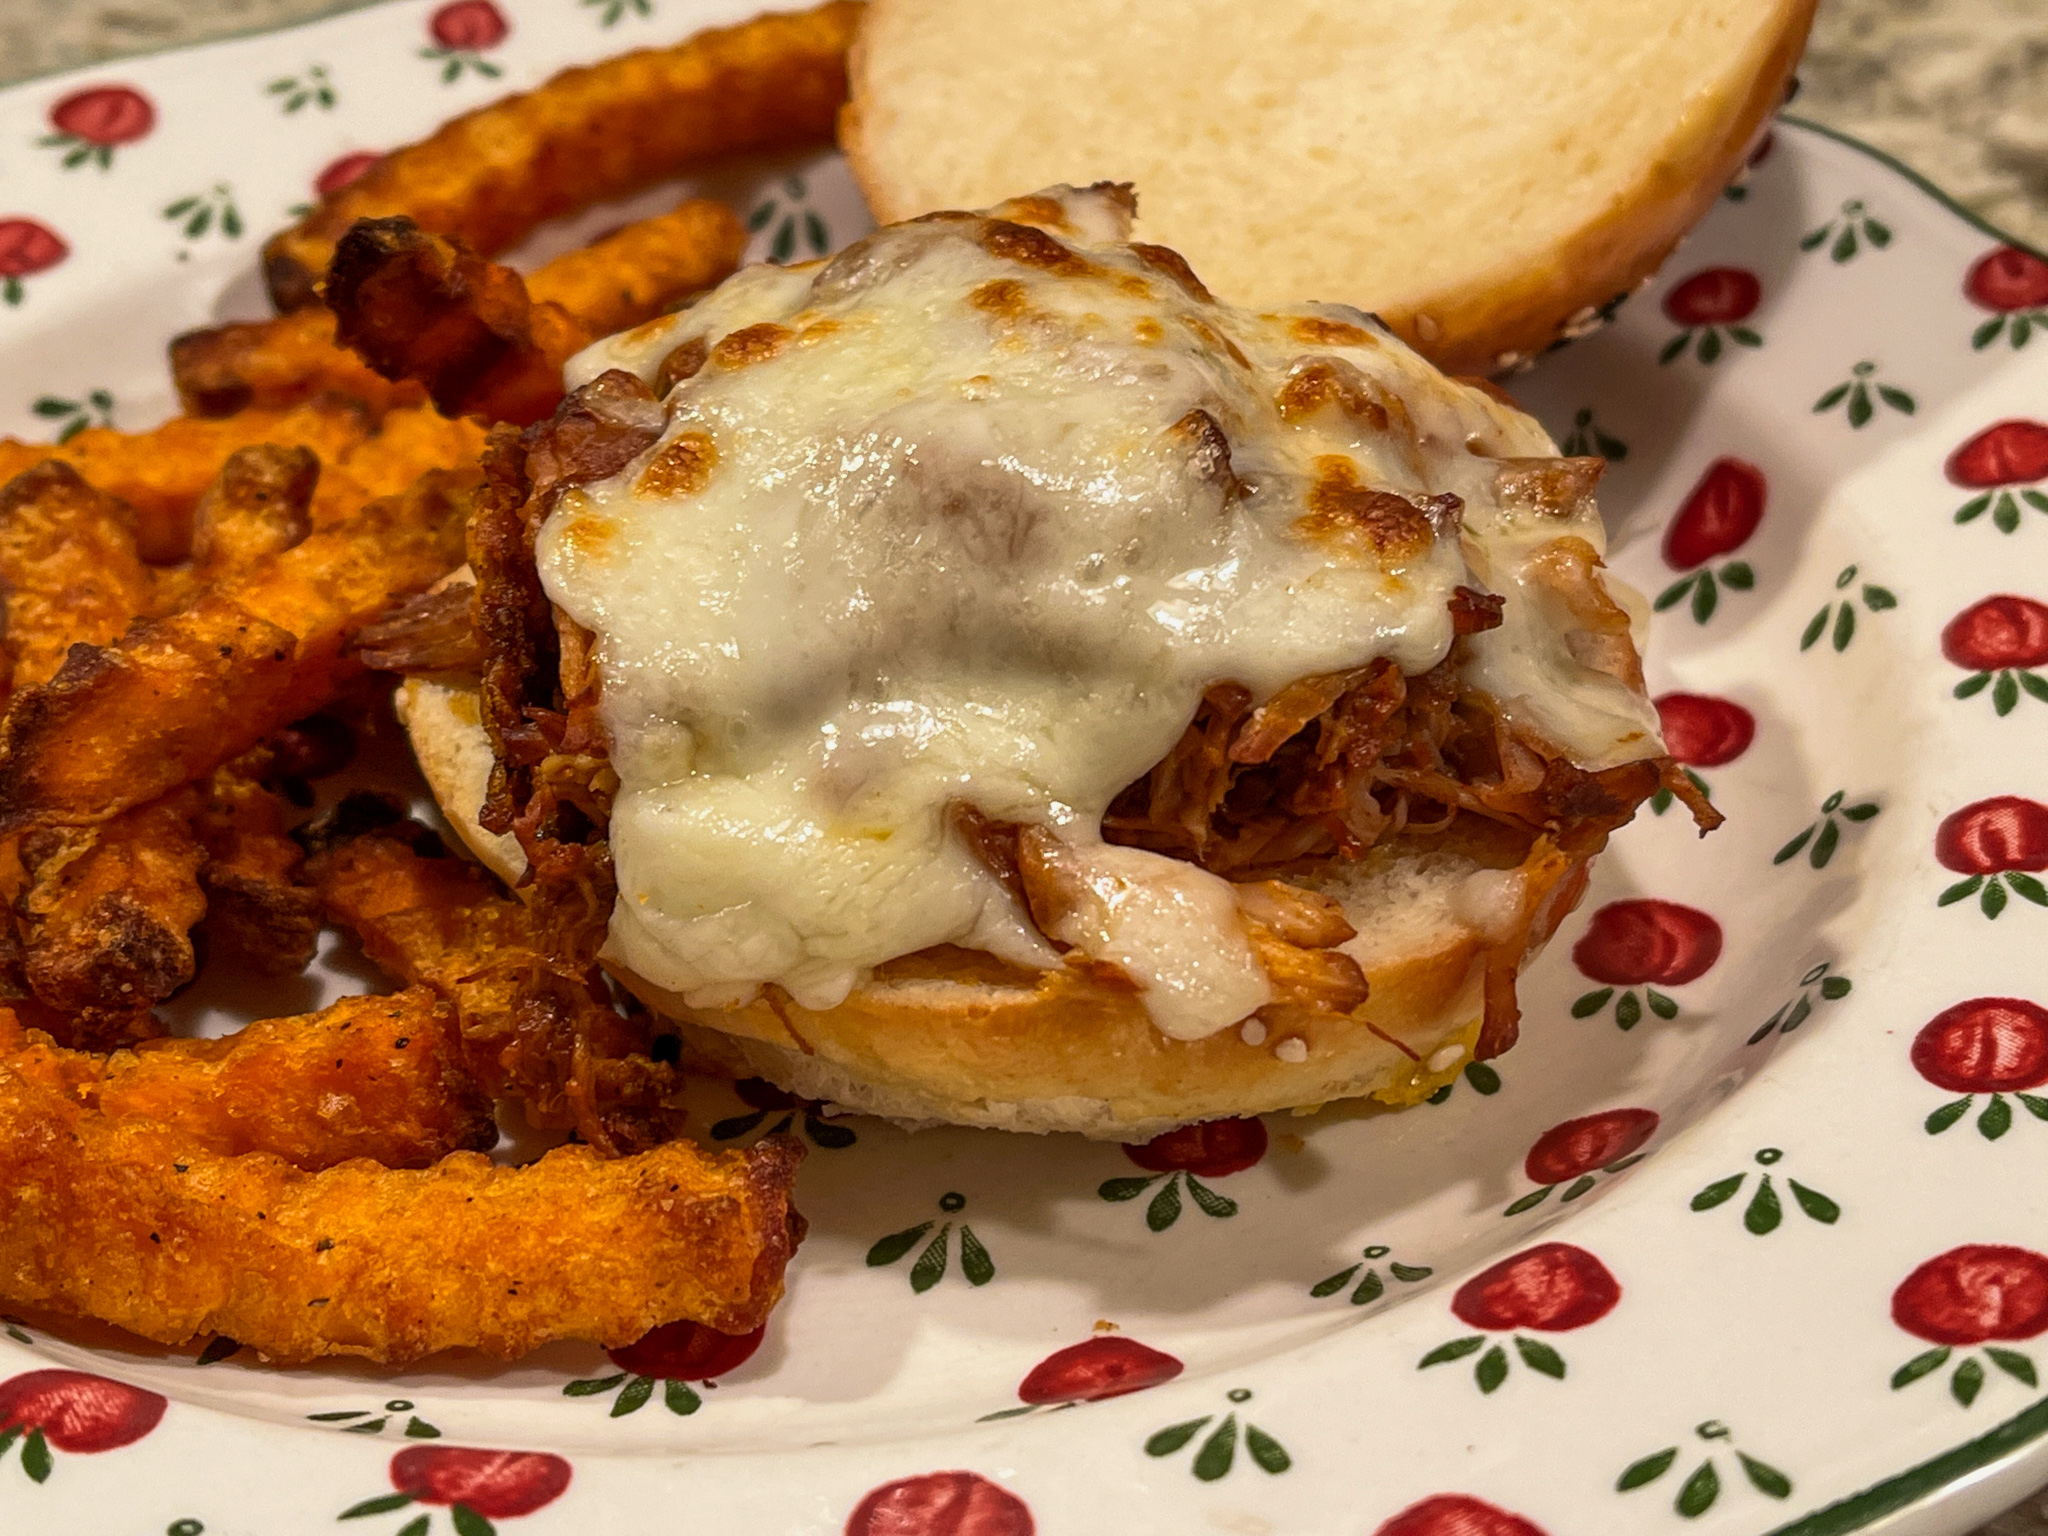
I did not expect to blog on this recipe, as I had a couple of not that great recipes made in the crockpot just the week before. Two big disappointments. The slow-cooker is one iffy gadget. As I’ve mentioned more than once in the past, crockpot recipes often stretch the limits of the “dump it all in and forget it.” Not every meat works in a crockpot unless you time the cooking much more carefully. This time I used my newest favorite cut, country-style boneless pork rib. Seven hours in low. Perfect texture. Perfect meal to watch a certain football game.
SLOW-COOKER HOISIN-PULLED PORK (slightly modified from taste.com.au)
Boneless country-style pork ribs (enough to fully cover the surface of your crockpot) 1 tbsp grapeseed oil 1 large shallot, thinly sliced 4cm-piece fresh ginger, cut into matchsticks 1/4 cup tomato paste 1 cup vegetable stock 1/3 cup hoisin sauce 1/4 cup soy sauce 1 tsp Chinese five-spice mix
Place the pork in a slow cooker. Heat the oil in a large frying pan over medium-high heat. Add the onion and ginger. Stir-fry for a few minutes until the onion is soft and fragrant. Add the tomato paste and cook, stirring, for 1 minute. Add the stock, hoisin, soy sauce, and Chinese five spice. Simmer for 1 minute. Remove from heat and pour the mixture over the pork. If necessary, add a little water so that the meat is almost fully covered. Place the lid on the slow cooker and cook on LOW for 7 hours.
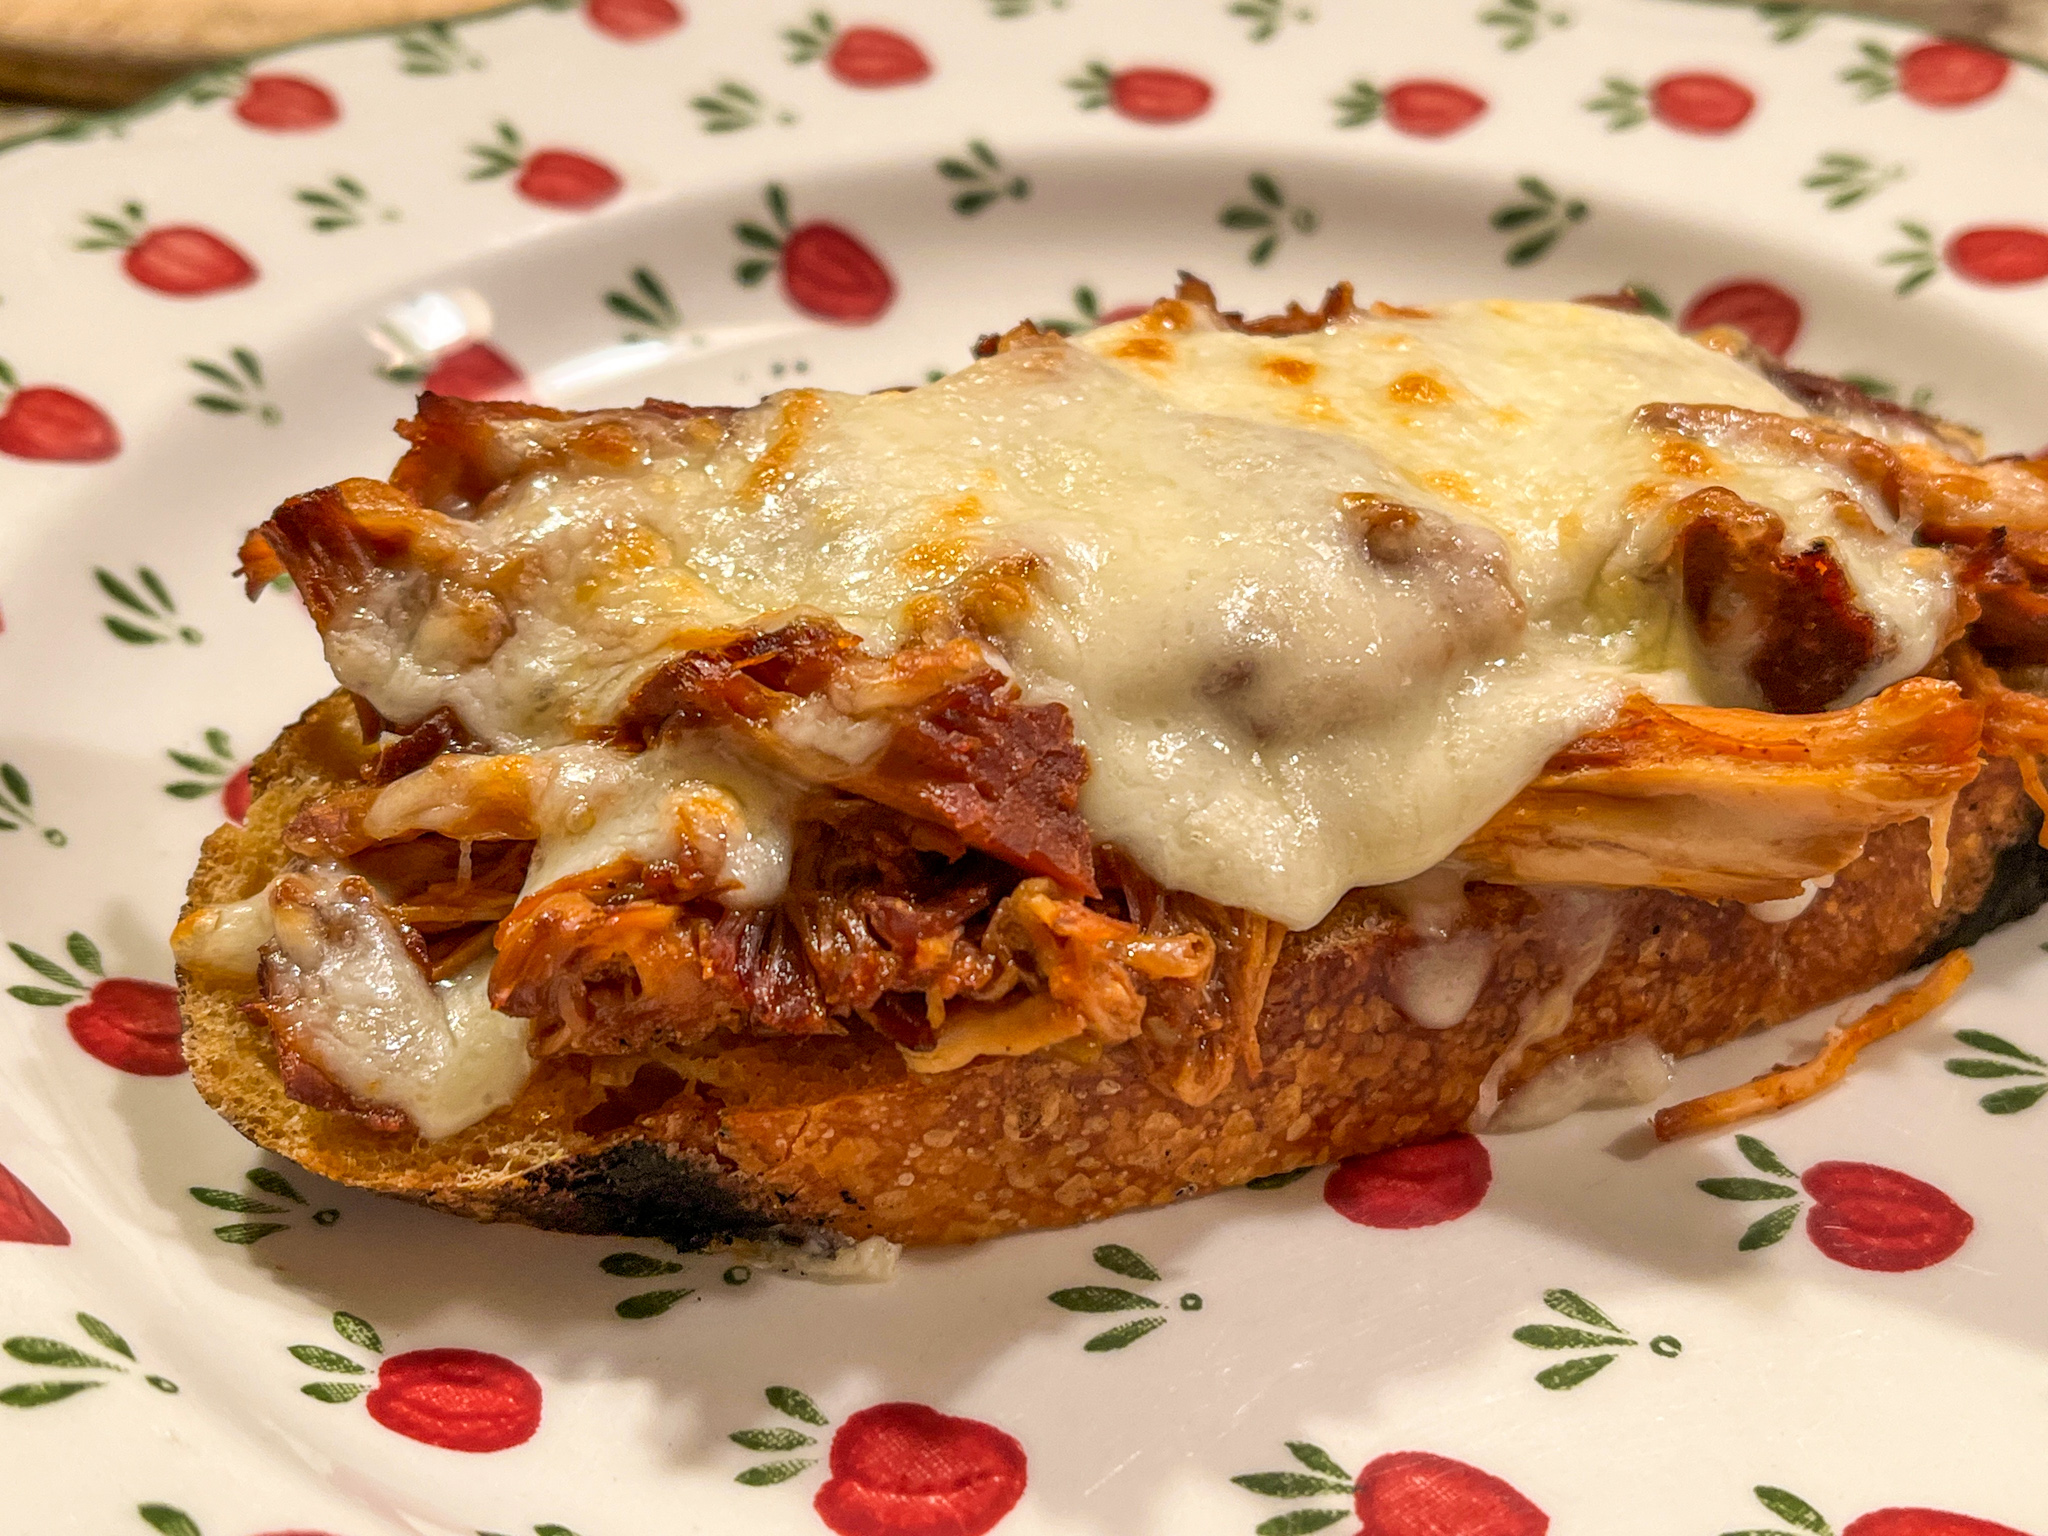
Transfer the pork to a large tray and use 2 forks to shred the meat. Transfer the braising liquid from the slow cooker to a large saucepan. Simmer over high heat for 5 minutes or until the sauce thickens slightly. Add the shredded pork and stir to combine. Serve right away.
Comments: Pulled pork is one of my favorite meals, and of course it is great with the usual, American-style barbecue sauce. However, I must say that this Oriental version won my heart. The Chinese five-spice is a must. Star anise shines and goes together with the fresh ginger and hoisin sauce in a perfect way. I hope you’ll give it a try.
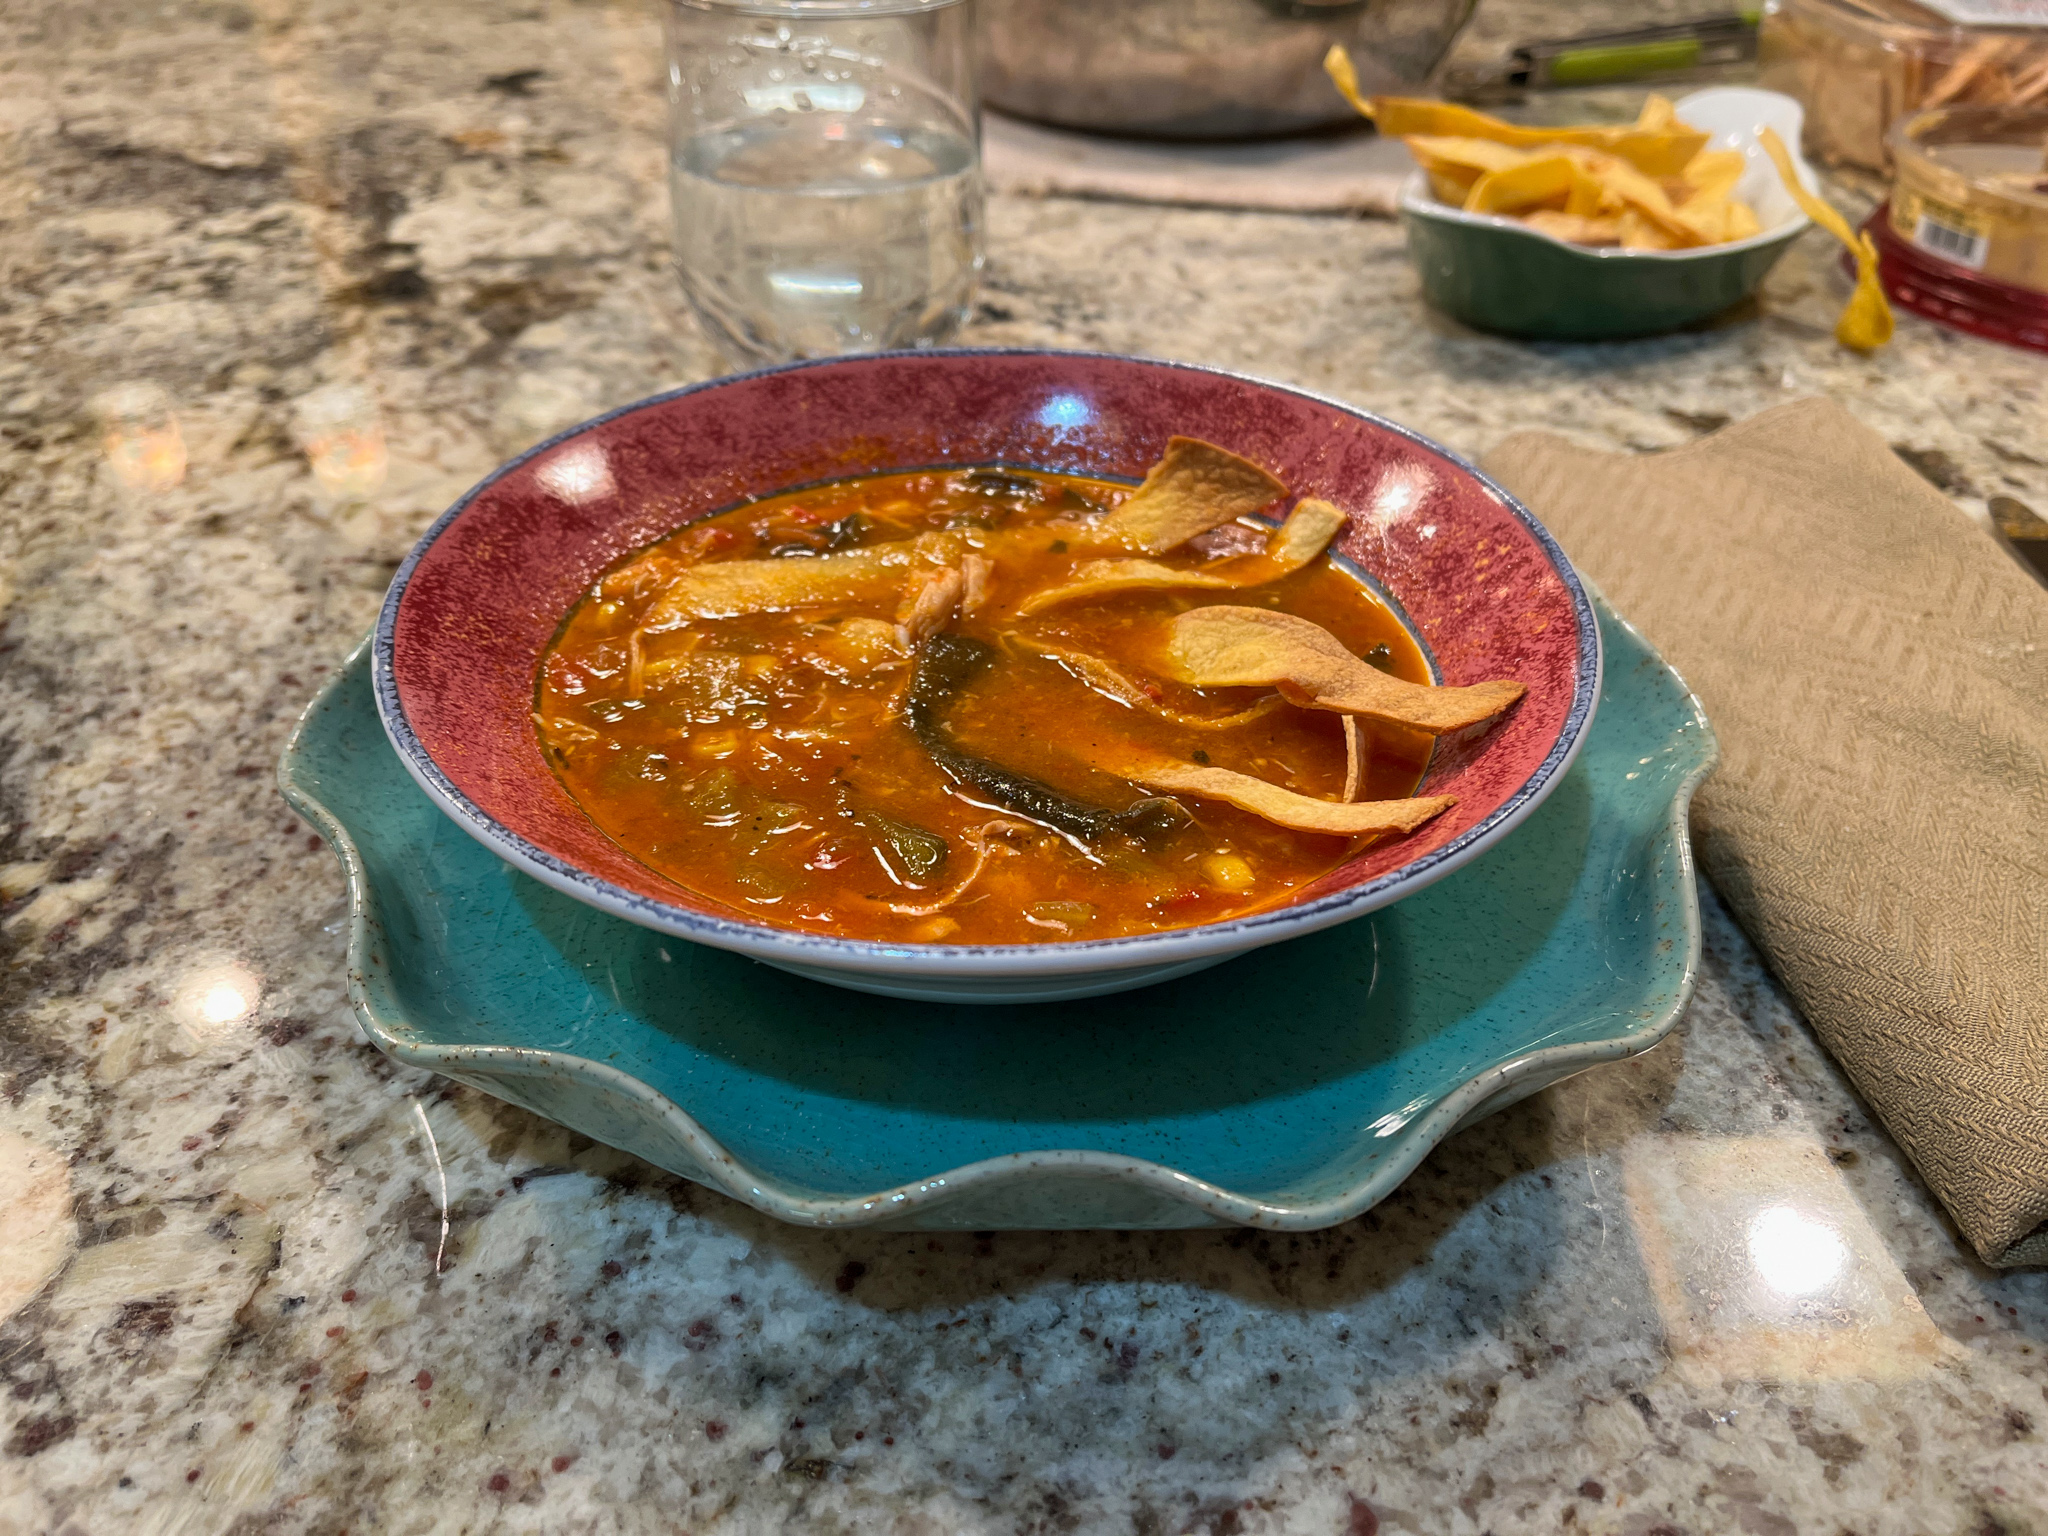
I don’t know why it took me so long to make this soup, as it is so popular. Every year I see countless examples in magazines, cookbooks, websites, and food blogs. And what makes it really painful is that we both loved it. Almost 13 years blogging. A chicken-tortilla-soup-virgin. No more.
CHICKEN POBLANO TORTILLA SOUP (slightly adapted from Averie Cooks)
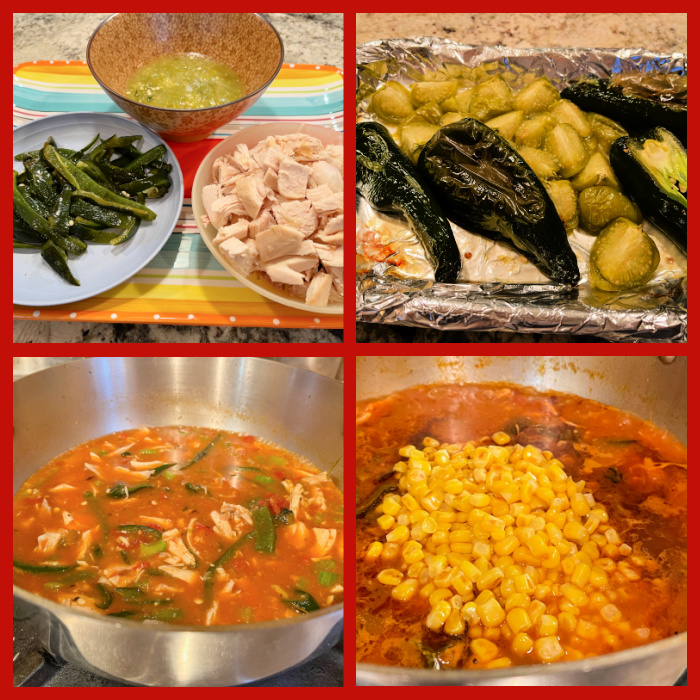
6 whole tomatillos, husks removed 3 whole poblano peppers olive oil spray and a little salt 2 tablespoons olive oil 1 medium shallot, diced small 6 cups low or no-salt added chicken broth 1 can (14.5-ounce) fire-roasted diced tomatoes, not drained 2 cups cooked shredded chicken 1 + 1/2 cups frozen corn kernels 1 tablespoon chili powder 2 teaspoons cumin 1 teaspoon smoked paprika 1 teaspoon kosher salt 1 teaspoon freshly ground black pepper Tortilla chips or strips, for garnishing
Roast the veggies: line a baking sheet with aluminum foil, spray the tomatillos and poblanos with some olive oil and season lightly with salt. Place in a 450F oven and roast until lightly charred. The tomatillos need less time in the oven, remove them when ready, allow the poblanos to roast further. Transfer the tomatillos into a blender, and process until still a bit chunky.
When the poblanos are well charred, transfer them to a plastic bag and seal. That will steam them making it easier to remove the skin. Remove the skin and seeds, cut the poblanos into slivers. Reserve. Add a very small amount of oil (2 tsp or so) into a small non-stick skillet, when very hot add the frozen kernels of corn, saute seasoning with a little salt until golden. Reserve.
Heat the remaining oil in a large stock pot, sauce the shallots for 5 minutes, add the broth, tomatoes, chicken, chili, smoked paprika, salt, and pepper. Simmer for a couple of minutes, add the reserved poblanos and corn. Simmer, uncovered, for 20 minutes in very gentle heat.
Taste, adjust seasoning, and serve with tortilla chips or strips.
Comments: This was so delicious, I am kicking myself for never trying this soup until now. The chicken was leftover from a clay pot roasted chicken, which I made after brining it overnight in buttermilk. It was one of the best clay pot concoctions of the recent past, and I shall share with you in the near future. But any roast chicken will do, so grab one in the grocery store if you want to make it really easy on you.
This soup is a meal in itself. Nothing else needed. Satisfying, complex, the tortillas and the corn offer that small amount of carbs that will keep you happy but not feeling heavy and lethargic. We absolutely loved it, and I hope you’ll give it a try…