SIMNEL CUPCAKES

I’ve wanted to make a Simnel Cake for the longest time, since it is such a classic, but baking a large cake is not something I do very often. Cupcakes are a different story, easy to share, great to include in my weekly box of donations. I made a few changes from recipes I found in my cookbooks and online, keeping the details that matter in the original, larger version.

SIMNEL CUPCAKES
(adapted from several sources)

100 marzipan
150g butter, softened
75g brown sugar
75g granulated sugar
2 large eggs, whisked
150g full-fat yoghurt
zest of 1 Lemon
170g mixed dried fruits
175g all-purpose flour
2 tsp baking powder
1/2 tsp salt

To decorate
200g marzipan
agave nectar to brush

Start by preparing the thin layer of marzipan that goes in the middle of the cupcakes. Divide the 100g in 12 little portions (about 8g each). Flatten them with your hands and stretch as a round that will fit inside your cupcakes. Mix the flour with baking powder and salt, reserve.

Heat the oven to 375F. Place paper liners inside the cupcake pan. Beat together the butter, sugars and lemon zest, until pale and light. Add the 2 eggs, slowly, whisking the batter well after each addition. Add the yoghurt, continue whisking. Add the flour mixture, incorporate gently, then add the dried fruit, folding until homogeneously mixed in.

Place a little cake batter in each cupcake liner, place the thin round of marzipan on top, press gently into the batter. Fill the cupcakes with more batter until 3/4 full. Bake for 20 to 25 minutes, until golden and a toothpick inserted in the middle comes out slightly moist, with some crumbs attached. Allow the cupcakes to cool for 5 minutes, then remove to a cooling rack.

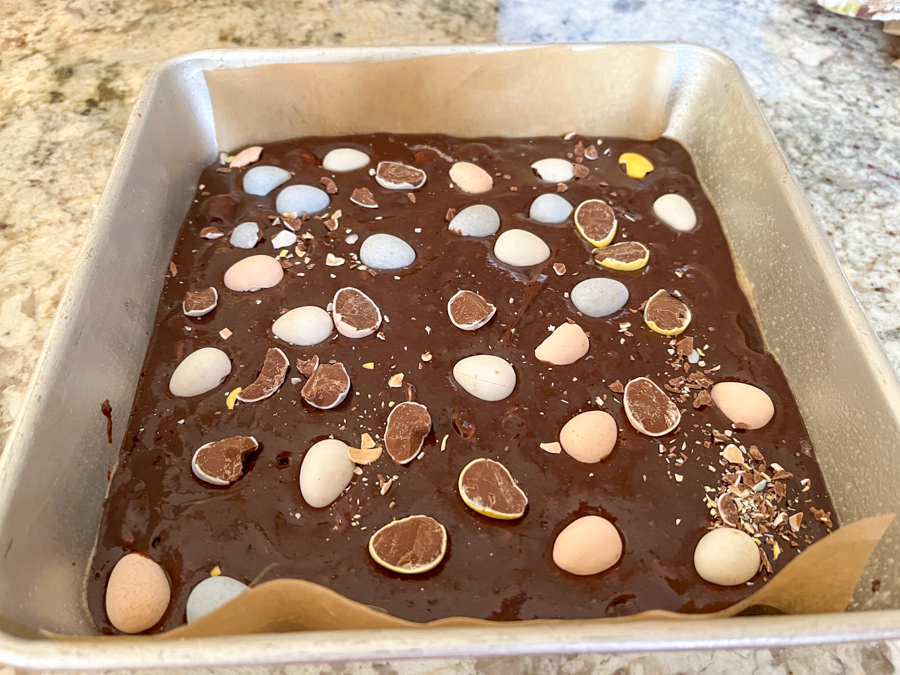
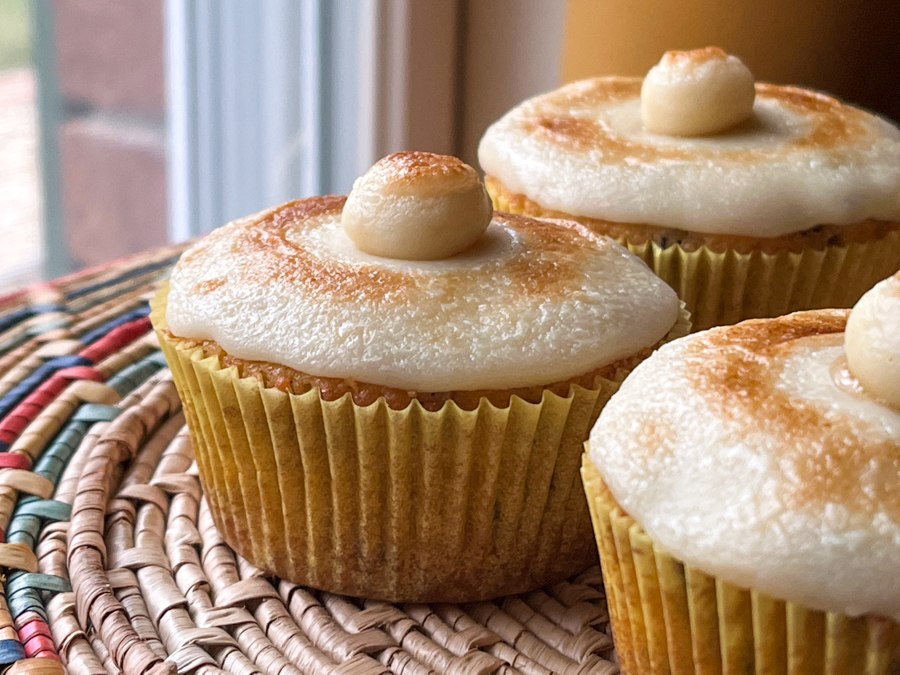
When the cupcakes are cold, make the topping: roll out the fondant and cut rounds to cover the top. Make the layer as thin as possible. Use trimmings to make little balls. Attach the layer of marzipan to the cake by brushing a tiny amount of agave nectar on the cupcake, and pressing the marzipan over it. Place the little ball on top, using some agave nectar to help glue it in place. Run the cupcakes under a broiler to give some color to the marzipan. Pay close attention, because it goes from golden to burn a matter of seconds!

ENJOY!

to print the recipe, click here

Comments: This is a delicious cake. The trickiest part is dealing with the marzipan, other than that, the recipe is quite straightforward. The mixture of fruit with the cake and the marzipan is a total winner. I highly recommend you give it a try. Plus, don’t they look just adorable? The cake stays fresh for a few days at room temperature, which is another big plus in my book…

ONE YEAR AGO: Oat and Sesame Seed Sourdough

TWO YEARS AGO: Moroccan Turkey Pie with Olive Oil Crust

THREE YEARS AGO: Another Twisted Sister of the Shepherd’s Pie 

FOUR YEARS AGO: Cashew Chicken, My Way

FIVE YEARS AGO: Two Deliciously Simple Salads

SIX YEARS AGO: In My Kitchen, April 2016

SEVEN YEARS AGO: Spring has Sprung with Suzanne Goin

EIGHT YEARS AGO: Chai Brownies

NINE YEARS AGO: Pomegranate-Molasses Glazed Carrots

TEN YEARS AGO: Braised Brisket with Bourbon-Peach Glaze

ELEVEN YEARS AGO: The Real Vodka Sauce

TWELVE YEARS AGO: Spring Rolls on a Spring Day

GRILLED ROMAINE LETTUCE WITH TAHINI DRESSING AND CHICKPEAS

Another food trend I kind of twisted my nose at… grilled lettuce. How wrong can a person be? Very. I am here to gently invite you to the bright side. Don’t eye-roll, just trust me. It is absolutely delicious! You can do it on the outside grill or in the comfort of your kitchen using a non-stick grill pan, which is what I did. I don’t remember the husband getting so excited about a salad, but he gave this one two very enthusiastic thumbs up and insisted it must become part of our regular rotation. I am more than happy to “make it so.”

GRILLED ROMAINE LETTUCE WITH TAHINI DRESSING AND CHICKPEAS
(inspired by several sources)

2 heads of Romaine lettuce, outer leaves removed, sliced in half lenghtwise
olive oil to rub on the surface
salt to taste to season
for the tahini dressing:
1/3 cup yogurt
1/4 cup tahini
1/4 teaspoon freshly ground black pepper
1 tablespoon olive oil
Zest of 1 lemon
2 tablespoon freshly squeezed lemon juice
1 teaspoon Dijon mustard
salt to taste
water to adjust consistency

for the chickpeas:
1 can of chickpeas, drained, rinsed, and dried
olive oil spray to coat chickpeas
salt to taste
smoked paprika to taste (or other spice of your choice)

Make the dressing: combine all ingredients except water in a blender. Blend until smooth, then add water until it reaches the consistency you like. Reserve.

Make the chickpeas: coat them with oil, season and air-fry for 15 minutes or until golden brown. Alternatively, roast them in a 425F oven until done.

Grill the lettuce: rub olive oil on the cut surface of the lettuce, season lightly with salt and pepper. Grill for about 3 minutes, flip the pieces and grill for just a couple of minutes on the other side. Transfer to a serving platter, opening the leaves a bit so that the dressing can reach in between them.

Drizzle the dressing, add the roasted chickpeas, and serve.

ENJOY!

to print the recipe, click here

Comments: You can grill the lettuce 30 minutes in advance, and just allow it to sit in the serving platter waiting for showtime. You must use Romaine, other lettuces cannot stand to the heat as well, although I did see some recipes using little butter lettuce heads cut in half. I have not tried to use them, to me they seem a bit too delicate. The dressing is so good I could eat it with a spoon. And of course, fried chickpeas take the concept of croutons to a whole new level. A little tip for you that worked super well for me: I air-fryed the chickpeas twice. After they were first made, I let them sit at room temperature, and then right before adding to the salad I fried them again for 2 minutes. The crispiness factor went off the charts. I have to try that again and write down some specific timing but keep this in mind if you own an air-fryer. Elaine and Karen, I am winking at you both!

ONE YEAR AGO: Asparagus and Snow Peas with Walnut Crumbs

TWO YEARS AGO: Yin and Yang Viennoise Bread

THREE YEARS AGO: Extreme Chocolate Cupcakes

FOUR YEARS AGO: Sunflower Seed Kamut Sourdough

FIVE YEARS AGO: The Joys of Grating Squash

SIX YEARS AGO: Auberge Pecan-Walnut Bread

SEVEN YEARS AGO:Gluten-free and Vegan Raspberry Bars
.

EIGHT YEARS AGO:Lasserre, a French Classic
.
NINE YEARS AGO:Sourdough Bread with Walnuts and Dates
.
TEN YEARS AGO:Braised Brisket with Bourbon-Apricot Glaze
.
ELEVEN YEARS AGO: The Real Vodka Sauce
.
TWELVE YEARS AGO:Pork Tenderloin and Blue Cheese


PAN-STEAMED BROCCOLI WITH MISO VINAIGRETTE

Some recipes become part of our routine and the pan-steamed broccoli is my default. Six exact minutes cooking. Six minutes that I use to make a simple dressing as described in the original blog post of years ago (click here). This time, I took the flavor into a Japanese territory, and used miso, vinegar, and ginger. Sesame seeds closed the deal. If you find broccoli flavor too strong, this method might please you, because it masks it quite a bit. If you prefer to taste the real flavor of broccoli, stay with a simpler dressing as previously blogged.

PAN-STEAMED BROCCOLI WITH MISO VINAIGRETTE
(adapted from Ellie Krueger)

1 large head of broccoli florets (1½ pounds)
1/2 cup water
salt to taste
1 tablespoon white miso
1 tablespoon olive oil
2 tablespoons lemon juice
1 tsp honey
grated fresh ginger, to taste
sesame seeds to garnish

Place the broccoli florets more or less in a single layer inside a saucepan. Add ½ cup water, sprinkle salt all over. Cover and cook over a high heat for 3 minutes. Reduce the heat to medium and cook for an additional 3 minutes. Do not remove the lid during cooking. When the broccoli is done, it will be cooked to crisp-tender. If you prefer it a bit softer, remove it from the heat and allow it to sit, covered, for another minute or two.

While the broccoli is cooking, make the dressing whisking all ingredients (from miso to ginger) vigorously until smooth.

Using a slotted spoon, transfer the broccoli to a serving bowl, toss gently with the dressing, and garnish with sesame seeds. Adjust seasoning if needed.

ENJOY!

to print the recipe, click here

Comments: I share the picture of what the pan will look like once you open it at the end of 6 minutes, because if I don’t you will be shocked and hate me for a few minutes. It will look bad. However, it cleans like a breeze, do not worry about it, the moment you rinse the pan that brown residue goes away. And you are left with perfectly cooked broccoli that can be dressed in any way you like. As I mentioned, this is a recipe I cook all the time, probably once/week. We love it, and it is sooooo simple! The dressing tames the natural funky flavor of broccoli. It will please that family member who twists the nose at this beautiful vegetable.

ONE YEAR AGO: Cookies and Rubber Stamps

TWO YEARS AGO: Macarons for all Seasons and Reasons

THREE YEARS AGO: Lentils and Radicchio? Yes, please!

FOUR YEAR AGO: Tres Leches Cake

FIVE YEARS AGO: The Joys of Grating Squash

SIX YEARS AGO: Auberge-Pecan Walnut Bread

SEVEN YEARS AGO: Gluten-free and Vegan Raspberry Bars

EIGHT YEARS AGO: Lasserre, a French Classic

NINE YEARS AGO: Sourdough Bread with Walnuts and Dates

TEN YEARS AGO: Braised Brisket with Bourbon-Apricot Glaze

ELEVEN YEARS AGO: The Real Vodka Sauce

TWELVE YEARS AGO: Pork Tenderloin and Blue Cheese

LEMONY CHICKEN THIGHS WITH ARTICHOKES AND OLIVES

This was the first meal I cooked the day after we arrived from a wonderful trip to Lake Tahoe. Got together with stepson and soon-to-be daughter-in-law, went skiing, and relaxed. Celebrated both our wedding anniversary and my Birthday: one more revolution around the sun successfully completed by yours truly. We landed late and arrived home around 1am. Next day brought that daze that often happens after trips. So I wanted something simple to put together, but with a hint of celebration, because nothing beats having a home to come back to. When so many in our world are denied such basic right, forced to leave it all behind or face certain death.

LEMONY CHICKEN THIGHS WITH ARTICHOKE HEARTS AND OLIVES
(adapted from many sources)

8 chicken thighs, bone-in, skin-on
juice and zest of one lemon
1 tsp turmeric
1 tsp ground ginger
1 tsp Rose Harissa (I used this one)
1 tsp salt
1/4 cup olive oil
1/4 cup vermouth
frozen artichoke hearts, amount to taste
pitted green olives, amount to taste
1 tablespoon capers

Make a marinade with the olive oil, lemon juice and zest, vermouth and spices. Whisk well or add to a small processor to emulsify. Add to the chicken pieces and leave it in the fridge for a few hours, if you have the time.

Heat oven to 350F. Place the chicken pieces, skin-side down on a large baking pan. Pour the marinade over. Add the artichoke hearts, olives and capers all around. Season lightly the meat with salt. Cover with foil and bake for 50 minutes.

Remove the foil, turn the pieces over, to have the skin-side up. Bake for 20 more minutes at the same temperature, then increase to 420F and bake until the skin is golden brown.

Serve with your favorite side dish.

ENJOY!

to print the recipe, click here

Comments: My main advice is to load it with frozen artichoke hearts, keep in mind there is no need to thaw them. They will shrink considerably, so don’t be afraid to pack the baking dish to the limit. The liquid that forms during baking is absolutely delicious. If you don’t have vermouth, use any dry white wine, or if you prefer, some chicken stock, but the acidity of the wine helps to brighten up the flavors. If you don’t have rose harissa powder, use any hot condiment you like (smoked paprika, a little Sriracha or Gochujang).

We enjoyed it with green beans and almonds, but some white rice or couscous would go well too. Apparently it is considered rude to keep going back to the dish and mindlessly pick all the artichoke hearts until there is none left. I don’t know who makes these rules, but clearly “I” was not consulted.

ONE YEAR AGO: Farari Bateta

TWO YEARS AGO: Covid-19, Keeping yourself safe

THREE YEARS AGO: Carrot Cake Macarons

FOUR YEARS AGO: Soup Saturday: Say Goodbye to Winter

FIVE YEARS AGO: Manchego and Poblano Soup

SIX YEARS AGO: A Smashing Pair

SEVEN YEARS AGO: Spinach and Mushroom Stuffed Pork Tenderloin

EIGHT YEARS AGO: Crispy Chickpea and Caper Spaghetti

NINE YEARS AGO: Spring has Sprung!

TEN YEARS AGO: Chickpea and Fire Roasted Tomato Soup

ELEVEN YEARS AGO: Double Asparagus Delight

TWELVE YEARS AGO:  Sun-dried Tomato and Feta Cheese Torte

MINI-EGG BROWNIES

This is a super simple bake, perfect for the season. Toughest part of the recipe? Cutting the mini-eggs in half. But don’t skip that step, it makes them better dispersed in the brownie batter and easier to cut after baking. Just be careful.

MINI-EGG BROWNIES
(slightly modified from Kitchen Mason)

200g mini-chocolate eggs
110g unsalted butter
110g semi-sweet chocolate
2 Eggs
125g granulated sugar
100g brown sugar
1 tsp Vanilla Extract
1/4 tsp Salt
60g all-purpose flour
2 tbsp cocoa powder (Dutch processed)

Lightly grease and line an 8 inch square baking pan with parchment paper, and heat the oven to 350F.

Measure half of the mini-eggs and cut in half.

Melt the butter with the chocolate in a microwave, gently. Let it cool slightly and add the eggs, whisking until fully smooth. Add the sugars, and beat until fully dissolved. Add the vanilla, salt, and sift the flour and cocoa powder on top. Gently fold the batter until no dry bits remain. Add HALF the mini-eggs preciously cut and HALF the whole mini-eggs. Mix briefly and pour the batter into the pan.

Distribute the remaining eggs (cut and whole) over the surface, gently pressing them a little bit into the batter.

Bake for 25 to 30 minutes, until the top is crispy and dry. Do not over-bake. Allow to fully cool before cutting in small squares.

ENJOY!

to print the recipe, click here

Comments: Hard to come up with a simpler bake, apart from slicing the mini-eggs, it’s something you could do with kids. You can definitely use any brownie recipe you are fond of, and incorporate the mini-eggs the way this one does. But keep the basic recipe simple, this will be all about the little eggs dispersed in the brownie. Adorable little bake!

ONE YEAR AGO: The Luck of the Irish

TWO YEARS AGO: When life gives you Eye-of-the-Round

THREE YEARS AGO: Carrot Cake Macarons

FOUR YEARS AGO: Soup Saturday: Say Goodbye to Winter

FIVE YEARS AGO: Manchego and Poblano Soup

SIX YEARS AGO: A Smashing Pair

SEVEN YEARS AGO: Spinach and Mushroom Stuffed Pork Tenderloin

EIGHT EVEN YEARS AGO: Crispy Chickpea and Caper Spaghetti

NINE YEARS AGO: Spring has Sprung!

TEN YEARS AGO: Chickpea and Fire Roasted Tomato Soup

ELEVEN YEARS AGO: Double Asparagus Delight

TWELVE YEARS AGO:  Sun-dried Tomato and Feta Cheese Torte