
I am absolutely thrilled to share this recipe, fresh from the press, part of the second cookbook of my dear friend Elaine (click here for her sourdough site and here for her new book ordering info). Sourdough taken straight into brioche territory, with just the right level of sweetness, filled with your favorite jam. The recipe makes 16 rolls, I actually halved it and divided the dough in 8 pieces for shaping as rolls. To divide the egg, I just mixed one egg with the yolk, weighed that, and used half. It ended up being 30g egg mixture for half the recipe, in case you’d like to go that route.
ENRICHED SOURDOUGH JAM-FILLED ROLLS
(from Elaine Boddy’s Sourdough Whisperer)
Either line a large baking or cookie sheet with parchment paper and sprinkle with rice flour, or prepare fluted baby brioche pans (3 1/8 inches [8 cm] in diameter and 11/4 inches [3 cm] deep), lined up ready to fill on a baking sheet.
Makes 16 snack-sized buns
50 g active starter at 100% hydration
270 g milk, cold or room temperature
1 large egg
1 large egg yolk (reserve egg white for brushing)
75 g butter, at room temperature
50 g runny honey
500 g strong white bread flour, plus more for dusting
7 g (1 tsp) salt, or to taste
200 g jam of your choice (about 2 tsp per roll)
Powdered sugar, for sprinkling (optional)
In the early evening, in a large mixing bowl, roughly mix together all the ingredients, except the reserved egg white and jam. It will be a very sticky dough, and it may be easier to use a bowl scraper or spatula to mix it at this stage. Leave it roughly mixed, cover the bowl with a clean shower cap or your choice of cover and leave the bowl on the counter.
After an hour, perform the first set of pulls and folds on the dough. Lifting and pulling the dough across the bowl until it starts to come into a soft ball, then stop. The butter will not be fully mixed in yet; it will become more so as you work with the dough. Cover the bowl again and leave it to sit on the counter. During this first set of pulls and folds, the dough will still be sticky, but keep working with it.
Over the next few hours, perform three more sets of pulls and folds on the dough, covering the bowl after each set. The dough will remain sticky but nicely stretchy and will come together into a nice soft ball each time. Do the final set before going to bed. Leave the covered bowl on the counter overnight, typically 8 to 12 hours, at 64 to 68°F (18 to 20°C).
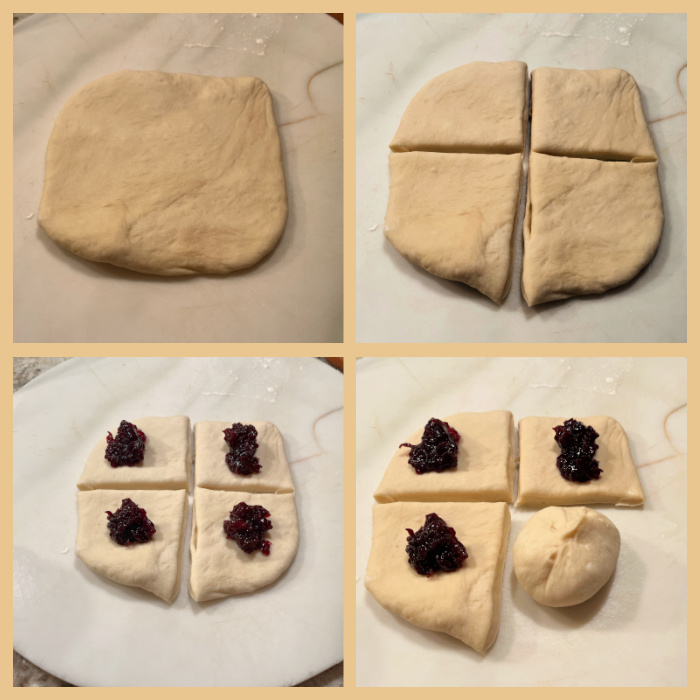
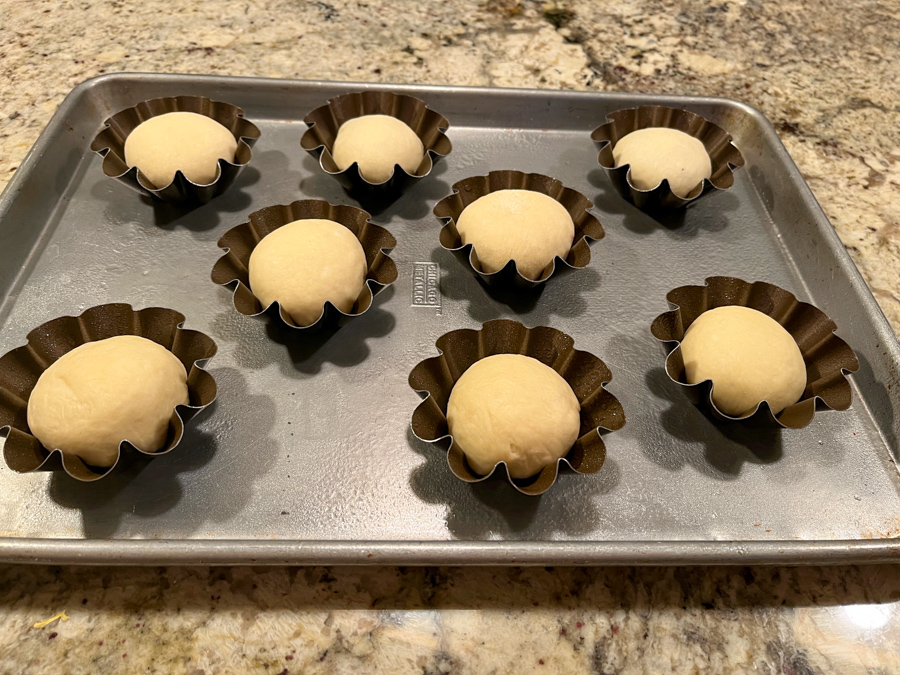
In the morning, turn the dough out onto a lightly floured surface and pull the dough into a 14-inch (35-cm) square that is an even thickness all over. Using a dough knife or pizza cutter, cut the dough into sixteen equal squares. Place a heaping teaspoon of jam in the middle of each square, pull the corners and edges of each square together and stick them together. Turn each parcel over and shape into a ball. Place each ball onto your prepared pan, allowing space between them to grow, or place them in your baby brioche pans. Cover the balls with a large plastic bag and leave on the counter for the rolls to proof again for 2 to 3 hours, or until doubled in size.
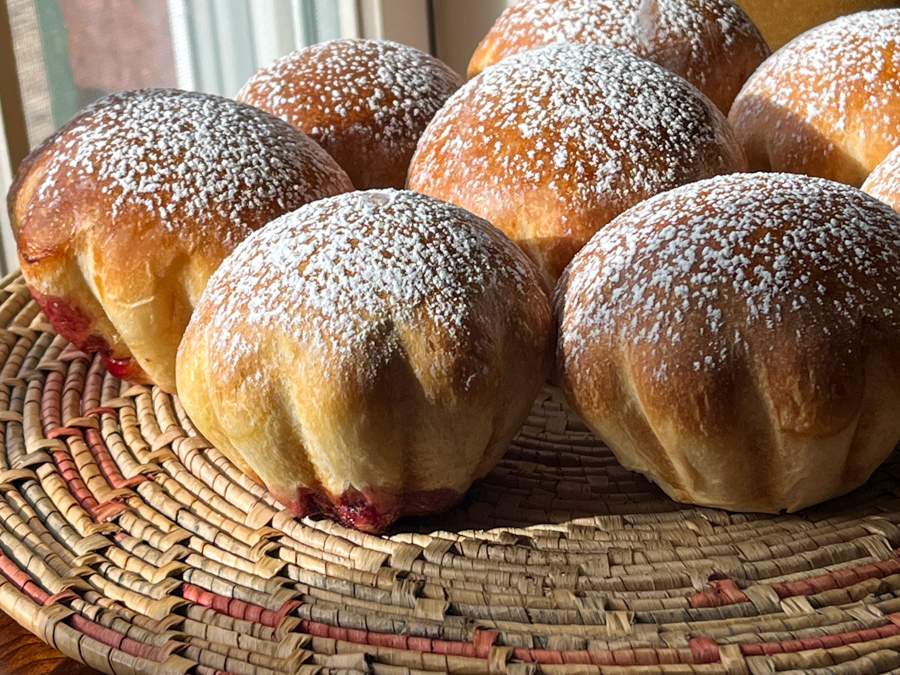
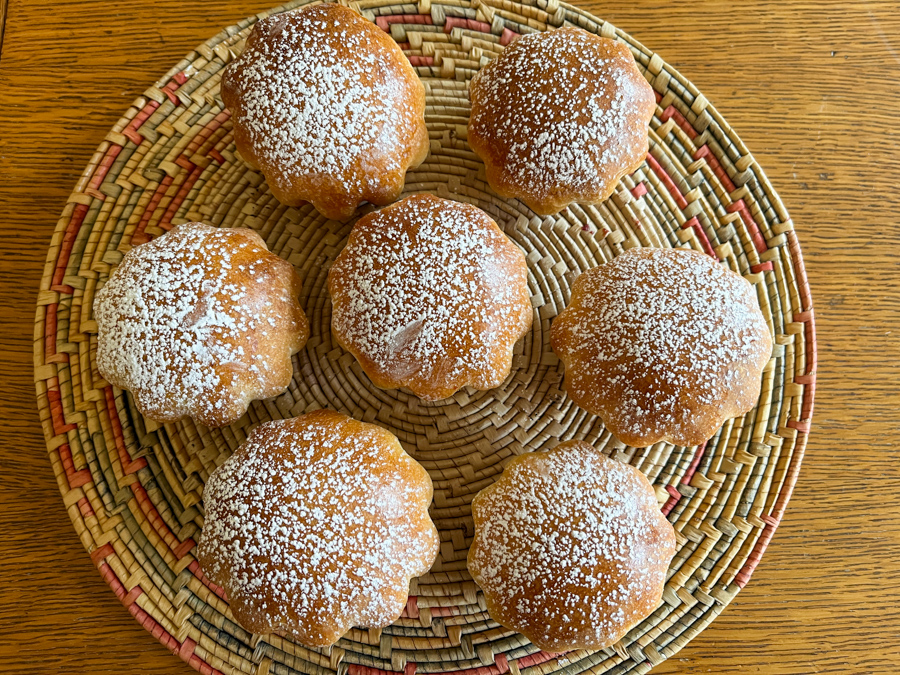
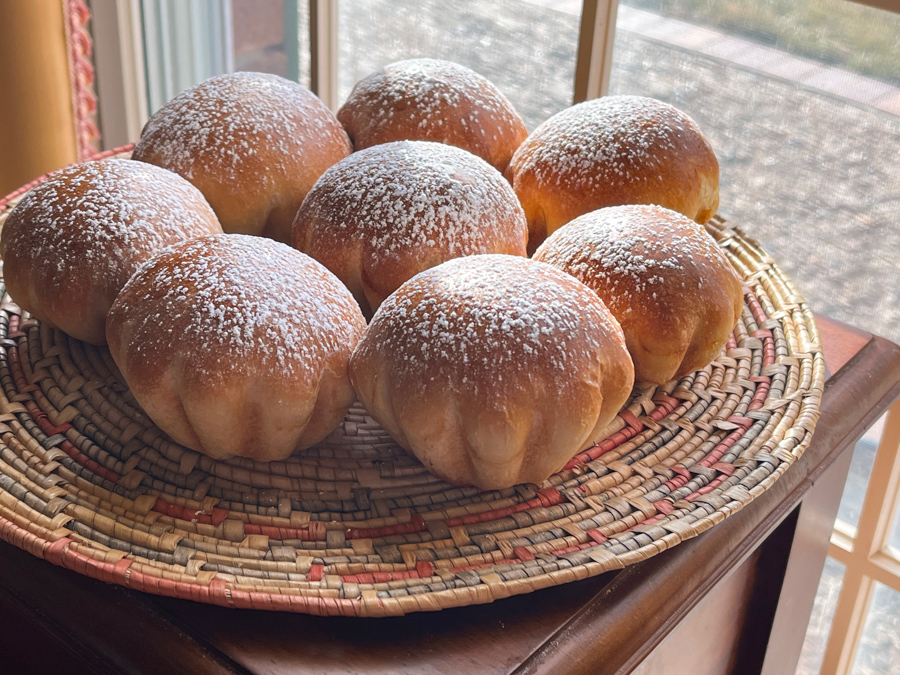
Heat the oven to 325F. Mix the egg white with a tablespoon of water and brush the top of each ball gently with it. Bake uncovered for 20 to 25 minutes. Remove from the oven and place the rolls directly on a rack to cool briefly. These are best eaten warm, with an optional sprinkle of powdered sugar.
ENJOY!
to print the recipe, click here
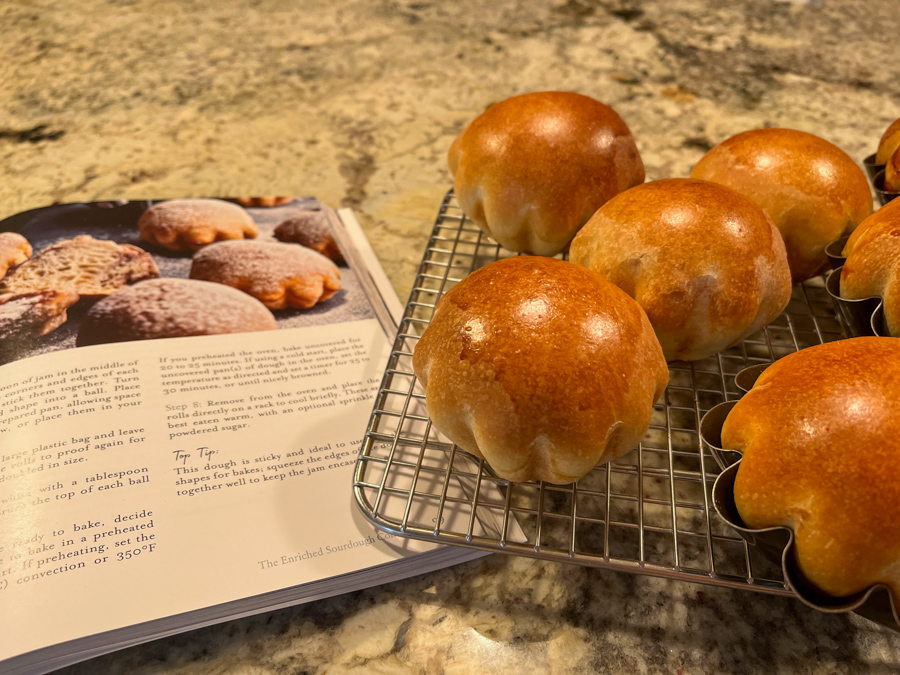
Comments: This dough is wonderful to work with… smooth, elastic, easy to shape. Do not be afraid of letting it sit overnight at room temperature, unless you live in a super warm climate without air-conditioning. This rich type of dough tends to proof a lot slower than regular sourdough. For the final proofing, I used these brioche pans. They are a bit pricey but excellent quality. Love the way they look… But as Elaine mentions in the recipe, you can simply shape them as round little balls instead.
You can fill them with any jam you like. I used Morello Cherry preserves and it was absolutely delicious… A little bit leaked from the bottom of some of the rolls, but no harm done.
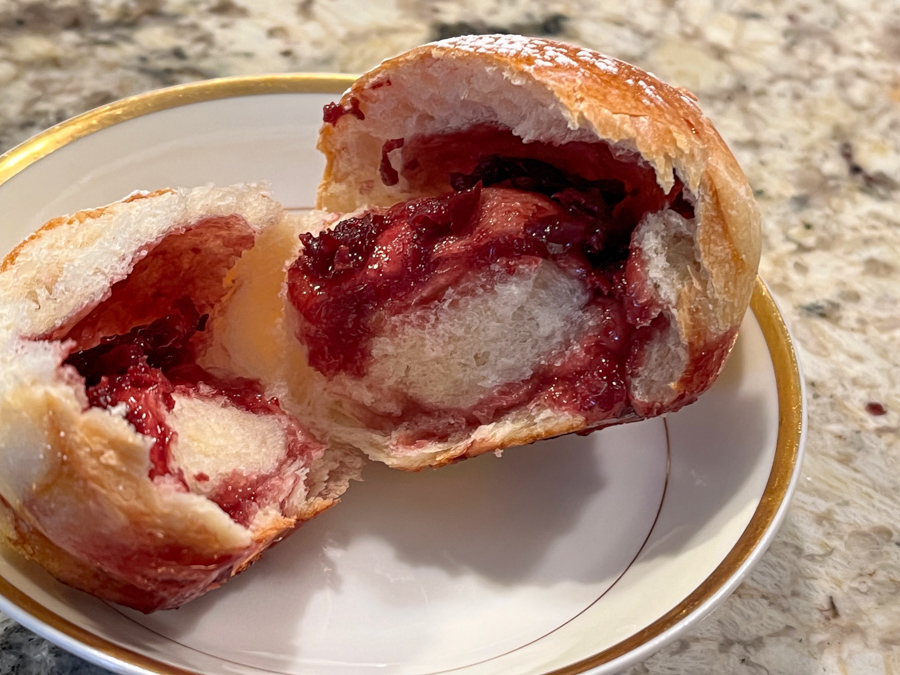
I don’t think I need to say much more, right? The picture is worth 1,000 words… They actually freeze well too. Just wrap them, and when you are ready to enjoy them, bring to room temperature for 20 minutes or so, then place in a warm oven to heat through. They will be as good as freshly baked!
Now let me walk you through Elaine’s new book, “The Sourdough Whisperer.” And in the end of this blog post you will see another bread I baked from her book, as a teaser recipe..
The book is organized in two parts, the first deals with everything you need to know about making sourdough: making a starter from scratch, maintaining it, ingredients, tools, her master recipe and timing your bread baking to suit your schedule. The essence of it all is exactly what we’ve seen in her first book: simplicity. I tell you one thing, in this first part she covers EVERY single question a baker might have as far as tweaking recipes, or changing proofing time and/or temperature. A must-read even if you are a seasoned sourdough baker.
Part Two is devoted to recipes, and you’ll find eight sub-chapters in it.
#1 – The Master Recipe Sourdough Collection. In this chapter she shows how versatile her Baby Master Recipe can be, adapting it to make different shapes, Wedge Rolls, Sandwich Loaf, a beautiful concoction using a Bundt Pan (yes, that is right, and the photo of that one is worth a prize), a Pullman Loaf, and she closes it with a cute little method to use up “ends of bags” of flour. Every single bread in the whole book has a picture, so keep that in mind. I love that.
#2 – The Enriched Sourdough Collection. I love this section! Normally I do a straight sourdough bread, so to me playing with enriched dough is not very common, which is one of the reasons why I chose the featured recipe. Elaine uses her default Enriched Sourdough in some formulas, and also offers a lighter alternative. The chapter opens with a total beauty, Enriched Sourdough Pesto Babka. Stunning! The Jam-Filled Rolls are part of that chapter, and I almost chose the Cinnamon and Raisin Enriched Bundt Pan Bake to showcase here.
#3 – The Spiced Sourdough Collection. I love bread with spices, if you follow my blog you’ve probably noticed. I definitely will be trying some of her versions like Smoked Paprika, Rosemary and Sun-Dried Tomato Master Loaf, and her Turmeric and Onion Seed Sandwich Loaf.
#4 – The Softer Sourdough Collection. Super interesting chapter. It centers on methods that will produce a sourdough with a much softer crust, something she achieves by adding milk into the formulas. She starts with a “Half-Milk, Half-Water Baby Master Loaf”, and moves to variations using different proportions and different liquids such as buttermilk (Buttermilk and Spelt Loaf with Pine Nuts and Oats, another thing of beauty). I made the teaser recipe from this chapter, “Olive Oil and Herb Master Loaf”, so check it out in the end of this post.
#5 – The Filled Collection. Maybe my favorite chapter, I just don’t know. In this section, she really shows her creativity, joining interesting ingredients together. First comes a Cheese, Fig and Walnut Sandwich Loaf, absolutely gorgeous and mouth-watering photo… Apricot and Almond Babka Loaf with very detailed pictures of the shaping. I absolutely MUST make the “Chickpea, Barberry and Lemon Pantry Loaf”.
#6 – The Flat Sourdough Collection. Elaine uses her master recipe to make focaccia, pizza, ciabatta, and fougasse. In other words, she covers all the classics. Pictures are wonderful, including once again quite detailed shots of shaping ciabatta, which can be tricky.
#7 – The Shaped Collection. Another super fun and creative chapter, she shares techniques for special shaping. Braided Loaf is the first example, but don’t think about challah, this braid decorates the top of the bread, super cool. Looks intimidating but the pictures show you exactly how to do it. A Chocolate and Nut Sourdough Crown follows, would be just amazing at a party. The one I intend to try soon is… Pull-Apart Sharing Sesame Sourdough. The chapter closes with baguettes, in my opinion the trickiest bread to shape correctly.
#8 – The Same Day Collection. Sometimes we want to speed things up, right? This series gives recipes to have sourdough prepared and baked the same day. It is all a play with amount of starter and proofing temperature. Sourdough Pizza and Pita are two examples, but my favorite might be Same Day Poppy Seed Sourdough Rolls. They are adorable.
If you bake sourdough bread, or if you flirt with the idea of venturing into it, you need this book. The tone is always friendly, supportive, positive, and again, reading the book and browsing through the wonderful pictures, I just wanted to stop and start baking right away. The mark of a captivating cookbook!…
And now, as I always like to do when reviewing cookbooks, I share…
A TEASER RECIPE
OLIVE OIL AND HERB SOURDOUGH

Isn’t that amazing? The crust is a lot softer than a regular sourdough, and the bread stays fresh longer. A pleasure to work with, great flavor with the herbs spread inside the crumb.

ONE YEAR AGO: Monet’s Glazed Carrots
TWO YEARS AGO: Brownies, Three Ways
THREE YEARS AGO: Berry Rebellion Tarts (one of my favorite blog posts)
FOUR YEAR AGO: Emilie Raffa’s High Hydration Sourdough
FIVE YEARS AGO: Short-Ribs with Chickpeas and Chard
SIX YEARS AGO: Asian-Style Short Ribs
SEVEN YEARS AGO: Herbed Goat Cheese Souffles
EIGHT YEARS AGO: Barley Risotto with Peas
NINE YEARS AGO: Jammin’ Blueberry Sour Milk Pancakes
TEN YEARS AGO: Scallops with Black Pasta in Orange Cream Sauce
ELEVEN YEARS AGO: Stir-fried Chicken with Creamed Corn
TWELVE YEARS AGO: Potato, Cheddar, and Chive Torpedo
