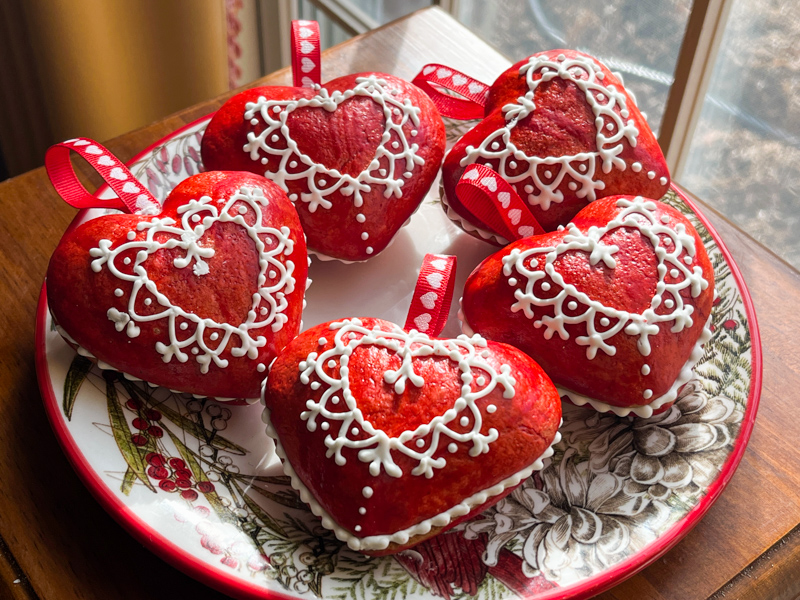
Would like to invite you to stop by my baby blog to see how I made my first 3D heart-shaped cookies. Click here.

Would like to invite you to stop by my baby blog to see how I made my first 3D heart-shaped cookies. Click here.
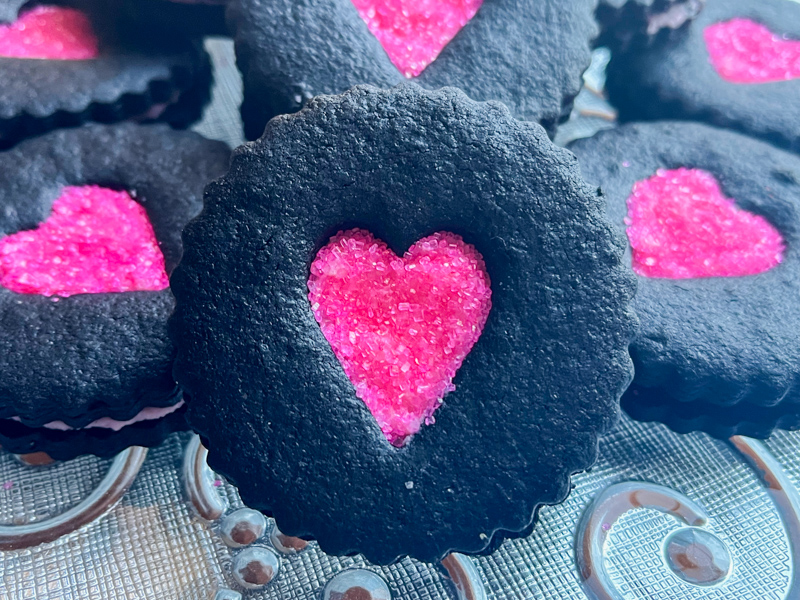
Yes, I do have a cookie blog, but when I try a new recipe, it will be here in my Bewitching Kitchen site. These cookies are a marriage of Oreos with Linzer, perfect for Valentine’s Day. They have a wonderful peppermint flavor, both in the cookie and the filling. Simply omit if you are not fond of it. I actually modified the filling a bit, because using the hard candy takes it too much into toothpaste-territory for my taste. Check the original recipe, you might prefer to follow that path. Remember, your kitchen, your cookies!
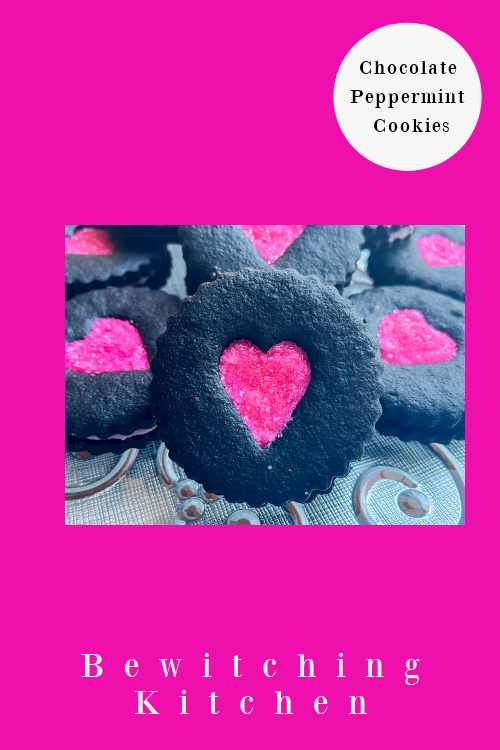
CHOCOLATE-PEPPERMINT COOKIES
(slightly modified from purewow.com)
for the filling:
1 bag of Moroccan mint tea
½ cup (115g) heavy cream
200g finely chopped white chocolate
Pinch of fine sea salt
pink gel food coloring
for the cookies:
10 tablespoons (142g) unsalted butter, at room temperature
135g granulated sugar
53g brown sugar
1 large egg, at room temperature
1 large egg yolk, at room temperature
1 teaspoon vanilla extract
¼ teaspoon peppermint extract
240g all-purpose flour
45g black cocoa powder
¼ teaspoon baking powder
½ teaspoon fine sea salt
pink sanding sugar to decorate
Place the tea bag and heavy cream in a small saucepan. Heat until simmering, close the pan and let it infuse for 5 minutes. Remove the tea bag, squeezing it hard. Re-heat the cream and when it is almost boiling, add to a bowl with the white chocolate, together with a pinch of salt. Let sit for a minute, then stir gently until fully dissolved. Add a tiny drop of pink gel food coloring (optional). Transfer to the fridge for several hours. When ready to use, whip it with a handheld blender but do not over-whip or the ganache might seize up.
Make the cookie dough: In the bowl of an electric mixer fitted with the paddle attachment, cream the butter, granulated sugar and brown sugar until light and fluffy, about 5 minutes. Add the egg and egg yolk; mix well to combine. Thoroughly scrape down the side of the bowl, then add the vanilla and peppermint extracts and mix to combine.
In a small bowl, whisk together the flour, cocoa powder, baking powder and salt; add to the mixer and mix until just incorporated. Scrape down the side of the bowl, then mix again briefly on low speed to make sure everything is combined. Divide the dough in half and form each half into a 1-inch-thick disk. Wrap each disk tightly in plastic wrap and refrigerate for at least 1 hour (and up to overnight).
Heat the oven to 325 F.
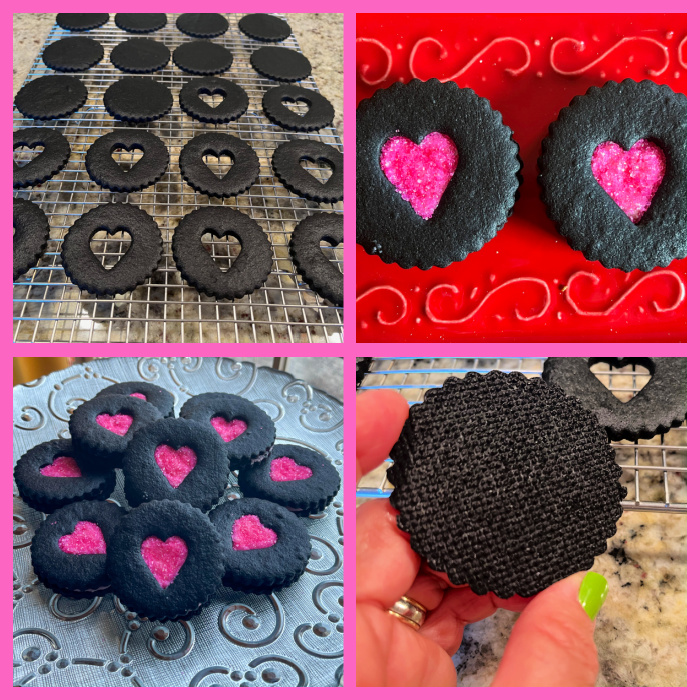
On a lightly floured surface, roll out one portion of dough to ⅛ inch thick. Use a 2-inch round cookie cutter to cut the dough and then transfer each round to one of the prepared baking sheets. Repeat with the second disk of dough. Use a mini cookie cutter to cut a shape from the center of each cookie on the second tray; remove the cutouts. Bake until the cookies are set at the edges, 8 to 10 minutes, rotating the trays between racks halfway through baking. Cool completely.
Assemble the cookies: Flip the cookies without cutouts over, then pipe the filling into the center of each cookie, leaving a ¼-inch border. Place one of the cookies with a cutout on top and press down slightly until the filling reaches the edge of the cookies. Sprinkle sanding sugar on the opening. Let set for 30 minutes before serving. They keep well at room temperature for several days.
ENJOY!
to print the recipe, click here
Comments: I used a small heart-shape cutter for the opening. You can use a simple round or another shape of your choice. I recommend using black cocoa if you really want to take those into the Oreo world. And the peppermint flavor was a nice twist. I visualize those with a Christmas aura, making the center as a round, or a star-shape and using red, white, and green non-pareils to decorate the center.
The cookie itself is very flavorful and I baked some in small little rounds, then decorated the top with dots of Royal icing I had leftover from another cookie adventure. That is of course totally optional, but oh so very cute, right?

If you like Oreos, I hope you give this version a try.
ONE YEAR AGO: Slow-Roasted Sweet Potatoes in Tomato Cardamon Sauce
TWO YEARS AGO: Sweet Potatoes in Tahini Sauce
THREE YEARS AGO: 30-Hour Leg of Lamb with Mashed Sweet Potatoes
FOUR YEARS AGO: Maple-Grilled Pork Tenderloin over Lemony Zucchini
FIVE YEARS AGO: Danish Rye Bread
SIX YEARS AGO: The Best Sourdough Recipe
SEVEN YEARS AGO: Mini-Quiches with Duxelles and Baby Broccoli
EIGHT YEARS AGO: Quinoa and Sweet Potato Cakes
NINE YEARS AGO: Pumpkin Bolo de Fuba’ Cremoso
TEN YEARS AGO: Citrus-crusted Tilapia Filets
ELEVEN YEARS AGO: Bran Muffins, not just for Hippies
TWELVE YEARS AGO: Flourless Chocolate Cake

This post inaugurates a new series, the Joy Cookie Club, inspired by a favorite book/movie of mine, Joy Luck Club. If you have not read it, buy two boxes of Kleenex and do so. I bake sugar cookies every week to include in a box that gets donated in the Common Table project of our town. It gives me the opportunity of trying new styles and learn cute tricks with the generous professionals who share their expertise on youtube and instagram. For the basic recipes, I used either Neat Edges Sugar Cookies or Gingerbread. For Royal Icing, my favorite recipe is Tanya’s. You can it in her blog here. Now let me walk you through some of the cookies I made in the past 6 weeks.
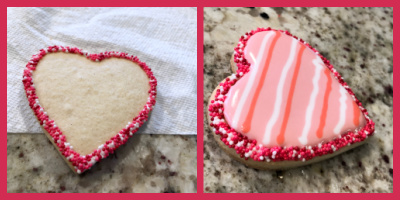
STYLE #1: ZIG ZAG WITH BORDER
This is a pretty striking cookie that is so so easy to make! One thing that is hard when we start decorating sugar cookies is the edge. It always ends up a bit messy. By adding a border, you can say goodbye to that problem. Just pipe Royal icing and immediately touch the surface of the cookie on a layer of your favorite non-pareils (or sanding sugar). Let that dry for a few minutes, flood, quickly add lines of contrasting colors and work a needle or toothpick up and down, curving it gently to follow the overall shape of the heart. Detailed instructions here.
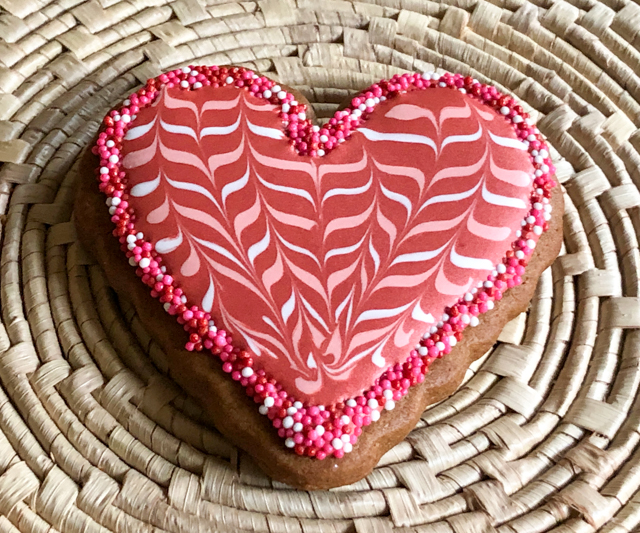
STYLE #2 – WAVY HEART

I consider this one a work in progress, as I could not quite match the beauty of the ones made by @thegracefulbaker. The design is actually quite simple. You pipe fine lines dividing the heart in wavy sections, then flood areas that are not touching. Wait for those to crust, maybe 30 minutes or so, and flood the others. If the consistency of your icing is thick enough, the sections will be more “puffed up” and it will look quite striking. I did not get there, but I still like the look.

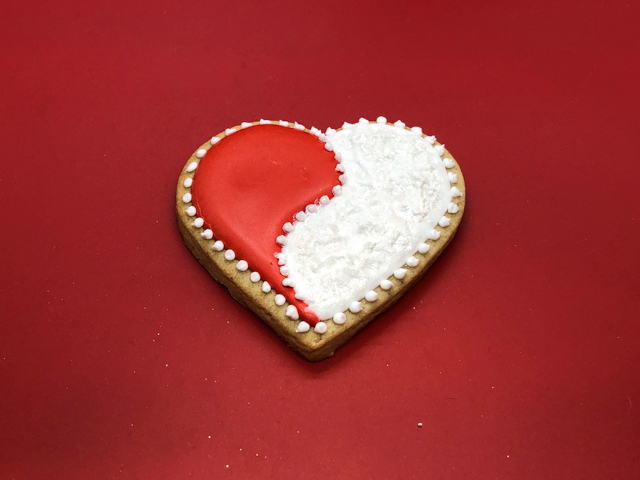
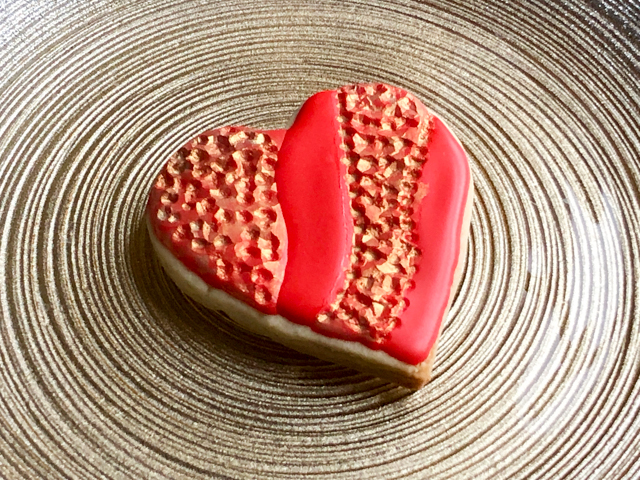
STYLE #3 – DIVIDED HEART

I love this one so much! Flood one side with red, another side with white. Let them both crust for 30 minutes or more. You can even continue the following day. Add the lines, the dots, and once it’s all crusted, you can use a little diamond dust to make it truly special. For the lines and dots, you’ll need slightly thicker royal icing, either straight from mixing the batch, or very lightly thinned with water. Do not use flooding consistency. But, a similar style can also work with a simpler, wet-on-wet decoration

You can also mess up one side with a brush, and add a totally different texture to the icing. In that case, brushing some white luster powder mixed with vodka is a good move. The picture does not show it very well, but it added a nice shine to the white portion.
STYLE #4 : CRACKLED HEART
A variation of the wavy design, I let the final flooded regions crust for only 15 minutes, and used a little fondant ball tool to press the design. Once it was fully crusted, I brushed gold luster powder mixed with vodka only on the crackled part.

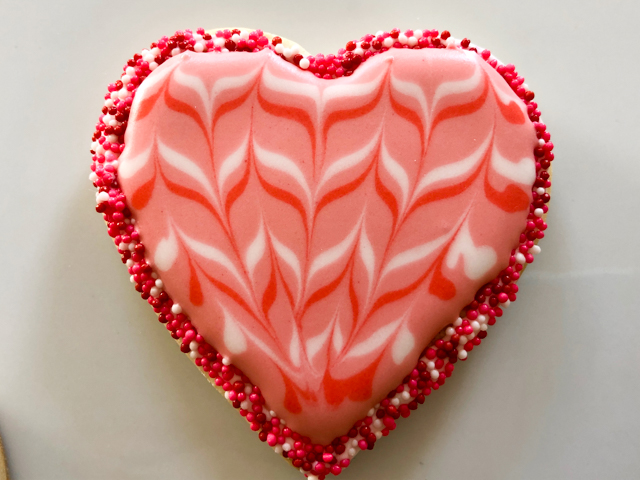
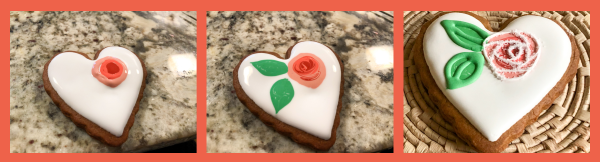
STYLE #5: ROSE BUDS
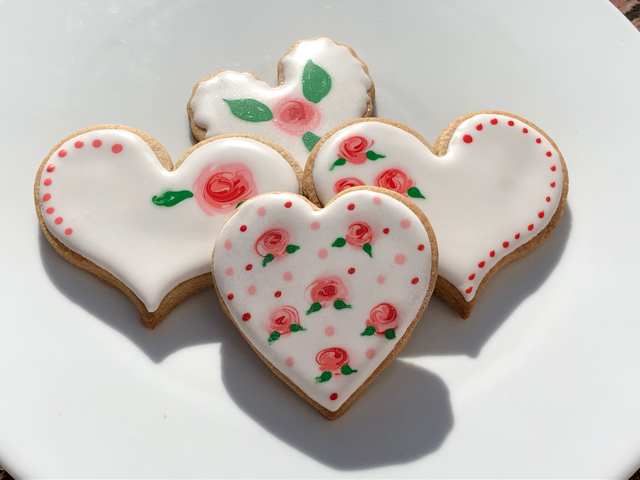
I was terrified of trying those, as they seemed way beyond my skill level. You can find countless youtube tutorials showing how it’s done, and in fact it is not that hard. You start by flooding in white (or any base color you like). Immediately add two or three concentric dots with the colors for the rose bud. Very slowly swirl them with a needle until you get the design you like. Add little dots of green and pull them with a needle to give them a leaf shape. Let it all dry completely and if you want, add additional bells and whistles. You can draw veins in the leaves, pipe their shape with thick royal icing, and add fine white lines on the rose buds for a completely different, almost modern look.
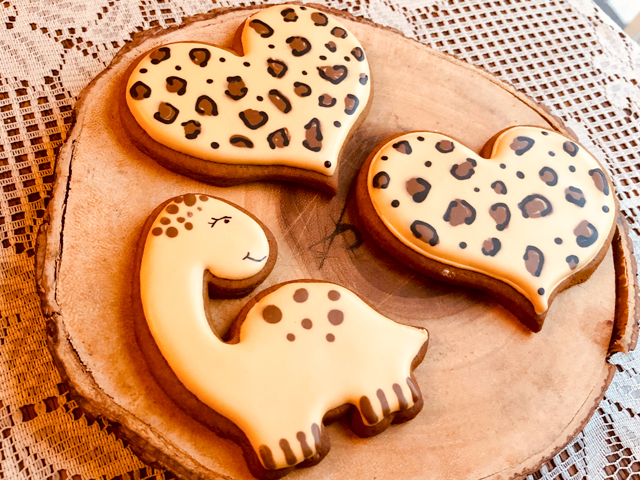
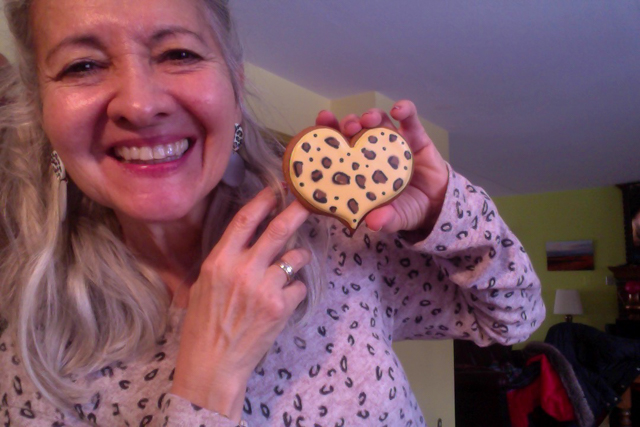
STYLE #6: CHEETAH HEARTS

I do sound like a broken record, but what can I do? I loved making those also… Super simple, which makes them even better. Flood with white, add large, irregular dots of your color of choice, immediately add edges, also irregular of a second, darker color. Since cheetahs are kept in zoos or far away from your home, no need to fear their revenge, you can go crazy with the color combination… Or even crazier, pairing them with a dinosaur!
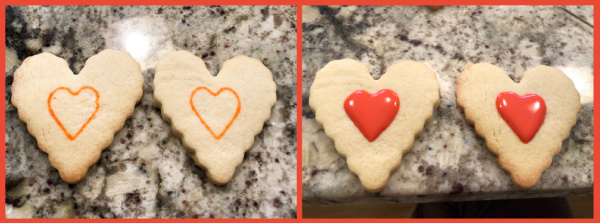
STYLE #7: HEART WITHIN A HEART
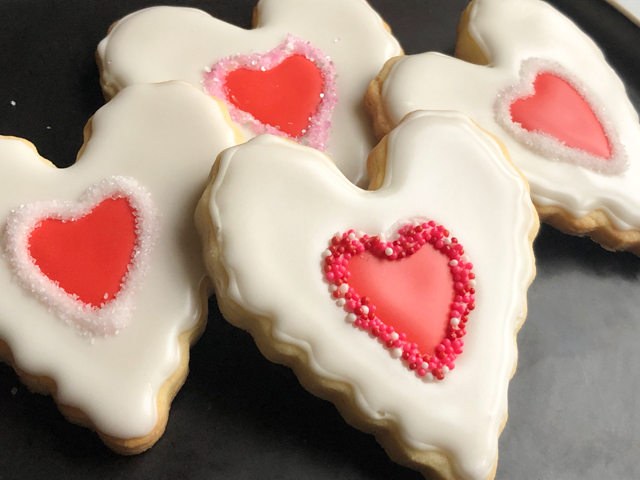
Are you going to roll your eyes to the ceiling if I tell you I loved making these? Ok, I won’t then. Start with a plain cookie, use a small cookie cutter to draw a small heart in the center. If you are brave, do it free-hand. Flood with red. Let it crust for 15 minutes, surround it with white. Let it fully dry, pipe the edge of the inner heart with white icing, and cover it with non-pareils or sanding sugar. It is a simple, but very elegant look.
STYLE #8: HEARTS WITH DECORATIONS
The only thing that changes is that you need to flood the cookies and let them dry overnight. Then, you can glue to the surface Royal icing transfers in the shapes you like. Either made by yourself or using store-bought sprinkles.
I made the two rosettes with very thick Royal icing dyed pink, and brushed with golden lust powder. But as I mentioned, you can simplify your life and glue little decorations made by Wilton and available pretty much everywhere these days.
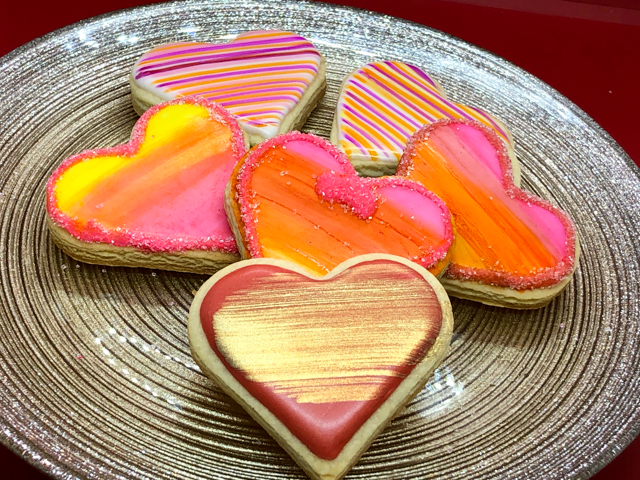
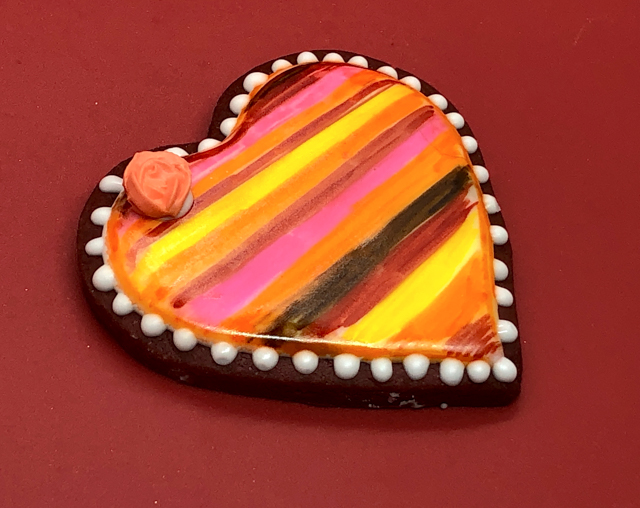
STYLE #9: WATERCOLOR SERIES
For these you absolutely need the coating to be fully crusted and dry, 24 hours is best. Flood the cookie with white. Mix food dye colors with a little vodka or everclear, and brush lightly on the surface of the cookie, making the design and colors you like. For a detailed tutorial on youtube, click here. I went with a tequila-sunrise motif. Add a border with royal icing and sprinkles if you so desire. You can also use food-safe pens and draw colorful lines all over the surface, or use a fan brush to add a band of gold, for a simple but effective design.
I hope you enjoyed this small collection of sugar cookies, and consider making them for someone you love.
Flour, sugar and eggs: $ 8.75
Assorted cookie cutters: $12.00
Food gel color: $10.00
Matching cookie to earrings and shirt
AND BEING FREE OF BRACES????
PRICELESS

ONE YEAR AGO: Uttapam, White Lentil and Rice Flatbread
TWO YEARS AGO: Valentine’s Day Sweetheart Cookies
THREE YEARS AGO: Fesenjan, Fast-Food Style
FOUR YEARS AGO: Lavender Macarons with White Chocolate Ganache
FIVE YEARS AGO: Raspberry Chocolate Truffles
SIX YEARS AGO: Red Velvet Cupcakes
SEVEN YEARS AGO: Happy Valentine’s Day!
EIGHT YEARS AGO: A Few Blogging Issues
NINE YEARS AGO: Dan Dan Noodles
TEN YEARS AGO: Sophie Grigson’s Parmesan Cake
ELEVEN YEARS AGO: Antibiotics and Food
Back in December, I made a batch of cookies and “decorated” them. After that experience it became clear that the road to hell is paved with Royal icing. Since it was a real roller coaster, I decided I was done with it for the rest of my existence. Having said that, I don’t know exactly why I woke up one day thinking that the combination of sugar cookies with Royal icing would be the best way to start Valentine’s week. A real sucker for punishment I am. Was it that bad? Sort of. Let’s say it had some ups and some dark and scary downs.

SWEETHEART SUGAR COOKIES WITH ROYAL ICING
(adapted from Alton Brown and Sweet Sugarbelle)
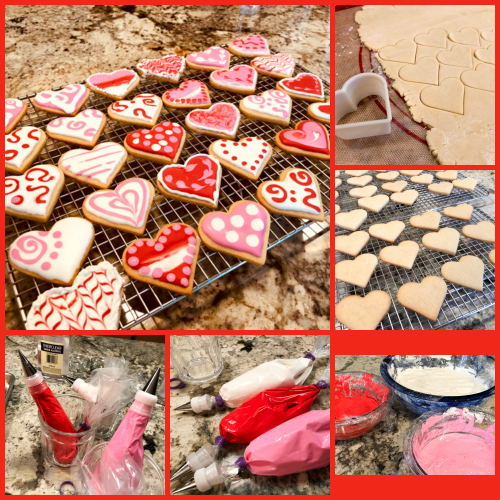
what you’ll need:
heart-shaped cookie cutter
scribe tool
piping bags
icing tips size 2 or 3
rubber bands for piping bags (2 per bag)
paper towels and water for constant clean-up
a Zen attitude
a very understanding partner in case you run out of previous item
for the cookie dough:
3 cups all-purpose flour (360 g)
3/4 teaspoon baking powder
1/4 teaspoon salt
1 cup unsalted butter, softened (225 g)
1 cup sugar (225 g)
zest of 1 lemon
1 egg, beaten
1/2 tsp vanilla paste
1 tablespoon milk
for the icing:
2 pounds confectioner’s sugar {907 grams}
5 tablespoons meringue powder {approximately 53 grams}
2 teaspoons vanilla bean extract (I used clear vanilla extract)
1/2-3/4 cups warm water
Sift together flour, baking powder, and salt. Set aside. Place butter and sugar in large bowl of electric stand mixer and beat until light in color. Add egg, lemon zest, milk and vanilla, beat to combine. Put mixer on low-speed, add flour, and mix just until the mixture starts to form a dough. Do not over mix or your cookies might be tough. Remove the dough from the mixer and finish mixing it by hand, gently. Divide the dough in half, flatten each portion as a square or rectangle and wrap in plastic foil. Refrigerate for 1 hour minimum.
Heat oven to 350 degrees. Remove one wrapped pack of dough from refrigerator at a time, sprinkle rolling-pin with powdered sugar, and roll out dough to 3/8-inch thick. Cut into heart shapes, place on baking sheet over parchment paper, and refrigerate for 30 minutes. Bake for 10 to 12 minutes or until cookies are just beginning to turn brown around the edges, rotating cookie sheet halfway through baking time. Let sit on baking sheet for 2 minutes after removal from oven and then move to cool on a rack. Ice the cookies when completely cool, or on the following day.
Make the icing (you can make the day before and store well covered at room temperature). Stir the vanilla into half of the water and reserve. Keep the other half of the water measured and ready to go.
Using a paddle attachment gently mix the sugar and meringue powder. With the mixer on the lowest setting slowly add the water/flavoring mix to the dry ingredients. As the water is added, the icing will become thick and lumpy. Continue to add the remaining water {this may or may not be the entire amount} until the mixture reaches a thick consistency. At this point, turn the mixer to medium speed and whip 2-4 minutes until the mixture is thick and fluffy. When it forms a soft peak, it has been beaten enough. Avoid mixing further, as you don’t want to incorporate too much air in the icing. Too much air might result in bubbles forming after icing.
Adjust the consistency that you need for flooding the cookies, separate the icing in portions, add dye according to your planned decoration. Store in air-tight containers at room temperature. If needed, re-adjust the consistency before piping.
Add the different colors of icing to piping bags fitted with the appropriate icing tips. I like number 3 for the basic color used for flooding, and a number two for the details. Flood each cookie, make the edges as neat as possible with the scribe tool. Decorate with the design you like, one cookie at a time, as the base color needs do still be wet, unless you prefer to do a wet-on-dry method. In this case, the base needs to dry for several hours before proceeding with the decoration.
Dry the cookies for at least 6 hours before handling them.
ENJOY!
to print the recipe, click here
Comments: I had no issues with the cookie component, I prefer the taste of a sablé type cookie, but as far as sugar cookies go, these are very nice. They retain a little chewiness upon baking (especially if you don’t let them get too dark), and the lemon zest brightens them up considerably. Now let’s talk Royal icing. I watched online classes and youtube videos. I read cook books.
Here is my advice for those who are as inexperienced as myself and for some irrational motive decide that a naked cookie must be dressed for party.
But, the most important thing is obviously the most elusive for beginners: the consistency of the icing. Nothing is more frustrating than filling the piping bag and realizing the icing is a tad too thick. Or worse yet, too thin, which will cause the icing to roll off the cookie and tears to roll down the baker’s face. There are tricks to judge the perfect consistency. For instance you can run a spatula or small knife into the icing bowl, and in about 15 seconds it should go back to a smooth, leveled surface. I was probably off by 20 seconds on my first attempt, which led me to say a few choice words, empty the bag, thin the icing, and start all over. Sadly, it was still a bit thick, but I could not bring myself to empty the bag again. So the white icing used to flood most of the cookies was not top-notch. Getting the consistency perfect is probably something that comes with practice. Perhaps I’ll get there before 2019 is over.
I developed a huge respect for those who do this type of stuff for a living. It is really time-consuming, and I imagine the profit margin is very low. Especially if a baker uses the best ingredients and does intricate decorations, he or she will have to charge a lot more than the stuff you can by at the grocery store in those big plastic boxes. But I guess that is a problem professional bakers are forced to deal with.
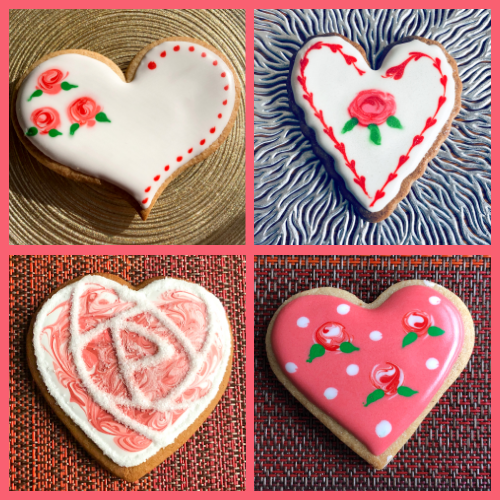
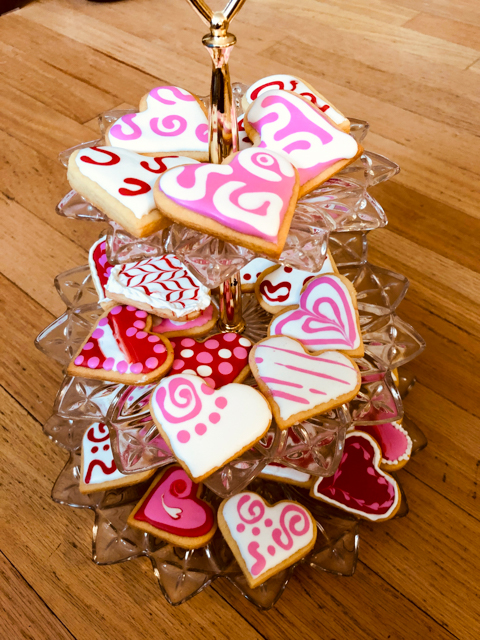
Several of my cookies had small boo-boos, but some made me very happy. So happy that I created a little composite photo with them.


ONE YEAR AGO: Fesenjan, Fast-Food Style
TWO YEARS AGO: Lavender Macarons with White Chocolate Ganache
THREE YEARS AGO: Raspberry Chocolate Truffles
FOUR YEARS AGO: Red Velvet Cupcakes
FIVE YEARS AGO: Happy Valentine’s Day!
SIX YEARS AGO: A Few Blogging Issues
SEVEN YEARS AGO: Dan Dan Noodles
EIGHT YEARS AGO: Sophie Grigson’s Parmesan Cake
NINE YEARS AGO: Antibiotics and Food
