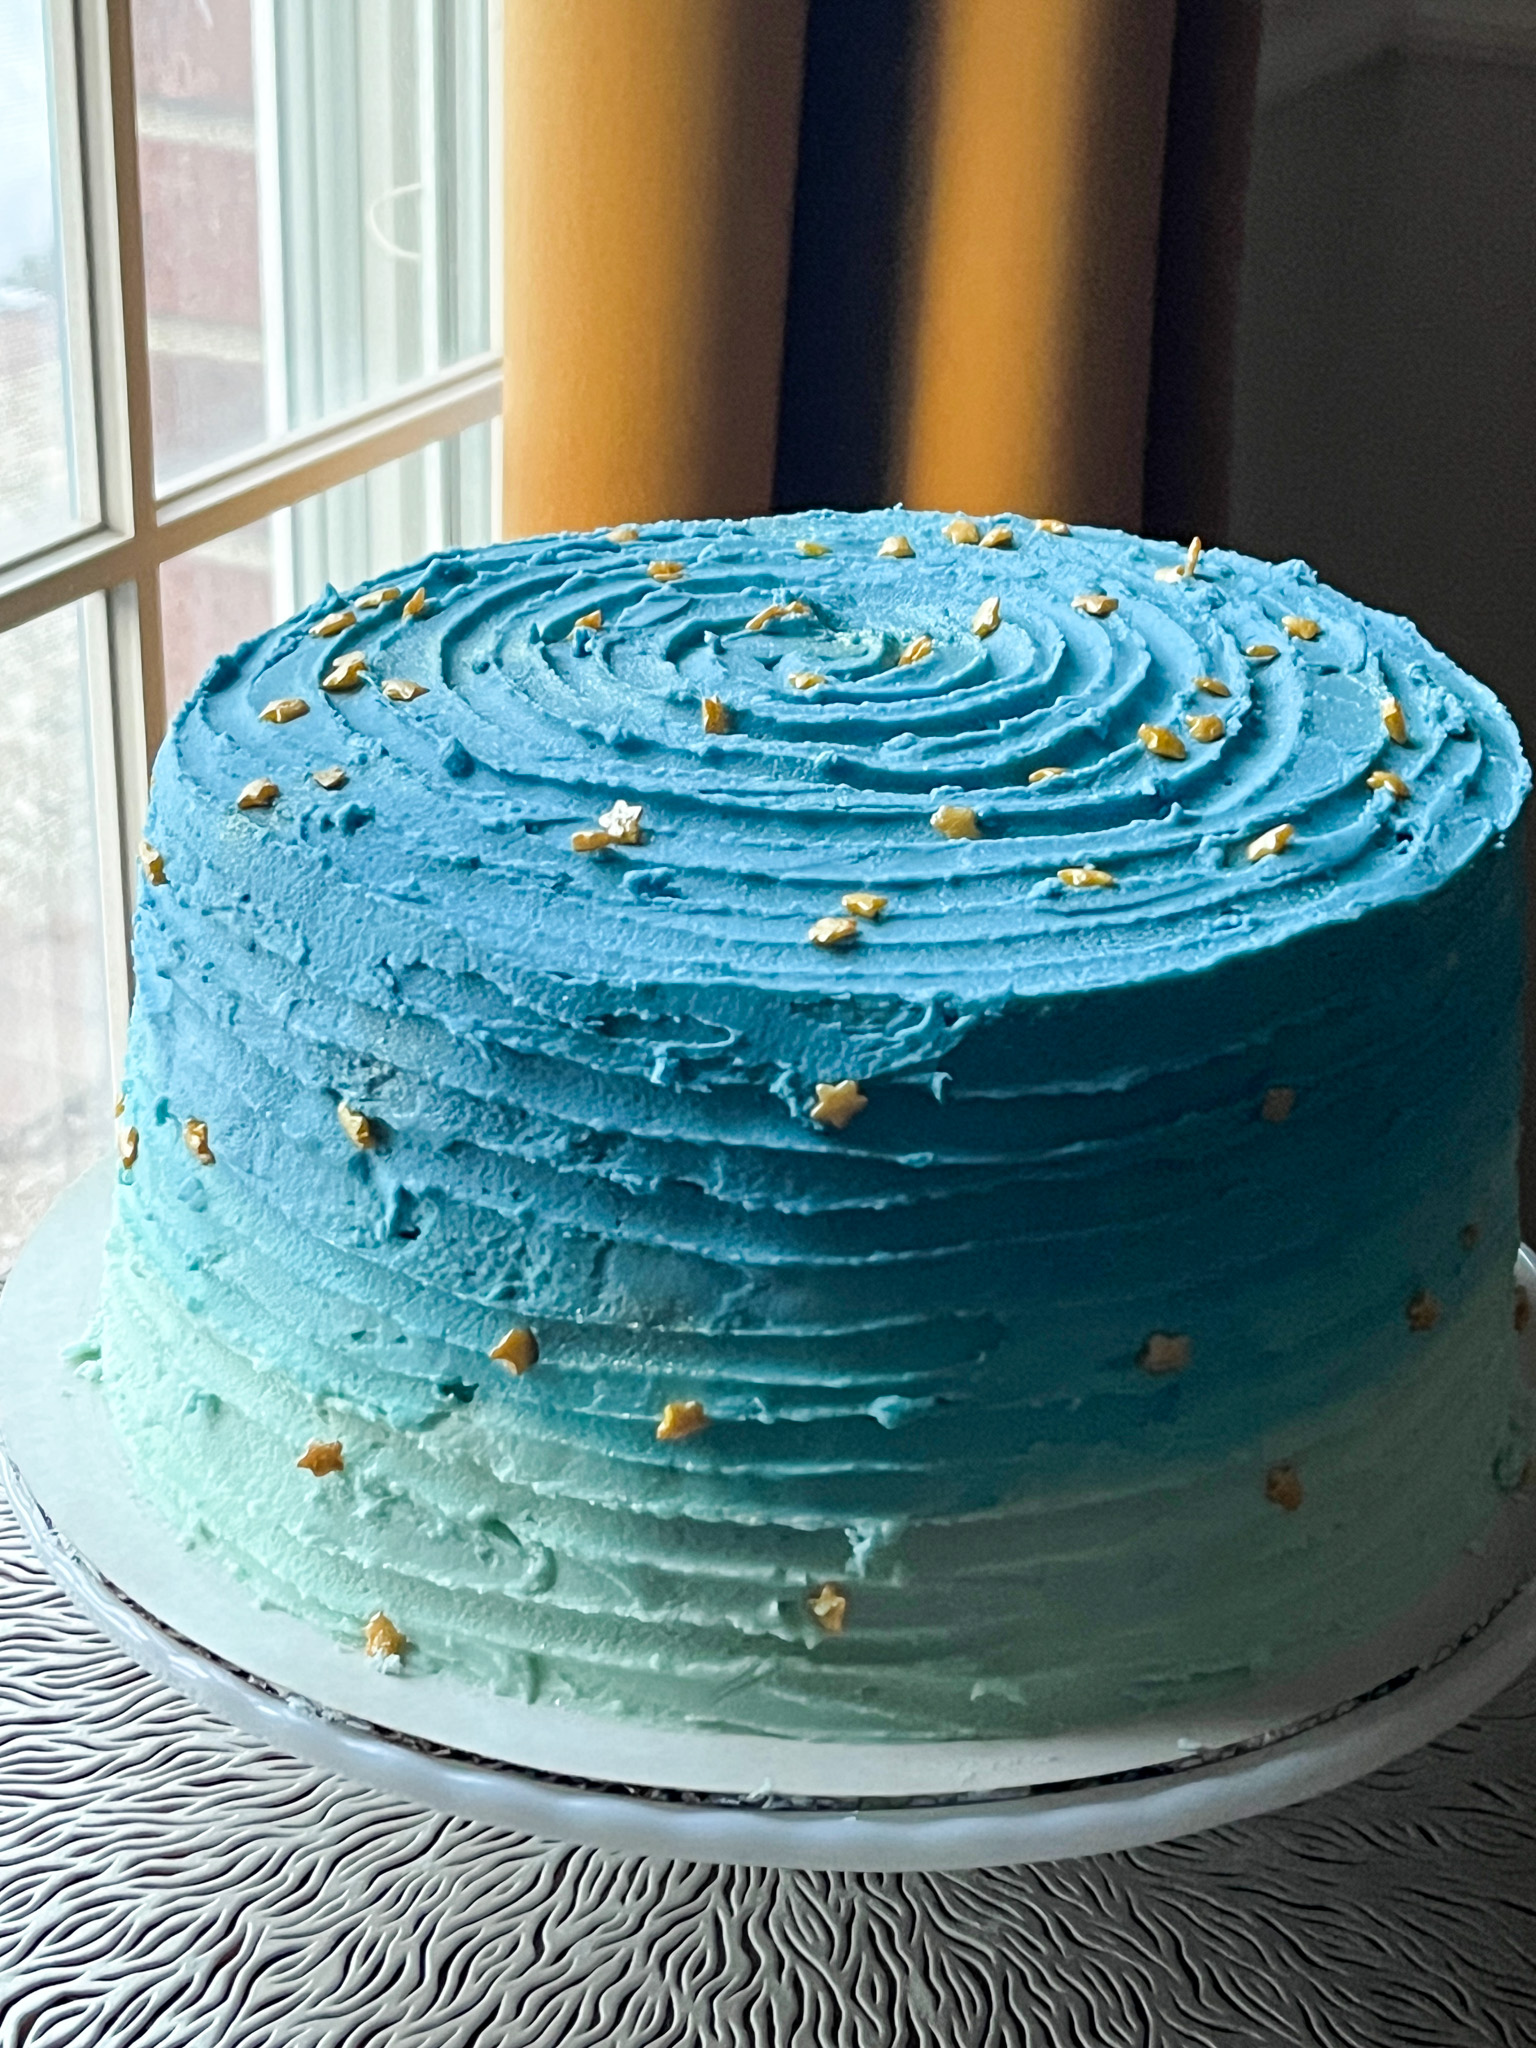
NIGHT SKY OMBRÉ CAKE

Inspiration from this cake came from a book I’ve had for many years: Cake Decorating for Beginners, by Rose Atwater. It is a wonderful book, full of cute ideas, some pretty simple, some a bit more involved. I love ombré style cakes, having done some in the past.

NIGHT SKY VANILLA CAKE WITH CHOCOLATE GANACHE FILLING
(inspired by Rose Atwater)

for the cake:
1 +1/2 cups whole milk 
1/4 cup heavy whipping cream 
2 + 1/2 cups all-purpose flour 
1 cup cake flour 
2 teaspoons baking powder 
1 cup (2 sticks) unsalted butter, at room temperature
2 + 1/2 cups sugar
½ teaspoons salt 
2 tsp buttery vanilla emulsion (from Lorann) 
3 large eggs

Heat the oven to 325 degrees. Grease and flour three 8 x 2 inch round cake pans, line bottom with parchment paper. Reserve.

In a small bowl, mix together the milk and heavy cream. In a medium bowl, sift together the two types of flour and baking powder. Set aside. Cream the butter using a stand mixer and the paddle attachment on medium speed until it’s soft and light, about 2 minutes. Add the sugar and salt and mix until the mixture is light in color and fluffy, about 2 minutes. Add the vanilla, and mix until just combined. Add the eggs, one at a time, mixing for 20 seconds after each egg, scraping down the sides of the bowl as needed.

Turn the mixer speed to low, then add one-third of the flour mixture and mix until just combined. Add half of the milk mixture and mix until just combined, then add another third of the flour mixture. Repeat with the remaining milk and flour mixtures. Divide the batter between the prepared pans and spread it out evenly. Bake for 35 to 40 minutes, until a toothpick or cake tester inserted into the center of each cake comes out clean.

for the ganache filling:
230g dark chocolate, cut in pieces
240g heavy cream

Heat cream until simmering, pour over chocolate in a large bowl. Allow to sit for 5 minutes than whisk gently until smooth. Let it cool for 15 minutes then place in the fridge for 90 minutes. Use a hand held mixer to whip the ganache until lighter and fluffier. Use to fill the two layers of the cake. 

for the frosting:
1 cup (2 sticks) unsalted butter, at room temperature
1 cup vegetable shortening
2 teaspoons pure vanilla extract
3 to 4 tablespoons milk
¼ teaspoon salt
2 pounds (approximately 8 cups) powdered sugar
food gel dye, Americolor Royal Blue and Diamond Black

In a large bowl, use a stand mixer with the paddle attachment, and beat together the butter, shortening and vanilla until smooth and creamy.

Add 2 tablespoons of the milk, the salt, and half the powdered sugar and mix just until combined. Scrape down the sides of the bowl. On low speed, gradually add in the remaining sugar. Add more milk as needed to achieve the desired consistency.

Divide the frosting in three bowls, and one drop of blue to the first bowl, two drops to the second, and 2 drops blue + 1 drop black in the last. 

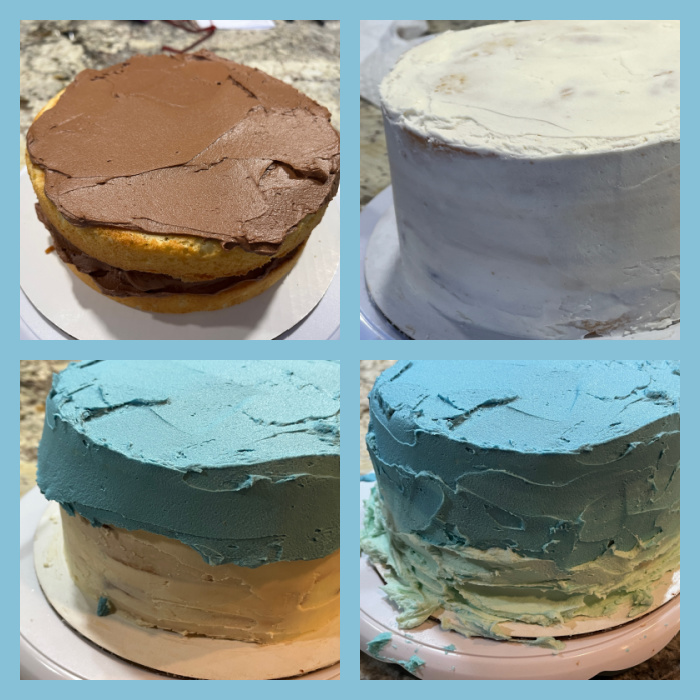
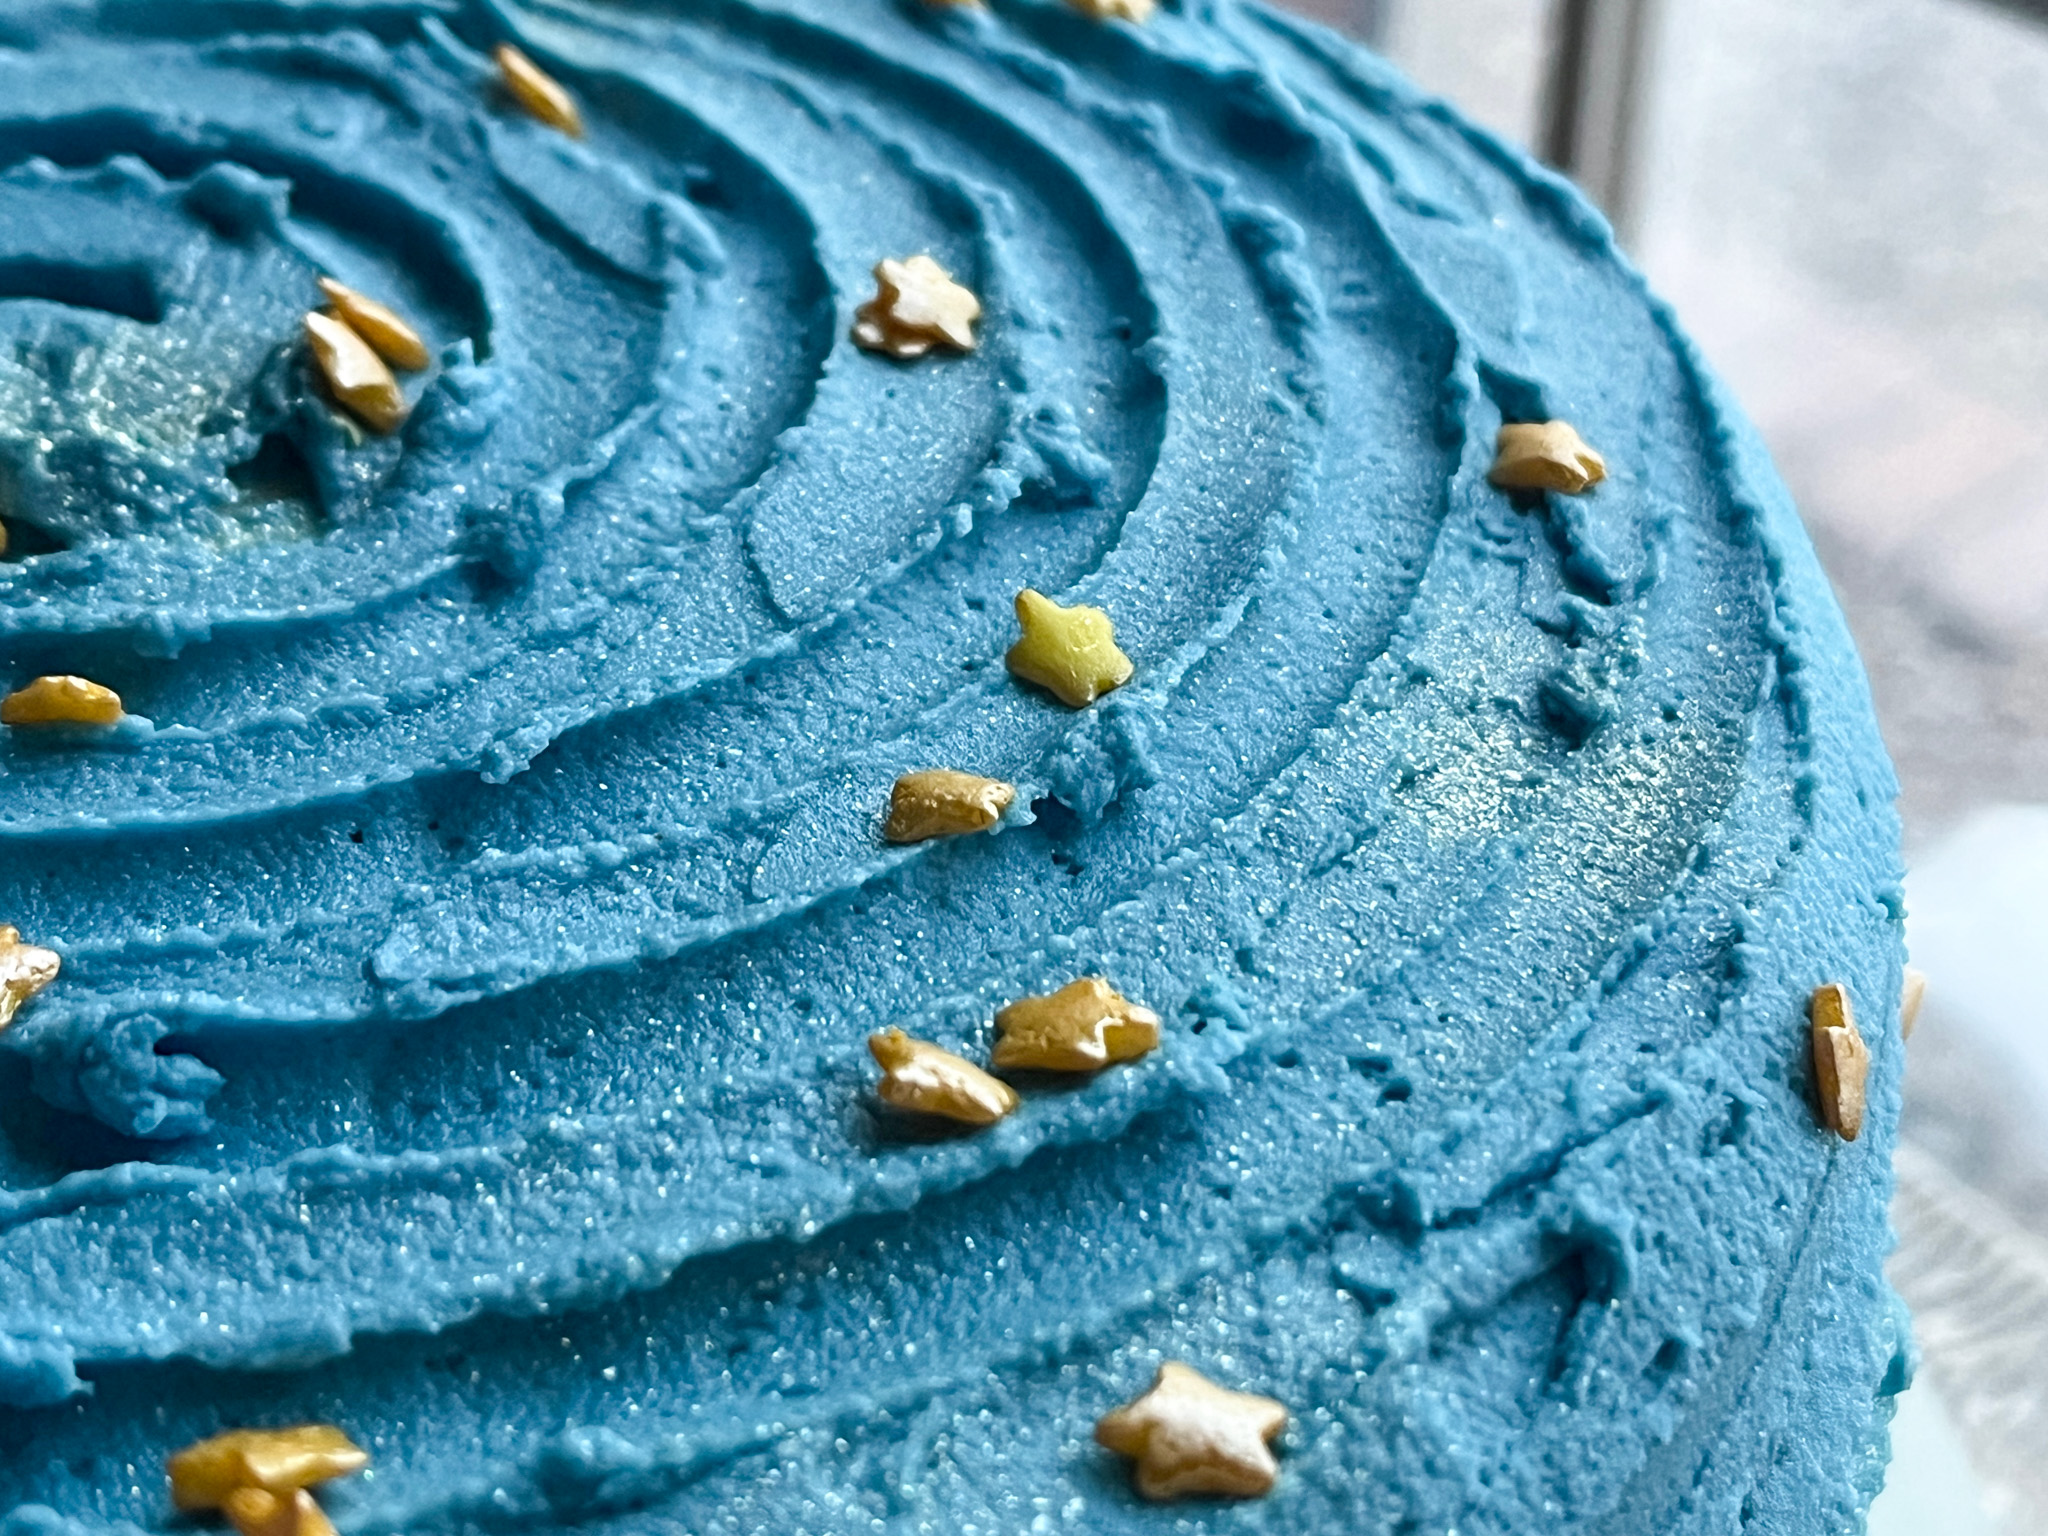
Assemble the cake: Place the first cake on a board, add ganache as a smooth layer on top. Place second cake over ganache, repeat the process. Add last round of cake and press gently. Frost with a thin layer of frosting in the lightest color (or do it before adding any dye to the buttercream). Let the cake cool in the fridge for an hour or more. Frost with the dyed buttercream: cover the top and 1/3 of the height from top to bottom with the darkest color of blue. Add the medium tone to the second third of the cake, and the lightest color to the bottom. Use a scraper to smooth the layers. Add texture with a little spatula as you turn the cake. Add star sprinkles.

ENJOY!

to print the recipe, click here
Comments: I wish I could report on taste and looks as it was sliced, but I donated the cake whole, so my fingers are crossed that the recipients liked it… At any rate, it is hard to go wrong with vanilla and chocolate ganache, right? The buttercream is simple to prepare and crusts nicely in case it needs to sit for hours at room temperature. I love the effect of the different colors. Of course, I had to add some gold dust because I cannot help it… I bet you are not surprised!
ONE YEAR AGO: Veronica Gowan, The Macaron Queen!

TWO YEARS AGO: Almond Raspberry Sandwich Cookies

THREE YEARS AGO: Cole-Slaw with Almond Dressing

FOUR YEARS AGO: Busy Bee Sugar Cookies

FIVE YEARS AGO: Mincemeat Pies, when the third time is a charm

SIX YEARS AGO: Shibari Bread]

SEVEN YEARS AGO: Incredibly Simple Times Four – January 2018 

EIGHT YEARS AGO: Two Salads and a Blog Award!

NINE YEARS AGO: When Three is Better than Two

TEN YEARS AGO: Somebody Stop Me!

ELEVEN YEARS AGO: Zucchini Pasta with Cilantro-Cashew Pesto

TWELVE YEARS AGO: Bran Muffins, Take Two

THIRTEEN YEARS AGO: Brown Butter Chocolate Chip Cookies

FOURTEEN YEARS AGO: Mogo Mojo

FIFTEEN YEARS AGO: Slow-Roasted Chicken Thighs: an Ice-Breaker
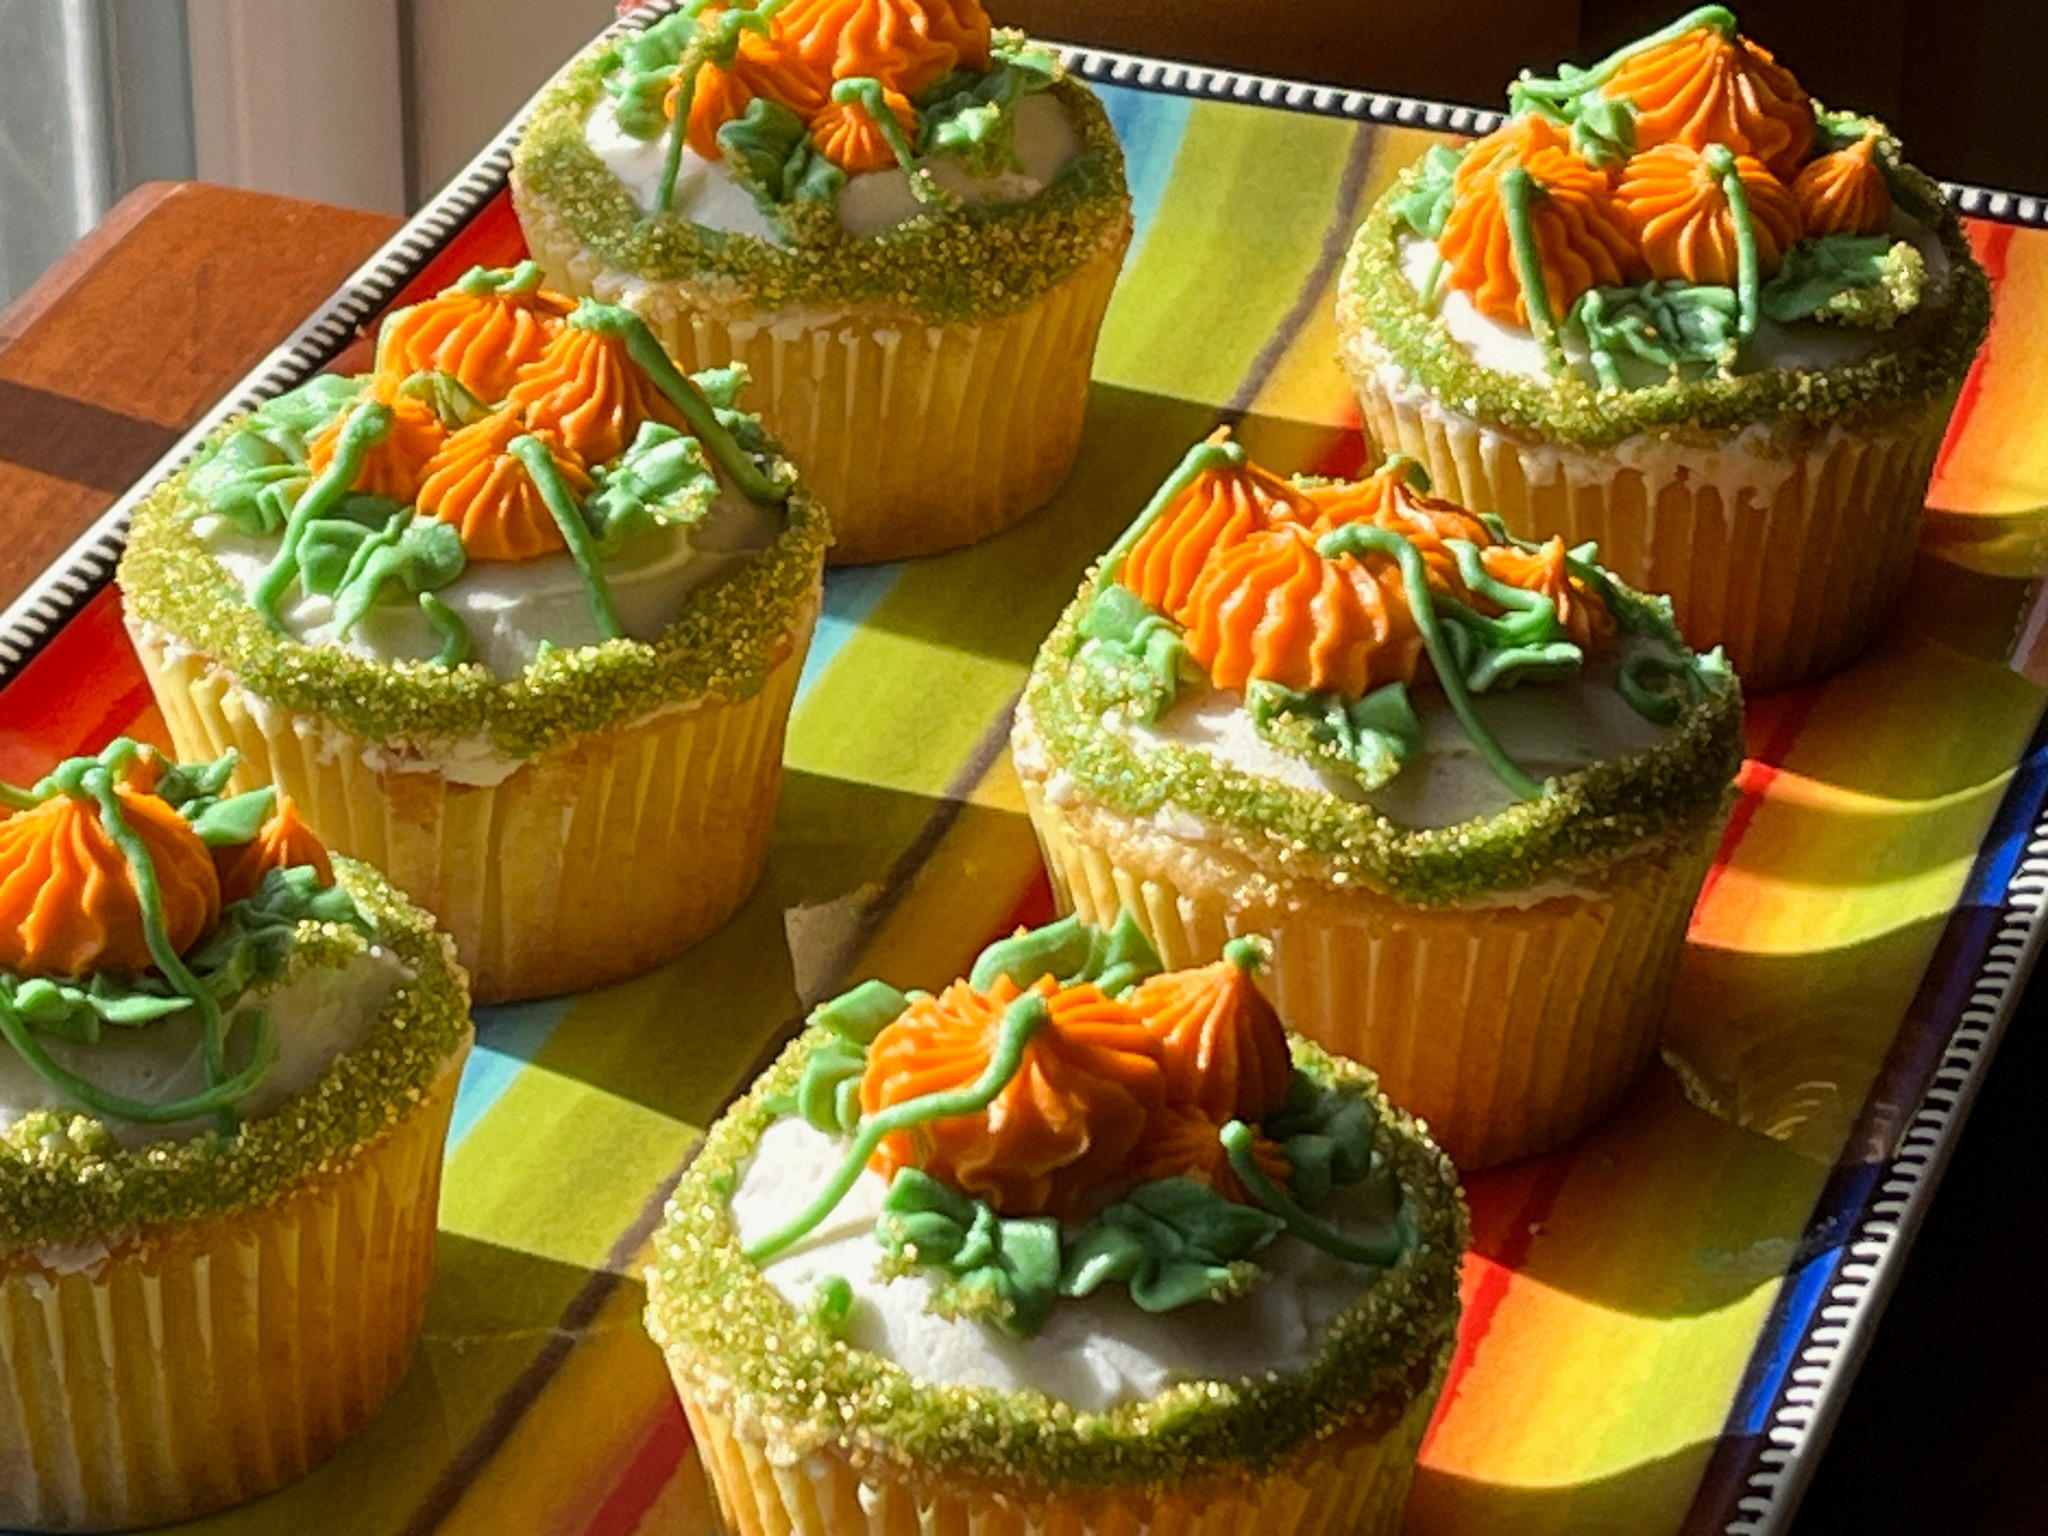
FALL-INSPIRED VANILLA CUPCAKES

It’s been a while since I made cupcakes to include in the donations I make on Fridays. I like to keep things simple, especially in a busy week, and these cupcakes are actually the definition of simple: I use a method that mixes butter with flour from the beginning, no creaming needed. It makes a soft crumb, tender cake, and it is lightening fast to prepare. What’s not to like?

VANILLA CUPCAKES
(adapted from several sources)

for the buttercream use this recipe

120g all-purpose flour
150g granulated sugar
40g butter, unsalted, removed from the fridge for 30 minutes
1 large egg
120mL milk
1 + 1/2 tsp baking powder
1/2 tsp vanilla paste or extract
1/4 tsp salt

Heat the oven to 350F and line a cupcake pan with paper baking cups. Recipe makes 9 to 10 cupcakes.

Put the flour, baking powder, sugar, salt and butter cut in small pieces in the bowl of a KitchenAid type mixer fitted with the paddle attachment. Mix on medium-low until the butter is in very small pieces, almost like sand.

Whisk the egg with the milk and vanilla, add slowly to the mixer running in low-speed. Once it is almost smooth, increase the speed to high for a couple of minutes, scraping the bottom of the bowl once.

Stop the mixer and make sure the batter is fully smooth, mixing by hand with a spatula. Add batter to the 9 cupcakes, filling half-way full only. Bake for 15 to 18 minutes, until a toothpick comes out clean when inserted in the center.

Leave cool completely before decorating.

ENJOY!

to print the recipe, click here


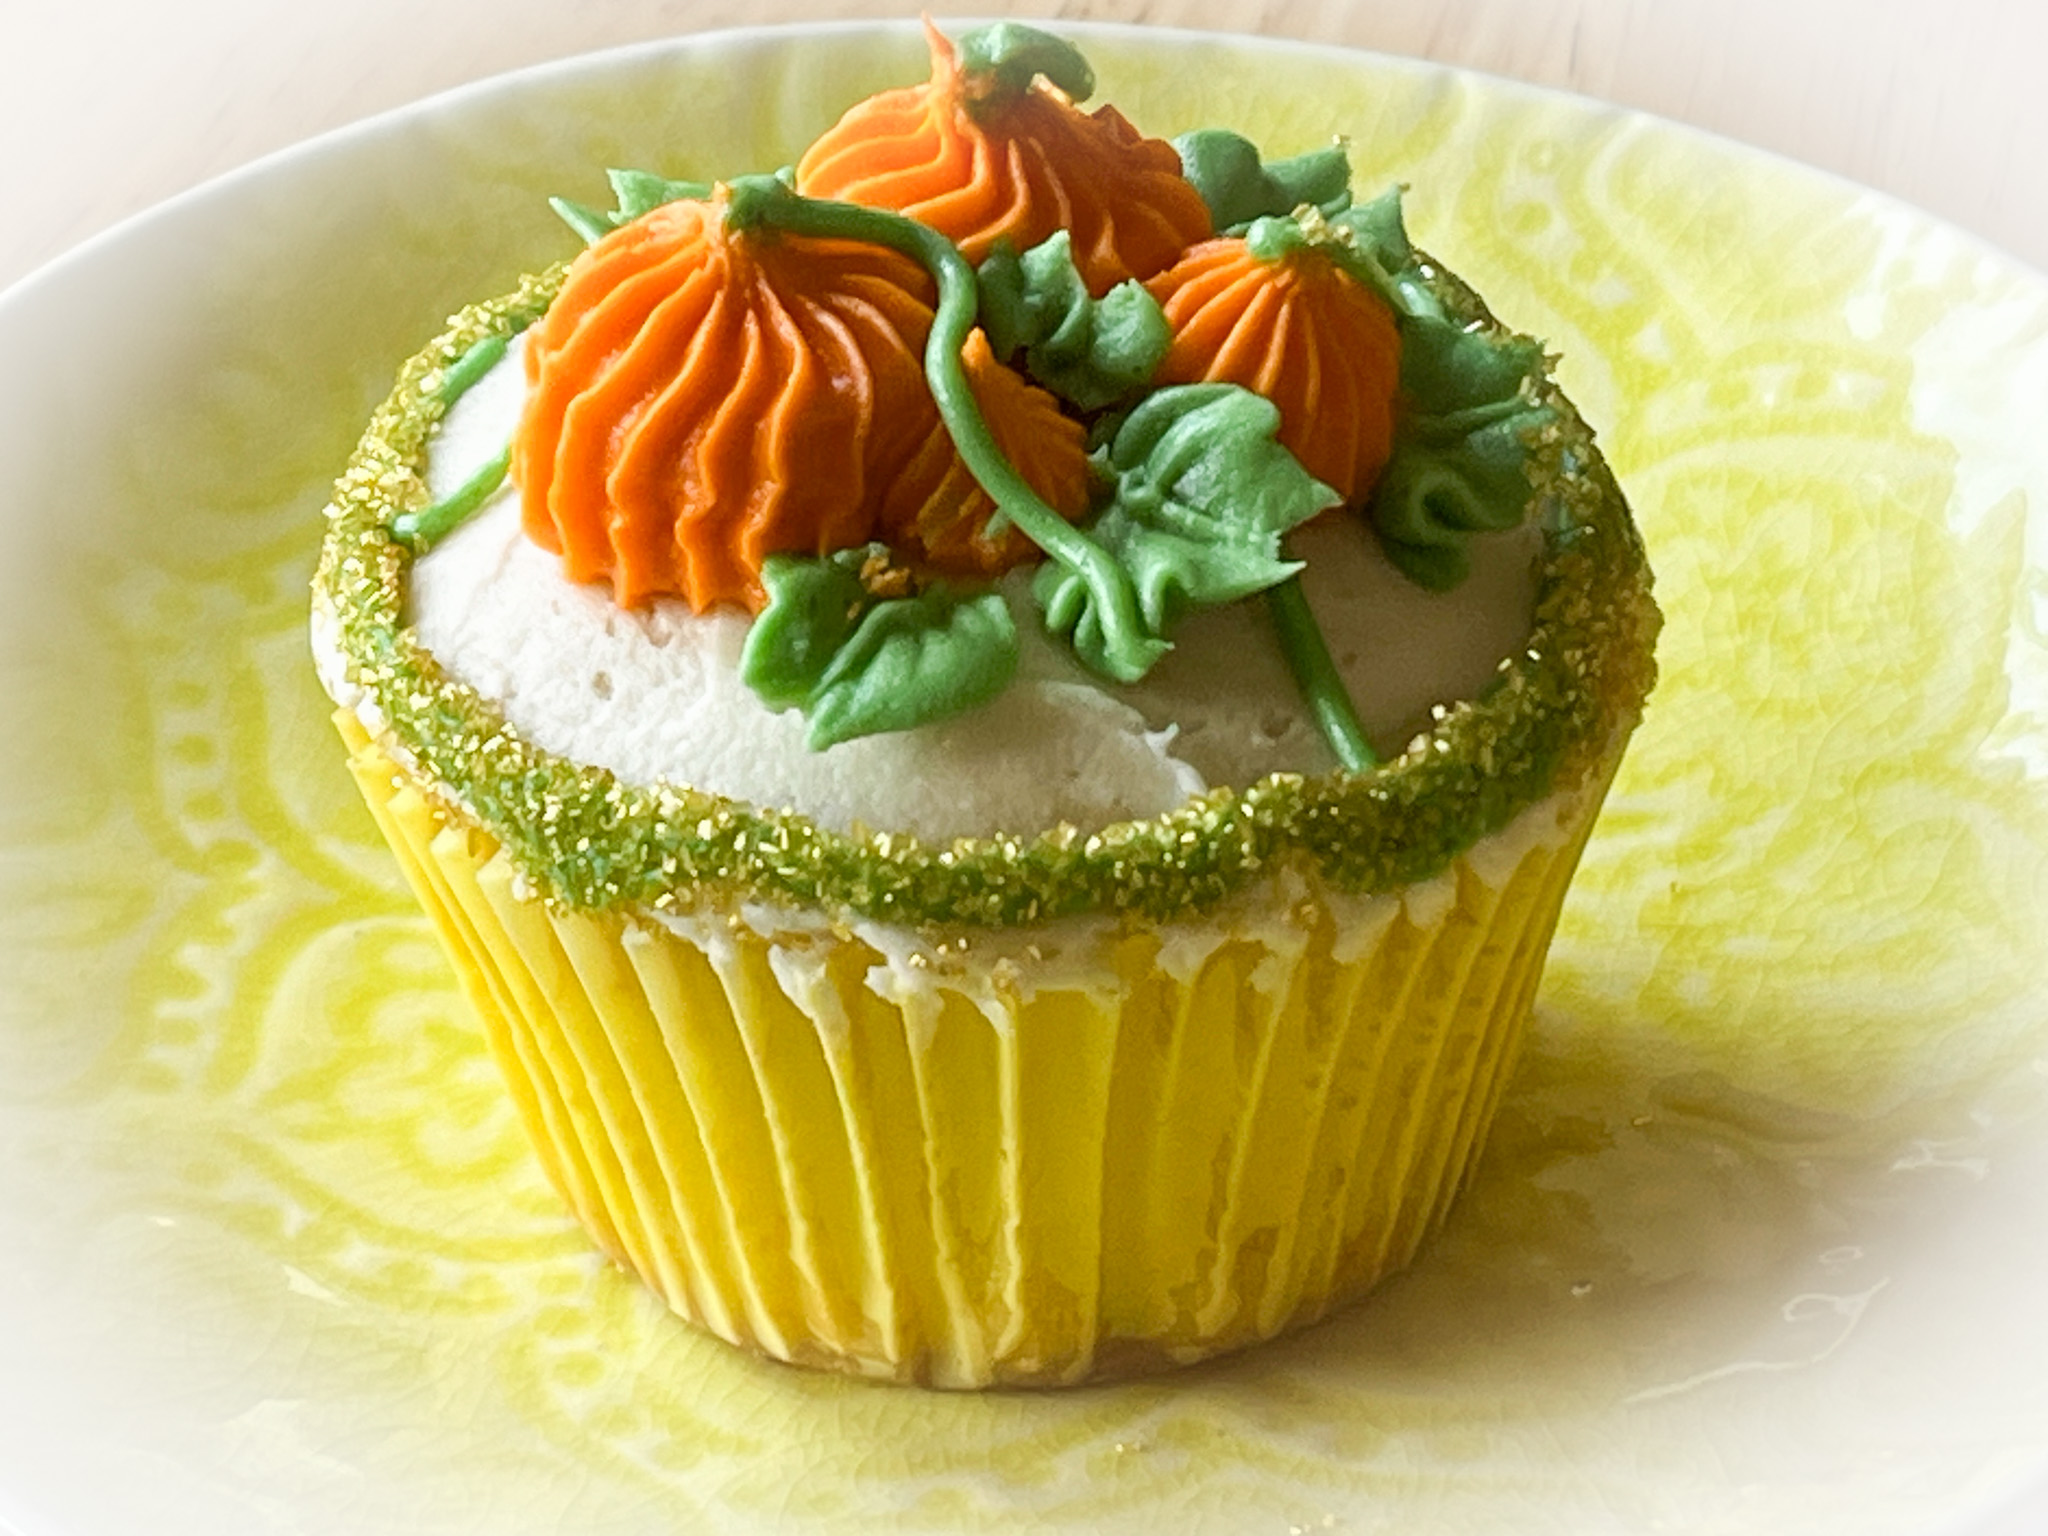
Comments: Leave a small portion of the buttercream without any color, and cover the top of the cupcakes. Dye one part orange and one part green (I used a mixture of Avocado and Leaf Green). For the design, my inspiration was a recent post by Chef Faye that she shared to make gorgeous mini-loaf cakes (check them out here). I used a medium size open star tip for the pumpkin, a small leaf tip and a PME #2 for the vines. A little golden sanding sugar for the border.

Really loved how these turned out and hope they made someone smile…

ONE YEAR AGO: Bake it Better with a Friend

TWO YEARS AGO: Bison a la Mode de Bourgogne

THREE YEARS AGO: Masala Mashed Potatoes

FOUR YEARS AGO: Lessons from Tanya: Sugar Cookie Silhouettes

FIVE YEARS AGO: Cherry-Chipotle Chicken Thighs

SIX YEARS AGO: White Chocolate Mini-Mousse with Sugared Cranberries

SEVEN YEARS AGO: You Say Ebelskiver, I say Falafel

EIGHT YEARS AGO: Happy Thanksgiving!

NINE YEARS AGO: Two Takes on Raspberries

TEN YEARS AGO: Spice Cake with Blackberry Puree & The Global Pastry Review

ELEVEN YEARS AGO: Own Your Kitchen with Cappuccino Panna Cotta

TWELVE YEARS AGO: Chicken Parmigiana, the Thriller

THIRTEEN YEARS AGO: Wild Mushroom Risotto

FOURTEEN YEARS AGO: Tartine Bread:  Basic Country Loaf 

FIFTEEN YEARS AGO:  Pugliese Bread

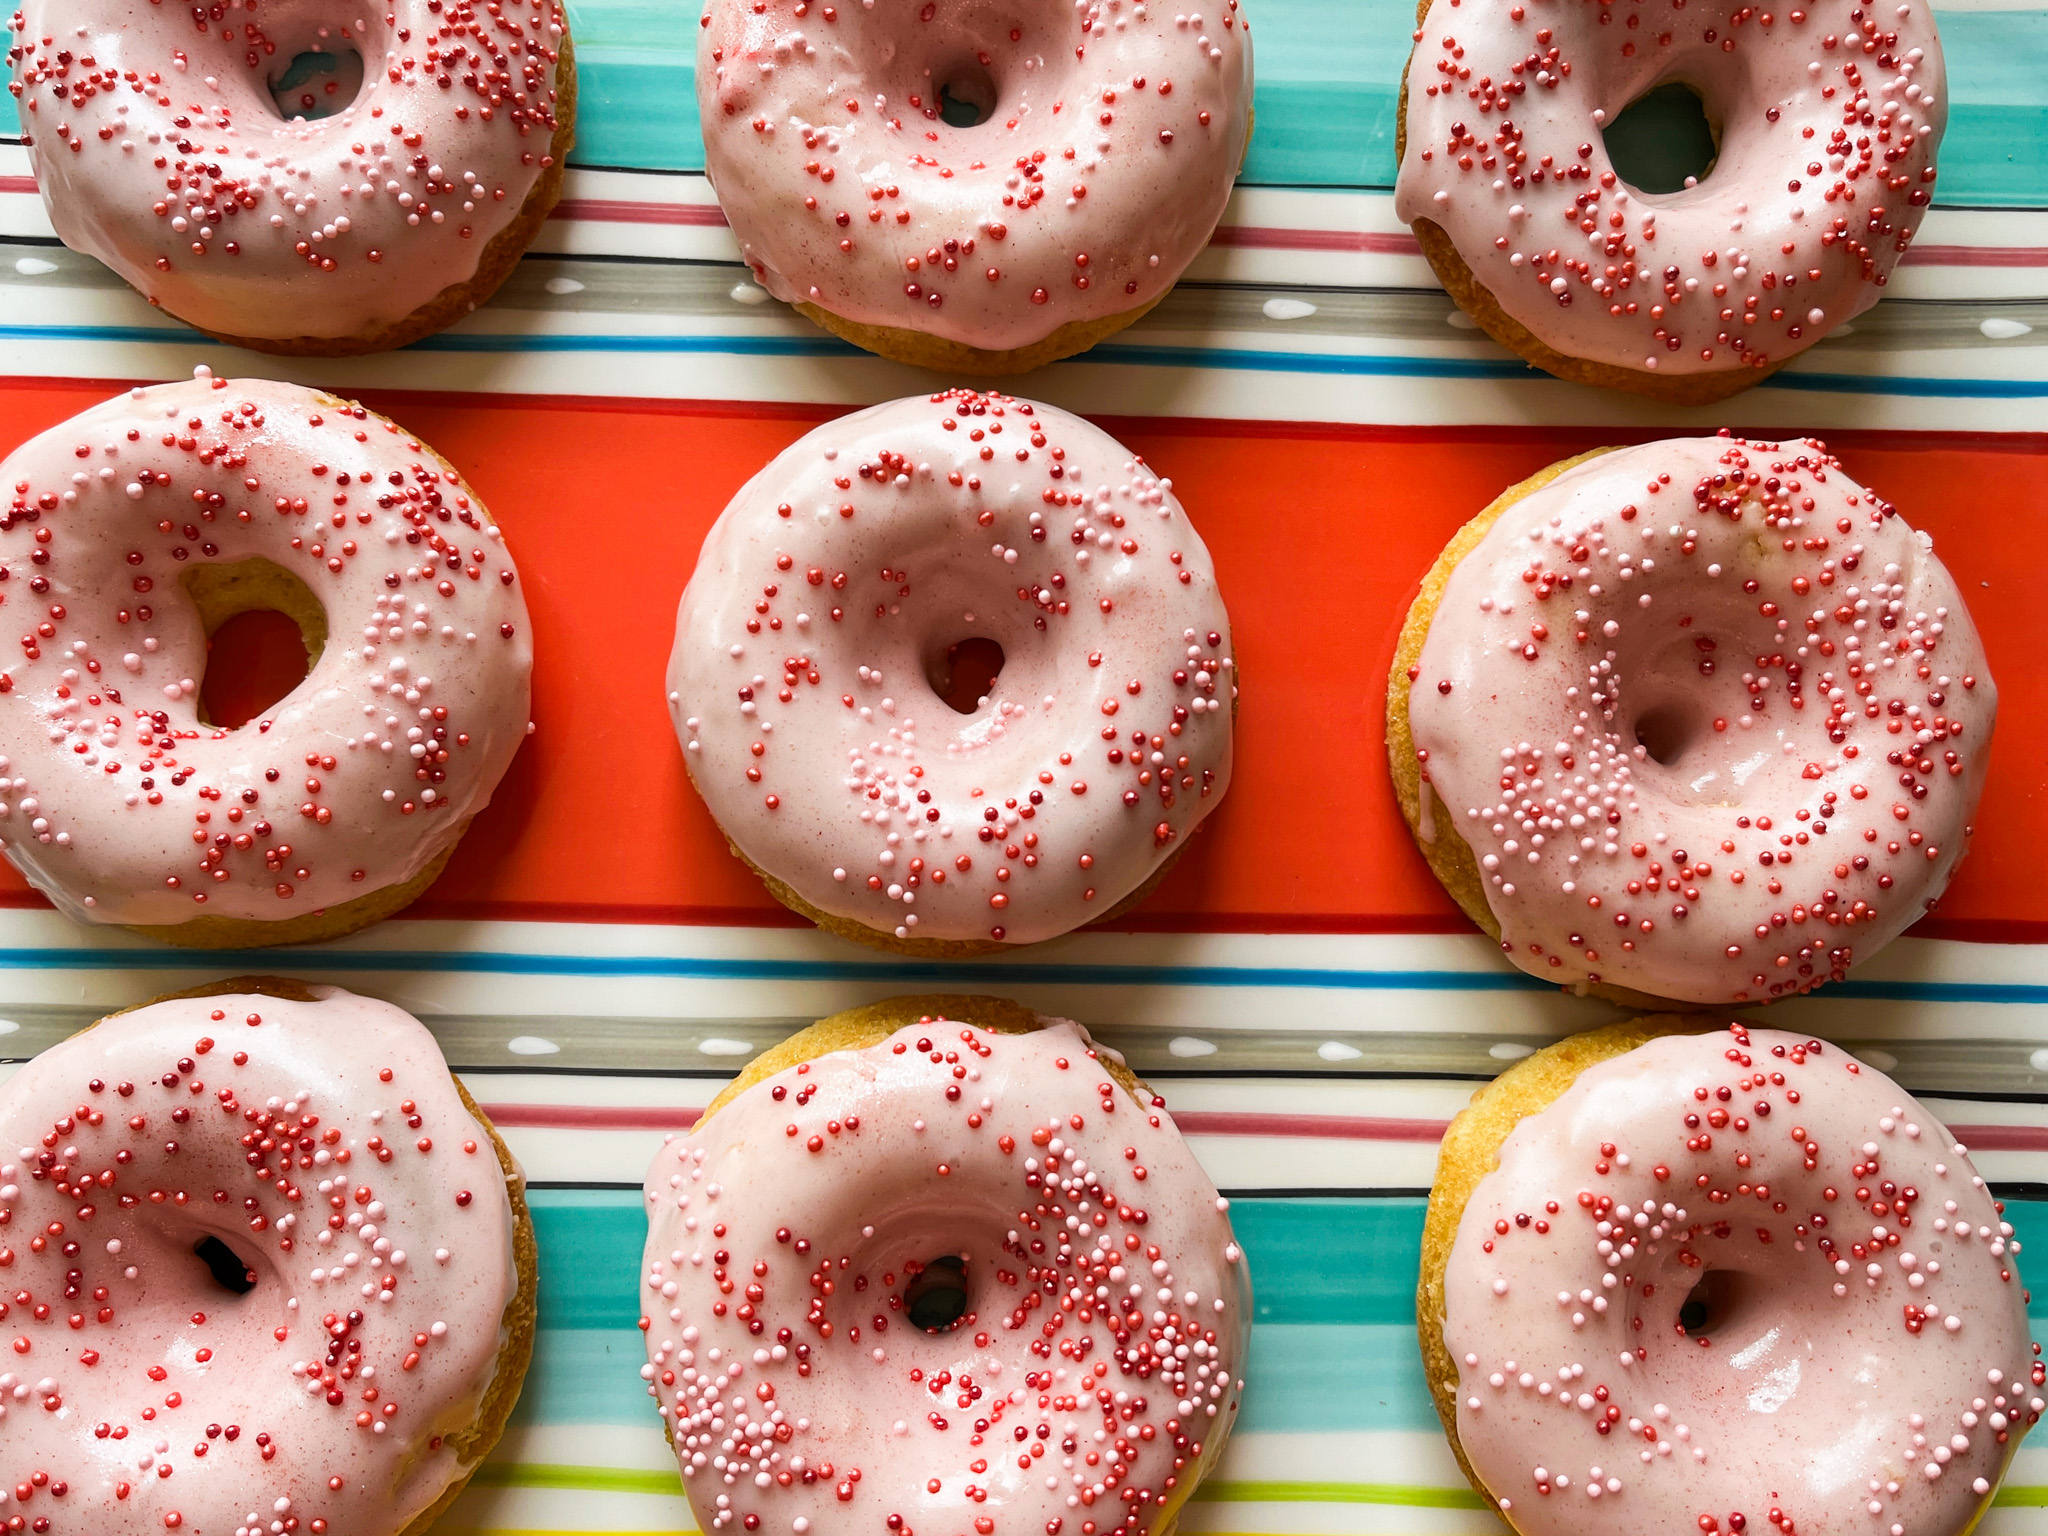
VANILLA DONUTS WITH STRAWBERRY GLAZE

As those who follow my blog might know, every Friday I donate a box of sweets for a homeless meal in our town. Some items are mandatory: decorated cookies, regular cookies and chocolate-covered Oreos come to mind. Then, I like to include some variety. Little tartlets, brownies, cupcakes. Or… donuts!

VANILLA DONUTS WITH STRAWBERRY GLAZE
(adapted from several sources)

1 + 3/4 cups all-purpose flour
1 cup granulated sugar
3/4 teaspoon kosher salt
1 teaspoon baking powder
1/2 teaspoon baking soda
1 large egg
1/2 cup buttermilk
1/4 cup grape seed oil
1/2 teaspoon vanilla extract
1/4 cup water

for the glaze:
1 + ¼ cups powdered sugar
2 tablespoon freeze-dried strawberries, crumbled
2 tablespoon whole milk
1/4 teaspoon vanilla extract
sprinkles to decorate (optional)

Heat the oven to 375 F. Spray a 12-cavity donut pan with cooking spray and set aside.

Whisk together the flour, sugar, salt, baking powder and baking soda in a large bowl. Whisk together the egg, buttermilk, oil, vanilla and water in a medium bowl. Whisk the wet mixture into the dry mixture and stir to combine. Fill a piping bag with the batter and pipe the batter into the donut pans, filling each cavity halfway, as the batter will expand quite a bit.

Bake until a toothpick inserted into a donut comes out clean, about 15 minutes. Cool in the pan for 5 minutes. Remove to a rack and cool completely.

Make the glaze: Whisk the sugar and dried strawberries in a shallow bowl. Slowly stir in milk and vanilla extract to make smooth, pourable glaze. Dip each donut in the glaze and place back on cooling rack. Add sprinkles before the glaze sets. Allow glaze to set for 30 minutes before serving.

ENJOY!

to print the recipe, click here

Comments: This is a very simple recipe and produces donuts that are soft and delicate. Make sure not to fill the pan more than halfway. The glaze is also quite straightforward. It relies on freeze-dried strawberries that these days are available in most grocery stores. I do have a harder time finding freeze-dried raspberries… Those could go perfectly here also.

Plump, soft, sweet, with a little sharpness of the strawberry, these are a crowd-pleaser!

ONE YEAR AGO: Shrimp and Cucumber Stir-Fry

TWO YEARS AGO: One Bowl, One Whisk Confetti Cupcakes

THREE YEARS AGO: Incredibly Simple Times Four

FOUR YEARS AGO: Phyllo Parcels with Moroccan Turkey

FIVE YEARS AGO: Roasted Corn and Zucchini Salad

SIX YEAR AGO: Fraisier Cake, A Celebration of Spring

SEVEN YEARS AGO: Zucchini Frittata with Roasted Tomatoes and Goat Cheese

EIGHT YEARS AGO: Playing with Pectinase

NINE YEARS AGO: Poached White Asparagus with Lemon and Pistachios

TEN YEARS AGO: Dan Lepard’s Saffron Bloomer

ELEVEN YEARS AGO: Fesenjan & The New Persian Kitchen

TWELVE YEARS AGO: Quinoa Salad with Roasted Beets

THIRTEEN YEARS AGO: Pasta Puttanesca

FOURTEEN YEARS AGO: Miche Point-a-Calliere

SILIKOMART RAGGIO

I have quite a few Silikomart cake molds for the most part acquired before the Great Pandemic of 2020, when I was baking cakes to include in my donation box. Once Covid hit, I went through a long time of donating exclusively stuff that could be individually wrapped, and cakes went into the back burner. Now I am set on trying to bring my molds to play, and plan to bake one cake every week. Should be a fun little adventure. Today it is time for Raggio to shine! ( Mold available here).


RAGGIO VANILLA AND CHOCOLATE CAKE
(adapted from several sources)

for the cake:
3 large eggs at room temperature
140 g white sugar (about 2/3 cup)
180 g butter, softened (about 3/4 cup)
1 tsp vanilla extract
225 g all-purpose flour (about 1 + 3/4 cup)
1 tsp baking powder
1/2 tsp salt
90 ml milk at room temperature (about 1/3 cup + 1 tablespoon)
60 g dark chocolate, finely chopped

for the ganache:
60 g dark chocolate
30 ml whipping cream
sprinkles of your choice


Heat oven to 350F.

Sift the flour, baking powder and salt together in a medium bowl. Reserve.

In the bowl of a KitchenAid type mixer, cream the butter together with the sugar for several minutes, until light and fluffy. Gradually add the eggs to and mix each time until incorporated, then the vanilla extract.

Turn off the mixer. Add the sifted mixture of flour, and the milk, dividing the flour in three portions, and the milk in two. Start and end with the flour, eye-balling the amount it totally fine. Once all is incorporated, fold the chopped chocolate gently.

Spray your Silikomart or other Bundt pan (about 1.5 L volume). Pour the batter into the pan and level it gently with an offset spatula. Bake at 350F for 40-50 minutes or until a toothpick inserted in the center of the cake comes out clean.

Remove from the oven and wait until the cake is warm before removing it from the pan. I left it sit for about 30 minutes and it un-molded easily.

Make the ganache: Heat the cream until almost boiling and pour over the chocolate. Wait a few minutes, then whisk gently to combine. It should be smooth and shiny. Once it cools a bit, but it is still runny, pour over the cake. It is important that the consistency is right, so that it won’t simply run off the edges. Decorate with sprinkles before it is fully set, so they glue to the surface.

ENJOY!

to print the recipe, click here

Comments: The cake has such a beautiful shape that it would stand nicely with just a shower of powdered sugar. But the ganache is a perfect way to make it even more luscious. I cannot give personal feedback on the taste, as I donated the cake whole, but I heard that people really loved it… It is a simple cake, but the bits of chocolate add a lot, and of course the ganache makes it very festive. I hope that if you are like me, and have some Silikomart pans hiding in the depths of your basement, you’ll bring them to play…. Stay tuned for more in the future!

ONE YEAR AGO: Cremino a la Nociolla

TWO YEARS AGO: Roasted Broccoli and Apple Salad with Tahini Dressing

THREE YEARS AGO: A Different Kind of Cookie Swap

FOUR YEARS AGO: Scary Good Recipes for your next Halloween

FIVE YEARS AGO: Pumpkin Sourdough

SIX YEARS AGO: First Monday Favorite

SEVEN YEARS AGO: Secret Recipe Club: Paalak Paneer, a Farewell Post

EIGHT YEARS AGO: In My Kitchen, November 2015

NINE YEARS AGO: Helen Fletcher’s Oatmeal Cookies

TEN YEARS AGO: Thai-Style Pesto with Brown Rice Pasta

ELEVEN YEARS AGO: Shrimp with Spicy Orange Sauce

TWELVE YEARS AGO:  A Simple Appetizer (Baked Ricotta)

THIRTEEN YEARS AGO: Sour Cream Sandwich Bread

FOURTEEN YEARS AGO: Pasta with Zucchini Strands and Shrimp

FAST, FRESH, AND GREEN

As you may remember, 2012 was another year that began with the regrettable, futile  decision to avoid buying any more cookbooks.  But, one of the curious things about New Year’s resolutions is that  you must overcome a certain barrier to break them. This situation is analogous to a biochemical paradigm, the   so-called  “energy of activation,”  to make a reaction go forward.  It’s that little kick an enzyme provides, by binding its substrate,  that causes a normally slow reaction to happen right away.   Two things boosted me  to buy  Fast, Fresh, and Green.  First,  Susie Middleton wrote it.  Having known her  for a long time as the editor of Fine Cooking, I expected a great book.   Then, I read reviews on amazon.com and THAT was the catalyst,  the activation energy, the end of my inner debate.   Reaction CATALYZED,  iTunes contacted, book delivered to My Preciousss  within 2 milliseconds!!  Below I share with you a recipe, a teaser, and my thoughts on the book.

THE RECIPE

VANILLA AND CARDAMON GLAZED ACORN SQUASH RINGS
(reprinted from Fast, Fresh, and Green, with permission from Susie Middleton)

1 small acorn squash (1 + 1/4 pounds maximum)
2 Tablespoons unsalted butter
2 teaspoons maple syrup
1 + 1/2 teaspoon vanilla extract
1/8 teaspoon ground cardamon
kosher salt

Heat your oven to 475 F (or 245 C).  Line a large rimmed sheet pan with parchment paper.  Cut the acorn squase in half lengthwise. Scrape out the seeds and fibery stuff with a spoon. Place each half, with the cut side down on a cutting board, and slice a little less than an inch of both ends. Discard the ends. Slice the squash crosswise into 1/2 inch slices, and place them over the prepared baking sheet.

Melt the butter in a small saucepan. Remove the pan from the heat and add the maple syrup, vanilla, and cardamon. Stir well to combine. Use a brush to lightly brush the slices of squash with the a little less than half the amount of butter. Season lightly with salt and turn the slices over.  Brush the second side with the remaining melted butter, reserving some to brush at the end (optional). Season the second side with salt.

Roast the squash for 12 minutes. Carefully flip the pieces over, and roast until  nicely browned, 10 to 12 minutes more. If you want, brush with a little more butter before serving.

ENJOY!

to print the recipe, click here

I think I am becoming cardamon-obsessed. Cannot have enough of it. Love everything about it, particularly that intense smell that hits me when I first open the spice grinder… heaven!  In this recipe, the combination of maple, vanilla, and cardamon is outstanding and perfect with the acorn squash.  A keeper, and ready so quickly, you can make it for Thanksgiving dinner (as  Susie advised in the book) while the turkey rests after roasting.  Keep that in mind, Thanksgiving is already peeking at us.  😉

THE TEASER

MAHOGANY MUSHROOMS

Baby-bella mushrooms are sauteed in a simple sauce full of flavor and with a few unexpected twists…   They turn out with just the right amount of heat and a sweet and sour hint.  Perfect alongside many main dishes.  We had it with a T-bone steak.

THE REVIEW

Contrary to many cookbooks in which chapters ate divided either by season of the year, or ingredient, Susie Middleton went through a different route, sorting recipes by method of preparation.  I really like that.

The first and second chapters deal with general stuff: what you should have in your pantry as well as cooking equipment (half sheet pans are a must, according to her, and I could not agree more).   All other chapters are centered on cooking methods, as follows:

Quick Roasting: My favorite chapter of the book, as I love roasting veggies but usually my impatient nature prevents me from enjoying them too often.  The acorn squash rings featured in this post is an example found in this chapter.  Some other tempting dishes from the same group:  Quick-Roasted Cauliflower with Zesty Orange-Olive Dressing, Quick-Roasted Beet Slices, Sweet Potato “Mini-Fries” with Limey Dipping Sauce and Spiced Salt,  Caramelized Plum Tomatoes in an Olive Oil Bath, Roasted Turnips and Pears with Rosemary-Honey Drizzle.

Quick Braising:  I think quick braising and stir-frying are two of the most common techniques used in the home-kitchen, and in these categories Susie really shines.  All recipes come with some creative twist, an expected flavoring, or combination of ingredients that makes the most humble veggie take center stage. Some examples:   Quick-Braised Green Beans with Pomegranate-Balsamic Pan Sauce, Cider-Braised Baby Bok Choy and Golden Apples, Braised Carrots with Blood Orange-Fresh Tarragon Pan Sauce, Silky Braised Fennel in Pink Sauce (this will be my next recipe to try from the book).
.
Hands-On Sauteing: These are recipes that require you to stay around the stovetop doing some baby-sitting, but they come together in lightning speed.  The teaser recipe, Mahogany Mushrooms, comes from this group. Other recipes on my list to try:   Corn Saute with Chile and Lime, Sauteed Carrots with Warm Olive and Mint Dressing, Sauteed Savoy Cabbage with Apple Cider Butter (oh, my…),   Brown Butter Summer Squash “Linguine”.

Walk-Away Sauteeing: As the name indicates, once you start cooking, there’s plenty of opportunity to do something else, work on a main dish, play fetch with your dog, or stare at the window admiring the arrival of the Fall.  Some tasty examples include:  Gingery Sweet Potato and Apple Saute with Toasted Almonds, Carmelized Green Beans and Sweet Onions, Sauteed Turnips with Ham and Molasses, Southwestern Butternut Squash Saute, Smoky Spanish Carrots and Fennel with Toasted Hazelnuts.

Two-Stepping:  includes recipes that call for boiling the vegetables and then continuing with another type of preparation, like sauteeing, or inclusion in a salad.   I absolutely MUST make the “Brown Butter Asparagus with Pine Nuts”  from this chapter.  But there’a a lot there to chose from.

No Cooking:  This whole chapter calls my name very loud.  😉  The Double-Lemon Ginger Carrot Salad will be showing up at our table very soon.  But wouldn’t you be happy with a serving or two of Heirloom Tomato, Summer Peach, and Fresh Herb Gazpacho Salad?   I thought so…  😉

Stir-Frying:  A collection of very tasty options for stir-fries, with additions such as black bean sauce and balsamic butter to make them special.

Grilling. Reading this chapter it occurred to me that I only grill two veggies: eggplant and zucchini.  If you are like me, Susie will definitely open your horizons to include mushrooms, asparagus, even potatoes.
.
Baking Gratins:  This is the slow-cooking chapter that closes the book.  I don’t think any book on veggies would be complete without some gratins, the comfort food by default.  Some examples:  Mini-Potato Gratin,  Slow-Roasted Heirloom Tomato Gratin, Christmas Kale Gratin with Sun-Dried Tomatoes, Harvest Gratin of Butternut Squash, Corn, and Leeks.

My verdict: this is a wonderful cookbook, one that will change the way you view your side dishes, especially if you have a busy schedule.  I tend to have more problems figuring out what to cook as a side dish than anything else,  because we usually rotate a few main dishes during the week. There’s the roast chicken, the grilled salmon, the pork tenderloin, the chicken cutlets, the steaks.   But what to serve with them is the million dollar question.  This book helps answer that, big time!  😉

Susie, thanks for allowing me to share a recipe from your book!

ONE YEAR AGO: Speculaas

TWO YEARS AGO: Capital Sauce Pork Ribbons over Pot-Browned Noodles

THREE YEARS AGO: Pain a l’ancienne