COOKIES AND RUBBER STAMPS

I try hard to avoid repeating myself, but sometimes I cannot help it: I am soooo excited about this! Rubber stamping is one cool method to decorate cookies for the artistically-challenged like myself. Truth is, if someone asks me to draw something or else face the guillotine I will simply tell them to make sure it is well-sharpened. Make it quick. Now, rubber stamping? Anyone can do it! All you need is to flood your cookies in any color you like, but I normally go for white. Let it sit overnight. Do not rush. I repeat: do not rush! The surface needs to be fully set and hard so that you can press the stamp on top and make sure the maneuver is not going to hurt the icing. If you go to a store such as Michael’s or Jo-Ann, visit the section on scrapbooking and pick your weapons. Some stamps work better than others, so it is a bit of a trial and error thing. But… so much fun!
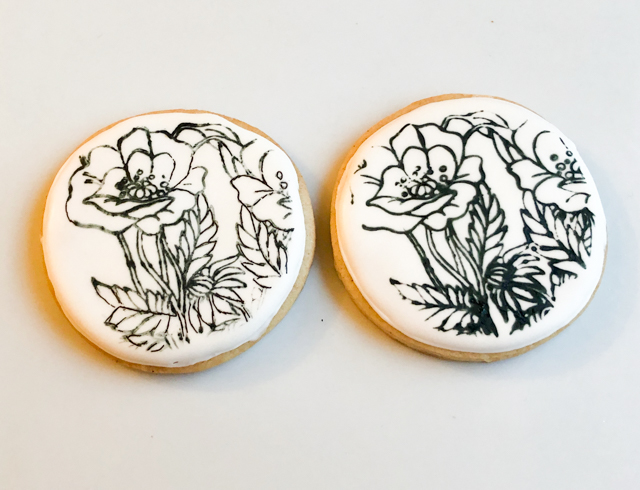
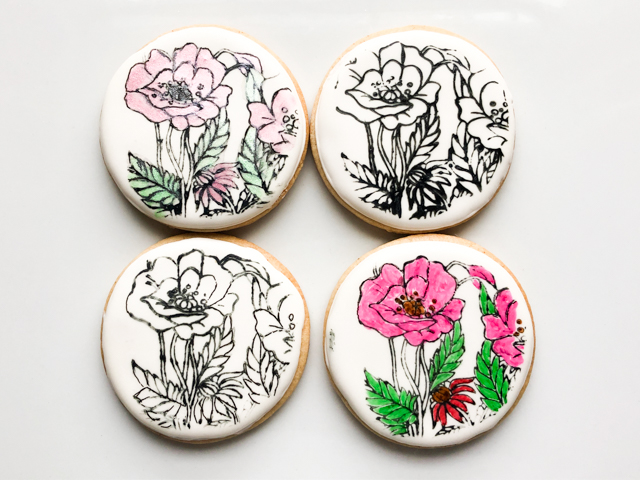
For this set, I used a type of stamp that I had never heard of, but apparently is very popular with the crowd that does serious scrapbooking. They are made of plastic and come glued to a type of acetate sheet. You can find them on amazon or etsy, I have not seen them for sale in stores where I live. For the one I used in these cookies, click here. Usually one sheet comes with several different designs. I find it easier to cut the acetate and isolate the image I want to work with. Then, I spread with a brush a small amount of food gel dye on kitchen paper, either black or another dark color like gun metal from Americolor, a bit more subtle. Press the stamp on it, and practice on a sheet of paper to check that the whole extension of the design was properly covered with dye. It does take a bit of playing with it. If you look at the set of four cookies above, you’ll notice that the design transferred better in some than others. If the design does not transfer completely, you can fill the missing lines with a very fine food pen like Tweets Cookie Connection 03. The cookies look nice in black and white, but I also made a couple painted either with luster powder (top left) or food pens (bottom right). Food pen is a lot easier and faster but I think I prefer the subtle look of luster powder.
Regular rubber stamps also work very nicely and tend to have simpler designs that are more user-friendly.
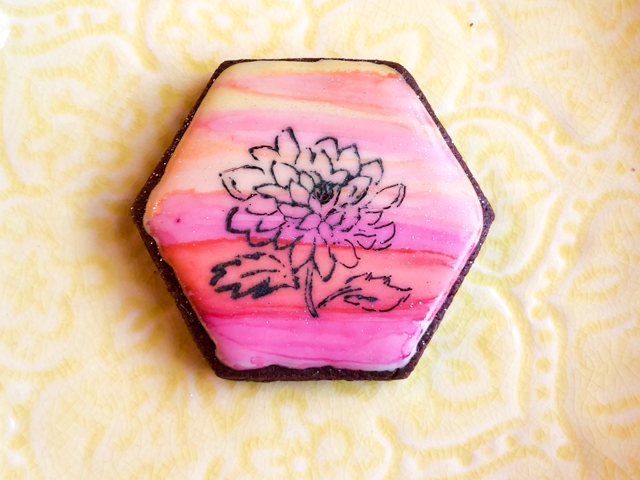
For this design I started with a flooded white icing and painted a background of striped in warm colors, using food gel dye and alcohol, just like described in a recent blog post.
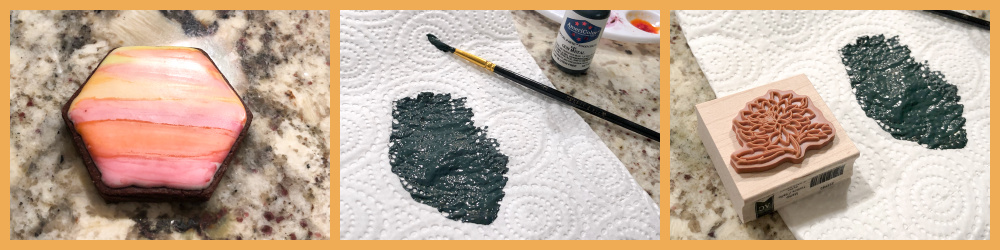
The amount of dye to add to the paper is something you’ll need to adjust as you go. I don’t like the idea of buying a pad as used in scrapbooking because you need a lot of dye to soak it, and I am not sure how well it keeps for future uses, so I believe you waste too much dye.
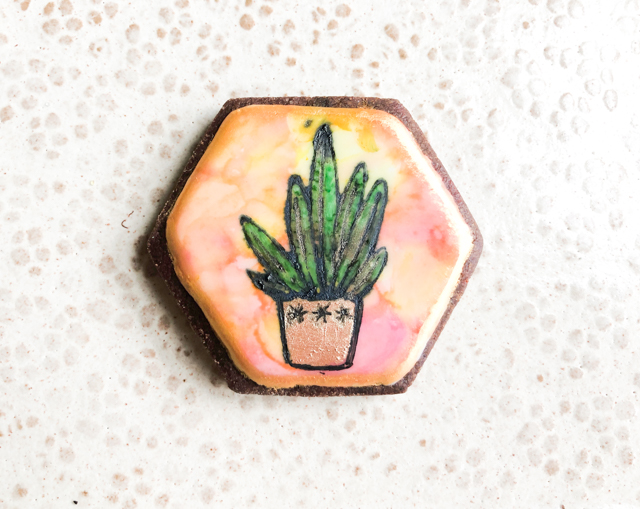
This is another stamp, also the traditional type, rubber with a wooden base. I colored the icing as before, but using a tie-dye instead of stripes. And in this design I went with colors: leaves painted with a food pen, and the little vase with gold luster powder. After painting, you might have to go back to the outline and touch it up with a fine tip black pen. Make sure the paint is fully dry, which happens quite quickly anyway.

Another way to deal with the stamp is using a food pen with a thicker point (I like this kind), paint the stamp, then quickly press it on the iced cookie. You need to work a bit faster because the amount of dye is going to be less than by soaking the paper, therefore it might dry quickly as you paint the stamp. The advantage of this method is reducing the probability of smearing, and saving quite a bit of dye. Below you see what it looks like.
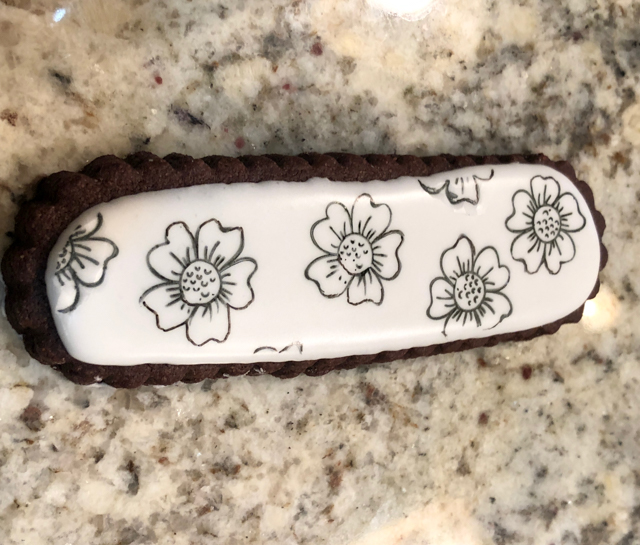
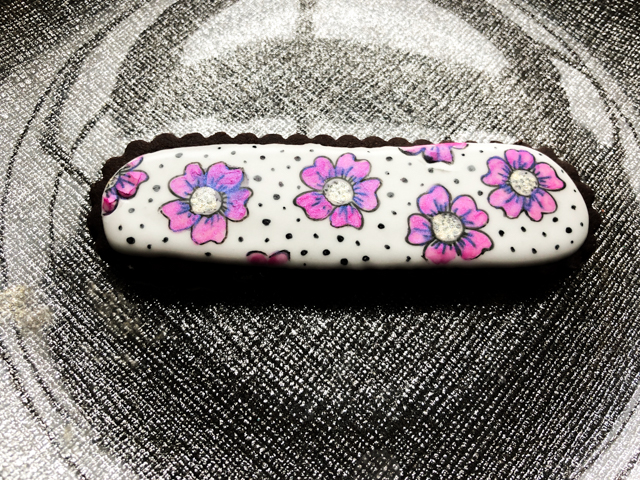
Very sharp lines, no smearing at all. Again, you can leave it black and white or go wild with the design….
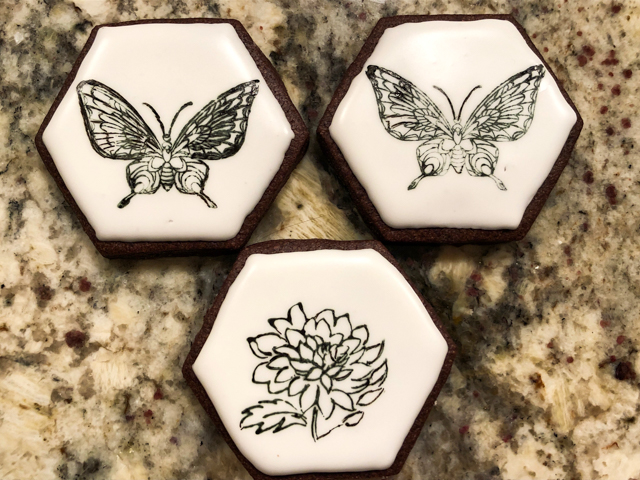
Some drawings like the butterfly are a bit too “busy” and not easy to transfer. I still think they are worth playing with, because the end result is quite striking. You need a very steady hand and be very assertive when laying the stamp on the cookie. Any hesitation and you’ll have a smudged design. If that happens, just eat the evidence when no one is looking.
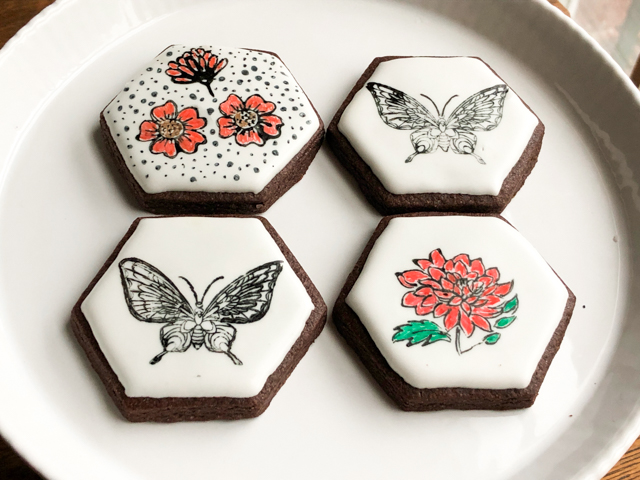
In the set above, the butterfly was a plastic-acetate stamp, the other two were the traditional rubber kind. The top left, a composite using two very small stamps.

My most recent “experiment” with stamping was with a design that proved a bit tricky. It involved a silhouette type stamp, and it was almost impossible to get it uniform and without blurry edges. This was the best I could do. I think silhouettes might be better left for a projector.
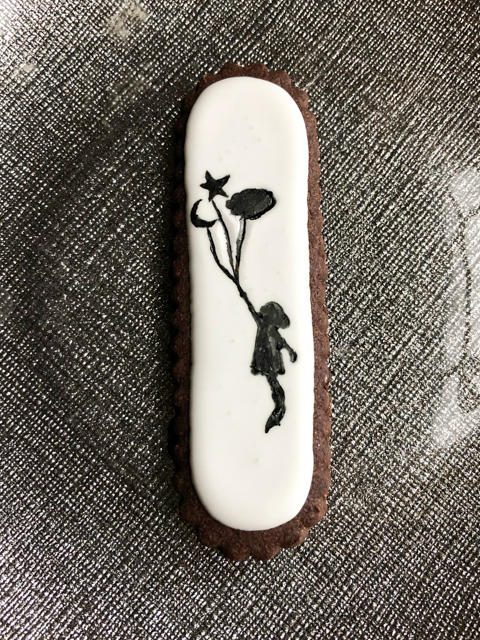
I close this post with something I got in the mail just as I finished writing this article.. Available here.
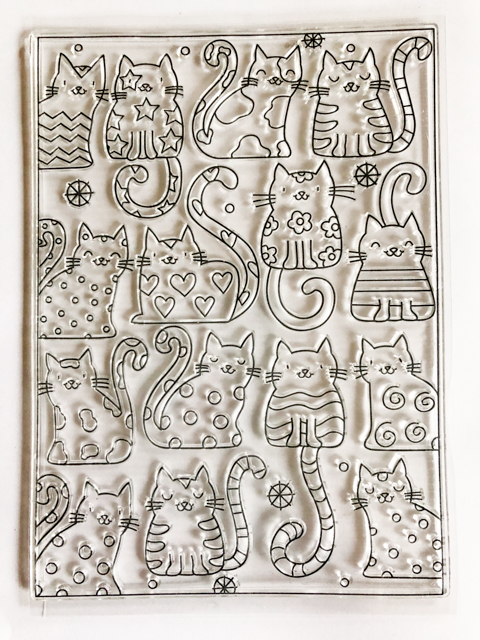
This is a plastic-acetate stamp sheet. It measures 4 1/2 x 6 in. Each kitten is a little different, so you can either stamp a series together or cut them individually and add to your cookie as a central image, which is what I intend to do. I suspect those images will work very well, as they are overall simple. My last attempt with a complicated image was a beautiful hummingbird (you can see it here), but I could not make it work on the surface of the cookie. Too bad, it is a stunning image. Maybe I’ll conquer it at some point.
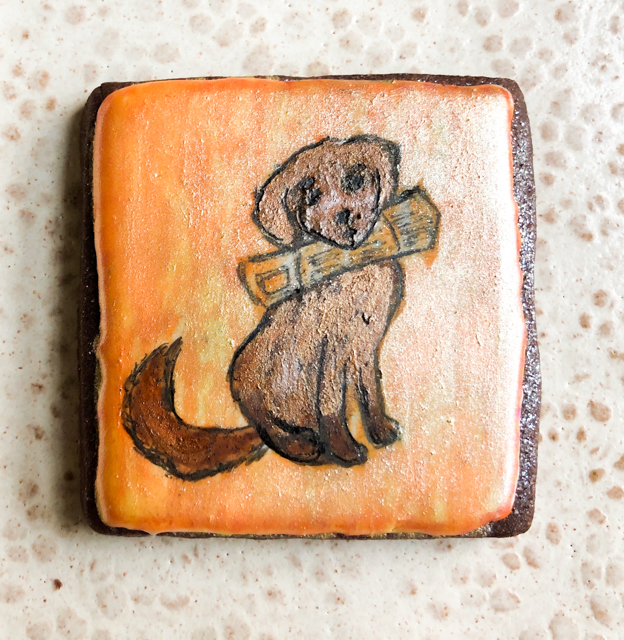
I hope you’ll consider rubber stamping as a nice alternative for cookie decorating. It does take some experimenting and playing with it, but the possibilities are endless, and once you get the hang of it, you’ll be hooked.

ONE YEAR AGO: Macarons for all Seasons and Reasons

TWO YEARS AGO: Lentils and Radicchio? Yes, please!

THREE YEAR AGO: Tres Leches Cake

FOUR YEARS AGO: The Joys of Grating Squash

FIVE YEARS AGO: Auberge-Pecan Walnut Bread

SIX YEARS AGO: Gluten-free and Vegan Raspberry Bars

SEVEN YEARS AGO: Lasserre, a French Classic

EIGHT YEARS AGO: Sourdough Bread with Walnuts and Dates

NINE YEARS AGO: Braised Brisket with Bourbon-Apricot Glaze

TEN YEARS AGO: The Real Vodka Sauce

ELEVEN YEARS AGO: Pork Tenderloin and Blue Cheese

THE LUCK OF THE IRISH

Hard to believe that in almost 12 years of blogging I’ve never made anything that celebrates St Patrick’s Day. But today I am correcting this huge mistake. Gingerbread, sugar cookies and macarons to bring you good luck and hopefully restore my reputation as a food blogger, particularly with the wonderful people from Ireland.

LUCK OF THE IRISH GINGERBREAD COOKIES

to print the recipe, from last year’s post, click here

I received the shamrock cookie cutter as a gift from a dear friend, and designed this set of cookies with her in mind. The jar cookie was inspired by a video tutorial from SweetAmbs that you can find here. I adapted for my skill level, because I still struggle a lot with fine lines. It is absolutely mandatory to include one four-leaf clover to ensure the best of luck.

GOLD BUTTON SUGAR COOKIE

Same cookie recipe, decoration also found in the video link I included above. Really a lot of fun to make it, although you do have to prepare the golden buttons the day before, they need to dry completely before you can paint them and glue to the iced cookie. If you watch Amber’s video you will see that she uses the base of any icing tip to draw circles on parchment paper, then pipe the button shape with white Royal icing, a little border after it has a chance to slightly crust, and that’s about it. Let it dry overnight, paint with gold luster + alcohol. It took me two attempts to get it right, or at least right enough to be able to use in my cookies…

It is a good idea to make more than you think you’ll need. You can always save it for later, these Royal icing decorations last forever and not every single one of them will be nicely round, at least not when I do them.

Moving on, a really easy but quite effective way to decorate a sugar cookie. For this one, I used my recent default recipe that gives super sharp edges and you can find here.

GOLD SHAMROCK SUGAR COOKIES

Really super easy! You start by drawing a shamrock shape in the center of a baked cookie. You can do a round cookie, square, or hexagon, anything will work. Then, paint a nice and bright gold layer right on the cookie’s surface. For this I like to use Egyptian Gold from Oh Sweet Art. It is the most aggressive (but still food-safe) gold paint out there, and in this case you need it to be bright. Then, simply flood with green Royal Icing and you are done.

This simple method has so much potential! You can paint all sorts of basic shapes using different colors, and flood it to suit the occasion.

Another nice way to decorate is using the marbling technique, in which you swirl colors over a reasonably loose powdered sugar icing, and dip the surface of the cookie over it. The method is carefully detailed on my friend Helen’s blog that you can find here.

Finally, I close the post with my beloved macarons. For this recipe, I used a template found over at Pies and Tacos, but used my default recipe for macarons, but dyed green. A little splash with gold luster, and the filling was a Mint Buttercream from my friend Caroline’s recent post.

SHAMROCK MACARONS BUTTERCREAM FILLING
(from Caro’s Easy Online Baking Lessons)

128g butter, melted
3/4 tsp vanilla
sprinkle of salt
187g powdered sugar, sifted
Peppermint Extract (1/8tsp at a time, to taste)

Melt the butter in a small cooking pot on the stove top on medium to high. Turn the heat down to low-medium heat, letting it simmer and remember to stir. The butter will hiss & pop. If browning reduce the heat again. Continue until silent and then strain through a sieve into a mixing bowl. There will be foamy fat residue sticking to the sides of the bowl and in the bottom of the sieve. Add in the salt. The mixture will sizzle again so be careful.

Add in the powdered sugar and mix by hand until all sugar is incorporated and a smooth paste is formed. This will only take a minute, so no need to get the mixer out again. Leave till it cools down. Now add in the peppermint extract. Place in a piping bag, no need for icing tip. Fill the macarons. Leave them in the fridge overnight for best texture.

ENJOY!

to print the recipe, click here

I hope you enjoyed this small collection of goodies, and that we are all moving to better times, as vaccination picks up all over the world. I am ready for some luck coming our way, what about you?

ONE YEAR AGO: When life gives you Eye-of-the-Round

TWO YEARS AGO: Carrot Cake Macarons

THREE YEARS AGO: Soup Saturday: Say Goodbye to Winter

FOUR YEARS AGO: Manchego and Poblano Soup

FIVE YEARS AGO: A Smashing Pair

SIX YEARS AGO: Spinach and Mushroom Stuffed Pork Tenderloin

SEVEN YEARS AGO: Crispy Chickpea and Caper Spaghetti

EIGHT YEARS AGO: Spring has Sprung!

NINE YEARS AGO: Chickpea and Fire Roasted Tomato Soup

TEN YEARS AGO: Double Asparagus Delight

ELEVEN YEARS AGO:  Sun-dried Tomato and Feta Cheese Torte


JOY COOKIE CLUB: WOODLAND CREATURES

This is my second blog post in the Joy Cookie Club series. For the basic recipes, I used either Neat Edges Sugar Cookies or Gingerbread. For Royal Icing, my favorite recipe is Tanya’s. You can it in her blog here. In this post, all cookies celebrate the woodlands and their beautiful creatures, starting with a majestic bird, one of my favorites. We do have families of owls living in the woods around our home, and often one will fly silently, sit on a branch high on a tree and stare at us for a while. It is magical.

OWLS

For this technique, you’ll need three colors of icing, brown, white and orange. Flood with brown, allow it to crust for 30 minutes. Pipe the white and add black pearls to the eyes. Adding them slightly off center is a good idea, it changes a bit the expression, making them look more natural. Let that crust for 10 minutes and add the orange detail. Feathers were painted with a food pen and gold pearl dust one day later, when the icing is fully set.

CARDINALS

Another beautiful creature we have around, particularly nice to see when it is all snowy outside…

For this design, you’ll need red, orange and black royal icing. I followed the steps of Marlyn, from Montreal Confections. She uploaded to her Instagram page a short video, but as is the case for Instagram, it goes pretty fast. I paused the video and took screenshots to help me figure it all out. But the basic steps are shown in the composite picture below.

I consider this a work in progress. The wings should have been piped with a slightly thicker consistency, so that they would puff up nicely. I ended up trying to gild the lily too much to compensate for the flattish look of the wings, and I don’t like the result very much. I will be re-visiting these cookies soon.
DEERS

I used two different cookie cutters for the deers, but with the same basic decoration approach. Some were dark brown, some were made with a lighter body. Piping was all at the same time, wet-on-wet, except for the nose that was added after 10 minutes, so it would get a little lift. After one day drying, a fine food pen joined the party for the eyes and mouth.
It is easier to make the design if you draw with a pen the basic separation of the two colors. Then, slowly pipe them so they join together nicely. It is really a lot easier than it seems, as long as the consistency of the icing is not too loose.

LLAMAS

Two different styles of llamas, with the same cookie cutter. The main difference is that in one case I made the nose after the rest of the body was crusted, so it got that puffy structure. I liked them both, but the first one is obviously easier. The nose, the ears, the details around the saddle and the collar were all added 30 minutes after crusting. The blush on the cheeks is luster powder (Ruby Red from Oh Sweet Art), applied with a very light touch using a soft brush.

Royal icing roses for additional flair on that lady… Her name is Mercedes, by the way.

ELEPHANTS

I debated whether to make a separate Joy Cookie Club post just for elephants because I love them so much, and they go well with many different designs for decoration. But I did not want them to feel neglected, so here they are.

First technique is like a tie-dye. A lot of fun to do, although I messed up on my first attempt (sorry, no pictures!). What you do is gather all the colors you want to use, place them in individual spots, add vodka or everclear to dilute them well. They will form a gunk in the center, just continue swirling with a brush and then remove the gunk, all you need is a very diluted liquid. After that, working quickly, use a brush to add alcohol to the spot you want to color, and immediately touch it with another brush containing the diluted dye. Move it around quickly, do another spot some place else. When you are done with color #1, move to color #2, until you cover the whole surface. Add details with royal icing.

A different cookie cutter, with a modern “feel” is also fun to decorate. Many of these cookies were made the weeks before Valentine’s Day, so I had hearts in my mind…

For this design, the body is flooded, allowed to crust for 30 minutes, then the piped dots are added. Eyes and mouth need to wait 24 hours to be made.

It is also nice to use a marbling technique. Very similar to tie-dye, instead of adding spots of diluted dye, just go with a fine brush and paint lines over the white flooded body. Immediately pass a sponge on the surface, to soften the lines. A make-up small sponge is perfect for that. Once the dye dries, you can add designs on top with royal icing. Later I brushed luster gold, but that is optional.

DINOSAURS

Yes, that is pushing the envelope as far as woodland creatures go. But I find them so adorable and like elephants, you can really go crazy with the colors. Extinct animals cannot get mad at you… Poor things.

Another very easy design. Flood the body, use a second color to add details right away. Add the black pearls for the eyes, and after 24 hours draw the eyes and mouth. DONE.

I hope you liked this small collection of decorated cookies. Stay tuned for the next series, that will focus on a Spring and Easter motif.

May you always be excited by your own individual inspiration and vision.
(unknown source)

ONE YEAR AGO: Incredibly Simple… Crunchy Asparagus

TWO YEARS AGO: A Sourdough Quartet

THREE YEARS AGO: When bad things happen to good people

FOUR YEARS AGO: Sweet Potato “Hummus”

FIVE YEARS AGO: Cauliflower Crust Pizza

SIX YEARS AGO: Silky Rutabaga Puree

SEVEN YEARS AGO: Bon Bon Chicken: Light and Spectacular

EIGHT YEARS AGO: Red Wine Sourdough Bread with Cranberries

NINE YEARS AGO: Award-Winning Sourdough Baguettes

TEN YEARS AGO: Country Rye (Tartine)

ELEVEN YEARS AGO: Penne a la Vechia Bettola

May you always be excited by your own individual inspiration and vision.

JOY COOKIE CLUB: VALENTINE’S DAY!

This post inaugurates a new series, the Joy Cookie Club, inspired by a favorite book/movie of mine, Joy Luck Club. If you have not read it, buy two boxes of Kleenex and do so. I bake sugar cookies every week to include in a box that gets donated in the Common Table project of our town. It gives me the opportunity of trying new styles and learn cute tricks with the generous professionals who share their expertise on youtube and instagram. For the basic recipes, I used either Neat Edges Sugar Cookies or Gingerbread. For Royal Icing, my favorite recipe is Tanya’s. You can it in her blog here. Now let me walk you through some of the cookies I made in the past 6 weeks.

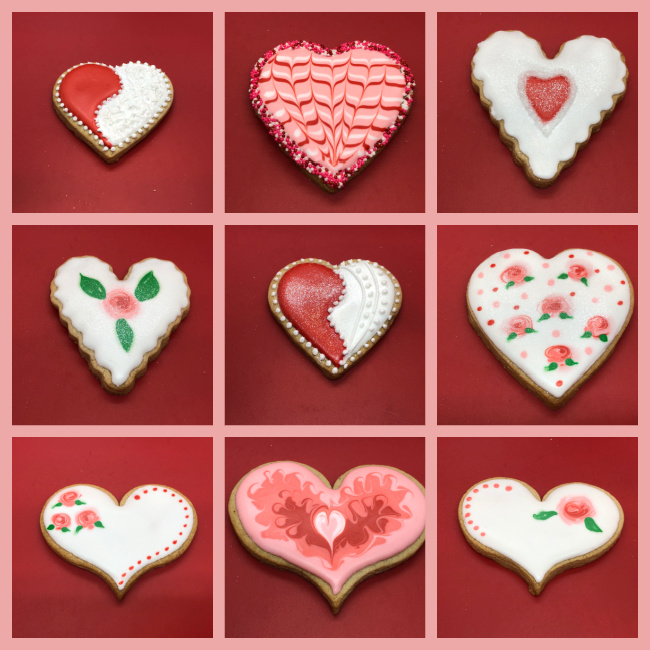
STYLE #1: ZIG ZAG WITH BORDER

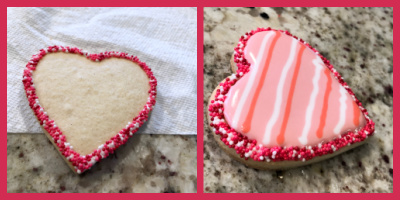
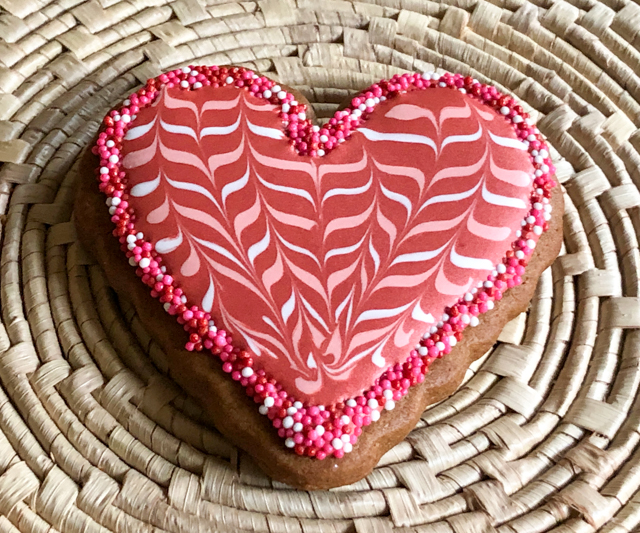
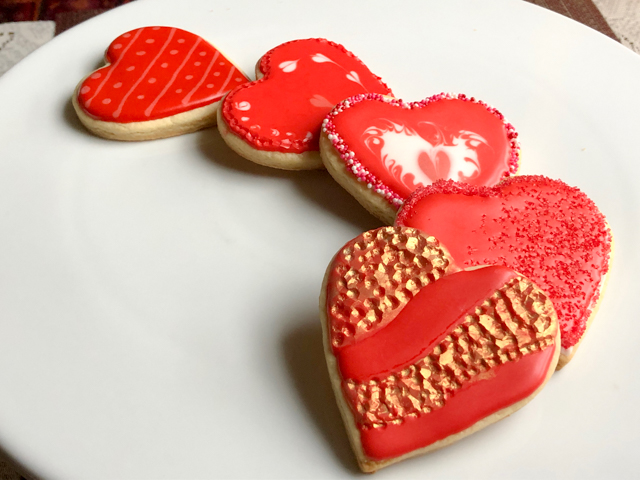
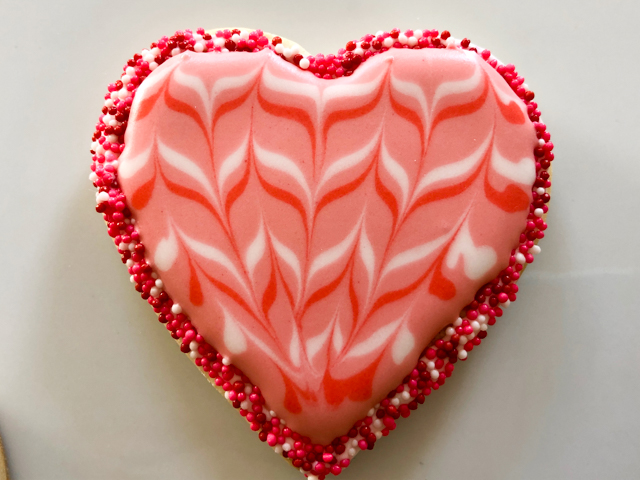
This is a pretty striking cookie that is so so easy to make! One thing that is hard when we start decorating sugar cookies is the edge. It always ends up a bit messy. By adding a border, you can say goodbye to that problem. Just pipe Royal icing and immediately touch the surface of the cookie on a layer of your favorite non-pareils (or sanding sugar). Let that dry for a few minutes, flood, quickly add lines of contrasting colors and work a needle or toothpick up and down, curving it gently to follow the overall shape of the heart. Detailed instructions here.

STYLE #2 – WAVY HEART

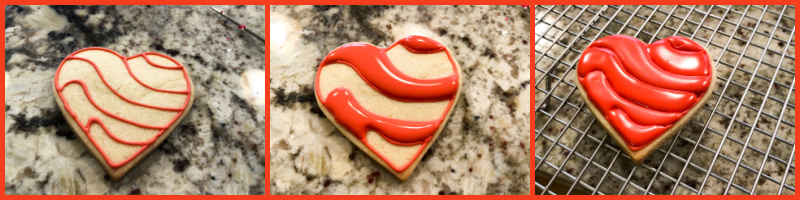
I consider this one a work in progress, as I could not quite match the beauty of the ones made by @thegracefulbaker. The design is actually quite simple. You pipe fine lines dividing the heart in wavy sections, then flood areas that are not touching. Wait for those to crust, maybe 30 minutes or so, and flood the others. If the consistency of your icing is thick enough, the sections will be more “puffed up” and it will look quite striking. I did not get there, but I still like the look.

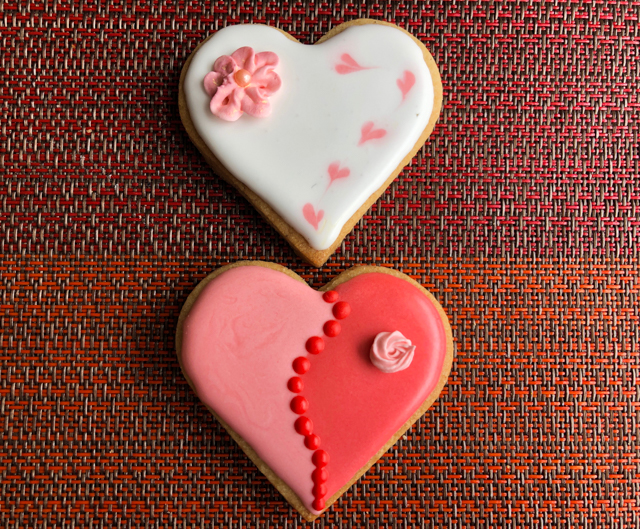
STYLE #3 – DIVIDED HEART

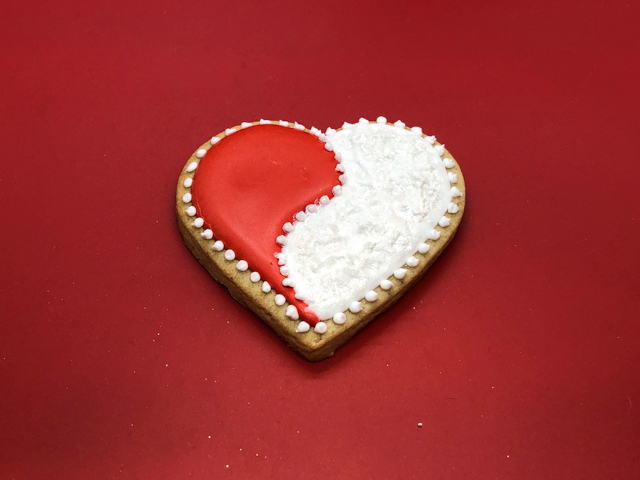
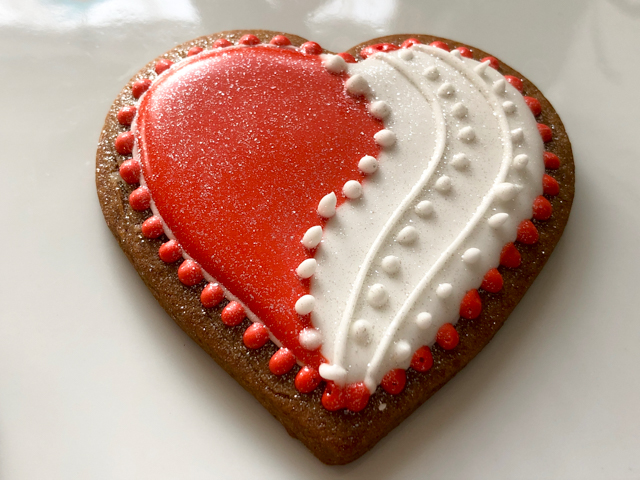
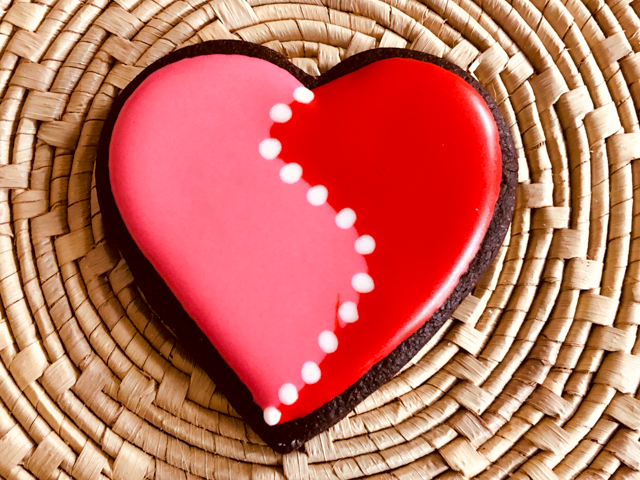
I love this one so much! Flood one side with red, another side with white. Let them both crust for 30 minutes or more. You can even continue the following day. Add the lines, the dots, and once it’s all crusted, you can use a little diamond dust to make it truly special. For the lines and dots, you’ll need slightly thicker royal icing, either straight from mixing the batch, or very lightly thinned with water. Do not use flooding consistency. But, a similar style can also work with a simpler, wet-on-wet decoration

You can also mess up one side with a brush, and add a totally different texture to the icing. In that case, brushing some white luster powder mixed with vodka is a good move. The picture does not show it very well, but it added a nice shine to the white portion.

STYLE #4 : CRACKLED HEART

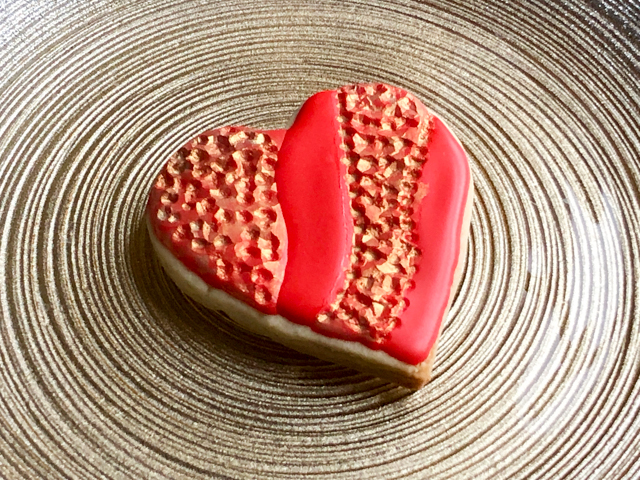
A variation of the wavy design, I let the final flooded regions crust for only 15 minutes, and used a little fondant ball tool to press the design. Once it was fully crusted, I brushed gold luster powder mixed with vodka only on the crackled part.

STYLE #5: ROSE BUDS

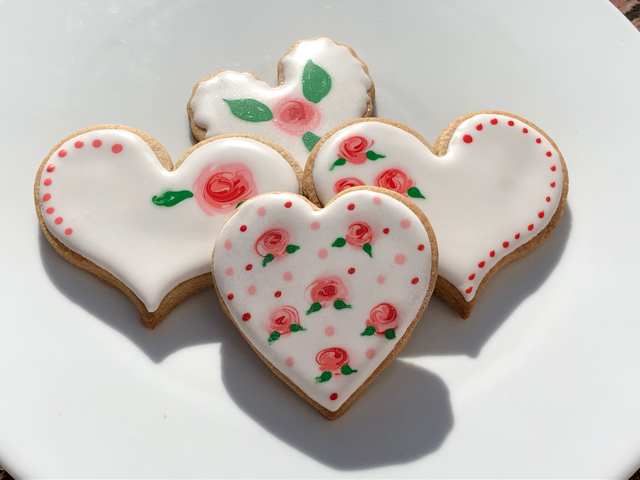
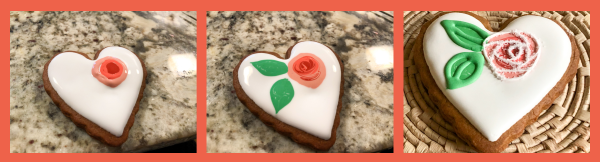
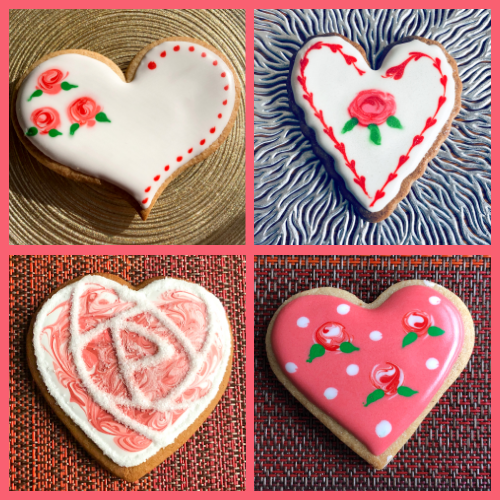
I was terrified of trying those, as they seemed way beyond my skill level. You can find countless youtube tutorials showing how it’s done, and in fact it is not that hard. You start by flooding in white (or any base color you like). Immediately add two or three concentric dots with the colors for the rose bud. Very slowly swirl them with a needle until you get the design you like. Add little dots of green and pull them with a needle to give them a leaf shape. Let it all dry completely and if you want, add additional bells and whistles. You can draw veins in the leaves, pipe their shape with thick royal icing, and add fine white lines on the rose buds for a completely different, almost modern look.

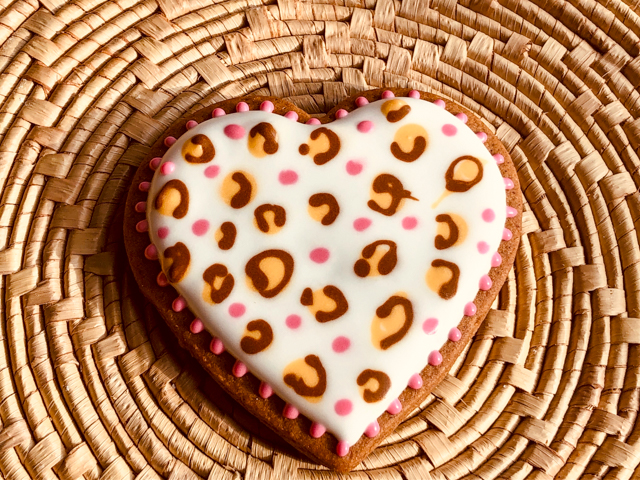
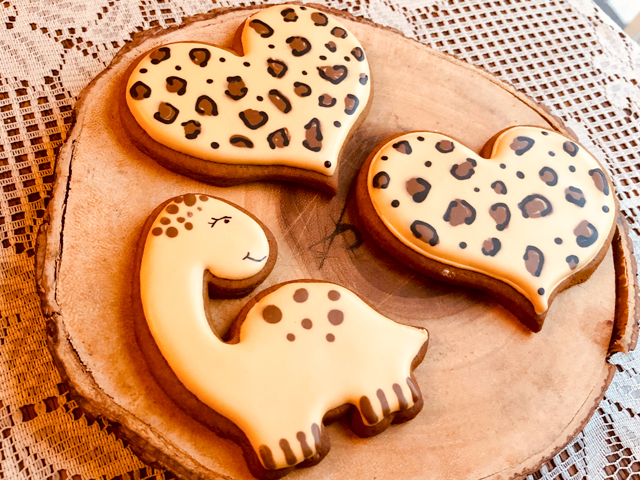
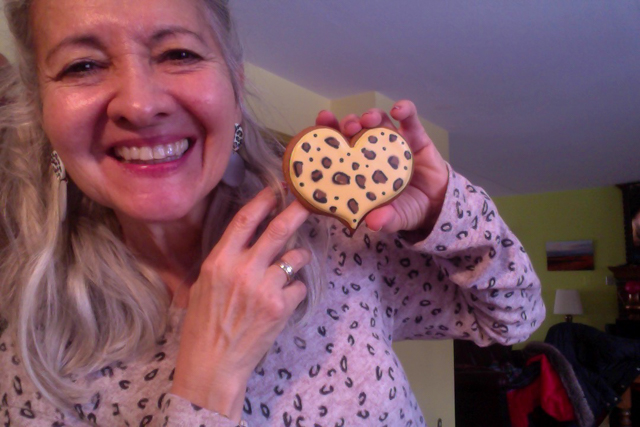
STYLE #6: CHEETAH HEARTS

I do sound like a broken record, but what can I do? I loved making those also… Super simple, which makes them even better. Flood with white, add large, irregular dots of your color of choice, immediately add edges, also irregular of a second, darker color. Since cheetahs are kept in zoos or far away from your home, no need to fear their revenge, you can go crazy with the color combination… Or even crazier, pairing them with a dinosaur!

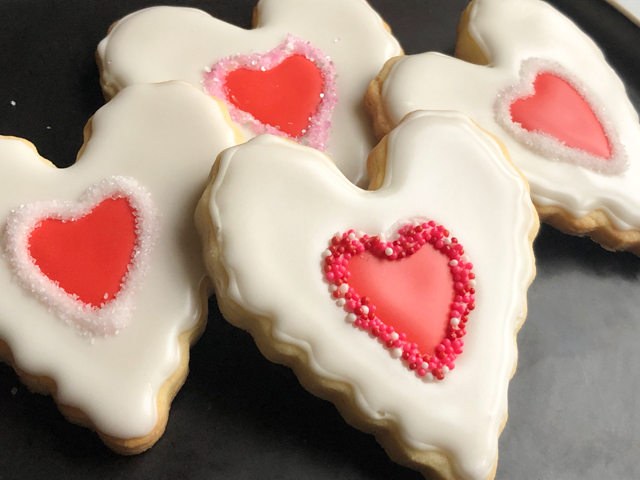
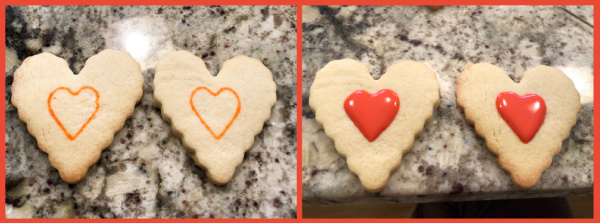
STYLE #7: HEART WITHIN A HEART

Are you going to roll your eyes to the ceiling if I tell you I loved making these? Ok, I won’t then. Start with a plain cookie, use a small cookie cutter to draw a small heart in the center. If you are brave, do it free-hand. Flood with red. Let it crust for 15 minutes, surround it with white. Let it fully dry, pipe the edge of the inner heart with white icing, and cover it with non-pareils or sanding sugar. It is a simple, but very elegant look.

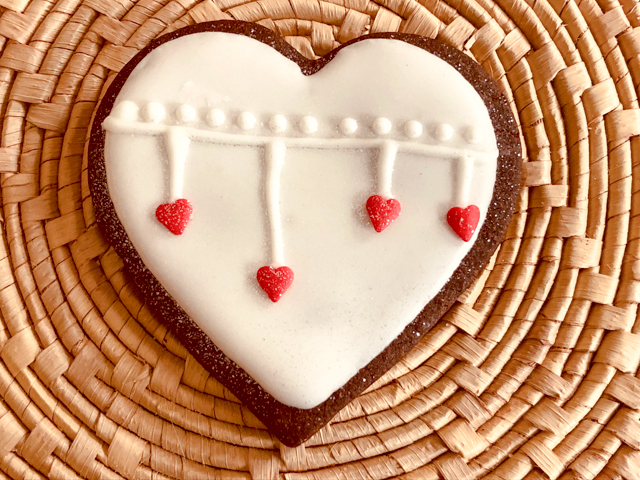
STYLE #8: HEARTS WITH DECORATIONS

The only thing that changes is that you need to flood the cookies and let them dry overnight. Then, you can glue to the surface Royal icing transfers in the shapes you like. Either made by yourself or using store-bought sprinkles.

I made the two rosettes with very thick Royal icing dyed pink, and brushed with golden lust powder. But as I mentioned, you can simplify your life and glue little decorations made by Wilton and available pretty much everywhere these days.

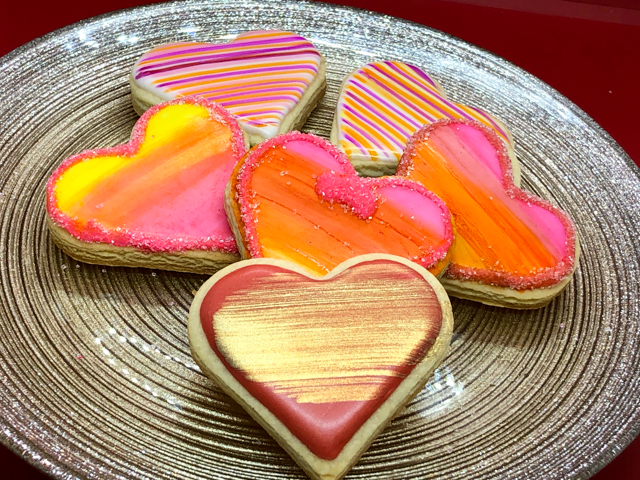
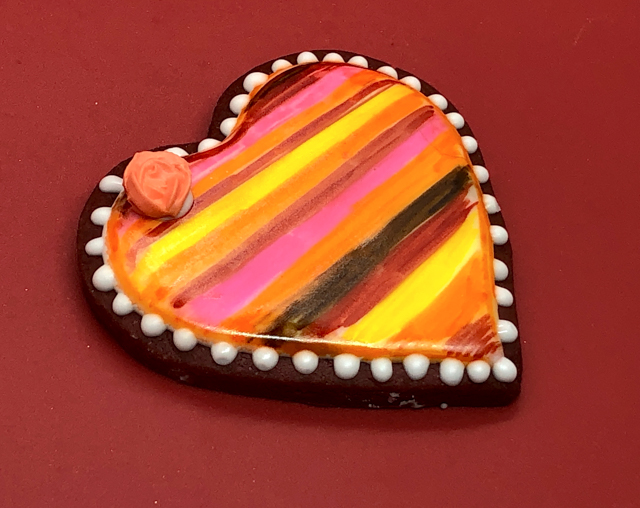
STYLE #9: WATERCOLOR SERIES

For these you absolutely need the coating to be fully crusted and dry, 24 hours is best. Flood the cookie with white. Mix food dye colors with a little vodka or everclear, and brush lightly on the surface of the cookie, making the design and colors you like. For a detailed tutorial on youtube, click here. I went with a tequila-sunrise motif. Add a border with royal icing and sprinkles if you so desire. You can also use food-safe pens and draw colorful lines all over the surface, or use a fan brush to add a band of gold, for a simple but effective design.

I hope you enjoyed this small collection of sugar cookies, and consider making them for someone you love.

Flour, sugar and eggs: $ 8.75
Assorted cookie cutters: $12.00
Food gel color: $10.00
Matching cookie to earrings and shirt
AND BEING FREE OF BRACES????
PRICELESS

ONE YEAR AGO: Uttapam, White Lentil and Rice Flatbread

TWO YEARS AGO: Valentine’s Day Sweetheart Cookies

THREE YEARS AGO: Fesenjan, Fast-Food Style

FOUR YEARS AGO: Lavender Macarons with White Chocolate Ganache

FIVE YEARS AGO: Raspberry Chocolate Truffles

SIX YEARS AGO: Red Velvet Cupcakes

SEVEN YEARS AGO: Happy Valentine’s Day!

EIGHT YEARS AGO:  A Few Blogging Issues

NINE YEARS AGO: Dan Dan Noodles

TEN YEARS AGO:  Sophie Grigson’s Parmesan Cake

ELEVEN YEARS AGO: Antibiotics and Food

BUSY BEE SUGAR COOKIES

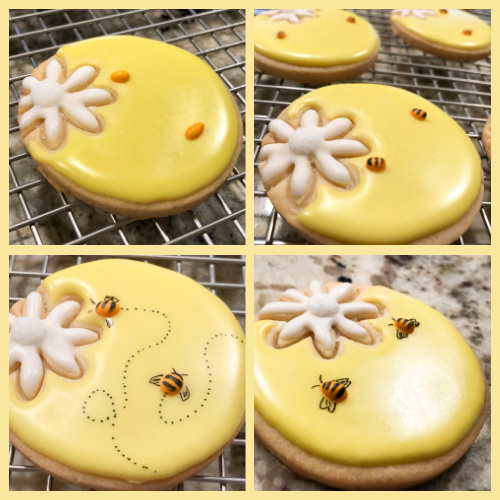
Not too long ago I made some macarons decorated with little bees (view post here). I really wanted to send some to a friend, but in the past I’ve been burned badly trying to ship macarons. What to do? What to do? Turn them into sugar cookies instead! Much more mail-friendly. I adapted the decoration to give those bees a flower to fly to, and to get busy. Then I got busy myself… The cookie dough recipe is a recent incorporation into the Bewitching Kitchen. It produces very sharp edges and I also like the texture of the cookie after baking.

NEAT EDGES SUGAR COOKIES
(adapted from Baking a Moment)

1 cup (227g) unsalted butter,cubed, cold
1 cup (200g) granulated sugar
zest of 1 lemon or half an orange
2 eggs
3 1/2 cups (420g) all-purpose flour
1/2 cup (60g) cornstarch
1/2 teaspoon kosher salt
1/4 tsp baking powder
1 teaspoon Fiori di Sicilia extract (or vanilla, or lemon extract)

to decorate:
your favorite recipe of Royal Icing (I use Tanya’s)
sprinkles
food-safe pen

Heat the oven to 350 F and line baking sheets with parchment. Sift the flour, cornstarch, baking powder and salt, and set aside. Mix the sugar with the zest rubbing it well to release the oils. Cream the butter with the flavored sugar, just until smooth and combined.

Mix in the eggs and Fiori di Sicilia (or other flavoring extract) until incorporated. Add the flour mixture on low-speed, in three portions. The mixture will seem very dry and sandy at first, but after a couple of minutes the mixer it will start to pull away from the sides of the bowl.

Remove the dough from the bowl, cut in two pieces and wrap one in plastic. Roll the second piece of dough out between 2 sheets of parchment paper, to a thickness of 1/4 inch. Cut into rounds, press a detail flower using another type of cutter, and freeze for 10 minutes. Bake for 10 to 15 minutes, depending on the size of the cookie. I like to have a slight golden tone at the edges.

Cool on a rack and decorate as desired. For the bee decoration you’ll need yellow, and white Royal Icing with flooding consistency, and orange Royal Icing in orange (very small amount, just for the bee’s body).

ENJOY!

to print the recipe, click here

Comments: At the risk of sounding repetitive, I must say I had a considerable amount of fun making these cookies. Perhaps because I made those according to my own imagination, did not follow any design found in the internetic world. I am usually not fully satisfied with my bakes, but this batch of cookies ended up just the way I wanted. What more can a poor baker wish for?

For Royal Icing, I used my default recipe, which you can find in Tanya’s blog. I started flooding the white flower, let it crust. Added a layer of additional icing to the center, and some sanding sugar. Then I flooded the yellow part. Waited for it to crust and piped the bee body. Then, patience was called for. I placed the cookies away from sight and did not touch them until next day. You really want to have the icing fully set before moving on to the next step. A food pen does the rest, details of bee body, wings, and flight path. Finally, I painted the center of the flower with gold.

As to the cookie dough recipe, I’ve settled on this one for the past 6 weeks or so. I’ve tweaked it quite a bit, and this version is probably my favorite, although by now you probably know I rarely leave a recipe alone for too long… The amount of cornstarch can vary from 1/2 cup to 1/3 cup (60 to 40g), and the edges will show a slight difference in sharpness depending on how much you use. I suggest you play around with it and decide what is the magical combination that suits your needs and taste. I prefer to add a tiny amount of baking powder, rather than leaving the recipe without.

Before I leave you, a little announcement. Since I’ve been making sugar cookies on a weekly basis, I will publish posts that group my favorite designs under the title “Joy Cookie Club.” There will be no recipe, just a brief description of the techniques used to decorate them. I hope you will enjoy those posts, the first one should be published in the near future.

ONE YEAR AGO: Mincemeat Pies, when the third time is a charm

TWO YEARS AGO: Shibari Bread]

THREE YEARS AGO: Incredibly Simple Times Four – January 2018 

FOUR YEARS AGO: Two Salads and a Blog Award!

FIVE YEARS AGO: When Three is Better than Two

SIX YEARS AGO: Somebody Stop Me!

SEVEN YEARS AGO: Zucchini Pasta with Cilantro-Cashew Pesto

EIGHT YEARS AGO: Bran Muffins, Take Two

NINE YEARS AGO: Brown Butter Chocolate Chip Cookies

TEN YEARS AGO: Mogo Mojo

ELEVEN YEARS AGO: Slow-Roasted Chicken Thighs: an Ice-Breaker