
I try hard to avoid repeating myself, but sometimes I cannot help it: I am soooo excited about this! Rubber stamping is one cool method to decorate cookies for the artistically-challenged like myself. Truth is, if someone asks me to draw something or else face the guillotine I will simply tell them to make sure it is well-sharpened. Make it quick. Now, rubber stamping? Anyone can do it! All you need is to flood your cookies in any color you like, but I normally go for white. Let it sit overnight. Do not rush. I repeat: do not rush! The surface needs to be fully set and hard so that you can press the stamp on top and make sure the maneuver is not going to hurt the icing. If you go to a store such as Michael’s or Jo-Ann, visit the section on scrapbooking and pick your weapons. Some stamps work better than others, so it is a bit of a trial and error thing. But… so much fun!
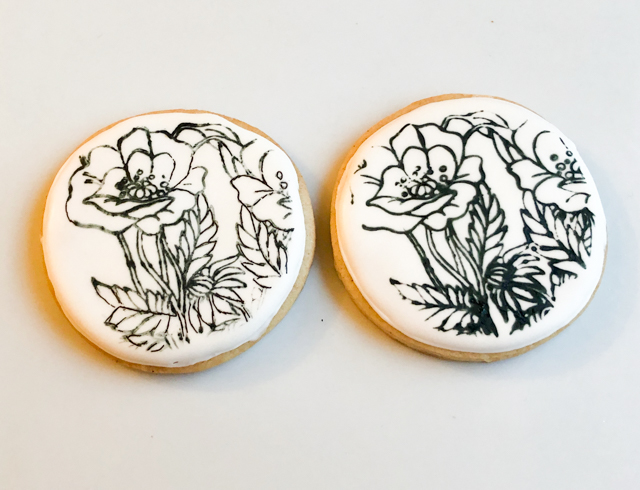
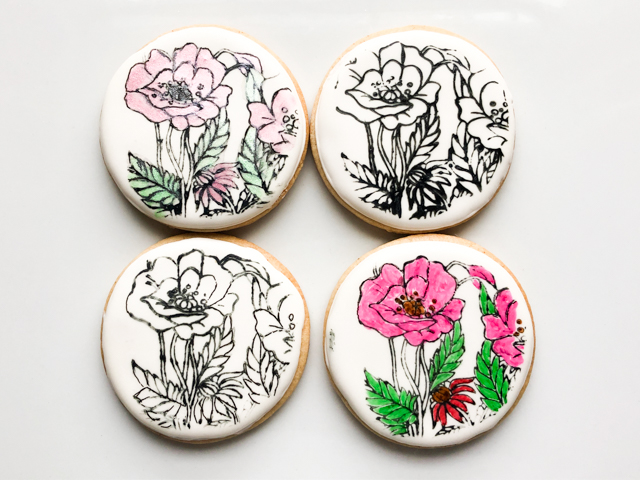
For this set, I used a type of stamp that I had never heard of, but apparently is very popular with the crowd that does serious scrapbooking. They are made of plastic and come glued to a type of acetate sheet. You can find them on amazon or etsy, I have not seen them for sale in stores where I live. For the one I used in these cookies, click here. Usually one sheet comes with several different designs. I find it easier to cut the acetate and isolate the image I want to work with. Then, I spread with a brush a small amount of food gel dye on kitchen paper, either black or another dark color like gun metal from Americolor, a bit more subtle. Press the stamp on it, and practice on a sheet of paper to check that the whole extension of the design was properly covered with dye. It does take a bit of playing with it. If you look at the set of four cookies above, you’ll notice that the design transferred better in some than others. If the design does not transfer completely, you can fill the missing lines with a very fine food pen like Tweets Cookie Connection 03. The cookies look nice in black and white, but I also made a couple painted either with luster powder (top left) or food pens (bottom right). Food pen is a lot easier and faster but I think I prefer the subtle look of luster powder.
Regular rubber stamps also work very nicely and tend to have simpler designs that are more user-friendly.
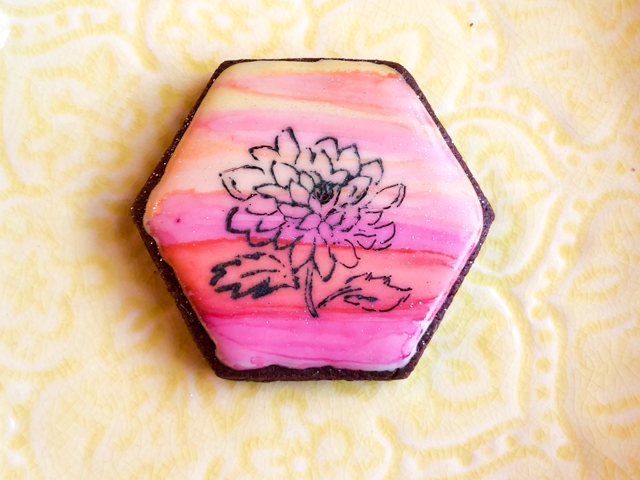
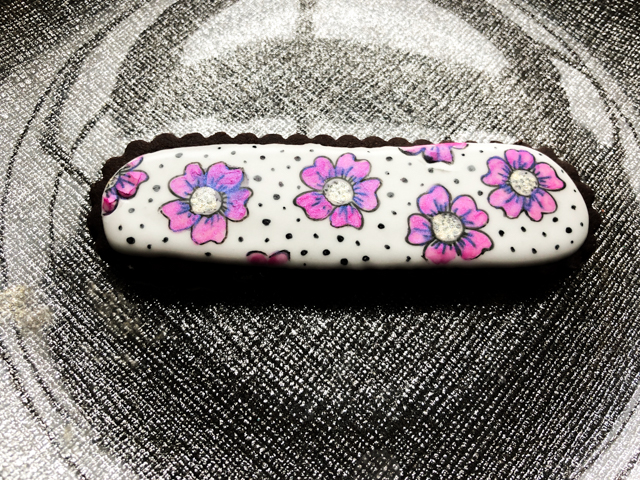
For this design I started with a flooded white icing and painted a background of striped in warm colors, using food gel dye and alcohol, just like described in a recent blog post.
The amount of dye to add to the paper is something you’ll need to adjust as you go. I don’t like the idea of buying a pad as used in scrapbooking because you need a lot of dye to soak it, and I am not sure how well it keeps for future uses, so I believe you waste too much dye.
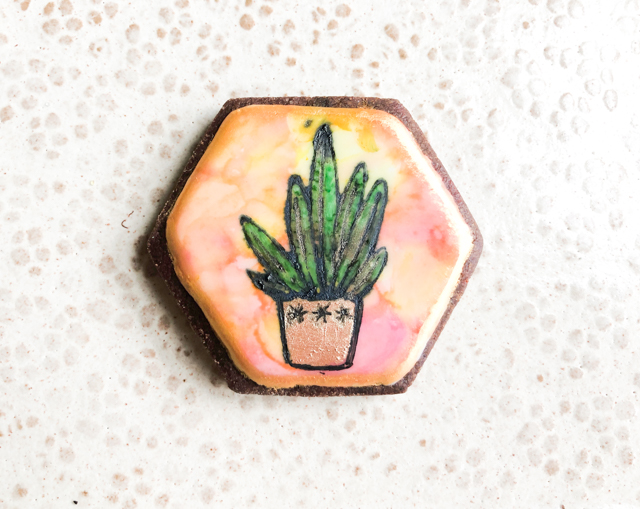
This is another stamp, also the traditional type, rubber with a wooden base. I colored the icing as before, but using a tie-dye instead of stripes. And in this design I went with colors: leaves painted with a food pen, and the little vase with gold luster powder. After painting, you might have to go back to the outline and touch it up with a fine tip black pen. Make sure the paint is fully dry, which happens quite quickly anyway.
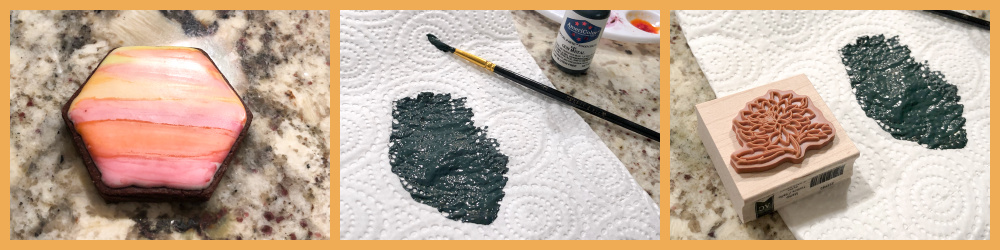
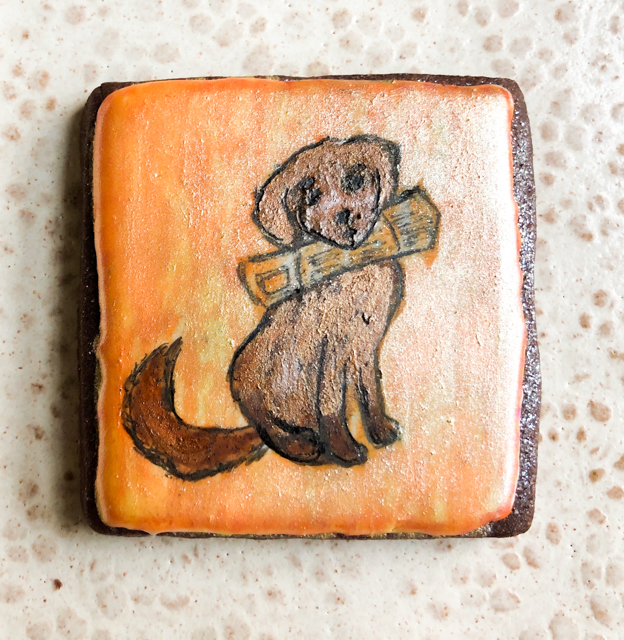
Another way to deal with the stamp is using a food pen with a thicker point (I like this kind), paint the stamp, then quickly press it on the iced cookie. You need to work a bit faster because the amount of dye is going to be less than by soaking the paper, therefore it might dry quickly as you paint the stamp. The advantage of this method is reducing the probability of smearing, and saving quite a bit of dye. Below you see what it looks like.
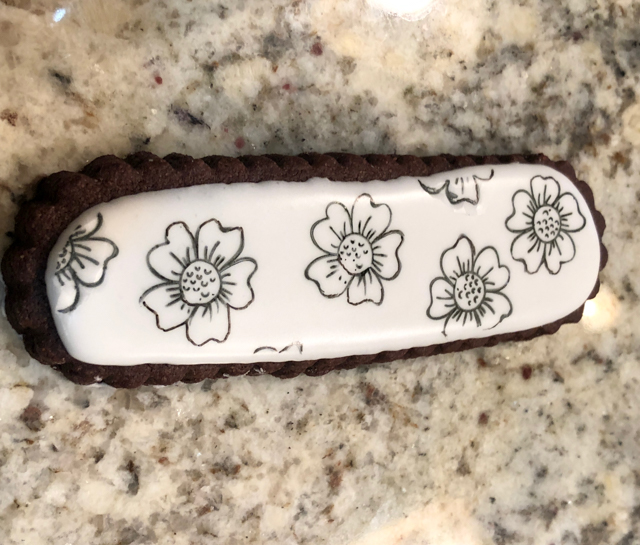
Very sharp lines, no smearing at all. Again, you can leave it black and white or go wild with the design….
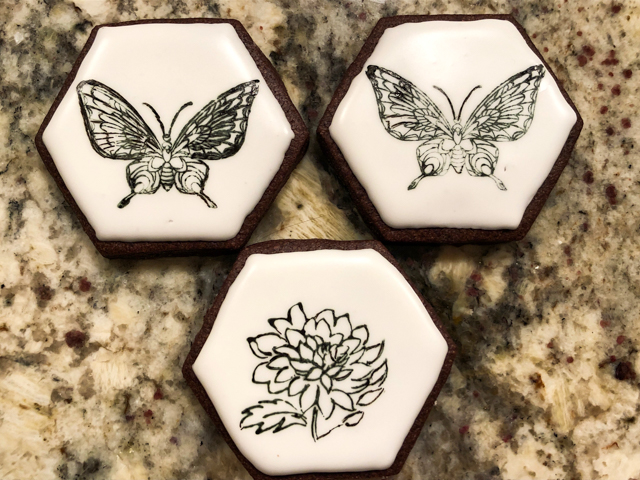
Some drawings like the butterfly are a bit too “busy” and not easy to transfer. I still think they are worth playing with, because the end result is quite striking. You need a very steady hand and be very assertive when laying the stamp on the cookie. Any hesitation and you’ll have a smudged design. If that happens, just eat the evidence when no one is looking.
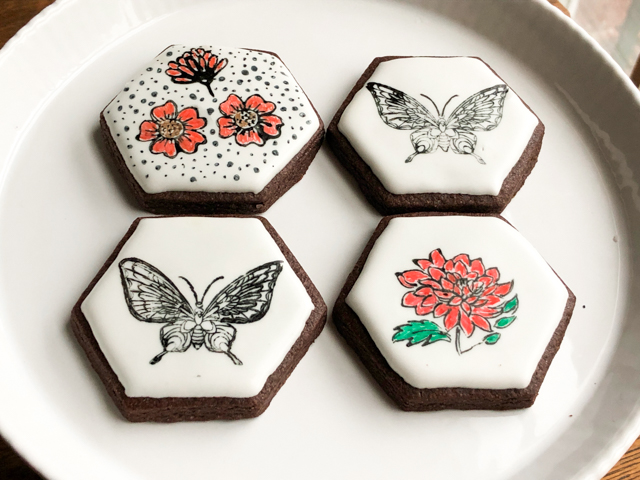
In the set above, the butterfly was a plastic-acetate stamp, the other two were the traditional rubber kind. The top left, a composite using two very small stamps.
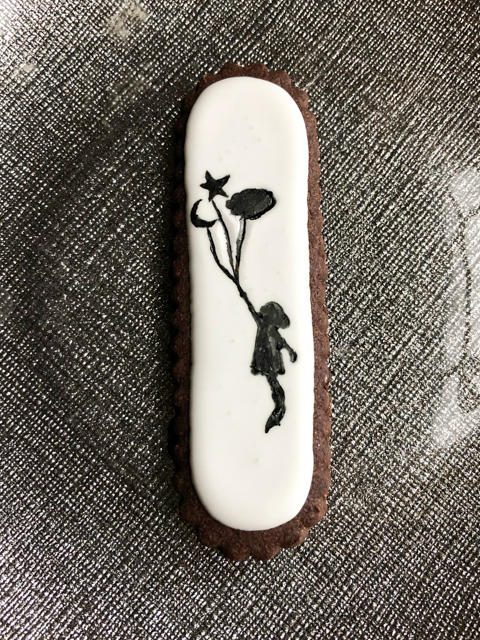
My most recent “experiment” with stamping was with a design that proved a bit tricky. It involved a silhouette type stamp, and it was almost impossible to get it uniform and without blurry edges. This was the best I could do. I think silhouettes might be better left for a projector.
I close this post with something I got in the mail just as I finished writing this article.. Available here.
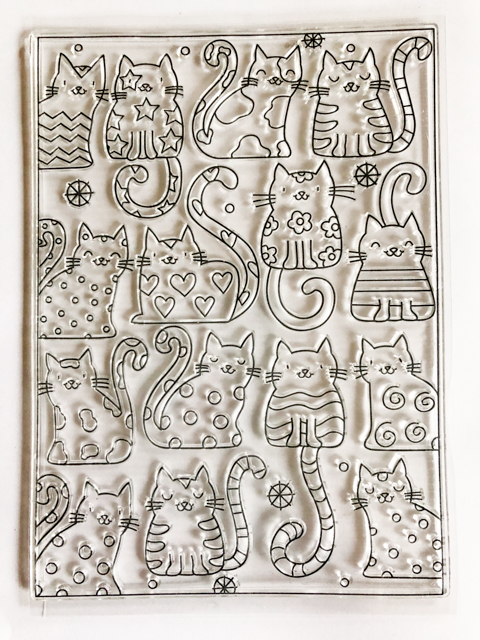
This is a plastic-acetate stamp sheet. It measures 4 1/2 x 6 in. Each kitten is a little different, so you can either stamp a series together or cut them individually and add to your cookie as a central image, which is what I intend to do. I suspect those images will work very well, as they are overall simple. My last attempt with a complicated image was a beautiful hummingbird (you can see it here), but I could not make it work on the surface of the cookie. Too bad, it is a stunning image. Maybe I’ll conquer it at some point.
I hope you’ll consider rubber stamping as a nice alternative for cookie decorating. It does take some experimenting and playing with it, but the possibilities are endless, and once you get the hang of it, you’ll be hooked.
ONE YEAR AGO: Macarons for all Seasons and Reasons
TWO YEARS AGO: Lentils and Radicchio? Yes, please!
THREE YEAR AGO: Tres Leches Cake
FOUR YEARS AGO: The Joys of Grating Squash
FIVE YEARS AGO: Auberge-Pecan Walnut Bread
SIX YEARS AGO: Gluten-free and Vegan Raspberry Bars
SEVEN YEARS AGO: Lasserre, a French Classic
EIGHT YEARS AGO: Sourdough Bread with Walnuts and Dates
NINE YEARS AGO: Braised Brisket with Bourbon-Apricot Glaze
TEN YEARS AGO: The Real Vodka Sauce
ELEVEN YEARS AGO: Pork Tenderloin and Blue Cheese
