SPANAKOPITA, CRACKERS & THE ADVENTURE OF PHYLLO DOUGH

Have I totally lost my mind? No, not answering that. It turns out that I’ve always wanted to try making phyllo from scratch. When I was preparing for the Great American Baking Show, I had this annoying suspicion that it could be a technical challenge, but once you get accepted there is absolutely NO WAY to try to bake anything apart from the required, known bakes (signature and showstopper for every single episode). So I put it on the back burner ever since. But my friend Caro sent me the perfect rolling pin for the job, and it was the little nudge I needed. I tell you one thing, making phyllo is not for sissies. But I managed to have quite a bit of fun that weekend…


PHYLLO DOUGH
(following this video tutorial from Shereen Pavlides)

353 grams all purpose flour (3 cups)
1 teaspoon kosher salt
1 teaspoon baking powder
1 tablespoon olive oil
2 teaspoons white distilled vinegar
3/4 cup – 15 tablespoons warm water
corn starch – to roll out and dust the dough

Make the dough by adding all ingredients and HALF the amount of water to a KitchenAid type mixer fitted with the dough hook.

Knead for a few minutes, then start adding the other half volume of the water, tablespoon by tablespoon until the dough starts to clean the sides of the bowl. Once a smooth dough forms, remove it from the machine, knead it by hand for a couple of minutes, form a smooth ball and place in a large oiled bowl for one hour.

Divide the dough into 20 equal pieces (mine were 28g each). Place each little ball over a parchment covered baking sheet. Leave for one hour at room temperature.

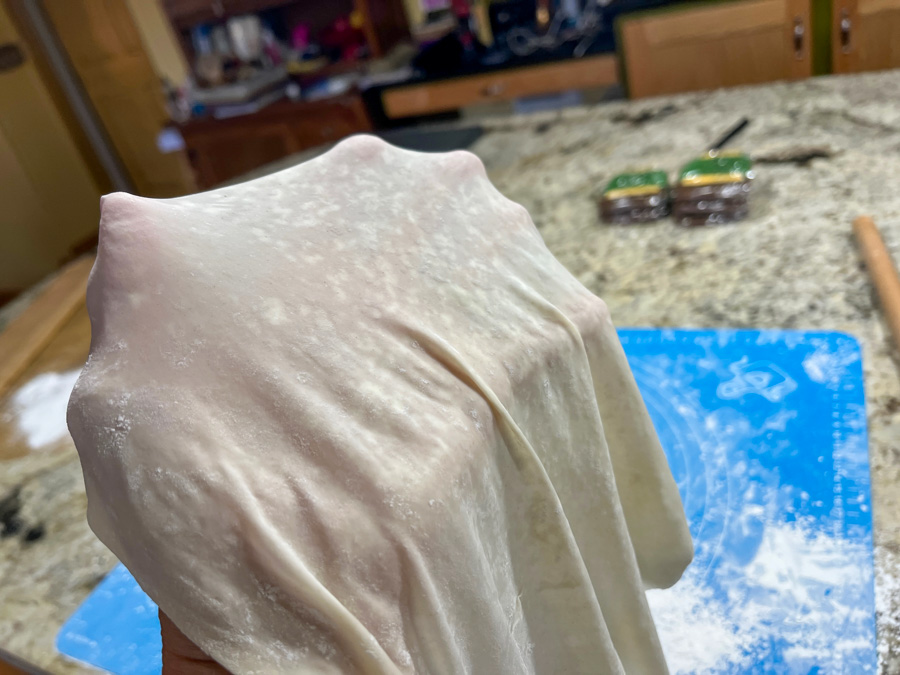
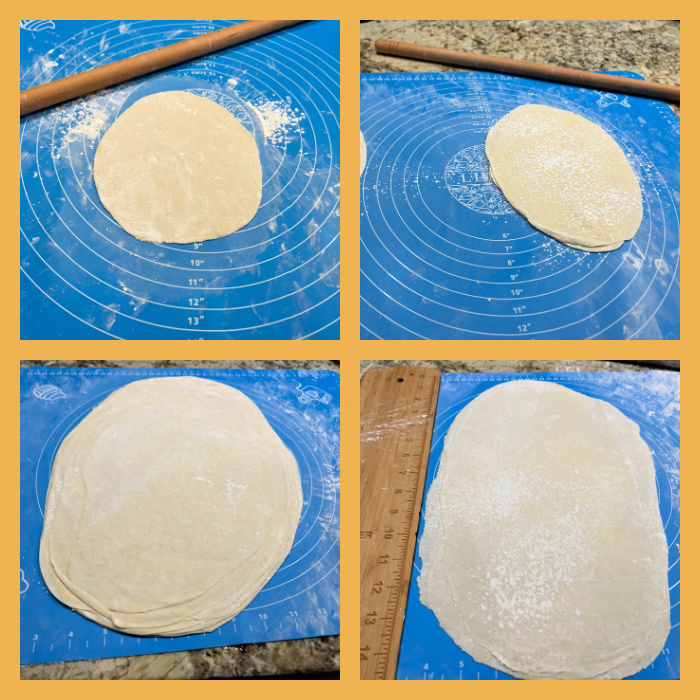
Start working the dough, first one little ball at a time, following her instructions on the video. My main change was to work with FOUR sheets at a time instead of TEN. I had too much trouble keeping them easier to separate, and decided ten was just too much for a first time. Four sheets at a time worked very nicely. That required 5 full cycles of rolling out to work on all 20 balls of dough. Another change I did was to separate each two sheets of phyllo fully rolled out with parchment paper, because I was afraid keeping them all together would result in severe sticking. I kept them in the fridge for a couple of hours before proceeding with the spanakopita and the crackers.


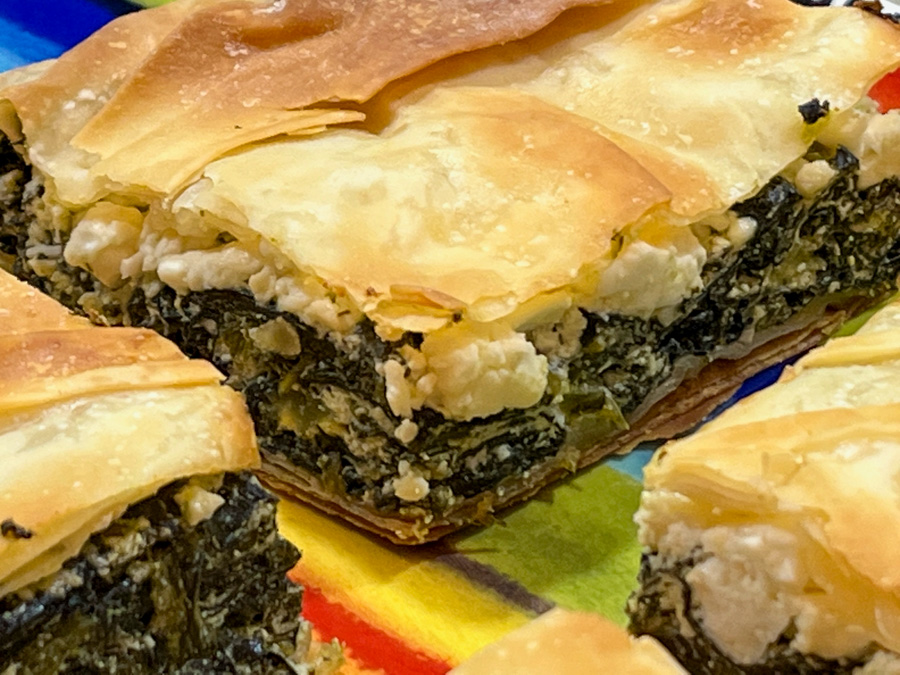
SPANAKOPITA
(adapted from several sources)

8 sheets of phyllo dough (if using commercial you probably get by with 6)
500 g spinach (preferably not baby spinach)
1 tablespoon olive oil
2 ribs of celery, finely diced
1 shallot, finely diced
salt and pepper to taste
nutmeg to taste
200 g full-fat ricotta cheese
100 g feta cheese, crumbled in large pieces
1 egg, beaten
olive oil spray

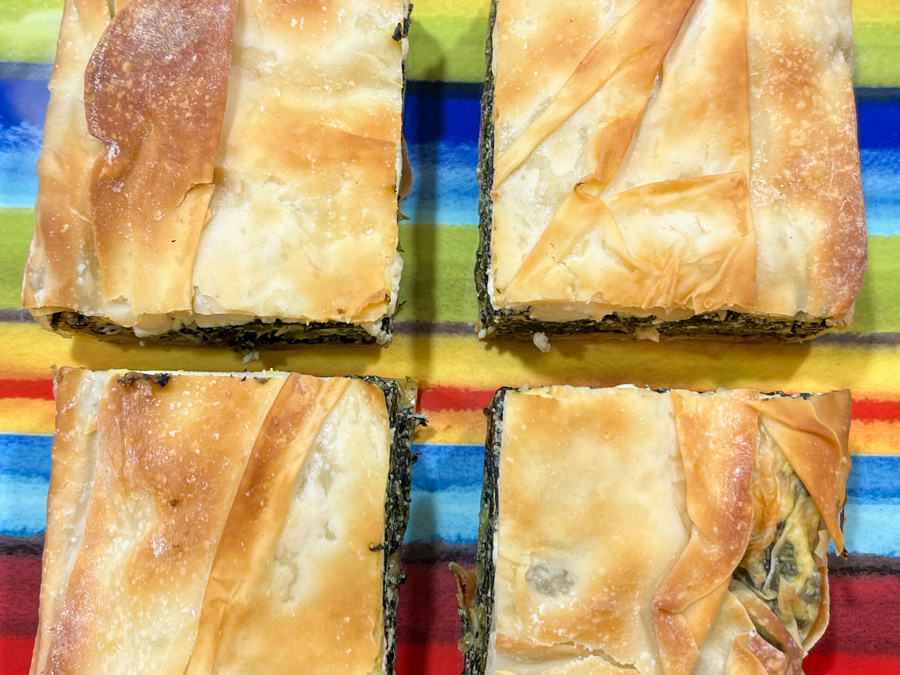
Boil water in a very large pan, add the spinach and press it down with a wooden spoon until the leaves wilt, 30 seconds or less. Drain into a large colander and place under running cold water to cool quickly. Drain well – squeeze out any excess water by pressing the spinach down with the wooden spoon, then squeezing with your hands. Using kitchen paper, pat the spinach dry into a compact shape, lay it on a board and roughly chop, then set aside.

Heat the olive oil in a large non-stick frying pan. Add the shallot, celery, and fry over a high-ish heat for 3-4 mins, stirring often, until softened and just starting to brown. Lower the heat, add the chopped spinach and stir for a few minutes to finish drying. Season with salt, pepper and nutmeg, and leave to cool.

Heat oven to 375F and put a baking sheet in to heat up. In a bowl, stir the ricotta into the beaten egg and season with pepper and a pinch of salt.

Lightly oil an 8 inch square baking pan. Lay one or two filo pastry sheets over the pan, spray with olive oil, and att two more, leaving a nice overhang on all sides. The pan should be completely covered, with a pastry overhang all round. Repeat the criss-cross layering with 2 more oiled filo sheets.

Stir the ricotta mixture into the spinach, then crumble in the feta. Lightly stir it in so you leave a few chunky pieces. Spoon this filling into the pan and level it. Bring the pastry sides up and over the filling, then brush a little oil over them. Add one or two more sheets sprayed with olive oil to top the spanakopita.

Bake for 30 to 35 mins until the pastry is crisp and golden. Leave to cool for 10-15 mins. Carefully remove from the pan, slice and serve.

ENJOY!

to print the recipes, click here

Comments: The most “traditional” way to roll out phyllo is going for a very large and thin sheet, patiently rolling and stretching the dough over a lightly floured cloth. I watched videos, read articles, and decided to go for a ‘beginner’s friendly” method, in which you divide the dough in small pieces and roll them thin, but to a smaller final size. The other change is that the sheets are stacked as you roll. The video advised to stack 10 sheets but I could not make it work. I went for 4 sheets at a time, and rolled them to 9 x 13 inches. Don’t expect to get phyllo as thin as the one you can buy at the store, particularly not on your first time. But I was pretty happy with the overall outcome. Very rewarding!

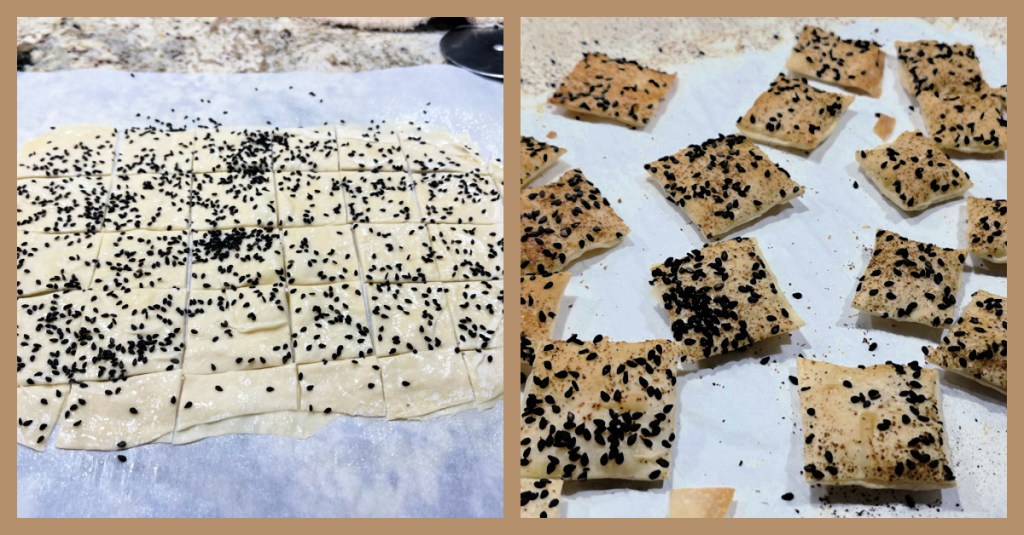
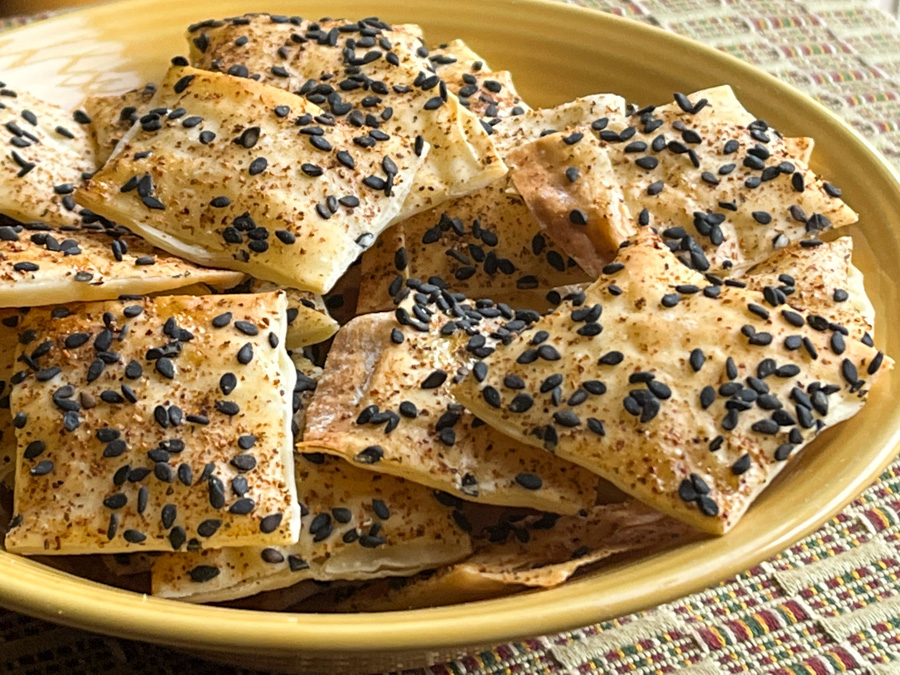
I also made crackers, using 4 of my precious sheets of home-made phyllo… Super simple. Stack the four sheets with a good spray of olive oil over each one. When you place the last sheet on top, brush some beaten egg white and add the toppings of your choice, so they will glue to the phyllo. I used black sesame seeds and Southwest spice from Penzey’s. Cut with a pizza roller and bake.

The crackers were absolutely delicious, and hubby thought I was a genius, crackers worth it of a Paul Hollywood handshake (allow me to dream, as I totally missed my chance, will you?)

I cannot lie to you, making phyllo from scratch is quite involved. I’ve found cornstarch in amazing places over the next couple of days. Things got wild, my friends… But how else can you have spanakopita made TOTALLY from scratch?

Caro, thanks so much for the thoughtful gift! I intend to make phyllo again, might even try the traditional approach and get a table cleared for the next adventure…

ONE YEAR AGO: Chicken Noodle Soup

TWO YEARS AGO: Floral Chocolate Stick Cookies

THREE YEARS AGO: Sally’s Spicy Mango and Coconut Macarons

FOUR YEARS AGO: Bouillabaise for a Chilly Evening

FIVE YEARS AGO: Bergamot-Cherry Macarons

SIX YEARS AGO: Roasted Veggies with Queso Cotija Dressing

SEVEN YEARS AGO: Creamy Broccoli and Mushroom Casserole

EIGHT YEARS AGO: Maple Walnut Biscotti

NINE YEARS AGO: Barley Risotto with Peas

TEN YEARS AGO: Oatmeal Fudge Bars

ELEVEN YEARS AGO: Cauliflower Steaks

TWELVE YEARS AGO: Soft Spot for Chevre

THIRTEEN YEARS AGO: Quick sun-dried Tomato Crostini

I WILL CRACKER YOU UP

THIS IS MY 1,400th BLOG POST!

Crackers are a lot of fun to make and bake. Ok, there is the rolling step to consider but if you are not too wild about a rolling pin and elbow grease, a pasta machine attachment can do wonders for the ones that need to be super thin. Today I share four recipes. Salted Egg Yolk Crackers and Moroccan Tortitas are quite unusual, different from any kind I’ve ever had. A copy-cat version of a Trader Joe’s favorite is a bit more involved to make but pretty amazing to eat. And finally, a lightning-fast Sourdough Cracker that can be made quite dramatic with a small amount of charcoal powder. Grab your flour, and let’s get crackin’!

SALTED EGG YOLK COOKIES
(from Dana’s Wakeandbakemama)

240g plain flour
15g cornstarch
1/4 teaspoon baking powder
1/8 teaspoon baking soda
1 tablespoon milk powder
4 salted egg yolks (use this recipe to make them)
170g butter, at room temperature
1/2 teaspoon salt
85g sugar

Topping:
1 egg yolk + a little water for wash
1 tablespoon each of black and white sesame seeds

Make the egg yolks at least one day in advance, preferably a couple of days, so they are nice and dry. Once it is ready, smash with fork or pastry cutter until crumbled and set aside.

In separate bowl, sift flour, cornstarch, baking powder, baking soda and milk powder. In the mixer bowl, add butter, salt and sugar. Mix until well incorporated. Add smashed salted egg yolks and sifted flours until well combined. Chill dough for a few minutes. If it gets too cold it will crack easily. Roll out to 1/4 inch thick and use any cutter you desire. Place them on lined cookie sheets and refrigerate for 15 minutes.

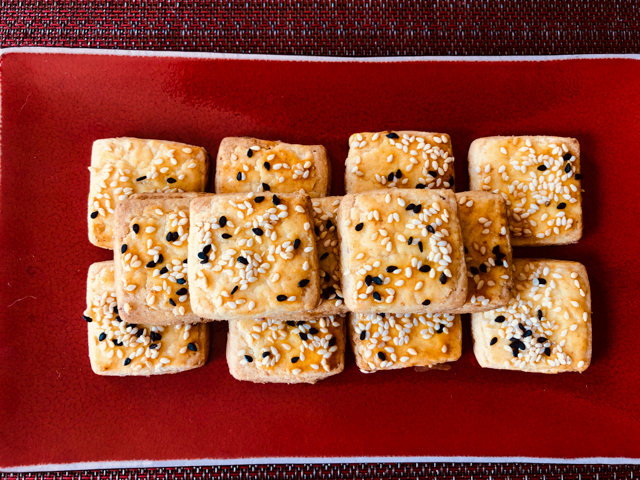
Preheat oven to 350 degrees F. Place sesame seeds in a small bowl and mix. Remove cookies from refrigerator and brush with egg wash and sprinkle with sesame seeds. Bake for 15 minutes or until golden brown.

ENJOY!

to print the recipe, click here

Comments: Dana called them cookies, and it’s true, they are cookies. But their flavor is so unique, I see them quite well as “crackers”, going well with sweet or savory items. They are addictive, with a very intriguing texture. Definitely, the salted egg yolk talking. For people who bake macarons often (if the shoe fits, I better wear it), salted egg yolks are a great ingredient to play with.

MOROCCAN TORTITAS
(slightly adapted from The Jewish Journal)

3 eggs
1/4 cup sugar
1/2 cup grapeseed oil
1 tsp anise oil
1 tablespoon fennel seeds
1 tablespoon sesame seeds
1 tsp baking powder
2 and a half cups all-purpose flour

In large bowl on stand-up mixer, mix eggs, sugar and oil until well blended. Add the anise extract, seeds and baking powder and mix. While mixing, add flour half a cup at a time and continue to mix until the dough forms a ball. You may not need all the flour, or you may need a little bit more, it all depends on the size of your eggs and the moisture of the flour. Let the dough rest for 10 minutes.

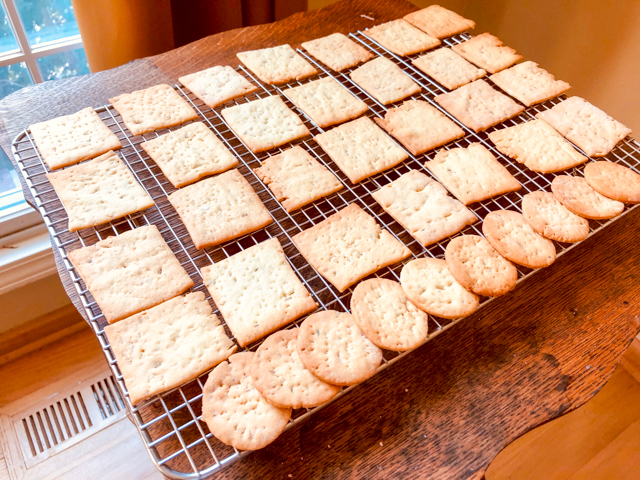
Heat the oven to 350 F. Divide dough in tennis ball-size pieces. Roll out dough as thinly as possible, a pasta rolling machine works great. Pierce dough with fork or decorating tool. Cut into squares or use cookie cutters to cut in circles. Bake on parchment paper-lined cookie sheet for 15 minutes or until golden. Let cool for several hours, as they get crunchy as they fully dry.

ENJOY!

to print the recipe, click here

Comments: Don’t let the humble look of these crackers prevent you from making them. Much like the Salted Egg Yolk version, you will grab one and go back to munch on another. Fantastic with hummus. I made them twice, first time with a pasta roller machine (the ones in the photo), second time rolling by hand. They turned out slightly thicker when rolled by hand, but equally delicious. They keep very well at room temperature.

TRADER JOE’S CRACKERS WITH RAISINS AND ROSEMARY
(from Luci’s Morsels)

1/2 cup raisins or currants
1/2 cup unsalted sunflower seeds
1/4 cup almonds
1/2 cup each white and whole wheat flour
2 tablespoons fresh rosemary chopped
1 teaspoon baking soda
1 teaspoon salt
1 cup buttermilk
1 + 1/2 tablespoons maple syrup
extra salt for top

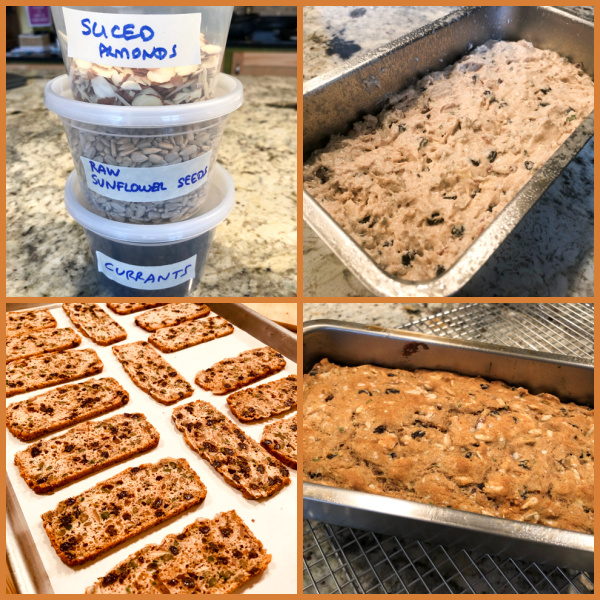
Heat oven to 350 degrees. Spray one large bread loaf pan with nonstick cooking spray.

Combine raisins, seeds, and almonds in a small bowl. Stir to combine, and reserve. In a large bowl, combine flours, rosemary, baking soda, salt, buttermilk, and syrup. Mix in fruit, nuts, and seeds. Pour batter into loaf pan. Sprinkle top with salt.

Bake 35 minutes until top is firm. Let bread come to room temperature. Wrap in plastic wrap or foil. Place in freezer for at least 2 hours or overnight. The cold bread helps with thinner slicing.

Heat oven to 400 degrees. Remove bread from freezer. Let sit 10 minutes to thaw slightly. With a serrated knife, cut 1/8-inch slices. Slices should be as uniform as possible. Place slices cut side down on an ungreased pan. Bake 8-10 minutes until crackers are a deep golden brown and corners start to crisp. Let cool completely for best texture.

ENJOY!

to print the recipe, click here

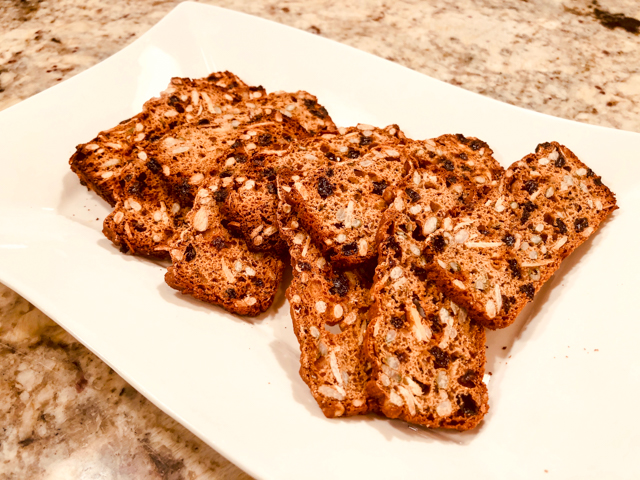
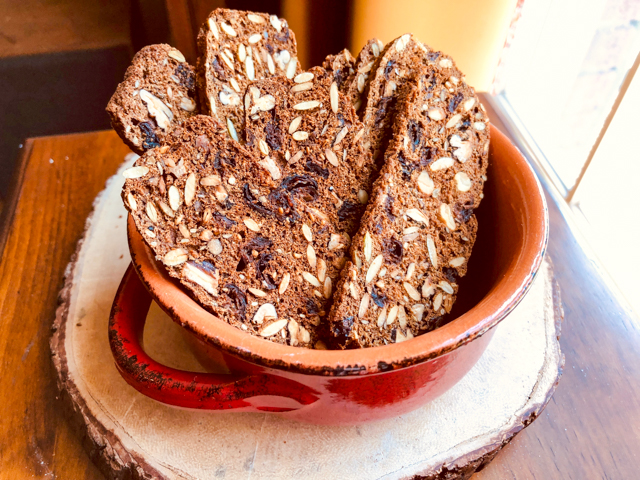
Comments: Whenever we have a chance to stop by Trader Joe’s, we get a couple of boxes of their delicious crackers. I am usually disappointed with copy-cat recipes, but I love these crackers so much, I decided to give the recipe a chance. I am very glad I did. Off all the versions I am sharing today, this is by far the most involved. Think about biscotti, but even a little worse because you need to cut the slices very very thin before the second baking. As you place the slices in the oven for the second bake, pay attention to how they are baking, because small variations in thickness will affect the outcome. Chances are you will have to remove some crackers before others are done baking. For my taste, these crackers are very close to perfection. Sweet, savory, crunchy, they are perfect with any type of cheese or jam.

My dear friend Heather from California designed a recipe for another copy-cat version of a wonderful cracker, the brand is called Raincoast, maybe you’ve seen them in grocery stores. They can be super expensive, actually. Her recipe, which she called Suncoast Crisps, is another big winner, but I don’t feel it’s fair to share it. It took her quite a bit of work to perfect it, so I will leave it as a teaser…. These have pumpkin seeds, dried cranberries and pecans.

20 MINUTE SOURDOUGH CRACKERS
(slightly modified from Phil’s Home Kitchen)

50g sourdough starter
50g bread flour
2g fine salt
charcoal powder to achieve desired color (1/2 tsp or more)
cold water to mix
olive oil
sesame seeds, black and white

Heat the oven to 400F. Mix the starter, flour, salt and charcoal powder in a bowl. Add enough water to give a soft but not sticky dough. Knead for a moment until smooth, but you do not need to knead the dough as fully as you would for full bread.

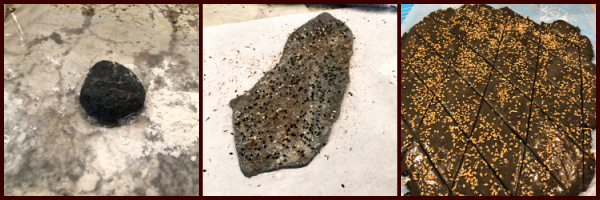
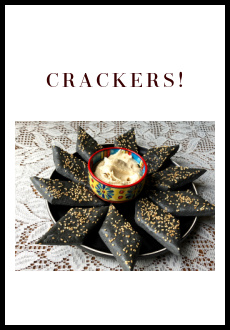
Take pieces of dough and either roll it by hand or pass it through the pasta machine: start with the widest setting 0, increasing a setting at a time until you get to two-settings before the last, thinnest one. That ensures a thin enough dough that won’t tear. You can bake it in large pieces and then break them in random shapes, or if you roll it by hand, make the dough thicker and cut in diamonds, squares, or circles. Brush the surface very lightly with olive oil and immediately sprinkle sesame seeds all over.

Bake over parchment paper for 10 minutes, turning the pieces over after 7 minutes or so. If baking large pieces uncut, cool completely before breaking them.

ENJOY!

to print the recipe, click here

The composite above shows the two types of dough, rolled by pasta machine, very thin, or rolled by hand and cut in diamonds. The dough rolled in the machine will give a very crisp texture, whereas the other one will still retain some bread quality in it.

I cannot quite pick a favorite in this group, I really like them all. I make the sourdough version more often because it is so easy. The starter does not even have to be fully active. Stop by Phil’s blog for instructions on how to use regular yeast, if you prefer. One of my goals is to bake Ak-Mak from scratch, but that has proven quite tricky. I found a couple of recipes online but they were not even remotely close to the real thing. I am tempted to improvise from the ingredients list in the box, but have not yet gathered the energy for it. Stay tuned, if I get to Nirvana, I’ll share my recipe with you. Come to think of it, I might enlist the help of Heather to reach my goal…

ONE YEAR AGO: Pickling Ribbons

TWO  YEARS AGO: Green Beans and Carrots with Spicy Almonds

THREE YEARS AGO: Quiche 101

FOUR YEARS AGO: Persian Butternut Squash Soup

FIVE YEARS AGO: Walnut Cranberry Sourdough Bread

SIX YEARS AGO: Ottolenghi in Brazil?

SEVEN YEARS AGO: Roasted Winter Vegetables with Miso-Lime Dressing

EIGHT YEARS AGO: 2012 Fitness Report: P90X2

NINE YEARS AGO: Caramelized Bananas

TEN YEARS AGO: Roasted Lemon Vinaigrette

ELEVEN YEARS AGO: Whole Wheat Bread

HOME BAKERS COLLECTIVE WARM UP FOR THANKSGIVING

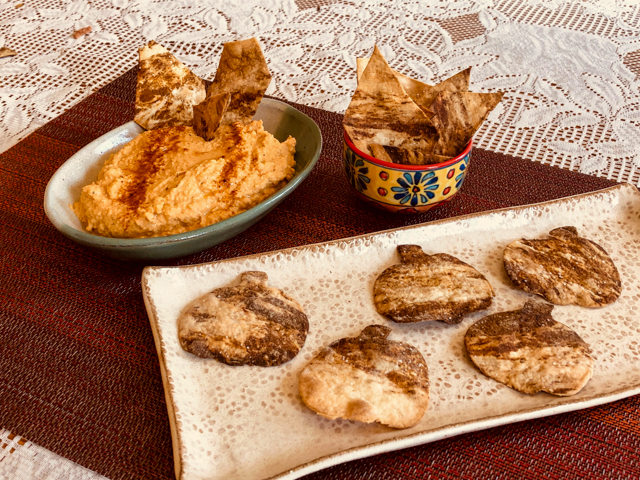
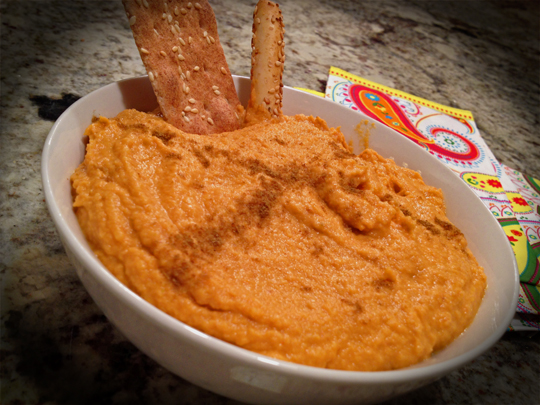
If you are like me, and learned how to ski as an adult, you are familiar with that fear as you slide downhill catching speed and see curves coming up, trees on both sides, overwhelmed by that feeling of “this might not have a happy ending.” That is pretty much what 2020 feels like. Eleven months and counting of sliding downhill feeling out of control. But 2020 cannot rob us of Thanksgiving. There are many things to be grateful for, including the fact that we are still hanging on to the ski poles, and braving the elements. To warm us all up for my favorite American holiday, the Home Bakers Collective got together to share a few recipes inspired by the season. Here is my little contribution. Pumpkin Crackers and hummus. To start your meal on a festive note.

PUMPKIN CRACKERS
(from the Bewitching Kitchen)

for the white dough:
60g all-purpose flour 1 cup all purpose flour
1/4 tsp salt
1 tsp olive oil
about 2 tablespoons water

for the pumpkin dough:
50g all-purpose flour
10g pumpkin flour (or all-purpose)
1 tablespoon pumpkin puree (canned)
1/4 tsp salt
1 tsp olive oil
about 1 tablespoon water

Hheat the oven to 400 degrees. Prepare a baking pan by lining with parchment paper.

Make the white dough: in a small bowl, combine all ingredients and knead by hand to form a dough. Adjust water, you don’t want the dough to be too sticky. Reserve.

Make the pumping dough by mixing all the ingredients, again adjusting with more all-purpose flour in case it is too sticky (the pumpkin puree will add quite a bit of moisture). Reserve.

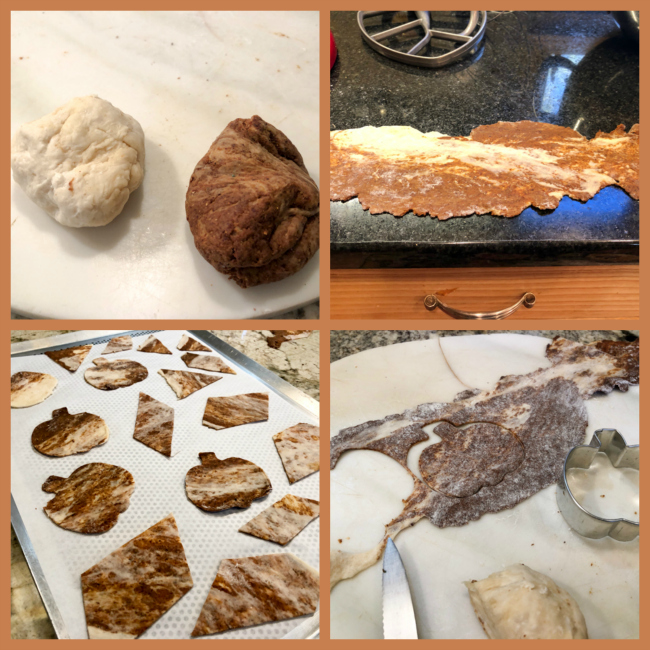
Allow both balls of dough to sit at room temperature for about 20 minutes. Divide each dough in two and marble the two colors. Roll each piece very thinly, the best way is using a pasta rolling machine or Kitchen Aid attachment, but you can definitely do it by hand. Cut in pumpkin shapes using a cookie cutter or simply in small pieces.

Bake for about 10 minutes, depending on how thin you rolled them, until they start to get brown and crisp. They will get slightly harder as they cool. Serve with your favorite dip.

ENJOY!

to print the recipe, click here

Comments: Pumpkin flour is a great ingredient when you want to get flavor without adding too much moisture. It works well in cookies also. Since it contains no gluten, it behaves completely different from all-purpose flour. You will have to play a bit with the dough to get a similar texture in both the white and pumpkin components. As usual when you marble two colors, the dark will be dominant, so keep that in mind. You can always use more of the white dough and marble with 1/4 of the amount of dark. The recipe I shared makes a small batch of crackers. Since it is just me and the husband around, I did not want to make a huge amount. The recipe will double easily.

For the pumpkin hummus, visit my old blog post with a click here. And of course, stop by The Home Bakers Collective to see what everyone else decided to share. One blink of the eye and Thanksgiving will be here. Make sure you keep you and your loved ones safe.

(post might take a couple of hours to be published in the Collective, check later if not yet there)

ONE YEAR AGO: Black Sesame Japanese Milk Bread

TWO YEARS AGO: Swirls and Whirls

THREE YEARS AGO: The Tabatiere

FOUR YEARS AGO: Curry Turmeric Sourdough

FIVE YEARS AGO: Brigadeiros de Morango

SIX YEARS AGO: Feta-Stuffed Turkey Meatloaf

SEVEN YEARS AGO: Artichoke-Saffron Souffle

EIGHT YEARS AGO: Cinnamon-Wreath

NINE YEARS AGO:
  Yeastspotting 11.11.11

TEN YEARS AGO:
 Oven-baked Risotto

ELEVEN YEARS AGO:
  Potato-Roquefort Cakes with Ripe Pears

SEEDY CRACKERS FOR A FUN PARTY!

Remember The Secret Recipe Club? Oh, how I miss those fun times…  But, even if it’s over, many of the virtual ties made over the years stayed strong. One of the “secreters”, Sid, has just published a nice cookbook, and organized this Virtual Tapas Time Party in which bloggers pick one recipe to highlight, everyone posting together today. I am thrilled to be part of it, and share with you a delicious take on crackers. They leave anything you can buy at the store in a smoke. They are hearty, tasty, crunchy, and I must also say… addictive (sigh).  Some serious self-control is needed. They are awesome even naked. Yeah, some jokes come to mind, but I’ll exercise self-control there too, and skip them.

SOMETHING’S SEEDY CRACKERS
(from Sid’s Nibbles and Bites)

2 cups bread flour
1 cup mixed seeds – equal amounts of each of Flax – Chia – Sesame
1 1/2 tsp. salt
2 tsp. baking powder
3 Tbsp. olive oil
3/4 cup water (enough to moisten the dough, maybe a little more if needed)

Heat oven to 450 F.

Mix all ingredients together, and let rest for about 15 minutes.  Divide the dough into either thirds or quarters, and roll out each piece 1/8 thick. Cut into squares and place on a baking sheet.

Bake for about 12-15  minutes, or until the crackers start to brown around the edges. Remove from pan, cool on a rack and serve.

ENJOY!

to print the recipe, click here

Comments: I rarely make crackers. Some of the store-bought products are so good and convenient, I truly do not mind opening a package and serving them at dinner parties. Take Ak-Mak, for instance. They are simply perfect with hummus, cheese, tapenade. But Sid’s book gave me the push I needed to bake a batch, and I must admit, they are much, much better than those commercially available. Plus, you can customize them the way you like, using different seeds, or even some spices. And fun to make too. I could have rolled them a little thinner, because they do puff up a little during baking. It’s the baking powder speaking.  Oddly shaped pieces should be baked too, I think they look great and the pointy edges are perfect to stab into a creamy spread.

A little overview of Nibbles and Bites

I share my two top favorites of each chapter, so you can have an idea of what the book is all about.

SPREADS, DIPS AND MORE… Mini-Dried Cranberry and Pistachio Balls (they look adorable, and I imagine taste great). Jalapeno Popper Dip (definitely my kind of a dip).

HUMMUS… A full chapter on my favorite appetizer in the known universe! Hard to choose only two, but here we go: Curried Carrot Hummus, and Chocolate Hummus (intriguing, but I bet it works, the combination of tahini with chocolate is becoming a classic).

RETRO… Who does not like a good old retro concoction?  Smoked Salmon Pinwheels, and Egg Salad Pinwheels make my list, most definitely.

CRACKERS… The recipe I featured, absolutely delicious! The second contender which I almost made, Lemon and Rosemary Crackers. No justification needed.

EGGS… Basic Deviled Eggs (I am addicted, always searching for new takes on it), and Snowmen Eggs, which would be a perfect culinary project to do with kids.

WINGS AND THINGS… Cranberry-Orange Wings, and Chutney Wings called my name… I think chutney is one under-rated food, a bit retro perhaps, but so delicious!

SEAFOOD THINGS… Definitely the Blackened Mango Shrimp on a Stick… and Carrabelle Crab Cakes, a recipe that won People’s Choice Award two years in a row! Talk about a great endorsement…

PLAIN FUN STUFF… Tomato Bites (adorable) and Vegetarian Potstickers make my favorite pair.

I hope you enjoyed the featured recipe and the virtual tour of Sid’s book. Make sure you stop by Sid’s blog to see what our friends made from Nibbles and Bites.

ONE YEAR AGO: Brutti ma Buoni Low-Carb Soup

TWO YEARS AGO: Turkey Stir-Fry with Almond Butter

THREE YEARS AGO: Secret Recipe Club: Tailgating Party!

FOUR YEARS AGO: One Million Page Views!

FIVE YEARS AGO: Tlayuda, a Mexican Pizza

SIX YEARS AGO: Paradise Revisited 

SEVEN YEARS AGO: Feijoada, the Ultimate Brazilian Feast

EIGHT YEARS AGO: Vegetable Milhojas

NINE YEARS AGO:  Italian Bread

CHEDDAR AND FENNEL SEED CRACKERS

Cheddar Fennel Crackers
These crackers were part of the appetizers we served at a small dinner get-together.  I’ve always wanted to re-visit crackers, as my first experience with them was pretty awesome. But way too long ago, this blog was just a baby back in September 2009.  Fun times. These are completely different creatures, thick and flavorful, they stand by themselves without the need of any spread.  The fact that you can make them ahead of time, then slice & bake is an added bonus. I am all for making my life easier when entertaining. Let me rephrase that. I am all for making my life easier. 😉
.tray.
CHEDDAR AND FENNEL SEED CRACKERS

(adapted from the blog Lemons & Anchovies)
.
¼ pound (1 stick) unsalted butter, room temperature
3 ounces sharp cheddar cheese (grated with a Microplane)
1 tablespoon + 1 teaspoon fennel seeds
1 + ¼ cups all-purpose flour
zest of 1 lemon
Pinch kosher salt
A pinch or two of freshly ground black pepper
.
Using a stand mixer with the paddle attachment, cream the butter for about one minute. With the mixer on low-speed, add the cheese, salt, pepper, lemon zest, and fennel seeds just until combined, scraping the sides of the bowl as necessary.  With the mixer still in low-speed add the flour,  and turn off the mixer once the mixture is in large crumbles, about one minute.
.
Transfer the dough to a lightly floured surface, press into a ball then roll it into a 9-inch log. Wrap it in plastic wrap and chill for at least 30 minutes before slicing and baking.
.
When ready to bake, heat your oven to 350℉. Slice the dough into roughly 3/8-thick rounds and lay them on a baking sheet lined with parchment paper. You can sprinkle more fennel seeds on top of the rounds if you wish.
.
Bake for 20 minutes, rotating the sheet halfway through the cooking time, until very lightly browned. Cool on a wire rack and serve at room temperature. They keep well in an airtight container for a few days.Makes about 24 rounds.
.
ENJOY!
.

to print the recipe, click here
.
composite
.
Comments: 
At first I had some trouble shaping the log of dough, and had to add a little more flour, but finally it all came together smoothly.  These crackers have a shortbread feel, they crumble as you bite into them, and their flavor gets more and more pronounced as you chew them. The lemon zest definitely adds a lot, even though fennel and cheese are strong components in the overall taste.  The basic recipe could be taken in many different directions with different cheeses and spices…  I think that an experiment with a little bit of dried lavender could be quite interesting, but it might be tricky to pick the right cheese to go with it.
.
This was my first time baking this type of cracker. After slicing it would have been nice to smooth out the surface gently with the tip of the finger, particularly the edges.  Something to consider for next time. Bake and learn, my friends, bake and learn…
.
TWO YEARS AGO: My First Award!
.
THREE YEARS AGO: A Message from WordPress
.
FOUR YEARS AGO:
Turkish Chicken Kebabs