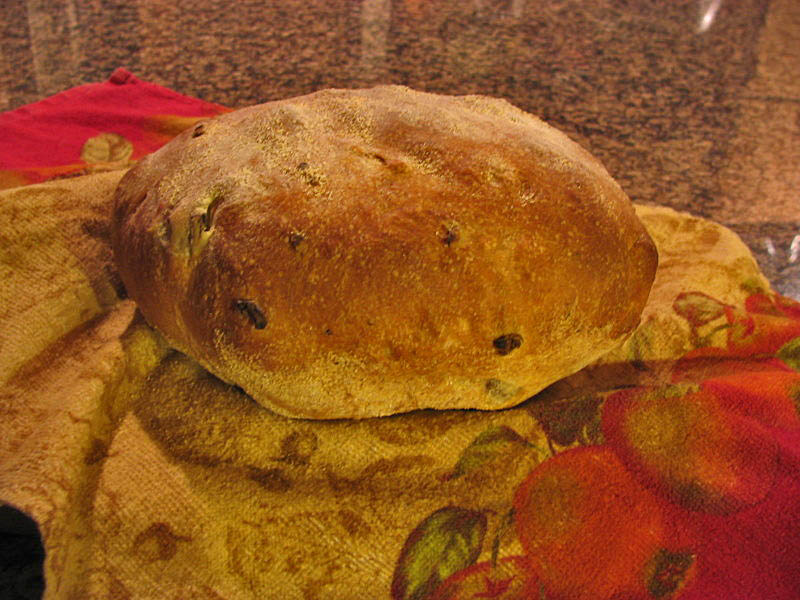
PIERRE NURY’S RUSTIC LIGHT RYE: BOUGNAT

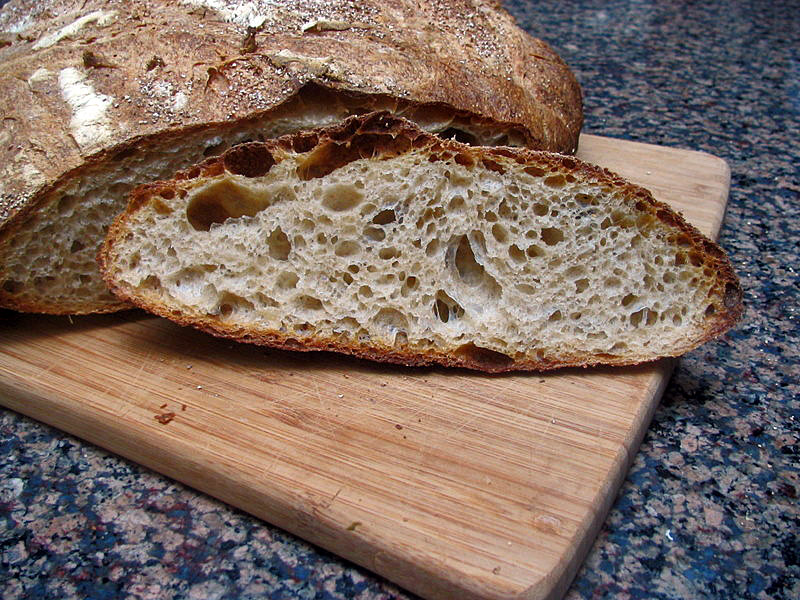
I’ve browsed the pages of Leader’s “Local Breads” countless times over the past year, but taking part in “The Bread Baker’s Apprentice” challenge prevented me from indulging in many other bread books. Once the  challenge finished, I felt excited to attack other projects, but also somewhat paralyzed.   Not anymore: last weekend I dove into my first Local Breads recipe, a three-day project that led to a couple of delicious loaves of a rustic, toothsome bread.

PIERRE NURY’s RUSTIC LIGHT RYE
(from Local Breads)

Levain (sourdough starter)

45 g firm sourdough starter
50 g water
95 g bread flour
5 g whole wheat flour

Mix all the ingredients until they form a stiff dough, trying to incorporate all the flour into it. Place the dough in a container, marking its level with a tape or pen. Allow it to ferment at room temperature for 8 to 12 hours, until it doubles in volume. This recipe will make more levain than used in the bread.

Bread dough

400 g water
450 g bread flour
50 g rye flour
125 g levain
10 g salt

Pour the water into the bowl of a Kitchen Aid type mixer. Add the bread and rye flours, stir with a spatula until it begins to form a dough. Cover the bowl and let stand at room temperature for 20 minutes.

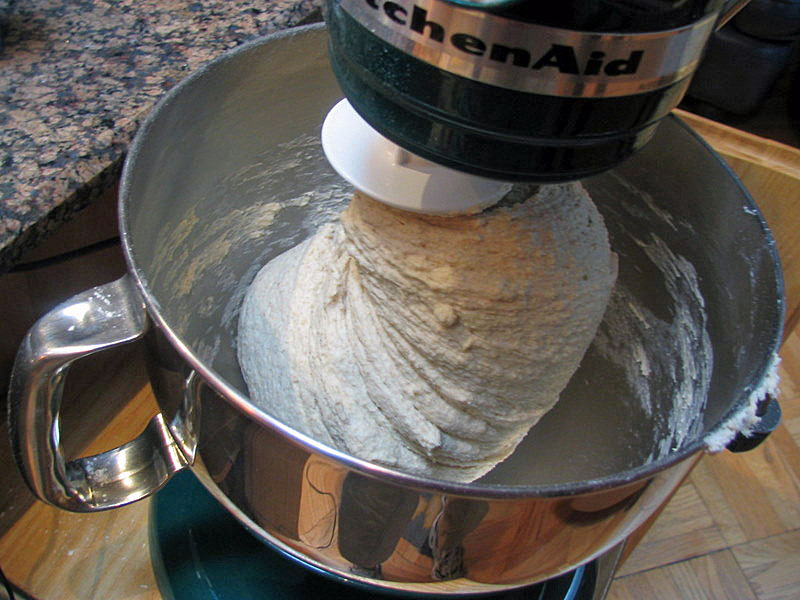
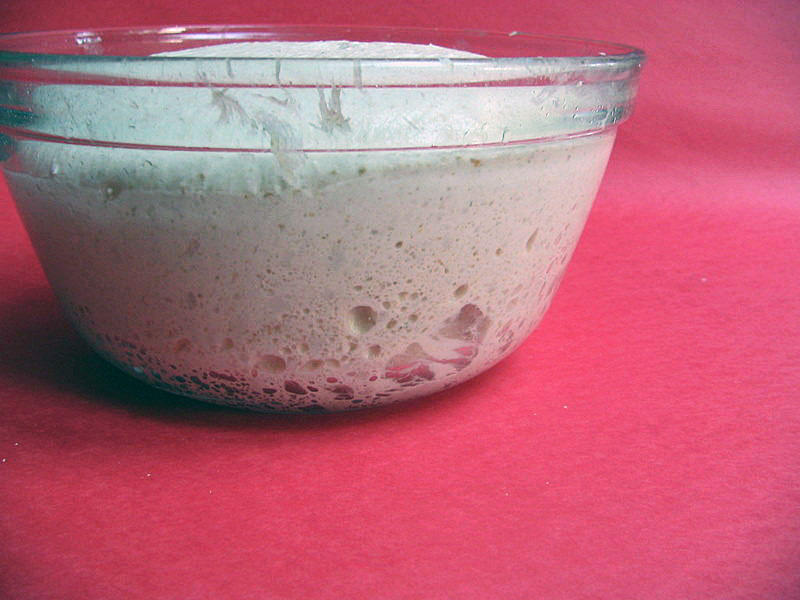
Uncover the bowl, add the levain (only 125 g of it) and the salt, and start kneading with the dough hook on medium speed for 12-14 minutes, or until you have good gluten development (do a windowpane test). Transfer the dough to a slightly oiled bowl and keep it at room temperature for 1 hour. Scrape the dough into a floured surface and fold it a couple of times to induce gluten development. You can see how to fold the dough by clicking here. Repeat the folding again after 1 more hour. After the second folding cycle, let the dough rise for 1 to 2 hours at room temperature until doubled in volume. Transfer to the refrigerator for 12 to 24 hours.

After 14 hours, my dough looked like this….
“Shaping” and baking
Remove the dough from the fridge 3 hours before baking. Heat the oven to 450F and place a baking stone (or tiles) on the middle rack.

Heavily dust the counter with flour, scrape the dough onto the counter, and open it gently into a 10 inch square shape, trying not to deflate it too much. I like to mark the dimensions on the flour, to have an idea of how much to open the dough.

Transfer each piece to a rimless baking sheet covered with parchment paper, stretching the dough to about 12 inches long. Let it fall naturally, without worrying about a precise shape. If baking both loaves at the same time, separate them by at least 2 inches.

Bake with initial steam for 20 to 30 minutes, until a dark walnut color develops on the crust. Let the loaves cool on a rack for at least an hour before slicing.

ENJOY!

to print the recipe, click here

for a detailed discussion on this particular bread, visit this link

Comments: The recipe was quite involved and challenging, but the gods of Bread were on my side and things went smoothly.  A dough with this much water (in baker’s terms it’s called a high hydration ratio) is tricky to deal with, but extra flour on the work surface helps. As some of the bakers in The Fresh Loaf put it “it feels like you’re making pancakes” when transferring the “bread” to the baking sheet. It’s impossible to shape it, so don’t even try. Lift it, gently stretch it  (it will almost stretch itself as it’s lifted), place it on the baking sheet and transfer it to the oven.   It’s a delight to witness its impressive oven spring (yet another fancy term to indicate that the dough rises a lot during baking).

The crumb almost made me shed a few tears… I know, I know… it’s pathetic, but bread make’s me emotional!  (In a good way.)  😉

I am submitting this post to Yeastspotting….

Add to FacebookAdd to DiggAdd to Del.icio.usAdd to StumbleuponAdd to RedditAdd to BlinklistAdd to TwitterAdd to TechnoratiAdd to Yahoo BuzzAdd to Newsvine

THOM LEONARD’S COUNTRY FRENCH BREAD

I live in a state of bread anxiety.  On Thursdays I revive my sourdough starters and begin the tortuous process of choosing the bread to bake on the weekend.  That evening you’ll find me on the sofa, surrounded by bread books,  notebooks, pens, pencils, stickers, and close to a  computer with multiple open tabs: The Fresh Loaf, Wild Yeast, Makanai, Dan Lepard, King Arthur, Northwest Sourdough… My beloved husband knows it’s useless to converse with with me when I’m in such a “bread daze,” and I can’t come out of it until I make my choice.

This weekend’s pick was an impressive loaf from Maggie Glezer’s book Artisan Baking. She ranks each of her recipes according to its level of difficulty, and this one forewarned  “advanced” at the top of the page.  But, that didn’t stop me, which ultimately resulted in quite a bit of pain  for this baker.

THOM LEONARD’s COUNTRY FRENCH BREAD
(from Maggie Glezer’s Artisan Baking)

Make the levain on the evening before baking by mixing:

25 g fermented firm sourdough starter

140 g lukewarm water

140 g bread flour

Allow it to sit at room temperature for 12 hours, or until it has expanded and just started to sink in the center.

(click to enlarge)

On baking day:

Prepare the whole wheat component, by measuring 350g whole wheat flour and sifting it with a  fine strainer. This will remove the large flakes of bran (you can use it to make muffins). Measure 250g of the sifted product, and start making the dough.

(click to enlarge)

250 g sifted whole wheat flour

750 g bread flour

30 g  rye flour

660 g water

23 g salt

all of the levain made the previous evening

Add the three types of flour to the bowl of a large KitchenAid type mixer. Mix the water with the levain to dissolve it, and add it to the flours. Using the dough hook, mix it for 10-15 minutes, until the dough is very smooth and almost cleans the bowl. Add the salt and continue mixing for 5 more minutes.

(click to enlarge)

Place the dough in a very large bowl and let it rise for 3 hours, folding three times (at 30, 60, and 90 minutes). After the final folding, just leave it undisturbed for the final 90 minutes. Remove the dough from the container, form it into a ball and let it rest for 10 minutes to relax the gluten (that makes it easier to shape).

(click to enlarge)

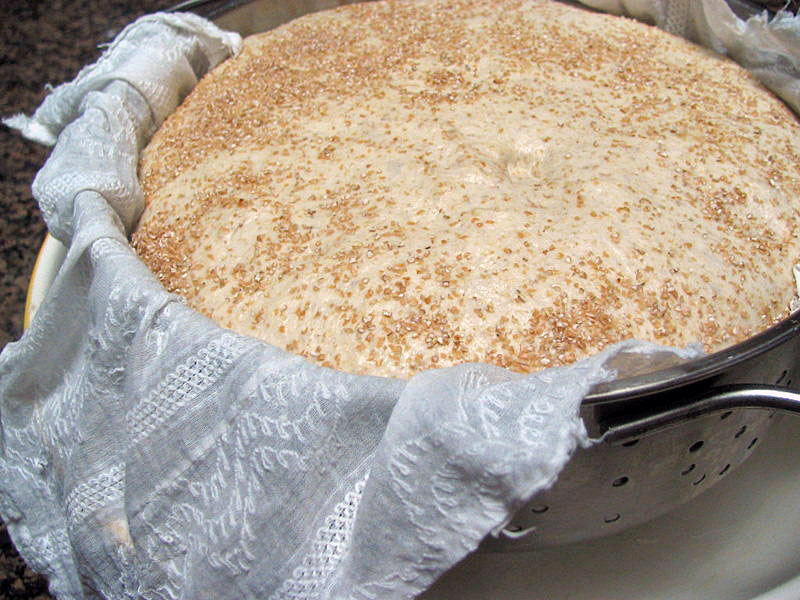
Shape it into a large round loaf, and place it in a suitable container for proofing, lining it with a heavily floured linen, with the smooth side down. Proof at room temperature for 4 hours, or until an indentation made in the dough will not bounce back right away.

(click to enlarge)

Carefully transfer the bread to a baking sheet lined with parchment paper, slash the surface and bake with an initial burst of steam, in a 450F oven. Bake it for 70 to 80 minutes, rotating the dough after 30 minutes, and reducing the temperature to 400F if it starts to get too dark. Allow it to cool on a rack for several hours before slicing it.

ENJOY!

to print the recipe, click here

Comments: I had high expectations for this bread, because once the kneading was over and the fun part started (the folding!), the elasticity of the dough surprised me:  gluten development at its best!   The shaping went smoothly and the dough rose beautifully in my improvised banneton: a pasta colander, lined with my improvised baker’s linen.  However, improvised is a dangerous word to use  twice in the same description.

At the end of 4 hours, the dough was all airy, absolutely perfect!  The oven was ready, with baking stones blazing hot,  and I was on top of the world!   As I inverted the dough on the parchment paper,  I could not help but day dream…  “When I submit this masterpiece to Susan for Yeastspotting, she’ll call me on the phone to personally compliment me!” ….  “The Fresh Loaf will feature this bread on their  front page, and leave it  there for a year or two“….  “I’ll have my own show on PBS: Bread Baking with Sally“….

Then, reality interfered.   The improvised baker’s linen  would not peel off.   It was stubbornly glued to my beautiful, airy, gorgeous dough.  I screamed and howled in pain!   As I was wrestling the fabric off,   my beautiful, airy, gorgeous round loaf began to spread sideways and collapse right before my eyes!    It was horrible:  no glory for me, no phone call from Susan, no highlight on The Fresh Loaf, and definitely no show on PBS.  Finally, with the dough threatening to slide off the baking sheet the linen came free and I rushed the loaf into the oven, without  slashing, without steam,  with just frantic moves and a few well chosen words that are unfit to print.

A major lesson learned:  a 4.6 pound dough demands a perfect proofing environment, particularly for a 4 hour rise.  Now, after helpful advice from the crowd at The Fresh Loaf, I’m seriously considering one of these.

Back to Thom Leonard’s country loaf.  Aside from the top crust of my bread , which looked like the aftermath of Freddie Krueger,  the crumb was open and the bread was incredibly flavorful.   It’s a  bread that begs to be in a Croque Monsieur!  We shall comply shortly.

A bread that can survive the abuse I inflicted on this dough is worth saving in your personal repertoire.   Try it.  But do yourself a favor, and use the right tools for the job.   You might just get that phone call from Susan….

I am submitting this post to Yeastspotting

Add to FacebookAdd to DiggAdd to Del.icio.usAdd to StumbleuponAdd to RedditAdd to BlinklistAdd to TwitterAdd to TechnoratiAdd to Yahoo BuzzAdd to Newsvine

NQBWC92RPPUQ

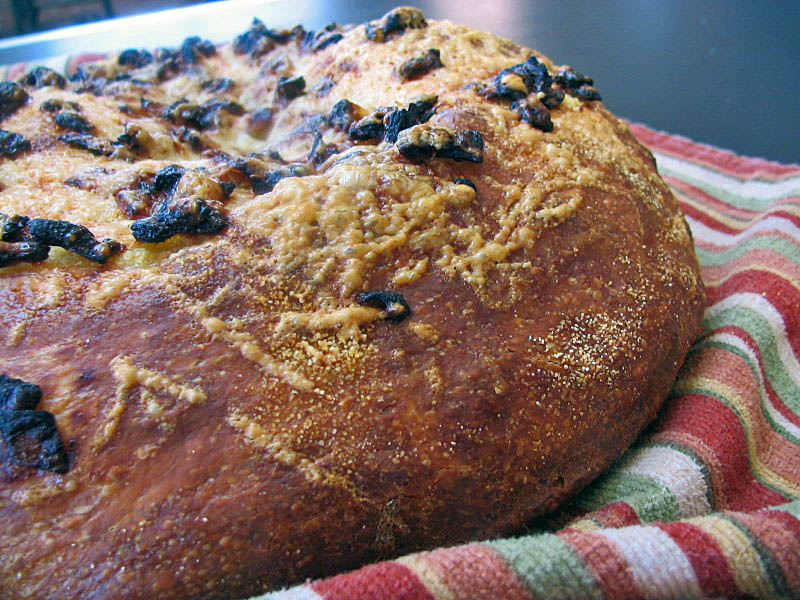
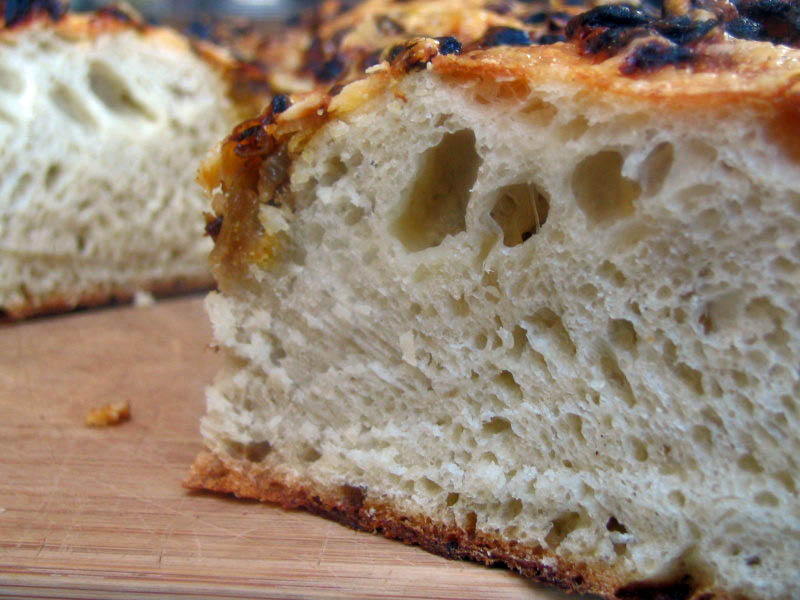
BBA#43: ROASTED ONION and ASIAGO CHEESE MICHE

Photo courtesy of  PJG, thanks!

With this bread, I completed the BBA CHALLENGE!


For a PDF version, click here (breads are ranked from one to five stars)

A big thank you to Nicole for setting up this event, and of course to Peter Reinhart for his wonderful book.  I’ve had it many years, but never imagined that one day I’d say that “…I baked them all!”

ROASTED ONION AND ASIAGO CHEESE MICHE

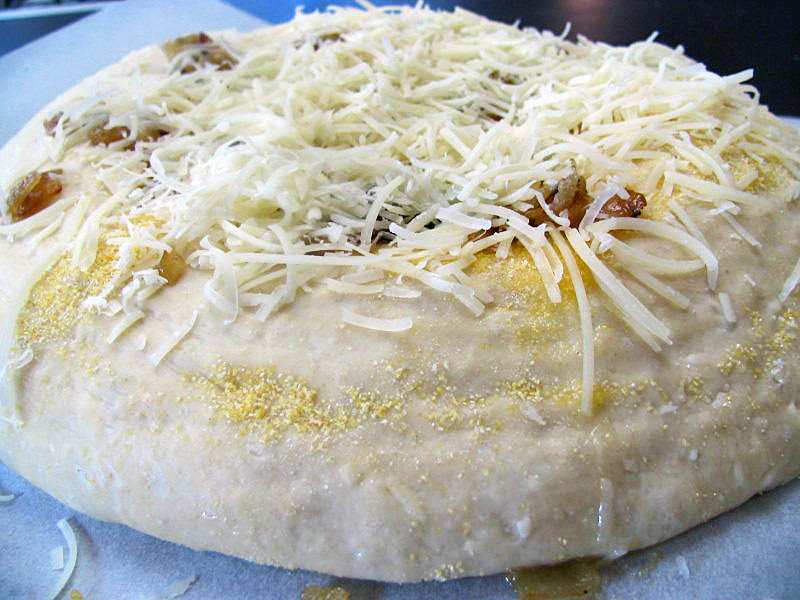
This last bread took 3 days to prepare.  The sourdough sponge, made on the first day, was mixed and shaped on the second day, and  after a night in the fridge it was topped with roasted onions and grated asiago cheese, then finally baked.   I made a half  recipe, which was still  enough for one  big round loaf.

The onions can be prepared the day before…

and added to the bread 30 minutes before baking ….

The dough contains a lot of grated asiago cheese,  so each bite acquires its sharp flavor, mellowed  by the sweet roasted onions.   What a beautiful combination!

You can check the Roasted Onion Asiago bread made by Oggi (the first baker to complete BBA Challenge) by clicking here….

Our five favorite breads from the challenge were:
Potato, Cheddar, and Chive Torpedo
Roasted Onion and Asiago Miche
Vienna Bread
New York Deli Rye
Potato Rosemary Bread

To all my virtual fellow challengers baking along this tasty path, have fun with it.   I’ll be watching and cheering for you!  😉

BBA#30: BASIC SOURDOUGH BREAD

Here we are, at the beginning of my favorite, sourdough breads, which are all made from a “starter”, or, as Peter calls it, a  “seed culture”.    For  those unfamiliar with the BBA Challenge, it’s a net-event that was launched by Nicole, in which home bakers make every recipe from “The Bread Baker’s Apprentice“, in the order that they appear in the book;  forty-three breads in all.    People participating in this challenge agreed not to publish the recipes, so if you are interested, help the economy and buy the book.  😉

I’ve been regularly baking sourdough bread for the past two years, so I took some liberties and made a few changes in the overall method.  First, I didn’t put the “barm”  in the fridge overnight.  Instead,  I prepared it at 11pm the night before and used it next morning,  at 6am, without refrigeration.   I see no need to retard the barm in the fridge:  it adds an extra hour to the overall process (you do need to warm it to room temperature before using it), and from my experience it doesn’t  improve the bread’s flavor.  Retarding the dough after the final shaping is a better option, that is also discussed in the recipe.

My second change was the kneading method.  I am partial to folding the dough, as you can see by browsing my bread recipes in this site.   Why? Because it always works.   Kneading the dough in a machine or extensively by hand  may or may not produce the crumb texture I love: airy and full of uneven holes.  I don’t like to gamble with my breads, so I fold it.

The dough was easy to work with,  I am always  fascinated by the way it changes with minimal kneading over time.   These two photos show the dough 15 minutes after mixing all the ingredients, and after rising for 45 minutes.   I folded it at 45, 60, and 120 minutes, then allowed it to rise for 2 more hours (for a total of 4 hours) before shaping.

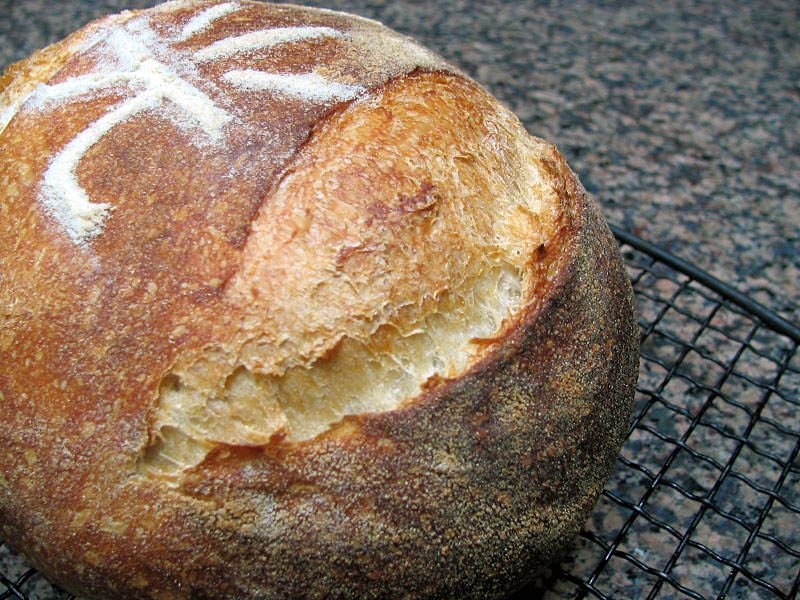
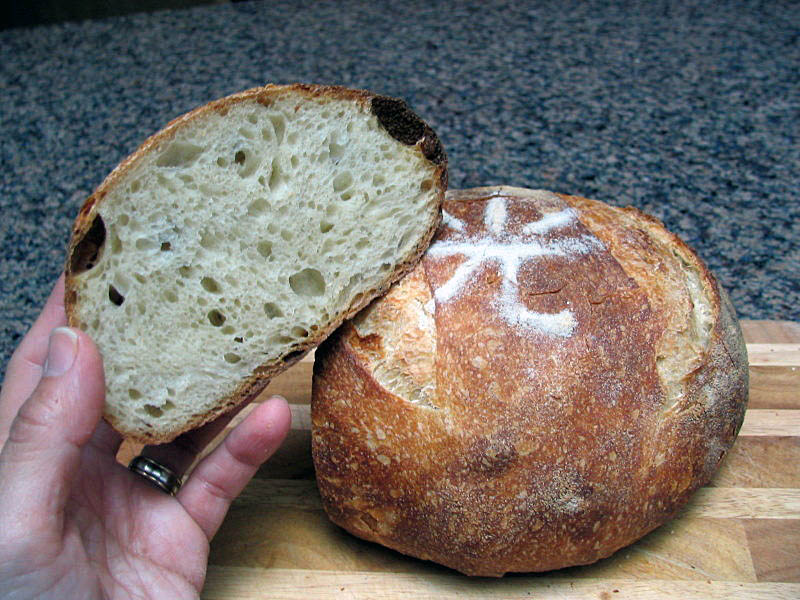
I’ve been flirting with the idea of stenciling my breads, and this time I decided to go for it.   It didn’t work perfectly.   I think I made my Chinese character too big, and I added too much flour in making it, but I’m hoping to improve my skills.

This is an ideogram that I like very much – guang – it means light, as in sunlight.  I guess my tropical nature attracts me to it.  😉

Excellent flavor, not too sour, the crust just the way we like it…

Click here is for a link to the sourdough post by Oggi, from “I Can Do That” – she did some nice different shapes  with her dough, very nice job!

FOR THE LOVE OF BREAD

A few years ago, a small revolution  took place among American bakers  after the publication of the no-knead bread recipe.  It was hard to surf the internet food world without daily encounters of posts about it.  Like many other people, I boarded that train, which I do not regret.  As a result of the “no-knead” recipe, I baked good bread at home, which was something I’d struggled with for years.  Also thanks to the “no-knead” recipe, I gained the self-confidence to attempt more elaborate breads, until my travels took me to an unforgettable turning point:  the “Handmade Loaf“, by Dan Lepard.

I now have too many bread-baking books,  but  The Handmade Loaf is the one that I cherish, in part because his respect and love for everything about bread shines through in every sentence.  Technically, his instructions are flawless and his photography is superb.  Sure, I can make and enjoy a loaf of bread that was mixed in five minutes, but that’s not the bread that I fell  in love with.  Rather, this is it….

WHITE THYME BREAD
(Dan Lepard’s  Handmade Loaf)

350 g bread flour
1 tsp sea salt
150 g water
150 g sourdough starter
1/2 tsp fresh yeast (I used instant)
25 g olive oil
100 g pitted green olives
1 tsp fresh thyme leaves, chopped
cornmeal

Combine the flours with the salt in a large bowl. In another bowl, whisk the water, starter, yeast, olive oil, olives, and thyme.  Add the liquid to the flour, then stir with your hands. Form a loose ball with the ingredients and allow it to rest for 10 minutes.

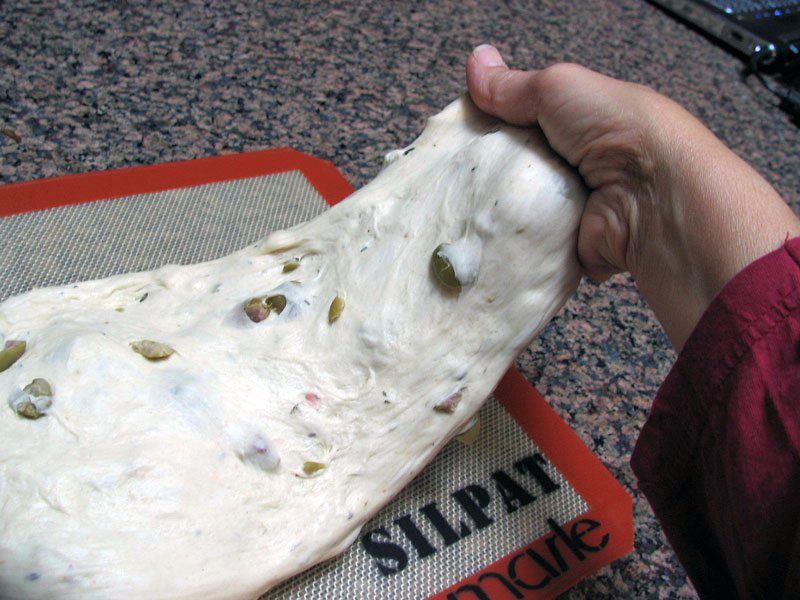
Proceed to kneading the dough three times at 1o minute intervals. Each kneading cycle will last only 10-15 seconds.  After the last kneading cycle,  let it rest for 10 minutes and form it into a rectangle.  Fold it by thirds like a letter, let it rest for 1 hour.  Stretch the dough again, fold it by thirds, allow it to rest for another hour.  Shape the dough very gently into a rectangle and pat the surface with your fingers  to flatten it slightly.   Sprinkle cornmeal on the surface, cover with a cloth and allow it to rise for 45 minutes.

Bake in a 425F oven for about 40 minutes.

ENJOY!

I am submitting this post to Susan’s Yeastspotting….

Comments: I’m not sure why this bread wasn’t called “White Thyme Bread with Green Olives,” as they are so obvious in the loaf.  Make sure to use best quality green olives;  Dan suggests piccolini olives from France, even if you have to pit them yourself.

The bread is supposed to be quite flat, but I decided to form a more rounded shape.   I could have slashed the surface,  but I didn’t expect as much oven bounce as it achieved during baking.

This bread is a departure from his white levain, because it calls for a small amount of commercial yeast in the dough.  That adjustment reduces the fermentation time, and creates a slightly less “creamy” crumb.  The addition of olive oil allows the flavor of thyme to permeate  the crumb, imparting an assertive, but not overpowering taste.

It’s bread as bread should be.  Thank you, Dan!

Here are some photos of the process…  Keep in mind that I gave only a short, summarized version of the recipe.  In the book, Lepard goes through all the steps in detail.  So, if you want to make  a loaf of bread in your own home that you can write a poem about later, then consider buying The Handmade Loaf.   It’s worth every penny.

Easy to fall in love…